To create rustic boho open shelves for books and decor, start by reclaiming weathered wood from old pallets or vintage furniture. Sand and finish the wood with natural stains, then assemble sturdy floating or wall-mounted shelves using secure brackets or knots with natural rope for a boho touch. Incorporate crates, baskets, or small niche shelves to maximize space. Keep your styling simple with greenery, candles, and curated decor for a cozy look—explore more ideas ahead.
Key Takeaways
- Use reclaimed or weathered wood with natural grain for authentic rustic boho open shelves.
- Sand and finish the wood with stains or sealants to enhance rustic charm and durability.
- Securely attach the shelves to wall studs or with anchors, ensuring stability for books and decor.
- Incorporate natural materials like rope or metal brackets to add boho style and support.
- Style with plants, books, and decorative items, leaving space to prevent clutter and highlight key pieces.

MY VINTAGE FINDS Reclaimed Wood Floating Shelves Real Solid Thick Wood Rustic Shelf Handmade
- Reclaimed Barnwood Charm: Adds rustic character to decor
- Sturdy Hidden Bracket: Ensures stability and seamless look
- Natural Wood Finish: Highlights the natural beauty of wood
As an affiliate, we earn on qualifying purchases.
As an affiliate, we earn on qualifying purchases.
Crafting No-Sew Boho Pillows With Dollar Tree Materials
Creating no-sew boho pillows with Dollar Tree materials is a simple and budget-friendly way to elevate your decor. These DIY pillows add cozy, boho charm to your space without sewing skills or expensive supplies. Just cut the fabric to your desired size, fold it over, and secure the edges with hot glue for a clean finish. You can personalize your pillows by adding decorative accents like tassels, trims, or pom-poms, giving them a trendy boho vibe. With materials typically costing under $5, you can create multiple pillows that perfectly complement your rustic shelves and other boho decor elements. These easy DIY pillows help you craft a stylish, personalized space without breaking the bank. Incorporating color accuracy into your pillow designs can also enhance their visual appeal and cohesiveness.
Transforming Reclaimed Wood Into Rustic Shelves
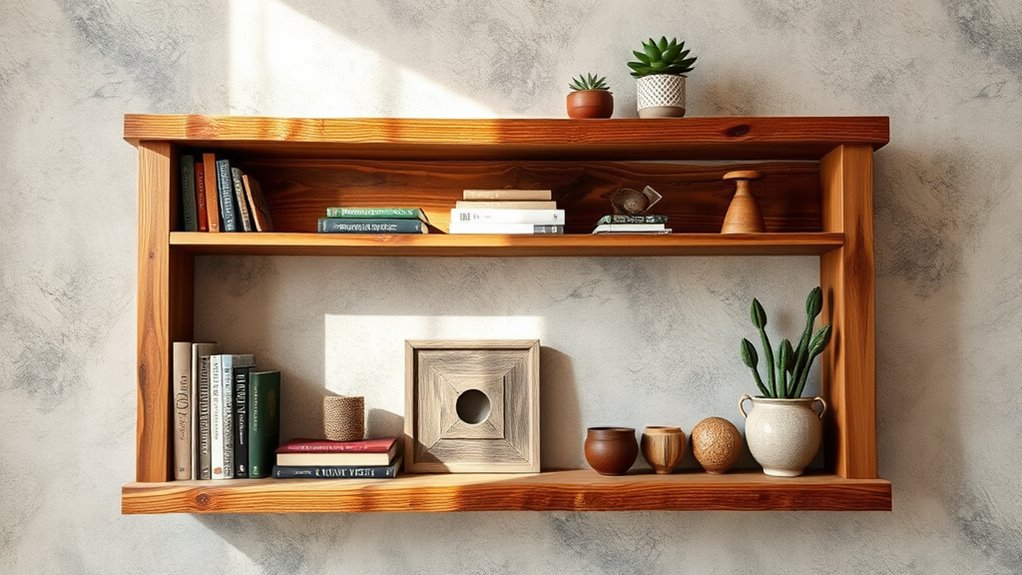
Start by choosing reclaimed wood with character, like visible grain and imperfections, to add rustic charm. Next, sand and seal the surface to preserve its texture and protect it from damage. To enhance the durability and authenticity, consider natural materials that reflect the farmhouse aesthetic. This approach not only emphasizes sustainability but also aligns with current DIY trends in home decor. Finally, assemble your shelves using simple brackets or rope ties for an easy, authentic look. Be sure to consider cookie consent management to ensure your website visitors have a smooth experience when browsing your DIY projects.
Selecting Reclaimed Wood
When selecting reclaimed wood for rustic shelves, it’s important to look for pieces that have authentic weathered textures and unique imperfections, as these features add charm and character to your design. Reclaimed wood, often sourced from old barns, pallets, or vintage furniture, naturally boasts a rustic appeal that enhances your boho aesthetic. Choose boards with visible knots, grain variations, and signs of age, which give your shelves a genuine, lived-in feel. Not only does using reclaimed wood add authentic character, but it also promotes sustainability by reducing waste and supporting eco-friendly practices. Confirm the wood is sturdy enough for your intended use, and consider how its weathered look complements your space. Selecting the right reclaimed wood sets a solid foundation for creating beautiful, personalized rustic shelves. Additionally, choosing wood with distinctive grain variations can further enhance the unique, rustic appearance of your shelves. Incorporating wood with natural imperfections can also heighten the rustic charm and authenticity of your finished shelves. Paying attention to the stability and durability of reclaimed wood ensures your shelves will stand the test of time while maintaining their charming rustic appeal. Properly inspecting the wood for structural integrity helps ensure safety and longevity for your DIY project. Moreover, understanding the spiritual energy of reclaimed materials can add a meaningful layer of connection and intention to your creative process.
Preparing the Wood Surface
Before installing your reclaimed wood shelves, it’s essential to prepare the surface properly to guarantee a smooth, durable finish. Start by thoroughly sanding the wood to remove rough patches, splinters, and blemishes. A smooth surface ensures the stain and finish adhere evenly. Next, apply a wood conditioner or primer to improve stain absorption, which helps achieve a more consistent, rustic look. Choose a stain or paint that complements rustic decor, such as weathered or distressed finishes, to highlight the wood’s natural grain. Once stained, seal the surface with a clear matte or satin polyurethane to protect it from moisture and wear. Remember to let each coat dry completely before applying the next, ensuring your shelves have a professional, long-lasting finish. Incorporating personal development principles like mindfulness during this process can help you stay patient and focused, resulting in better craftsmanship. Additionally, considering the variety of finishes available can help you select the best protective coating for your specific needs.
Assembling Rustic Shelves
Transforming reclaimed wood into rustic shelves involves a few straightforward steps to guarantee both beauty and stability. First, cut your reclaimed wood to the desired length and smooth the edges for safety and a polished look. Choose wood with natural imperfections and weathered textures to enhance that authentic rustic charm. Attach sturdy mounting brackets, ensuring they are securely anchored into wall studs or using wall anchors for extra support, especially with heavier reclaimed wood. Seal the wood with a clear sealant or matte stain to preserve its character while protecting it from moisture and wear. Proper sealing ensures longevity, while well-installed brackets keep your shelves stable and secure. With these steps, you’ll create stunning, functional rustic shelves that beautifully showcase your books and decor.
Building Stylish Hanging Rope Shelves for Wall Display
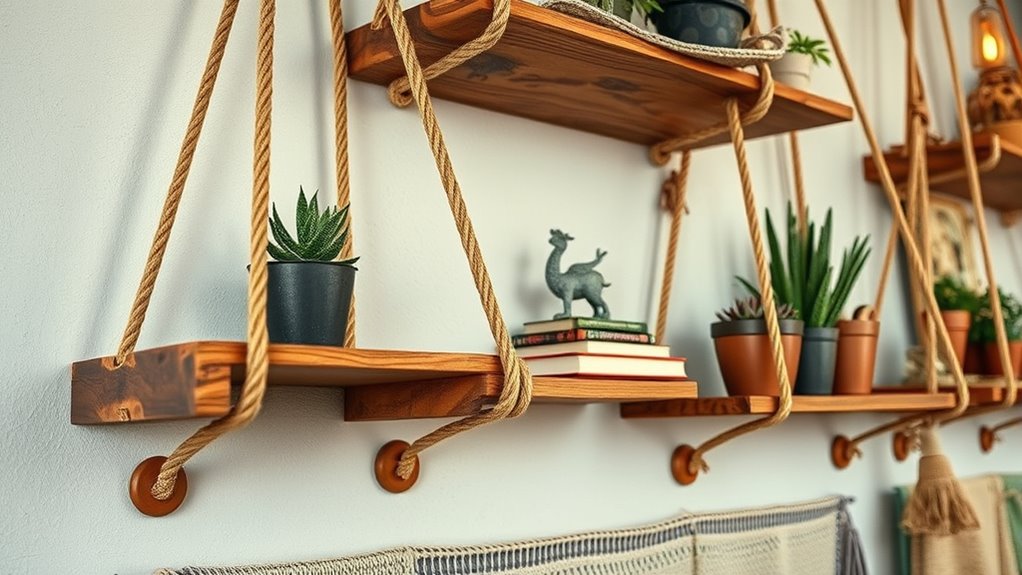
Ever wondered how to create a stylish and functional wall display with just a few simple materials? Building a DIY Hanging Rope Shelf is easier than you think. Start with sturdy rope, a wooden plank, and hardware like hooks or eye screws. Measure and cut the rope to your desired length, leaving enough for knots that can support your items. Attach the ropes securely to the wooden plank, ensuring it’s balanced for stability. Then, anchor the ropes to the wall using hooks or wall anchors, making sure they’re level for a cohesive look. This rustic boho wall shelf is perfect for displaying plants, books, or decor, adding a natural, textured element to your space. With just a few steps, you’ll have a beautiful hanging shelf to showcase your favorite items. Additionally, understanding the importance of proper support can help ensure your shelf remains safe and durable over time. Incorporating natural elements like wood and rope enhances the rustic boho aesthetic and creates a warm, inviting atmosphere in your home. For added stability, consider checking retail store hours to ensure you can purchase any additional supplies needed without interruption. Remember that maximizing space and organization can make your DIY project even more functional and pleasing to the eye. Furthermore, selecting the right storage techniques can help keep your shelves looking neat and organized over time.
Creating Basket-Inspired Storage Solutions for a Rustic Look
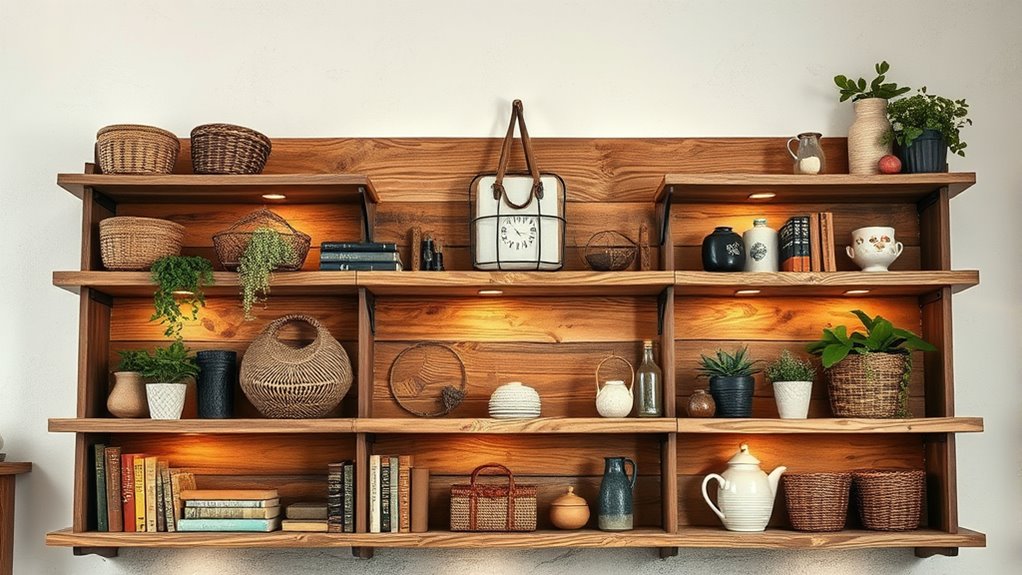
To achieve a warm, rustic look in your storage solutions, consider creating basket-inspired organizers that incorporate woven materials like rattan, wicker, or seagrass. These DIY baskets add texture and coziness, transforming your space into a welcoming retreat. You can repurpose existing baskets or craft custom basket-style shelves with wood frames and woven textures. Incorporating tea accessories such as small teapots or cups into your decor can further enhance the cozy, inviting atmosphere of your space. Integrating these baskets into open shelving creates versatile storage for books, plants, or decor, enhancing both style and function. The natural materials evoke a sense of craftsmanship and authenticity that’s perfect for rustic or boho interiors. Utilizing merchant services for secure payment processing can also streamline online sales if you decide to sell your handmade baskets or decor items. Additionally, utilizing relationship principles such as trust and open communication can foster a more harmonious environment as you organize and decorate your space. By combining baskets with your shelving, you bring warmth and visual interest to your home, making your storage both practical and beautifully styled.
Repurposing Wooden Crates and Pallets for Decor and Organization
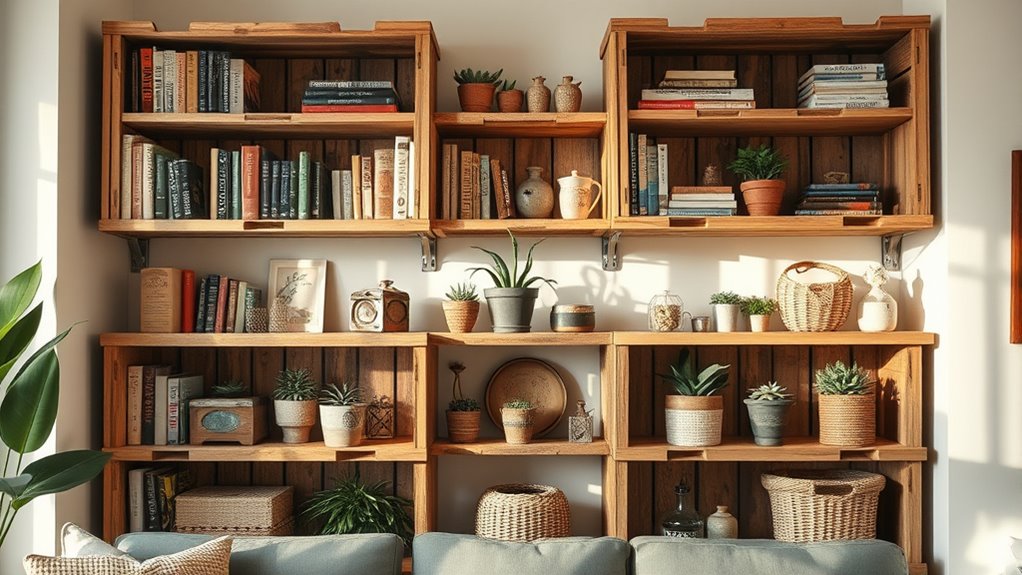
Repurposing wooden crates and pallets offers a simple, budget-friendly way to add rustic charm to your home decor and organization. You can transform these materials into stylish DIY boho rustic shelves perfect for displaying books, plants, and decor. Sanding and staining or painting wooden crates and pallets elevate their appearance, giving them a polished, high-end look. Horizontal stacking or mounting crates on walls creates versatile storage units that blend form and function. These repurposed pieces work well in living rooms, kitchens, or entryways, adding warmth and character. Plus, they’re affordable—often costing under $10 for supplies from dollar stores or hardware shops. Incorporating upcycling techniques ensures that your projects are both eco-friendly and unique. Using low-cost materials allows for more creativity without breaking the bank. Adding hooks or legs can turn these rustic shelves into functional coffee tables, storage benches, or decorative accents, enhancing your space effortlessly. Considering electric bike accessories can further customize your DIY shelves for a more personalized look, especially if you incorporate elements like bike-themed decor or hardware. Incorporating appropriate hardware ensures stability and safety for your DIY projects. Additionally, adding decorative elements like vintage signs or textiles can further enhance the rustic boho aesthetic of your shelves.
Designing Small Niche Shelves for Unique Wall Accents

Designing small niche shelves is a smart way to create eye-catching wall accents that maximize limited space. These shelves add visual interest and serve as functional wall storage for your favorite tiny plants, photos, or decor. You can craft niche shelves from inexpensive materials like scrap wood, pine, or bamboo, making your DIY boho project affordable and eco-friendly. With simple step-by-step guides, you’ll measure, assemble, and finish your shelves for a polished look. When styled thoughtfully, niche shelves bring a rustic, boho, or modern vibe to your space while optimizing every inch. Incorporating eco-friendly materials can also enhance the sustainability of your DIY project. Imagine transforming an awkward corner into a charming display that sparks joy and personality. Incorporating vetted Halloween product reviews can also inspire creative ideas for seasonal decor displays on your shelves.
- Feel the satisfaction of a custom, handmade piece
- Elevate your space with personal, curated decor
- Enjoy the beauty of eco-friendly, DIY boho accents
- Maximize small spaces with clever wall storage
- Create a cozy, inviting atmosphere effortlessly
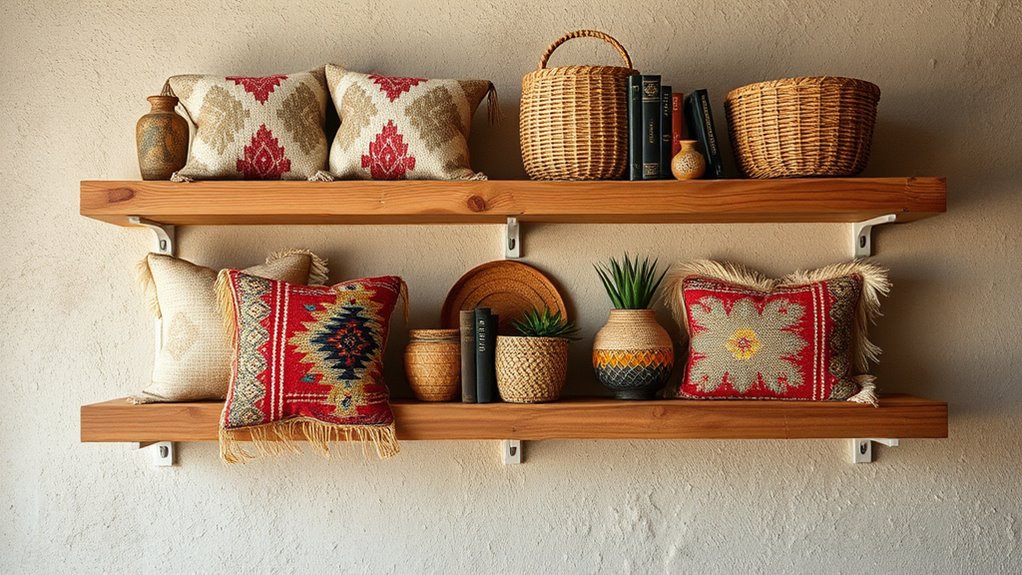
Styling Tips for Displaying Books, Plants, and Decor on Your Shelves
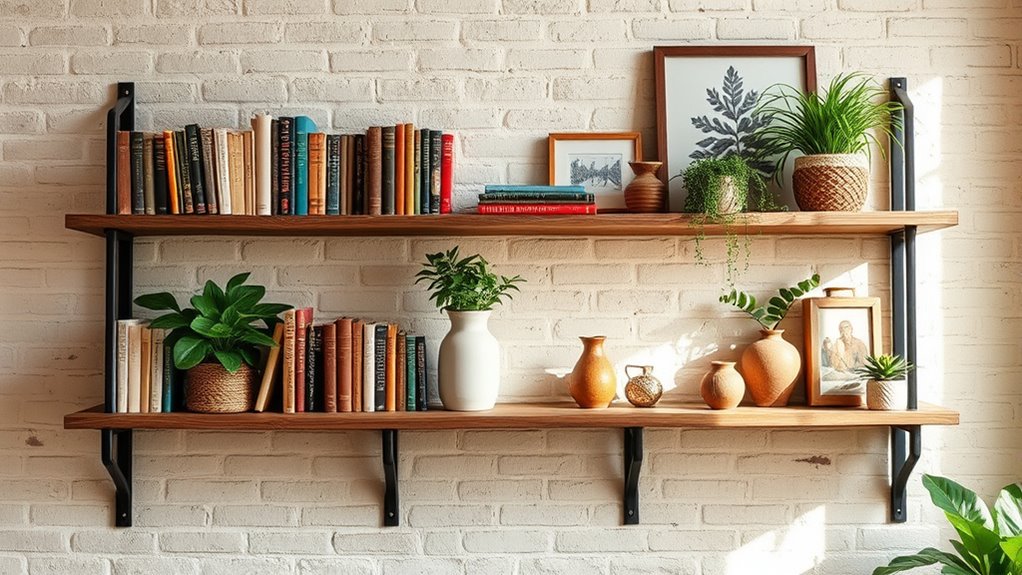
Once you’ve built your niche shelves, the next step is to style them in a way that highlights your personality and keeps your space organized. Start by arranging books vertically with decorative bookends or stacking a few horizontally for visual interest and balance. Mix in greenery like potted plants or hanging vines to add a fresh, boho vibe. Place small decor items—candles, vases, or framed art—between larger pieces to create layered, curated displays. Group similar items, such as botanical prints or ceramic pieces, to establish cohesive themes. Remember to leave some open space on each shelf; it prevents clutter and allows your favorite decor and books to stand out, making your boho-inspired shelves both functional and stylish.
Frequently Asked Questions
How Do You Style Rustic Shelves?
To style rustic shelves, you wanna create a cozy, laid-back vibe. Start by arranging vintage books, potted plants, and woven baskets for balance. Mix textures like wood, rattan, and metal to add depth. Use asymmetrical placements and layer items for visual interest. Place taller or eye-catching pieces at varying heights, and keep the color palette neutral with earthy tones to achieve that perfect rustic boho look.
How Do You Decorate a Bookshelf Without It Looking Cluttered?
You can keep your bookshelf looking organized by mixing open and closed storage, hiding clutter behind cabinets or baskets. Use varying shelf heights and objects like plants, artwork, or decorative boxes to add interest. Limit items on each shelf, leaving some empty space to prevent overcrowding. Arrange books vertically and horizontally, pairing them with decorative accents. Regularly rotate and edit items to maintain a fresh, balanced look free of visual clutter.
How Do You Make Open Shelves Look Less Cluttered?
To make your open shelves look less cluttered, start by displaying only a few carefully chosen decor pieces and books. Use baskets or small containers to hide clutter and keep things tidy. Arrange items asymmetrically or at different heights to add visual interest. Regularly declutter and rotate your decor to keep it fresh. Stick to neutral or cohesive colors for a harmonious, less chaotic look that feels inviting.
How Do You Arrange Decorative Shelves?
You arrange decorative shelves by creating asymmetrical groupings to add visual interest. Mix shelf heights and depths to display books, plants, and decor dynamically. Place larger statement pieces on the center or bottom to anchor the look, and leave vertical and horizontal gaps to avoid clutter. Coordinate colors and themes for a unified appearance, ensuring each shelf complements the others and enhances your space’s overall aesthetic.
Conclusion
Now that you’ve discovered these DIY rustic boho shelves, your space will transform faster than you can say “Pinterest perfection!” Your home will become the ultimate sanctuary of style and organization, turning heads and inspiring envy from everyone who visits. With just a little creativity and effort, you’ll create a stunning haven so breathtakingly beautiful, even the most seasoned interior designers will be left speechless. Get ready to wow the world with your incredible new shelves!