Connect with us

Beauty and Grooming

Protect Your Eyes: Tanning Bed Safety Essentials

Uncover essential tips for protecting your eyes during tanning sessions and discover why proper eye care is crucial for your long-term health!

Published

on

tanning bed eye protection

When using a tanning bed, it is important to protect your eyes! Those UV rays can be up to 100 times stronger than sunlight, which is no joke. Be sure to wear snug UV-blocking goggles; they provide better fit and keep those harmful rays away from your eyes. Remember, simply closing your eyes is not enough! After tanning, put on some stylish sunglasses to give your eyes extra protection. Just like you wouldn’t share a snack with germs, avoid sharing goggles! Taking care of your eyes today will lead to brighter tomorrows, so keep reading for more safety tips!

Key Takeaways

  • Always wear UV-blocking goggles specifically designed for tanning to protect your eyes from harmful rays.
  • Ensure goggles fit snugly to prevent UV exposure and avoid tan lines during your tanning session.
  • Clean and disinfect your goggles after each use to maintain hygiene and prevent germ transmission.
  • Limit tanning sessions to recommended durations to minimize overall UV exposure and protect eye health.

Understanding UV Radiation Risks

When you step into a tanning bed, it's crucial to recognize that the intense UV radiation can pose serious risks to your eye health.

Did you know that the UV levels in tanning beds can be up to 100 times stronger than sunlight? That's like comparing a cozy fireplace to a roaring bonfire!

Long-term exposure to these rays can lead to eye conditions like cataracts and even uvea cancer. Yikes!

So, while you're working on that perfect tan, don't forget your eyes need protection too.

Skipping eye safety isn't just a bad idea; it's like leaving your umbrella at home during a downpour!

Advertisement

Prioritize your eye health during those tanning sessions, and keep those peepers safe and sound!

Choosing the Right Goggles
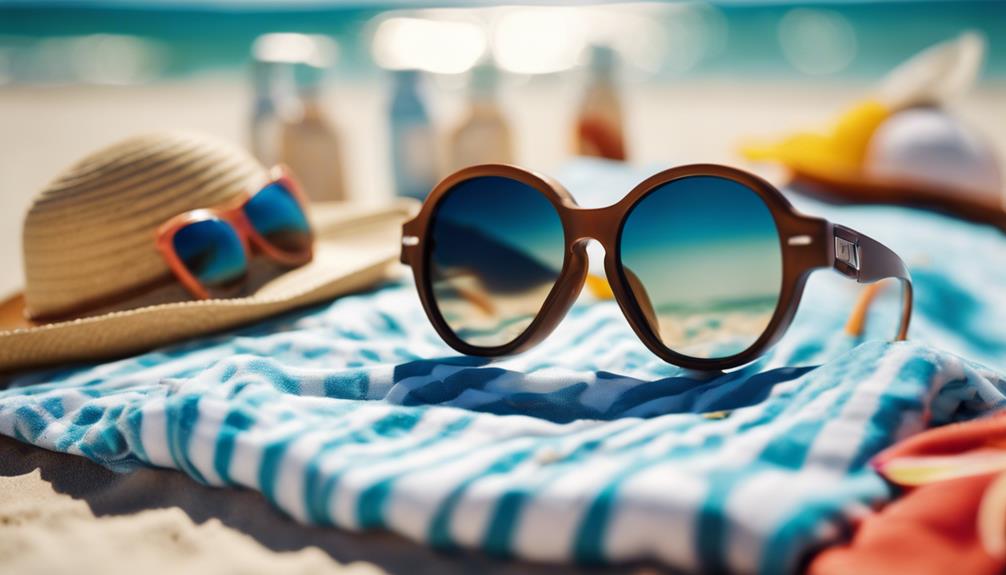
select appropriate goggles wisely

Choosing the right goggles is essential for protecting your eyes from the harmful UV rays emitted by tanning beds.

You wouldn't jump into a pool without checking if there's water, right? Well, don't enter a tanning bed without proper goggles!

Make sure to pick UV-blocking goggles specifically designed for tanning; regular sunglasses just won't cut it. They need to fit snugly, covering your eyes completely, so you don't end up with weird tan lines.

Look for certified safety goggles that meet protection standards—trust me, your future self will thank you!

Remember, wearing the right goggles isn't just about style; it's about keeping those peepers safe.

Advertisement

Goggle Fit and Comfort

goggle comfort and fit

Finding the right fit and comfort in your goggles is key to ensuring effective eye protection while tanning.

Think of your goggles as your trusty shield—they should hug your face snugly, preventing any sneaky UV rays from slipping in.

If they're too loose, you might feel like you're on a roller coaster, and if they're too tight, well, that's just a headache waiting to happen!

Look for goggles that feel like a cozy pair of shoes—secure but not pinching.

Also, check for cushioned edges; they can make a world of difference!

Remember, comfy goggles mean you can relax and enjoy your tanning session without worrying about your eyes getting burnt.

Advertisement

Eyewear Hygiene Practices

proper eyewear cleaning techniques

Maintaining proper hygiene for your goggles is essential to prevent eye infections and guarantee safe tanning sessions. Think of your goggles as your eye's best friends—they need care too! After each use, clean them with a disinfectant solution or wipes. Avoid sharing them; germs can be sneaky! Here's a little table to help you remember the dos and don'ts of eyewear hygiene:

Do'sDon'tsTips
Clean after every useShare without sanitizingUse salon-provided products
Store in a dry placeLeave them dirtyCheck for damage regularly
Inspect for fit regularlyIgnore discomfortReplace if they're worn out

Safe Tanning Techniques

healthy sun exposure practices

When you decide to tan, prioritizing safety techniques can help minimize the risks associated with UV exposure.

First, always wear those stylish UV-blocking goggles; they're like superhero masks for your eyes! You wouldn't go into battle without your gear, right?

Next, limit your tanning sessions to the recommended time—think of it like taking a quick dip in a pool; too much can leave you feeling overwhelmed.

Remember to reassess your tanning habits regularly, just like checking your phone for updates.

Finally, don't forget to hydrate your skin and protect your eyes post-tan with UV-blocking sunglasses.

Post-Tanning Eye Care
protecting skin after tanning

After tanning, it's crucial to protect your eyes by immediately wearing UV-blocking sunglasses to shield them from lingering UV exposure. Think of it like putting on a seatbelt after a ride; it keeps you safe! You can also use moisturizing eye drops to soothe any irritation. And hey, wearing a stylish brimmed hat outdoors adds a little flair while providing extra protection!

Here's a quick table to remember what to do post-tanning:

Advertisement
ActionPurposeExtra Tip
Wear UV-blocking sunglassesBlock lingering UV raysChoose a fun pair!
Use moisturizing eye dropsSoothe drynessKeep them handy!
Wear a brimmed hatAdd extra UV protectionLook fabulous while doing it!

Taking these steps guarantees your eyes stay healthy and happy!

Debunking Common Myths

myth busting common misconceptions

Many people still believe common myths about tanning beds and eye safety that can lead to harmful practices.

For instance, some think closing their eyes is enough protection, but that's like hoping a raincoat will keep you dry while you swim! You really need those UV-blocking goggles to shield your eyes from intense rays.

Another myth? “It's just like sunbathing!” Nope! Tanning beds can expose you to UV levels much higher than the sun, which means your eyes are at serious risk.

Don't fall for these misconceptions; they could lead to long-term damage. Remember, keeping your peepers safe is super important, so always wear those goggles and treat your eyes like the treasures they are!

Frequently Asked Questions

Can I Use Regular Glasses Instead of Tanning Goggles?

You can't use regular glasses instead of tanning goggles. They don't block harmful UV rays like specialized goggles do. For proper protection, always opt for UV-blocking goggles designed specifically for tanning bed use.

Advertisement

How Often Should I Replace My Tanning Goggles?

Like a well-tended garden, your tanning goggles need regular care. Replace them every six months or sooner if you see wear and tear. Fresh goggles guarantee your eyes stay safe from harmful UV rays during tanning sessions.

Are There Any Specific Brands Recommended for Tanning Goggles?

When selecting tanning goggles, look for brands like EyeCandy, ProSun, or Solar Eye, which offer UV-blocking goggles specifically designed for tanning beds. Always verify they fit well and meet safety standards for maximum protection.

Can I Tan Without Goggles if I Have Dark Skin?

You shouldn't tan without goggles, even if you have dark skin. UV rays can still damage your eyes, leading to serious conditions. Always prioritize eye protection to safeguard your vision during tanning sessions.

What Should I Do if My Eyes Feel Irritated After Tanning?

If your eyes feel irritated after tanning, rinse them gently with cool water, avoid rubbing, and apply lubricating eye drops. If irritation persists, consult an eye care professional to guarantee there's no serious damage.

What are the essential safety measures for protecting your eyes in a tanning bed?

When using a tanning bed, it’s important to be aware of the tanning bed safety limits to protect your eyes. Always wear FDA-approved protective eyewear to shield your eyes from harmful UV rays. Ensure the goggles fit properly to prevent any accidental exposure to the eyes during the tanning session.

Advertisement

Conclusion

So, you might think, “But I don't want to wear goofy goggles!”

Well, trust me, those goggles are like sunglasses for your eyes—super important! By protecting your peepers, you're not just avoiding a serious sunburn but also keeping your vision safe for all those future tanning sessions.

Remember, looking good and staying healthy can totally go hand in hand!

So, gear up, follow the tips, and enjoy that glow without the worry. Your eyes will thank you!
Advertisement
Advertisement

Beauty and Grooming

How to Shave Your Balls Safely: The Game-Changing Grooming Hack

Prepare to elevate your grooming game with essential tips for safely shaving your balls—discover the secrets that will change your routine forever!

Published

on

safe ball shaving techniques

Shaving your balls safely is all about the right tools and techniques. Start with a quality trimmer made for sensitive areas, like the MANSCAPED® Lawn Mower® 4.0. Trim first to keep the blades clear, and then use a sharp razor designed for delicate skin. Apply a soothing shave gel, and always shave in the direction of hair growth to avoid irritation. Don't forget to pull the skin taut for precision. Post-shaving, rinse with cool water and moisturize to keep everything smooth. Following these tips will boost your confidence and comfort, plus there's a lot more to discover about your grooming routine!

Key Takeaways

  • Use a quality trimmer or razor specifically designed for sensitive areas to reduce the risk of nicks and irritation.
  • Trim hair first to minimize discomfort and keep blades clear; a warm shower helps soften hair for easier shaving.
  • Stand with legs spread and one leg propped up for better access, pulling the skin taut to prevent cuts.
  • Shave in the direction of hair growth using slow, gentle strokes, rinsing the blade frequently to maintain effectiveness.
  • Rinse with cool water post-shave, apply a soothing moisturizer, and avoid tight clothing to promote healing and comfort.

Essential Tools and Preparation

necessary equipment and readiness

When you're ready to shave your balls safely, having the right tools and preparing your space is crucial. First off, invest in a quality trimmer designed specifically for the pubic area, like the Gillette Intimate Pubic Hair Trimmer or MANSCAPED'S The Lawn Mower® 4.0. You'll also need a sharp razor—think Gillette Pubic Hair Razor—to ensure a smooth shave without nicks. Don't forget a gentle shave cream or gel with soothing ingredients like aloe vera to protect your skin.

Next, prep your bathroom. Clear the space and set up something like The Magic Mat® to catch those pesky hair clippings. Good lighting is key, too—trust me, you don't want to miss a spot! Position yourself comfortably, spreading your legs wide for better access, and remember to pull the skin taut to avoid cuts. Using a hand mirror can also help you achieve better visibility in hard-to-see areas.

Lastly, warm water is your best friend here; it softens both hair and skin, making the whole process easier. With these tools and preparations in place, you're well on your way to a safe and effective shave. Now, go get that grooming done!

Effective Trimming Techniques

precision in cutting methods

Effective trimming techniques are essential for achieving a safe and comfortable grooming experience. Before you dive into shaving, take a moment to trim that pubic hair. This will help keep your blades clear and reduce any discomfort. Using an electric trimmer or even scissors can save you from nasty nicks, so opt for tools that have features like SkinFirst technology to protect your skin.

Make sure the area is clean, preferably after a warm shower, which softens the hair for easier trimming. When you're ready to trim, prop one leg up on a sturdy surface for better access and visibility. Gently pull the skin taut to create a flat surface—this helps you avoid accidents, trust me! Trim the hairs as short as possible without touching your skin. It's all about control, so tackle it in sections to ensure you don't miss any spots. Additionally, trimming before shaving can help reduce friction during physical activities.

Finally, rinse the area thoroughly after trimming to get rid of any loose hair. Pat it dry with a clean towel, and you're one step closer to a smooth, comfortable grooming experience. Remember, preparation is key!

Advertisement

Optimal Positioning for Shaving

shaving posture for comfort

Finding the right position for shaving is crucial for a smooth and safe experience. Start by standing with your legs spread wider than your shoulders. This stance gives you better access and control, making the whole process easier. Initially, position yourself outside the shower; this way, you can see what you're doing and avoid any slippery mishaps.

Propping one leg up on a sturdy surface, like a stool or the side of the tub, helps you reach all areas comfortably. Just make sure you're near the tub to easily rinse off and access warm water. Keep the area clean and free of obstructions—trust me, you don't want to trip mid-shave! Additionally, remember to use a trimmer before applying a razor for enhanced safety.

As you get into it, use one hand to pull the skin taut. This is key to avoiding cuts and nicks, so apply gentle, firm pressure. Keep adjusting your grip to maintain that tension without causing discomfort. Lastly, be sure you've got good lighting and visibility. A clear shaving gel can help, too. With the right positioning, you're on your way to a safe and effective shave!

Proper Shaving Techniques

effective shaving practices guide

Your shaving technique plays a significant role in achieving a smooth, irritation-free experience. First things first, trim the hair using an electric razor or trimmer; this reduces discomfort and keeps those pesky hairs from getting caught in your razor. A warm shower beforehand helps soften the hair and makes trimming easier.

When it's time to shave, pick a razor designed for sensitive skin—like the Gillette Fusion5—and use a quality shaving gel. Apply it generously to lubricate the area and prevent irritation. Always shave in the direction of hair growth, using slow, light strokes for better control. Pull the skin taut to avoid nicks, and don't forget to rinse your blades regularly to keep them clear of buildup.

After you're done, rinse the area with cold water to close those pores and minimize the risk of ingrown hairs. Pat the area dry—no rubbing!—and consider applying a moisturizer to soothe your skin. Remember, give your skin some downtime before the next shave, ideally a few days. Proper technique isn't just about looks; it's about keeping things comfortable and irritation-free!

Safety and Hygiene Practices

health and cleanliness protocols

Before diving into the shaving process, prioritizing safety and hygiene practices is essential for a smooth experience. Start by giving the area a good clean; this helps prevent infections. A warm shower not only softens the stubble but also washes away dirt and sweat—just make sure the water's warm, not hot, to avoid any skin burns!

Visibility is key, so stand with one leg up on a steady surface, ensuring you can see everything clearly. Choose a shaving cream or soap that's gentle on sensitive skin, steering clear of fragrances and harsh chemicals. Remember, soaps with foaming agents can irritate, and over-washing can strip away healthy bacteria.

Advertisement

When it comes to general genital hygiene, wash with plain water or a gentle emollient. Opt for cotton underwear to keep things breathable and change your undergarments frequently, especially after workouts. And let's not forget about safe practices—use condoms, avoid sharing sex toys, and trim pubic hair carefully to dodge irritations. These simple steps will set you up for a smooth and safe shaving experience!

Aftercare and Skin Maintenance

skin care and maintenance

After shaving, giving your skin the care it deserves is crucial for maintaining comfort and preventing irritation. Start by applying a good moisturizer to minimize friction—trust me, your skin will thank you! Look for lotions or creams with soothing ingredients like aloe vera; they're game-changers when it comes to calming sensitive areas.

Next, keep things breezy! Avoid tight clothing for a while, as it can lead to unwanted irritation. And don't forget to keep the area clean and dry to ward off any pesky bacteria or fungi. For a few days after shaving, consider using antiseptic creams; they'll soothe and protect your newly shaved skin.

Exfoliation is key, too! Gently scrub the area several times a week to remove dead skin cells, but steer clear of harsh products. Instead, opt for something mild and fragrance-free. Remember, over-exfoliating can lead to ingrown hairs, which is nobody's idea of fun.

Lastly, hydration matters! Drink plenty of water to flush out toxins, and always wash your hands before applying products. With these aftercare tips, you'll keep your skin happy and healthy!

Tips for Regular Grooming

regular grooming habits essential

Regular grooming is essential for maintaining a neat and comfortable appearance down there. To kick off your routine, use a trimmer to tackle long hair before you shave. This helps prevent your razor from getting caught, which can lead to those dreaded snags and cuts. Always trim on dry hair for better control, pulling the skin taut as you go to ensure an even trim.

Next, indulge in a warm shower for about five minutes. This softens the hair and opens your pores, making the shave smoother and reducing the risk of nicks. When you're ready to shave, grab a sharp razor designed for sensitive areas. Lather up with soap or shaving gel to help the razor glide effortlessly. Remember, shave in the direction of hair growth to avoid irritation.

Advertisement

Position yourself comfortably—spreading your legs wider than your shoulders helps access all areas easily. Take your time and don't rush; it's all about precision. Rinse the blade after every stroke to keep things hygienic. Regular grooming doesn't just make you look good; it makes you feel great, too! So, embrace the habit and enjoy the confidence that comes with it.

Frequently Asked Questions

How Often Should I Trim Before Shaving?

You should trim about once a week, or as needed, to keep hair manageable. This makes shaving easier and reduces irritation. Pay attention to your hair growth rate and skin sensitivity for best results.

Can I Use Regular Shaving Cream Instead of Shaving Oil?

Yes, you can use regular shaving cream instead of shaving oil. It provides a protective layer and lubrication, reducing irritation. Just ensure it's gentle, hypoallergenic, and free of harsh chemicals for sensitive areas.

What Should I Do if I Get a Cut?

If you get a cut, apply gentle pressure for a few minutes, clean it with warm water and soap, and use a soothing product. Keep the area clean and moisturized to prevent infection while it heals.

Is It Safe to Shave While in a Hurry?

No, it's not safe to shave while in a hurry. Rushing increases the risk of nicks, cuts, and irritation. Take your time to prepare properly and ensure a smooth, safe shaving experience for your skin.

Advertisement

Can I Shave My Balls if I Have Sensitive Skin?

Yes, you can shave your balls with sensitive skin. Just use a sharp razor and soothing shaving cream, pull the skin taut, and shave gently to minimize irritation. Don't forget to moisturize afterward for comfort.

Conclusion

So there you have it! With the right tools, techniques, and a little practice, shaving your balls can be a breeze—no nicks or awkward mishaps required. Remember, safety and hygiene are key for a smooth experience. Embrace your grooming routine, and don't shy away from experimenting to find what works best for you. With these tips in your back pocket, you'll be rocking that fresh, clean feel in no time. Happy shaving!

Continue Reading

Beauty and Grooming

How to Apply Cologne: The One Mistake That’s Ruining Your Scent

How to apply cologne effectively can transform your scent, but are you making the one mistake that could ruin it? Discover the secret now!

Published

on

applying cologne correctly

Applying cologne can be a game-changer, but the biggest mistake you might be making is overdoing it! Less is definitely more here. Stick to a light spray—3 to 4 spritzes on pulse points like your wrists and collarbone. This ensures you don't overwhelm anyone (or yourself). Remember to apply right after a shower on clean skin for the best absorption! Moisturizing beforehand helps, too. Avoid the face and over-saturating your clothes; that's a recipe for disaster! Want to keep your scent on point? There's a lot more to master when it comes to cologne application.

Key Takeaways

  • Avoid applying cologne on dry skin; moisturize first to enhance scent longevity and absorption.
  • Don't over-saturate; stick to 3-4 sprays focusing on pulse points for subtle diffusion.
  • Skip rubbing the fragrance into your skin; it can break down the scent molecules.
  • Apply cologne after showering when skin is warm; this helps the fragrance meld with your body chemistry.
  • Avoid spraying directly on clothing to prevent damage and ensure the scent is experienced on your skin.

Choosing the Right Cologne

selecting the perfect fragrance

When you're choosing the right cologne, it's essential to consider the scent profile that resonates with you. Think about fragrance families like floral, oriental, woody, and fresh. Each family has its own unique blend of natural essences that can evoke different moods or vibes. For instance, if you want a lively, refreshing scent, citrus notes from the fresh category could be your go-to. On the other hand, if you're looking to make a bold impression, consider the rich, heavy notes of oriental fragrances. Additionally, understanding the components of perfume can help you appreciate how different notes interact and evolve throughout the day.

Also, keep in mind the occasion and setting. Lighter scents are perfect for warm days or casual outings, while deeper, spicier fragrances suit colder seasons or formal events. Your skin type matters too! Oily skin tends to hold fragrances longer, while dry skin might let those lovely aromas fade away faster. Furthermore, selecting a cologne with energy-saving features can enhance your overall experience by ensuring that you enjoy the scent throughout the day without frequent reapplication.

Applying to the Right Areas

targeting appropriate locations

Applying cologne effectively is crucial for ensuring the scent lasts throughout the day. One of the best places to start is by targeting your pulse points. These are spots like your wrists, inner elbows, collarbone, and behind your knees, where blood flows close to the skin. They emit warmth, helping diffuse your fragrance beautifully. You might also want to consider your neck and behind your ears as key areas for application.

Now, here's a pro tip: always apply cologne directly onto your skin rather than your clothes. The natural oils and pH of your skin enhance the scent, giving it longevity. Avoid spritzing on your face or any broken skin—your fragrance should be a delight, not a discomfort! Keep a distance of about 3-6 inches from your skin to avoid over-saturation; less is often more. Remember, excessive application can overwhelm senses and may require a shower to remove.

Also, try applying right after your shower when your pores are open and ready to absorb. If you notice the scent fading, don't hesitate to reapply at those pulse points mid-day. With these tips, you're well on your way to mastering the art of cologne application!

Correct Application Technique

proper method for application

The correct application technique for cologne can significantly enhance your fragrance experience. First things first, timing is everything! Apply your cologne right after showering, when your skin is clean and warm. This helps the fragrance last longer because warm and damp skin anchors the scent beautifully. Before you spritz, don't forget to moisturize! This step locks in moisture and helps the fragrance blend with your skin's natural oils.

Now, when it's time to apply, go for a gentle spray or light dab—no need for aggressive rubbing! If you're using a spray, aim directly at your skin. Walking through a mist cloud? That's so yesterday! Instead, gently press the cologne into your skin using your wrist; this keeps it close to the surface. Additionally, applying cologne to pulse points can enhance the fragrance's diffusion throughout the day, as these areas generate body heat.

Advertisement

Avoiding Over-Application

prevent excessive usage

Over-application of cologne can quickly turn a pleasant fragrance into a headache-inducing experience for both you and those around you. Picture this: you walk into a room, and instead of a subtle aura of freshness, you're met with an overwhelming cloud of scent. Yikes! This can be offensive and even trigger migraines or allergic reactions in others.

To avoid this, start with a light application—just 3 to 4 sprays is usually enough. Focus on pulse points like your neck and wrists, where the warmth helps diffuse the fragrance without overpowering it. Remember, you're looking for that subtle allure, not a "scent bomb" that lingers after you leave.

Also, skip spraying directly onto clothing; it doesn't mix well with skin oils and can ruin fabric. Plus, using an unscented moisturizer before cologne can help lock in the scent, enhancing its longevity.

Finally, if you feel the need to freshen up, reapply as needed rather than dousing yourself all at once. Avoiding over-application not only keeps you smelling great but also ensures everyone around you appreciates your fragrance, rather than running for the door!

Timing of Application

application submission schedule

Finding the right moment to apply cologne can significantly enhance your fragrance experience. The best time? Right after a shower! When you hop out, your skin's clean and dry, and your pores are open, ready to soak up that scent. It's like giving your fragrance a VIP pass to last longer and spread evenly. Plus, nobody wants to layer cologne over leftover soap or body lotion scents, right?

For optimal results, make sure your skin is well-moisturized beforehand. A smooth base not only feels great but also helps your cologne stick around longer. Just remember, apply it to dry skin—wet skin can wash away the fragrance faster than you can say "eau de toilette."

Morning is the perfect time to spritz on your cologne; it allows the scent to meld with your body chemistry throughout the day. If you have an evening event, don't hesitate to reapply, but keep it light. And always choose a well-ventilated spot for application, avoiding extremes in temperature. Your scent deserves to shine without overwhelming anyone nearby! So, get your timing right, and let that fragrance work its magic!

Advertisement

Common Mistakes to Avoid

avoid common pitfalls effectively

When applying cologne, avoiding common mistakes can make a significant difference in how your fragrance is perceived. First off, don't overdo it! One spritz to each pulse point is usually plenty. Applying too much can overwhelm others and might even lead to "nose blindness," where you can't smell yourself anymore. Remember, you want your scent to enhance your presence, not overpower it.

Next, let's talk application techniques. Rubbing the cologne into your skin can break down the fragrance molecules, changing the scent profile. Instead, dab it gently onto your pulse points. And please, don't spray it on your clothes! That prevents the scent from mingling with your natural oils and can damage fabrics.

Also, pay attention to where you're applying. Stick to heated areas like your neck and chest. Avoid spraying too close or too far—aim for 3 to 6 inches from your body. If it's been a while since your last spritz, don't hesitate to refresh halfway through the day. Just remember, subtlety is key; you want people to lean in, not back away!

Frequently Asked Questions

How Long Does Cologne Typically Last on the Skin?

Cologne typically lasts between 3 to 5 hours on your skin, depending on factors like your skin type, fragrance composition, and application technique. Oily skin tends to hold scents longer than dry skin.

Can Cologne Expire or Go Bad Over Time?

Yes, cologne can expire or go bad over time. You'll notice changes in smell, color, or consistency. To keep it fresh longer, store it in a cool, dark place and ensure the bottle's tightly sealed.

What Ingredients Should I Avoid in Cologne?

You should avoid colognes containing parabens, phthalates, and synthetic fragrances. Look for ingredients like PEGs and musk ketone, which can irritate your skin and disrupt hormones. Always check for "paraben-free" labels to stay safe.

Advertisement

Are There Specific Colognes for Different Skin Types?

Yes, there are specific colognes for different skin types. Oily skin benefits from lighter scents, while dry skin needs moisturizing fragrances. Sensitive skin requires hypoallergenic options, and normal skin can experiment with various scents to find the best match.

How Can I Layer Cologne With Other Scents?

To layer cologne effectively, start with a base scent on your skin, then add complementary body products like lotion or soap. Experiment with different applications on pulse points for a unique, harmonious fragrance blend.

Conclusion

So there you have it! Mastering your cologne game is all about choosing the right scent, applying it to the right spots, and knowing when to spritz. Avoiding those common mistakes will have you smelling fantastic all day. Remember, less is often more—don't drown in your fragrance! With these tips, you'll not only enhance your scent but also boost your confidence. Now go out there and make your presence known, one spritz at a time!

Continue Reading

Beauty and Grooming

Celebrity-Inspired Textured Hairstyles: Achievable Techniques

Learn how to effortlessly recreate stunning celebrity-inspired textured hairstyles and discover the secrets that will elevate your look to the next level!

Published

on

achievable celebrity hairstyling techniques

You can easily recreate textured hairstyles inspired by celebrities with some effective techniques. For instance, achieve beachy waves by using a 1-inch curling iron or try overnight braids for a heatless option. Add sea salt spray for extra volume and texture. For glamorous curls, section your hair and use a large barrel iron, finishing with a quality hairspray. Don't forget to maintain your locks with regular trims and moisturizing products to ensure health and shine. With these achievable methods, you'll be on your way to looking like a star. Discover even more tips and tricks to elevate your style!

Key Takeaways

  • Achieve celebrity-inspired asymmetrical bobs by utilizing a smoothing shampoo and a quality flat iron for sleek styling.
  • Create curtain bangs like Sydney Sweeney by incorporating layering techniques and a round brush for added volume and shape.
  • Embrace natural textures like Lizzo by using leave-in conditioners and moisture sprays to enhance curls and maintain hydration.
  • For messy styles like Kristen Stewart's, use texturizing sprays and a curling iron to create effortless waves and volume.
  • Incorporate seasonal hair colors that complement textured styles, utilizing rich shades to refresh your look and align with current trends.

Royal and Luxuriant Textured Styles

opulent elegant fabric designs

When it comes to achieving royal and luxuriant textured styles, you'll want to focus on a few key elements that exude sophistication and elegance.

Start with a smoothing shampoo, like Kérastase Discipline Bain Oleo-Relax, to ensure your hair is smooth and shiny. A real bristle brush is essential, as it helps distribute oils and achieves that polished look. Regular use of quality hair products can lead to improved hair health, enhancing your style further.

To add volume and bounce, incorporate a texturizing spray such as Oribe Dry Texturizing Spray. This not only lifts your roots but also gives your hair that coveted body. Additionally, regular trims are crucial for maintaining thick, healthy hair, keeping your style looking fresh and vibrant.

After styling, apply a shine-sealing hair gloss like Kiehl's Creme with Silk Groom to lock in shine and keep your style in place. For natural curls, use a wide-tooth comb to avoid tangles while maintaining that effortless texture.

Lastly, consider using rollers for a bouncy blow-dry, as recommended by royal hairstylists. Back-combing can amp up the volume for an even more dramatic effect.

Advertisement

With these products and techniques, you'll capture that royal allure effortlessly, making every day feel like a grand occasion.

Starlet Waves Techniques

starlet wave performance techniques

Starlet waves are the embodiment of glamorous, red-carpet-ready hair that never goes out of style. To achieve this look, start with damp hair and apply a volumizing foundation product with heat protectant.

Use a moisturizing shampoo and conditioner for shiny, voluminous waves, and follow up with a hydrating styling cream from midlengths to ends to tame frizz. For added drama, especially if you have finer hair, a root boost is essential. Energy-efficient models can also help reduce heat damage during styling.

When it's time to curl, grab a 1-inch or 1.25-inch curling iron. Use a twist-wrap-curl technique, ensuring no gaps between sections. Curl each section the same size and in the same direction, ideally towards your face for that classic Hollywood vibe.

Pin the curls and let them cool for about 10 minutes before brushing. Remember to limit hairspray usage to maintain a fresh appearance while styling.

When brushing out the curls, gently use a wide-tooth comb or round brush, starting from the ends and working upwards. Apply a smoothing cream before brushing to seal the ends.

Advertisement

Finish with a light mist of hairspray for hold, and a texturizing spray for added volume. A shine spray will complete your starlet waves, ensuring you look effortlessly glamorous.

Leading Lady Lob Styles

stylish lob hair trends

The leading lady lob is a versatile hairstyle that effortlessly combines sophistication with a touch of modern flair. When choosing the right length, consider your face shape: a jaw-length lob highlights your neck and jawline, ideal for heart or square shapes. A shoulder-length lob works wonders for round faces, creating a slimmer look, while a collarbone-length option flatters oval faces beautifully. If your hair grows quickly, opt for a slightly shorter lob to manage growth.

Styling your lob can vary based on your hair texture. For fine hair, a blunt cut adds fullness, while thick hair benefits from texture and movement by cutting into the ends. Textured or curly hair looks best with long layers to avoid a blocky appearance. Additionally, a shoulder length lob is particularly recommended for those with round faces, enhancing their facial structure. To achieve a polished finish, remember that loop integration can elevate your styling game, making it easier to achieve a variety of looks.

To achieve effortless styles, try casual waves using a straightener or curling iron, and remember to add dry shampoo for a lived-in look.

Maintaining your lob is crucial; use styling creams and serums for shine and protection. Don't forget highlights or lowlights to add depth, and finish with a light hairspray to tame any flyaways.

With the right techniques, you'll rock a leading lady lob that turns heads!

Advertisement

Glam Curls and Volume

stylish hair with volume

Glam curls deliver a stunning, voluminous look that's perfect for any special occasion or night out. To achieve this style, start with clean, dry hair. Apply a heat protectant to shield your strands from damage.

Section your hair into manageable parts, working from the nape to the crown. For extra volume, consider adding extensions and back combing the roots before you begin curling. The technique for achieving these curls is inspired by Hollywood waves, which have been a symbol of elegance since the 1940s. Engaging in music-making while styling can enhance your creativity and self-expression, making the process even more enjoyable.

Use a large barrel curling iron (1 to 1.5 inches) for those loose, glamorous waves. Curl each strand in the same direction for a cohesive finish, holding it in the curler for about 10 seconds. Let the curls cool completely while pinned up to maintain their shape.

For tighter, bouncier curls, bunch the hair on the wand.

After curling, gently brush out the waves with a natural bristle brush to soften the look. Refine any details using your fingers or a comb.

Finish off by securing your style with a quality hairspray and adding a shiny hair serum for that silky finish. With these techniques, you'll have gorgeous glam curls that turn heads all night long!

Advertisement

Beachy Waves Creation

coastal wave formation techniques

If you're looking for a more relaxed yet chic hairstyle, beachy waves are the perfect choice. You can achieve this look using either heat styling or heatless methods, depending on your preference.

For heat styling, grab a 1-inch curling iron or a 25 mm wand. Start with dry hair and section it into 4-5 parts. Curl your hair away from your face, alternating directions, and leave 1-2 inches uncurled at the ends for a natural vibe. Don't forget to apply a heat protectant beforehand to shield your strands from damage.

If you prefer to skip the heat, try overnight braids or a sock bun. Braid your damp hair when it's about 75% dry and sleep on it for effortless waves. Alternatively, use sea salt spray on damp hair and tousle for a quick beachy look. Beach waves are versatile for various occasions versatile for various occasions and can easily be dressed up or down. Incorporating a few drops of essential oils into your hair products can also add a pleasant scent and may provide additional benefits for your hair.

Finish off with a texture spray for extra grip and volume. For a polished touch, you can gently brush through your curls to create a looser wave. Remember, embracing those uncurled ends enhances the beachy effect, making your hairstyle effortlessly chic!

Messy, Textured Ponytails

chic untidy hair styles

Messy, textured ponytails offer a stylish yet effortless look that's perfect for any occasion.

To start, prep your hair by applying a texture spray on damp or second-day hair for added volume. If your hair is a bit oily, sprinkle in some dry shampoo to absorb excess oil and enhance texture. For extra lift, use a fine-tooth rattail comb to gently tease the roots. Adding curls to sections of your hair can also boost volume and movement.

Next, gather your hair into a mid-height ponytail, just below the crown, and secure it with a hair tie. Keep it loose by wrapping the tie around only twice, then tug gently on the ponytail for a lifted effect. Aim for a textured, voluminous base by ensuring even distribution of product throughout your hair. Split the ponytail into two sections to create separation.

Advertisement

To amp up the texture, apply a texturizing spray to the mid-lengths and ends. Backcomb sections for added volume, fluff the ponytail with a brush, and incorporate some flyaways for a lived-in vibe.

Tools for Textured Hairstyles

textured hairstyle styling tools

When it comes to achieving stunning textured hairstyles, having the right tools can make all the difference. For straightening and smoothing your hair, consider the T3 SinglePass StyleMax Flat Iron. It smooths sections in one pass and auto-customizes heat to minimize damage. Additionally, using tools with built-in heat protection features can significantly help in maintaining your hair's health while styling. This is particularly important as even heat distribution can prevent potential damage during the styling process.

The Conair Infiniti Pro Flat Iron is another great option, known for its quick heating and effectiveness on textured hair. For professional-grade results, GHD Hair Straighteners offer advanced ceramic heat technology, while the BondiBoost Airburst Styler combines a flat iron and curler with cool air to lock in styles and reduce heat damage.

If you're looking to add waves or curls, tools like the Mermade Hair Double Waver create beautiful waves in just two seconds per section. The Bed Head Crimper adds deep, defined waves, and curling wands provide versatility with various barrel sizes and temperature settings.

Two-in-one styling tools are also convenient, allowing you to switch between styles effortlessly. With these tools at your disposal, you can easily achieve the textured hairstyles that inspire you!

Products for Enhanced Texture

improving texture with products

To achieve beautifully enhanced texture, incorporating the right products into your hair care routine is essential.

Start with moisture sprays, which are perfect for encouraging curl formation and protecting your hair from heat styling. Applying these sprays to damp hair helps maintain hydration, reduces frizz, and enhances your natural texture, making them ideal for kinky, coily, curly, or wavy hair. Textured hair requires specific moisture levels to ensure curls remain defined and healthy. Additionally, using products with glycolic acid can help to improve overall hair health by promoting hydration.

Advertisement

Next, consider using leave-in conditioners. These products not only prepare your hair for styling but also detangle and soften it. By applying leave-in conditioner to damp hair, you'll enhance curl definition while reducing breakage, setting the stage for any styling technique you choose.

For a polished finish, anti-humectant pomades are your go-to. They smooth flyaways, control frizz, and add shine, especially when applied during blow-drying.

Lastly, if you're looking to boost volume and texture, texture sprays work wonders. Use them on damp or dry hair to create that tousled, effortless look, enhancing your natural texture at the roots. Incorporating a product that balances skin pH can also enhance the effects of your hair care routine, contributing to overall hair vitality.

With these products, you'll elevate your textured hairstyles effortlessly!

Step-by-Step Styling Guide

comprehensive fashion advice manual

With the right products in hand, you're ready to bring your textured hairstyles to life. Start by cleansing your hair with a sulphate-free shampoo to maintain those natural oils. Follow up with a thorough conditioning to enhance your hair's texture.

Let your hair air dry or use a gentle heat diffuser to avoid damage. Once it's slightly damp, spritz it with a moisture spray and apply a leave-in conditioner for added moisture.

Advertisement

To define your curls and coils, use a wide-tooth comb or your fingers, working on one section at a time. For extra definition, use medium-heat tongs (which help achieve royal lustrous locks) and finish with ORIBE moulding wax for hold and texture. A lightweight styling serum will add shine.

For volume and movement, section your hair, spritz it with leave-in conditioner, and create finger twists from roots to ends. Air dry or use a heat diffuser, then separate curls once dry. Finally, flick your hair from side to side for added bounce.

Experiment with partings, swapping sides or adjusting their depth for different looks. Use a carbon tail comb for precision and add PureFro Hold and Shine Serum for sharp partings.

Hair Care for Texture

textured hair care tips

Taking care of textured hair requires a dedicated approach that keeps moisture locked in and damage at bay. Start with leave-in conditioners to maintain hydration and reduce frizz. Incorporate natural oils like coconut, argan, or olive oil to nourish dry strands and add shine. Regular deep conditioning treatments are essential, as are pre-conditioning sessions before shampooing to protect against dryness. Don't rinse all the conditioner out; leaving some in acts as an additional moisture barrier. Additionally, consider using pimple patches to address any acne that may arise during your hair care routine.

When it comes to detangling, always do it while your hair is wet. Use a wide-toothed comb or your fingers to minimize breakage. Sectioning your hair helps release tangles more effectively. A detangling comb can work wonders when tackling knots from the bottom up, especially with a bit of serum or moisture spray. Additionally, hydration is crucial for all textured hair types, so make sure to adjust your routine based on your specific hair texture's needs.

Minimizing heat is crucial, so dial down the settings on your styling tools and opt for air drying or diffusing. Protect your hair at night by using a silk pillowcase and tying it up with a silk hair tie.

Advertisement

Lastly, remember to get regular trims to prevent split ends and breakage. Your textured hair deserves this care!

Celebrity Inspiration Gallery

famous figures art collection

In the ever-evolving world of hairstyles, celebrity-inspired looks offer endless inspiration for textured hair. If you're considering a bob, take cues from stars like Lucy Hale, who showcases versatile textured bobs that enhance natural structure. Skincare products dominate the beauty market, indicating the increasing focus on overall personal care, which complements a great hairstyle.

For a more voluminous look, Yara Shahidi's curly bob is perfect, emphasizing beautiful curls. You might also love Lucy Boynton's wavy bob, which combines softness and elegance. Embracing rich, warm colors during the fall can further elevate these styles.

If you're feeling bold, try an asymmetrical bob like Taraji P. Henson's, which adds drama with its uneven lengths. For a softer approach, consider curtain bangs, as seen on Sydney Sweeney, which frame your face beautifully.

Embracing your natural texture is trending, with celebs like Lizzo and Zendaya flaunting their curls without heat styling. To achieve similar looks, use leave-in conditioners and curl mousse, as recommended by experts. The rise in popularity of eco-friendly options in grooming products also reflects a shift towards healthier hair care choices.

For more effortless waves, check out Kristen Stewart and Florence Pugh's messy styles.

Advertisement

As we transition into fall, think about rich, warm colors and timeless styles like the long bob with soft waves, popularized by Jennifer Aniston and Selena Gomez.

These celebrity styles can inspire your next textured look!

Tips for Everyday Wear

casual style fashion advice

Whether you're heading to the office or out for brunch, everyday textured hairstyles can effortlessly elevate your look.

To achieve those beautiful beachy waves like Blake Lively, start by using a curling iron or wand to create loose curls. Divide your hair into sections, curl each one, and then gently brush them out for a soft, tousled appearance. Enhance the beachy vibe by applying sea salt spray, and finish with a light mist of hairspray for hold. Regular trims promote healthier hair growth, ensuring your waves look their best.

If you prefer a more effortless, undone texture, spritz sea salt or texturizing spray on freshly washed hair and let it air dry. Use a hair straightener to add gentle waves to your face-framing layers, curling away from your face while leaving the ends out for a relaxed look.

For a sleek and textured ponytail, pull your hair back, tease the roots for volume, and wrap a section around the base to conceal the elastic. Finish with some hairspray to maintain your style throughout the day.

Advertisement

Customizing Your Textured Look

personalizing your unique style

When you want to elevate your textured hairstyle, customizing it to fit your personal style and hair type is key. Start with a sulphate-free shampoo and conditioner to maintain your hair's natural texture.

After washing, apply a moisture spray to encourage curl formation and protect against heat styling. For added definition, utilize a styling wax or pomade, and finish with a lightweight serum for extra protection and shine. To achieve a polished finish similar to the sleek slicked-back ponytail, try using a hair straightener for an ultra-sleek look.

Next, adjust your styling techniques. Section your hair, using a medium-heat tong to define curls or a flat iron to create soft waves that drift to the sides. A diffuser can speed up drying and enhance your curls.

For more texture, try finger twists, then separate them for a defined look. Manipulate your parting and layers to refresh your style. Change the parting side for added volume or use a center part with a low bun for balance.

Incorporate layers for enhanced texture and trim the ends for a softer finish.

Frequently Asked Questions

What Hair Types Work Best for Textured Hairstyles?

Textured hairstyles work best with wavy, curly, and coily hair types. You'll find that layering and styling techniques enhance natural texture, allowing you to create versatile looks that suit your unique hair characteristics beautifully.

Advertisement

How Can I Maintain Texture Throughout the Day?

To maintain texture throughout the day, avoid touching your hair, use dry shampoo, and apply minimal finishing products. Incorporate braids or twists for a fresh look, and sleep on a satin pillowcase for protection.

Are There Specific Products for Fine Hair Texture?

Yes, there are specific products for fine hair texture. You should use lightweight shampoos, conditioners, and styling creams. Opt for non-greasy serums and moisture sprays to enhance your natural texture without weighing it down.

Can I Achieve These Styles Without Heat Tools?

Absolutely! You can achieve these styles without heat tools by using techniques like twisting damp hair, creating braids, and utilizing curlers. Embrace your natural texture, and you'll maintain healthy hair while looking fabulous!

How Often Should I Wash My Hair for Optimal Texture?

You should wash your hair based on your type; fine hair needs washing every 1-2 days, while curly hair can last longer. Pay attention to your lifestyle and scalp health for optimal texture.

Conclusion

You've explored a variety of celebrity-inspired textured hairstyles, each offering unique techniques you can easily achieve. Whether you're after royal waves or beachy looks, there's something for everyone. Remember to prioritize hair care to keep your locks healthy and vibrant. With the tips provided, you can customize your textured style to fit your personality and lifestyle. So go ahead, experiment with these techniques, and let your hair shine like the stars you admire!

Advertisement

Continue Reading
Advertisement

Affiliate disclaimer

As an affiliate, we may earn a commission from qualifying purchases. We get commissions for purchases made through links on this website from Amazon and other third parties.

Advertisement

Vetted

secret techniques for rapid results secret techniques for rapid results
Vetted4 hours ago

How to Get Ripped Fast: The Secret Techniques Trainers Won’t Tell You

You won't believe the secret techniques trainers keep hidden that can transform your body fast; discover them now!

stylish and comfortable men s shorts stylish and comfortable men s shorts
Vetted5 hours ago

15 Best Shorts for Men: Style and Comfort for Every Occasion

Find the perfect blend of style and comfort with our top 15 men's shorts, but which one will elevate your...

best fit gq jeans best fit gq jeans
Vetted5 hours ago

The Ultimate GQ Jeans: Discover the Best Fit for Your Style

Just when you thought you found the perfect jeans, discover how the right fit and style can elevate your wardrobe...

rising star in entertainment rising star in entertainment
Vetted5 hours ago

Hunter Schafer Young: The Rising Star Everyone’s Watching

Beneath her stunning exterior, Hunter Schafer's journey reveals a powerful blend of talent and advocacy that is just beginning to...

mold consumption health risks mold consumption health risks
Vetted16 hours ago

What Happens If You Eat Mold? The Answer Will Terrify and Surprise You

Have you ever wondered what really happens if you eat mold? The shocking truth might just leave you uneasy. Discover...

versatile stylish khaki pants versatile stylish khaki pants
Vetted17 hours ago

15 Best Khaki Pants for Every Occasion – Stylish, Comfortable, and Versatile

I discovered the 15 best khaki pants that combine style and comfort for every occasion, but which one will suit...

katt williams candid revelations interview katt williams candid revelations interview
Vetted23 hours ago

Katt Williams Interview: The Unfiltered Truth He Finally Revealed

A deep dive into Katt Williams' life reveals unexpected truths and challenges—discover the revelations that will leave you wanting more.

controversial rapper s unexpected saga controversial rapper s unexpected saga
Vetted1 day ago

Trouble Rapper: The Shocking Story Everyone Is Whispering About

Hidden beneath the surface of Trouble Rapper's rise to fame lies a tragic tale that will leave you questioning everything...

men s underwear comfort and style men s underwear comfort and style
Vetted1 day ago

10 Best Men’s Underwear Brands for Comfort and Style in 2024

Join us as we explore the 10 best men's underwear brands for comfort and style in 2024, revealing what makes...

moisturizing body washes for men moisturizing body washes for men
Vetted1 day ago

15 Best Moisturizing Body Washes for Men: Hydrate Your Skin Like Never Before

Browse through the 15 best moisturizing body washes for men that promise unbeatable hydration, but which one will transform your...

speed and luxury redefined speed and luxury redefined
Vetted1 day ago

Rimac Nevera: The Hypercar Redefining Speed and Luxury

Imagine a hypercar that redefines speed and luxury—discover the Rimac Nevera and what sets it apart from all others.

timeless men s denim jackets timeless men s denim jackets
Vetted2 days ago

15 Best Men’s Denim Jackets for Timeless Style and Comfort

Master the art of timeless style with the 15 best men's denim jackets that blend comfort and versatility; find the...

Trending

Copyright © 2024 StyleGuru.org Affiliate disclaimer As an affiliate, we may earn a commission from qualifying purchases. We get commissions for purchases made through links on this website from Amazon and other third parties.