Beauty and Grooming
Holiday Party Beauty Routines: Skincare to Makeup
Create a stunning holiday party look with essential skincare and makeup tips; discover the secrets to a flawless finish that shines all night long.
For your holiday party beauty routine, start with a tailored skincare regimen. Cleanse your skin based on your type, then exfoliate to boost texture. Hydrate with a rich moisturizer to combat winter dryness, and don't forget a good primer to create a smooth canvas for your makeup. Choose a foundation that matches your skin tone and apply it evenly. Focus on your eyes with long-lasting products and finish with defined lips for a festive touch. By mastering these techniques, you can achieve a flawless look that lasts all night. Explore more tips to elevate your holiday beauty game.
Key Takeaways
- Start with a tailored cleanser to remove impurities and prepare your skin for makeup application.
- Exfoliate regularly to enhance skin texture and improve the absorption of hydrating products.
- Use a hydrating primer suited to your skin type for a smooth canvas and long-lasting makeup.
- Apply makeup techniques like bold eyeliner and shimmering eyeshadow to elevate your holiday look.
- Finish with defined lips and a highlighter for added radiance and a polished appearance.
Skin Preparation Essentials
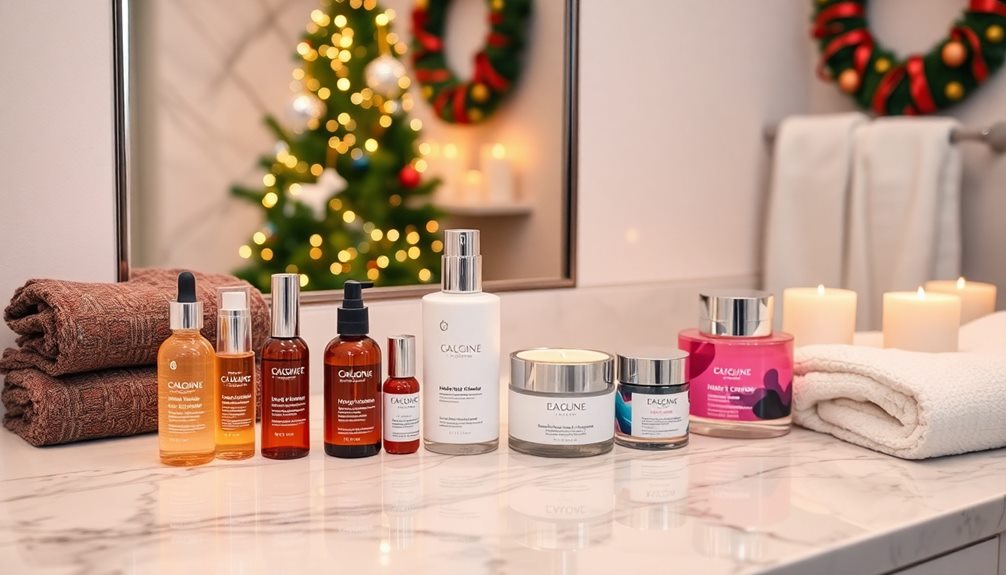
To nail your holiday party look, proper skin preparation is key. Start by cleansing your skin with targeted products tailored to your skin type. If you have normal or dry skin, try the Truth Juice Daily Cleanser; for oily or combination skin, the Find Your Balance Oil Control Cleanser will work wonders. This step eliminates dirt and impurities, setting a clean foundation for your makeup.
It's important to remember that good overall health, including dental health, can greatly impact your skin's appearance and liveliness; for instance, the connection between oral health and skin integrity is often overlooked.
Next, exfoliate with a product like the Cold Plunge Pore Mask. This helps achieve a smoother skin texture and enhances hydration, allowing for a flawless makeup application.
Once you've exfoliated, incorporate a hydrating moisturizer, such as the Strength Trainer Peptide Boost Moisturizer. This step strengthens your moisture barrier and creates a smooth canvas for your makeup.
Hydration and Moisturization
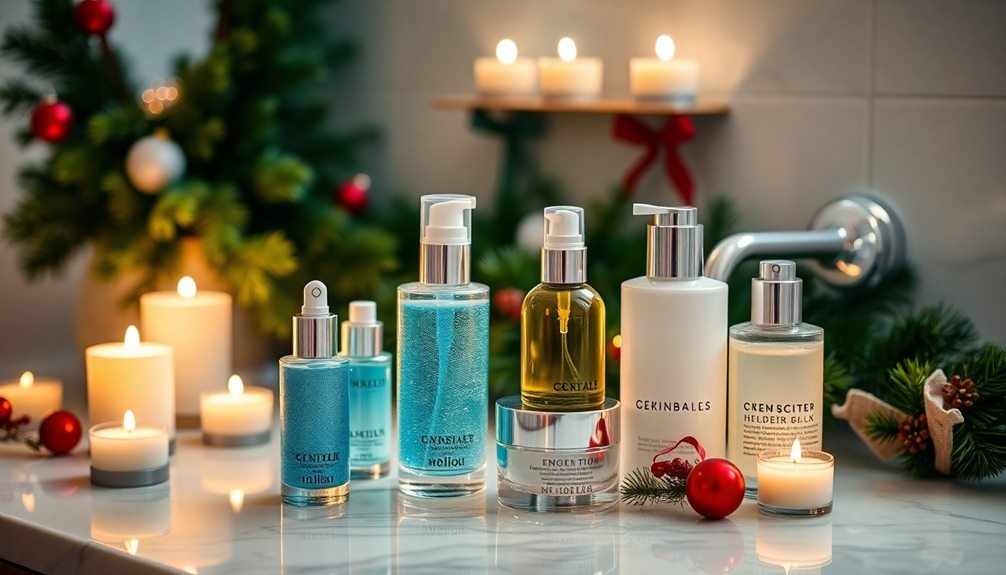
Keeping your skin hydrated is key, especially during the dry winter months when moisture can easily escape.
Using the right moisturizing products, like the Strength Trainer Peptide Boost Moisturizer or C-Rush Brightening Gel Crème, can make all the difference in achieving that radiant look.
Plus, adjusting your skincare routine for the season guarantees your makeup stays fresh and flawless throughout all your holiday celebrations.
Importance of Hydration
Hydration plays an essential role in maintaining your skin's health, especially during the winter months when dryness can take a toll. When your skin lacks moisture, it can lead to a compromised moisture barrier, making it essential to prioritize hydration in your skincare routine.
Incorporating products with ingredients like glycolic acid can help improve skin texture and enhance moisture retention, providing a smoother canvas for makeup application, while the benefits of glycolic acid further elevate your skincare game.
Products like the Strength Trainer Peptide Boost Moisturizer and C-Rush Brightening Gel Crème can enhance hydration, providing a smooth canvas for makeup application. Proper hydration improves your skin's elasticity and texture, ensuring you look radiant at holiday events.
Best Moisturizing Products
Finding the right moisturizing products can elevate your skincare routine, especially during the winter months when your skin craves extra nourishment.
To help you achieve that perfect canvas for your holiday makeup, consider these best moisturizing products that cater to various skin types:
- Strength Trainer Peptide Boost Moisturizer: This powerhouse provides essential nourishment and elasticity, ensuring your skin remains hydrated and plump.
- C-Rush Brightening Gel Crème: Ideal for enhancing skin balance, it delivers hydration while leaving a radiant finish, perfect for holiday looks.
- Snail Mucin Serums: These serums greatly boost moisture retention and improve makeup adherence, making them a fantastic addition to your routine.
- Facial Oils: Incorporating facial oils can strengthen your moisture barrier, preventing dryness and ensuring your skin looks smooth and healthy.
Seasonal Skincare Adjustments
As winter's chill sets in, your skin needs extra attention to maintain moisture and vibrancy. The cold air can strip your skin of hydration, so adjusting your skincare routine is essential. Start by choosing a rich moisturizer like Strength Trainer Peptide Boost Moisturizer to enhance hydration and elasticity. Incorporate products with hyaluronic acid to greatly improve skin moisture retention, combating dryness and flakiness.
Regular exfoliation is key; using a product like Cold Plunge Pore Mask can remove dead skin cells and promote better absorption of hydrating ingredients. Aim to layer hydrating serums and oils under your moisturizer to create a fortified moisture barrier that protects against harsh winter elements.
Step | Product Recommendation |
---|---|
Hydration | Hyaluronic acid serum |
Moisturization | Strength Trainer Peptide Boost Moisturizer |
Exfoliation | Cold Plunge Pore Mask |
Eye Makeup Preparation
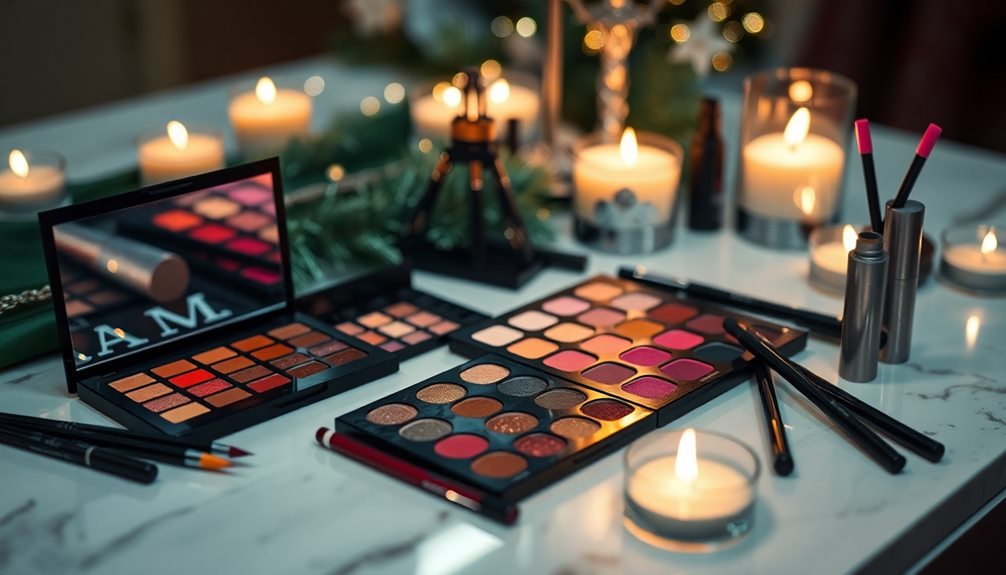
When it comes to eye makeup preparation, a well-defined routine can make all the difference in achieving that festive look for holiday parties. To enhance your overall appearance, consider incorporating a soothing essential oil like lavender oil to calm your nerves before applying makeup, guaranteeing a smoother application process.
Follow these steps to guarantee your eye makeup stays flawless all night:
- Prime Your Eyelids: Use a dedicated primer like e.l.f. Lock it Down Eyeshadow Primer for color retention and longevity.
- Brighten the Undereye: Apply pigments that color-correct dark circles, such as those in the Banana Bright Illuminating Eye Duo, to create a more energized appearance.
- Create a Stunning Eyeshadow Look: For a festive vibe, opt for e.l.f. Liquid Metallic Eyeshadow in gold or silver. Blend deeper shades in the outer corners for added dimension.
- Define Your Eyes: Elevate your look with eyeliner, considering a winged style for that extra drama.
Finish off your eye makeup with e.l.f. Lash Xtndr Mascara for extended, volumized lashes, or go for false lashes for a touch of glamour.
Don't forget to set everything with a setting spray to lock in your stunning holiday makeup throughout the festivities!
Importance of Makeup Primers
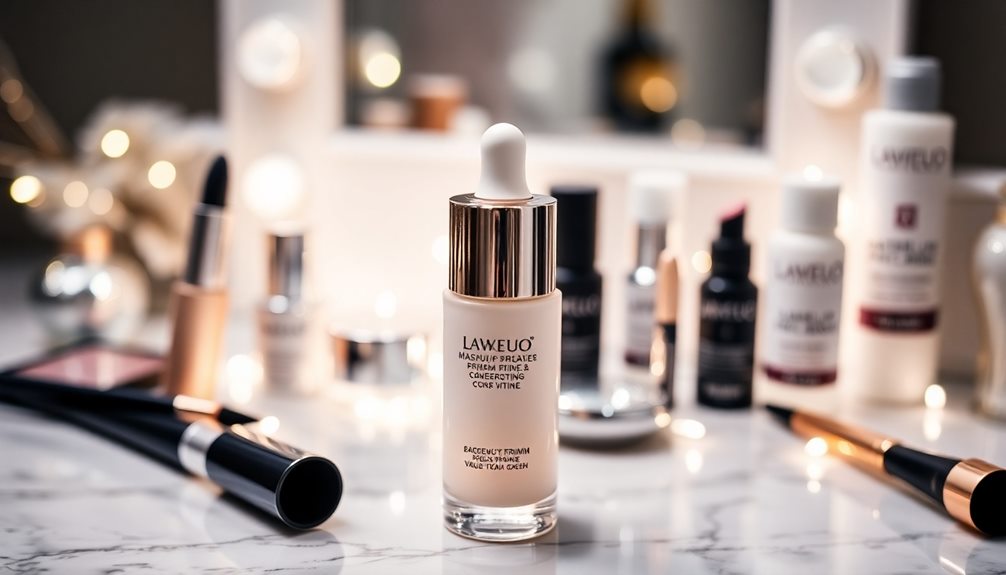
Makeup primers are often overlooked, yet they play an indispensable role in achieving a flawless holiday look. By creating a smooth canvas, makeup primers enhance the longevity of your holiday makeup, keeping it fresh for up to 8 hours, even in festive environments.
Different types of primers cater to specific skin needs: hydrating primers are perfect for dry skin, while mattifying options work wonders for oily skin, controlling shine and guaranteeing a polished finish.
Don't forget about your eyes! An eyeshadow primer is essential for preventing creasing and enhancing color retention, so your eye makeup remains vibrant throughout the event. The right makeup primer not only improves adherence but often contains skin-loving ingredients like niacinamide and vitamins, contributing to a healthier complexion.
Incorporating a primer as the final step in your skin prep routine is crucial. It sets the stage for your foundation and even allows your setting powder to work more effectively.
Makeup Base Application Techniques
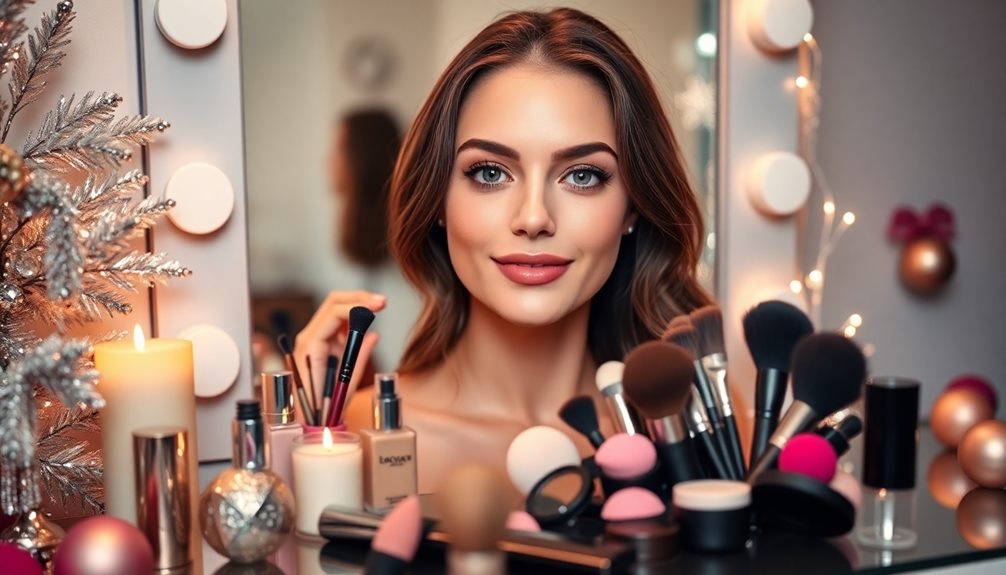
To achieve a stunning makeup look, start with proper skin prep to create a smooth base.
After cleansing and moisturizing, you'll want to apply your primer effectively to guarantee your makeup lasts all night.
Let's explore the best techniques for prepping your skin and mastering primer application for that flawless finish. Start by ensuring your face is clean and moisturized, as a smooth canvas is key to achieving a seamless look. Incorporate pristine tan cleaning essentials into your routine to gently exfoliate and remove any impurities, leaving your skin refreshed and prepped. Once your skin is ready, apply a small amount of primer evenly across your face, focusing on areas where makeup tends to crease or fade.
Skin Prep Importance
Since proper skin prep is vital for achieving a flawless makeup look, taking the time to cleanse and hydrate your skin can greatly enhance makeup longevity.
Here are four key steps to guarantee your skin is ready for the holiday party:
- Cleanse Thoroughly: Start by removing any impurities with a gentle cleanser. This step is essential for a smooth makeup application.
- Exfoliate: Use a product like the Cold Plunge Pore Mask to help achieve a smoother skin texture. Exfoliation preps your skin for even foundation application.
- Moisturize: Apply a nourishing moisturizer, such as the Strength Trainer Peptide Boost Moisturizer. This will hydrate your skin and improve its elasticity, laying a smooth foundation for makeup.
- Prime: Although we won't explore primer application techniques just yet, using a primer like Banana Bright Face Primer creates a gripping base that enhances makeup wear.
Primer Application Techniques
A perfect makeup look starts with the right primer application techniques.
Begin by choosing a primer suited for your skin type. If you have oily skin, opt for a mattifying primer like e.l.f. Liquid Poreless Putty Primer to help control shine. Apply a pea-sized amount to clean skin using your fingertips or a makeup sponge for even distribution.
Focus on areas that often show pores or excessive shine. Apply a bit more product in these spots for better coverage and extended wear.
Allow the primer to set for about a minute before you move on to foundation. This waiting period helps create a smooth canvas, enhancing makeup adherence and ensuring a flawless finish.
Eye Makeup Techniques
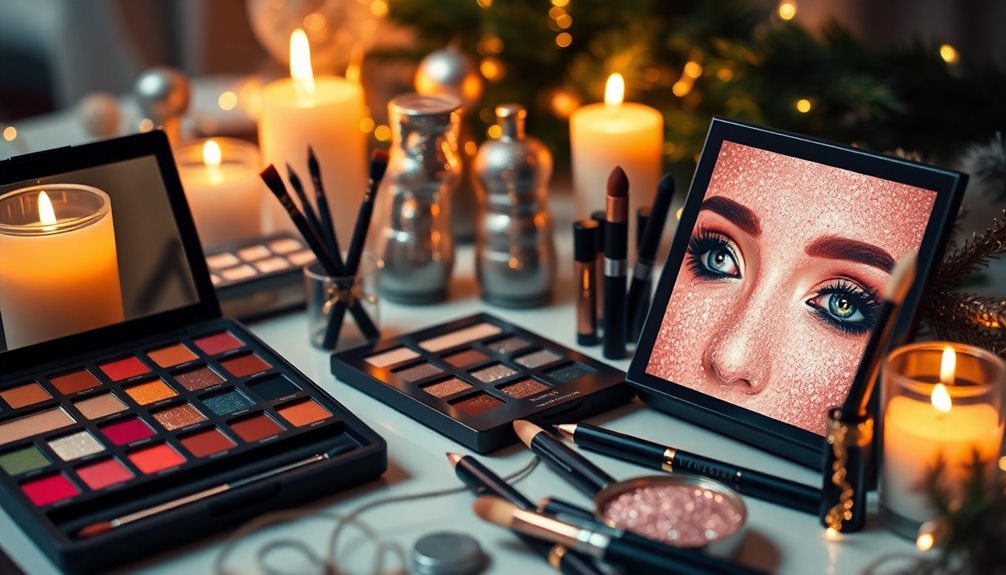
When it comes to eye makeup techniques for your holiday party look, starting with a solid base is key. Begin by priming your eyelids with e.l.f. Lock it Down Eyeshadow Primer. This guarantees color retention and prevents creasing, allowing your eye makeup to stay flawless all night long.
Here are four essential steps to create stunning holiday looks that impress:
- Shimmering Eyeshadow: Use e.l.f. Liquid Metallic Eyeshadow in festive shades like gold or silver. Blend deeper metallic shades in the outer corners and crease for added dimension.
- Bold Eyeliner: Define your eyes with a bold eyeliner. A winged look adds drama, while a waterproof formula keeps your eyeliner smudge-proof throughout the celebration.
- Voluminous Lashes: Finish your eye look with e.l.f. Lash Xtndr Mascara for voluminous lashes. Alternatively, opt for false lashes to elevate your holiday glam.
- Highlighting: Add brightness by highlighting the brow bone and inner corners of your eyes with a light, shimmery shade, giving that festive touch to your overall makeup look.
With these eye makeup techniques, you'll be ready to dazzle at any holiday gathering!
Finishing Touches and Lip Makeup
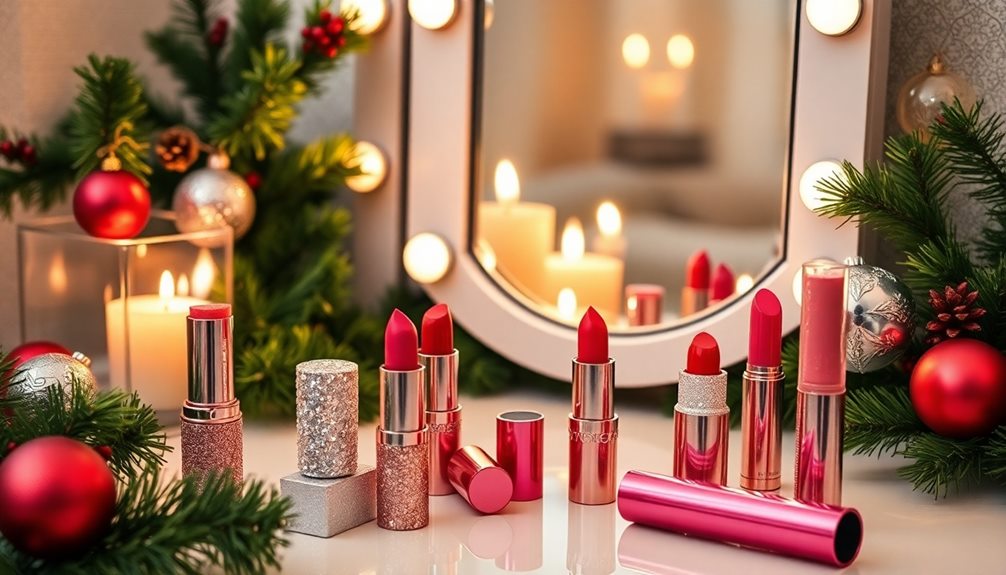
After perfecting your eye makeup, it's time to focus on your lips for that final touch. Start by defining your lips with a Cream Glide Lip Liner in a deep berry or classic red. This not only creates a bold statement but also prevents feathering throughout the night.
Next, layer on a Glow Reviver Lip Oil for hydration and a subtle sheen, ensuring your lips look plump and enticing during the holiday party.
For an extra boost, apply a Lip Plumping Lip Gloss Pen. This will enhance fullness and shine, adding a festive touch that complements your overall look.
Don't forget to dab a shimmery highlighter on your cupid's bow; this adds radiance and draws attention to your beautifully made-up lips.
Frequently Asked Questions
How Can I Achieve a Dewy Finish for My Makeup?
To achieve a dewy finish for your makeup, start with a hydrating primer. Use a luminous foundation, apply cream blush, and finish with a setting spray. Don't forget to highlight your cheekbones for that extra glow!
What Are the Best Ingredients for Winter Skincare?
For winter skincare, focus on ingredients like hyaluronic acid, glycerin, and ceramides. These hydrate and lock in moisture. Also, consider using oils like jojoba or argan to nourish and protect your skin from harsh conditions.
How Often Should I Exfoliate Before Holiday Parties?
You should exfoliate about once a week leading up to your holiday parties. This frequency helps remove dead skin cells, promoting a fresh glow. Just be careful not to overdo it, as that can irritate your skin.
Can I Mix Skincare Products From Different Brands?
Yes, you can mix skincare products from different brands! Just verify to check the ingredients for potential interactions. Start with a patch test to guarantee your skin responds well to the combination you choose.
What Should I Do if My Makeup Starts to Fade?
If your makeup starts to fade, don't panic! You can quickly refresh it with a setting spray or powder. Just dab on some concealer where needed, and reapply lipstick for a polished look.
Conclusion
As you gear up for your holiday party, remember that 60% of your makeup's longevity comes from a solid skincare routine. By prioritizing hydration and using the right primers, you'll not only enhance your look but also boost your confidence. A little extra care can go a long way in ensuring you shine bright all night. So, follow these beauty tips, and get ready to dazzle at your holiday celebrations!
Beauty and Grooming
How to Prepare Your Skin for Indoor Tanning: Pre-Tan Skincare Routine
Get your skin ready for indoor tanning with essential pre-tan tips that ensure a flawless glow; discover the secrets to achieving the perfect tan!
To prepare your skin for indoor tanning, start by knowing your skin type. Exfoliate gently 24 hours before your session to remove dead skin cells for an even tan. Stay hydrated by drinking plenty of water and applying a lightweight, non-oil-based moisturizer to avoid dry patches. Choose loose, dark clothing to minimize irritation and protect your tan from transfer. Finally, select the right tanning products that match your skin tone for the best results. With these steps, you'll set the stage for a beautiful glow, and there's plenty more to discover about enhancing your tanning experience.
Key Takeaways
- Exfoliate 24 hours before tanning to remove dead skin cells for an even tan application.
- Stay hydrated by drinking plenty of water and using lightweight moisturizers to prevent dry patches.
- Choose suitable tanning products based on your skin tone and conduct a patch test for compatibility.
- Wear loose-fitting, breathable clothing to minimize irritation and avoid tan transfer during tanning sessions.
- Consult tanning experts for personalized advice on skin type assessment and product recommendations.
Know Your Skin Type
Knowing your skin type is imperative for achieving the best results with indoor tanning. Different skin types respond uniquely to UV exposure, so understanding yours helps you select the right tanning products and develop an effective tanning routine.
If you have pale skin, you probably burn easily and mightn't tan at all. It's essential to choose products specifically formulated for sensitive skin to avoid irritation. Fair skin can struggle to tan and usually burns, so careful product selection is critical.
If you have light brown or olive skin, you can tan gradually but still need to monitor your exposure time. Be mindful of the product formulation you're using.
Caramel or medium brown skin tans easily and rarely burns, which gives you more flexibility in your tanning sessions and product choices. Finally, if your skin is bronze or rich brown, you likely tan effortlessly without burning. You may not need to tan as frequently to maintain your color.
Knowing your skin type allows you to prep effectively and guarantees a safer, more enjoyable tanning experience. By following a tailored tanning routine, you'll achieve the desired glow while minimizing risks.
Pre-Tanning Preparations
Before you hit the tanning bed, it's essential to prep your skin properly.
Start by exfoliating to slough off dead skin cells and then hydrate with a lightweight moisturizer for ideal absorption.
These steps guarantee an even and long-lasting tan, so don't skip them!
Exfoliation Techniques
Exfoliating your skin 24 hours before indoor tanning is essential for achieving a smooth and even application of tanning products. This step helps remove dead skin cells, ensuring your tan looks flawless.
Additionally, proper hydration is vital for maintaining skin elasticity, which enhances the overall appearance of your tan. Start your skin prep routine by choosing a physical exfoliant, like a body scrub or a loofah. Focus on rough areas, such as elbows and knees, where tanning products tend to cling.
Effective options include the Frank Coffee Scrub or the Bangn Body Smooth Skin Scrub, both designed to slough away those pesky dead skin cells. If you need to remove an old tan, the St Tropez Tan Remover Mousse is a great choice.
When you're exfoliating, use gentle circular motions to minimize skin irritation and inflammation. This approach not only promotes a better tanning canvas but also helps improve circulation.
Remember to stay hydrated for a healthier skin appearance, as noted in the importance of hydration.
Additionally, consider incorporating dry brushing into your routine before showers, as it can enhance exfoliation and prime your skin even further for tanning.
Skin Hydration Tips
Proper hydration is essential for getting the most out of your indoor tanning session. When your skin is hydrated, it prevents the tanning solution from clinging to dry patches, which can lead to an uneven tan. To achieve this, drink ample water in the days leading up to your appointment. Staying hydrated not only helps your tan look natural but also promotes overall skin health.
Additionally, remember that all skin types require protection from UV rays, even when tanning indoors, so consider using a broad-spectrum sunscreen for any exposed areas. This can help you avoid potential skin damage while enhancing your glow understanding UV radiation types.
The night before your tanning session, apply a light moisturizer to create a smooth base for the tanning solution. Make sure it's non-oil-based to avoid interfering with absorption. Pay special attention to rough areas like your elbows, knees, and ankles; using thicker creams or body butters on these spots will help keep them hydrated, preventing them from absorbing too much product and darkening unevenly.
On the day of tanning, skip heavy creams or oils right before your session. Instead, verify your skin is clean and prepped, ideally using an exfoliating mitt to remove any dead skin cells. This way, you'll achieve an ideal tan that looks even and radiant!
Exfoliation Techniques
To achieve an even and lasting tan, you'll want to exfoliate your skin about 24 hours prior to your indoor tanning session. This process removes dead skin cells, creating a smooth canvas that helps the tanning product adhere better and develop uniformly.
For body exfoliation, consider using physical exfoliants like scrubs or loofahs. These tools effectively slough off rough patches, especially on areas like elbows, knees, and ankles, where uneven tan can often occur.
On your face, opt for gentle chemical exfoliants, such as glycolic acid toners, to avoid irritation while ensuring an even tan.
Be cautious with your choice of exfoliant; avoid oil-based scrubs before tanning. These can create a barrier that prevents the tanning product from absorbing properly, leading to patchy results.
Regular exfoliation not only enhances your skin's texture but also prolongs the life of your tan by allowing for better product adherence and even fading.
Moisturization Strategies
To get the best results from your indoor tanning session, hydration is key.
Choose lightweight, non-oil based moisturizers and focus on applying them to dry areas like your elbows and knees.
This will help you achieve an even and vibrant tan while preventing patchiness.
Importance of Hydration
Hydration plays an essential role in achieving a flawless indoor tan. When your skin is adequately hydrated, you can prevent dry patches that lead to uneven tanning results and patchiness.
To kick off your pre-tan routine, apply a lightweight moisturizer the night before your tanning session. This helps create a smooth canvas without diluting the tanning solution. Additionally, maintaining proper skin health through hydration can enhance your overall appearance, as noted in the importance of moisturizing.
Don't forget to focus on extra hydration for commonly dry areas like your knees, elbows, and ankles. Using thicker products, such as balms or oils, can offer better protection for these spots.
Additionally, drinking plenty of water in the days leading up to your tanning session is vital. Staying hydrated enhances both the longevity and quality of your tan.
However, avoid applying heavy creams or oils immediately before tanning. These products can form a barrier that prevents the tanning solution from adhering properly to your skin, compromising your desired results.
Choosing the Right Moisturizer
Selecting the right moisturizer can make a significant difference in your indoor tanning experience. To guarantee peak hydration without compromising your tan, choose lightweight, non-oil based formulas. These won't create a barrier that hinders absorption and intensity.
Fast-absorbing creams or lotions with hydrating ingredients like hyaluronic acid or glycerin are ideal because they distribute moisture evenly without leaving a greasy residue.
For effective skincare, apply your moisturizer the night before your tanning session. This timing allows your skin to fully absorb the product, preparing it for the tanning solution without dilution.
While lightweight products are essential for overall skin prep, don't forget to give extra attention to particularly dry areas like elbows, knees, and ankles. Using thicker balms or oils on these spots can enhance hydration and help prevent patchiness in your tan.
Targeting Dry Areas
Dry patches on your skin can ruin an indoor tanning session, so it's crucial to target these areas for best results. Focus on applying thicker, hydrating products like balms or oils to commonly dry spots, such as your knees, elbows, wrists, and ankles. This guarantees even tan application and prevents patchiness.
In the days leading up to your tanning appointment, regularly hydrate your skin, as well-hydrated skin promotes a more natural and lasting tan appearance.
Use fast-absorbing creams or lotions containing humectants like glycerin to attract moisture and maintain skin hydration. Incorporating a dedicated pre-tan moisturizer specifically formulated for tanning can be a game-changer. These products often contain ingredients that enhance the tanning process, making your tan look more vibrant.
Before applying any tanning solutions, confirm that your skin is completely dry. Excess moisture can lead to uneven absorption and unsightly streaks in your tan.
Clothing and Environment
When you're prepping for indoor tanning, the right clothing and environment play an essential role in achieving that perfect glow. Start by choosing loose-fitting, dark clothing. This helps avoid tan transfer and minimizes irritation on your freshly tanned skin. Opt for breathable fabrics like cotton or linen; they'll keep you comfortable throughout your tanning session.
Make certain your tanning environment is well-ventilated. This prevents overheating and helps maintain your skin's hydration. Remember to bring a towel to sit on during the tanning process. It protects your clothing and keeps the area clean. Avoid tight shoes or accessories that may rub against your skin, disrupting the tanning process.
Here's a quick reference table to guide you:
Clothing Type | Fabric Choice | Environment Tip |
---|---|---|
Loose-fitting attire | Cotton or linen | Make certain good ventilation |
Dark clothing | Breathable materials | Keep the area cool |
Comfortable footwear | Avoid tight accessories | Bring a towel for cleanliness |
With these tips, you're set for a successful indoor tanning session!
Nail Preparation
Nail preparation is an essential step in your indoor tanning routine to guarantee your tan looks flawless. Before your spray tan appointment, schedule any nail services to avoid interference from chemicals in nail products that can affect the tanning solution.
To protect your nails from staining, apply a clear coat of nail polish before tanning. This not only enhances their appearance but also acts as a barrier against potential discoloration.
Make certain your nails are clean and free of any products, as residues can create barriers that lead to an uneven tan. It's also wise to remove any makeup from your nails to ensure a smooth application.
After tanning, avoid soaking your nails or using polish remover immediately, as this can result in patchiness and uneven fading of your tan.
If you've used light-colored nail polish, consider removing it after your session to prevent staining from the tanning solution, especially if your tan turns out darker than the polish.
Remember to wear protective goggles to shield your eyes during the tanning process. With these steps, your nails will complement your glow beautifully!
Skin and Shade Considerations
When it comes to indoor tanning, picking the right shade is key to achieving a natural look.
You should consider your skin tone and undertones to find a product that complements your unique complexion.
Don't forget to conduct a patch test beforehand to guarantee the shade works well for you and avoids any reactions.
Choosing Appropriate Shade
Selecting the right tanning shade is essential for achieving a natural look, and it starts with understanding your skin tone. When you're choosing an appropriate shade, consider your natural complexion. If you have lighter skin, opt for tanning solutions that are 1-2 levels darker to prevent an unnatural appearance.
For those with medium to dark skin, deeper shades can enhance your look without making it seem overdone.
Additionally, pay attention to your skin's undertones. Warm undertones pair well with golden or bronze tanning products, while cool undertones should lean toward ash or neutral shades to complement your natural tone.
A helpful tip is to conduct a patch test with your selected tanning solution at least a week before any big event. This way, you can see how the tan develops on your skin and guarantee you achieve the desired color.
If you're unsure about which shade to choose, start with a lighter option. This allows for gradual color building, minimizing the risk of an overly dark tan.
Skin Tone Matching
Finding the right tanning shade goes hand-in-hand with understanding how your skin tone interacts with different products. When you're working on your tan prep routine, remember that lighter skin tones should choose shades one to two levels darker than their natural color. This approach helps avoid an unnatural appearance.
If you have medium to olive skin, you can go for one to three levels darker to achieve your best look.
For those with fair skin, it's wise to start with a lighter shade and gradually build up your color over multiple sessions. This method guarantees a natural-looking tan without overwhelming your complexion. Conducting a patch test a week before application is also vital. It can help you assess how compatible the tanning product is with your skin tone and prevent any adverse reactions.
If you're unsure about your ideal shade, don't hesitate to consult a tanning expert. They can provide personalized recommendations tailored to your unique skin tone and desired outcomes.
Skin tone matching is essential for getting that perfect glow, so take the time to find the shade that complements you best!
Undertone Considerations
Understanding your skin's undertone is essential for achieving a natural-looking tan, as it directly influences how the shade will appear on your complexion. Knowing whether you have cool, warm, or neutral undertones can guide your tanning decisions and help you meet your tanning goals effectively.
Consider these undertone considerations:
- Cool Undertones: If you have pink or blue hues, go for ashier tan shades to complement your skin.
- Warm Undertones: If your skin has golden or peachy tones, warmer tan shades will enhance your natural glow.
- Neutral Undertones: Lucky you! You can wear both cool and warm shades, giving you more flexibility in your color choices.
- Patch Testing: Conduct a patch test with various shades a few weeks before a significant event to find the best match for your skin.
Immediate Post-Tan Care
After your tanning session, it's important to take immediate care of your skin to guarantee your tan looks its best.
First, allow your tan to dry completely before dressing. This step helps avoid transfer and guarantees even application.
When it's time to cleanse your skin, stick to a mild, oil-free body wash. This choice will help maintain the tan's integrity and extend the life of your glow. For your face, use gentle, non-abrasive cleansers to prevent stripping the color away.
It's also vital to avoid hot showers right after tanning. Instead, opt for lukewarm water to protect your tan and preserve the natural oils in your skin.
Once you've rinsed off, keep your skin moisturized with non-greasy lotions or creams. This will support tan longevity and help prevent any flaking.
Hydration Tips
To achieve that perfect tan, hydration plays a significant role in how your skin reacts to tanning products. Keeping your skin well-hydrated not only enhances the tanning process but also guarantees a more even application.
Here are some hydration tips to follow:
- Drink at least 8 glasses of water daily in the days leading up to your tanning session.
- Apply a lightweight, non-oil based moisturizer the night before to create a hydrated base without interfering with the tanning solution.
- Focus on dry areas like elbows, knees, and ankles by using thicker creams or balms to prevent these spots from absorbing too much pigment.
- Consider hydrating serums containing hyaluronic acid before tanning to lock in moisture and improve your skin's overall appearance.
Also, steer clear of alcohol-based skincare products, as they can dry out your skin, negatively affecting the tan's adherence and longevity.
Consultation With Experts
Consulting with tanning experts can make a significant difference in achieving your desired glow. They provide personalized recommendations tailored to your unique skin type and tanning goals, ensuring ideal results and safety. During your consultation, experts will discuss essential pre-tanning products like exfoliators and moisturizers, vital for preparing your skin for an even tan.
Consultation Topics | Benefits |
---|---|
Skin Type Assessment | Customized tanning plan |
Pre-Tanning Products | Enhanced skin prep |
UV Sensitivity Check | Safe tanning options |
Experts can identify any medications that may increase UV sensitivity, guiding you toward sunless tanning options if needed. They're also skilled in advising on appropriate session durations and frequencies based on your skin's response to UV exposure. Scheduling a consultation not only clarifies any doubts about the tanning process but also enhances your confidence in achieving a beautiful glow. Don't underestimate the value of expert advice—it's your best bet for a stunning tan while prioritizing skin health!
Frequently Asked Questions
What Should I Put on My Skin Before Tanning Bed?
Before hitting the tanning bed, exfoliate your skin gently, then apply a light, non-oil based moisturizer. Don't forget to remove makeup and jewelry, and use specific tanning lotion for the best results.
How Do I Prep My Skin Before Fake Tan?
Before applying fake tan, exfoliate your skin to remove dead cells, hydrate with a lightweight moisturizer, and guarantee your skin is clean of makeup and lotions. Test new products to avoid allergic reactions.
How to Prep Your Skin for Tanning?
Getting your skin ready for a sun-kissed glow is essential. Exfoliate gently, hydrate deeply, and guarantee you're makeup-free. A little prep goes a long way in achieving that flawless, radiant tan you desire.
How Do I Prepare My Skin for Gradual Tanning?
To prepare your skin for gradual tanning, exfoliate gently, hydrate with a lightweight moisturizer, and choose a suitable product for your skin tone. Apply evenly, focusing on dry areas, and maintain with regular moisturization.
Conclusion
Preparing your skin for indoor tanning is like setting the stage for a great performance. By knowing your skin type, exfoliating, and moisturizing, you'll create the perfect canvas for that sun-kissed glow. Don't forget to take into account your clothing and environment, and always hydrate afterward to maintain your tan. With these tips in mind, you'll guarantee your tanning experience is as smooth as possible. Enjoy your time in the tanning booth and flaunt your beautiful, radiant skin!
Beauty and Grooming
Star Appeal: Can Astrology Predict Your Charisma?
Explore the cosmic connection between the stars and your allure. Discover if star appeal: can astrology predict if you’ll be hot or not?
Were you aware that approximately 75% of individuals believe that astrology impacts their everyday lives? This eye-opening statistic underscores our fascination with the influence of celestial bodies on characteristics such as charisma. It suggests that the stars could significantly contribute to a person’s charm and allure.
Analyzing planets and stars lets us see how personalities link to zodiac signs. For instance, Libras are known for their charm, and Leos for their boldness. This idea of “star appeal” shows how zodiac traits influence how we interact and form connections. It lays the groundwork to explore how astrology can help boost our natural charisma.
Key Takeaways
- The majority of people show interest in astrology’s influence on their lives.
- Zodiac signs may provide insights into individual charisma and social appeal.
- Astrological energies can shape personality traits and social behaviors.
- Libra’s charm and Leo’s assertiveness exemplify star appeal variations.
- Understanding these connections can aid individuals in enhancing their charisma.
The Cosmic Connection Between Charisma and Astrology
Astrology shows us how charisma links to our zodiac signs. Each sign has unique traits. Many of these traits help people shine in social scenes. By understanding these qualities, we learn how stars shape our charm and appeal.
Understanding Charisma Through Zodiac Signs
Charisma is influenced differently by each sign. Libra, for example, is known for its great diplomacy and social finesse. This quality makes Librans connect well with others, balancing charm and grace. Similarly, Leos attract attention with their boldness and flair.
How Astrology Influences Personality Traits
Astrology deeply impacts personality traits, affecting confidence, empathy, and social abilities. The stars’ positions guide how we express ourselves and interact. The Sun shapes our core being and goals. The Moon focuses on care, significant in both Western and Vedic astrology.
Venus is especially key for women, influencing values and connections. The twelve houses tied to zodiac signs add depth to our personalities.
Zodiac Sign | Influence on Charisma | Key Traits |
---|---|---|
Libra | Natural diplomacy | Social, charming, elegant |
Leo | Expressive presence | Dramatic, confident, engaging |
Aries | Bold approach | Energetic, commanding, adventurous |
Gemini | Versatile communication | Witty, intelligent, adaptable |
Sagittarius | Storytelling charm | Open-minded, enthusiastic, cultural |
Star Appeal: Can Astrology Predict If You’ll Be Hot or Not?
Astrology gives insights into how we attract others. It shows the unique charm of different zodiac signs. Libra, for example, shows how stars affect our social skills and charm in relationships.
Libra’s Natural Charm and Social Connections
Libras have a special charm that draws people to them. This week, they’ll find their relationships getting better. They should try things that keep them fit and relaxed. This will boost their ability to charm others even more.
How Zodiac Signs Attract Partners and Friends
Zodiac signs have their own ways to attract friends and partners. This adds to the beauty of relationships. For instance:
- Empathy makes Libras great at building strong bonds.
- Aquarius stands out by bravely building new relationships.
- Aries gets a charm boost, making them more attractive.
- Gemini uses writing to connect deeply with their partners.
Every sign has its unique way of attracting others. This week, Libras have a good chance to do well in money matters and friendships. Their inborn charisma will make their social life sparkle.
Exploring the Astrology of Relationships
Astrology provides deep insights into relationship dynamics. It looks at the roles of Venus and Mars. These planets shape our unique traits and how we appeal to others. Getting to know these influences helps us understand astrological compatibility.
This understanding can greatly improve how we experience relationships.
The Role of Venus and Mars in Charisma
Venus is about love, beauty, and attraction. Mars deals with passion, energy, and assertiveness. People with strong Venus placements often have charm and grace. They easily connect with others.
Those with a strong Mars influence are confident. They express their desires openly. This makes them more appealing.
Compatibility Based on Zodiac Signs
Zodiac signs offer clues about compatibility, impacting how we build relationships. Each sign has its own traits. These traits affect how we connect emotionally, communicate, and our chemistry with others.
Below is a table with compatibility traits for some zodiac pairs:
Zodiac Pair | Emotional Connection | Communication Style | Physical Chemistry |
---|---|---|---|
Aries & Libra | Dynamic and Passionate | Direct vs. Diplomatic | High Attraction |
Taurus & Scorpio | Intense and Deep | Stable vs. Intense | Magnetic Pull |
Cancer & Capricorn | Supportive and Nurturing | Emotional vs. Practical | Steady and Comforting |
Gemini & Sagittarius | Mutual Curiosity | Playful vs. Honest | Adventurous |
The Influence of Astrology on Career and Public Image
Astrology gives us unique insights into our work lives and how we’re seen by others. Each zodiac sign has traits that can help us do better in our careers and when networking. For example, some signs are naturally good at growing professionally. They know how to use their astrological strengths at work.
Professional Growth and Networking Opportunities
Some zodiac signs stand out in diplomacy and social skills. Take Libra, for instance. Libras are great at connecting with people. This skill opens doors to new opportunities and helps them grow professionally. Libras are also good at making positive impressions, which helps in building strong industry relationships. Zodiac signs influence our careers and networking in different ways:
- Libra: Known for networking prowess, often creates harmony in group settings.
- Aries: Exhibits fierce determination and ambition, driving their professional advancement.
- Gemini: Their communication skills shine, making them adept at establishing contacts.
- Capricorn: Hardworking and practical, they often achieve leadership roles through their relentless work ethic.
How Signs Perform in Leadership Roles
The zodiac has a clear influence on leadership. Each sign brings different strengths to leadership positions. Some have charisma that stands out in the workplace. This charisma shapes their image and earns them respect. But, leadership styles can vary a lot based on zodiac traits:
Zodiac Sign | Leadership Style | Strengths | Weaknesses |
---|---|---|---|
Leo | Charismatic and Confident | Inspires others, strong vision | Can be overly dominant |
Scorpio | Strategic and Intense | Deep insights, persuasive | May struggle with trust |
Sagittarius | Visionary and Free-spirited | Encourages innovation, risk-taker | Can lack focus |
Virgo | Analytical and Detail-oriented | Perfectionism, diligent | May be overly critical |
Knowing how the zodiac affects leadership can help people improve and chase their dreams. By understanding these influences, we can boost our public image. We can also find careers that fit our natural qualities.
Conclusion
As we dive into astrology, charisma, and how people connect, we see the stars offer deep insights. Zodiac signs shape our personalities and how we interact with others. By tapping into our astrological side, we can boost our charm and social skills.
Zodiac signs bring unique strengths to the table. For example, Cancers are caring, while Leos are driven. By understanding our signs, like how the Quarter Moon in Taurus suggests seeking balance, we can improve our relationships. Reflecting on ourselves helps us grow and connect more deeply.
Knowing our astrological traits helps us handle relationships and work better. The cosmos have a big influence on us. They encourage us to explore how our star signs affect our charisma and connections. Let the stars guide you in understanding and boosting your personal and social strengths.FAQ
How does astrology influence an individual’s charisma?
What role does Libra play in terms of charm and social connections?
Can astrology be used to improve relationship compatibility?
How do Venus and Mars influence personal charm?
How can astrology impact one’s career and public image?
Are there specific strategies for zodiac signs to attract friendships?
Can astrology help enhance confidence in social situations?
Beauty and Grooming
Maximize Your Tan: Space Out Sessions
Just like baking a cake, spacing out your tanning sessions is key—discover how to achieve that perfect sun-kissed glow safely!
In order to achieve the best tan possible and avoid looking like a cooked lobster, it is essential to space out your tanning sessions! It is crucial to allow your skin time to recover. If you have fair skin, start with shorter sessions and then wait at least 24-48 hours before your next one. This will allow your melanin to gradually deepen your tan while also keeping your skin safe. Think of it like baking a cake; if you rush it, you might burn it! Keep track of your progress, and you will achieve that perfect sun-kissed glow. There is even more valuable information to learn ahead!
Key Takeaways
- Always allow 24-48 hours between tanning sessions to let your skin recover and minimize damage.
- Start with shorter sessions to prevent overwhelming your skin and gradually increase duration over time.
- Monitor your skin's reactions during sessions to adjust frequency and duration accordingly.
- Daily moisturizing helps maintain your tan and supports skin health between sessions.
Know Your Skin Type
Understanding your skin type is essential for developing a safe and effective tanning strategy that maximizes your results. Think of your skin like a unique fingerprint; it's special and requires personalized care!
You might fall into one of the Fitzpatrick skin types, ranging from very fair to deeply pigmented. If you burn easily, you're likely on the fair side, while those with deeper tones may tan more easily. Knowing this helps you tailor your tanning sessions—short and sweet for fair skin, longer for darker tones.
So, what's your skin type? Remember, every time you step into the sun or a tanning bed, listen to your skin. It'll give you hints about what it loves and what it doesn't.
Happy tanning!
Understand Melanin Production
Melanin production plays a significant role in how your skin reacts to UV exposure, influencing your tanning experience and results. When you soak up some sun, your skin's melanocytes kick into action, producing melanin as a natural defense. Think of melanin as your skin's sunscreen, helping to protect against damage while giving you that sought-after tan. Here's a quick overview of how melanin works:
Stage | Description | Importance |
---|---|---|
UV Exposure | Skin gets exposed to UV light | Triggers melanin production |
Melanocyte Activation | Melanocytes start producing melanin | Creates your tan |
Tan Development | Melanin oxidizes over time | Deepens the tan |
Skin Recovery | Time between tanning sessions | Prevents burns and damage |
Frequency of Tanning Sessions
Finding the right frequency for your tanning sessions is essential to achieving a beautiful tan while minimizing skin damage. You don't want to end up looking like a lobster, right?
Here's how to space out your sessions for the best results:
- Know your skin type: Fair skin needs more time between sessions.
- Start slow: Begin with shorter sessions, letting your skin adjust.
- Wait 24-48 hours: Give your skin time to recover and develop melanin.
- Consult the pros: Ask the tanning facility staff for personalized advice.
Importance of Session Duration
Session duration plays an essential role in achieving a safe and effective tan, ensuring that your skin has the right amount of exposure without risking damage.
Think of your skin like a sponge—too much water at once and it gets overwhelmed! Instead, you want to soak it up gradually. Starting with shorter sessions lets your skin adjust and builds that beautiful melanin layer without burns.
You might even find it fun to track your progress! Remember, waiting 24 to 48 hours between sessions is key, giving your skin time to recover and show off its new glow.
Risks of Overexposure
Overexposure to UV light poses serious risks, including skin damage, premature aging, and an increased likelihood of skin cancer. You wouldn't want to end up looking like a raisin, right?
Here are some important things to remember about the dangers of too much sun:
- Sunburns: They're painful and can lead to long-term skin damage.
- Premature Aging: Wrinkles and sunspots can sneak up on you faster than you think.
- Skin Cancer: It's a serious risk that increases with excessive UV exposure.
- Dehydration: Your skin needs moisture, and too much sun can dry it out!
Safe Tanning Practices
To enjoy the benefits of tanning while minimizing risks, you need to adopt safe tanning practices that protect your skin from damage.
Start slow—think of your skin like a sponge that can only soak up so much sun at once! Begin with short sessions, especially if you have fair skin, and gradually increase the time.
Remember to space out your tanning sessions; waiting 24 to 48 hours lets your skin recover and build that glorious melanin.
And hey, don't forget to hydrate your skin! Moisturizers are like your skin's best buddies, keeping it happy and healthy.
Enhancing and Maintaining Your Tan
Enhancing and maintaining your tan requires a combination of proper skincare and smart tanning habits. You want that glow to last, right? Here are some tips to keep your tan looking fabulous:
- Moisturize daily: Hydrated skin holds onto your tan better, so slather on that lotion!
- Use tan extenders: These products can help boost and prolong your tan without extra UV exposure.
- Exfoliate gently: Doing this 24 hours before tanning helps achieve an even base, avoiding patchy spots.
- Stay consistent: Regular tanning sessions spaced out properly allow your skin to develop a deeper, richer color.
Frequently Asked Questions
How Can I Tell if I'm Overexposing My Skin?
You can tell you're overexposing your skin if you notice redness, stinging, or peeling. If your skin feels sore or looks irritated, it's a sign to reduce exposure and give it time to recover.
What Are the Signs of a Good Tan Versus a Bad Tan?
A good tan appears even and golden without redness or irritation. In contrast, a bad tan shows uneven patches, burns, or peeling skin. Listen to your skin's cues to guarantee healthy tanning results.
Can I Tan Indoors and Outdoors on the Same Day?
Sure, you can juggle indoor and outdoor tanning like a circus performer, but your skin might not appreciate the show! Balance is key; give your skin time to recover between sessions for the best results.
What Skin Products Should I Avoid Before Tanning?
Before tanning, avoid products with heavy oils, perfumes, or alcohol. These can irritate your skin and affect the tanning process. Stick to light moisturizers or specific tanning lotions for the best results and skin health.
Will My Tan Fade Faster in Winter?
You might notice your tan fading faster in winter due to reduced sunlight and moisture loss from indoor heating. Keeping your skin hydrated and using tan extenders can help maintain your glow during colder months.
How Can I Space Out My Tanning Sessions to Maximize My Tan?
To maximize your tan, follow these tanning session tips for glow. Space out your sessions to every 2-3 days to allow your skin to recover and produce more melanin. Ensure proper hydration and moisturization to keep your skin healthy and glowing. Don’t overdo it – moderation is the key to a long-lasting tan.
Conclusion
So, as you gear up for your tanning adventure, remember: patience is key!
Spacing out your sessions not only helps your skin build that gorgeous glow but also keeps it safe from pesky burns.
Imagine this—every time you step into the sun or a tanning bed, you're one step closer to that perfect tan, but rush it, and you might regret it!
So, take your time, enjoy the process, and let your beautiful tan develop naturally!
-
Beauty and Grooming1 week ago
Embrace Natural Glow With Bronzer-Free Accelerators
-
Beauty and Grooming2 weeks ago
Discover Top Outdoor Tanning Lotions Today
-
Fashion Trends4 weeks ago
Fall 2025 Fashion Trends: Be Ahead of the Curve!
-
Vetted3 weeks ago
15 Best Affordable Sustainable Fashion Brands You Need to Know About in 2025
-
Beauty and Grooming1 week ago
Unlock Flawless Tanning With Skin Prep
-
Interior Design2 months ago
Mylar vs. Foil Balloons: The Ultimate Showdown
-
Vetted3 weeks ago
15 Best Women's Fashion Trends of 2025 You Need to Know About
-
Fashion Trends2 weeks ago
Fashion Nova Kids: Stylish Outfits for Your Little Ones!