
To transform dull wood furniture into boho chic, start by thoroughly prepping the surface with sanding and cleaning to guarantee a smooth base. Apply vibrant, layered colors using stippling and textured techniques, then distress edges and corners to reveal underlying wood and paint for a weathered look. Add faux rust details and metallic accents for character. Finish with stains and protective coats. Keep experimenting with textures and colors—more tips to help you achieve that perfect eclectic style await.
Key Takeaways
- Sand and prep the furniture thoroughly, then apply layered, vibrant paints with stippling and random strokes for a textured, colorful base.
- Create faux rust and metal accents using stippled reds and oranges, and lightly sand to reveal weathered, vintage details.
- Use blending techniques with semi-dry paint layers and distress edges to add depth and a handcrafted, eclectic feel.
- Incorporate a gel stain to enhance wood grain, followed by light sanding and multiple protective coats for durability.
- Emphasize distressing on edges and corners, then add mixed media accessories for a lively, boho-chic, vintage-inspired look.
Preparing the Surface for Refinishing
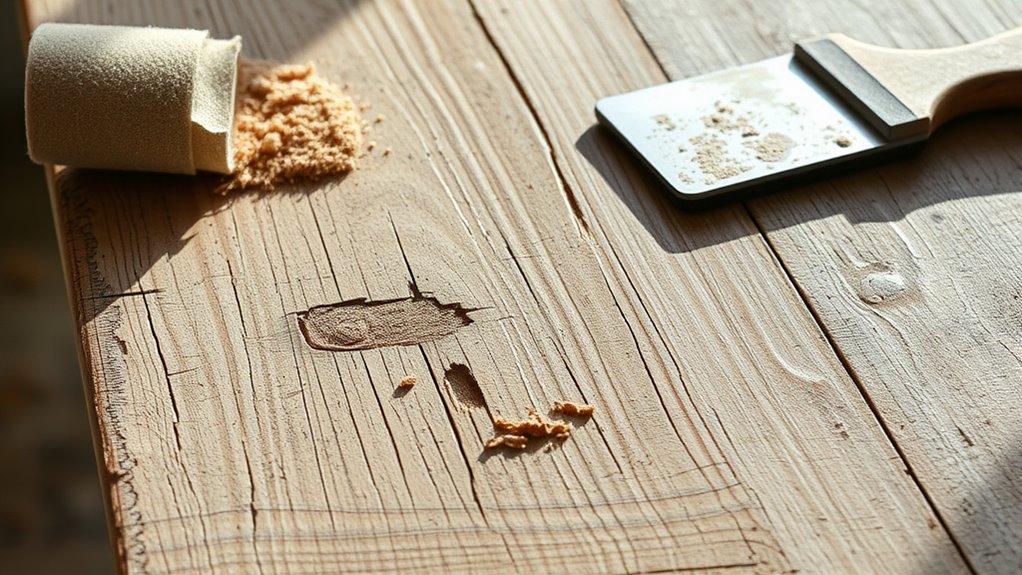
Before you start refinishing your wood furniture, it’s essential to prepare the surface properly. Begin by sanding the entire piece with a 5-inch orbital sander using medium grit. This removes the factory finish and creates a smooth base for your new finish. After sanding, clean the surface thoroughly with Dixie Belle White Lightning to degloss and eliminate any dust or residue, ensuring better paint adhesion. Use painter’s tape around edges or areas you want to protect from paint to achieve clean lines and prevent overspray. Once cleaned, wipe the surface with a damp cloth or tack cloth to remove all remaining dust. Proper preparation guarantees a flawless finish and long-lasting results for your refinished furniture. Additionally, understanding the color accuracy of your projectors can help you select the right hues for your decor. Ensuring your workspace is well-lit with professional lighting can further improve your ability to see surface details clearly during the refinishing process. For the best results, consider lighting placement to minimize shadows and highlight surface imperfections. Incorporating the principles of sound therapy science can also create a calming environment that enhances your focus and patience during your furniture makeover.
Building a Colorful Layered Base
Start by selecting vibrant colors like barn red, Sea Spray, Kernel Mustard, and Mermaid Tail to create a lively base. Use stippling and random strokes with a chip brush to add texture and visual interest, applying uneven patches for depth. Let each layer dry completely before adding the next to build a rich, layered foundation for your finish. Be mindful to avoid scams and high-pressure tactics when choosing your paints and supplies to ensure a safe and successful project. Incorporating space and organization principles can help you plan and manage your workspace more effectively throughout your project. Additionally, understanding paint properties can help you select the right finishes for durability and aesthetics, especially when working with specialized coatings like those used in Vetted flat iron bike finishes. Familiarity with ethical hacking concepts can also inspire creative problem-solving approaches during your project planning.
Selecting Vibrant Colors
Choosing vibrant colors is essential for creating an eye-catching layered base on your furniture. Select a lively palette with bold hues like Mermaid Tail, Pure Ocean, and barn red to bring energy to your piece. To build a textured background with layered paint, consider these steps:
- Apply thin, almost dry coats of each vibrant color, letting each layer dry thoroughly.
- Mix shades like barn red with Sea Spray or Kernel Mustard with Sea Spray for added complexity.
- Use stippling, random strokes, or dry brushing to create a textured, multi-dimensional surface rather than a flat finish.
- Incorporate core personality traits such as openness and conscientiousness to guide your color choices and techniques, ensuring a cohesive and dynamic outcome. Additionally, understanding AI in Business can inspire innovative design techniques, like using automated tools for precision in your project. This process encourages embracing failure as a learning opportunity, which can lead to more creative and unique results. Recognizing the importance of layering techniques helps in building depth and visual interest in your furniture piece. Developing an understanding of color theory can further refine your choices and enhance harmony in your layered design.
This approach allows some areas to remain semi-transparent, showcasing underlying hues and adding depth. The vibrant colors combined with textured techniques set the perfect foundation for your boho-chic furniture transformation.
Creating Texture Layers
To create compelling texture layers, focus on applying colors in scattered, irregular patterns rather than uniform coverage. Layering different shades adds depth and visual interest, making your piece stand out. Use stippling and random strokes with a mixture of barn red and Sea Spray to achieve a textured, brownie-like consistency. Apply barn red selectively, in scattered areas, to enhance the distressed look and prevent flatness. Incorporate vibrant colors like Kernel Mustard with Sea Spray or Mermaid Tail with Pure Ocean to build a multidimensional background. Use a dry brush to softly blend similar colors, creating seamless gradations and enriching the texture. Remember to let each layer dry completely before adding the next to avoid muddiness and preserve the layered, distressed effect. Additionally, utilizing layered painting techniques can further enhance the depth and complexity of your finished piece. Incorporating techniques for color layering can help achieve more nuanced and dynamic textures in your furniture refinishing project. Being mindful of paint application methods ensures that each layer contributes effectively to the overall distressed aesthetic.
Blending for Depth
Building a colorful, layered base begins with applying multiple thin coats of semi-dry paint, using colors like Mermaid Tail, Pure Ocean, barn red, and Kernel Mustard. To achieve depth, focus on layering different hues thoughtfully.
- Use a dry brush to lightly blend similar colors, creating smooth gradations that enhance texture.
- Apply each layer with small, scattered strokes, allowing ample drying time to build complexity without muddiness.
- Incorporate textured layers, like stippled barn red mixed with Sea Spray, to add visual warmth and interest beneath the top coats.
Creating Texture and Depth With Mixed Media

Creating texture and depth with mixed media involves layering different colors and techniques to produce a rich, tactile surface. You’ll want to build a layered, textured background by stippling with a chip brush and blending colors like barn red with Sea Spray, adding visual interest and dimension. Applying thin, almost dry layers of Mermaid Tail and Pure Ocean, then blending with a dry brush, creates seamless color transitions that deepen the effect. Incorporate layered rust hues such as red and orange, then distress with sanding to reveal underlying textures and add character. Using stippling, random strokes, and multiple color layers results in a textured, tactile finish that emphasizes rustic charm. Distressing stencils with water-based washes and sanding further enhances the multi-layered, textured surface. Staying mindful of legislative changes can also help in understanding how to protect and preserve your furniture projects. Additionally, experimenting with different layering techniques can help achieve more dynamic depth and visual interest. Incorporating protective finishes ensures your distressed piece remains durable over time, and exploring various application methods can optimize the durability and appearance of your work.
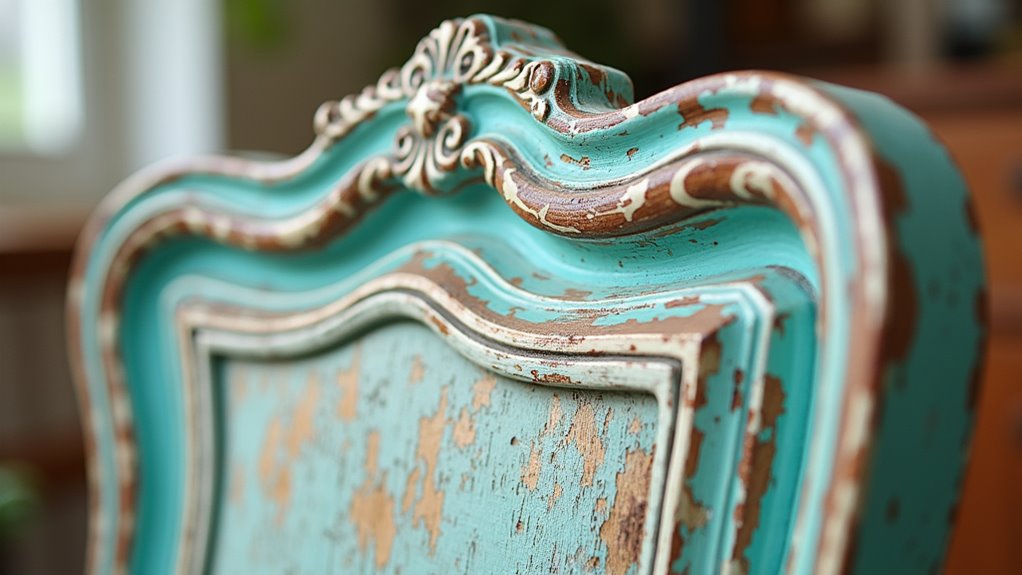
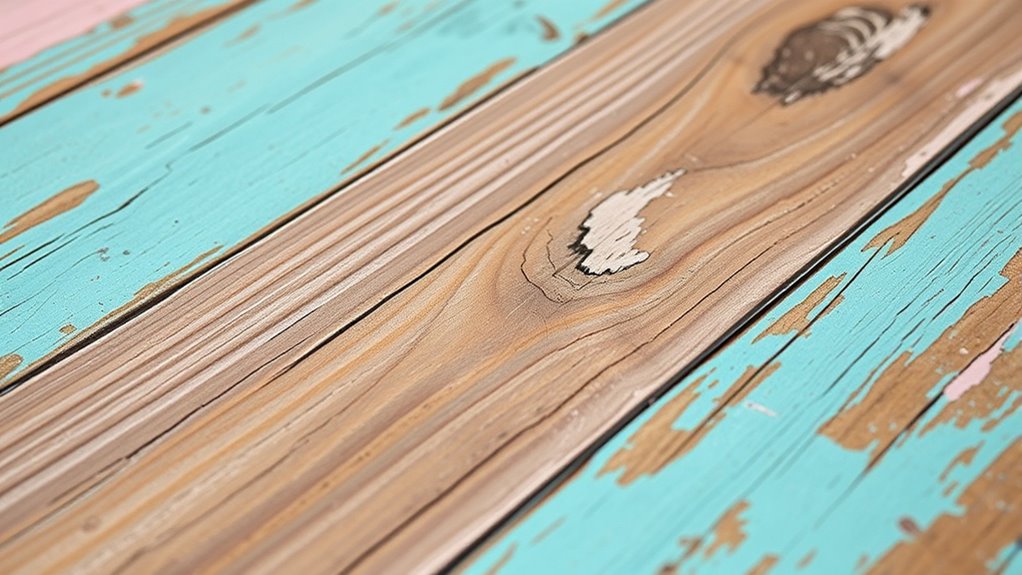
Achieving a Rustic, Weathered Finish With Distressing
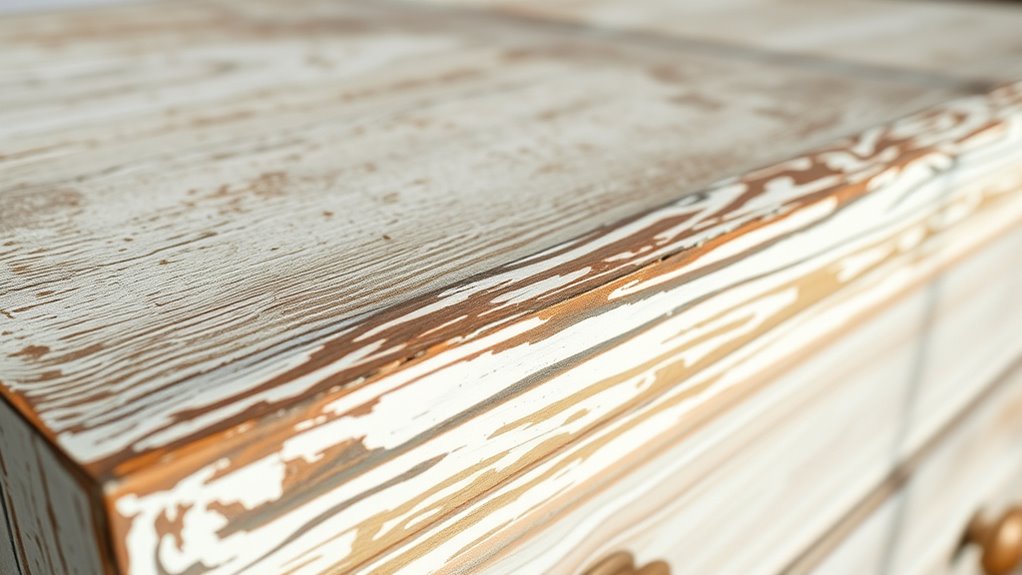
Achieving a rustic, weathered finish with distressing starts with preparing the surface properly. First, sand the entire piece with a 5-inch orbital sander to remove the factory finish and create a rough base for distressing. Next, use fine grit sandpaper (220 or higher) between coats to smooth edges and reveal layers underneath, enhancing the weathered look. Finally, distress specific areas by sanding through paint and stain—focus on edges, corners, and naturally worn spots—to mimic age and use. This process creates a layered, uneven appearance, giving your furniture character. Incorporate uneven paint application and multiple colors for added depth. Finish with light sanding after sealing to soften edges and expose underlying textures, heightening the weathered, vintage charm.
Adding Faux Rust and Metal Details for Character
To add authentic-looking rust and metal details, start by applying layered red and orange paints to the metal parts using a stippling technique. This creates the textured, distressed appearance of rust. After the initial paint, sand the metal legs lightly to reveal underlying colors and enhance the weathered feel. Use a water mister to produce drips and layered rust effects, controlling how the paint ages naturally. Build realism by applying multiple layers of red and orange, then selectively sanding to expose underlying textures. For added character, use a tongue depressor or brush to create distressed areas and layered drips that mimic corrosion. This technique transforms simple hardware into vintage, weathered accents that elevate your furniture piece. Regularly inspecting and maintaining the drivetrain components can also help preserve the distressed aesthetic while ensuring longevity. Additionally, incorporating authentic materials can enhance the realism of your faux rust and metal details. Proper layering techniques are essential for achieving a convincing aged look, so take your time to build up the textures gradually. Be sure to research asset division laws if you plan to incorporate any hardware or fixtures that might be considered part of a legal estate transfer.
Using Stencils and Wax for Vintage Accents
Using stencils and wax is an effective way to add vintage accents that enhance your furniture’s character. First, peel the stencil from its backing and press it firmly onto the surface, smoothing all edges to prevent paint bleeding. Next, use a high-quality chip brush to dab or push paint through the stencil’s mesh, creating crisp, clean patterns. Once you’ve achieved the desired design, allow the stencil paint to dry completely. To add subtle vintage accents, mix clear wax with a small amount of colored wax, like Florida Orange, and apply it over the stencil. Imagine the textured patterns that stand out, the soft glow of wax enhancing the details, and the overall piece exuding timeless charm. This technique transforms your furniture with personalized, vintage-inspired touches. Incorporating self watering plant pots into your decor can also complement the vintage look, adding both functionality and style to your space. Additionally, understanding regulations and best practices for furniture refinishing can help ensure your project remains safe and compliant with local standards.
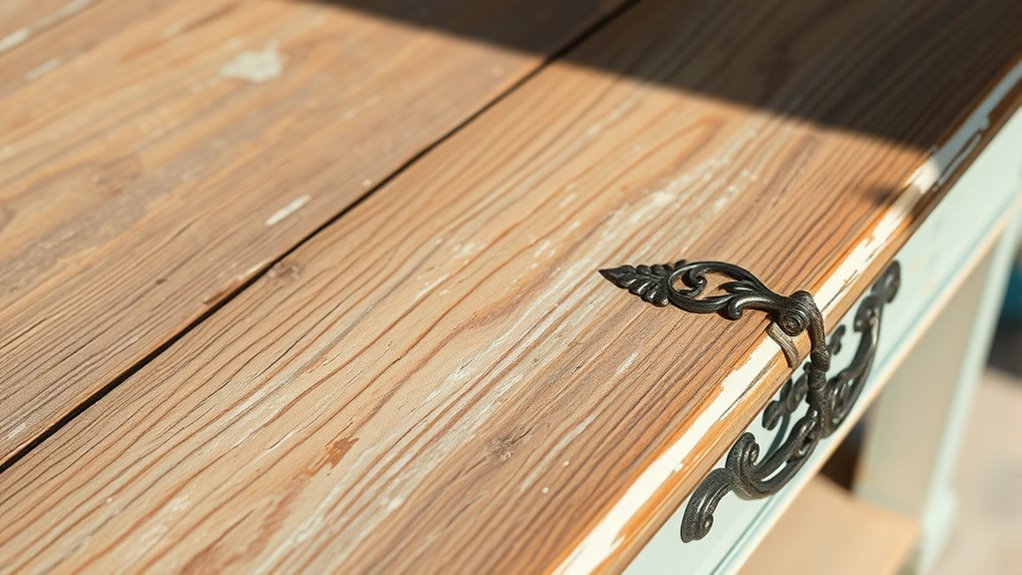
Applying Stain and Protective Coatings for Durability
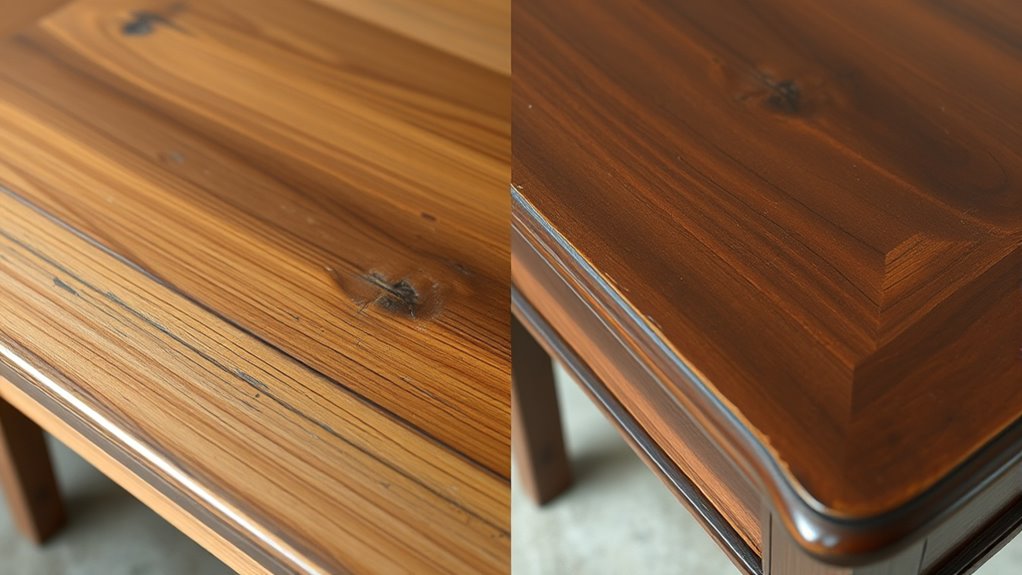
Choosing the right stain and applying protective topcoats are key to a durable finish. You want to select a water-based gel stain like Voodoo Gel Stain for rich, natural color, and guarantee you wait 24-48 hours before sealing. Using multiple thin coats of a clear protective finish, like Gator Hide, helps lock in color and extend your furniture’s lifespan.
Choosing the Right Stain
Selecting the right stain is crucial for achieving a beautiful, durable finish on your wood furniture. First, choose a water-based gel stain like Dixie Belle’s Voodoo Gel Stain for smooth, even application and enhanced wood grain visibility. Second, lightly spritz the surface with water before stain application to improve movement and reduce absorption, helping you achieve a more natural look. Third, apply the stain with long, grain-following strokes using a lint-free cloth or brush, then wipe off excess to prevent blotchiness. This process ensures a consistent, rich color and a professional finish. Proper stain choice and application lay the foundation for a stunning transformation, making your furniture both eye-catching and long-lasting.
Applying Protective Topcoats
After applying your stain and achieving the desired look, the next step is to add a protective topcoat to guarantee your furniture lasts. A good protective topcoat like Gator Hide enhances durability, resisting scratches, water, and UV damage. For best results, apply multiple thin coats, allowing each to dry fully before adding the next. Light sanding between layers helps create a smoother, more even finish and improves adhesion. Proper surface preparation is key—clean and sand your furniture thoroughly to ensure the topcoat bonds correctly. Use a high-density foam roller or a fine brush to apply the protective coating smoothly, avoiding bubbles or streaks. Taking these steps ensures your furniture will stay beautiful and protected for years to come.
Ensuring Long-lasting Finish
To guarantee your wood furniture maintains its beauty and durability, it’s essential to apply protective coatings carefully and correctly. Start by applying a clear, water-based Gator Hide or similar protective topcoat in thin, even layers. Ensure each coat dries completely before adding the next to prevent clouding or streaking. Between coats, lightly sand the surface with fine-grit sandpaper (220 or higher) to improve adhesion and smoothness. Be sure all paint, stain, or stencil layers are fully dry before sealing to avoid smudging. Use a foam roller or brush for even application, avoiding excessive pressure that can cause bubbles. Finally, allow the protective finish to cure fully—usually 24-48 hours—before handling, ensuring maximum durability and a long-lasting, beautiful finish.
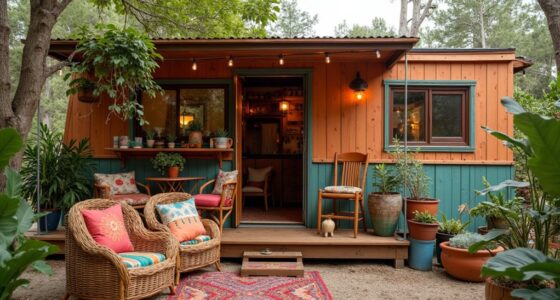
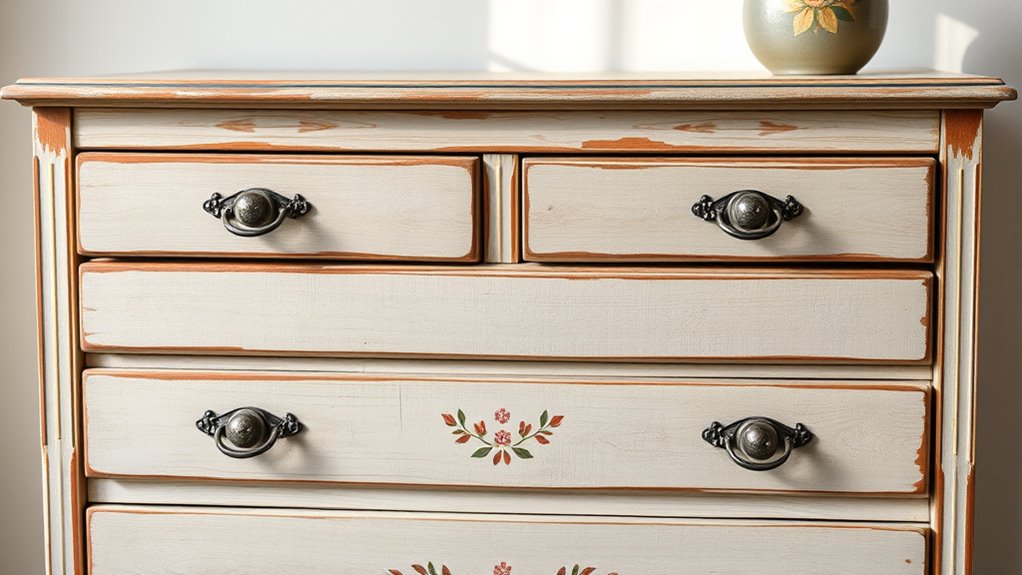
Showcasing the Final Transformation and Style Tips
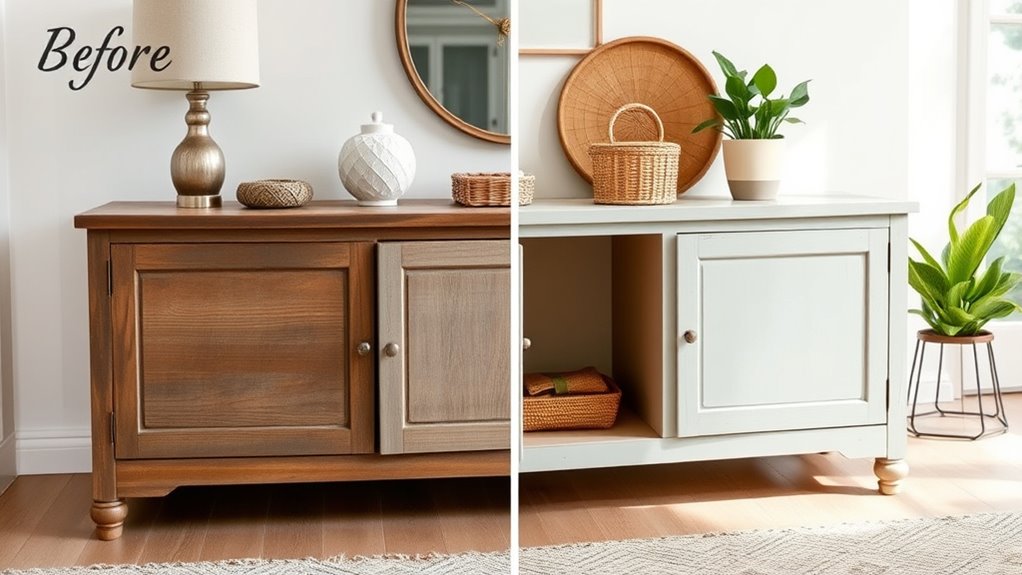
The final transformation of your furniture piece showcases a vibrant, layered finish that perfectly embodies boho chic style. The textured layers of barn red, Sea Spray, Kernel Mustard, and Mermaid Tail create a rich, eclectic look. Distressed areas reveal underlying colors and wood grain, enhancing that rustic, boho charm. To protect your work, apply a coat of Gator Hide, locking in the textures and colors while preserving the handcrafted feel. Faux rust and metal accents add an industrial touch, perfectly complementing the layered, distressed surface. Your piece now captures a lively, artistic vibe with vibrant hues and textured details that truly embody boho chic.
| Element | Description | Style Tip |
|---|---|---|
| Layered Finish | Vibrant, textured layers of color | Use multiple hues for depth |
| Distressed Areas | Expose wood grain and underlying colors | Focus distressing on edges |
| Protective Coat | Gator Hide sealing layers | Ensures durability |
| Faux Rust & Metal | Adds aged, industrial appeal | Use sparingly for authenticity |
| Overall Look | Eclectic, handcrafted boho vibe | Mix textures and colors freely |
Frequently Asked Questions
How to Get a Distressed Look on Wood Furniture?
To get a distressed look on wood furniture, start by sanding the surface with 220 grit or higher to smooth it out. Apply layered, uneven paint or stain, then selectively sand areas to reveal underlying layers. Use a dry brush or stippling to add textured, contrasting colors. Focus on edges and high-wear spots, then finish with a light sanding or distressing to highlight imperfections and achieve that rustic, boho chic vibe.
How Do You Make Furniture Look Like Weathered Wood?
Imagine your furniture as a canvas, waiting for a story of age and character. To make it look weathered, start by sanding smoothly to remove any gloss. Then, layer semi-transparent washes of colors like Sea Spray and Mermaid Tail, lightly sanding between layers to reveal hints of the past. Finish with distressing techniques and a wax or stain to create that authentic, aged, rustic charm you’re after.
How Do You Make Old Wood Furniture Look New?
To make old wood furniture look new, start by thoroughly sanding it with a 5-inch orbital sander to remove any existing finish. Then, apply multiple thin coats of paint or stain, letting each dry completely and lightly sanding between coats for a smooth finish. Finish with a protective topcoat like Gator Hide to seal and preserve the new look, giving your furniture a refreshed, polished appearance.
How Do You Paint Antique Furniture Without Sanding?
Did you know you can completely transform furniture without sanding? To paint antique pieces without sanding, start by cleaning the surface thoroughly with a deglosser like Dixie Belle White Lightning. Apply a high-quality bonding primer to guarantee the paint adheres well. Use thin coats of chalk or milk paint, letting each dry fully. Finish with a clear wax or topcoat to protect your work and add a polished look.
Conclusion
With patience and passion, you’ve transformed dull furniture into dazzling décor. By blending bold techniques, balancing beauty with grit, and embracing imperfections, you create enthralling, customizable pieces. Remember, the magic lies in meticulous messiness and mindful mastery. So, seize your supplies, stay spirited, and let your style shine through every scratch and stain. Your stunning, salvaged style story is just a step, a stroke, and a spray away from spectacular.