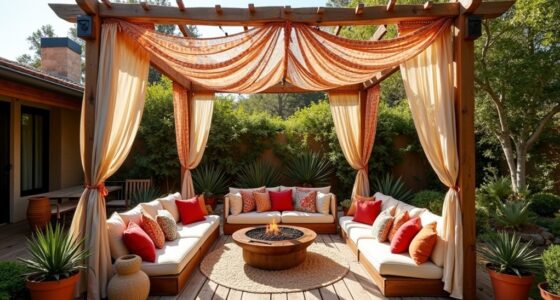

To craft your own boho lanterns and lampshades, start by gathering unique thrifted or vintage items and choosing natural or synthetic materials like rattan or plastic grass skirts. Prepare your shades by inspecting and cleaning them, then build waterproof outdoor bases with sealants and drainage. Wrap and weave rattan into stylish patterns, focusing on symmetry for a polished look. Finish with personal touches like paint or accessories. Continue exploring to learn more detailed techniques and creative ideas.
Key Takeaways
- Utilize upcycled thrifted shades and natural fibers like rattan for unique, eco-friendly boho lighting designs.
- Waterproof outdoor lanterns with sealants and proper drainage to ensure durability in exterior spaces.
- Master rattan wrapping and weaving techniques to create custom patterns and textures for lampshades and lanterns.
- Develop cohesive weaving styles such as minimal cage or basket patterns for personalized, stylish lighting fixtures.
- Finish projects with secure attachments, decorative touches, and safety checks for functional and aesthetic boho lighting.
Exploring Inspiration and Material Choices
Are you wondering where to find ideas and materials for your DIY lighting projects? Thrift stores and vintage décor are goldmines for inspiration, helping you create unique focal points with statement lighting. These sources encourage creative upcycling, turning everyday items into eye-catching pieces. When choosing materials for boho lanterns, natural fibers like rattan offer an authentic look, while synthetic options like plastic grass skirts provide durability and weather resistance—especially important if you’re planning outdoor installations. If you’re going to break away from traditional lampshades, customizing with weaving techniques and embellishments lets you craft styles from minimalist to glamorous. Best of all, affordable materials from dollar stores can be transformed into stunning fixtures, making your DIY lighting projects accessible and budget-friendly. Incorporating upcycling techniques not only enhances the uniqueness of your creations but also promotes sustainable practices in your crafting process. Exploring different material options can help you achieve varied textures and aesthetics, elevating your design. Trying out various lighting styles can also inspire new ideas and help you develop a cohesive look for your space. Additionally, researching the trustworthiness of AI models can inspire innovative design ideas, including smart lighting solutions that integrate AI technology to enhance ambiance and functionality. Incorporating sound healing principles into your design process can inspire calming and harmonious environments that enhance your space’s ambiance.
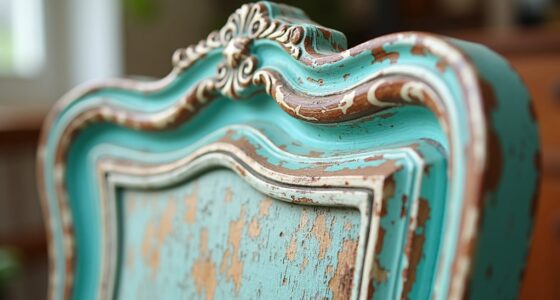
Selecting and Preparing Thrifted Lamp Shades
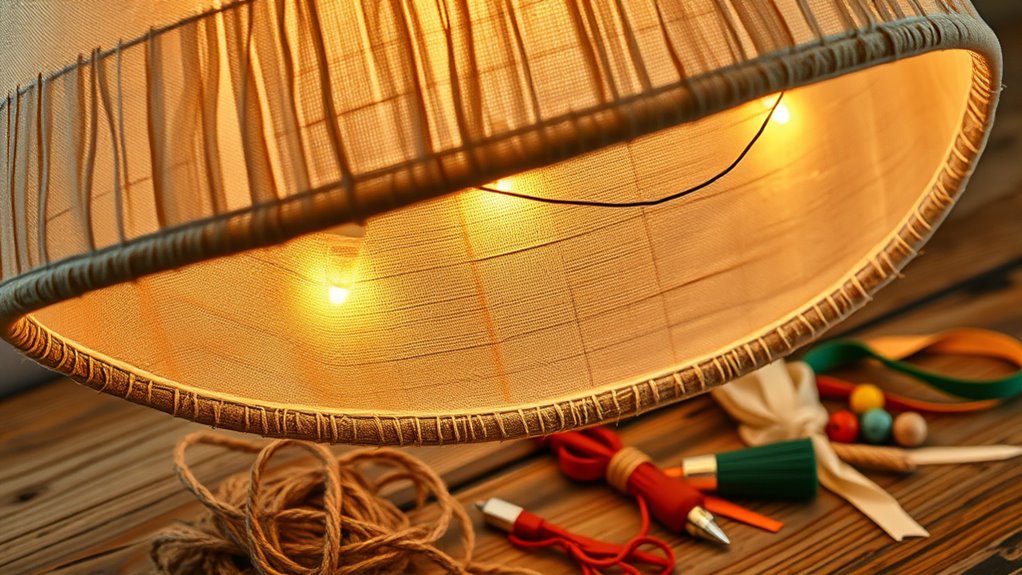
When selecting thrifted lamp shades for your DIY projects, it’s essential to carefully evaluate their condition and style to guarantee they’ll work with your design. Look for shades with a sturdy frame that can support modifications, especially if you’re considering rattan pendant lights or other textured materials. Inspect for cracks, breaks, or damage that could compromise durability, and remove any old fabric, glue, or embellishments to create a clean surface. Consider the material—metal, plastic, or fabric—and think about how you’ll reinforce or waterproof the shade if needed for outdoor use. Choose shapes that complement your vision, whether a classic drum or vintage style. Properly preparing your thrifted shades ensures a solid foundation for transforming them into beautiful, custom lighting fixtures. Additionally, selecting a preppy dog name that suits your pet’s personality can add a touch of sophistication to your home environment. Understanding light fixture materials can help you select the most suitable shade for your project, and familiarizing yourself with cultural content can inspire unique design ideas that celebrate community traditions. Moreover, assessing the contrast ratio of the original shade’s material can influence the final brightness and color vibrancy of your DIY lighting. Recognizing the significance of angel number soulmate signs can also inspire a sense of harmony and positive energy in your creative space, making your DIY projects even more meaningful.
Creating a Waterproof Base for Outdoor Use
Wondering how to guarantee your outdoor lamp stays dry and functional? Start by choosing waterproof materials like vinyl-coated fabric or plastic grass skirts to cover your lantern. These materials prevent rain from seeping in and damaging the interior. Apply a waterproof sealant or polyurethane coating to the lampshade’s surface to boost water resistance and extend its lifespan. Make sure the base has proper drainage—drill small holes or use a stand with gaps—to prevent water from pooling around the bottom. Elevate your lanterns on weatherproof bases or stands to keep them above ground moisture and improve stability. Additionally, selecting outdoor-rated electrical components to ensure safety and reliable operation in all weather conditions can make a significant difference. Furthermore, using outdoor-specific lighting components designed for weather exposure can enhance both durability and safety. Incorporating waterproof lighting technology can further safeguard your DIY project against unexpected weather changes. Recognizing the importance of attention in creative practice, ensuring your materials and design consider environmental factors is crucial for lasting outdoor installations. To further enhance durability, consider using weatherproof coatings on exposed surfaces to add an extra layer of protection against the elements.
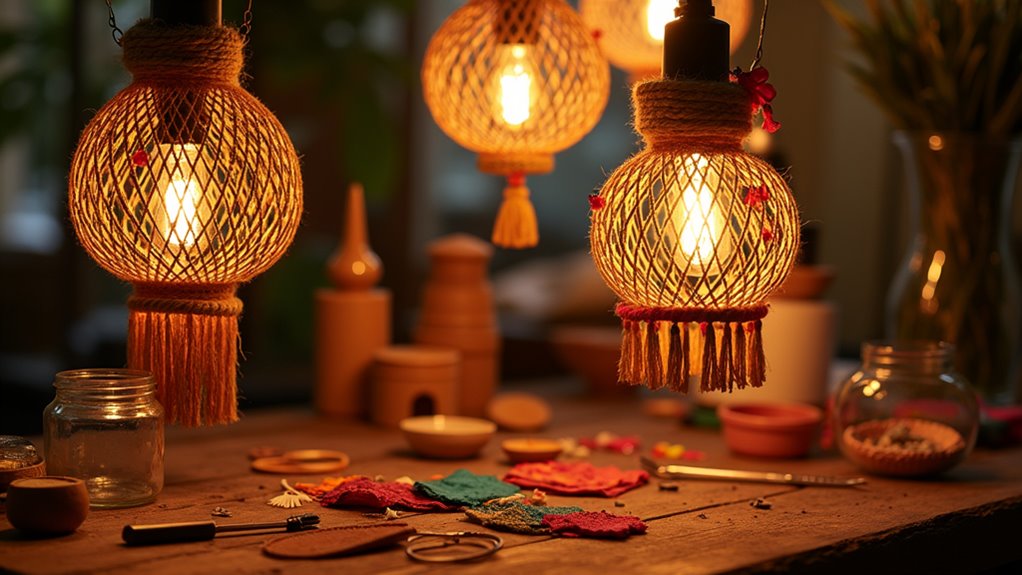
Wrapping and Securing the Frame With Rattan
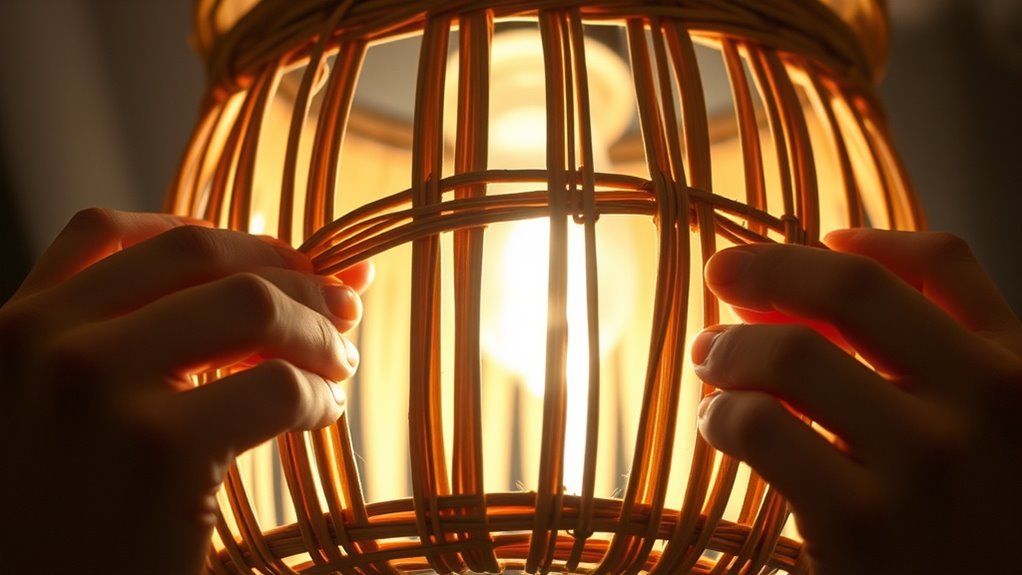
Wrapping the lamp frame with rattan ribbon creates a sturdy, attractive foundation for your outdoor lighting project. Begin at the top and work downward, overlapping the ribbon slightly to guarantee a seamless appearance. Use a strong adhesive like Gorilla wood glue, applying it evenly along the ribbon’s length to secure it tightly. To maintain consistent tension and keep the rattan aligned, use binder clips or clothespins while the glue dries. Wrap the ribbon around the frame multiple times, especially at stress points such as the base and top, for added stability. Continuously adjust the rattan to keep it taut and smooth, ensuring an even covering that provides a solid base for weaving or decorative accents later on. Incorporating proper safety precautions is essential when working with adhesives and tools to ensure a safe and successful project. Additionally, considering the noise levels of modern heat pumps can help maintain a peaceful environment around your workspace. For a more professional finish, you may also want to explore candle making techniques to add custom lighting elements to your design. Understanding hackathon events can inspire innovative ideas and techniques to enhance your crafting process. Remember that emotional alignment can also influence your creative flow, helping you stay motivated and focused during your project.
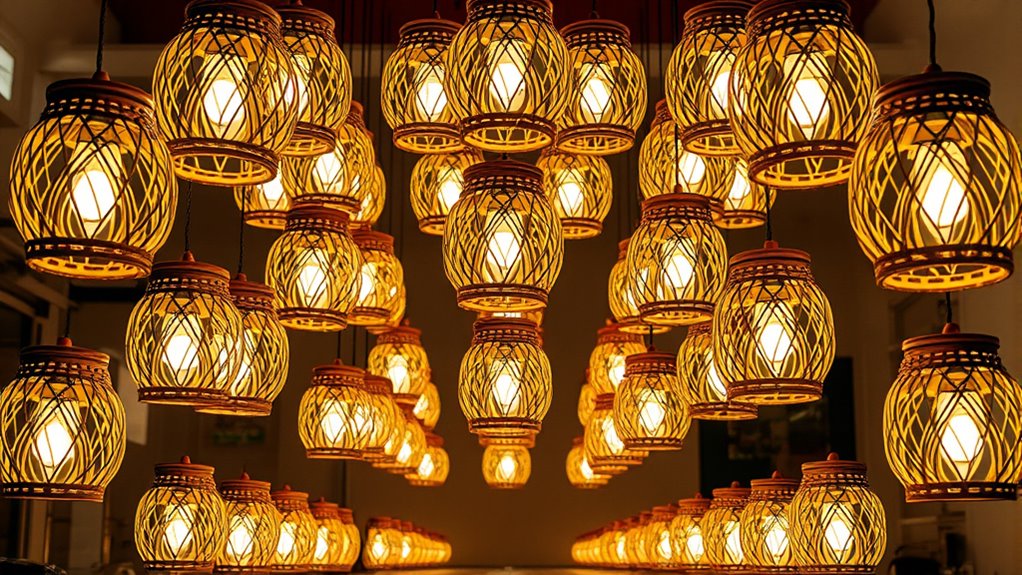
Developing Weaving Techniques for Unique Patterns
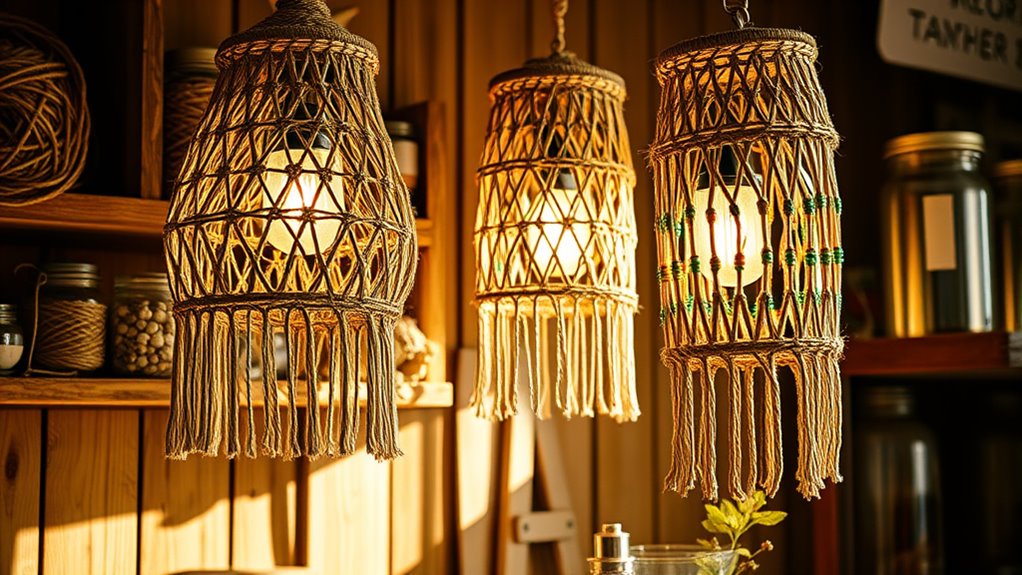
How can you elevate your lantern designs with weaving techniques? Focus on mastering tension control and consistent spacing to create uniform, professional-looking patterns. Using flat, non-twisted strands helps you achieve precision and even gaps, which are essential for intricate designs. Incorporate simple knotting techniques at key points to add stability and clearly define your pattern, especially in cage or basket weave styles. Experiment with alternating weaving directions and pattern sequences to introduce varied textures and visual interest. Practice upside-down weaving and precise knot placement to develop symmetrical, clean patterns. Additionally, understanding cultural impact on artistic expression can inspire you to incorporate diverse weaving motifs into your projects. Developing a keen eye for pattern consistency will help ensure your designs stay balanced and harmonious. Engaging with traditional techniques can also deepen your appreciation for heritage craftsmanship, enriching your creative process. Exploring different material types can further enhance the texture and appearance of your lanterns. Incorporating color coordination can also help create visually appealing and cohesive designs. With these techniques, your boho lanterns will stand out with unique, eye-catching patterns that demonstrate craftsmanship and creativity. Consistent practice will help you refine your skills and develop your signature weaving style.
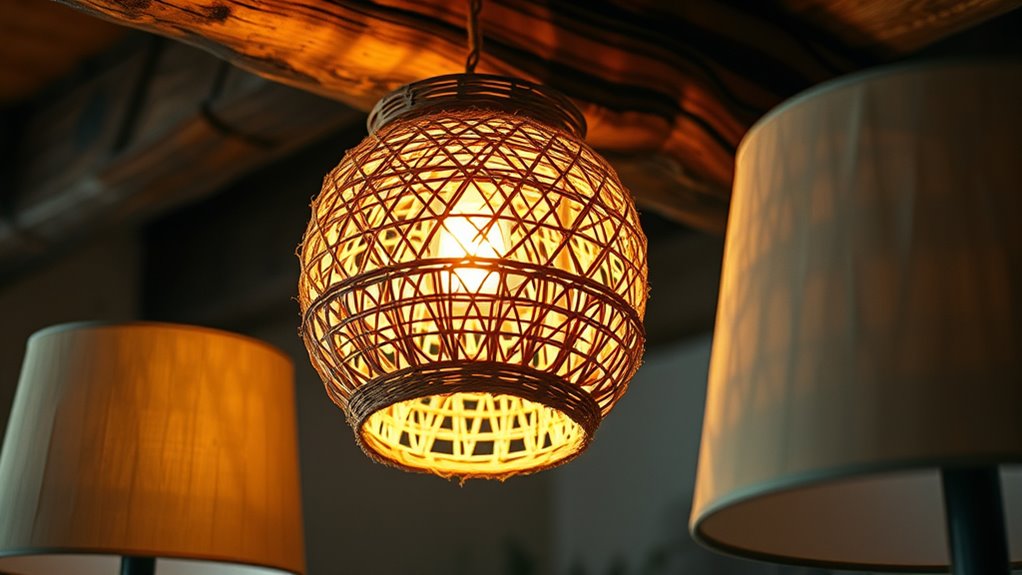
Implementing a Minimal Cage-Style Design
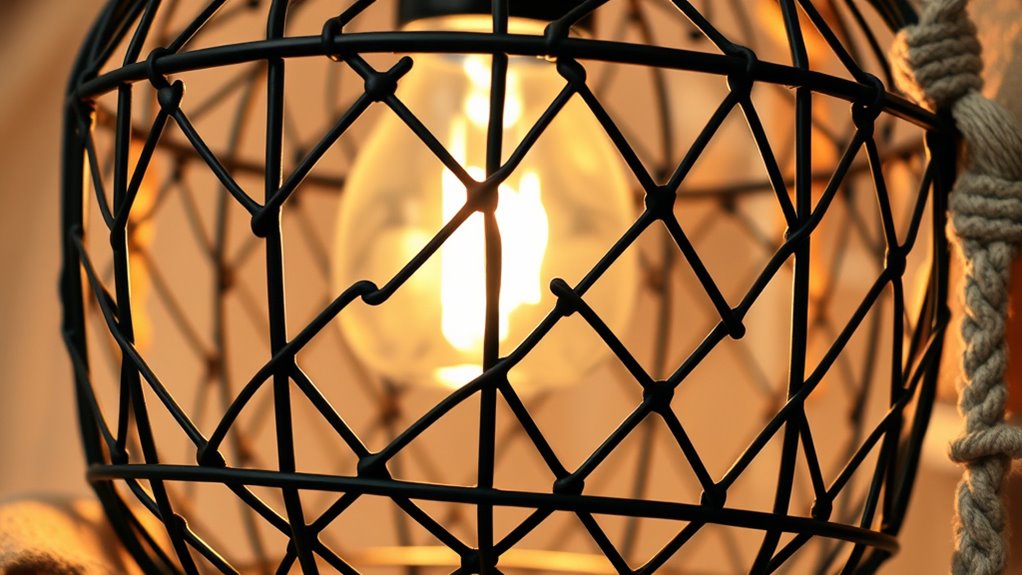
To create a minimal cage-style lantern, focus on building a clean and open framework that highlights simple geometric shapes. Use flat, non-twisted strands of material to guarantee even spacing and a sleek, uniform pattern. Secure the vertical spokes with knots or glue at key points to maintain stability and allow for customization of spacing and pattern density. Working upside down during the weaving process helps align knots and patterns correctly, ensuring symmetry once flipped right-side up. Keep the design simple by reducing material use and complexity, making it more cost-effective and easier to customize. This approach results in a striking, lightweight structure that emphasizes clean lines and geometric forms, perfect for a modern, boho aesthetic. Incorporating seasonal variations can enhance the visual appeal and adaptability of your design. Additionally, experimenting with different lighting materials can add warmth and character to your finished piece.
Crafting an Elegant Basket Weave Pattern
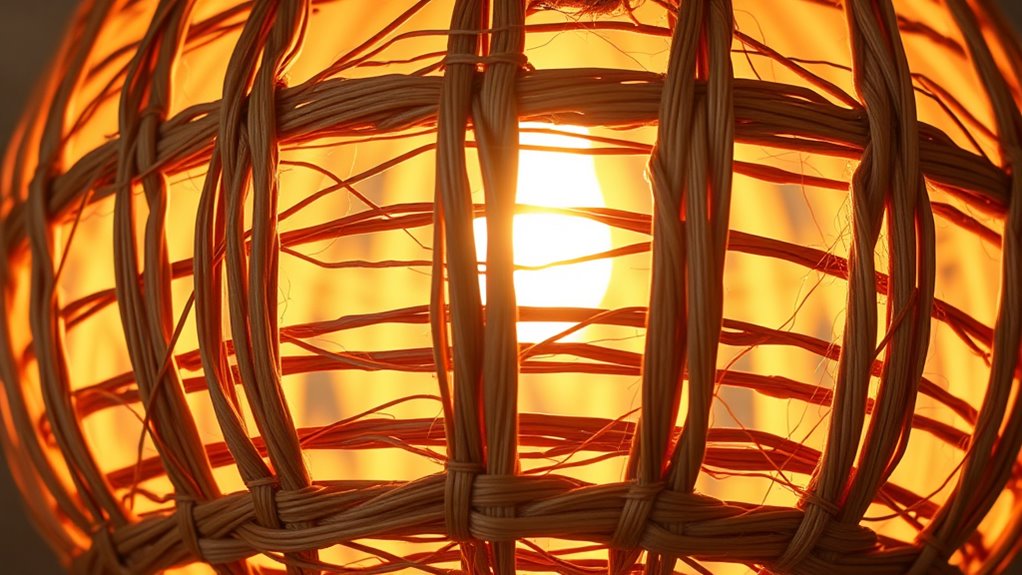
Creating an elegant basket weave pattern involves selecting flat, non-twisted strands of rattan or similar material to guarantee uniformity throughout the design. Start by securing the vertical spokes evenly around your lamp frame, maintaining consistent tension for symmetry. Weave horizontal strands over and under the vertical spokes in an alternating pattern, ensuring tight and even spacing for a clean, basket-like look. At key intersections, use small knots or glue to stabilize the weave and prevent shifting over time. As you progress, trim any excess material to maintain a tidy appearance. Finally, adjust the weave to achieve a smooth, polished surface that elevates the lamp’s overall elegance. This method results in a sophisticated, handcrafted pattern that enhances your DIY lighting project.
Tips for Achieving Symmetry and Consistency
Achieving symmetry and consistency in your lighting DIY project requires careful planning and keen attention to detail. To keep your design uniform, measure and mark spacing on each strand or weaving section consistently. Use a template or guiding line to maintain symmetry when wrapping or knotting materials around the frame. Working upside down or on a stable surface helps you better visualize and align patterns, ensuring even spacing and tension. Secure each section with clips or ties temporarily to check for uniformity before finalizing the weave or glueing. Regularly step back and assess your work from different angles to spot any asymmetries or irregularities. Staying mindful of these tips will help create a balanced, professional-looking finished piece.
Final Assembly and Finishing Touches

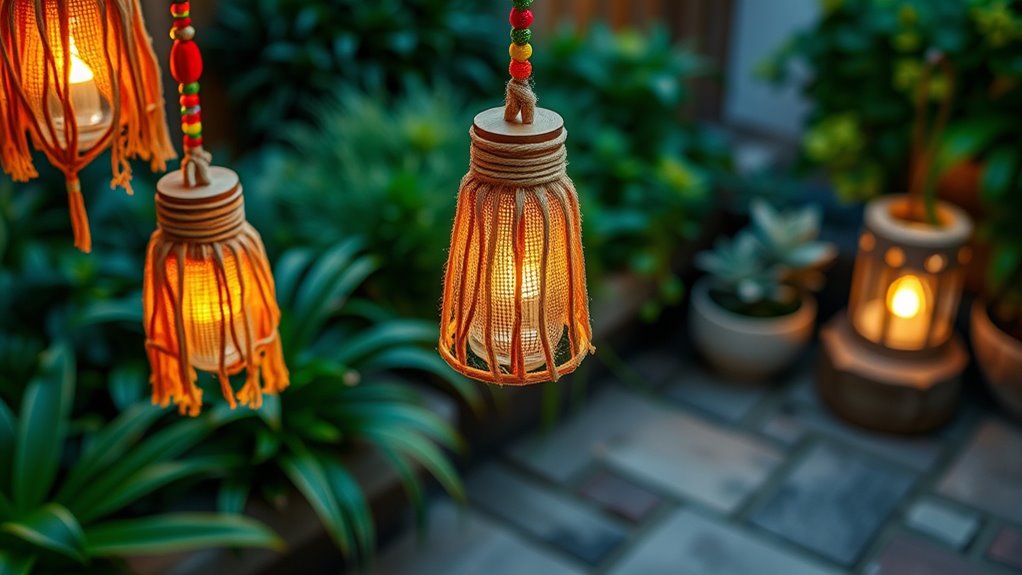
Before finalizing your lighting project, focus on trimming and securing the woven strips to guarantee clean edges. Neatly cut any excess material and use a strong adhesive or fasteners to keep everything in place. Once secured, attach your lampshade or lantern to a suitable light fixture or pendant chain, making sure it’s firmly fastened to prevent wobbling or falling. For outdoor use, apply weatherproof sealants or waterproof spray to protect your creation from rain and moisture. Consider adding decorative touches like tassels, beads, or paint accents to give your piece a personalized look. Before hanging or installing, test the electrical connection and lighting to ensure everything works safely. These finishing steps will give your DIY project a polished, professional appearance and lasting durability.
Ideas for Personalizing Your DIY Lanterns
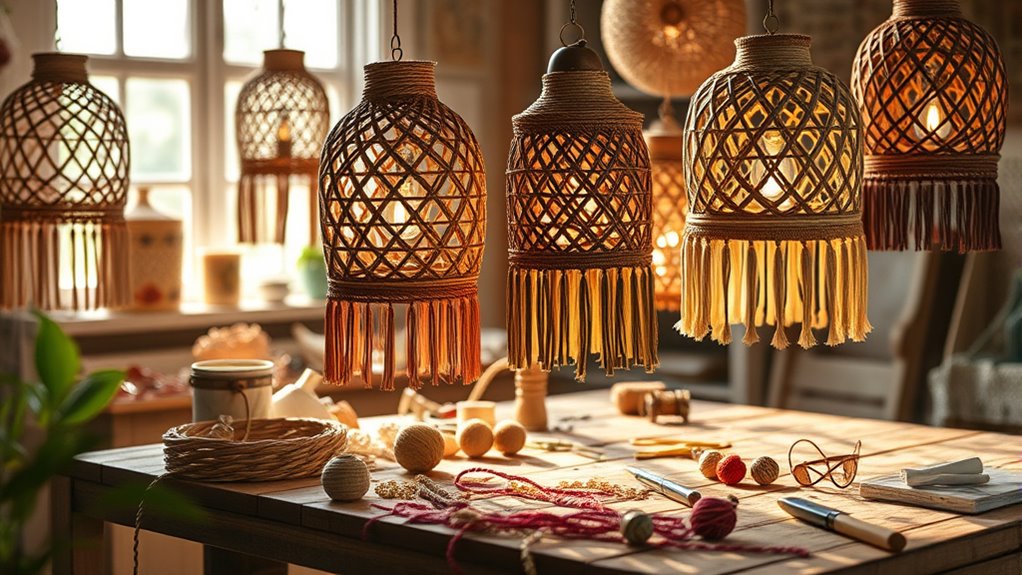
You can make your DIY lanterns truly stand out by choosing vibrant colors and interesting patterns that match your style. Incorporating natural elements like twigs or dried flowers adds texture and a rustic charm. Experimenting with different materials and decorative touches lets you create lanterns that reflect your personality and complement your space.
Color and Pattern Choices
Wondering how to make your DIY lanterns stand out? The key is in your color and pattern choices. Vibrant or patterned ribbons instantly add a boho flair and help personalize your design. Incorporate contrasting colors in your weaving to create visual interest and highlight the handcrafted detail. If you prefer a more subtle look, natural hues like earth tones or muted shades lend an understated, sophisticated vibe. Experiment with striped or ombré dye effects for unique patterns and smooth color transitions. To add extra flair, customize color accents at the top or bottom of your lanterns, emphasizing their shape and adding decorative detail. Play around with these options to craft truly eye-catching, personalized boho lanterns that match your style perfectly.
Incorporate Natural Elements
Adding natural elements to your DIY lanterns instantly enhances their organic charm and personal flair. You can weave dried flowers, leaves, or small branches into your design for texture and visual interest. Attach shells, pinecones, or stones with twine, jute, or hemp cord to create a rustic, earthy vibe. Incorporate woven fibers like seagrass, rattan, or wicker to boost the organic aesthetic. Decorate the exterior with pressed botanicals or seasonal prints to reflect your style. For a fresh touch, place small potted succulents or air plants inside or around the lanterns, bringing life and greenery to your space.
| Natural Elements | Symbolic Meaning |
|---|---|
| Dried Flowers | Preserved beauty, memory |
| Leaves & Branches | Growth, nature, renewal |
| Shells & Stones | Earth, grounding, stability |
| Woven Fibers | Tradition, craftsmanship |
| Living Plants | Freshness, vitality, serenity |
Frequently Asked Questions
How Do I Choose the Best Lighting Elements for My DIY Lanterns?
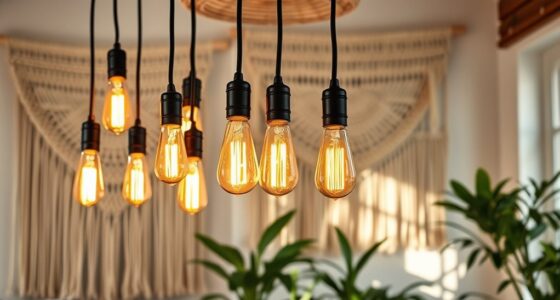
When choosing the best lighting elements, you need to contemplate the mood you want to create and your lantern’s style. Think about the brightness level, energy efficiency, and bulb shape. Opt for warm-toned LEDs or Edison bulbs for a cozy, boho feel. Make sure your chosen elements fit your lantern’s size and socket type. Testing different options helps you find the perfect glow for your DIY project.
What Safety Precautions Should I Consider During the Crafting Process?
During your crafting process, you should prioritize safety by wearing gloves and eye protection, especially when handling sharp tools or hot glue. Make sure your workspace is well-ventilated, and keep flammable materials away from heat sources. Always unplug electrical components before working on them, and double-check wiring for safety. Taking these precautions helps prevent accidents and guarantees your DIY project is both fun and safe.
Can I Incorporate LED Lights for Energy Efficiency?
The proof is in the pudding—you can absolutely incorporate LED lights for energy efficiency. LEDs use less power, last longer, and emit less heat, making them perfect for your DIY lanterns and lampshades. Just make certain your wiring is correct and that the LEDs are compatible with your power source. With a little planning, you’ll create a beautiful, eco-friendly glow that saves energy and adds charm to your space.
How Do I Maintain and Clean My Handmade Lanterns?
To keep your handmade lanterns looking their best, you should regularly dust them with a soft cloth or brush to remove dirt. For cleaning, gently wipe the surfaces with a damp cloth, avoiding harsh chemicals that could damage the material. If your lanterns have fabric or delicate elements, spot clean carefully. Store them in a dry, safe place when not in use to prevent damage and prolong their beauty.
Are There Eco-Friendly or Sustainable Materials Suitable for These Projects?
You might think eco-friendly materials aren’t durable enough, but many are surprisingly sturdy. For your projects, consider bamboo, recycled glass, or jute, which are sustainable and versatile. You can also use biodegradable cords and natural dyes. These choices not only reduce your environmental impact but add authentic charm. So, embrace eco-conscious options—they’re practical, stylish, and perfect for crafting beautiful, sustainable lighting fixtures.
Conclusion
Now, as your handmade boho lanterns glow softly in the evening, they blend rustic charm with modern creativity. The warmth of your craft contrasts beautifully with the cool night air, transforming your space into a cozy haven. With each knot and weave, you’ve created more than just lighting—you’ve built a personal story. Embrace that sense of achievement, knowing your unique touches make your outdoor ambiance truly one-of-a-kind.