To refresh your space, try repurposing old furniture with fresh paint and new hardware for a modern update. Create custom wall art using budget-friendly supplies like canvas, fabric, and printable images. Add a bold accent wall with stencils or colors, and incorporate handmade touches like throw pillows, candle holders, or a photo gallery wall. Building DIY planters and wall hangings completes the look. Keep exploring for more creative ideas to transform your home effortlessly.
Key Takeaways
- Upcycle old furniture with fresh paint, new hardware, or creative conversions to add personality and maximize existing space.
- Create custom wall art using affordable materials like canvas, fabric, or recycled items to add visual interest.
- Use decorative techniques such as stenciling, geometric tape patterns, and textured elements for accent walls and artwork.
- Incorporate DIY accessories like throw pillows, candle holders, and planters to introduce color, texture, and greenery.
- Plan and arrange photo galleries, wall hangings, and thematic decor elements for a cohesive, refreshed look.
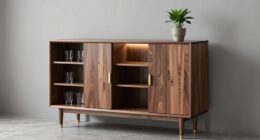
Repurposing Old Furniture for a Fresh Look
Have you ever considered giving your old furniture a new lease on life? Instead of tossing out that worn-out table or outdated chair, think about transforming it into something fresh and stylish. A simple coat of paint can instantly update the look, especially if you choose bold or trendy colors. You might also replace old hardware with new knobs or handles to add a modern touch. For a more creative approach, repurpose furniture into different pieces; turn an old dresser into a stylish storage bench or a vintage ladder into a unique bookshelf. These projects not only save money but also add character to your space. By incorporating upcycling techniques, your DIY projects can evoke the charming farmhouse aesthetic and create a cozy, inviting atmosphere. Using creative repurposing strategies, you can further personalize your furniture transformations to suit your style. Exploring remote hackathons can also inspire innovative ideas for your projects, connecting you with a global community of creative makers. With a little effort, your old furniture can become a standout piece that reflects your personal style and highlights innovative design.
Creating Custom Wall Art With Simple Materials
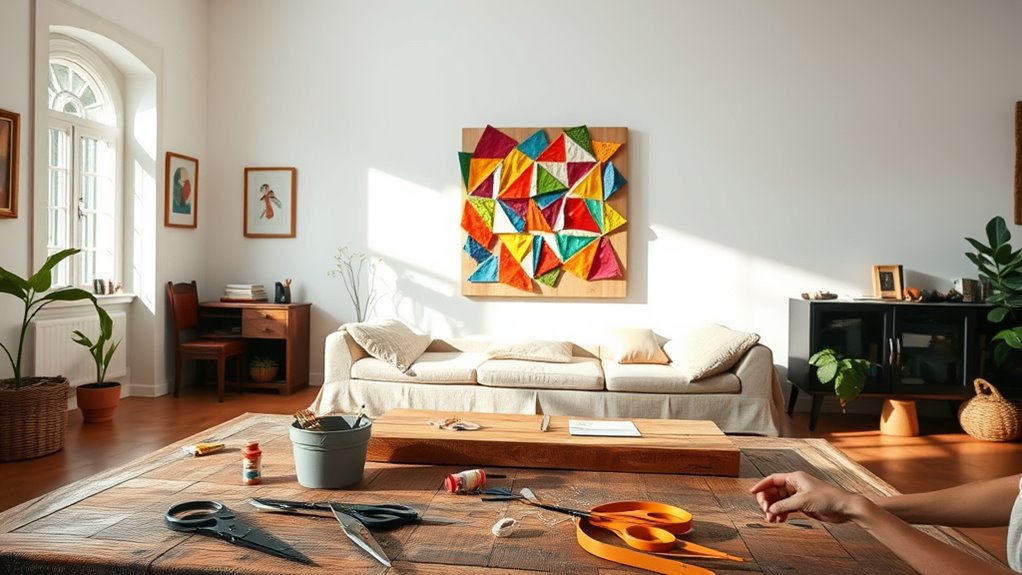
To create your own wall art, start by selecting easy-to-find materials like canvas, paper, or fabric. Next, plan your layout carefully to guarantee your design fits your space and style. Incorporating visionary quotes into your designs can also inspire personal growth and add meaningful depth. Remember that customizing your artwork can reflect your unique personal style and make your space truly one-of-a-kind. Using creative materials like recycled products can further enhance your project’s eco-friendliness and uniqueness. When choosing materials, consider options that are suitable for DIY projects and easy to work with. Additionally, selecting self watering planters for your plant displays can add a functional and aesthetic touch to your decor. Finally, add finishing touches like framing or embellishments to make your artwork truly stand out.
Choosing Art Materials
Wondering how to create striking wall art without breaking the bank? The key is choosing the right materials that are simple, affordable, and easy to work with. Start with basic supplies like canvas or thick paper, which serve as versatile backgrounds. Use inexpensive items such as paint, markers, or printable images to add personality. Consider repurposing everyday objects—like fabric scraps or old magazines—for textures and colors. Keep these tips in mind:
- Opt for acrylic or watercolor paints for vibrant, easy-to-mix colors
- Use stencils or printable templates for clean, professional-looking designs
- Gather inexpensive tools like brushes, sponges, or even Q-tips for detail work
- Look into Vetted electric bike conversion kits to explore creative projects and repurpose materials from other hobbies. Incorporating art materials that are accessible and budget-friendly allows you to craft unique art pieces without stress or overspending. Additionally, exploring organization strategies can help keep your creative space tidy and inspiring.
Designing Your Layout
Once you’ve gathered your art supplies, it’s time to plan how your design will come together on the wall. Start by measuring your space and sketching out different arrangements on paper or using a digital tool. Consider the size and shape of each piece, and how they’ll relate to one another. Think about creating balance—mixing larger and smaller pieces—and how your layout can complement your room’s overall style. You might opt for a symmetrical grid or an eclectic, freeform design. Use painter’s tape to outline your planned arrangement on the wall; this helps visualize the final look without making holes. Adjust as needed until you’re happy with the composition, then mark the spots for hanging. Incorporating visual harmony into your layout can enhance the overall aesthetic. Paying attention to spatial proportions ensures your art arrangement feels cohesive and well-balanced. Proper planning and wall organization can make your DIY project look polished and intentional, especially when considering how contrast ratios influence visual clarity and appeal.
Finishing Touches
Adding the finishing touches to your wall art is an easy way to personalize your space using simple materials. You can create eye-catching pieces that reflect your style with minimal effort. Start by gathering basic supplies like canvases, paint, or even printable images. To add a unique flair, consider these options:
- Use washi tape or painter’s tape to create geometric patterns or borders.
- Attach meaningful photographs or quotes with adhesive or clips.
- Incorporate textured elements like fabric, feathers, or dried flowers for depth.
- Experiment with different composition techniques to enhance visual interest and balance. These techniques are inspired by design principles that help create harmony and focal points in your artwork. Incorporating interior decor ideas can help you achieve a cohesive look that complements your existing space. These simple touches transform plain wall decor into meaningful art. Play with colors, shapes, and materials to match your aesthetic. The key is to keep it fun and reflective of your personality. With just a few supplies, you can craft stunning, personalized wall art that refreshes your entire space. Engaging in creative practice can help develop your skills and inspire new ideas for your projects.
Painting and Stenciling for a Bold Accent Wall
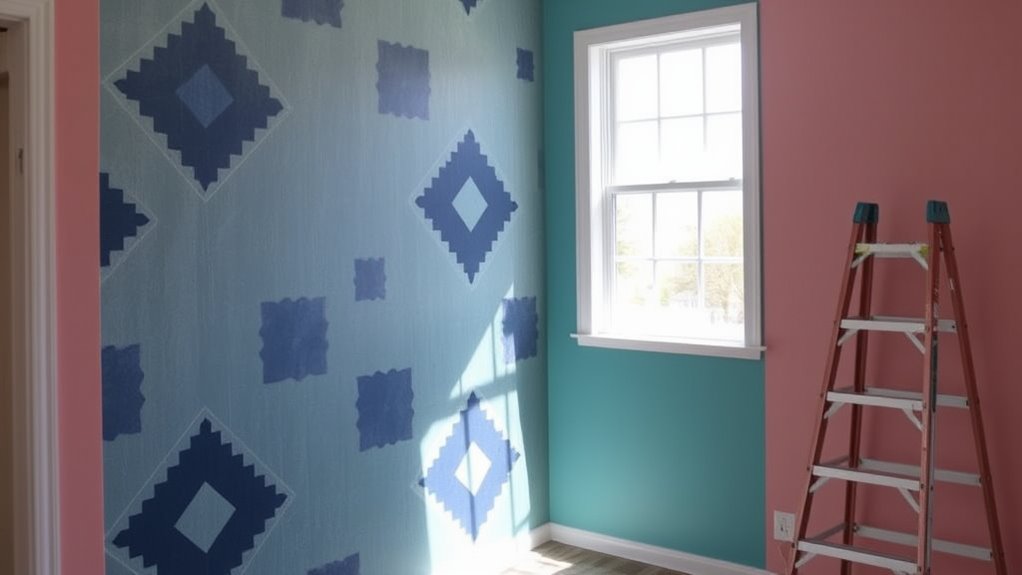
Creating a bold accent wall with paint and stencils instantly transforms your space and adds visual interest. Start by choosing a striking color or pattern that complements your existing decor. Use painter’s tape to section off your wall and ensure clean lines. For a more intricate design, stencils are your best friend—they simplify complex patterns. Pick a contrasting color for the stencil to make it pop. Here’s a quick guide:
| Step | Tips | Tools Needed |
|---|---|---|
| Prepare the wall | Clean and prime for smooth finish | Sandpaper, primer |
| Choose design | Pick bold patterns or geometric shapes | Stencils, painter’s tape |
| Apply paint | Use a stencil brush or sponge | Paint, stencil, leveler |
| Finish | Seal with clear coat for durability | Sealant, brush |
This DIY approach makes a statement and refreshes your space effortlessly. Additionally, selecting the right painting supplies can ensure a professional-looking result and prolong the life of your accent wall. Understanding dynamic communication exercises can also help you better involve others in your decorating projects, making the process more enjoyable and collaborative. For example, exploring culinary arts principles like regional flavors can inspire color choices and thematic designs for your space. Incorporating project planning skills can help organize your decorating process efficiently, ensuring you stay on track and achieve the desired outcome.
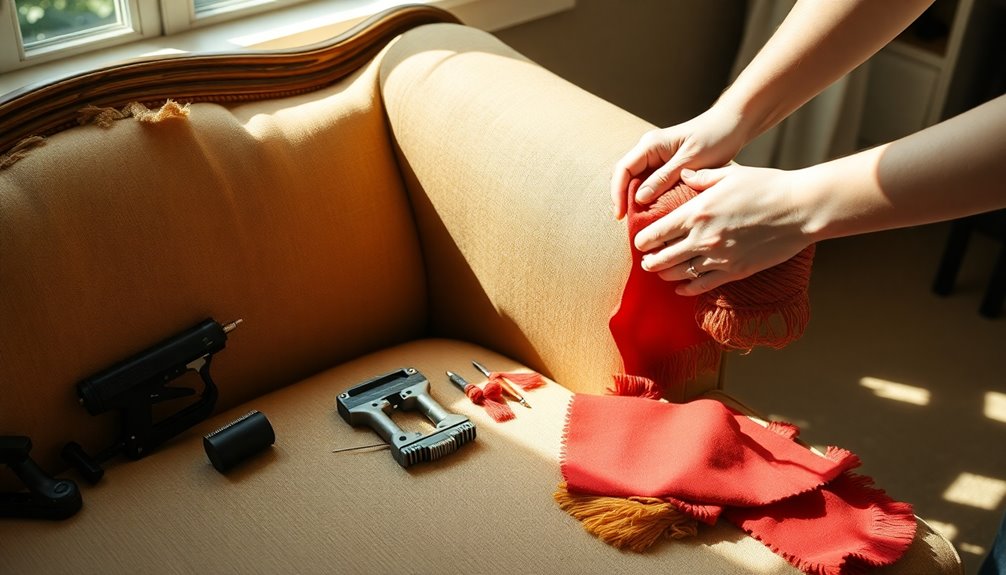
Making Stylish Throw Pillows and Cushions
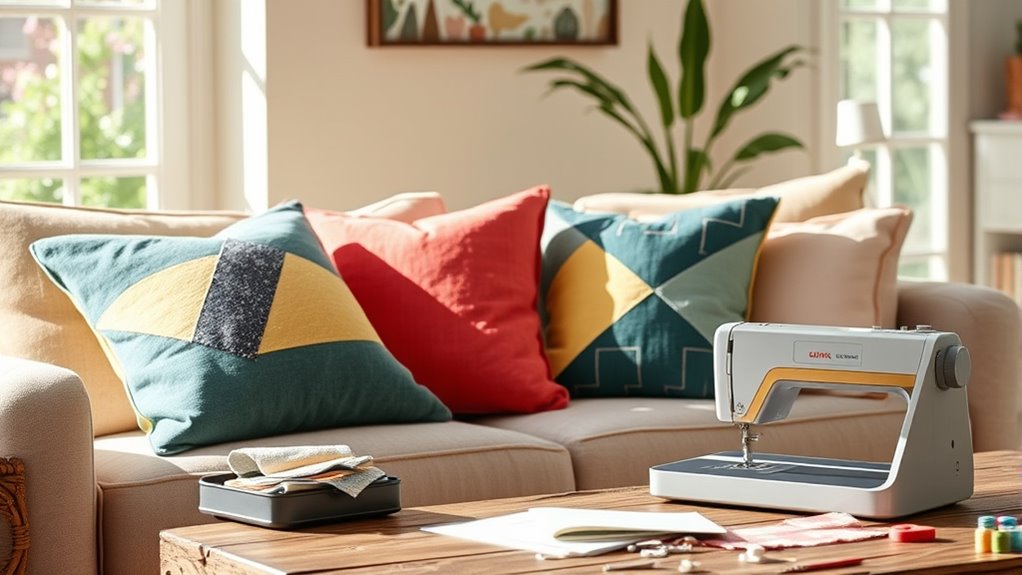
Ever wondered how to elevate your living space with personalized accessories? Making stylish throw pillows and cushions is a simple way to add color, texture, and personality to any room. Start by choosing fabrics that match your decor or showcase your style—think bold patterns, soft neutrals, or luxurious textures. Sew or glue fabric pieces together, adding zippers or buttons for extra flair. To make your cushions more comfortable, insert quality foam or stuffing. You can also customize sizes to fit your furniture perfectly. Here are some ideas to inspire you:
- Use contrasting fabrics for a modern look
- Add embellishments like tassels or embroidery
- Mix and match different sizes for visual interest
- Selecting fabric types that are suitable for both durability and style can enhance your project and ensure your cushions last longer. Additionally, considering bicycle tire longevity in storage can be useful if you plan to store your cushions or fabric supplies in a garage or shed. With a few supplies and some creativity, you’ll craft cushions that truly reflect your style.
Crafting Unique Candle Holders and Lanterns
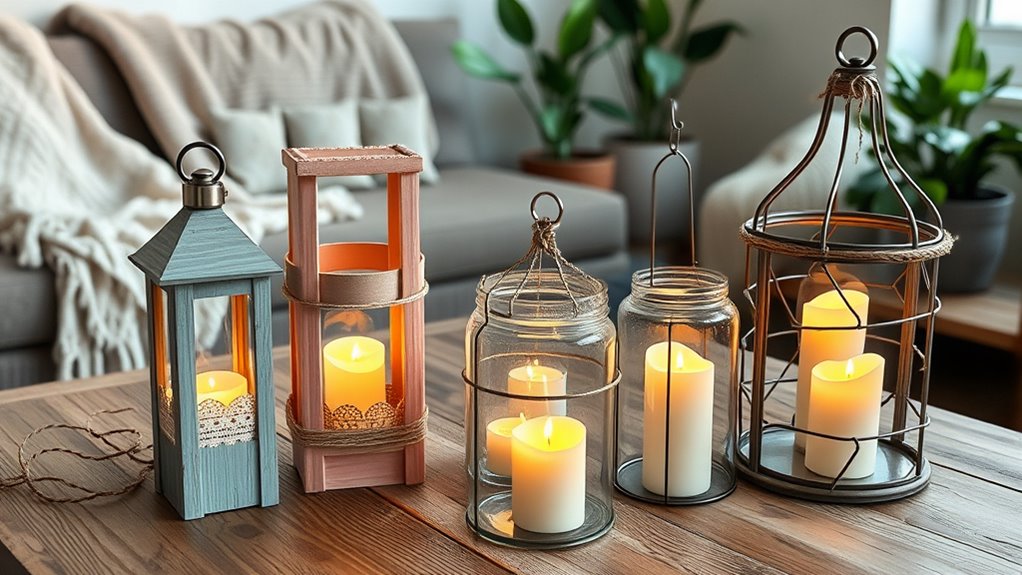
To create eye-catching candle holders and lanterns, start by selecting materials that match your style and budget. Then, explore creative design ideas like repurposing everyday items or adding personal touches. With the right choices, you’ll craft unique pieces that enhance your home decor effortlessly.
Choosing the Right Materials
Choosing the right materials is essential for crafting unique candle holders and lanterns that are both functional and visually appealing. Your material choices affect durability, safety, and style. You want materials that can withstand heat and won’t easily break or discolor. Think about the overall look you want—rustic, modern, vintage—and select accordingly. For example, you might use:
- Reclaimed wood for a cozy, rustic feel
- Glass jars or bottles for a sleek, minimalist design
- Metal wire or cages for an industrial look
Consider how each material interacts with light and how easy it is to work with. Picking the right materials ensures your DIY project is safe, durable, and perfectly matches your decor style.
Creative Design Ideas
Unleashing your creativity can lead to truly unique candle holders and lanterns that become focal points in your home decor. Think outside the box—use everyday objects like teacups, jars, or driftwood to create personalized pieces. Paint, add embellishments, or carve patterns to match your style. Incorporate natural elements like stones or dried flowers for a rustic touch. These handcrafted accents can evoke warmth and personality, transforming your space into a cozy retreat. Below is a table showcasing inspiration for your projects:
| Material | Design Idea | Mood |
|---|---|---|
| Mason jars | Wrap with twine and add candles | Rustic charm |
| Teacups | Stack for layered candle holders | Vintage elegance |
| Driftwood | Carve out spaces for tealights | Coastal vibe |
| Tin cans | Paint and decorate with patterns | Playful fun |
| Glass bottles | Fill with fairy lights | Magical glow |
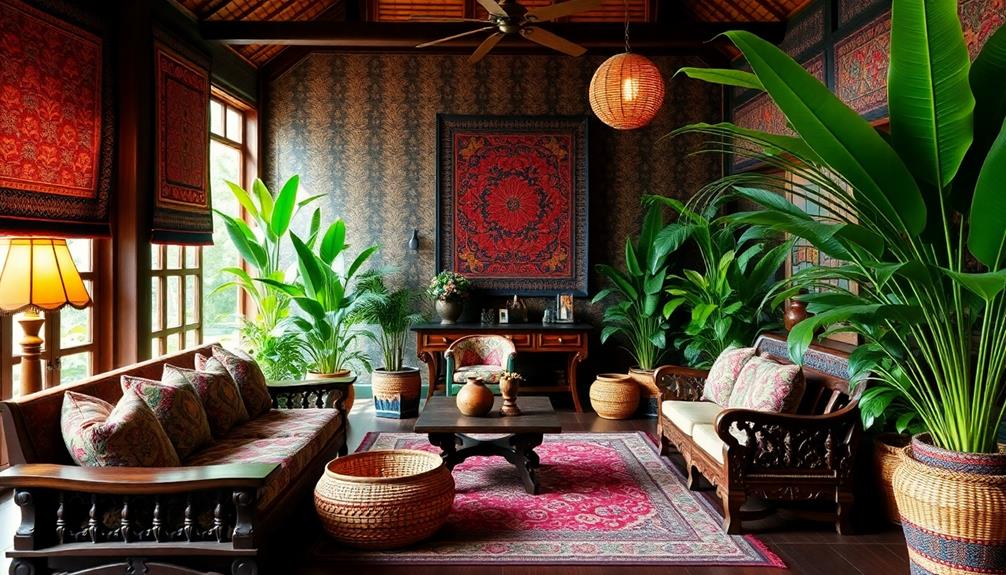
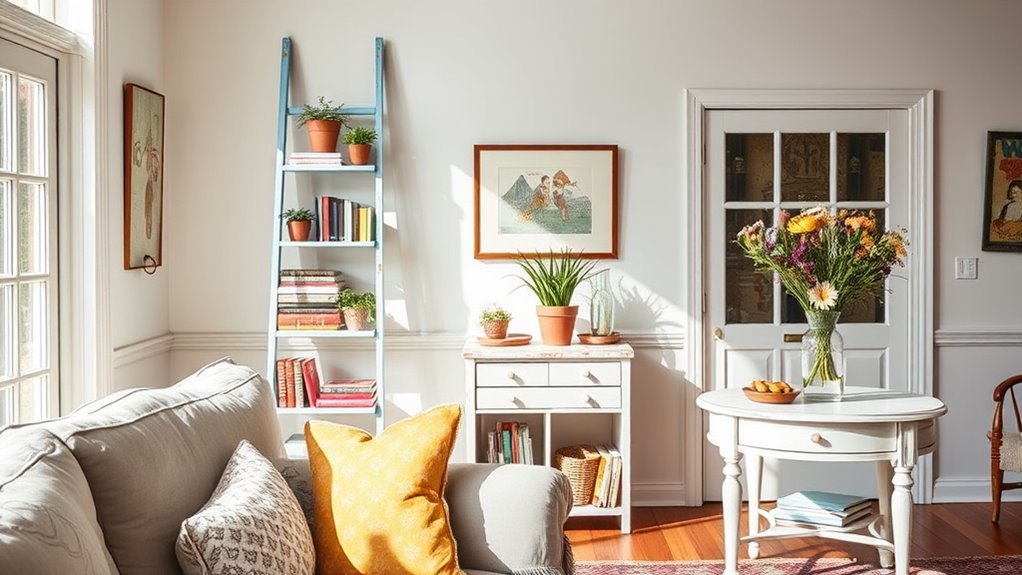
Designing Your Own Photo Gallery Wall

Creating a stunning photo gallery wall starts with selecting a cohesive theme or color palette that reflects your personal style. Once you’ve chosen your overall look, gather photos, artwork, or mementos that fit within that scheme. To keep things organized, consider arranging your frames in a grid, salon style, or freeform design—whichever suits your space best. Use these tips to make your gallery stand out:
- Mix different frame styles and sizes for visual interest
- Use painter’s tape or paper templates to plan your layout before hanging
- Incorporate personal touches like quotes or decorative elements for a unique vibe
Building DIY Planters for Indoor Gardens
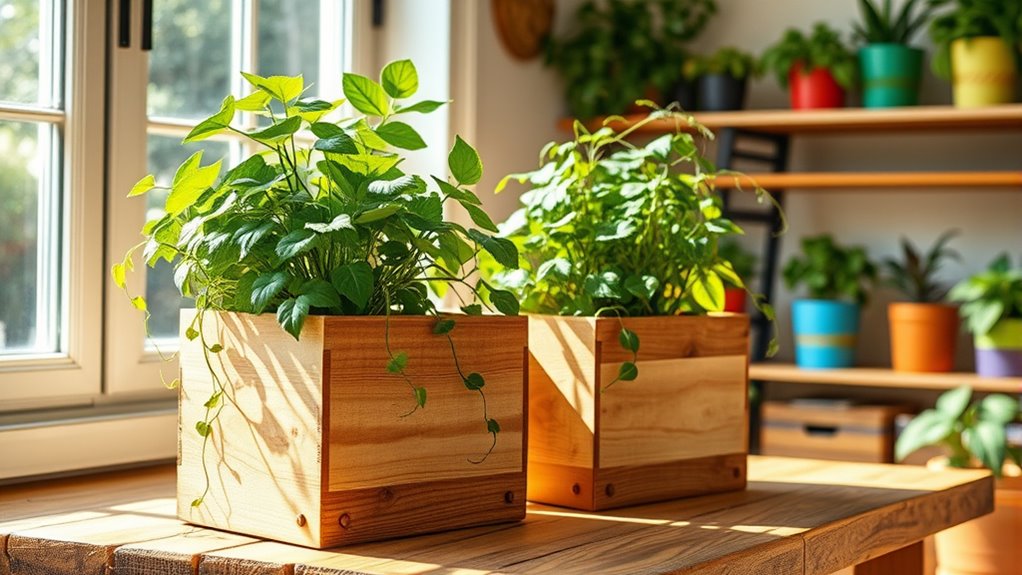
Have you ever thought about making your own planters to give your indoor garden a personalized touch? Building DIY planters is simple and cost-effective, plus it lets you customize them to match your space. Start with basic materials like wood, ceramic, or repurposed containers. Measure and cut your materials to fit your chosen plants, then assemble using nails, glue, or screws. You can add decorative paint, stencils, or even decoupage for a unique look. Make sure your planters have drainage holes to prevent overwatering. Once finished, fill them with quality potting soil and your favorite indoor plants. Creating your own planters not only saves money but also adds a charming, handcrafted vibe to your indoor garden. Plus, you’ll take pride in nurturing your personalized creations.
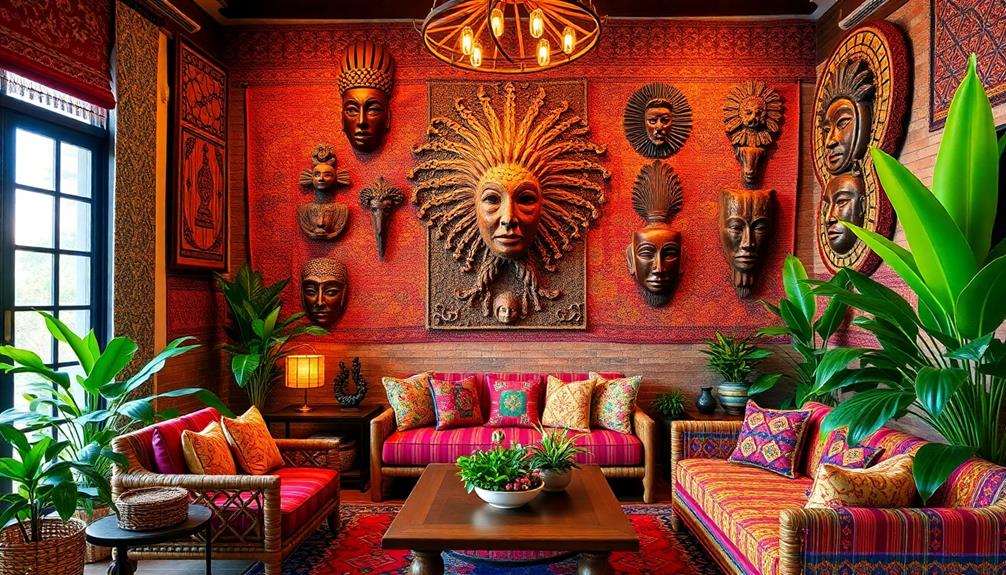
Decorating With Handmade Wall Hangings and Tapestries
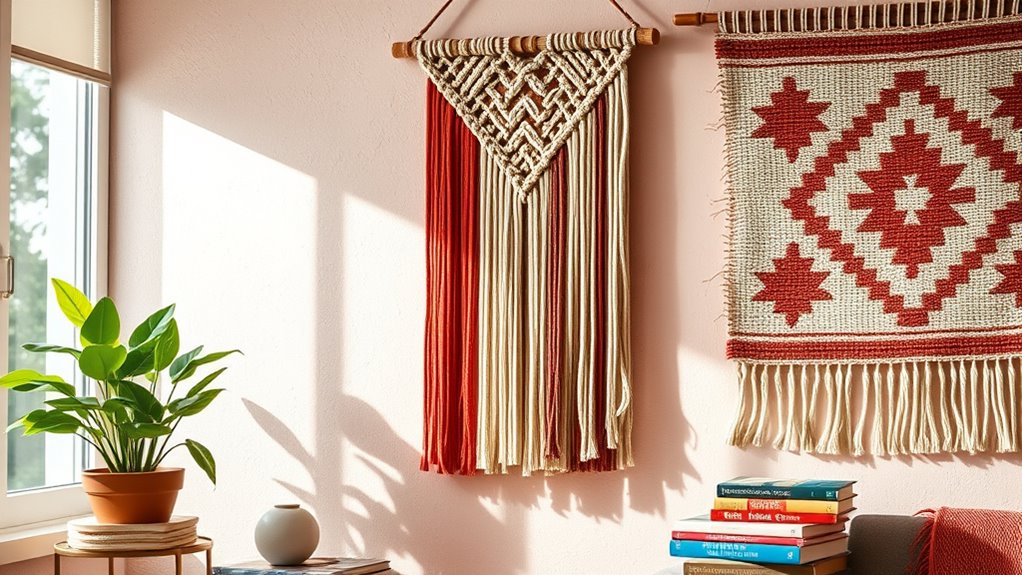
After assembling your personalized planters, you might want to enhance your indoor space further with unique wall decor. Handmade wall hangings and tapestries instantly add personality and warmth to any room. You can craft your own using simple materials like fabric, yarn, or reclaimed textiles. Consider creating a macramé wall hanging for a boho vibe, or sew a colorful tapestry with your favorite patterns. Adding framed embroidery or weaving your own wall art can also elevate your space. Here are some ideas to get you started:
- Use natural fibers and textures to create a cozy atmosphere
- Incorporate bold colors or patterns to make a statement
- Mix and match different wall hangings for an eclectic look
These personalized touches make your space truly yours.
Frequently Asked Questions
What Tools Are Essential for DIY Home Decor Projects?
You’ll want a few essential tools for your DIY home decor projects. A good pair of scissors or utility knife helps you cut fabrics and materials accurately. A hot glue gun is perfect for quick, strong adhesion. Don’t forget a measuring tape and level to guarantee everything’s aligned. Sandpaper and a small electric sander smooth surfaces, while paintbrushes and rollers help you add color and detail effortlessly.
How Can I Choose the Right Color Schemes?
When choosing color schemes, you should consider your personal preferences and the mood you want to create. Think about the existing furniture and decor, and pick colors that complement or contrast nicely. Test paint samples on your walls to see how they look in different lighting. Keep it simple with a primary color and accents, and remember that lighter shades can make a space feel bigger and more inviting.
Are These Projects Suitable for Beginners?
Ever wonder if you can take on these projects as a beginner? Absolutely! Many DIY projects are designed with simplicity in mind, making them perfect for those new to crafting or home improvement. You’ll find step-by-step instructions and helpful tutorials that guide you through each process. With a bit of patience and enthusiasm, you’ll be surprised at what you can accomplish. So, why not give it a try and start transforming your space today?
How Do I Ensure Safety During DIY Activities?
You want to guarantee safety during DIY activities, and that’s smart. Always read instructions carefully before starting, wear protective gear like gloves and goggles, and work in a well-ventilated area. Keep your workspace organized to prevent accidents, and never rush through tasks. If you’re using tools or chemicals, handle them responsibly, and ask for help if you’re unsure. Staying cautious keeps your projects fun and injury-free.
What Budget Options Are Available for DIY Decor?
You can find budget-friendly options for DIY decor by shopping at thrift stores, discount craft stores, or online marketplaces. Repurposing old items, like turning jars into vases or old furniture into statement pieces, also saves money. Use inexpensive materials like paint, fabric, and adhesive to customize your projects. Planning your ideas and sticking to a list helps avoid impulse buys, keeping your costs low while creating stylish, personalized decor.
Conclusion
Ready to transform your space? With over 70% of homeowners embracing DIY projects, it’s clear that personal touches make a big impact. By repurposing furniture, creating custom art, or building planters, you not only refresh your home but also enjoy the satisfaction of craftsmanship. So grab your supplies and start crafting—your perfect, stylish haven is just a project away!