
Updating your furniture can bring a fresh look to your pieces. To get started, assess the current condition, looking for any damage or loose joints. Prep the surface by removing old finishes and sanding it smooth. Repair any scratches with wood putty, allowing it to dry before sanding again. Select your preferred finish – whether it’s stain, paint, or a clear coat – and apply it evenly using high-quality brushes. Remember, having patience is crucial; take your time for the best outcome. Lastly, inspect your work and think about adding an additional protective layer. By following these steps, you’ll discover more techniques and tips to enhance your furniture refinishing skills.
Key Takeaways
- Assess the furniture's condition, checking for structural issues and existing finishes to inform your refinishing approach.
- Prepare the surface by removing old finishes using sandpaper or chemical strippers while ensuring safety precautions are in place.
- Choose your desired finish, such as stain or paint, and gather the necessary application tools for a professional result.
- Fill any dents or scratches with wood putty, allowing it to dry before sanding for a smooth surface.
- Apply a final coat of finish, inspecting for imperfections, and plan for regular maintenance to preserve your refinished piece.
Backstory of Furniture Refinishing
The journey into furniture refinishing often starts with personal projects, where you might seek to breathe new life into old pieces that hold sentimental value. Many individuals plunge into this rewarding craft by salvaging discarded furniture, perhaps through dumpster diving, finding treasures that spark creativity.
As you tackle these projects, you'll likely develop emotional connections to inherited family heirlooms, driving you to restore them and preserve cherished memories. Incorporating elements of modern farmhouse decor can enhance the aesthetic of your refinished pieces, allowing you to blend rustic charm with contemporary design.
Sharing your refinishing adventures through a blog or social media can create a sense of community connection. You'll find like-minded enthusiasts who inspire and support each other as you navigate this journey together. With each new project, your skills improve, transforming your hobby into a more refined craft.
As your expertise grows, you might even consider turning this passion into a business. The demand for unique, handcrafted furniture is on the rise, and many have expanded from small workspaces to multiple locations.
Ultimately, the backstory of furniture refinishing is about more than just restoration; it's about nurturing emotional ties, honing your skills, and fostering connections within a vibrant community.
Importance of Preservation

Preserving furniture through refinishing not only honors its heritage but also keeps alive the stories and memories tied to each piece. When you take the time to restore your family heirlooms, you're contributing to a larger historical tapestry that celebrates the craftsmanship and personal history behind every item.
Just as essential oils can enhance well-being through their therapeutic properties, refinishing your furniture can rejuvenate its essence and liveliness. Each refinished piece not only revitalizes its aesthetic but also embeds the narratives of those who came before you, ensuring that their legacy lives on.
Your emotional investment in the refinishing process transforms it into more than just a DIY project; it becomes a significant chapter in your own life story. These thoughtful transformations enhance your appreciation for both the furniture and your roots, reinforcing the importance of preservation in our everyday lives.
By engaging in refinishing, you're making a conscious choice to connect with your heritage, creating lasting memories that can be shared with future generations.
Ultimately, preserving furniture through refinishing fosters a deeper understanding of craftsmanship and the value of personal connections, allowing you to cherish those meaningful narratives that define who you’re and where you come from. Refinishing furniture also opens up opportunities to appreciate renaissance furniture design, as you gain a greater appreciation for the intricate details and artistry that went into creating each piece. It allows you to connect with the history and cultural significance of different furniture styles, further enhancing your understanding of the craft. By preserving and restoring these pieces, you are not only adding to the beauty of your home but also maintaining a connection to the past and honoring the work of artisans who came before.
Key Terms in Refinishing
When you're ready to refinish furniture, it's important to understand the differences between refinishing, restoring, and refurbishing.
Each term has its own implications for the project, influencing everything from the tools you'll need to the techniques you should use.
For example, refinishing often requires specific products to properly prepare surfaces, similar to the way appliance maintenance plans can help maintain the longevity of your appliances.
Refinish vs. Restore vs. Refurbish
Understanding the differences between refinishing, restoring, and refurbishing furniture is essential for achieving your desired results. Each approach serves a unique purpose, depending on the condition and history of your furniture piece.
Here's a quick breakdown to help you decide:
- Refinish: This process involves removing the old finish and applying a new finish to enhance the piece's appearance and protect the wood.
- Restore: When you restore furniture, you aim to return it to its original state. This often requires minor repairs and using original finishes to preserve its historical value.
- Refurbish: Refurbishing is about making significant repairs or structural changes. This might include altering the design or functionality, along with refinishing or restoring.
Choosing between these terms can impact your project's outcome. If your goal is to simply refresh the look, you might want to refinish your furniture piece.
However, if you're focused on preserving its historical integrity, restoring is the way to go. For a more modern touch or functional improvements, refurbishing could be your best bet.
Knowing these distinctions helps you make informed decisions as you commence your furniture transformation journey.
Essential Tools for Refinishing
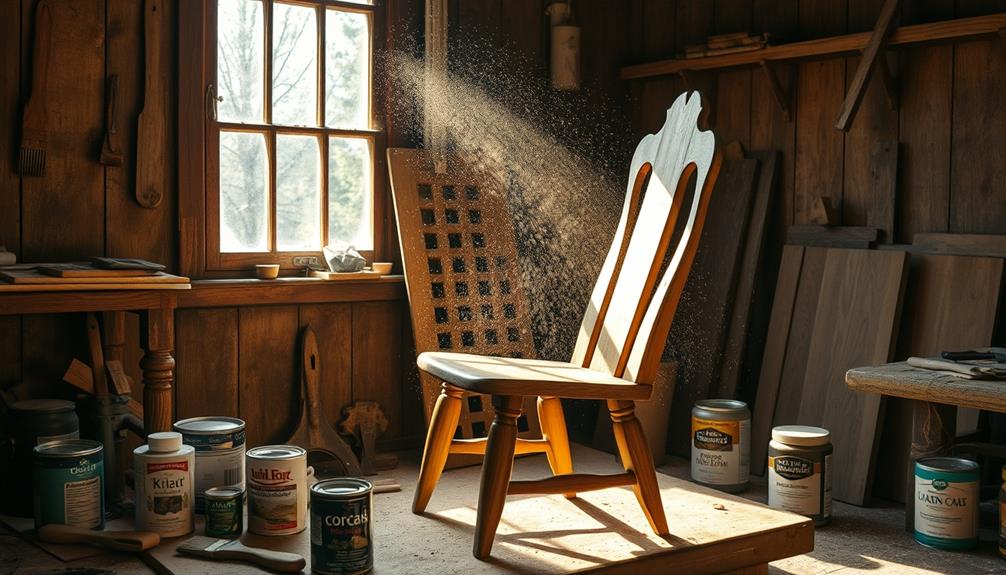
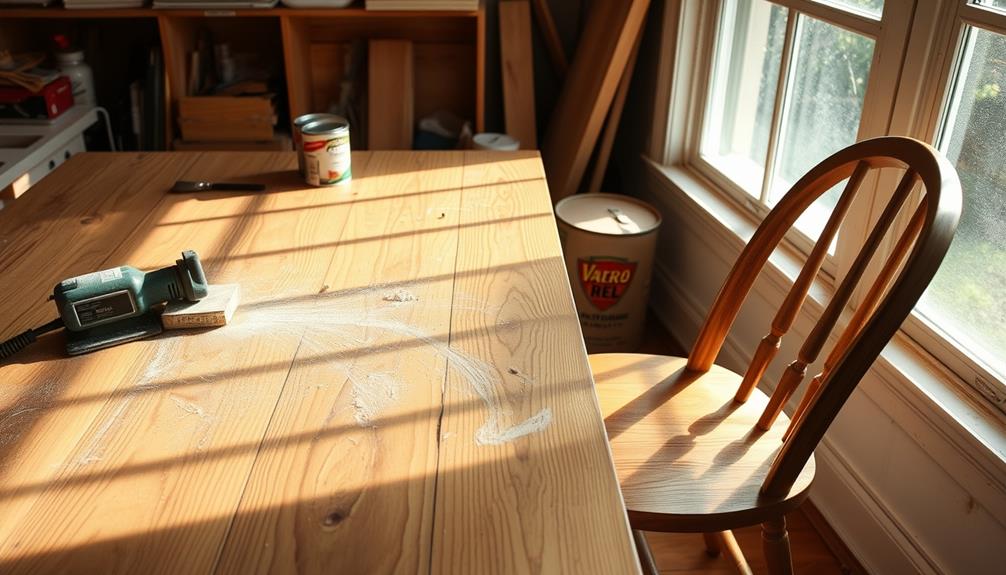
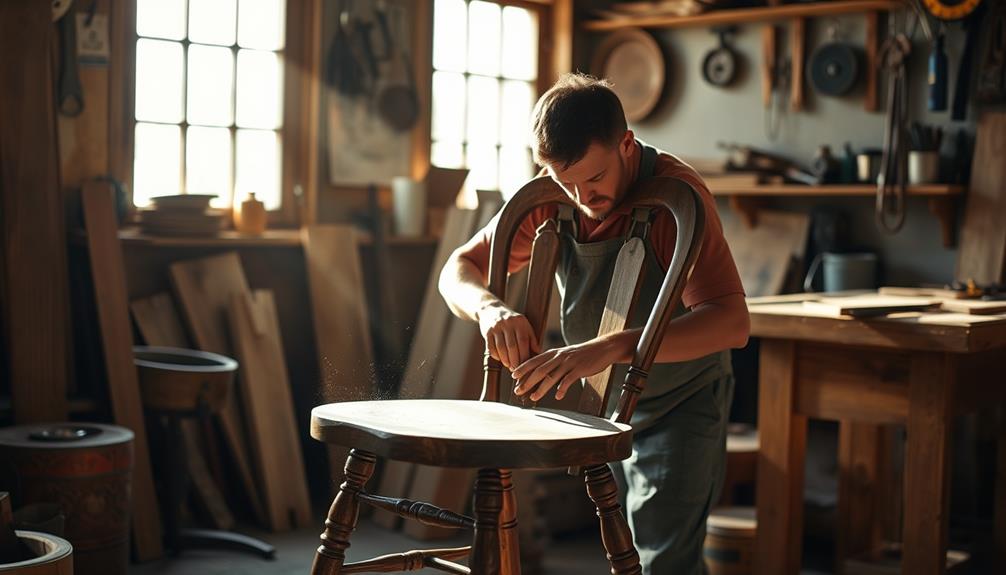
To tackle a refinishing project effectively, you'll need the right tools at your side. Start with sandpaper in various grits to prepare the surface. For larger pieces, an orbital sander can save you time and effort.
You'll also want a tack cloth to clean the surface before applying any finishes, ensuring a smooth application.
When it comes to removing old finishes, chemical strippers or heat guns are your best bets, but be sure to follow safety precautions.
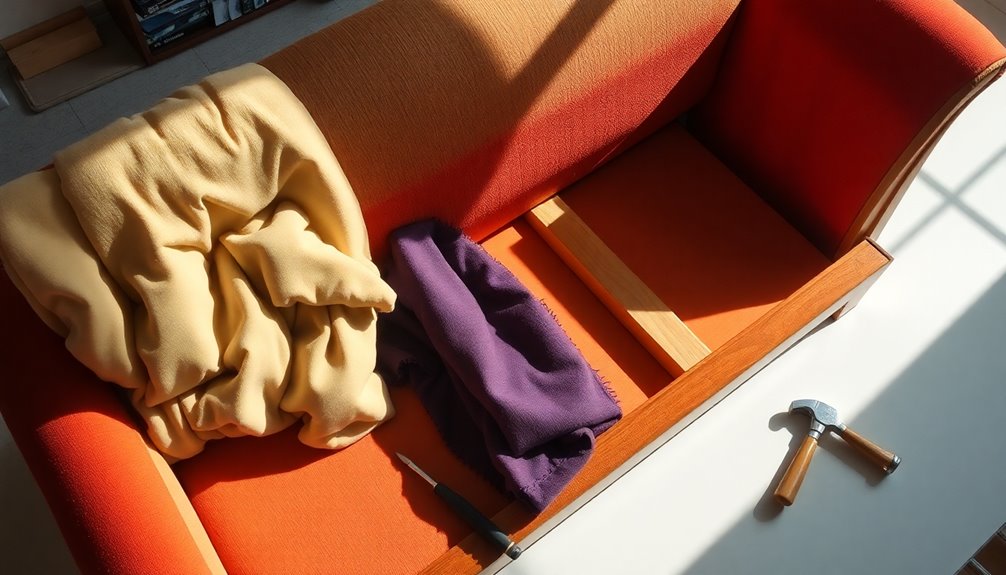
For repairing imperfections, wood fillers like epoxy putty and wax filler sticks are essential for fixing dents and cracks before you begin the finishing process.
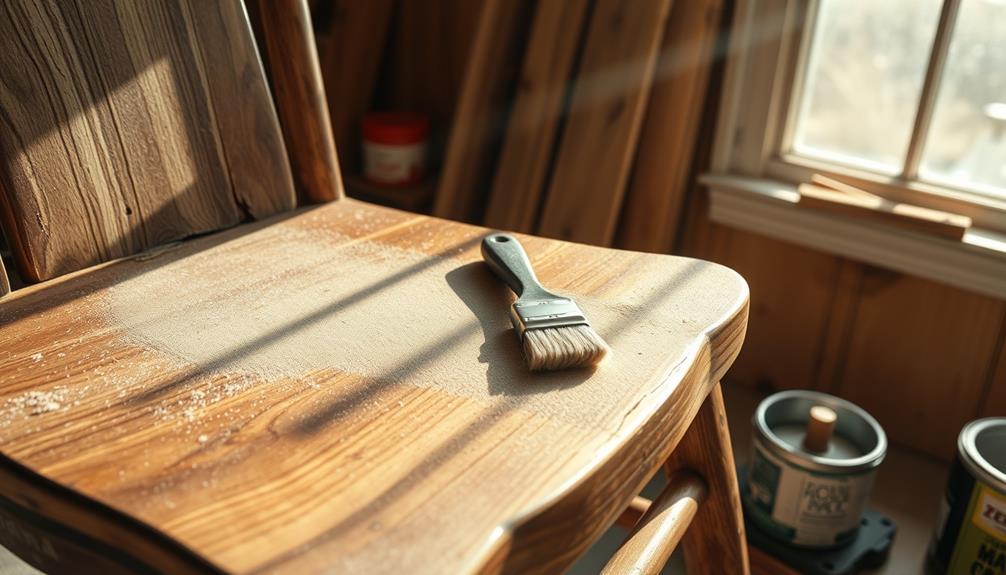
To apply stains, paints, or finishes, a good-quality paint brush, foam brushes, or even spray equipment will help achieve a professional look.
After your final coat, a clean rag will be indispensable for applying wipe-on finishes and buffing out any filled areas to create that polished appearance.
With these essential tools in hand, you'll be well-equipped to transform your furniture and give it a fresh, new look. Happy refinishing!
Evaluating Furniture Condition
Before you start refinishing, it's important to evaluate the furniture's condition. This step guarantees you're fully prepared for the project ahead.
Here are three key areas to focus on:
- Structural Issues: Check for any loose joints or stability problems. A sturdy base is essential before applying any new finishes.
- Major Damages: Look for scratches, dents, and gouges that may need fixing. Identifying these will help you plan necessary repairs.
- Existing Finish: Use mineral spirits to assess the current finish. This will show if it's in good shape for a simple clean or if you need to refurbish the piece more extensively.
Essential Tools and Workspace

To get started on refinishing furniture, you'll need to gather essential tools and set up an organized workspace.
Make sure your area is well-ventilated and free from contaminants to protect your project.
With the right tools at hand and a tidy environment, you can work more efficiently and safely.
Required Tools Overview
Refinishing furniture requires a specific set of tools and a well-organized workspace to guarantee a smooth process and quality results.
To get started on your refinishing project, here's a required tools overview that'll help you prepare:
- Sandpaper and a Random Orbital Sander: For stripping old finishes and smoothing surfaces, these are essential to achieve a flawless base.
- Paintbrushes or Foam Rollers: Use these for even application of stains and sealants—different sizes help for detailed work and larger areas.
- Safety Gear: Don't forget gloves and dust masks to protect yourself from dust and chemicals while sanding and applying finishes.
Additionally, make sure you lay down drop cloths to safeguard your workspace from spills and stains.
A well-ventilated area is vital to minimize exposure to harmful fumes from paints and strippers.
Using a tack cloth can help you clean off dust before finishing, and a razor blade is handy for any detailed repairs.
With these tools and precautions in place, you'll set yourself up for a successful refinishing project.
Organizing Your Workspace
A well-organized workspace is essential for achieving efficiency and quality in your furniture refinishing project. Start by selecting a well-ventilated area where you can safely work with paints and solvents. Gather your essential tools, including various sandpapers, a random orbital sander for larger surfaces, and different brushes for applying finishes.
Use drop cloths to protect your floors and surfaces from stains and debris during the refinishing process. This simple step can save you a lot of cleanup later. Keep cleaning supplies handy, like tack cloths and damp sponges, so you can easily remove dust before applying your finish.
Organizing your workspace doesn't just help with cleanliness; it streamlines your workflow. Designate specific storage areas for your tools and materials, making it easy to find what you need without wasting time searching.
A well-arranged workspace won't only enhance your efficiency but also improve the overall quality of your refinishing project. By following these steps, you create an environment where you can focus on your craft and achieve the best results.
Step-by-Step Refinishing Process
Evaluating your furniture's condition is the essential first step in the refinishing process. Look for any structural issues, scratches, or dents that need repair before you plunge into it.
Here's a quick checklist to guide you:
- Assess any visible damage or imperfections.
- Prepare the surface by removing old paint and finishes.
- Choose your desired finish, whether it's stain, paint, or a clear coat.
Next, grab some coarse sandpaper (80-100 grit) to strip away that old paint. Once the surface is clear, switch to finer sandpaper (120-220 grit) for a smooth surface.
Any dents or scratches can be filled with wood putty—just verify it dries completely before you sand it down to blend with the wood.
When the surface is smooth, it's time to clean and dry the entire piece using a tack cloth to eliminate dust and debris.
Now you're ready to apply a coat of your desired finish. Follow the manufacturer's instructions for application, confirming that you use the right tools for a durable and aesthetically pleasing result.
Happy refinishing!
Quality and Patience in Craft
Embracing quality and patience in your craft is essential for achieving remarkable results in furniture refinishing. Rushing the process can lead to diminished quality and ultimately, a loss of value in your finished piece. Each project you undertake can take several hours or even days, depending on its complexity and condition. This underscores the importance of investing your time for quality results.
As you refine your skills and techniques, remember that the learning process is gradual. Your initial projects serve as valuable practice, allowing you to build your abilities over time. Patience is key here; it helps you develop a deeper understanding of the craft.
Quality work not only enhances the beauty of your furniture but also increases its worth, making that initial time investment worthwhile in the long run.
Regularly reflecting on past projects can improve your techniques and foster a deeper emotional connection to each piece. Embrace this journey, knowing that patience and quality are the cornerstones of successful refinishing.
With dedication, you'll find your skills evolving, leading to stunning results that you'll be proud to showcase.
Final Touches and Details

Final touches play an essential role in the refinishing process, ensuring your hard work truly shines. To achieve that flawless finish, follow these key steps:
- Inspect for Imperfections: After repairs, carefully check your refinished furniture for any remaining flaws before applying the final coat. Addressing these issues now will make a world of difference.
- Apply a Second Coat: Consider adding a second coat of wipe-on finish. This not only enhances protection but also elevates the overall appearance, giving your piece a refined look that lasts.
- Plan for Maintenance: Regular maintenance is vital. Clean your furniture with a soft cloth and steer clear of harsh chemicals. This simple practice prolongs the life of the finish.
Additionally, store your refinished furniture in a controlled environment to guard against moisture and temperature fluctuations.
Periodic touch-ups will also be necessary, so keep matching paint or finish on hand for quick repairs.
With these final touches, your refinished furniture will look stunning and stand the test of time.
Frequently Asked Questions
What Is the Easiest Way to Refinish Furniture?
The easiest way to refinish furniture is to clean it thoroughly, use a chemical stripper for quick finish removal, sand the surface smoothly, and apply a user-friendly wipe-on finish for protection and enhancement. Finally, once the furniture has been refinished and is looking brand new, it is ready to be sold. Many people are opting to sell their refinished furniture online through platforms such as Facebook Marketplace, Etsy, or even their own personal websites. The key to successfully selling furniture online is to take high-quality photos that show off the beauty of the refinished piece, and to write a detailed description highlighting its features and any special techniques used in the refinishing process. By following these steps, anyone can easily refinish and sell furniture online for a profit.
Is It Better to Sand or Strip Wood Furniture?
When deciding whether to sand or strip wood furniture, consider the condition. If it's damaged or has multiple finishes, stripping might be necessary. For simpler projects, sanding can provide a smooth, controlled finish without harsh chemicals.
What Furniture Should Not Be Refinished?
Not all furniture's worth the effort. You shouldn't refinish heavily veneered pieces, antiques, or items with severe damage. If it's got lead paint, get professional help to avoid health risks during the process.
Can You Refinish Furniture Without Stripping?
Yes, you can refinish furniture without stripping. Just clean with mineral spirits, lightly sand imperfections, and apply a new finish. If the original surface is sound, a simple refresh can work wonders.
Conclusion
You've transformed a worn piece of furniture into a stunning work of art, breathing new life into its wood grain like sunlight breaking through a cloudy sky. By investing time and care, you've not only preserved its history but also created a lasting legacy for future generations. As you step back to admire your handiwork, remember that every scratch tells a story, and every finish reflects your dedication. So go ahead, cherish your creation and let it shine!