Connect with us

Interior Design

How to Repair Cracked Leather Sofa

Unlock the secrets to repairing a cracked leather sofa and discover essential tips for maintaining its beauty—your furniture deserves the best care!

Published

on

fixing cracked leather sofa

You can repair a cracked leather sofa effectively with some simple steps. First, clean the surface using a mild soap solution and let it dry completely. For light cracks, apply a leather conditioner, allowing it to absorb overnight. If cracks are deep, use 600-grit sandpaper to smooth the edges, fill them with a leather repair compound, and color-match with dye. Once dried, seal the repairs with a quality leather sealer. Regular maintenance, like conditioning every few months, will help prevent future cracks. Stick around for more tips that can keep your leather looking its best!

Key Takeaways

  • Regularly clean and condition leather every three months to prevent and address cracks effectively.
  • Assess crack severity and use leather conditioner for light cracks, while deep cracks may require filler.
  • Clean the leather surface thoroughly before applying any repair products to ensure proper adhesion.
  • Match and apply leather dye to blend repaired areas seamlessly with the original color of the sofa.
  • Maintain humidity levels and protect from sunlight to prolong the life of your leather furniture.

Understanding Leather Damage
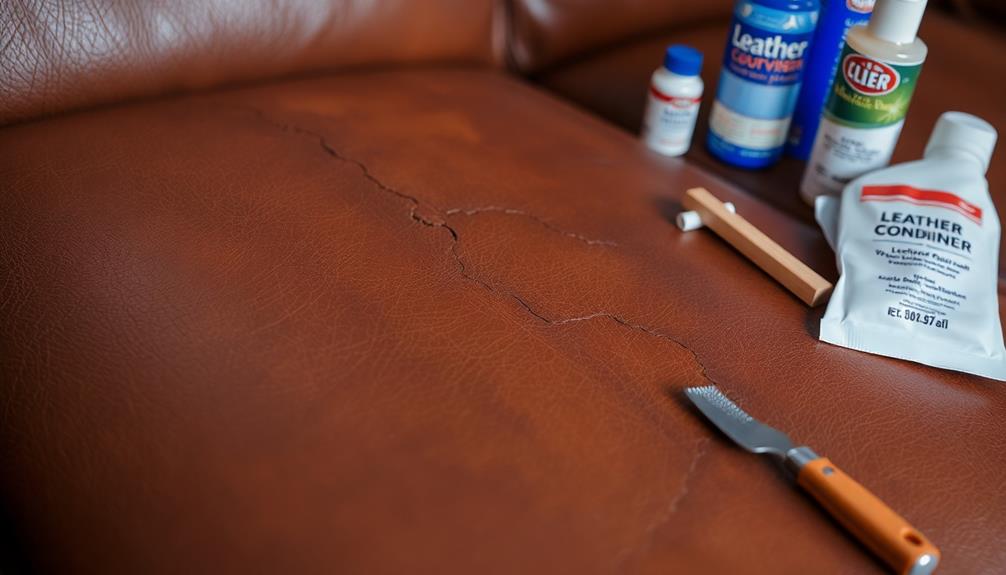
identifying leather damage types

Leather damage can sneak up on you, often starting with subtle signs that you might overlook. As your leather products age, they can lose moisture, leading to dry leather and, ultimately, cracks. These cracks may begin faintly but can worsen without proper attention.

Environmental factors, such as exposure to direct sunlight and extreme temperatures, can accelerate the process, causing your leather to become brittle and worn. Regular care is essential to maintain leather, much like how cold medications require proper selection for effective relief.

To keep your leather in good condition, regular maintenance is essential. You should clean and condition your leather every three months to maintain its moisture levels. Using a high-quality conditioner not only helps to restore lost oils but also prevents future cracks from developing. Remember, the key to repairing cracked leather lies in proactive care. By addressing the signs of damage early, you can prolong the life of your leather sofa.

Neglecting your leather care routine can lead to significant, visible damage, making it harder to repair cracked leather down the line. Stay vigilant and prioritize the upkeep of your leather to enjoy its beauty and functionality for years to come.

Assessing Crack Severity
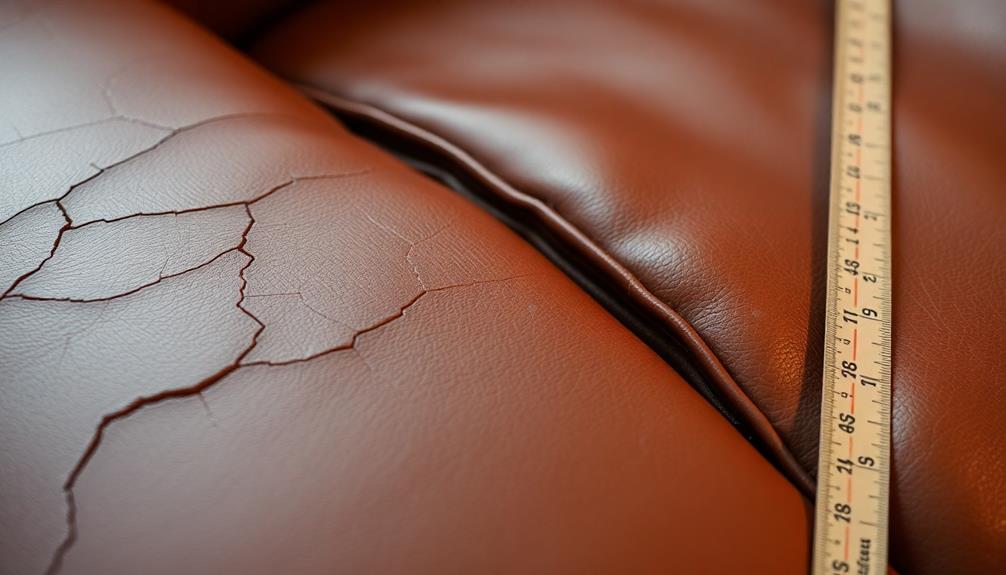
evaluating crack damage levels

When evaluating the severity of cracks in your leather sofa, start with a careful visual inspection. You'll want to categorize the cracks into two main types: light surface cracks and deep cracks.

Light surface cracks are usually shallow and cosmetic, making them easier to handle. You can often treat these effectively with a high-quality leather conditioner. Additionally, maintaining the environment around your sofa can help prevent future damage, much like how regular maintenance of air purifiers guarantees their efficiency.

Advertisement

On the other hand, deep cracks penetrate through the leather and may require more intensive cracked leather repair methods, such as leather crack filler or glue.

As you assess crack severity, check for additional signs of damage like chafing or stiffness. These could indicate a need for thorough maintenance beyond just addressing the cracks.

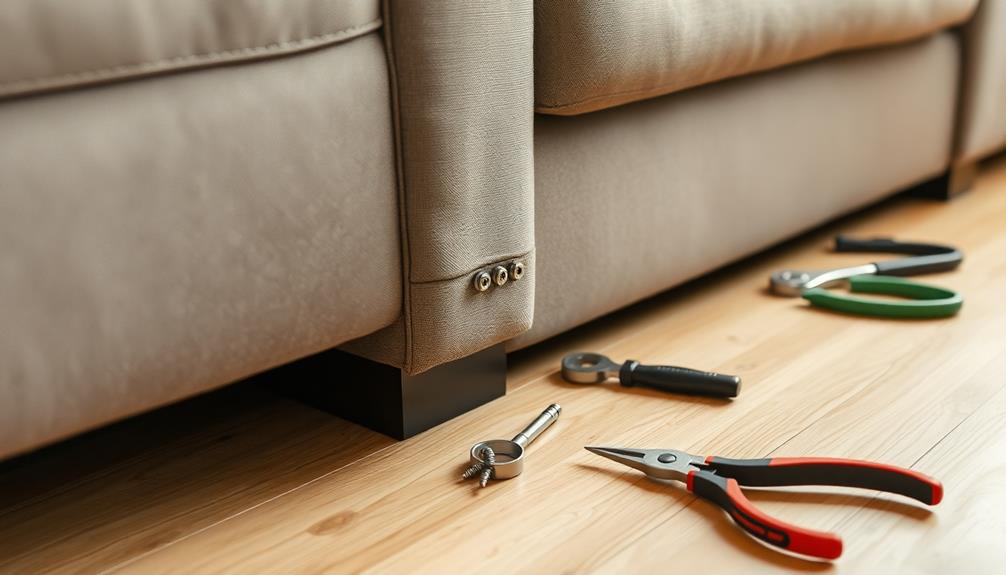
For deep cracks, use 600-grit sandpaper to gently smooth the edges, preparing the surface for filler application. This guarantees a better bond and finish, enhancing the overall repair.

Make it a habit to conduct regular assessments of your leather sofa. Catching early signs of cracking allows for timely interventions, preventing further deterioration and guaranteeing your sofa remains in great condition for years to come.

Cleaning the Leather Surface
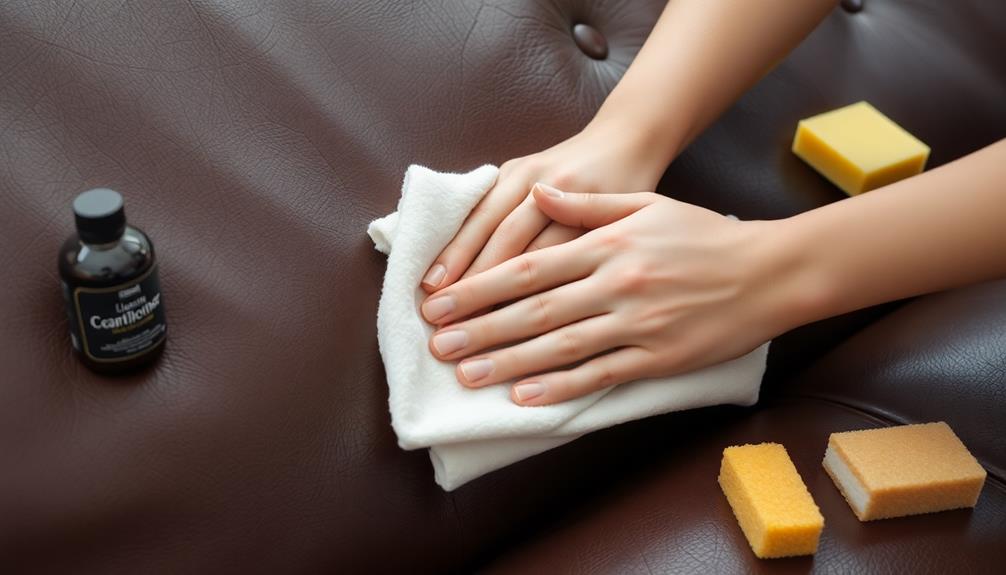
leather surface cleaning tips

After evaluating the severity of the cracks, it's important to clean the leather surface to prepare it for repair. Regular cleaning maintenance can prevent further damage and extend the life of your leather furniture, similar to how best vacuums for dust removal help maintain a clean environment.

Start by using a soft brush or a microfiber cloth to gently remove dust and debris from the leather surface. This step is essential to guarantee you don't trap any particles during cleaning.

Advertisement

Next, prepare a mild soap solution by mixing a few drops of saddle soap or a specialty leather cleaner with distilled water. Lightly dampen a microfiber cloth with this solution—make sure it's not soaking wet to prevent excess water exposure to the leather.

Now, it's time to wipe the leather. Work in small sections and apply gentle pressure as you clean, making sure you don't cause further damage to the material. This method will help lift grime without harming the leather.

After you've finished cleaning, allow the leather to dry completely overnight in a well-ventilated area. This drying process is essential before proceeding with any conditioning or repair treatments.

Taking these steps will set a solid foundation for your leather sofa restoration.

Repairing Light Cracks
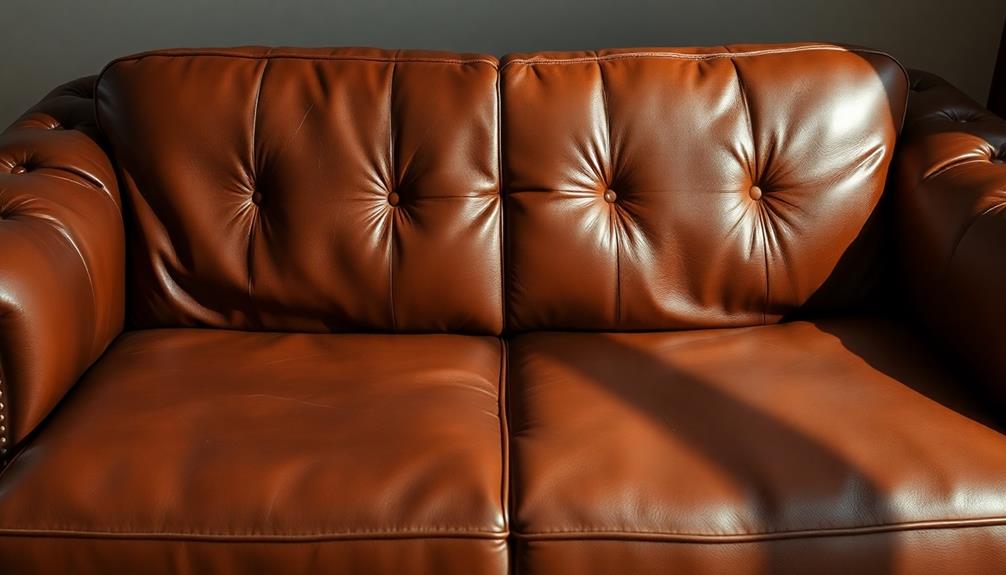
fixing minor surface imperfections

To effectively repair light cracks in your sofa, you'll want to start by cleaning the affected area with a soft brush and a mild soap solution. This step removes dirt and debris, preparing the surface for further treatment.

Once clean, take a clean microfiber towel to dry the area gently. For added moisture and protection, you might consider applying a few drops of essential oils for leather care to enhance the conditioning process.

Advertisement

Next, apply a leather conditioner to rehydrate the leather fibers and smooth out the cracked surface. Focus the conditioner on the cracks, using gentle circular motions to guarantee thorough absorption. It's important to allow it to dry naturally, preferably overnight, to achieve the best results.

If any cracks remain visible after conditioning, you might consider using a leather crack filler. This product can help further smooth the surface and blend with the surrounding leather.

Remember, regular monthly applications of leather conditioner can prevent future cracking and maintain the sofa's appearance and flexibility, so don't skip this crucial step.

Repairing Deep Cracks

fixing significant surface damage

When you notice deep cracks in your leather sofa, it's crucial to assess their depth before starting the repair. Understanding the severity of the cracks helps you choose the right filler and apply it effectively.

Additionally, maintaining your leather sofa through regular cleaning and conditioning can prevent future damage, ensuring its longevity. Consider financial mistakes to avoid when budgeting for home repairs to keep your expenses in check.

Let's explore the best techniques for applying the filler to achieve a seamless finish.

Advertisement

Assessing Crack Depth

Evaluating the depth of cracks in your leather sofa is vital for determining the right repair approach. Start by inspecting the surface closely to assess whether the cracks are merely superficial or if they penetrate deeply into the leather. Superficial cracks typically require a simple cleaning and application of conditioner, while deep cracks call for more intensive repair methods involving filler.

It's significant to acknowledge that maintaining your leather furniture is similar to providing proper care for pets, as both require attention to detail to prevent further damage proper diet for pets.

Before you begin any repairs, make sure to clean the leather thoroughly. Dirt and oils can inhibit the effectiveness of fillers and conditioners, leading to unsatisfactory results.

Once you've cleaned the area, focus on the depth of the cracks. If you find deep cracks, gently smooth the edges using 600-grit sandpaper. This step is vital for ensuring better adhesion of the filler, which will help achieve a seamless finish.

Keep in mind that deep cracks may expand if left untreated, so early assessment and intervention can prevent further deterioration of your leather sofa. By accurately determining the depth of each crack, you'll be better prepared to choose the appropriate repair techniques, ensuring your sofa remains in good condition for years to come.

Advertisement

Filler Application Techniques

Once you've assessed the depth of the cracks in your leather sofa and prepared the surface, it's time to tackle the filling process.

Start by cleaning the leather thoroughly to remove any dirt or oils that could hinder adhesion. For an effective cleaning solution, consider using home remedies for cleaning that are non-toxic and safe for leather.

Next, use 600-grit sandpaper to smooth the cracked areas, creating a better surface for the filler.

Now, grab a high-quality leather crack filler and a palette knife. Apply the filler into the cracks, working it in well, and remove any excess to guarantee a smooth finish.

It's essential to allow the filler to dry completely—this usually takes at least six hours in a well-ventilated area to make sure it cures properly.

Advertisement

After the filler has dried, you may need to lightly sand the area again with fine sandpaper to blend it seamlessly with the surrounding leather.

For best results, consider applying a leather dye over the filled cracks to match the original color.

Finally, seal the repair with a leather sealer to protect against future damage and keep your sofa looking great. Allow the sealer to dry completely, ensuring a durable and long-lasting finish. For added protection, you can also consider applying a conditioner specifically designed for leather to keep it soft and supple. Additionally, if you’re looking to fix broken wicker furniture, similar care and attention to proper materials and techniques can help extend the life of those pieces as well.

These filler application techniques will help restore your leather sofa's beauty and durability.

Surface Preparation Techniques

effective surface treatment methods

To effectively prepare the leather surface for repair, you should always start by thoroughly cleaning it. Use a specialized leather cleaner or a mild soap solution to remove dirt and oils that could interfere with the repair process.

Before applying any repair products, grab a dry brush or a microfiber cloth to gently wipe away debris, guaranteeing a clean surface for treatment. Additionally, maintaining the leather regularly can prolong its lifespan, similar to how preventive maintenance can extend appliance lifespan considerably.

Advertisement

Next, lightly dampen a microfiber cloth to clean the leather without oversaturating it. Remember, excessive water exposure can lead to further damage. Allow the leather to dry completely overnight; this guarantees a proper bond during the repair.

While waiting, inspect the leather for any deep cracks. If you spot them, you'll want to sand those areas with 600-grit sandpaper to create a smooth surface for filler application.

This step is vital, as a well-prepared surface will lead to better results when you apply the filler and leather conditioner later on. By following these surface preparation techniques, you'll set yourself up for a successful leather repair project.

Applying Leather Dye
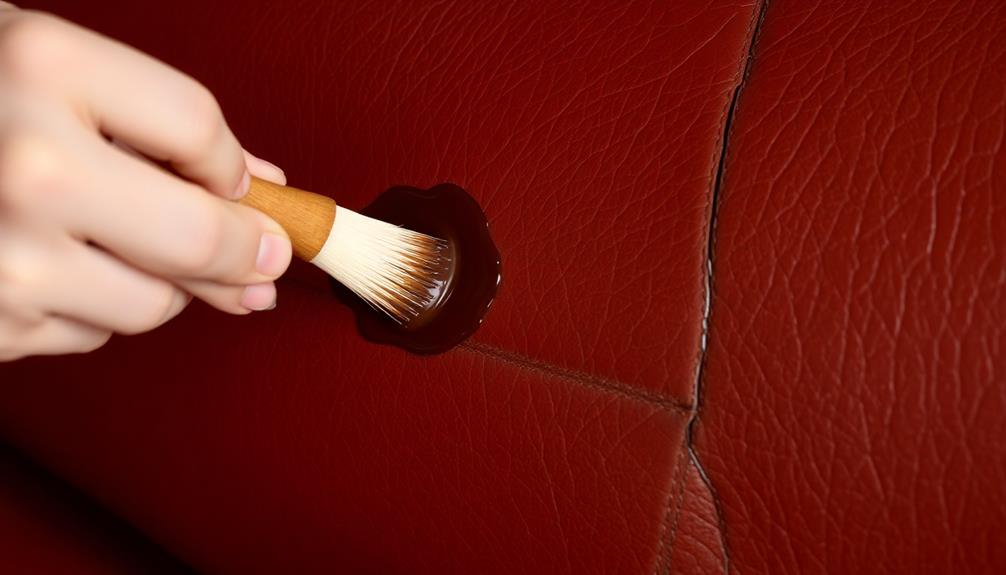
leather dye application process

When you're ready to apply leather dye, selecting a shade that closely matches your sofa's original color is vital for achieving a seamless repair. Start by applying a thin coat of dye over the cracked areas using an applicator pad or color-fast sponge. This technique promotes even absorption without pooling, guaranteeing a smooth finish.

Step Action Tips
1 Choose the right leather dye Match it closely to your sofa's original color.
2 Apply dye Use a thin coat and an applicator pad to prevent excess.
3 Blend deeper cracks Dab dye directly into fissures and rub the surrounding area.

As you apply the dye, utilize a hairdryer on a low setting to dry each coat for about two minutes. Be cautious not to overheat, as this can damage the leather. Repeat the blending process until you achieve your desired color and coverage. After this, you'll want to seal the dyed areas to guarantee protection and durability against future damage. This step is vital for maintaining your sofa's appearance and longevity!

Sealing and Protecting Repairs

repair sealing and protection

Now that you've dyed the repaired cracks, it's essential to seal and protect those areas. Choosing the right leather sealer and applying it correctly will help maintain the integrity of your repairs and prevent future damage.

Additionally, just like the importance of regular maintenance for heat pumps to guarantee longevity and efficiency, regular upkeep of your leather sofa is key.

Advertisement

energy-saving features can also apply to your home furniture care, helping you avoid costly repairs down the line.

Let's explore effective sealing techniques and product options.

Leather Sealing Techniques

How can you guarantee your repaired leather sofa stays protected from future damage? After you've addressed the cracks, it's vital to apply a quality leather sealer to the treated areas. This step enhances durability and protects against further wear.

Using a clean sponge or applicator pad, distribute the sealer evenly over the repaired surfaces to guarantee thorough coverage. Additionally, consider using a vacuum cleaner designed for pet hair removal, as high suction power vacuums can help maintain the overall cleanliness of your sofa.

Once applied, you'll want to cure the sealant. A hairdryer on a low setting for about two minutes works wonders, helping to lock in protection and prevent stains from setting in. Depending on the condition of your sofa, you may find that multiple coats of sealer are necessary. Allow each coat to dry completely before applying the next for best results.

Advertisement

For ongoing maintenance, it's important to regularly reapply the leather sealer every few months. This keeps the protective barrier intact and guarantees your leather remains in good condition over time.

Choosing Protective Products

Selecting the right protective products is essential for maintaining the integrity of your leather sofa after repairs. After you've taken the time to repair cracks, applying a high-quality leather sealer is critical. This sealer not only protects the repaired areas but also enhances durability against stains and damage.

Make certain the leather sealer is compatible with the dye and filler you used for repairs, guaranteeing a seamless finish. When applying the sealer, spray it onto a sponge and rub it into the affected areas, assuring even coverage. This step is important for protecting the leather effectively.

To expedite drying, use a hairdryer on low for about two minutes, helping the sealer cure properly. Regular application of the leather sealer every few months can greatly prolong the life of your sofa and maintain its appearance, especially in high-use areas.

Don't forget to use a leather conditioner periodically, as it helps keep the leather supple and further protects against potential damage. By choosing the right protective products and following these steps, you'll make sure your leather sofa stays looking great for years to come.

Advertisement

Maintenance After Repair

After applying protective products, it's important to focus on maintaining your leather sofa to guarantee the repairs hold up over time.

Start by applying a leather sealer to the repaired areas. This will protect your repairs and enhance durability, preventing future damage. Use a clean sponge or applicator pad to evenly distribute the sealer, making sure of complete coverage.

Once applied, cure the sealer by using a hairdryer on low heat for two minutes. This step helps the product penetrate and bond effectively with the leather.

Regular maintenance is vital, so make it a habit to inspect the sealer every six months. If you notice any wear, reapply the leather sealer to maintain protection against stains and everyday use.

Additionally, store your sofa in a cool, dry place away from direct sunlight and heat sources. This will extend the life of your repairs and prevent future cracking.

Advertisement

By taking these steps, you'll make certain your leather sofa remains beautiful and functional for years to come, keeping your hard work in great shape.

Preventative Care for Leather
leather care maintenance tips

To keep your leather sofa looking its best, regular preventative care is essential.

By following these simple steps, you can maintain the integrity of your leather and prevent drying or cracking.

  • Apply a high-quality leather conditioner every three months for moisture replenishment.
  • Avoid placing your sofa near direct heat sources or sunlight to prevent accelerated drying.
  • Store leather items in an environment with controlled humidity levels, ideally between 40-60%.
  • Conduct regular inspections to catch early signs of cracking, allowing for timely preventative measures.
  • Invest in protective sprays designed for leather to repel water and stains.

Frequently Asked Questions

Can You Repair a Cracked Leather Couch?

Yes, you can repair a cracked leather couch. Start by applying a quality leather conditioner to hydrate the surface. For deeper cracks, use a filler and dye that matches the original color for seamless results.

How Do You Fix a Split Leather Couch?

To fix a split leather couch, you'll first clean the area, then apply a matching leather crack filler. After it dries, sand lightly, dye the repair, and seal it for lasting protection.

Why Is the Leather on My Sofa Cracking?

Did you know about 90% of leather sofa cracking results from neglecting maintenance? Your sofa's leather might be cracking due to drying oils, environmental factors, or simply its age, leading to brittleness and visible fractures.

How Do You Fix Cracked Peeling Leather?

To fix cracked peeling leather, start by cleaning it thoroughly. Then, apply a quality conditioner to hydrate it. For deeper cracks, use a filler, sand it smooth, dye it, and seal the area for protection.

Advertisement

Conclusion

In the end, breathing new life into your cracked leather sofa isn't just about repairs; it's about cherishing the memories woven into its fabric. With a little care and effort, you can restore its beauty and comfort, allowing it to continue being a beloved part of your home. Embrace the journey of revitalization, and let your sofa once again become a cherished gathering place for laughter, stories, and warmth, just as it was meant to be.
Advertisement

Interior Design

Unlock the Secrets of American Interior Design

Find out how to elevate your home’s style with essential American interior design tips that will transform your space into a haven of elegance.

Published

on

discover american interior design

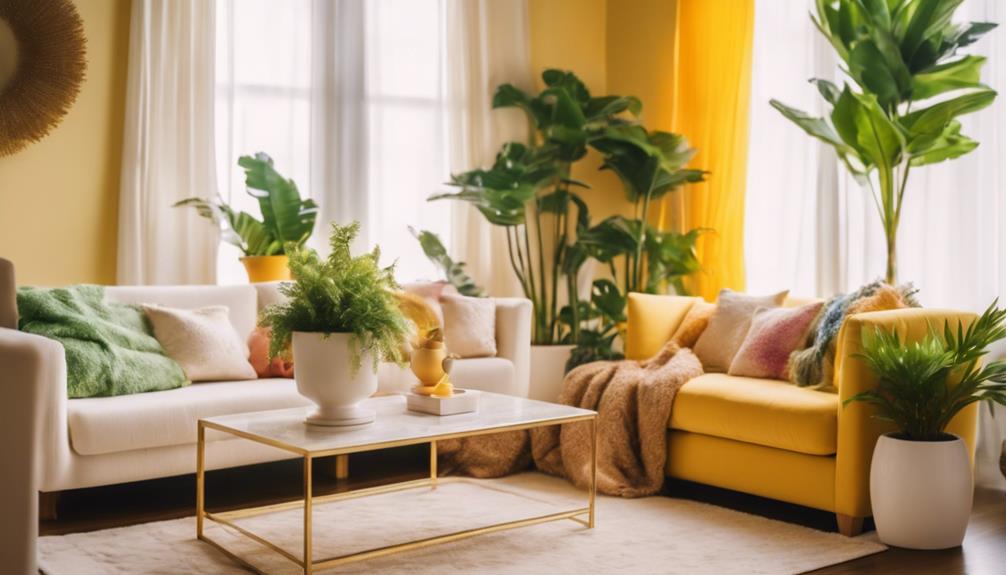
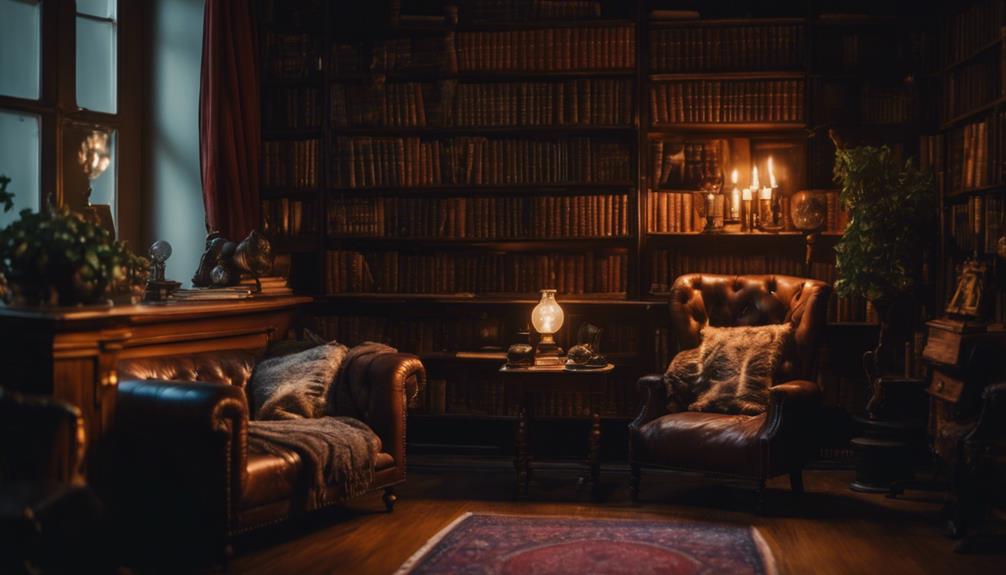
Revealing the secrets of American interior design means mastering key elements like color palettes, furniture, and style blending. Start with a neutral backdrop, adding darker accents for depth. Mix textures and rich materials, like plush fabrics and warm woods, to create a cozy yet elegant atmosphere. Guarantee your furniture combines aesthetics with functionality, mixing classic and modern pieces for visual interest. Layering different elements can enhance comfort and charm. Each choice you make sets the tone for your space. Stick around to discover more tips and tricks that will help transform your home into a stylish sanctuary.

Key Takeaways

  • American interior design often blends traditional and modern styles, creating a timeless appeal through diverse furniture choices and innovative materials.
  • A neutral color palette forms the foundation, enhanced by darker accents and vibrant accent colors for visual contrast and depth.
  • Textures play a crucial role; mixing plush fabrics, warm woods, and sleek materials adds warmth and layers to the design.
  • Area rugs help define spaces while promoting comfort, and layering different textures enhances the overall aesthetic and coziness of a room.
  • Strategic lighting and natural elements elevate the charm, contributing to a harmonious atmosphere that balances elegance and comfort.

Understanding the Color Palette

exploring color theory concepts

When it comes to American interior design, a well-thought-out color palette is essential for creating inviting spaces. Start with a foundation of neutral tones like beige, cream, or gray to establish a calm atmosphere.

Incorporating darker accents, such as navy blue or black, enhances depth and contrast, adding visual interest to your design. Mood boards essential for visualizing design concepts can help you play with these colors before finalizing your choices.

Mixing light and dark colors creates balance, while variations in shades bring richness to the overall aesthetic. Don't forget to integrate different textures and materials seamlessly; doing so elevates your color scheme and adds layers of warmth.

Selecting the Right Furniture

choosing appropriate furniture pieces

Choosing the right furniture is essential for achieving a balanced and inviting space in American interior design. You want pieces that blend aesthetics with functionality. Consider warm wood materials to foster a cozy atmosphere while using area rugs to define spaces. Here's a simple table to visualize your options:

Furniture Type Style Material
Sofa Classic Velvet
Coffee Table Modern Glass
Dining Chairs Shifted Wood
Accent Chair Eclectic Leather

Mixing these elements will create depth and visual interest in your home. Focus on textures and colors that resonate with your personal style, and you'll create an inviting ambiance that reflects your taste.

Blending Classic and Modern Styles

timeless fusion of aesthetics

Blending classic and modern styles can transform your space into a dynamic reflection of your personality. Start by selecting furniture that combines ornate classic pieces with sleek modern designs. This interplay creates a timeless appeal that feels both fresh and inviting.

Incorporate warm wood materials to foster a cozy atmosphere, while mixing in innovative materials for a contemporary touch. Consider integrating elements from modern farmhouse decor trends to enhance the rustic charm of your space.

Advertisement

Choose upholstery that plays with textures, ensuring your selections balance aesthetics with functionality. You'll find that layering different elements adds depth and interest to your interiors.

Exploring Color and Texture

color and texture exploration

Incorporating the right colors and textures can greatly enhance the appeal of your space. Start with a neutral palette, using shades like beige or gray as your foundation.

Then, add darker accents like navy blue or black to create depth and contrast. Mixing light and dark colors not only balances the room but also adds visual interest.

Textures play a vital role too; think plush cushions paired with sleek leather or warm wood finishes. Each texture contributes to a cozy atmosphere and invites touch.

Finally, don't shy away from accent colors; they can bring vibrancy and highlight key design elements.

Choosing Rich Fabrics

selecting luxurious textiles wisely

How can rich fabrics transform your space into a luxurious haven? By selecting the right materials, you can elevate your interior design dramatically.

Consider plush wool or shag rugs to provide warmth underfoot, making your home feel cozy and inviting. Silk draperies add elegance and a touch of sophistication to your windows, creating a refined ambiance.

Advertisement

Velvet upholstery not only enhances the opulence of your furniture but also contributes to a tactile experience that's hard to resist. When you carefully mix these rich fabrics, you'll create a harmonious blend of textures that captivates the eye.

Ultimately, your choices in fabrics can set the tone, making every room feel more inviting and luxurious.

Creative Texture Layering

artistic design techniques employed

Rich fabrics set the stage for creating a luxurious environment, but the magic truly happens when you start layering textures creatively.

Embrace the interplay of diverse materials like soft linens, sleek leathers, and plush rugs. This combination not only enhances comfort but also adds depth and visual intrigue to your space.

Consider using velvet cushions atop a smooth leather sofa, or draping silk throws over a cozy knit blanket. Each layer contributes its unique sensory appeal, inviting you to explore the room.

Don't shy away from mixing patterns and colors; they can elevate the overall aesthetic.

Advertisement

Thoughtfully selecting and arranging these elements will transform your living area into a warm, inviting haven, showcasing your personal style and creativity.

Assessing Overall Design Impact

evaluating design s overall influence

The overall impact of American Style Interior Design hinges on a seamless blend of comfort and elegance that resonates throughout the space.

You'll notice how each element, from color to texture, works together to create a harmonious atmosphere. Neutral tones set the stage, while darker accents add depth and contrast.

When choosing furniture, consider a mix of classic and modern pieces to achieve timeless appeal. Layering rich fabrics like velvet and silk enhances both comfort and sophistication, while incorporating high-quality content can further elevate your design narrative.

Don't overlook the importance of strategic lighting and natural elements, as they elevate the overall charm.

Frequently Asked Questions

What Are the Common Mistakes in American Interior Design?

You often overlook the importance of a cohesive color palette, crowd spaces with excessive furniture, and neglect proper lighting. Misjudging scale and mixing styles without balance can also lead to disjointed and uncomfortable interiors.

Advertisement

How Can I Personalize My American Interior Design Style?

Did you know 70% of homeowners personalize their spaces? You can add personal touches by incorporating meaningful decor, choosing a color palette you love, and mixing furniture styles to reflect your unique taste and lifestyle.

What Role Does Lighting Play in American Interior Design?

Lighting sets the mood and highlights your design choices. It creates warmth, enhances textures, and showcases color palettes. You'll want to layer different light sources to achieve depth and comfort throughout your space.

How Do I Maintain My Furniture in American Style Interiors?

Imagine your furniture as cherished companions; they need care. Regular dusting, gentle cleaning, and avoiding direct sunlight preserve their beauty. Embrace their stories, and they'll continue to enrich your space with warmth and character.

What Are the Best Plants for American Interior Design Aesthetics?

When selecting plants for your American interior, consider low-maintenance options like snake plants or pothos. They enhance warmth and charm while complementing your color palette, adding life and vibrancy to your overall design.

Conclusion

Incorporating American interior design elements can truly transform your home, making it a reflection of your style and comfort. Did you know that 75% of homeowners believe their interior design choices greatly impact their mood? By understanding color palettes, selecting the right furniture, and creatively layering textures, you can create inviting spaces that uplift your spirits. Embrace these design secrets and watch as your living environment evolves into a harmonious blend of elegance and functionality.

Advertisement
Continue Reading

Interior Design

Color Psychology in Room Design: A Complete Science-Based Guide

Transform your space with the power of color psychology; discover how hues can shape emotions and elevate your room’s ambiance in our complete guide.

Published

on

color impact on interiors

Color psychology plays an essential role in room design, influencing emotions and creating desired atmospheres. By understanding color theory, you can select hues that evoke calmness, joy, or creativity. For instance, soft blues promote tranquility, while vibrant yellows can energize a space. Consider using structured color schemes like monochromatic or complementary to enhance visual appeal. Start with neutral walls to allow bold accents to shine. Testing colors in various lighting conditions is critical for accurate perception. If you want to master these concepts and learn strategies to apply them effectively, the journey towards vibrant and inviting spaces awaits you.

Key Takeaways

  • Understanding color theory is essential; primary, secondary, and tertiary colors impact emotional responses and room ambiance significantly.
  • Calming colors like blues and greens enhance tranquility, suitable for bedrooms, while yellows stimulate energy and happiness when used sparingly.
  • Structured color schemes such as complementary and monochromatic create visual harmony and emotional resonance in design.
  • Testing colors under different lighting conditions helps observe their effects throughout the day, ensuring appropriate mood settings.
  • Consulting color experts can provide tailored schemes based on color psychology principles, enhancing overall aesthetics and preventing clashing palettes.

Understanding Color Theory

mastering color relationships efficiently

When you immerse yourself in color theory, you're exploring the science and art behind how colors interact and impact our emotions. This intriguing field combines physics and psychology to help you understand the psychological effects colors have on human perception.

The color wheel, developed by Isaac Newton, is your foundational tool, categorizing primary colors like red, yellow, and blue, which mix to create secondary and tertiary colors.

Understanding hue is essential, as it refers to the distinct color itself. When you modify a hue with tints, shades, or tones, you can achieve a variety of emotional responses.

Using structured color schemes, such as monochromatic, complementary, or analogous, allows you to blend colors effectively for aesthetic appeal and emotional resonance.

Incorporating calming colors, like soft blues and greens, can transform a space into a tranquil retreat, while vibrant yellows may evoke happiness and energy.

Advertisement

Emotional Impact of Colors

colors influence emotions deeply

Colors considerably influence our emotions, often dictating the overall atmosphere of a room. Understanding the emotional impact of colors can enhance your design choices and create spaces that resonate with your feelings.

Here are three key colors and their effects:

  1. Blue: This color promotes calmness and focus, making it perfect for offices or study rooms. It helps you concentrate and reduces stress, creating a tranquil environment.
  2. Green: Associated with nature and rejuvenation, green evokes feelings of safety and tranquility. It's an ideal choice for bedrooms or living rooms where relaxation is a priority.
  3. Yellow: Linked to happiness and optimism, yellow can uplift a room's mood. However, use it sparingly, as too much intensity can lead to agitation.

Incorporating colors like purple can also spark creativity, with brighter shades invigorating a space and softer tones fostering serenity.

Color Schemes in Design

effective design color palettes

Color Schemes in Design

Choosing the right color scheme is essential for creating a harmonious and inviting environment in any room. Color schemes like complementary, monochromatic, and triadic play a vital role in establishing visual harmony and emotional impact.

For instance, complementary color schemes use colors opposite each other on the color wheel, generating vibrant contrast that energizes a space. In contrast, monochromatic schemes focus on variations of a single color, promoting cohesion and tranquility. Incorporating elements from your interior design mood board can enhance this process, allowing for a more cohesive design approach that reflects your desired atmosphere.

Creating an Interior Design Mood Board will help you visualize your choices effectively.

Analogous color schemes, which feature colors adjacent on the color wheel, create serene and comfortable settings, making them perfect for relaxation areas like bedrooms. On the other hand, triadic color schemes incorporate three evenly spaced colors, offering a balanced yet dynamic palette ideal for social spaces like dining rooms.

Advertisement

The proportions of colors you choose to implement greatly affect their interaction within the design. Bold colors should be balanced with neutrals to avoid overwhelming visuals, enhancing the overall aesthetic.

Staying attuned to current design trends can also guide your color choices, ensuring that your room design resonates with contemporary styles while reflecting your personal taste.

Practical Implementation Strategies

effective execution techniques

Incorporating color into your room design involves understanding how different hues influence mood and atmosphere.

To effectively use color psychology, you need to take into account the psychological effects of specific shades. Here are three practical implementation strategies:

  1. Choose Your Base: Start with a neutral color for your walls, like soft grays or whites, to create a calming backdrop. This allows you to incorporate an accent color, such as vibrant yellow, to add energy without overwhelming the space.
  2. Test Lighting: Use both natural and artificial lighting to see how your chosen room colors change throughout the day. Lighting can greatly affect color perception, so don't skip this step.
  3. Incorporate Elements: Utilize various elements like paint, textiles, and decorative accessories to weave your color scheme together.

For instance, balance calming blues in fabrics and art with your accent color to enhance the overall aesthetic.

Consulting Color Experts

expert color consultation services

How can you guarantee your color choices truly resonate with your personal style and emotional needs? Consulting color experts can be the key. These professionals provide tailored color schemes that enhance your space's ambiance while aligning with your design preferences. Their expertise helps you navigate complex color theories and psychological impacts, assuring your selections support the intended mood and functionality.

During an in-home consultation, color experts assess your lighting, existing furnishings, and space dimensions, leading to well-informed color choices. They collaborate with interior designers to integrate color psychology principles, creating environments that promote well-being and comfort. By utilizing their knowledge, you can avoid the pitfalls of color overload or clashing palettes, resulting in a balanced design.

Here's a quick overview of the benefits of consulting color experts:

Advertisement
Benefit Description
Tailored Color Schemes Aligns with your emotional needs and style
In-Home Consultation Evaluates your space for informed choices
Psychological Insight Assures colors support desired mood and function
Collaboration Works with interior designers for cohesive design
Balanced Aesthetics Prevents color overload and enhances ambiance

With their guidance, you can create a harmonious and inviting space.

Continuous Learning in Color Psychology

color psychology continuous learning

Staying current in color psychology can open up new avenues for enhancing your design projects. By engaging in continuous learning, you'll not only grasp the latest findings on how colors influence mood and behavior but also apply them practically in your work.

Here are three ways to keep your knowledge fresh:

  1. Participate in Workshops: Join workshops or webinars that focus on color theory and its practical applications. These events often feature insights from experts, providing invaluable knowledge about psychological effects and design trends.
  2. Explore Online Courses: Enroll in online courses that explore color interactions and the evolving perceptions of color in society. This structured learning can deepen your comprehension and inspire innovative ideas.
  3. Utilize Community Resources: Connect with other designers and color experts through community resources. Engaging in discussions fosters collaboration and can lead to fresh concepts in your projects.

Frequently Asked Questions

What Is the Psychology of Colors in a Room?

Colors in a room affect how you feel and behave. For instance, blue calms you, while red energizes conversations. Choosing colors mindfully can enhance your mood and create the atmosphere you want in your space.

What Is the Science of Color in Interior Design?

Think of color as the soul of a room. The science of color in interior design explores how hues influence emotions and behaviors, shaping your experience and interactions within a space, creating harmony or evoking feelings.

What Is the Science Behind Color Psychology?

The science behind color psychology explores how colors affect your emotions and behaviors. Different hues can trigger specific feelings, influencing your mood, decisions, and even cognitive functions, shaping your overall experience in various environments.

How Do Interior Designers Use Color Psychology?

Imagine walking into a room that instantly lifts your spirits. Interior designers use color psychology to evoke emotions, selecting hues that energize, calm, or inspire, ensuring each space feels just right for you.

Advertisement

Conclusion

Incorporating color psychology into your room design can transform your space and mood. Did you know that 85% of consumers make decisions based on color? This statistic highlights just how powerful color can be in influencing emotions and behaviors. By understanding color theory and choosing the right schemes, you can create an environment that not only looks good but also feels right. Embrace these strategies, and you'll enhance both your space and your well-being.

Continue Reading

Interior Design

Master the Art of Drying Corn Stalks

Bring your corn stalks to life with expert drying techniques, but discover the secret to keeping them vibrant and durable for years to come.

Published

on

drying corn stalks techniques

To master the art of drying corn stalks, start by selecting sturdy, healthy stalks free from mold and pests. Cut them close to the ground using sharp tools to guarantee a clean harvest. Once harvested, hang the stalks upside down in a cool, dry area with good ventilation. Monitor the temperature, keeping it between 100-120°F, and check moisture levels regularly, aiming for below 15%. Store your dried stalks in a cool, dark place to prevent fading. With these techniques, your corn stalks will stay vibrant and durable. Keep going to discover more tips and creative uses for your dried stalks!

Key Takeaways

  • Select sturdy, healthy corn stalks free from mold and pests to ensure successful drying.
  • Cut stalks close to the ground using sharp tools to maintain their integrity.
  • Hang stalks upside down in a cool, dry place with good air circulation for effective drying.
  • Monitor drying conditions, aiming for temperatures between 100-120°F and humidity below 15%.
  • Store dried stalks in a cool, dark area to preserve color and prevent degradation.

Selecting the Right Corn Stalks

choose optimal corn stalks

When you're out in the field, look for sturdy corn stalks that stand tall and strong. You want stalks that are free from mold and pest damage, guaranteeing your selection is healthy.

Choose corn varieties known for their durability and thick, robust stalks. Inspect each stalk closely, avoiding those with signs of rot or decay.

Utilize sharp, clean harvesting tools to prevent contamination during the cutting process. Remember, the right selection not only enhances the beauty of your decor but also guarantees its longevity.

By taking the time to choose wisely, you set the stage for a successful drying process, leading to a stunning final product that showcases your effort and care.

Happy harvesting!

Advertisement

Harvesting Techniques for Drying

effective drying methods explained

To effectively prepare your corn stalks for drying, it's crucial to start with proper harvesting techniques. First, choose sturdy stalks free from mold and pest damage. Use sharp garden shears or machetes to cut the stalks close to the ground, minimizing damage. Remove any leaves and debris to guarantee a clean harvest, making them ready for drying.

Here's a quick reference table for effective harvesting:

Step Action Purpose
Choose Stalks Select strong, healthy stalks Guarantees durability
Use Sharp Tools Cut with clean instruments Prevents contamination
Remove Leaves Clean stalks before drying Improves drying efficiency
Cut Close to Ground Minimize damage Preserves stalk integrity

Following these techniques will set you up for successful drying.

Effective Drying Methods

optimal moisture removal techniques

After harvesting your corn stalks properly, the next step is to implement effective drying methods. One of the best techniques is hanging the stalks upside down in a cool, dry place. This encourages even drying and prevents curling.

You can also use a dehydrator to speed up the process, guaranteeing vibrant colors while minimizing decay. Make certain to monitor air circulation by spacing the stalks adequately.

If you opt for indoor drying, keep humidity levels low and guarantee proper ventilation to prevent mold growth. Whichever method you choose, consistency is key.

Regularly check for mold and mildew, and adjust your setup as needed to achieve the best results for your dried corn stalks.

Advertisement

Optimal Drying Conditions

ideal drying environment parameters

For successful drying of corn stalks, maintaining ideal conditions is crucial. Aim for a temperature range of 100-120°F to facilitate gentle drying without causing brittleness.

Make sure you have good ventilation in your drying area, as proper airflow prevents mold growth and promotes even drying. Choose a cool, dry environment, ideally with low humidity, to enhance the drying process.

If you're hanging stalks, select a shady spot to avoid rapid drying, which can lead to color loss. Monitor the drying duration, typically around 6-8 hours, to achieve best results.

Monitoring the Drying Process

observing moisture evaporation stages

Monitoring the drying process is essential to confirm your corn stalks achieve ideal results. You should regularly check their moisture levels, aiming for below 15%.

Proper air circulation is key, so space the stalks adequately to promote even drying. Inspect for signs of mold or mildew; if you find any affected stalks, remove them immediately to prevent further contamination.

Turning the stalks occasionally will help guarantee they dry uniformly.

Here are some quick tips to keep in mind:

Advertisement
  • Check moisture levels frequently.
  • Confirm good air circulation between stalks.
  • Rotate stalks regularly for even drying.

Storing Dried Corn Stalks

properly storing corn stalks

Once your corn stalks are properly dried, storing them correctly is key to preserving their quality and appearance. Choose a cool, dry location to keep them safe from humidity and heat, ideally between 60-70°F. Avoid direct sunlight, as it can lead to fading. Use well-ventilated areas to prevent moisture buildup and wrap the stalks in breathable materials to protect against dust and insects. Here's a quick guide to help you store your dried corn stalks effectively:

Storage Method Location Type Additional Tips
Upright Storage Indoor Keep stalks away from windows
Hanging Dry Shed/Room Use sturdy hooks or lines
Wrapped Closet/Storage Use cotton or burlap bags
Ventilated Container Basement Check regularly for pests

Creative Uses for Dried Stalks

innovative dried stalk crafts

Dried corn stalks offer a versatile material for various creative projects, making them perfect for enhancing your seasonal decor or crafting unique items.

You can transform these sturdy stalks into beautiful decorations that bring a rustic charm to your home. Here are a few ideas to spark your creativity:

  • Create eye-catching wreaths for your front door.
  • Craft adorable corn husk dolls for a nostalgic touch.
  • Design stunning centerpieces for your dining table.

With dried corn stalks, the possibilities are endless.

Whether you're looking to celebrate autumn or add a handmade touch to your decor, these natural materials can help you achieve that rustic aesthetic effortlessly.

Let your imagination run wild and enjoy the crafting process!

Maintaining Dried Corn Stalks

preserving dried corn stalks

To keep your dried corn stalks looking their best, store them properly in a cool, dry place. Aim for temperatures between 60-70°F to prevent brittleness and fading. Avoid direct sunlight, as it can diminish their vibrant colors.

Regularly check for signs of mold or pests, and promptly remove any affected stalks to maintain quality. Consider using protective sprays to enhance durability and help preserve their natural appearance.

When displaying your stalks, handle them with care to avoid breakage, and store them upright or hang them to maintain their shape.

Advertisement

Frequently Asked Questions

Can I Dry Corn Stalks in Humid Weather?

You can dry corn stalks in humid weather, but it's challenging. Guarantee proper air circulation and choose a well-ventilated area. Monitor them closely for mold, and consider using a dehumidifier to assist the process.

How Do I Know When Dried Stalks Are Ready for Storage?

When dried stalks whisper gently, they're ready for storage. Check moisture levels; below 15% is ideal. If they feel brittle yet flexible, you've achieved perfect dryness. Store them carefully, preserving their rustic charm.

Are There Specific Corn Varieties Better for Drying?

Yes, certain corn varieties are better for drying. Look for sturdy, thick stalks without damage. Varieties like Indian corn or field corn provide durability and vibrant colors, making them ideal for your drying projects.

How Long Do Dried Corn Stalks Last?

Dried corn stalks can last several months to a few years if stored properly. Keep them in a cool, dry place, away from sunlight, to maintain their color and prevent brittleness or mold.

Can I Dye Dried Corn Stalks for Decoration?

Yes, you can dye dried corn stalks for decoration! Use fabric dye or spray paint, ensuring the stalks are clean and dry. Experiment with colors to create vibrant, personalized decor pieces that enhance your space.

Advertisement

Conclusion

Now that you've mastered the art of drying corn stalks, release your creativity and let your imagination run wild. With a little effort, these vibrant stalks can transform your home into a canvas of rustic charm, capturing the essence of autumn's embrace. As you weave them into your seasonal decor, remember that each dried stalk tells a story, inviting warmth and nostalgia into your space. So grab those stalks, and let your decor shine like a golden harvest!

Continue Reading
Advertisement

Affiliate disclaimer

As an affiliate, we may earn a commission from qualifying purchases. We get commissions for purchases made through links on this website from Amazon and other third parties.

Advertisement

Vetted

sustainable fashion photography studios sustainable fashion photography studios
Vetted1 week ago

6 Best Eco-Conscious Fashion Photography Studios: Equipment Guide

Overview the top 6 eco-conscious fashion photography studios and discover how their innovative equipment choices can inspire your sustainable journey.

eco friendly fashion styling kits eco friendly fashion styling kits
Vetted1 week ago

15 Best Professional Sustainable Fashion Styling Kits for Eco-Conscious Stylists

Highlighting the 15 best sustainable fashion styling kits for eco-conscious stylists, discover how to elevate your wardrobe responsibly and stylishly.

hemp fashion photography backdrops hemp fashion photography backdrops
Vetted1 week ago

6 Best Hemp-Based Fashion Photography Backdrops for Stunning Shoots in 2025

Discover stunning hemp-based fashion photography backdrops that elevate your shoots in 2025, but there's more to explore beyond just their...

nordic minimalist fashion accessories nordic minimalist fashion accessories
Vetted1 week ago

6 Best Nordic Sustainable Fashion Accessories for Embracing Minimalist Style in 2025

Find out the six must-have Nordic sustainable fashion accessories for 2025 that elevate minimalist style—your next favorite piece is waiting...

affordable sustainable fashion lighting affordable sustainable fashion lighting
Vetted1 week ago

15 Best Sustainable Fashion Photography Lighting Sets Under $500 That Will Elevate Your Shots

You won't want to miss these top 15 sustainable fashion photography lighting sets under $500 that can transform your photography...

vegan fashion styling essentials vegan fashion styling essentials
Vetted1 week ago

The 6 Best Vegan Fashion Styling Products of 2025: A Professional Guide to Sustainable Style

Find out the top six vegan fashion styling products of 2025 that merge sustainability and style, and discover how they...

sustainable mediterranean fashion collections sustainable mediterranean fashion collections
Vetted1 week ago

5 Best Mediterranean-Inspired Sustainable Fashion Collections to Watch in 2025

Get ready to explore five breathtaking Mediterranean-inspired sustainable fashion collections for 2025 that redefine style and ethics in the industry.

eco friendly hair accessories collection eco friendly hair accessories collection
Vetted1 week ago

15 Best Professional Sustainable Hair Accessories Made From Natural Materials You Need to Try

You won't believe the stunning sustainable hair accessories made from natural materials that can elevate your style while being eco-friendly;...

sustainable art deco fashion sustainable art deco fashion
Vetted1 week ago

15 Best Sustainable Art Deco Fashion Pieces That Combine Elegance and Eco-Friendliness

You won't believe how these 15 stunning sustainable Art Deco fashion pieces redefine elegance and eco-friendliness—discover the perfect additions to...

affordable sustainable fashion tools affordable sustainable fashion tools
Vetted1 week ago

4 Best Eco-Friendly Fashion Styling Tools Under $150 That You’ll Love

Discover the top four eco-friendly fashion styling tools under $150 that combine style and sustainability, and learn why they deserve...

eco friendly photography gear guide eco friendly photography gear guide
Vetted1 week ago

15 Best Sustainable Fashion Photography Equipment to Elevate Your Eco-Friendly Shoots

Discover the top 15 sustainable fashion photography tools that not only enhance your shoots but also promote eco-friendly practices—what's on...

aesthetic led strip lights aesthetic led strip lights
Vetted1 week ago

15 Best LED Strip Lights for Aesthetic Room Transformations: The Ultimate 2025 Guide

Prepare to elevate your room's aesthetic in 2025 with the 15 best LED strip lights that promise to transform your...

Trending

Copyright © 2024 StyleGuru.org Affiliate disclaimer As an affiliate, we may earn a commission from qualifying purchases. We get commissions for purchases made through links on this website from Amazon and other third parties.