To fix your leather sofa, begin by assessing the damage to identify any scratches or tears. Use a leather cleaner and a soft cloth to clean the affected area. For minor scratches, apply leather filler and smooth it out; for larger tears, cut a patch slightly larger than the damage and secure it with leather adhesive. After the repairs have dried, use leather dye to blend the mended area with the rest of the sofa. Lastly, condition the leather every few months to preserve its softness. Continue reading for a more comprehensive step-by-step repair process and helpful resources.
Key Takeaways
- Assess the damage by inspecting for scratches, tears, and discoloration before deciding on a repair method.
- Clean the leather surface thoroughly using a leather cleaner and soft cloth to prepare for repairs.
- Use leather filler for small scratches and secure a patch with adhesive for larger tears.
- Apply leather dye after repairs to blend the color with the surrounding area, sealing with conditioner afterward.
- Consider professional help for extensive damage or color loss beyond simple DIY repairs.

DRMTLGY Microdermabrasion Scrub – Face Exfoliator to Smooth & Polish Dull, Rough Skin – Gentle Facial Scrub with Pumice – 2 oz
- Gentle Exfoliation: Non-abrasive pumice granules for gentle buffing
- Smooths and Softens Skin: Enriched ingredients for a refined, radiant complexion
- Improves Skin Tone: Reduces uneven texture and fine lines
As an affiliate, we earn on qualifying purchases.
Assessing the Damage
How can you effectively assess the damage on your leather sofa? Start by visually inspecting the surface for visible signs like scratches, tears, or discoloration. Make a note of their locations and severity.
You'll want to use a leather cleaner and a soft cloth to clean around the damaged areas, as this gives you a clearer view and prepares the surface for any leather repair work. Additionally, consider the impact of environmental factors, such as humidity and temperature, which can affect the leather's condition.
For instance, using essential oils for leather care can help maintain the leather's suppleness.
For small scratches and minor tears, determine if they're superficial or if they penetrate deeper into the leather. This assessment will guide you in choosing the right repair method.
If you encounter larger damages, measure the size and shape of the tear or hole. This will help you decide if a patch is necessary and how to cut it properly.
Cleaning the Leather Surface

Regular cleaning is vital to keep your leather sofa looking its best. Start by using a soft cloth and a leather cleaner specifically designed for leather surfaces. This will gently remove dirt and grime without causing damage. Always test the cleaner on a small, inconspicuous area first to verify it doesn't discolor or harm the leather.
For ideal air quality, consider using an air purifier to reduce allergens that can settle on your furniture, as air quality considerations can also impact the maintenance of your leather.
For deeper cleaning, you can use a mixture of equal parts vinegar and water. Apply it with a soft cloth, and make sure to wipe it dry promptly to prevent moisture absorption, which could lead to damage. Remember, avoiding harsh chemicals or abrasive materials is essential, as they can create cracks or discoloration in the leather.
Aim to clean your leather sofa every few months. This routine maintenance won't only enhance its appearance but also prolong its lifespan by preventing the buildup of dirt and oils.
Patching Small Scratches and Tears
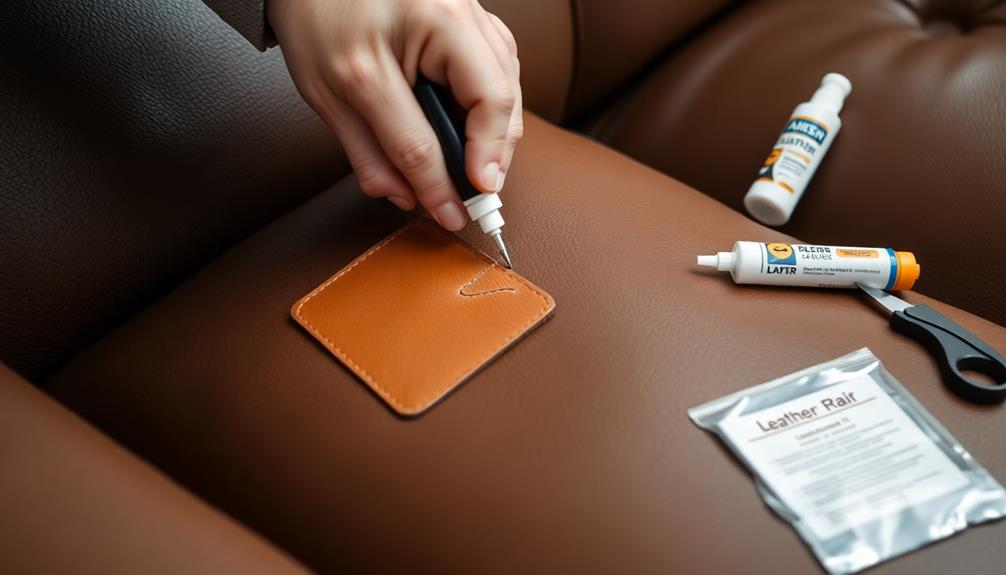
When you notice small scratches or tears on your leather sofa, it's important to have the right repair tools on hand.
Using high-quality materials, similar to how one would choose jewelry materials for body piercings, will guarantee a durable fix.
You'll follow a step-by-step process to guarantee a seamless fix that restores the appearance of your furniture.
Let's explore the essential tools and the exact steps you need to take for effective patching.
Essential Repair Tools
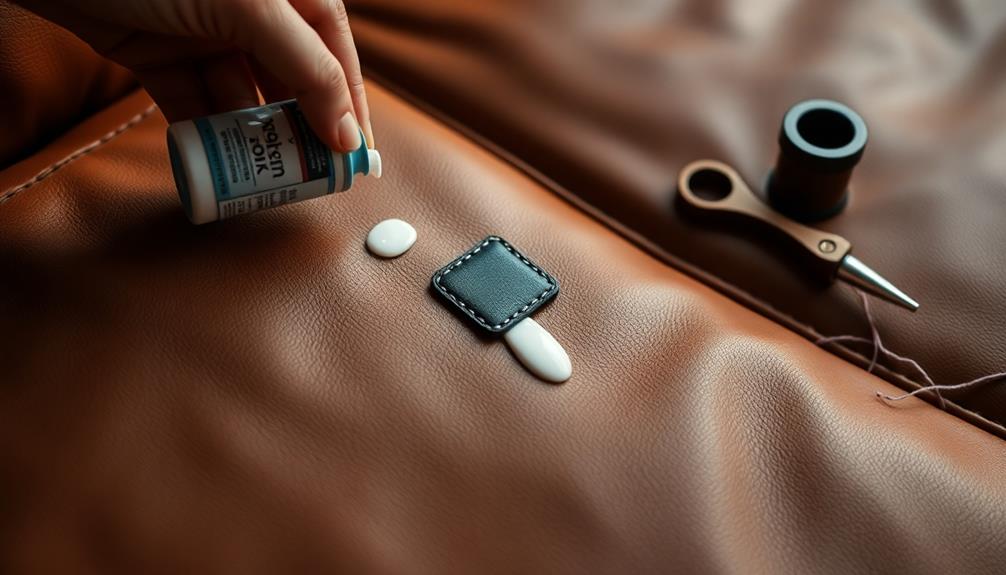
Patching small scratches and tears on your leather sofa requires a few fundamental tools to guarantee a seamless repair. First, you'll need a soft cloth to clean the damaged area, removing dirt and oils that could interfere with the process.
Additionally, ensuring your workspace is free from dust and debris can enhance the quality of the repair, similar to how best vacuums for dust removal can improve indoor cleanliness. Next, sharp scissors are essential for trimming any loose fibers around the tear, ensuring a smooth surface for the repair.
A spatula is also necessary; it helps you apply leather filler evenly, contributing to a professional finish. Once the filler has dried, fine-grit sandpaper will smooth out the repaired area, making it blend more naturally with the surrounding leather furniture.
To achieve a uniform appearance, leather dye is critical. It allows you to match the color of the repaired section with the rest of your leather furniture seamlessly.
Investing in a quality leather repair kit can streamline the process, as it typically includes filler, dye, and the application tools you'll need for repairing leather. With these fundamental repair tools on hand, you'll be well-equipped to tackle any small scratches or tears, restoring your leather sofa to its former glory.
Step-by-Step Repair Process
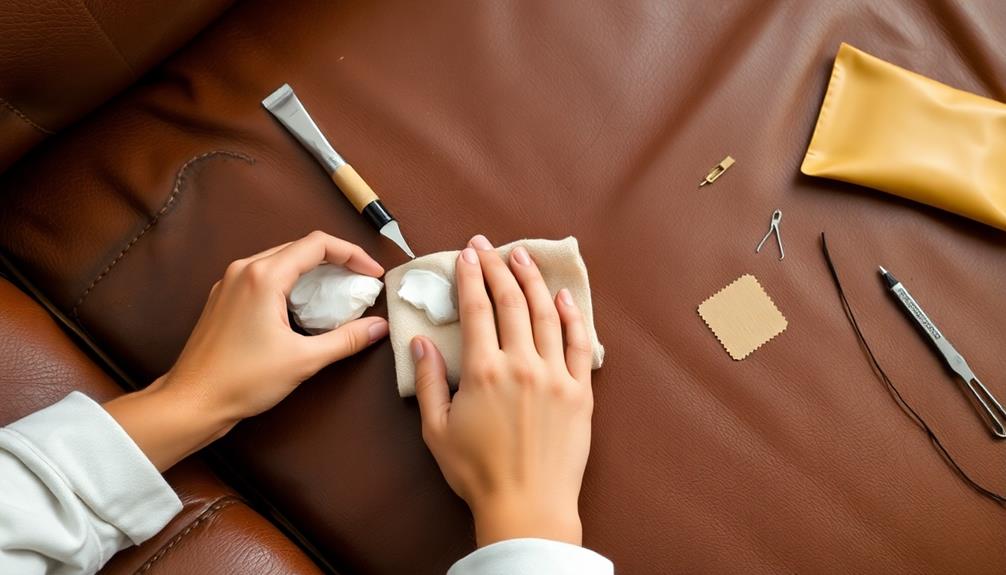
With your repair tools gathered and ready, you can start fixing those small scratches and tears on your leather sofa. First, clean the area around the scratch with a soft cloth and a mild leather cleaner to remove any dirt or debris. Then, apply a leather filler or patch kit, following the manufacturer’s instructions to ensure a seamless fix. If you’re also repairing damaged wicker material on your couch or chair frames, it’s essential to have the proper tools and matching material to restore their original appearance.
Begin by cleaning the damaged area with a soft cloth and a leather cleaner to remove any dirt or oils that might interfere with the repair. It's important to guarantee that your cleaning products are safe for leather to avoid causing further damage, similar to how appliance maintenance plans help in prolonging the life of your appliances.
Next, grab sharp scissors and trim any loose fibers around the tear, ensuring you create a clean edge for better adhesion.
Now, it's time to apply a matching leather filler using a spatula. Make sure to let it dry completely before adding more layers if the scratches or tears are deeper.
Once the filler is dry, take fine-grit sandpaper and gently sand the area to achieve a smooth finish that blends seamlessly with the surrounding leather couch.
Repairing Larger Tears and Holes
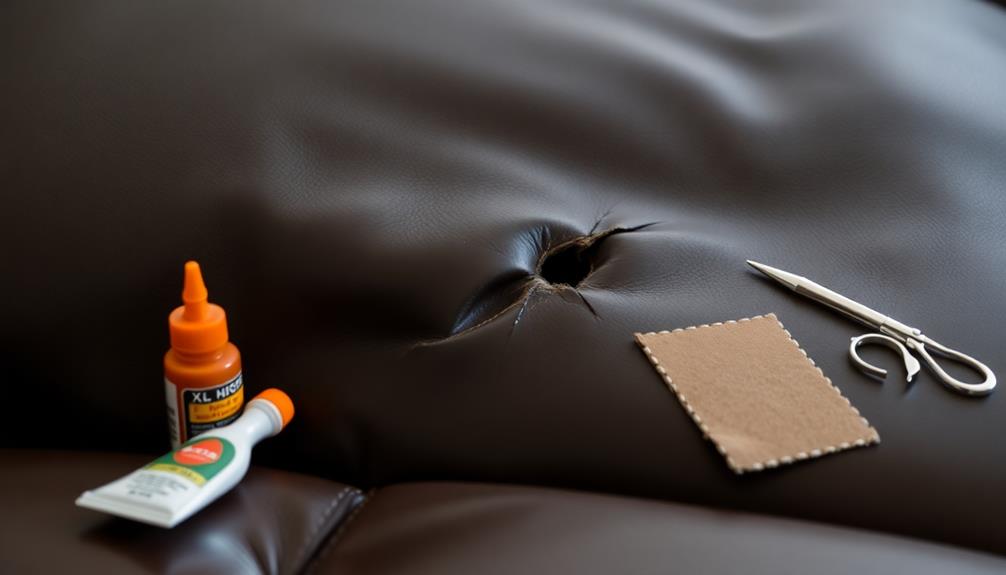
If you notice larger tears or holes in your leather sofa, tackling the repair promptly can prevent further damage. Ignoring significant damage may lead to costly replacements or irreversible wear over time. It’s crucial to consult a professional or use specialized leather repair kits to ensure the job is done correctly. While you’re addressing the leather issues, you may also want to check for any sagging or discomfort, and look into *sofa spring repair tips* to enhance both the longevity and comfort of your furniture.
Start by measuring the tear or hole, then cut a leather patch that's slightly larger than the damaged area. This guarantees you have enough coverage for a solid fix. Using a leather-specific adhesive is essential for durability, as it provides a strong bond that can withstand wear and tear, much like choosing the best home printers for quality results assures consistent performance.
Next, use tweezers to insert the patch behind the tear. Make sure it lies flat against the leather surface for a seamless appearance. Once positioned, apply a leather-specific adhesive along the edges of the tear. Press the patch firmly onto the damaged area to secure it in place.
After the patch is attached, fill any gaps or holes with leather filler, smoothing it out as needed. Once the filler dries, sand the area lightly with fine-grit sandpaper to create a smooth and even surface. This step is vital for a polished look.
Applying Leather Dye
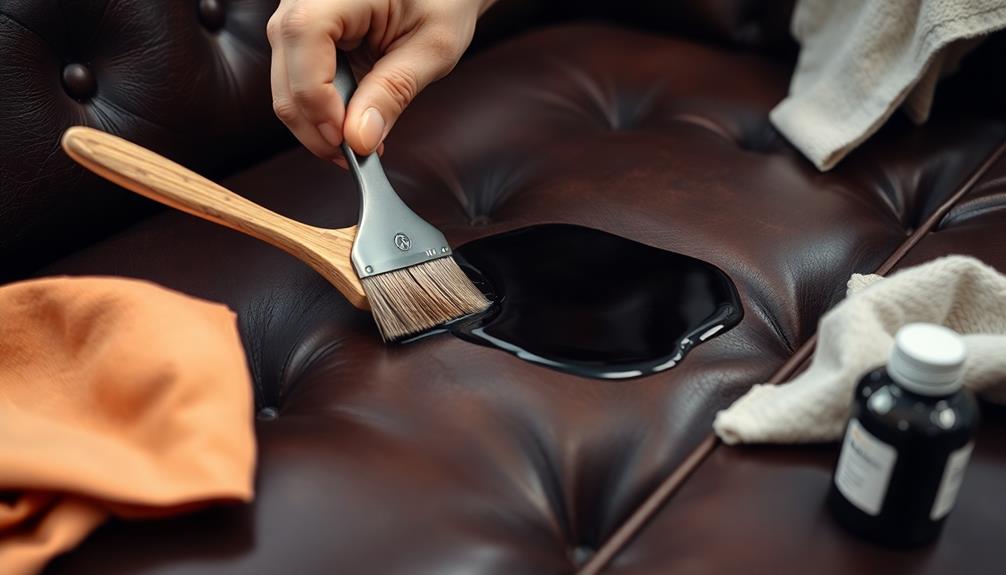
Before applying leather dye, you need to prepare the surface by cleaning it thoroughly with a leather cleaner and a soft cloth.
It's essential to recognize that much like individuals with BPD dynamics in relationships, the quality of the leather's surface can considerably affect the outcome of the dye application.
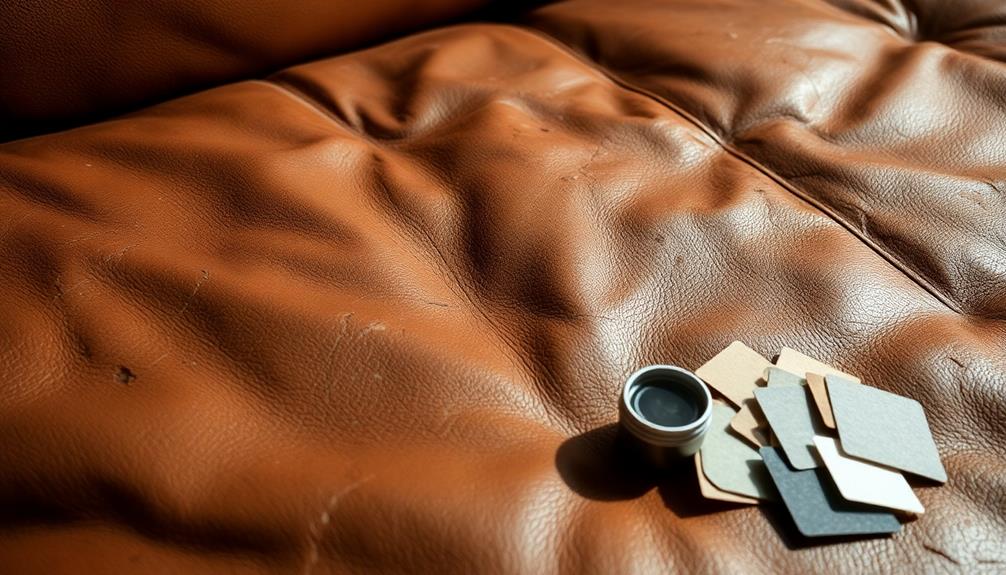
Choosing the right dye is vital, so pick one that matches your sofa's color and is compatible with its leather type.
Once you've got that sorted, you're ready to start the dyeing process for a fresh, vibrant look.
Preparing the Leather Surface
To achieve a successful leather dye application, it's crucial to start with a clean surface. Use a soft cloth and a leather cleaner to wipe away any dust or dirt. This step guarantees that the dye adheres properly to the leather. Next, select a leather dye that closely matches your sofa's original color for a seamless repair. The Leather & Vinyl Complete Repair Kit offers a variety of shades to choose from.
When applying the dye, use a sponge or applicator to spread it in thin, even layers. Let each coat dry completely before adding more for the best color saturation. After dye application, lightly sand the repaired area with fine-grit sandpaper to help blend the texture with the surrounding leather.
Finally, for long-lasting results, seal the dyed area with a leather conditioner once it has dried. This helps maintain flexibility and prevents cracking.
| Step | Action |
|---|---|
| Clean Surface | Wipe with a soft cloth and leather cleaner |
| Apply Dye | Use a sponge/applicator in thin layers |
| Seal and Protect | Use leather conditioner after drying |
Choosing the Right Dye
After preparing the leather surface, selecting the right dye becomes a key step in achieving a seamless repair. First, make certain you choose a dye that matches the specific type of leather—Aniline, Semi-Aniline, or Pigmented. This compatibility is vital for ideal results, as using the correct dye enhances content quality and topical authority of your repair efforts.
Next, consider using a dye that offers a color matching option. Many kits provide base colors and tints, allowing you to mix and achieve your desired shade. Before applying it to the entire area, always test the dye on a small, inconspicuous spot to check for compatibility and color accuracy.
When you're ready to dye, use a sponge or brush to apply the dye in thin layers. Allow each layer to dry completely before adding more. This method helps you achieve a more even finish.
Preventing Future Damage
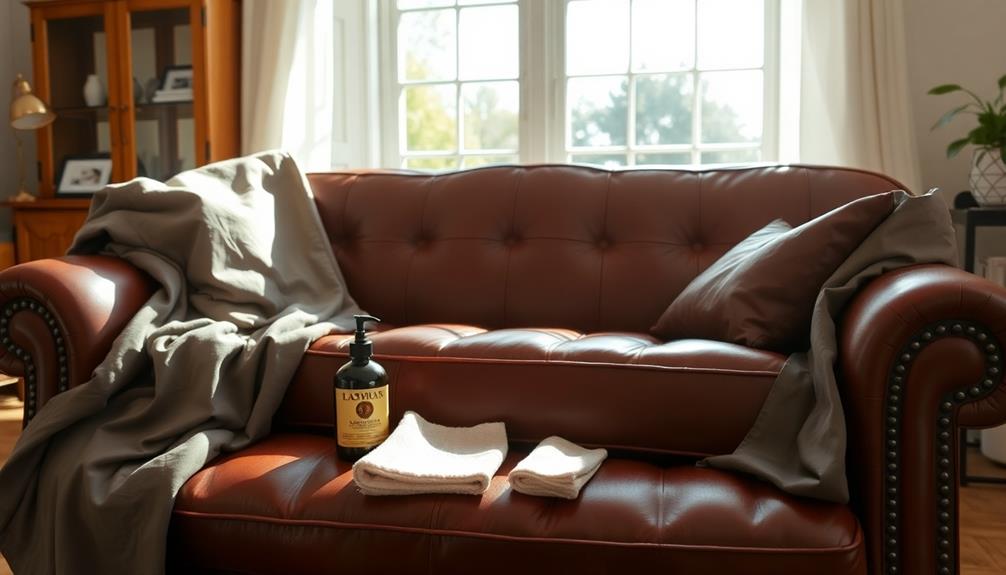
How can you guarantee your leather sofa stays in top shape for years to come? Start by keeping it away from direct sunlight and heat sources. These can cause fading and drying, leading to premature wear.
Regular conditioning is essential too; aim to condition your leather every 6 to 12 months to maintain its appearance and prevent cracks. Additionally, consider investing in specialized cleaning tools like a best value vacuum cleaner to help keep your sofa free from dust and debris that can cause damage over time.
Consider using throws or blankets on high-use areas like armrests and headrests. This simple step can protect against everyday wear and tear.
If you notice minor scratches or tears, address them promptly. The sooner you tackle these issues, the less likely they'll escalate into larger, more difficult repairs.
Establish a consistent cleaning schedule to preserve your sofa's quality. Use a leather cleaner and conditioner to keep your sofa looking its best.
Regular maintenance won't only enhance its appearance but also extend its lifespan. By being proactive and attentive, you can guarantee your leather sofa remains a beautiful centerpiece in your home for many years.
Tools and Materials Needed
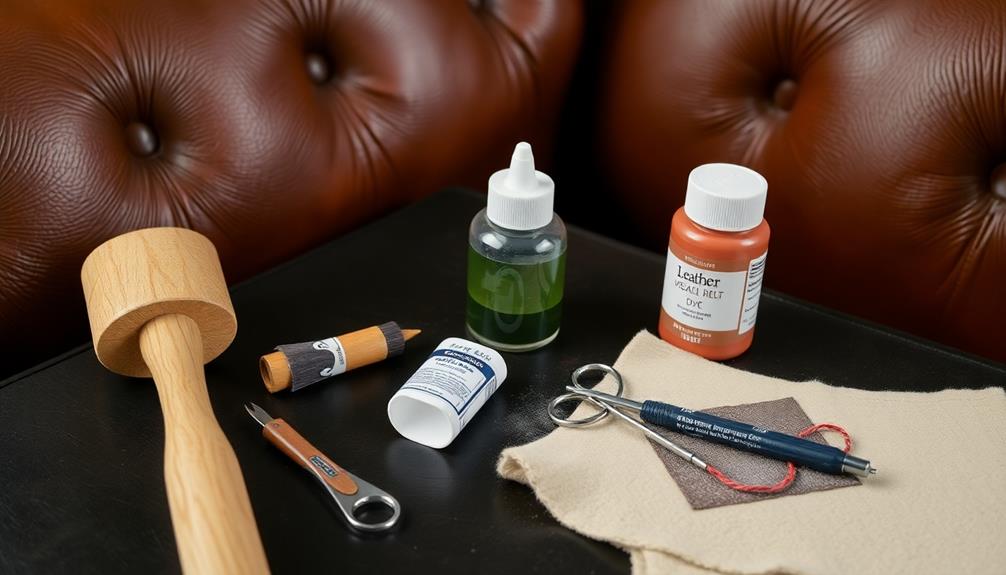
To successfully repair your leather sofa, you'll need a few essential tools and materials.
Start with a Leather & Vinyl Complete Repair Kit, sharp scissors, and fine-grit sandpaper to guarantee a smooth finish.
Additionally, considering the advanced technology found in high-performance units can provide insights into maintaining the longevity of your sofa's leather.
Don't forget to keep safety in mind while handling these items to prevent any accidents.
Essential Repair Tools
When you're ready to tackle leather sofa repairs, having the right tools at your fingertips is vital for achieving a professional finish. Here's a handy list of essential repair tools you'll need:
| Tool | Purpose | Additional Notes |
|---|---|---|
| Leather Cleaner | Removes dirt and oils | Use before starting repairs |
| Sharp Scissors | Trims loose fibers | Keep them sharp for precision |
| Fine-Grit Sandpaper | Smooths repaired areas | Ideal for blending repairs |
| Leather Filler | Fills scratches and holes | Choose the right color |
| Leather-Specific Adhesive | Secures patches behind tears | Guarantees a strong bond |
| Leather Dye | Restores color for seamless blending | Match it to your sofa's color |
| Spatula or Application Tool | Applies filler evenly | Helps achieve a smooth finish |
| Microfiber Cloths | Cleans and buffs the surface | Use for final touches |
| Patch Kit | Addresses larger damages effectively | Includes various patch sizes |
With these tools at your disposal, you'll be well-equipped to restore your leather sofa effectively.
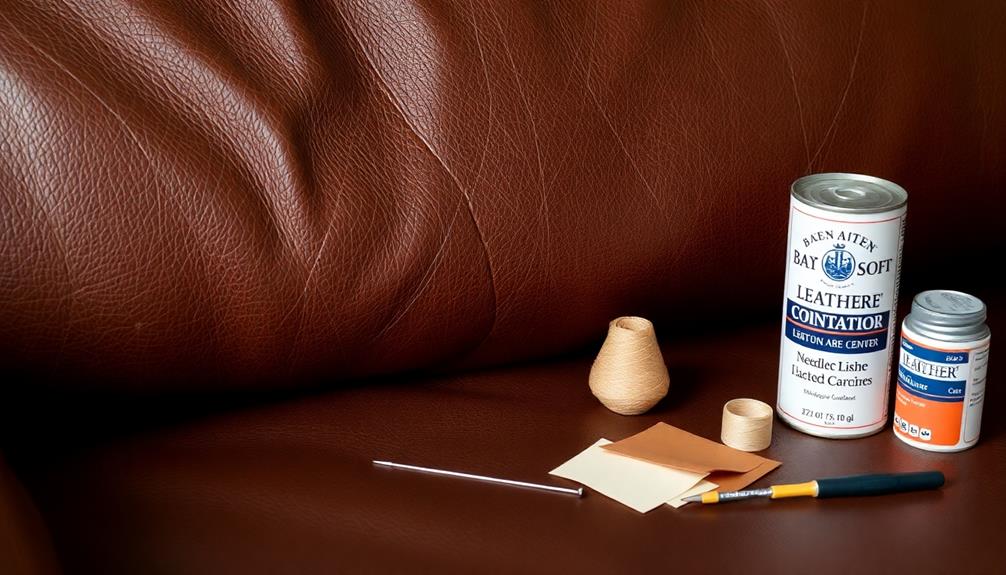
Required Materials Overview
With your tools gathered, it's time to focus on the materials required for repairing your leather sofa. First, you'll need a leather-specific adhesive. This is vital for securing any patches and filling gaps, ensuring a strong bond at the damaged site.
For larger tears, a sub-patch made from matching leather is often necessary. It provides structural support beneath the damaged area during repairs.
Next, gather leather dye and colorants from a complete repair kit. These will help restore the original color and blend your repairs seamlessly with the surrounding leather.
You'll also want fine-grit sandpaper for smoothing out any repaired areas, ensuring a more polished finish.
Don't forget sharp scissors; they'll help you trim loose fibers and make clean cuts. A spatula is essential for applying leather filler precisely.
Finally, have some microfiber cloths on hand. You'll use these to clean the damaged area before you begin repairs, as they effectively remove dirt without causing additional damage.
With these materials ready, you're set to tackle your leather sofa repair!
Safety Precautions Needed
Before diving into the repair process, it's important to prioritize safety. Start by wearing gloves whenever you handle leather repair products. This simple step protects your skin from potentially harmful chemicals and dyes.
Next, make sure you're working in a well-ventilated area. This is vital when using adhesives and fillers, as it helps you avoid inhaling any harmful fumes.
When trimming loose fibers, use sharp scissors. Clean cuts will prevent further damage to your leather sofa, making your repair more effective.
Additionally, keep all your tools—like spatulas and sandpaper—organized and within reach. A tidy workspace enhances safety and efficiency, allowing you to focus on your repair.
Lastly, always follow the manufacturer's instructions for your leather repair kit. Proper use of tools and materials not only guarantees a successful repair but also keeps you safe during the process.
Step-by-Step Repair Process
To successfully repair your leather sofa, start by thoroughly cleaning the damaged area. Use a soft cloth and leather cleaner to eliminate any dirt and oils, guaranteeing a clean surface for the repair.
For small scratches and tears, trim any loose fibers around the damage. Then, apply matching leather filler with a spatula and let it dry before sanding it down for a smooth finish.
If you're dealing with larger tears or holes, measure and cut a leather patch slightly larger than the damaged area. Insert it behind the tear and secure it with leather adhesive, filling any gaps with leather filler.
Once you've filled and sanded the area, use leather dye to blend the repaired section with the surrounding leather. Allow the dye to cure for 24 hours before using the sofa to guarantee a seamless look.
When to Call a Professional
Not every leather sofa repair can be tackled with DIY methods. If you're facing large tears, significant holes, or extensive color loss, it's best to call in a professional. These types of damage require specialized skills and materials that you mightn't have access to, guaranteeing a more durable and visually appealing repair.
Take a moment to evaluate the extent of the damage. While minor scratches and scuffs can often be fixed at home, larger structural or aesthetic issues may need the touch of trained professionals. Services like Sofa Disassembly and Movers specialize in leather care and restoration, making them a reliable choice for complex repairs.
Another good reason to seek professional help is if you feel uncertain about matching colors or materials. Professionals can guarantee that the restoration blends seamlessly with your existing leather, maintaining the overall look of your sofa.
Plus, many professional services offer warranties on their work, giving you peace of mind that the repairs will be handled with quality and reliability. When in doubt, don't hesitate to reach out to an expert for assistance.
Additional Resources for Repair
Many helpful resources are available to assist you in repairing your leather sofa. Whether you're a seasoned DIYer or just starting, these tools can make your repair journey easier and more successful.
- Reference guides like "How to Repair a Leather Sofa" provide detailed, step-by-step instructions, making the process manageable.
- The "Leather Sofa Repair: A Step-by-Step Guide" offers insightful tips on evaluating damage and choosing the right repair techniques for various leather types.
- Online communities and social media platforms are great for sharing experiences and seeking advice from others who've tackled similar repairs successfully.
- For larger items or significant damage, consider professional services. Expert teams specialize in leather furniture care and restoration, ensuring exceptional results.
Additionally, don't forget to check customer reviews and recommendations for reliable repair services. This can guide you in selecting trusted professionals if your repairs require advanced skills.
With these resources at your fingertips, you'll feel more confident in your ability to restore your leather sofa to its former glory.
Frequently Asked Questions
Can You Repair a Damaged Leather Sofa?
Yes, you can repair a damaged leather sofa. Depending on the damage, you might use a leather repair kit for small scratches or a patch for larger tears. Regular maintenance helps prevent further issues, too.
Is It Worth Repairing a Leather Couch?
Did you know a well-maintained leather couch can last 10 to 15 years? Yes, it's worth repairing one! Addressing minor damages promptly saves you money and extends your couch's life considerably.
How to Fix a Leather Couch That Is Peeling?
To fix a peeling leather couch, clean the area, trim loose pieces, apply a repair compound, sand it smooth, and finish with matching dye. Don't forget to condition the leather for durability!
Do Leather Repair Kits Actually Work?
Yes, leather repair kits really do work! You'll find they effectively address scuffs, scratches, and tears with ease. Users often appreciate their satisfaction with color restoration, making them a great option for leather maintenance.
Conclusion
In summary, repairing your leather sofa doesn't have to be an intimidating task. With a bit of patience and the right tools, you can breathe new life into your furniture and save yourself some cash in the process. Remember, every cloud has a silver lining—your sofa can look as good as new if you follow the steps carefully. Don't hesitate to seek professional help if the job seems too big. Happy repairing!