Interior Design
How to Design Your Own Bathroom Remodel
With careful planning and creativity, you can transform your bathroom into a personalized oasis; discover the essential steps to get started.
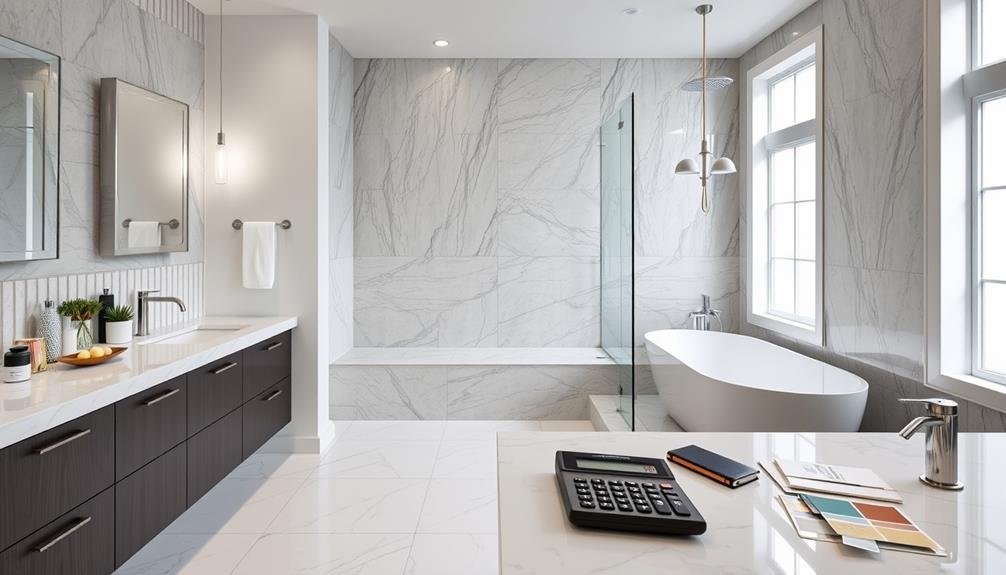
To start creating your own bathroom remodel, first assess your needs and personal style. Set a budget and plan for expenses such as fixtures, materials, and installation. Utilize design tools to map out your floor plan, ensuring optimal space and flow. Prioritize sturdy, moisture-resistant materials and select fixtures that improve both functionality and aesthetics. Remember to plan for the demolition process and carefully schedule each step. Lastly, incorporate personal touches like decorations and color schemes to design your oasis. There is a lot to discover during the planning and implementation phases that can enhance your remodeling journey. Consider seeking inspiration from various bathroom remodel ideas online or in home design magazines. Make sure to research the latest trends and techniques to incorporate into your design. Don’t be afraid to think outside the box and incorporate unique and personal touches that reflect your individual style and preferences. This will ensure that your bathroom remodel is not only functional but also a reflection of your personality and taste.
Key Takeaways
- Assess your bathroom's primary purpose, layout, and user needs to personalize the design effectively.
- Establish a clear budget, considering costs for materials, fixtures, and potential financing options.
- Utilize design tools to create and compare floor plans, ensuring functionality and flow in the space.
- Select durable, moisture-resistant materials and energy-efficient fixtures for long-term performance and aesthetics.
- Plan for demolition and installation, coordinating with contractors and scheduling inspections for compliance and safety.
Assess Your Needs
When you're planning a bathroom remodel, it's crucial to assess your needs first. Start by identifying the primary purpose of your bathroom. Is it meant for daily family use, serving guests, or providing a luxurious retreat? This will guide your design choices.
Consider incorporating features like a freestanding soaking tub for a spa-like feel or shaker-style cabinetry for a timeless look, which are popular in key features of a farmhouse bathroom.
Next, evaluate the current layout and functionality. Pinpoint areas needing improvement, whether it's storage, accessibility, or upgrading fixtures.
Consider your personal style preferences along with current design trends to create a space that reflects your taste while being practical and comfortable.
Don't forget to assess the needs of all users in your household. If you have children or elderly family members, verify the design accommodates everyone effectively.
Think about features like grab bars, step-in showers, or extra storage for toiletries.
This thorough evaluation helps you prioritize what's important for your bathroom remodel. By taking the time to assess your needs upfront, you'll set the foundation for a successful remodel that meets your lifestyle and enhances the overall functionality of your space.
Establish a Budget
When you start your bathroom remodel, it's crucial to establish a clear budget that outlines total costs.
Consider tracking your income and expenses to guarantee you have a realistic understanding of your financial situation.
Think about where you can splurge on high-quality fixtures while saving on less visible materials.
Additionally, incorporating a personal budget plan can help you allocate funds effectively.
Also, explore financing options that might ease the upfront expenses, making sure you stay on track financially throughout the project.
Determine Total Remodeling Costs
Establishing a solid budget for your bathroom remodel can make all the difference in ensuring a smooth renovation process. To determine your total remodeling costs, start by evaluating the scope of your project. Simple surface makeovers might only set you back a few thousand dollars, while extensive renovations can exceed $30,000. Mid-level remodels typically range from $15,000 to $18,000, so it's important to make strategic choices.
It's also wise to reflect on diversifying your investments, similar to the way one might look at options like a Gold IRA for long-term financial stability, which can help shield against unexpected costs.
Research local costs for subcontractors like plumbers and electricians, as well as materials, to create a more accurate budget. This step helps you avoid unexpected financial strain during your bathroom renovation.
Additionally, explore financing options, such as home equity loans, to provide necessary funds for larger projects.
Implementing effective budgeting strategies can help you minimize expenses while maximizing the impact of your investment. Evaluate the long-term financial implications and potential resale value of your renovation investments, ensuring they align with your overall financial goals.
Identify Splurge vs. Save
A well-planned bathroom remodel allows you to identify where to splurge and where to save, maximizing your budget's impact.
Start by evaluating your overall costs, which can range from a few thousand dollars for surface makeovers to over $30,000 for extensive renovations. By creating a mood board to visualize your design concepts, you can better determine which elements are essential for your space.
Focus on areas where splurging pays off, like high-quality plumbing fixtures and finishes that enhance your bathroom design. These premium options can boost aesthetics and functionality, making your space feel luxurious.
On the flip side, consider saving on less visible aspects like plumbing or electrical work. Opt for budget-friendly materials in these areas while prioritizing essential upgrades, such as energy-efficient fixtures.
These investments may have higher upfront costs but will lower your utility bills and provide better long-term value.
Explore Financing Options Available
Exploring financing options for your bathroom remodel can make a significant difference in how you manage your budget. By understanding the costs involved and the various financing methods available, you can tackle your project without financial stress.
Typical remodeling costs can range from $5,000 for simple updates to over $30,000 for extensive renovations, so it's crucial to plan your budget carefully. Additionally, just like diversifying your investment portfolio with options like a Gold IRA, evaluating various financing sources can enhance your financial flexibility and provide greater resilience against unexpected expenses.
tax advantages of Gold IRAs can also offer insights into how you might manage your funding choices.
Here are some financing options to evaluate:
- Home equity loans: Use your home's equity to secure a loan with potentially lower interest rates.
- Personal loans: These can cover renovation expenses and allow you to spread payments over time.
- Grants or assistance programs: Look for options that support energy-efficient upgrades or accessibility modifications.
- Flexible budgeting: Regularly review and adjust your budget to accommodate unexpected costs.
Identifying where you can splurge on high-impact features while saving on other aspects helps you stay within budget.
Design Your Floor Plan
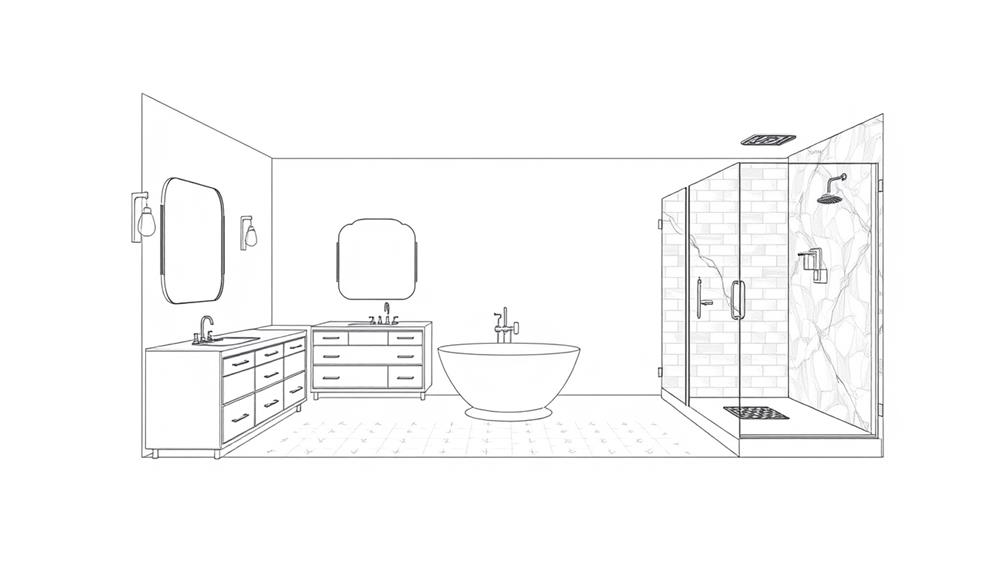
Your bathroom's floor plan is essential for maximizing both space and functionality. Start by creating a free account on RoomSketcher to access handy design tools. With its drag-and-drop features, you can easily position fixtures to create a layout that effectively utilizes your available bathroom floor space.
Consider both existing and new floor plans to visualize changes and compare different design options effectively. Here's a simple table to help you brainstorm elements to include in your design:
Element | Considerations | Purpose |
---|---|---|
Fixtures | Size, style, and placement | Guarantee comfort and accessibility |
Doors/Windows | Location and swing direction | Maximize natural light and flow |
Plumbing | Existing lines and layout | Maintain feasibility of design |
Storage | Type and placement | Enhance organization and usability |
Incorporate essential elements like doors, windows, and plumbing locations to guarantee your design is feasible and functional. Don't forget to save your designs for future reference or to share with contractors and designers, facilitating clear communication of your vision.
Select Materials and Finishes
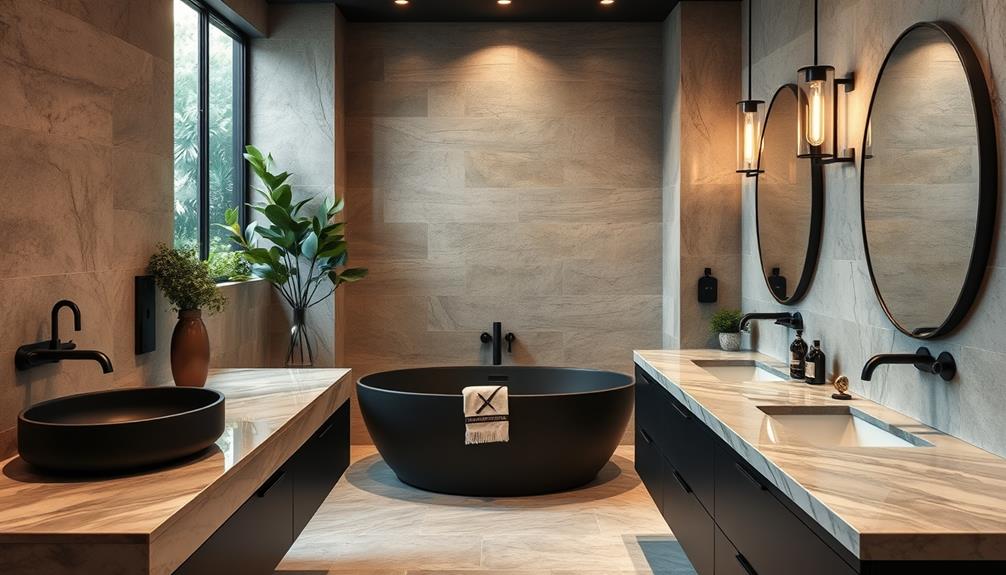
Selecting the right materials and finishes is essential for achieving a stunning and functional bathroom. Prioritize waterproof and durable options to withstand the moisture-rich environment.
Ceramic or porcelain tiles are excellent choices for flooring due to their longevity, and you might want to take into account incorporating a well-draining best soil for string of hearts plants approach when selecting materials that will endure humidity.
You might also think about mixing finishes, like natural stone for countertops and vinyl for flooring, to balance aesthetics with practicality and budget constraints.
Here are some key considerations for your materials and finishes:
- Tile Work: Choose styles that complement your overall design while guaranteeing durability.
- Color and Texture: Light colors can make your space feel larger, while darker shades add sophistication.
- Grout Options: Select mildew-resistant grout to enhance maintenance and appearance.
- Consult Resources: Utilize video tutorials and expert advice to guarantee proper installation techniques.
Be sure to account for any plumbing changes that may affect your material choices, particularly with tile work.
Choose Fixtures and Amenities
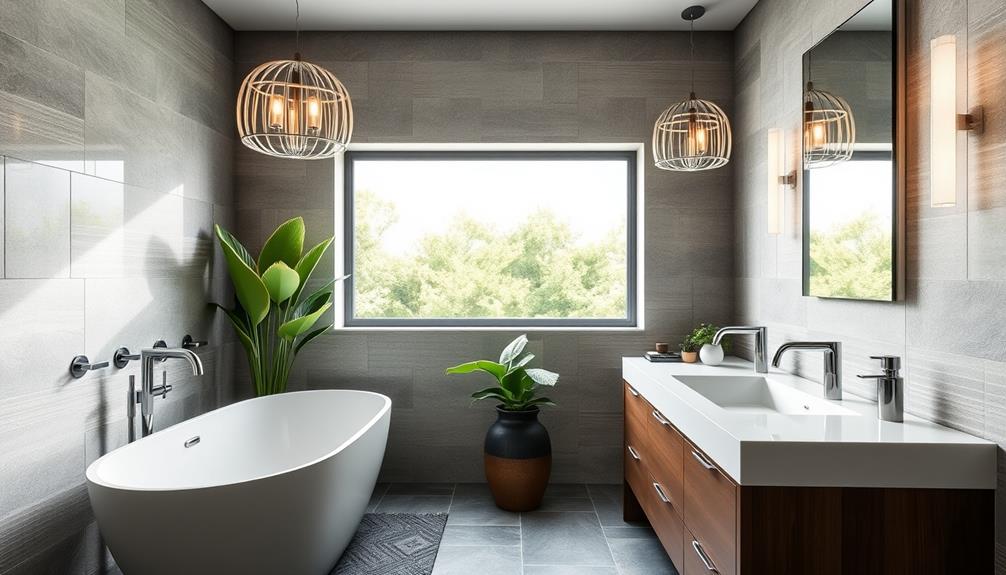
Choosing the right fixtures and amenities can transform your bathroom into a stylish and functional space. Start by exploring the hundreds of options available online for tubs, showers, vanities, sinks, and toilets.
Consider adding energy-efficient fixtures to reduce your overall energy consumption, which aligns with the trend of energy-efficient appliances. Use online planners to visualize how each fixture aligns with your design vision. The Properties feature in these design tools allows you to adjust sizes, ensuring everything fits perfectly and optimizes your layout.
Don't overlook the importance of accessories. Items like mirrors, towel bars, and lighting can enhance both functionality and aesthetic appeal, adding a personal touch to your bathroom.
Consider incorporating smart devices, such as digital faucets or smart lighting, to bring modern convenience and energy efficiency into your remodel.
Plan for Demolition
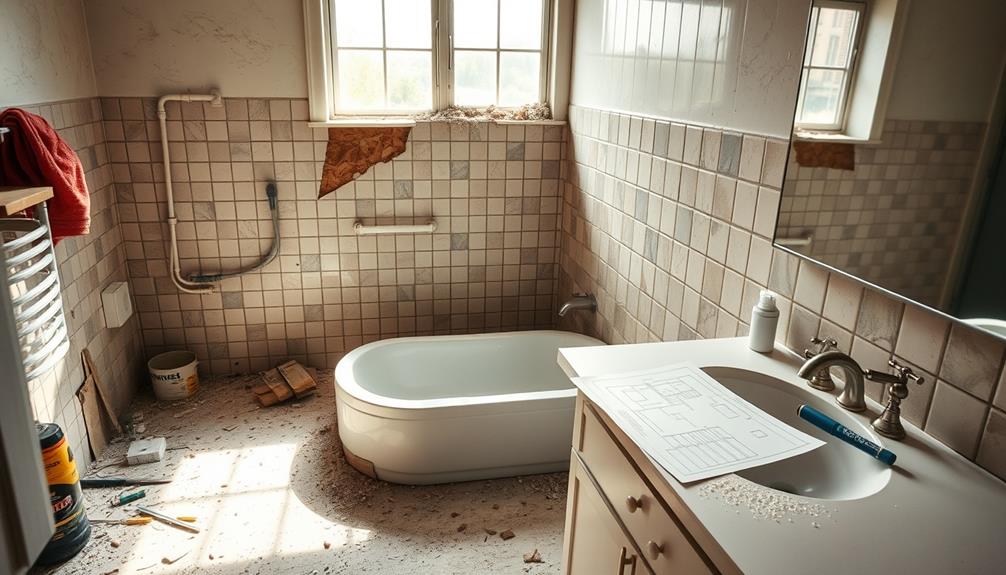
Planning for demolition is a crucial step in your bathroom remodel that requires careful consideration. Before you start, it's important to prepare for the temporary loss of bathroom access. This means arranging alternate shower and restroom options to minimize inconvenience.
Also, consider the impact on your home's overall cleanliness and how you might need to manage dust and debris during this process, similar to preventing cross-contact in kitchens.
Additionally, you'll need to guarantee everything is in place for a smooth process. Here are some key points to keep in mind:
- Schedule necessary inspections and approvals from local officials for plumbing work and electrical systems.
- Coordinate with contractors to create a detailed demolition plan that sequences work efficiently and meets all inspection requirements.
- Communicate with neighbors about any shared facilities that may be impacted during the demolition process to maintain good relations.
- Confirm all fixtures and materials are removed carefully to prevent damage to existing plumbing and electrical systems that will remain in place.
Installation Process
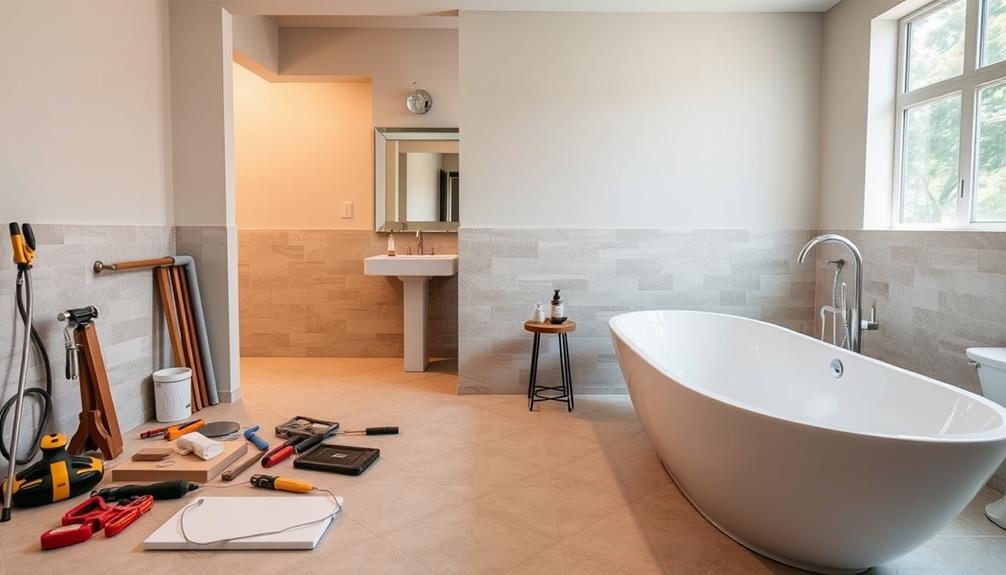
Once you've completed the demolition, the installation process kicks off with careful preparation and planning steps.
It's essential to guarantee that your bathroom is secure and safe during the remodel, akin to how the value of home security systems can enhance safety in a home.
You'll want to focus on tiling and fixture installation, ensuring everything fits perfectly and functions well.
Preparation and Planning Steps
Remodeling your bathroom starts with a solid foundation in preparation and planning. To guarantee a successful project, you'll want to follow several key steps.
Consider exploring DIY Fire Pit Ideas for inspiration on creating inviting outdoor spaces that can complement your bathroom's design with a relaxing atmosphere.
- Assess your current bathroom layout and identify necessary changes.
- Develop an extensive floor plan, considering existing plumbing and electrical layouts.
- Schedule the demolition phase while maintaining communication with your contractors.
- Plan for the installation of essential elements, including plumbing, electrical systems, and ventilation.
Consult with a general contractor to determine the feasibility of any modifications to your layout.
Don't forget to check local codes for required building permits, as these can affect your timeline.
Establishing a realistic schedule is vital; be sure to account for potential delays due to inspections, material availability, or unforeseen construction challenges.
Tiling and Fixture Installation
With a solid plan in place, it's time to focus on the details of tiling and fixture installation.
Start the tiling process by applying a waterproofing membrane, like RedGard, to your wall tiles. This will protect against moisture and potential water damage. For the shower floor, opt for smaller tiles, as they accommodate necessary drainage gradients effectively.
When you mix thin-set mortar, verify it's consistent and apply it quickly to create a strong bond between the tiles and the substrate. After laying the tiles, fill the gaps between them with grout for a polished finish and to prevent water infiltration.
During fixture installation, double-check the placement based on your chosen finishes and plumbing requirements. This step is essential to guarantee everything aligns properly and functions well.
Final Inspections and Adjustments
Thoroughly inspecting your installations is essential to confirm everything meets local building codes and functions as intended.
Conduct your final inspections with a keen eye, focusing on plumbing, electrical, and safety standards. This confirms your bathroom will be both functional and safe.
Here are key areas to evaluate during your final inspections:
- Fixture Integrity: Check for leaks around toilets and sinks, and confirm faucets and showers operate correctly.
- Tile Alignment: Assess tile placement for evenness, addressing any uneven areas or grout issues for a professional finish.
- Element Functionality: Review cabinetry and countertops to validate they align with the original design vision, both in style and functionality.
- Adjustments Needed: Make any necessary adjustments based on contractor feedback and personal observations, including cosmetic touch-ups or minor repairs.
Personalize Your Space
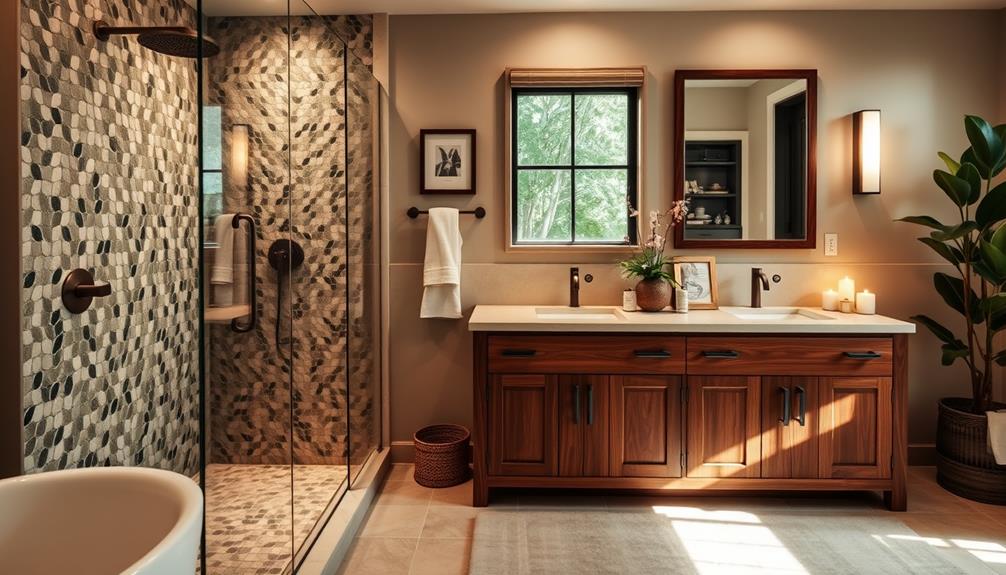
Personalizing your bathroom space can transform it from a simple necessity into a true reflection of your lifestyle. To effectively personalize your space, start by evaluating your individual needs, including storage requirements and preferred fixtures. This guarantees that you create a functional area that caters to your daily routines.
Contemplate incorporating current design trends, such as spa-inspired elements or modern lighting, to elevate the aesthetic appeal. These features not only look great but also enhance the practicality of your bathroom.
Using an online bathroom planner can help you visualize different layouts, colors, and finishes, allowing you to experiment with options before making any commitments.
Don't forget to add unique décor items, like artwork or plants, to create an inviting atmosphere. Be sure to take into account the light conditions for plant health, ensuring they thrive in your personalized space.
Prioritize customization with features like a soaking tub or walk-in shower, turning your bathroom into a personal retreat tailored to your preferences. By focusing on these elements, you can truly personalize your space and make your bathroom a meaningful part of your home.
Final Touches and Maintenance
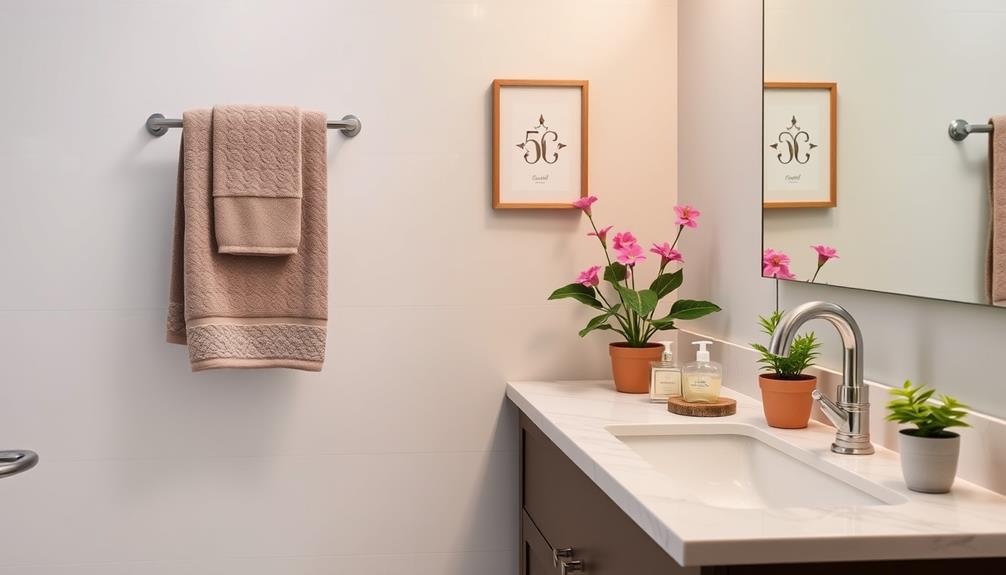
Completing your bathroom remodel means focusing on the final touches and maintenance to guarantee your new space stays beautiful and functional.
After major installations, paint your walls with mildew-resistant options to prevent future touch-ups in humid environments. Choose decor items that reflect your style while enhancing functionality, making your bathroom a cozy retreat.
Consider these ideas for your final touches:
- Select stylish rugs, mirrors, and faucets that tie the room together.
- Incorporate smart devices, like smart mirrors or lighting, for added convenience.
- Add living plants that thrive in low-light conditions, bringing a revitalizing natural element.
- Regularly check for leaks and clean fixtures to maintain your bathroom's appearance.
Maintenance is essential to guarantee longevity and performance.
Set a routine to inspect plumbing and fixtures, keeping everything in check. By prioritizing these final touches and maintenance tasks, you can enjoy your new bathroom for years to come.
Frequently Asked Questions
Is There an App That Lets You Design a Bathroom?
Yes, there's an app called RoomSketcher that lets you design a bathroom easily. You can create 2D and 3D layouts, customize fixtures, and visualize your design in different perspectives—all with a user-friendly drag-and-drop interface.
Is It Possible to DIY Bathroom Remodel?
Yes, you can DIY a bathroom remodel, but it's not always easy. While surface updates like painting are manageable, complex tasks like plumbing might need professional help. Assess your skills before diving into the project.
In What Order Should You Renovate a Bathroom?
When renovating a bathroom, start with planning and permits. Next, demolish old fixtures, tackle plumbing and electrical work, install larger items first, then complete with flooring, wall finishes, and final touches for a polished look.
What Is the Most Expensive Part of a Bathroom Remodel?
Renovating a bathroom's like piecing together a puzzle, and the most expensive part often lies in labor costs. You'll find plumbing and electrical work can take up 20% to 35% of your budget.
Conclusion
In the end, remember that "home is where the heart is." Your bathroom remodel should reflect your personal style and meet your needs. By carefully evaluating your requirements, sticking to your budget, and choosing the right materials and fixtures, you can create a space that feels uniquely yours. Don't rush through the process—enjoy each step, and soon you'll have a beautiful bathroom that you'll love for years to come. Happy remodeling!
Interior Design
Eco-Friendly Nordic Furniture Essentials: Top Picks
With sustainable materials and minimalist designs, discover essential Nordic furniture that enhances your space while supporting eco-conscious living. Will you make the switch?
If you're looking for eco-friendly Nordic furniture essentials, you'll want to choose pieces made from sustainable materials like FSC-certified wood and organic fabrics. Brands like MAKE nordic and EcoBalanza focus on eco-conscious practices, ensuring durability and minimizing waste. Embrace minimalist design principles that promote functionality, such as multi-functional furniture and hidden storage solutions. Natural materials like oak and wool not only add warmth but also connect your space to nature. Investing in these timeless pieces not only enhances your home but shows your commitment to sustainability. Stick around for more tips on creating your perfect eco-friendly space!
Key Takeaways
- Sustainable Materials: Choose furniture crafted from FSC-certified wood and eco-friendly textiles like organic wool and renewable fabrics for a minimal environmental impact.
- Durability and Repairability: Opt for Nordic furniture designed for longevity, featuring long-lasting materials and easy repair options to reduce waste.
- Minimalist Design: Select pieces that emphasize clean lines, multi-functionality, and hidden storage to create serene, clutter-free living spaces.
- Local Manufacturing: Support brands that produce furniture locally in Scandinavia, minimizing transportation impacts and promoting local economies.
- Natural Aesthetics: Incorporate furniture made from natural materials like oak, birch, and wool to foster a warm connection to nature in your home.
Sustainable Material Choices
When it comes to sustainable material choices in Nordic furniture, you'll find that the emphasis on eco-friendliness is both impressive and essential.
Wood serves as a primary material, often sourced from responsibly managed forests. Notably, over 90% of wooden furniture from MAKE nordic comes from FSC®-certified forests, ensuring that no more wood is harvested than the forest can regenerate. This commitment reflects a growing demand for certified sustainable wood products, which has risen by 30% in the Scandinavian market.
In addition to wood, eco-friendly textiles are integral to Scandinavian furniture design. You'll notice an increase in certified organic wool production, with MAKE nordic utilizing textiles labeled with Oeko-tex or the EU Flower for minimal environmental impact. Renewable fabrics like linen are also common, adding a sustainable touch. Furthermore, many designs emphasize timeless style, allowing them to blend seamlessly into various interiors.
Moreover, many manufacturers incorporate recycled and sustainably sourced materials. For example, Hammel Furniture uses chipboard made from over 90% recycled wood, significantly reducing carbon emissions.
With non-toxic finishes and eco-conscious production practices, these choices highlight a true dedication to sustainability. Embracing these materials not only enhances your home but also supports a healthier planet.
Minimalist Design Principles
Nordic furniture design isn't just about sustainable materials; it also embodies minimalist principles that enhance both style and functionality. You'll find that each design element serves a practical purpose, eliminating unnecessary clutter to create a calm, serene environment. Clean, simple lines dominate the furniture and decor, emphasizing the beauty of unadorned shapes that draw the eye without overwhelming the space. In places like California, where divorce rates are high, such serene environments can provide a much-needed sense of calm amidst life's chaos.
The color palette tends to be monochromatic, featuring neutral tones like white, gray, and earth colors, which contribute to a sense of openness. Maximizing natural light is crucial, as it brightens the space and highlights the minimalist aesthetic. You should aim for decluttered areas, utilizing open-plan layouts that foster tranquility.
Incorporating hidden storage solutions allows you to maintain a tidy atmosphere, while selecting only essential furniture pieces further reduces visual noise. This approach is reflective of minimalism's emphasis on essential elements, which prioritizes simplicity and functionality in design choices.
Embrace the use of well-chosen materials like wood, concrete, and glass for a cohesive look that feels both modern and timeless. Multi-functional furniture optimizes your space and enhances the balance between form and function, giving your home a polished, minimalist vibe that's effortlessly chic.
Eco-Friendly Manufacturer Practices
Eco-friendly manufacturer practices play a crucial role in the Nordic furniture industry, with many companies prioritizing sustainability at every stage of production.
For instance, Vestre ensures all its products are manufactured in Scandinavia, supporting local economies while maintaining high ethical standards. Ekornes takes it a step further by investing in eco-friendly technologies like bio-energy and heat pumps to lower its carbon footprint. They also automate production processes to reduce raw material usage and extend product lifespans. In addition, Vestre's commitment to sustainable manufacturing practices includes a lifetime anti-rust guarantee and plans to utilize fossil-free steel by 2025.
Waste reduction is another key focus. Ekornes sorts waste meticulously, recycling the majority of foam plastic production waste and using recycled packaging for shipping.
Similarly, Wehlers designs products with reusability and recyclability in mind, minimizing waste at the end of their life cycles.
Sustainable supply chains are vital too. Companies like Hammel Furniture strive for short supplier journeys to cut down CO2 emissions, while Vestre sources local materials to reduce transportation impacts.
They all collaborate with suppliers to ensure materials are sustainably sourced, fostering a greener future.
Importance of Natural Materials
Natural materials are essential in Scandinavian furniture design, offering both aesthetic appeal and sustainability. When you choose pieces made from wood, you're embracing not only the natural beauty of materials like oak, birch, and pine but also the warmth they bring into your home. The growing demand for sustainably sourced wood reflects a broader commitment to environmental responsibility. This shift towards eco-friendly products is evident as more consumers prioritize sustainability in their purchasing decisions.
Leather and wool play a crucial role too, providing comfort and texture that enhance your living space. Luxurious leather upholstery and cozy woolen textiles create inviting atmospheres, making your home feel both stylish and welcoming. The rise in certified organic wool production shows a conscious shift toward sustainability in textile choices.
Incorporating stone elements like marble or granite introduces sturdiness and a striking visual contrast. By opting for locally sourced stone, you're also reducing carbon emissions, connecting your furniture to the raw beauty of the Nordic landscape. Other natural materials, such as cotton and rattan, contribute to the serene, minimalist aesthetic that defines Scandinavian design.
Investing in Durability
When you're choosing furniture, investing in durability should be a top priority. Nordic furniture emphasizes long-lasting materials, such as sustainably sourced wood, which not only ensures durability but also reduces environmental impact. Responsibly sourced leather and wool enhance comfort while contributing to longevity. By opting for renewable materials like linen and flax, you can lessen your dependency on non-renewable resources. Minimalistic designs play a crucial role in durability as well. They require fewer materials, resulting in less production waste and ensuring your furniture won't go out of style quickly. Quality over trendy appearances means you're less likely to discard your pieces in a few years. Moreover, durable furniture isn't just about longevity; it's also about repairability. Many Nordic designs allow for easy disassembly and component replacement, so you don't have to replace entire pieces. Plus, lengthy warranties provide assurance of the product's functionality over time. Additionally, choosing furniture made from FSC-certified wood is a great way to support responsible forestry practices and ensure sustainability.
Certifications to Look For
Choosing sustainable furniture can feel overwhelming, but knowing which certifications to look for makes the process easier.
Start by looking for the Nordic Swan Ecolabel, which mandates at least 70% certified wood and bans harmful chemicals. The FSC Certification ensures that the wood comes from responsibly managed forests, promoting both environmental sustainability and fair labor practices.
Also, check for the EU Ecolabel, which imposes strict limits on harmful chemical content, ensuring safer products for you and the planet. The PEFC Certification is another mark of sustainable forest management, while Oeko-Tex Certification guarantees that textiles are free from harmful substances. Additionally, the Nordic Swan Ecolabel has extensive requirements for materials to further ensure eco-friendliness.
Pay attention to emission standards, too. Certifications like Greenguard and CARB Phase 2 signal low chemical emissions, contributing to better indoor air quality.
Top Eco-Friendly Furniture Brands
Navigating the world of sustainable furniture becomes easier when you know which brands prioritize eco-friendly practices. Some top choices include MAKE nordic, which crafts over 90% of its wooden furniture from FSC®-certified forests, ensuring sustainability at its core.
EcoBalanza stands out with its use of FSC-certified Alder and Western Maple for hardwood frames, combining quality with environmental responsibility. This commitment to sustainable wood sourcing not only reduces deforestation but also supports responsible forestry management.
If you're looking for longevity, Mater offers timeless pieces designed to last while promoting a circular economy.
HAY collaborates with designers to create durable, functional furniture, while Normann Copenhagen focuses on clean, minimalist designs that endure.
For eco-friendly production practices, Emeco operates an energy-efficient factory relying on renewable resources, and IKEA powers its outlets with renewable energy, minimizing waste through smart designs.
Brands like Avocado and Emeco are also committed to ethical labor practices, ensuring transparency and decent wages throughout their supply chains.
When you choose furniture from these brands, you're not only enhancing your space but also supporting sustainable and ethical practices.
It's a win-win for your home and the planet!
Essential Nordic Furniture Pieces
Incorporating essential Nordic furniture pieces into your home elevates both style and sustainability. Start with solid wood accents like beech, ash, or pine, which provide a natural feel and timeless appeal. Opt for high-end options like teak or rosewood that emphasize sustainable sourcing and gorgeous aesthetics.
Look for multifunctional items like entryway benches with built-in drawers and coat hooks, which streamline storage while keeping your space organized. Storage furniture—think cabinets, dressers, and bookcases—are vital in Scandinavian design, allowing you to maintain a clutter-free environment. Incorporating natural elements through greenery and wood accents can enhance the overall aesthetic and bring the beauty of the outdoors inside. Additionally, functional hooks can be utilized for wall organization to maximize space and reduce clutter.
Nesting tables can save space while offering flexibility when you need more surface area.
Don't forget about lighting. Embrace natural light by using minimal window treatments and incorporating clear glass elements that keep your space airy. Layered lighting with table lamps or floor lamps can create a warm, inviting atmosphere.
Stick to a neutral color palette, featuring soft whites, grays, and taupes, for an open feel. Lastly, prioritize quality over quantity by investing in durable, aesthetically pleasing pieces that blend function with minimalist design.
Tips for Sustainable Furniture Care
While you enjoy the beauty of your eco-friendly Nordic furniture, caring for it sustainably ensures it lasts for generations.
Start by using natural cleaning solutions, like a mix of vinegar, water, and essential oils. Opt for eco-friendly products that protect both your furniture and the planet. For wood pieces, dust with a microfiber cloth to avoid scratches, and when cleaning, stick to mild dish soap and water.
Maintaining consistent humidity levels between 40-50% is crucial to prevent wood warping. A humidity monitor can help you adjust conditions, potentially extending your furniture's life by up to 15 years. Keep it out of direct sunlight and heat, especially leather, to avoid fading. This is important because sustainable furniture is often crafted with superior craftsmanship and longevity.
Learn basic repair techniques to add another 5-10 years to your furniture's lifespan. Establish relationships with local restorers for professional help when needed. When refinishing, choose low-VOC products and treat old finishes gently.
For specific materials, use a damp cloth with equal parts water and vinegar for leather, and plant-based oils for wood oiling quarterly.
Annual rust inspections for metal and careful cleaning for natural stone will also preserve your investment.
Incorporating Furniture Into Your Home
Creating a cozy living space starts with selecting furniture that reflects your values and style. When you choose eco-friendly Nordic furniture, consider the raw materials and their impact on the environment. Opt for pieces made from certified sustainable woods like oak, birch, or beech, which add warmth and durability to your home. Sustainable furniture choices reduce carbon footprint and enhance your overall living experience.
Incorporating natural materials not only enhances aesthetics but also aligns with the concept of "hygge," promoting tranquility. Look for furniture that features eco-labels such as FSC® or the Nordic Swan Ecolabel. These certifications indicate responsible sourcing and environmentally friendly production processes. By selecting locally sourced materials, you can further reduce transportation-related carbon emissions, contributing to a more sustainable living environment. Additionally, the use of natural materials like wood and stone is a key aspect of creating a serene atmosphere, much like in Balinese interior design.
Emphasizing timeless designs ensures that your furniture lasts for generations, moving away from the throwaway culture. Consider pieces that can be easily repaired or recycled, allowing them to become part of your family's history. Lastly, prioritize furniture designed with health in mind, avoiding harmful chemicals to create a healthier home atmosphere. By thoughtfully incorporating eco-friendly furniture, you not only beautify your space but also support a more sustainable future.
The Future of Eco-Friendly Design
As the world shifts toward more sustainable practices, eco-friendly design is evolving to meet both environmental needs and personal preferences.
You'll notice a growing emphasis on sustainable materials like wood, bamboo, and reclaimed woodgrains, which offer both beauty and renewability. Faux woodgrain finishes are also emerging as eco-friendly alternatives, allowing you to enjoy the aesthetic without the negative environmental impact.
Moreover, multifunctional designs are taking center stage. Scandinavian furniture, known for its adaptability, features pieces like modular shelving and convertible sofas that optimize space. Items with built-in storage keep your home clutter-free while maintaining style.
Integration of technology plays a crucial role in this evolution. Smart, energy-efficient solutions enhance furniture functionality, making your daily life easier. Natural materials also play a significant role in eco-friendly design, as they foster a connection to nature within indoor spaces.
Advanced printing technologies ensure high-quality, realistic finishes without sacrificing sustainability.
Lastly, eco-friendly design encourages personal expression. As you curate your space, you can blend cultures and stories through artisanal pieces, reflecting individuality while preserving traditional techniques.
In embracing these trends, you're not just decorating; you're contributing to a mindful, sustainable future.
Frequently Asked Questions
How Can I Identify Genuine Eco-Friendly Furniture Brands?
To identify genuine eco-friendly furniture brands, look for certifications like FSC® and Oeko-tex, check for responsibly sourced materials, ensure sustainable production practices, and prioritize transparency about their environmental and social impact.
Are There Affordable Options for Eco-Friendly Nordic Furniture?
Yes, you can find affordable eco-friendly Nordic furniture options. Brands like IKEA and Target offer stylish, sustainable pieces at budget-friendly prices. Just explore online or in-store to discover trendy selections that suit your taste.
What Is the Lifespan of Sustainable Furniture Compared to Conventional Options?
Sustainable furniture typically lasts longer than conventional options, often outlasting them by 5-10 years. With high-quality materials and craftsmanship, you'll enjoy durable pieces that require fewer replacements, ultimately saving you money and resources.
Can I Customize Eco-Friendly Furniture Designs?
Yes, you can customize eco-friendly furniture designs. Many brands offer advanced configurators, allowing you to adjust dimensions, choose finishes, and visualize your creations in real-time, ensuring your furniture perfectly suits your style and needs.
How Do I Properly Dispose of Old Furniture Sustainably?
To properly dispose of old furniture sustainably, consider donating it to charities, recycling components, or selling it online. You can also repurpose items creatively, reducing waste while contributing to your community and environment.
Conclusion
Incorporating eco-friendly Nordic furniture into your home not only elevates your space but also supports sustainable practices. By choosing pieces made from natural materials and embracing minimalist designs, you're investing in durability and style. Remember to care for your furniture properly to extend its life and impact. As the future of design leans toward sustainability, you're making a positive choice for the planet while enjoying timeless, functional aesthetics in your everyday life.
Interior Design
How to Care for Teak Outdoor Furniture
Follow these essential tips for maintaining your teak outdoor furniture, and discover how to keep it looking stunning for years to come!
To keep your teak outdoor furniture in good condition, begin by regularly cleaning it with a firm bristle brush and diluted dish soap. Make sure to rinse it thoroughly and dry it well to prevent damage from moisture. Immediately attend to any spills by using a soft cloth on mild stains. Apply a teak sealer every 6 to 12 months to shield it from UV rays and moisture. When winter comes, store your furniture in a cool, dry spot away from direct sunlight. Regularly inspect your pieces for signs of wear and mildew to ensure they stay in great condition. There’s a lot more to learn about maintaining that gorgeous teak appearance!
Key Takeaways
- Clean teak furniture regularly with diluted soap and a stiff bristle brush to maintain its appearance and prevent grime buildup.
- Apply teak sealers every 6 to 12 months for long-lasting protection against UV rays and moisture.
- Quickly address spills with a soft cloth to prevent staining, using a stiff brush for stubborn marks.
- Store teak furniture in a dry, shaded area and inspect regularly for signs of wear or mildew.
- Consider professional restoration services for significant damage to enhance longevity and preserve aesthetic integrity.
Importance of Regular Cleaning
To keep your teak outdoor furniture looking its best, regular cleaning is necessary. This isn't just about aesthetics; it's a significant part of teak furniture care that helps maintain its natural appearance and longevity. Aim to scrub your furniture with a stiff bristle brush at least four times a month.
Using a diluted dish soap and warm water solution can help you effectively remove dirt and stains while making sure you follow the wood grain to prevent scratches. Just like maintaining an air purifier, consistent upkeep is key to preserving quality and performance, so don't overlook the importance of routine care in your outdoor furniture maintenance air purifier maintenance dos.
After cleaning, thoroughly dry the furniture to prevent moisture damage and preserve the wood's integrity. Remember, neglecting regular cleaning can lead to the buildup of grime, resulting in dark stains and potential long-term discoloration. The weathering process can take a toll on your furniture, making it important to stay on top of maintenance.
Additionally, consider scheduling annual professional maintenance to guarantee your teak furniture remains in ideal condition. Professionals can address any signs of wear or damage that you might overlook.
Effective Spill Management
When spills happen, acting quickly is key to preventing stains and damage to your teak furniture.
Keeping a bottle of butter storage tips handy can help guarantee that your furniture remains clean and well-maintained.
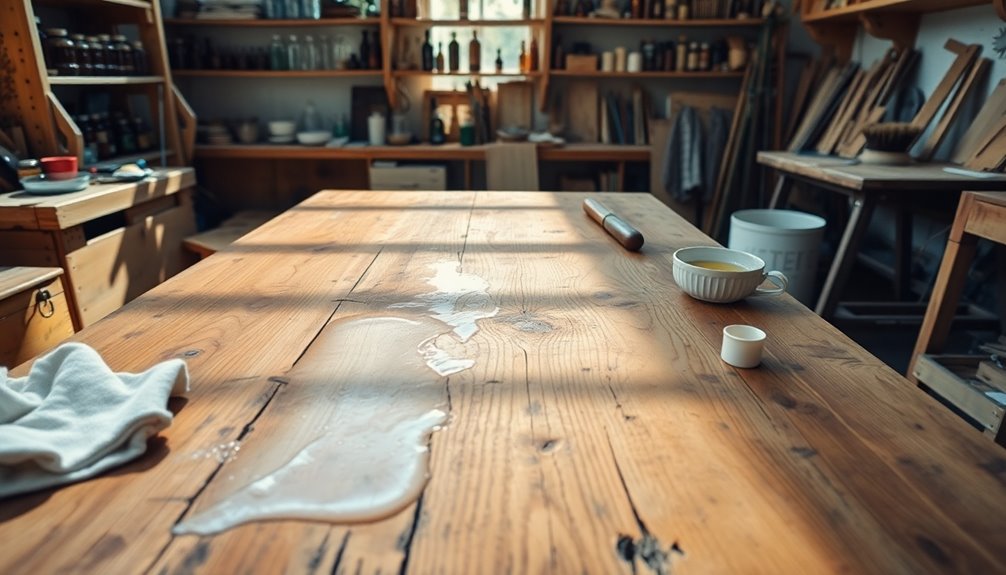
For liquid spills, grab a stiff bristle brush or plastic scraper to gently clean up any residue without scratching the surface.
If you notice stubborn stains, a diluted wood cleaner can help restore your furniture's beauty while following the wood grain.
Immediate Cleanup Importance
Immediate cleanup of spills is essential for preserving the beauty and integrity of your teak outdoor furniture. If you let spills sit, you risk staining and permanent damage to the wood. Quick action minimizes potential long-term aesthetic effects and keeps your teak furniture looking its best.
Additionally, just as with proper care for pets, such as ultimate hamster care, staying attentive to your furniture will guarantee it remains in excellent condition for years to come.
For effective spill removal, start by gently lifting the stain with a stiff bristle brush or a plastic scraper. Be cautious not to scratch the surface of the wood. If you encounter stubborn stains, mix diluted water with a specialized wood cleaner to break down the residue. Apply this mixture carefully, making certain you don't oversaturate the wood.
For persistent stains that won't budge, fine-grit sandpaper can help, but steer clear of steel wool or metal brushes as they can cause scratches and further damage.
Stain Removal Techniques
Effective stain removal is key to maintaining the beauty of your teak outdoor furniture. Quick action on spills can save you from stubborn stains and long-term damage.
Here are some stain removal techniques you can use:
- Always use a soft cloth for initial cleanup.
- For gentle stains, try a stiff bristle brush or a plastic scraper, working with the wood grain.
- For tougher marks, a diluted mixture of water and wood cleaner can do wonders.
- Avoid steel wool or metal brushes, as they can scratch and damage the teak surface.
Regular monitoring of your furniture will help you catch spills early.
After cleaning, consider applying teak oils for added protection and to keep your furniture looking its best.
Remember, proper care involves not just cleaning but also maintaining the natural beauty of your clean teak.
With these techniques, you can guarantee your outdoor furniture remains a stunning focal point in your space.
Safe Moving Techniques
When moving your teak furniture, always lift it instead of dragging to prevent damage.
Take a moment to assess the structure and identify any detachable parts that can make the move easier.
Don't forget to clear your pathway of obstacles to guarantee a safe and smooth changeover.
Lifting, Not Dragging
Moving teak outdoor furniture requires care, as lifting it instead of dragging is vital for maintaining its beautiful finish. Dragging can cause friction damage and scratches that mar the wood's surface. To lift safely, assess the structure of your furniture first. Look for detachable parts or strong points to grip, guaranteeing a secure hold.
Before you start moving, it's important to clear the pathway of any obstacles. This helps you avoid accidents and guarantees a smooth relocation process. If you're dealing with heavy items, don't hesitate to seek assistance. This will prevent strain and potential injury, making the task safer and more efficient.
Here are some tips to keep in mind while lifting:
- Plan your route: Know where you're going and avoid sudden movements.
- Use your legs: Bend at the knees, not your back, to lift properly.
- Communicate with helpers: If you have assistance, coordinate your movements.
- Mind the temperatures: Avoid placing the furniture in direct sunlight or near heaters to preserve its integrity.
Clear Pathway Assessment
A clear pathway is essential for safely relocating your teak outdoor furniture. Before you start, perform a clear pathway assessment to identify any obstacles like plants, furniture, or decorative items that could cause accidents. This preparation prevents unnecessary struggles during the move.
Key Considerations | Actions to Take |
---|---|
Identify Obstacles | Look for plants, furniture, or decor |
Strong Points | Find sturdy parts to lift from |
Prepare Placement Spot | Set the area before moving furniture |
Always lift furniture rather than dragging it to prevent friction damage and structural damage to your teak. If you're dealing with heavy pieces, don't hesitate to ask for help. This not only reduces the risk of injury but also maintains the integrity of the furniture during the process.
Additionally, aim to move your teak furniture in moderate temperatures, avoiding direct sunlight. This helps preserve the wood's integrity and keeps it looking beautiful for years to come. By following these safe moving techniques, you'll guarantee a smooth shift for your outdoor furniture.
Furniture Structure Evaluation
Evaluating the structure of your teak furniture is essential for a safe move. Start by checking for detachable parts, like cushions or tabletops, which can make the moving process easier. Identify strong points on the furniture to lift from, guaranteeing you have a secure grip.
Here are some tips to keep in mind:
- Use a lifting technique to minimize strain and avoid friction damage.
- Clear obstacles from your pathway to prevent accidents.
- If you're dealing with heavy items, don't hesitate to ask for help.
- Always handle teak furniture gently to maintain its integrity.
When moving your furniture, remember that dragging or pulling can create scratches and dents, diminishing its beauty.
By taking the time to perform a thorough furniture structure evaluation, you'll guarantee a smooth shift without compromising the quality of your outdoor pieces. Keep in mind that a little preparation goes a long way in preserving the natural elegance of your teak furniture.
Teak Preservation Methods
Five effective teak preservation methods can help keep your outdoor furniture looking beautiful and lasting for years.
First, apply teak sealers every 6 to 12 months. These sealers preserve the wood's natural oils, protect against UV radiation, and maintain its golden color. Avoid using teak oils, as they can create maintenance issues without offering lasting protection.
Second, regularly clean teak furniture with a mild soap and water solution. This simple step prevents dirt buildup and potential staining, enhancing the longevity of your teak outdoor furniture.
Third, always cover your furniture during inclement weather. This protects the wood from moisture damage and mold growth.
Fourth, if you notice surface stains or a dull finish, consider lightly sanding the surface. This periodic action can restore the original look of your furniture, but be cautious not to damage the wood. In addition, always use fine-grit sandpaper to avoid unnecessary scratches and preserve the wood’s natural beauty. After sanding, wipe down the surface with a clean cloth to remove any dust before applying a protective finish. If you’re thinking of disposing of old furniture, consider donating or recycling it, as many pieces can find a second life in someone else’s space or be repurposed in creative ways. Additionally, when deciding *how to get rid of furniture*, it’s important to research local disposal guidelines, as different areas may have specific rules for recycling or throwing away large items. By opting to donate or recycle, you not only declutter your space but also contribute to reducing waste in landfills, promoting sustainability in the process.
Finally, inspect your furniture regularly for any signs of wear or damage. Early detection allows you to take action before problems worsen.
Seasonal Maintenance Tips
After implementing effective teak preservation methods, seasonal maintenance becomes key to keeping your outdoor furniture in top shape. Each season presents unique challenges, so it's crucial to adapt your clean and care routine accordingly.
- Spring: Clean and inspect your teak furniture for any winter damage. Remove debris and check for mold and mildew before using it again.
- Summer: Regularly check for signs of fading or damage due to UV exposure. Consider using protective covers when not in use to minimize wear.
- Fall: Clear leaves and debris from your teak furniture to prevent moisture buildup. This helps avoid mold and discoloration over time.
- Winter: Thoroughly clean your furniture and make certain it's dry before covering or storing it indoors. This prevents moisture damage and mildew growth.
Additionally, periodically check the condition of your protective covers throughout the seasons. Make sure they fit securely and allow airflow, preventing trapped moisture and mildew.
Understanding Natural Aging
Teak outdoor furniture undergoes a fascinating transformation over time, shifting from its warm honey-brown hue to a striking silver-gray patina. This change results from the natural aging process, where the wood's natural oils evaporate due to exposure to the elements.
Generally, within 9 to 12 months, untreated teak will develop this beautiful silver-gray color, which doesn't compromise its structural integrity.
Keep in mind that environmental conditions, such as sunlight and humidity, can accelerate this aging effect. As your teak furniture matures, you might notice fine cracks appearing on the wood surface. Don't worry; these cracks are normal and reflect the wood's natural characteristics rather than a sign of deterioration.
Many people appreciate the unique aesthetic of aged teak, as the silver-gray patina enhances the beauty of outdoor furniture while still providing durability.
If you prefer the original warmth of teak, you can choose to apply treatments, but recognizing and embracing the natural aging process can lead to a stunning, timeless outdoor space. Understanding this evolution helps you appreciate the enduring quality and charm of your teak furniture.
Teak Oil vs. Teak Sealer
When it comes to protecting your teak outdoor furniture, understanding the differences between teak oil and teak sealer is essential.
Teak oil enhances gloss but needs more frequent applications, while teak sealers offer longer-lasting protection and maintain that beautiful golden color.
Consider how often you're willing to reapply and what kind of protection you want for your furniture.
Protection Duration Comparison
Choosing between teak oil and teak sealer for your outdoor furniture can greatly impact its protection duration.
Teak oil typically requires reapplication every 6 months to 1 year, providing only temporary protection against water and UV rays. While it enhances surface gloss, it doesn't prevent the wood from graying.
On the other hand, teak sealers can last from 1 to 2 years, helping to maintain the original honey color of your furniture while offering stronger defense against moisture and UV radiation.
Here's a quick comparison for you:
- Teak oil: Shorter protection duration, needs more frequent maintenance.
- Teak sealers: Longer-lasting protection, requiring less frequent applications.
- Aesthetic benefits: Sealers preserve original color better than oils.
- Natural oils: Oils enhance gloss but may lead to quicker aging.
Application Frequency Differences
Understanding the differences in application frequency between teak oil and teak sealer is vital to maintaining your outdoor furniture effectively. Teak oil should be applied every 6 months to 1 year for ideal protection, while teak sealer typically lasts about a year, requiring reapplication annually or bi-annually. This distinction is essential for ensuring your furniture remains in top shape.
Teak oil provides temporary protection against water and rot but doesn't offer long-lasting UV protection. It enhances the surface gloss of your outdoor furniture, but it won't greatly extend its lifespan.
On the other hand, teak sealer preserves both the appearance and durability of the wood over time, maintaining its natural golden color.
One important consideration is the waiting period after applying teak oil. If you plan to seal afterward, this step is necessary to prevent mildew growth, which can be a challenge when using natural oils like teak oil.
Ultimately, for long-term protection and lower maintenance issues, teak sealer is often the better choice, providing effective UV protection and a longer-lasting finish for your outdoor furniture.
Proper Storage Solutions
Properly storing your teak outdoor furniture is essential to maintaining its beauty and durability. By following some proper storage solutions, you can greatly enhance the longevity of your teak furniture.
Start by choosing a dry, cool place away from direct sunlight and heaters, as excessive heat can cause the wood to dry out and crack. If indoor storage isn't an option, invest in high-quality waterproof covers that allow for ventilation, protecting against moisture damage.
Here are some quick tips to think about:
- Always make sure your furniture is clean and dry before storing it to minimize mold and mildew risks.
- During winter, use elevated furniture storage methods like pallets or blocks to keep it off the ground and prevent contact with snow or standing water.
- Regularly inspect stored furniture for any signs of wear or damage, addressing issues promptly to maintain its integrity.
- Reflect on rotating pieces to avoid uneven fading or wear.
Protecting Against Mildew
Storing your teak outdoor furniture correctly sets the foundation for protecting it against mildew. Regularly inspect your teak furniture for signs of mildew, especially in humid conditions. Damp surfaces can encourage mildew growth, so it's essential to act promptly.
Remove any debris, like leaves and dirt, from the surface to minimize moisture retention and help prevent mildew formation.
If you spot existing mildew, use a solution of water and bleach to clean the wood effectively. Rinse thoroughly afterward to avoid any residue that could harm the finish.
Avoid covering damp teak furniture, as trapped moisture can lead to mildew; always make sure the furniture is completely dry before applying protective covers.
To further protect against mildew, apply a high-quality teak sealer every 6 to 12 months. This not only guards against UV damage but also helps repel moisture, making it easier to prevent mildew growth.
Professional Restoration Services
When your teak outdoor furniture shows signs of wear or damage, turning to professional restoration services can make all the difference.
These experts specialize in cleaning, sealing, and repairing your teak furniture, ensuring it remains both beautiful and functional for years to come.
Consider these benefits of using professional restoration services:
- Early Damage Detection: Regular inspections can spot mold, mildew, or structural issues before they worsen.
- Refinishing Techniques: Professionals use advanced refinishing techniques to restore your furniture's original color and finish.
- Tailored Maintenance Plans: They can create customized maintenance plans to suit your specific environmental conditions.
- High-Quality Materials: Using only high-quality materials and techniques, they extend the life of your teak furniture while preserving its value.
Frequently Asked Questions
Does Outdoor Teak Furniture Need to Be Oiled?
Outdoor teak furniture doesn't necessarily need oil. It contains natural oils for protection. However, if you want to enhance its appearance and maintain color, applying teak oil every 6 to 12 months is beneficial.
Does Outdoor Teak Furniture Need to Be Sealed?
If you want your outdoor teak furniture to withstand the wrath of nature, you've got to seal it! Sealing protects its beauty, prevents damage, and keeps it looking stunning. Don't skip this vital step!
How Do You Care for Weathered Teak Outdoor Furniture?
To care for weathered teak, clean it with soapy water and a stiff brush, sand lightly to refresh the wood, and apply a quality teak sealer every 6 to 12 months for protection.
Should You Sand Outdoor Teak Furniture?
Imagine a painter restoring a canvas. If your outdoor teak furniture's surface feels rough or looks faded, light sanding can revive its beauty. Just remember to follow the grain and clean it afterward for best results.
Conclusion
Caring for your teak outdoor furniture might seem like a hassle, but it's worth it for the beauty and longevity it brings to your space. By following these simple maintenance tips, you can keep your furniture looking stunning with minimal effort. Don't worry if you're short on time; even a little attention goes a long way. Embrace the charm of teak and enjoy your outdoor oasis without the stress—your furniture will thank you for it!
Interior Design
How to Dismantle Sofa to Fit Through Door
Carefully dismantle your sofa to fit through tight doorways with expert tips that could save you from a frustrating move. What challenges might you face?
To disassemble your sofa and fit it through a door, begin by measuring its dimensions and identifying where it is too wide. Take off detachable parts such as cushions and legs, using screwdrivers and a staple remover. Take care when removing upholstery staples to prevent any damage. If necessary, trim the frame for a more snug fit, focusing on areas between the springs and utilizing a circular saw for precise cuts. Once you have successfully fit it through, reconstruct the sofa according to the notes you made during disassembly. Remember to inspect for any loose components. Stay tuned for helpful tips on overcoming difficult obstacles throughout your project!
Key Takeaways
- Measure the sofa's dimensions and weight to ensure it can fit through doorways before disassembly.
- Remove detachable components like cushions and legs to reduce bulk and height for easier maneuvering.
- Use the appropriate tools, such as screwdrivers and staple removers, to take apart the sofa carefully.
- Document the disassembly process with photos and organize removed parts for efficient reassembly.
- If faced with difficulties, consider seeking professional help for large or complex sofa designs.
Assessing the Sofa for Disassembly
Before you plunge into dismantling your sofa, it's crucial to assess it properly. Start by measuring the sofa's dimensions—height, width, and depth—to verify it can fit through doorways and openings. You don't want to find out later that it's too big to pass through!
If you have pets or allergies, it's also a good idea to think about cleaning your sofa with a best vacuum for dust removal before disassembly to minimize allergens in your space.
Next, reflect on the weight of the sofa. Smaller couches typically weigh around 100 lbs, while larger models can reach up to 350 lbs. Make sure you have enough manpower for the job, or you might struggle to maneuver it.
Look for detachable components like legs and cushions. Removing these parts can notably reduce the sofa's size, making it easier to handle.
Then, check for any staples, screws, or bolts securing the sofa's arms and back. You'll need to remove these fasteners to disassemble the piece successfully.
Lastly, plan the disassembly process by creating a diagram or taking photos of how the parts fit together. This will make reassembly much easier later on.
Essential Tools and Materials
To successfully dismantle a sofa, you'll need a few essential tools and materials at your disposal. Start with a staple puller and a staple remover to tackle the fabric securely attached with numerous staples. These tools will help you remove approximately 200 staples, making the process much smoother. Next, grab a screwdriver, preferably with interchangeable heads, to remove any screws holding the frame together. A pair of pliers will come in handy for pulling out nails or loosening tight joints. By following these steps, you will be able to approach dismantling a sofa step by step, ensuring that no part is overlooked during the process.
Additionally, it's vital to create a budget for your project, as budgeting for home projects can help manage costs effectively. You'll also need both flathead and Phillips screwdrivers to unscrew any components holding the sofa together.
If the sofa has stubborn parts, a rubber mallet can help dislodge them without causing damage. Depending on the sofa's construction, a circular saw might be necessary for cutting through the frame, so keep that handy if needed.
Don't forget about pliers; they'll be helpful for gripping and pulling when you encounter nails or other fasteners.
When you're ready for reassembly, have wood screws, metal connector plates, and liquid nails on hand to reinforce your work.
Step-by-Step Disassembly Process
Before you start dismantling your sofa, make sure you've got all the essential tools on hand.
It's also wise to take into account the space you're working in, as some areas may require energy-efficient appliances for ideal lighting.
Using safe cutting techniques is vital, especially if you need to trim any parts for easier handling.
Let's walk through the step-by-step process to get your sofa ready for its new home.
Essential Tools Required
When dismantling a sofa, having the right tools can make all the difference. Using the proper equipment not only speeds up the process but also guarantees you don't damage your furniture or surroundings. Here's a quick rundown of essential tools you'll need:
Tool | Purpose | Importance |
---|---|---|
Pliers | Remove stubborn staples and connectors | Essential for accessing parts |
Staple Remover | Efficiently pull out staples | Helps in gaining access quickly |
Screwdriver | Unscrew legs and arms | Necessary for disassembly |
Rubber Mallet | Gently separate parts | Prevents damage to upholstery |
Power Drill | Quickly remove screws | Saves time on disassembly |
Hammer | Assist in loosening tight joints | Helps with stubborn components |
Tarp or Drop Cloth | Contain debris and protect the area | Keeps the workspace clean |
Gathering these tools beforehand will streamline your disassembly process. Remember to wear safety gear and work in a well-lit area for the best results. Happy dismantling!
Safe Cutting Techniques
Dismantling a sofa requires careful attention to detail and safety, especially during cutting. Begin by evaluating the sofa's structure to determine the best cutting lines, typically between the 3rd and 4th springs. This guarantees you relieve tension while maintaining stability.
It's important to verify that your workspace is clear and organized to prevent any accidents while working with tools. Before starting, consider checking for any hidden components or wires that may need special handling, as you'd with a pet's habitat during maintenance, such as ensuring a safe environment for your hamster care.
Once you've marked your cutting lines, put on protective gear like goggles and gloves to safeguard against debris. Use a circular saw for clean cuts, and take your time when peeling back the fabric. Carefully remove any staples to avoid damaging the material.
Next, cut the tie wire connecting the springs with bolt cutters. This will facilitate easier movement and disassembly without harming the components.
After cutting, secure the sofa with braces or clamps to maintain stability until reassembly. Smooth out all cut edges to prevent injuries later. Always double-check your work to confirm everything is secure and safe.
Removing Cushions and Legs
Starting with the cushions makes the process of dismantling your sofa much easier.
Begin by removing all detachable cushions, as this reduces bulk and weight, making it simpler to maneuver through doorways. Additionally, understanding the importance of financial considerations for elderly care can help you assess the costs associated with moving or replacing furniture if needed.
Pack the cushions and any small pillows in labeled plastic bags to keep everything organized for reassembly later.
Next, focus on the legs. Most legs can be easily removed to decrease the overall height and width of your sofa, helping it fit your sofa through tight spaces.
Use an appropriate tool to remove the screws that secure the legs. Keep these screws in a safe place, like a labeled bag, so you won't lose them during the moving process.
After you've removed the legs, measure your sofa's new dimensions to confirm it will fit through the doorways or other entry points.
This step is essential—double-checking the measurements can save you from unforeseen complications later on.
Dealing With Staples and Upholstery
When you start removing the upholstery, you'll find yourself facing a lot of staples that need to come out.
For a smoother process, consider utilizing tips for effective natural ingredients for grout cleaning to help maintain a clean area around your furniture.
Use a staple remover carefully to protect the fabric and avoid any tears during disassembly.
Keeping the upholstery intact as much as possible will save you time and effort later on.
Removing Upholstery Staples
As you tackle the task of removing upholstery staples, it's important to proceed with care to avoid damaging the fabric or the sofa's wooden structure. Start by gathering your tools—a staple remover or flathead screwdriver works well for this job.
Additionally, consider the significance of maintaining a clean environment during this process, as it can help prevent unnecessary mess and complications. Many vacuum models, such as those from BISSELL offer effective cleaning options that can assist in removing any debris.
Carefully pry out the staples holding the upholstery in place, ensuring you don't snag the fabric underneath. Count and document each staple you remove; some sofas can have as many as 200, and keeping track will help during reassembly.
If you encounter stubborn staples, use a pair of pliers to grip and pull them out more effectively. While you're at it, be cautious when removing the dust cover from the bottom of the sofa, as sharp edges from staples and metal strips may be exposed.
After removing the staples, it's advisable to keep them organized in a container to prevent loss. This way, you'll have everything you need for reassembly later on.
Protecting Fabric During Disassembly
Protecting your upholstery during disassembly is vital to preserving its integrity. Start by using a staple puller to carefully remove staples without damaging the fabric. Some sofas can have upwards of 200 staples securing the covering, so take your time.
When peeling back the fabric, begin at the bottom and work your way up. This technique minimizes the risk of tearing or fraying the upholstery. Additionally, guaranteeing high-quality content about your process can enhance your understanding and execution, as holistic SEO integrates technical, on-page, and off-page strategies.
To shield the fabric from potential cuts or scratches, lay down a towel or drop cloth as a barrier while you work with tools like pliers and staple removers. This simple step can save you from costly repairs later.
It's also important to document the disassembly process. Take photos of the fabric positioning and staple placements to aid in reassembly and prevent damage during removal.
After you've removed the staples, store the fabric pieces in labeled bags. This organization will help avoid loss and keep everything in order for when you're ready to put it back together.
Cutting and Preparing the Frame
Dismantling a sofa requires careful cutting and preparation of the frame to guarantee a smooth process. Start by selecting a cut line between the 3rd and 4th springs. This placement helps release the tension in the springs, making the cutting easier and safer.
Before you begin cutting, use bolt cutters to remove the tie wire connecting the springs. This step will allow for smoother movement of the sofa halves during the dismantling. Additionally, it's wise to verify that your workspace is clear of any distractions, similar to how essential oils for relaxation can create a calming environment when working on projects.
Once you've cleared the springs, grab a circular saw for precise cuts along the marked line. Be sure to take protective measures to shield the fabric from damage. Always wear protective gear, such as gloves and safety goggles, to protect yourself from sharp edges and flying debris while cutting the frame.
After cutting, stabilize the two halves of the sofa with scrap wood braces. This will keep them secure until you're ready to reassemble.
Reassembling the Sofa Correctly
When you start reassembling the sofa, focus on proper alignment techniques to make certain everything fits together smoothly.
Consider using natural materials during the assembly, as seen in modern farmhouse decor trends, to enhance the aesthetic appeal of your living space.
Secure all structural components using the right tools and materials for a sturdy finish.
Proper Alignment Techniques
To guarantee a seamless reassembly of your sofa, start by referencing the diagram you created during disassembly. This visual guide will help you verify that all components are aligned correctly.
Follow these proper alignment techniques to reassemble your sofa effectively:
- Align the Frame: Begin by positioning the main frame on a flat surface. Make sure all parts fit snugly together according to your diagram of the sofa.
- Secure the Upholstery: Tuck back and side flaps under the frame before re-stapling the upholstery. This prevents sagging and keeps the fabric taut.
- Replace the Springs: If you'd to cut any tie wire connecting springs, replace them with 14-gauge copper wire. This maintains proper tension for comfortable seating support.
After completing these steps, do a final check.
Verify all screws and staples are tightened, and the sofa is stable. This attention to detail will guarantee your sofa isn't only visually appealing but also sturdy and ready for use.
Securing Structural Components
Securing the structural components of your sofa is vital for guaranteeing its longevity and comfort. When reassembling, replace any cut tie wire with 14-gauge copper wire to keep the springs tensioned. Since your sofa has removable parts, it's important to keep everything organized. Label and store screws and bolts for easy reattachment, minimizing misplacement risks.
Use the table below to guide your reassembly process:
Component | Method of Securing | Tips |
---|---|---|
Springs | Replace with copper wire | Verify tension is maintained |
Lower Cushions | Tuck and staple | Be careful not to damage fabric |
Disassembled Pieces | Metal plates & liquid nails | Create a strong bond |
Screws & Bolts | Organize and label | Prevent missing components |
Final Inspection | Check for stability | Verify safe and functional setup |
After securing the components, reattach the lower cushions by tucking the flaps under the frame and using a staple gun. Finally, perform a thorough inspection to catch any loose parts, guaranteeing your sofa is ready for use.
Final Touches and Adjustments
As you wrap up the reassembly process, start by aligning and attaching the lower cushions back onto the sofa frame. Make certain all flaps are tucked in and secured with staples or tacks to keep everything in place.
Next, it's time to focus on the structure. Here are some final touches to guarantee everything's secure:
- Replace any cut tie wire: Use 14-gauge copper wire to reconnect the springs, maintaining the sofa's structural integrity.
- Reattach the legs: Verify they're securely fastened to provide stability and support to the sofa.
- Check the upholstery: Smooth out any wrinkles and re-staple any fabric that may have loosened during disassembly.
After completing these steps, inspect the sofa for any misalignments or loose parts.
Don't hesitate to make adjustments as necessary, ensuring a solid and aesthetically pleasing final product. Taking the time for these final touches won't only enhance the sofa's appearance but also assure its longevity.
You've put in the effort, so make certain to enjoy your newly reassembled sofa!
Common Challenges and Solutions
Moving a sofa can be a challenging task, especially when faced with common obstacles like tight doorways and heavy weight. To overcome these challenges, planning ahead is essential. Measure your sofa against door and passageway sizes to determine if you need to dismantle any components for a better fit.
Challenge | Solution |
---|---|
Tight doorways | Assess dimensions; tilt or pivot the sofa for clearance. |
Heavy weight | Use lifting straps and enlist extra help to move safely. |
Bulky components | Remove detachable parts like legs, cushions, and backs. |
When you find that your sofa needs to be moved, disassembly can greatly ease the process. Take off legs and cushions first, as they reduce bulk. If needed, you can even remove arms or backs to make it easier to navigate tight spaces. Additionally, maneuvering the sofa at a 45-degree angle can create more room in those tricky spots. By tackling these common challenges with the right solutions, you'll make your sofa moving experience smoother and safer.
Emotional Journey of DIY Projects
Tackling DIY projects, especially something as significant as disassembling a sofa, can stir up a whirlwind of emotions. You might feel anxiety and fear creeping in at first, but overcoming these feelings can lead to a sense of bravery and accomplishment. Embrace the full range of your emotional journey, as it can be truly transformative.
Here are three key emotions you might experience during this process:
- Stress and Frustration: When you encounter challenges, it's natural to feel overwhelmed. Remember, these feelings are temporary.
- Joy and Pride: Once you start making progress, the satisfaction of seeing your hard work pay off can fill you with happiness.
- Feelings of Gratitude: If you've got a supportive partner or friends helping you, take a moment to appreciate their encouragement.
Completing a DIY project like sofa disassembly brings a profound sense of relief. It not only transforms a formidable task into a rewarding experience but also deepens your connections with those who supported you.
When to Seek Professional Help
Knowing when to call in professionals can save you time, effort, and potential headaches during the sofa disassembly process. If your sofa is particularly large or heavy, it's wise to contemplate professional help. They can guarantee safe disassembly and transport, minimizing the risk of injury or damage to your furniture.
Professionals, like NY Couch Doctor, have years of experience and specialized skills to handle complex sofas, including sofa beds and sectionals, which may require additional techniques. Hiring experts can save you significant time and alleviate stress, as they typically complete disassembly and reassembly faster than a DIY approach.
The estimated cost for professional disassembly services usually ranges from $250 to $400 per piece, plus travel fees, but this investment can be worthwhile for valuable or delicate furniture. Moreover, professionals guarantee that all components are carefully handled and correctly reassembled, preserving the integrity and aesthetics of your sofa post-move.
Frequently Asked Questions
Can You Dismantle a Sofa to Fit Through a Door?
Yes, you can dismantle a sofa to fit through a door. Remove cushions, legs, and arms to make it smaller. Always measure both the sofa and doorway first to guarantee a proper fit before disassembling.
How to Make a Couch Fit Through a Door?
When life gives you a tight squeeze, measure your couch and door first. Remove cushions and legs, tilt it at an angle, and pivot carefully. Sometimes, a little creativity makes all the difference in moving!
What if My Sofa Doesn't Fit Through the Door?
If your sofa doesn't fit through the door, measure both the sofa and doorway. Consider removing legs or cushions, using the pivot method, or separating sections to simplify maneuvering through tight spaces.
How to Work Out if a Sofa Will Fit Through a Door?
Imagine you've bought a stunning sectional. To check if it fits through your door, measure both the sofa and door dimensions. If the sofa's width is less than 36 inches, you're likely in luck!
Conclusion
Now that you've tackled the sofa disassembly, you can finally breathe easy as it glides through your doorway like a knight in shining armor. Remember, each piece you've removed is a step closer to your goal. If you hit any snags, don't hesitate to reach out for help. Sometimes, even the best DIY warriors need a trusty squire. With patience and practice, you'll have that sofa back together in no time, ready for its new spot!
-
Beauty and Grooming3 weeks ago
Embrace Natural Glow With Bronzer-Free Accelerators
-
Beauty and Grooming4 weeks ago
Discover Top Outdoor Tanning Lotions Today
-
Fashion Trends1 month ago
Fall 2025 Fashion Trends: Be Ahead of the Curve!
-
Vetted1 month ago
15 Best Affordable Sustainable Fashion Brands You Need to Know About in 2025
-
Interior Design3 days ago
Mylar vs. Foil Balloons: The Ultimate Showdown
-
Beauty and Grooming3 weeks ago
Unlock Flawless Tanning With Skin Prep
-
Interior Design3 weeks ago
Create Your Dream Cottagecore Home Office Now!
-
Vetted1 month ago
15 Best Women's Fashion Trends of 2025 You Need to Know About