Interior Design
How to Afford Bathroom Remodel
Incredible bathroom remodels can be achieved on a budget; learn the secrets to transforming your space without overspending. Discover how to make it happen!
You can complete a bathroom remodel without spending a fortune by being strategic with your planning and exploring budget-friendly options. Begin by creating a practical budget, with typical costs ranging from $9,600 to $11,000. Keep existing plumbing to minimize expenses and take on the role of general contractor to save on labor costs. Explore financing options such as personal loans or home equity loans if necessary. Purchase materials online and consider tackling DIY projects to make your budget go further. Seek advice from local experts and discover additional ways to keep your remodel affordable as you progress.
Key Takeaways
- Set a detailed budget considering average costs, allocating funds to plumbing, fixtures, materials, labor, and miscellaneous expenses.
- Explore financing options like personal loans, home equity loans, or 0% credit cards to manage remodeling costs effectively.
- Act as your own general contractor to save up to 30% on labor costs and hire professionals only for complex tasks.
- Choose budget-friendly materials and DIY where possible, such as painting existing fixtures or using straight-edged tiles for easier installation.
- Engage with local resources and online communities for expert advice, shared experiences, and cost-saving tips throughout your remodeling journey.
Understanding Remodeling Costs
When planning a bathroom remodel, it's crucial to understand the costs involved to avoid any surprises. The average remodeling costs range from $9,600 to $11,000, but your specific project might push that figure higher or lower.
If you're considering a larger renovation, be prepared for potential overruns; having a detailed budget helps you manage these fluctuations. Setting a clear budget plan will also assist in keeping your spending on track.
Your design choices and materials will greatly influence your final expenses. Opting for high-end fixtures or custom designs can quickly elevate your costs.
If you're handy, acting as your own general contractor might save you some money, but it also means you'll need to oversee everything closely.
Another way to keep expenses down is to maintain your existing layout and plumbing. Major structural changes can lead to additional costs that can quickly add up.
Additionally, keep in mind that material and labor costs can fluctuate annually based on market conditions and demand.
If you're considering financing options, a home equity loan could be a viable solution to help cover remodeling costs. Just make sure you've accounted for all potential expenses before diving into your dream bathroom project.
Exploring Financing Options
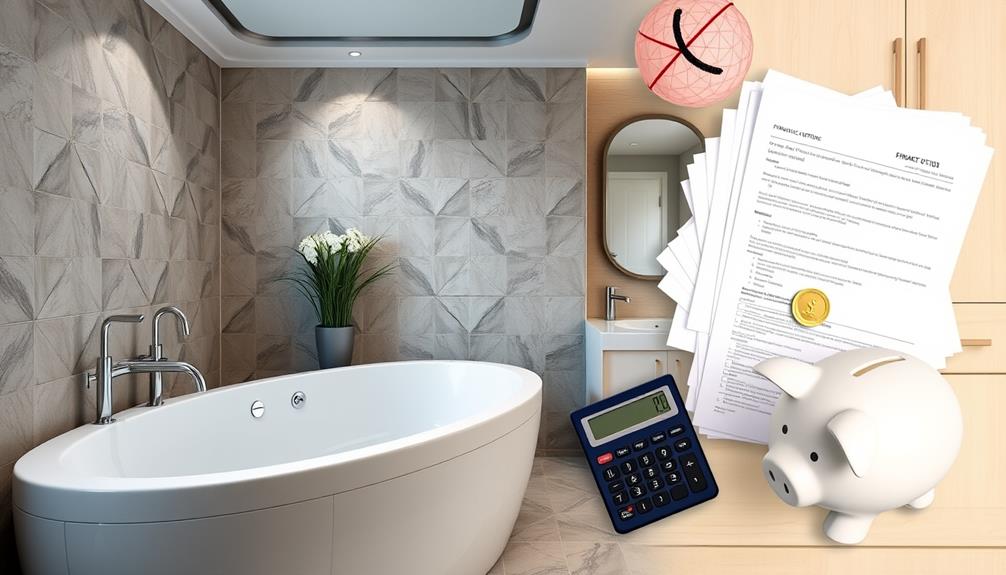
Finding the right financing option can make a significant difference in your bathroom remodel budget. You've got several choices to take into account, including personal loans, home equity loans, and home equity lines of credit (HELOCs).
With average remodeling costs ranging from $9,600 to $11,000, understanding these options is vital. Additionally, it's important to protect your savings during this investment process, ensuring you avoid high-pressure sales tactics and research your financing options thoroughly, especially if pondering a Gold IRA scam.
Personal loans are a flexible method for funding your project, typically offering amounts from $2,500 to $50,000. The interest rates can vary based on your credit score, so it's important to shop around for the best deal.
If you have substantial equity in your home, a home equity loan could be a smart choice. These loans provide fixed interest rates and predictable payments, making them suitable for larger renovations, but you usually need at least 20% equity for approval.
Alternatively, think about using a 0% promotional rate credit card for short-term financing. If you can pay off the balance before interest kicks in, this can help you manage costs effectively.
Evaluate each of these financing options to find the one that best fits your needs and budget.
Comparing Personal Loans
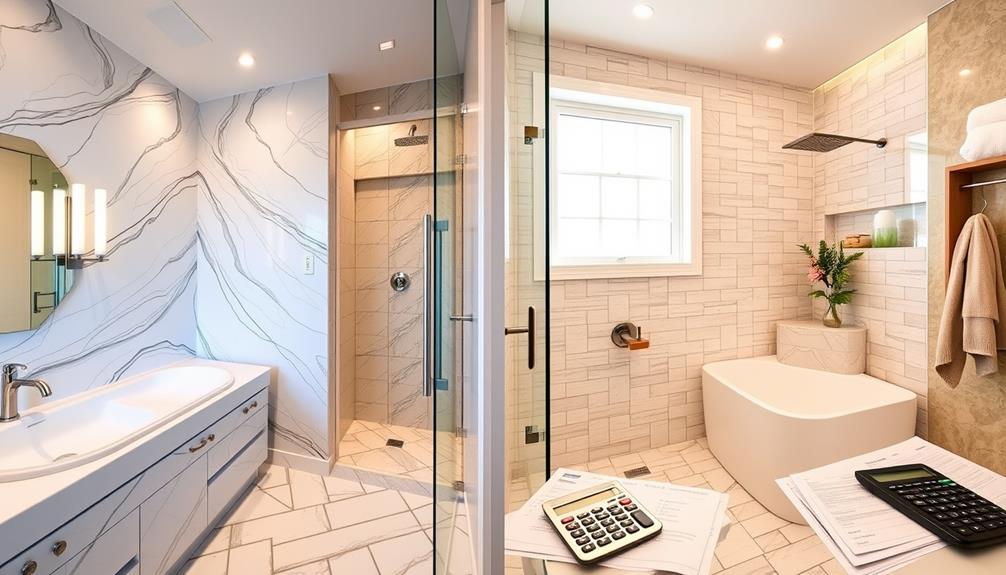
Comparing personal loans can greatly impact your bathroom remodel budget, offering various options tailored to your financial situation.
Start by looking at different lenders and their interest rates. For instance, Discover Personal Loan provides APRs from 7.99% to 24.99% for amounts between $2,500 and $40,000, but requires a minimum credit score of 660.
If you're looking for flexibility, Upstart offers loans from $1,000 to $50,000 with APRs ranging from 7.80% to 35.99%, and it doesn't have a minimum credit score requirement.
Additionally, it's important to evaluate diversification strategies that can help secure your financial future while managing your remodeling costs.
Best Egg is another option, allowing you to borrow between $2,000 and $50,000, with interest rates from 8.99% to 35.99%, but a minimum credit score of 550 is necessary.
When comparing personal loans, always evaluate interest rates, repayment terms, and any associated fees. These factors can considerably impact the overall cost of borrowing.
Aim for loans with consistent monthly payments to simplify your budgeting and reduce the financial strain that often comes with funding a bathroom remodel.
Application Process for Loans
To kick off your loan application process, start by gathering essential documents like your Social Security number, employment details, income verification, bank statements, and your last tax return. Having these items ready streamlines your application and helps you secure a loan against the equity in your home.
Next, consider pre-qualification with lenders. This step allows you to compare rates without impacting your credit score, giving you insight into the best options. Be mindful of whether the lender conducts a hard or soft credit check. Hard checks can negatively affect your credit score, while soft checks won't.
Expect most online lenders to respond to your application within minutes, making the process swift. However, before you hit submit, check for any origination fees and inquire about flexible financing options.
Step | Description |
---|---|
Gather Documents | Collect all necessary financial info. |
Pre-qualify | Compare rates without credit impact. |
Credit Check Type | Know if it's hard or soft. |
Apply Online | Expect quick responses. |
Confirm Fees | Inquire about origination fees. |
Cost-Saving Strategies
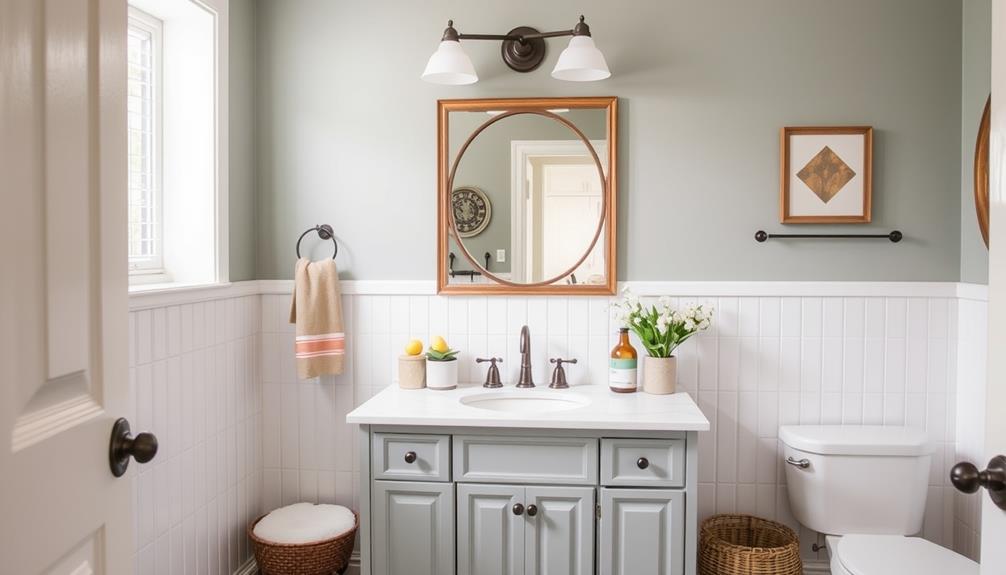
When planning your bathroom remodel, implementing cost-saving strategies from the start can make a significant difference in your budget. By taking control of certain aspects of the project, you can effectively lower your overall expenses.
Acting as your own general contractor can save you up to 30% on labor costs. Additionally, maintaining the existing layout and plumbing helps avoid extra expenses, keeping your remodeling costs within the average range of $9,600 to $11,000.
Quality assurance principles can also be applied in remodeling, ensuring that the work done meets high standards and minimizes future costs related to repairs or modifications, as seen in best practices in software quality assurance.
Here are some cost-saving strategies to take into account:
- Hire professionals only for complex tasks: Focus on areas that require expert skills, like shower installation, while handling simpler tasks yourself.
- Price shop online: Look for competitive rates on materials and fixtures, factoring in tax and shipping to find the best deals.
- Utilize platforms like Craigslist: Discover discounted materials to find quality items at a fraction of retail prices.
Smart Design Choices
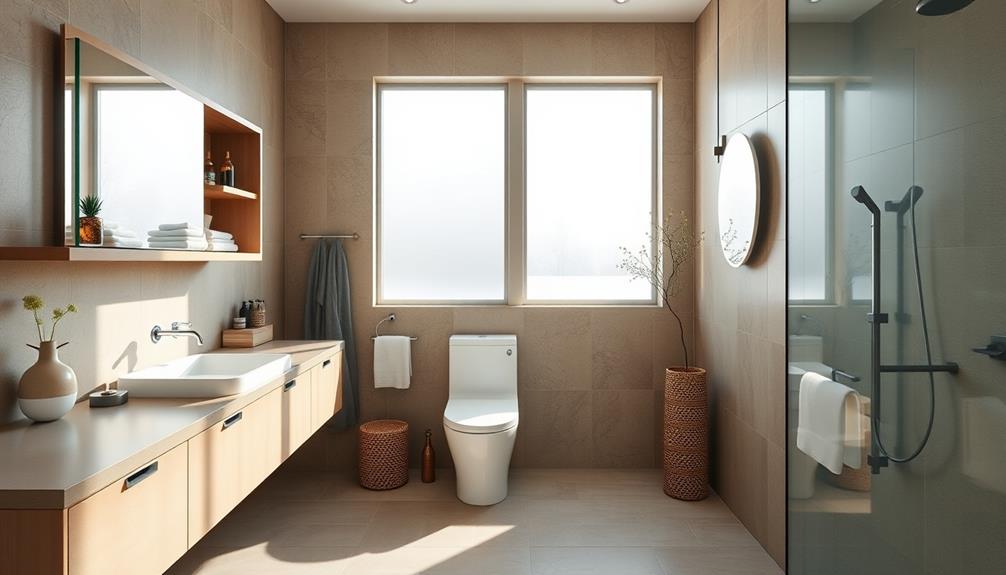
When planning your bathroom remodel, smart design choices can keep costs in check while still achieving that stylish look you want.
For instance, creating a mood board can help you visualize budget-friendly materials and styles that resonate with your personal preferences.
Consider exploration of personal tastes to decide whether you'll tackle some DIY tasks and how flexible you can be with your design options.
These elements can make a significant difference in your overall expenses while enhancing the beauty of your space.
Budget-Friendly Material Selection
Your bathroom remodel doesn't have to break the bank, especially when it comes to material selection. By making smart choices, you can achieve a stylish look while keeping your costs low. Here are some budget-friendly material selection tips to help you spend less:
– Choose straight-edged tiles over intricate designs. They not only look great but also cut down installation costs considerably.
Consider exploring DIY Fire Pit Ideas for other creative outdoor projects that can inspire your design aesthetic.
- Paint your existing vanity instead of buying a new one. A fresh coat of paint can transform its appearance for just $50-$100, saving you a lot of money.
- Opt for shower curtains instead of glass doors. While glass doors can cost $500 or more, a stylish shower curtain only costs $20-$100.
Additionally, consider sourcing discounted materials from platforms like Craigslist, where you can find quality items at up to 50% off retail prices.
Don't forget to use moisture-resistant paint for durability in your bathroom; it costs around $30 per gallon and helps maintain a fresh look without constant touch-ups.
With these tips, you'll guarantee a budget-friendly material selection that won't compromise on style.
DIY vs. Professional Help
Deciding between DIY and professional help can be a game-changer for your bathroom remodel. Acting as your own general contractor can save you significant labor costs, allowing you to allocate more of your budget to high-quality materials and fixtures.
If you maintain your existing layout and plumbing, you can avoid the hefty expenses of relocating pipes, which can add hundreds, or even thousands, to your project. Incorporating multi-functional gear in your design choices, much like in creating a bug out bag, can optimize space and enhance the functionality of your bathroom.
For complex tasks like shower installation or electrical work, hiring professionals is a smart move. Their expertise guarantees quality and safety, while you can manage simpler tasks like painting or installing accessories on your own.
This combination allows you to balance cost savings with the assurance of a job well done. Make budget-friendly design choices, too. For instance, refinishing an existing vanity instead of replacing it can save you hundreds while still giving your bathroom a fresh look.
Don't forget to utilize online resources and price shop for materials; this can help you find competitive rates, stretching your budget further while achieving a stylish home. Ultimately, mixing DIY efforts with professional help can lead to a successful bathroom remodeling project tailored to your needs.
Flexible Design Options
Finding flexible design options is essential for a successful bathroom remodel that stays within budget. By maintaining the existing layout and plumbing, you can greatly cut costs, avoiding extensive structural changes.
Consider opting for straight-edged tiles instead of intricate patterns; they'll give your space a modern look while saving on installation expenses. Additionally, incorporating family-friendly amenities can enhance the overall functionality of your bathroom.
To further enhance your design without breaking the bank, explore these budget-friendly materials and options:
- Refinish or paint existing fixtures: Update your vanity or sink to give them a fresh appearance at a fraction of the cost of new installations.
- Use shower curtains: They not only save money compared to glass doors but can also add style and color to your bathroom.
- Stay open to sales: Being flexible with your design choices allows you to capitalize on discounts and special offers, reducing your overall remodeling costs.
Resource Allocation Tips
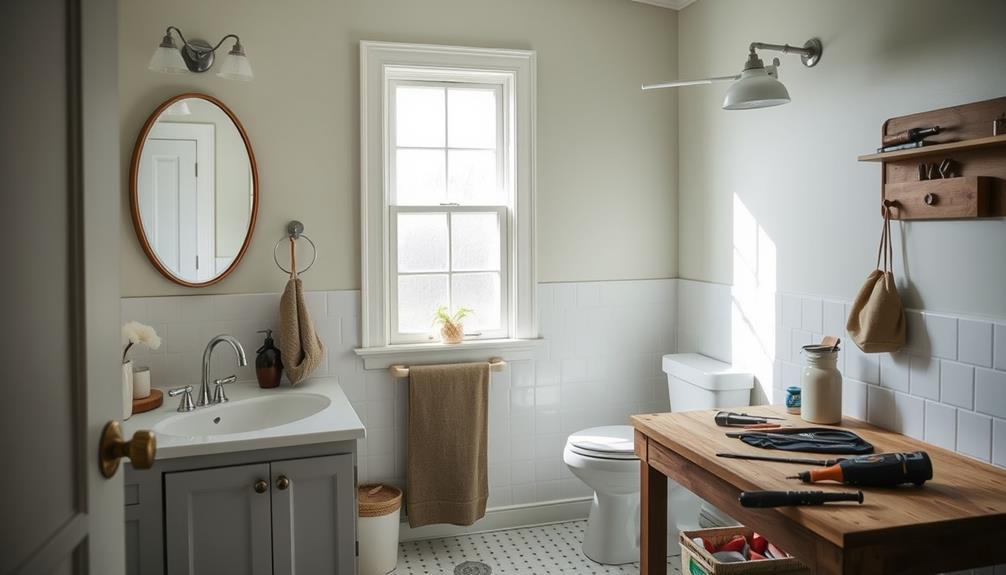
When planning a bathroom remodel, strategically allocating your budget can make all the difference in achieving a stylish yet functional space. Start by prioritizing essential aspects like plumbing and fixtures, which can cost over $3,500 for installation alone. Here are some resource allocation tips to help you manage your amount of money effectively:
Area | Suggested Budget Allocation |
---|---|
Plumbing | $1,500 |
Fixtures | $1,000 |
Materials | $800 |
Labor | $700 |
Miscellaneous | $500 |
Consider a detailed cost breakdown to identify savings. For instance, opting for a $200 toilet instead of a higher-end model can maintain quality while cutting costs. Use online pricing tools to compare materials and fixtures, ensuring you secure the best rates. Don't overlook potential savings through DIY projects, like painting the existing vanity, which can greatly lower labor expenses. Finally, keep your design flexible, allowing adjustments based on available resources and deals. This approach maximizes your budget's impact and helps you achieve the bathroom you desire without breaking the bank.
Seeking Expert Guidance

Reaching out for expert guidance can greatly enhance your bathroom remodel experience. By consulting with skilled bathroom remodelers, you can gain valuable insights that help you make informed decisions tailored to your budget and style.
This holistic SEO approach can also be applied to your remodeling project, ensuring that you consider various aspects from design to functionality. Don't hesitate to seek free advice from home builders and designers; their suggestions on cost-effective materials and design choices can be invaluable.
Consider the following ways to gather expert guidance:
- Engage with online communities: Join forums where homeowners share their experiences and tips, giving you a wealth of knowledge from those who've successfully navigated similar projects.
- Attend home improvement workshops: These events offer hands-on learning opportunities to develop practical skills, empowering you to maximize your remodeling budget.
- Research specialized blogs: Stay updated on the latest trends and cost-saving strategies by following blogs dedicated to bathroom remodeling.
Engaging With the Community
Engaging with your community can be a game-changer when planning your bathroom remodel.
Sharing experiences and gathering advice from others who've tackled similar projects can provide insights into common challenges and solutions.
You'll find a wealth of knowledge at your fingertips, especially when it comes to financial considerations for elderly care.
Plus, you'll pick up valuable budgeting tips that can keep your costs down while enhancing your design.
Share Your Experiences
Sharing your bathroom remodel experiences in community forums can be a game-changer. By engaging with others who've faced similar financial challenges, you gain valuable insights and tips that can enhance your project. Discovering cost-saving strategies, like utilizing reclaimed materials or acting as your own general contractor, can greatly impact your budget.
Here are some ways sharing your experiences can benefit you:
- Learn about financing options: Homeowners often exchange ideas on effective methods, such as personal loans or home equity lines of credit, which can help you manage your budget more effectively.
- Find local resources: Discussions often reveal workshops and free consultations from experts that can educate you on budget-friendly remodeling practices.
- Gain inspiration: User-generated content frequently highlights successful budget remodeling stories, motivating you to share your journey and learn from others' successes and lessons.
Ask for Advice
Asking for advice from the community can be one of the smartest moves you make during your bathroom remodel. Engaging with online communities provides valuable insights from others who've successfully tackled similar projects on a budget.
You'll find countless tips and strategies that can help you finance your bathroom without breaking the bank.
Consider attending home improvement workshops that often offer free advice from professionals. These sessions can equip you with essential knowledge to make informed decisions.
Participating in DIY forums is another effective way to share experiences and learn from the challenges faced by fellow remodelers.
Don't overlook local builders and designers who might offer complimentary consultations. Their expert guidance on cost-effective design choices and materials can be invaluable.
Additionally, utilizing social media platforms can connect you with like-minded individuals who can share their resources and recommendations for affordable remodeling strategies.
Tips for Budgeting
Setting a clear budget is a fundamental step in your bathroom remodel journey, and the community can be a great resource for this process. Start by determining your overall budget, knowing that average costs range from $9,600 to $11,000.
Engage with others who've gone through similar projects to uncover valuable budgeting tips and cost-saving strategies.
Consider these budgeting tips to maximize your resources:
- Act as your own general contractor: This can save you significant labor costs while giving you full control over the project.
- Explore online forums: These platforms often have user-generated content that can lead you to affordable fixtures and materials.
- Attend workshops: Local home improvement workshops or online webinars can provide insights into effective budgeting techniques and available financing options.
When planning, think about how monthly payments can fit into your financial landscape.
Enhancing Your Bathroom Affordably
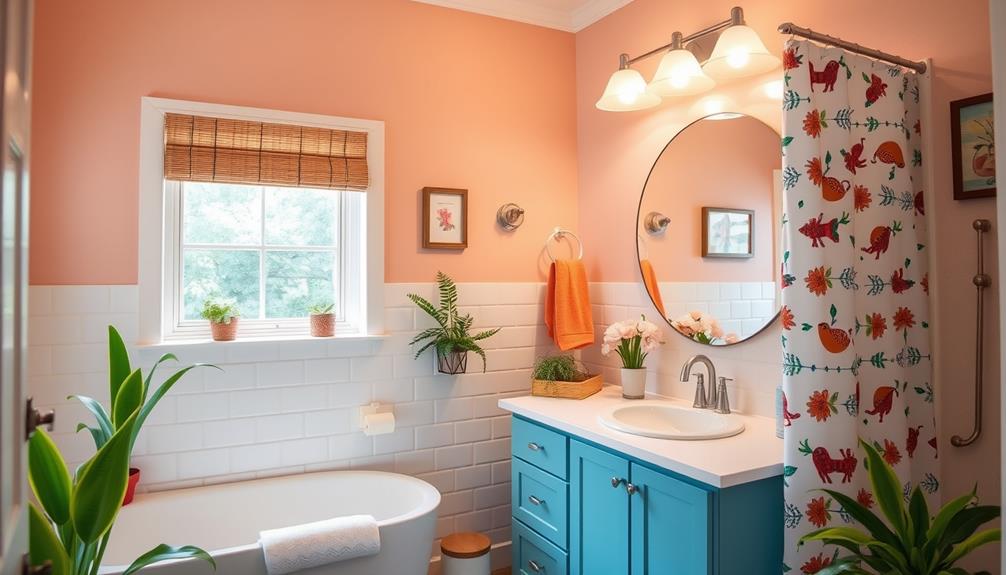
When it comes to enhancing your bathroom affordably, smart choices can make all the difference. Start by opting for cost-effective materials like vinyl or laminate flooring, which can give your space a stylish look without breaking the bank.
By maintaining the existing layout and plumbing, you can avoid the hefty costs associated with relocating fixtures—this alone can save you thousands.
Instead of replacing your vanity, consider a fresh coat of paint, which typically costs under $100 and can dramatically refresh the space. For a quick upgrade, budget-friendly options like peel-and-stick tiles are perfect for DIY projects, allowing you to achieve a new look without the expense of professional installation.
Don't forget to explore second-hand marketplaces or clearance sales for discounted fixtures and materials. You could save up to 50% on renovation supplies, making it easier to stay within your budget.
With these strategies, you can enhance your bathroom without overspending, ensuring that your remodel is both stylish and financially manageable.
Frequently Asked Questions
How Do People Afford Bathroom Renovations?
People often finance bathroom renovations through personal loans, home equity options, or credit cards. You might also consider cost-saving strategies like acting as your own contractor or keeping the existing layout to save money.
Can You Redo a Bathroom for ?
Yes, you can redo a bathroom for $5,000! Focus on cosmetic upgrades like paint, fixtures, and affordable materials. Prioritize discounts and shop strategically to stretch your budget while achieving a fresh, updated look.
What Is the Most Expensive Part of a Bathroom Remodel?
The most expensive part of a bathroom remodel is usually labor costs, which can take up to 40% of your budget. High-end materials and major plumbing work also greatly contribute to overall expenses.
How Much Should You Spend on a Bathroom Remodel?
When dreaming of a bathroom oasis, consider spending around $12,000 or more. Your choices, from fixtures to finishes, shape the budget. Prioritize what matters to you, ensuring every dollar transforms your space into a sanctuary.
Conclusion
In the wild world of bathroom remodels, you can totally transform your space without breaking the bank! With a little creativity and some savvy financing, you can turn that outdated shower into a spa-like oasis faster than you can say "luxury!" Remember, it's all about smart budgeting and resourcefulness. So plunge into those cost-saving strategies and don't hesitate to tap into your community for support. Your dream bathroom is just a few savvy choices away!
Interior Design
How to Use Chalk Paint on Furniture
Optimize your furniture transformation with chalk paint; discover essential tips and techniques to achieve a stunning finish that lasts.
To use chalk paint on furniture, start by cleaning and prepping your piece, ensuring it's free of dust and grease. Remove any hardware and fill holes if necessary. Stir your chosen chalk paint well before applying it in smooth, even strokes, allowing each coat to dry thoroughly—typically 1-3 hours apart. If desired, finish with a layer of wax for added protection and shine, buffing lightly to a smooth surface. Remember to maintain your painted furniture with gentle cleaning and periodic wax applications. For tips on techniques and enhancements, there's plenty more you can discover.
Key Takeaways
- Clean and prepare the furniture by removing hardware and filling holes, ensuring a smooth surface for painting.
- Choose a suitable chalk paint, stirring thoroughly, and apply in multiple thin coats for even coverage.
- Lightly sand between coats and allow adequate drying time to achieve the desired finish.
- Seal the paint with a wax or water-based sealer to protect and enhance the surface.
- Maintain the finish by cleaning gently and periodically applying wax to prolong durability.
Preparing Your Furniture
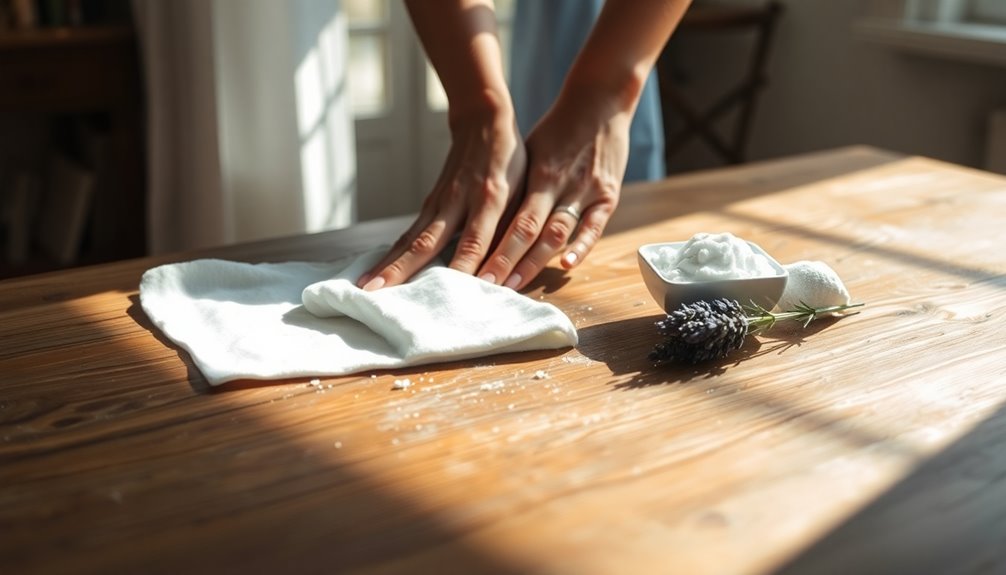
Before you dive into painting, it's essential to set up your furniture properly. Start by cleaning the surfaces with a damp cloth, avoiding harsh chemicals. If you encounter stubborn dirt or grease, mix warm soapy water or use a solution like White Lightning or TSP. Spray it on the surfaces and wipe down with a soft cotton cloth or paper towels. For kitchen cabinets, ensure you remove all grease residue to prevent affecting the finish. Finish up by wiping with clean water to eliminate any leftover cleaning solution.
Next, remove any hardware, such as handles, from the furniture to ensure smooth painting. Fill any holes left by removed hardware with wood filler and sand them smooth. If you prefer to paint over hardware, make sure it's clean and free of grease. Don't forget to take off any other fixings that could interfere with your painting process. Lastly, lightly sand shiny surfaces using 220 grit sandpaper for better paint adhesion. Chalk Paint® adheres well to multiple surfaces, including varnished wood, making it a versatile choice for your project. Wipe away any sanding dust before you begin painting. Following these steps will set you up for a successful chalk paint project!
Assessing Surface Conditions
Once your furniture is prepared, it's time to assess the surface conditions. Start by checking for dust or dirt; if you find any, gently wipe the surface down with a damp cloth. Avoid using harsh chemicals, especially on kitchen cabinets that may have grease. It's essential to ensure the surface is clean and dry before you begin painting.
Next, identify the type of surface you're working with. If it's shiny or laminate, you may need to do some light sanding to improve paint adhesion. Use a fine sanding sponge or block, and test the surface with a scratch test to confirm it's not too smooth or glossy.
Now, check for any previous finishes. Use nail polish remover to determine if it's oil-based or water-based; if color comes off, it's water-based. If it's oil-based, you'll need to apply a primer to ensure the Chalk Paint adheres properly. Remember that Chalk Paint™ adheres well without extensive sanding, which simplifies the preparation process.
Finally, inspect for any potential stains or bleeding, particularly in vintage furniture or untreated pine. Look for mold and be prepared to test for lead or other substances that could affect adhesion. This thorough assessment will set you up for successful painting.
Choosing the Right Paint
How do you choose the right paint for your furniture project? Start by considering the versatility of chalk paint. It works well on various surfaces like wood, metal, melamine, and even glass. Since chalk paint doesn't require sanding or priming, you can dive right into your project without extensive prep work.
Next, think about color selection. With an extensive palette inspired by historical decor, you'll find shades like Old White, Paris Grey, and Emperor's Silk. If you're feeling creative, you can mix your own bespoke shades. To avoid surprises, grab color cards and samples to test out your choices before committing.
When it comes to brands, Annie Sloan Chalk Paint is a widely recognized option, but don't overlook other cost-effective alternatives available at local hardware or DIY stores. Check online retailers for even more choices. Additionally, remember that Chalk Paint® is designed for both beginners and professionals, making it an excellent choice regardless of your skill level.
Lastly, consider your budget. Prices range from $16 to $45, but remember, you'll save on prep costs. Typically, two coats are enough for full coverage, giving you a durable finish that lasts. With these points in mind, you're set to choose the perfect chalk paint for your furniture project!
Applying Chalk Paint
Applying chalk paint can transform your furniture with relatively little effort. Start by stirring your chosen color thoroughly. If you've prepped your furniture by removing hardware and cleaning the surface, you're ready to paint. Dip your brush into the paint and apply it directly onto the furniture. Move the brush in all directions to ensure even coverage. If you prefer a rustic look, apply the paint thickly; for a modern finish, keep it smooth.
Allow the first coat to dry until it's touchable, which usually takes 1-3 hours, depending on your environment. If you feel additional coats are necessary, apply them in the same manner. Remember, each coat should be fully dry before you proceed to the next step.
Once your final coat is dry, you can sand it lightly with very fine sandpaper or a sanding sponge to achieve a smooth finish. Chalk paint's low VOCs make it a great choice for indoor projects, ensuring a safe environment while you work. If you want to create a distressed look, use sanding techniques to expose some of the underlying surface. Make sure the paint is completely dry before moving on to sealing it with wax, ensuring your hard work is protected.
Layering Additional Coats
When layering additional coats of chalk paint, it's essential to assess the coverage you desire and the color you're working with. If you're painting a dark piece with white or off-white, you might need three coats for solid coverage. Conversely, darker colors usually only require two coats for excellent results. For a distressed look, you can often achieve it with just two coats, while unfinished wood may need extra layers if staining is involved.
Timing is crucial between coats. Chalk paint dries quickly, typically within 1-3 hours, but you should wait until the first coat is completely dry before adding the next one. For layered effects, waiting 24 hours helps prevent unwanted mixing of colors. Keep an eye on humidity and weather, as these factors can influence drying times. It's also important to consider using a light coat of chalk paint for initial coverage to ensure a smooth finish.
When applying your coats, consider techniques like dry brushing for a textured finish. Use a nearly dry brush with stiff bristles for feathery strokes, concentrating darker shades along edges to create depth. Always test for bleed-through on older woods and apply primer as needed. This preparation ensures a smoother and more vibrant final result.
Waxing Techniques
Waxing is a crucial step in achieving a durable and beautiful finish for your chalk-painted furniture. Before you start, make sure the paint is fully dry. Use a fine sanding pad to smooth out any remaining texture, and wipe the surface with a damp cloth to remove dust. It's also wise to remove any hardware to avoid interference during waxing. Always work in a well-ventilated area to keep fumes at bay.
When applying the wax, use a Chalk Paint™ Wax Brush. Charge your brush with Clear Chalk Paint™ Wax and apply it in sections, sweeping it over the paintwork with either brush strokes or a lint-free cloth. Aim for thin, even layers, working in larger areas for better control. Applying wax in sections allows for better control and finish.
After applying the wax, use a clean, lint-free cloth to wipe off any excess while it's still wet. Rub lightly in one direction to minimize marks. Don't forget to check each section and remove any excess wax promptly. Allow the wax to be touch dry within 24 hours, but remember that full curing can take up to 21 days. Be gentle with your piece during this time to avoid damage.
Final Touches and Care
After you've successfully painted and waxed your furniture, it's essential to focus on the final touches and care to ensure your piece remains beautiful and durable. Start by sealing the paint with a water-based sealer or additional wax. Use a clean brush to cover every surface, and let it dry completely before handling. Once dry, buff the surface with a lint-free cloth to achieve a smooth finish.
For everyday cleaning, simply wipe off dust with a dry, lint-free cloth. For deeper cleaning, use a slightly damp cloth, wiping in the direction of the brush strokes. If you encounter tough stains, gently scrub with a mix of dish soap and water. Avoid harsh chemicals that could damage the paint. Remember that proper sealing prolongs the life of your finish, so be diligent in this step.
In case of spills, quickly wipe up any water to prevent spots. For oil spills, use a degreaser and follow with clean water. Remember to maintain your finish by periodically applying wax and addressing scratches or scuff marks as they arise. This way, your chalk-painted furniture will stay looking fresh and vibrant for years to come.
Enhancing With Dark Wax
Enhancing your chalk-painted furniture with dark wax can elevate its character and depth significantly. Start by ensuring your chalk paint is completely dry and has a beautiful texture from your brushwork. Once you're ready, apply a thin layer of Clear Chalk Paint® Wax using a Wax Brush or a lint-free cloth. This step protects the paint and prevents the dark wax from staining too much. Let the Clear Wax absorb and then wipe away any excess.
While the Clear Wax is still wet, grab your Dark Chalk Paint® Wax. Work in small sections, applying the dark wax liberally with a Wax Brush. Don't worry if it looks too dark at first; you can always wipe back the excess with a lint-free cloth to achieve your desired look. Focus on blending the dark wax into crevices and brush marks to enhance texture. Additionally, remember that Black Chalk Paint® Wax is compatible with Clear Chalk Paint® Wax for sealing, ensuring a durable finish.
If some areas become too dark, simply use Clear Wax as an "eraser" to lighten them. Always test on a small, hidden area first if you're unsure. This method allows you to control the darkening effect, giving your furniture a beautifully aged finish. Enjoy the transformation!
Frequently Asked Questions
Can I Use Chalk Paint on Outdoor Furniture?
Yes, you can use chalk paint on outdoor furniture! It adheres well to various surfaces, making it a great choice. Just remember to clean the furniture thoroughly before painting, and apply at least two thin coats for proper coverage. After painting, consider using a protective varnish to seal the paint and provide UV protection. This'll help maintain your furniture's beauty and durability against the elements. Don't forget to inspect and reapply varnish as needed!
How Long Does Chalk Paint Take to Cure Completely?
Chalk paint generally takes at least 24 hours to cure completely, but it can take up to two weeks under certain conditions. Factors like humidity, temperature, and the thickness of your paint layers can affect this time. You'll notice it's dry to the touch in 30 minutes to 2 hours, but don't rush—if the surface scratches easily, it's not fully cured. Patience is key for the best results!
What Is the Best Brush for Applying Chalk Paint?
When you're looking for the best brush to apply chalk paint, consider using an oval brush. Its domed profile and tapered bristles help you achieve a smooth finish. For larger areas, a flat brush can provide even coverage, while a round brush works well in tight spaces. If you're detailing small areas, a detail brush is your best bet. Natural bristles are ideal for chalk paint, ensuring a beautiful application every time.
Can I Mix Different Colors of Chalk Paint?
Absolutely, you can mix different colors of chalk paint! Just choose 2-3 complementary colors for a cohesive look. Experiment with various combinations to see what unique effects you can create. When blending, use a good quality brush and apply thin layers to help the colors merge smoothly. Remember, practice makes perfect, so don't hesitate to try out different techniques until you achieve the desired blend. Enjoy the creative process!
How Do I Remove Chalk Paint if Needed?
If you need to remove chalk paint, you've got several options. You can sand it off using medium and fine grit sandpaper for a smooth finish. Chemical strippers work well too—apply, wait, and scrape. A heat gun can soften the paint for easy removal, but be cautious. For a gentler approach, try warm water and soap to soften the paint before scraping. Always wear protective gear regardless of the method you choose!
Conclusion
Now that you know how to use chalk paint on furniture, you're ready to transform your pieces into stunning focal points. Remember to prep your surfaces well and take your time with each coat for the best results. Don't forget the finishing touches, like waxing, to add durability and a beautiful sheen. With a little practice, you'll master the art of chalk painting and give your furniture a fresh, stylish makeover that reflects your personal taste!
Interior Design
How to Remove Blood From Sofa
Not sure how to tackle blood stains on your sofa? Discover effective methods that can keep your furniture looking pristine and inviting!
To remove blood from your sofa, act fast to prevent the stain from setting. Start by gently blotting the area with a clean cloth and cold water; never rub, as that can spread the stain. Mix cold water with a bit of soap or use an enzyme-based cleaner. Apply this solution directly to the stain and scrub gently with a soft brush or cloth. Rinse thoroughly with cold water. If the stain persists, try hydrogen peroxide or a baking soda paste. With these tips, you can tackle stubborn stains effectively and keep your sofa looking great, so keep exploring for more insights.
Key Takeaways
- Act quickly to blot fresh blood stains with a clean cloth, avoiding rubbing to prevent spreading.
- Use cold water to blot the stain, as hot water can set the blood.
- Mix soap with cold water or use an enzyme-based cleaner to break down blood proteins.
- For stubborn stains, apply hydrogen peroxide or a saltwater solution, then rinse with cold water.
- Allow the area to air dry completely to prevent mold growth after cleaning.
Introduction
When it comes to keeping your sofa looking great, routine upholstery care is key. Knowing the right cleaning techniques for different materials will help you tackle tough stains, especially blood. In this guide, you'll learn effective methods to remove blood stains while preserving your sofa's fabric.
Routine Upholstery Care
Routine upholstery care is essential for keeping your furniture looking great and lasting longer. Regular cleaning and maintenance can significantly prolong the lifespan of your upholstery while preventing the buildup of dirt and stains. Start by vacuuming your furniture with a soft brush attachment at least once a week. This helps remove dust and debris, minimizing the risk of stains setting in.
When spills happen, don't wait! Spot clean them immediately with appropriate cleaning solutions tailored for your upholstery type. Quick action can prevent stains from becoming more difficult to remove. Additionally, consider applying a fabric protector. This creates a barrier against stains and spills, making your routine cleaning efforts even more effective.
While daily and weekly care is vital, don't forget the importance of periodic professional cleaning. This deep cleaning method can help tackle tough stains and ensure the integrity and appearance of your upholstery are maintained. By incorporating these routine care practices, you'll keep your furniture looking fresh and inviting for years to come, making it easier to handle any unexpected stains that may arise.
Material-Specific Cleaning Techniques
Cleaning blood stains from upholstery can be a challenge, but understanding the specific material of your furniture makes a significant difference. Different fabrics require tailored approaches to effectively remove blood without causing damage. For cotton and polyester, mix cold water with a few drops of dish detergent as your cleaning solution. Gently blot the stain with a cloth soaked in this mixture, ensuring you don't rub, which could spread the blood.
If your sofa is leather, treat it carefully. Use a damp cloth to wipe away the blood, then follow up with a specialized leather cleaner. This helps prevent water damage and maintains the material's integrity.
For delicate fabrics labeled "Dry Clean Only," it's best to avoid home attempts. Instead, take them to a professional cleaner who can safely handle the stain.
Regardless of the fabric, always perform a spot test with any cleaning solution on an inconspicuous area first. This ensures that the cleaner won't harm or discolor your upholstery. Taking these material-specific steps can save your furniture and keep it looking its best.
Blood Stain Removal Techniques
Understanding the right techniques for blood stain removal can make all the difference in preserving your sofa's appearance. Prompt treatment is essential; fresh blood stains are significantly easier to remove than dried ones, which can set into the fabric. Start by using cold water to blot the stain, as hot water can cause the proteins in the blood to coagulate, making the stain harder to clean.
For an effective cleaning solution, mix soap and cold water. Gently dab the stained area with a clean cloth instead of rubbing, which can spread the blood further. If you're dealing with stubborn stains that won't budge, try using hydrogen peroxide or enzyme-based cleaners. Just remember to test these on a small, inconspicuous area of your sofa first to avoid damaging the fabric.
Regular maintenance and immediate treatment of stains can prolong your upholstery's life, significantly reducing the likelihood of permanent stains. By following these techniques, you'll enhance your chances of keeping your sofa looking its best, even in the face of blood stains.
Sofa Protection With Slipcovers
Slipcovers are your best bet for keeping your sofa safe from stains and spills. By choosing durable, stain-resistant fabrics, you create protective layers that extend the lifespan of your furniture. Plus, they're easy to wash, so you can maintain a fresh look without hassle. Additionally, incorporating natural materials like wood and stone in your living space can enhance the overall farmhouse aesthetic.
Durable, Stain-Resistant Fabrics
When it comes to protecting your sofa from spills and stains, opting for durable, stain-resistant fabrics is a smart choice. Microfibers and synthetic blends are designed to repel liquids and resist staining, making them perfect for homes with high traffic. These durable fabrics help prevent dried blood stains and other messes from setting in, giving you peace of mind.
You can enhance your sofa's protection by using slipcovers made from treated materials. These slipcovers not only offer an extra layer of defense against spills but also allow for easy washing and maintenance. If you choose fabrics with a high rub count, typically over 15,000, you'll find they withstand daily wear and tear much better than lower-rated options.
Consider applying stain-resistant treatments like Teflon or Scotchgard to your upholstery. These create a protective barrier that makes removing blood and other stains much easier. Regular cleaning and maintenance of both slipcovers and upholstery will prolong the life of the fabric and maintain its stain-resistant properties, ensuring your sofa stays looking great for years to come.
Protective Fabric Layers
Adding protective fabric layers to your sofa is a practical step toward maintaining its appearance and longevity. Slipcovers act as a barrier that effectively shields your sofa from stains, including blood, and they're easy to remove for washing. Choosing high-quality slipcovers made from materials like cotton, polyester, or linen can enhance both the durability and aesthetic appeal of your furniture.
When you opt for machine-washable slipcovers, you make cleaning and maintenance a breeze. Any spills or stains can be promptly addressed, ensuring that your sofa stays looking fresh and clean. Regularly washing your slipcovers not only helps keep stains out of fabric but also prolongs the life of the underlying sofa material.
Investing in high-quality slipcovers means you're protecting your sofa against everyday wear and tear while also adding a stylish touch to your living space. With the right care, your slipcovers can maintain their appearance and functionality, making them a smart choice for anyone looking to safeguard their furniture. Additionally, incorporating mindful decluttering practices can further enhance your living environment by reducing distractions and promoting a sense of calm. Remember, the right protective fabric layers can make all the difference in keeping your sofa looking brand new!
Extending Fabric Lifespan
How can you ensure your sofa remains in top condition for years to come? One of the best strategies is to invest in slipcovers. These protective barriers help prevent spills and stains from directly contacting the upholstery fabric, significantly extending your sofa's lifespan. If you ever face a situation where you need to remove blood stains, slipcovers can be a lifesaver.
Regularly washing your slipcovers keeps them fresh and hygienic. Most machine-washable options withstand multiple washes without fading or shrinking, so you won't have to worry about their quality over time. Plus, choosing slipcovers made from stain-resistant fabrics can make cleanup even easier, allowing you to tackle any liquid spills with a simple wet cloth. Additionally, integrating smart home devices can help monitor your home's environment, ensuring optimal conditions that further protect your furniture.
This approach not only protects your investment but also saves you from costly reupholstering or hiring cleaning services. With a range of colors and patterns available, you can easily update your sofa's look while ensuring it's shielded from everyday wear and tear. By incorporating slipcovers into your home, you're not just protecting your furniture; you're extending its life and maintaining its beauty for years to come.
Upholstery Stitching and Seams
When you're dealing with blood stains, the integrity of your upholstery stitching and seams matters more than you might think. Weak or frayed seams can trap stains, leading to bigger cleaning challenges down the line. By ensuring your upholstery is well-maintained and considering reupholstering for enhanced durability, you can keep your seating cozy and inviting while minimizing future stain issues.
Fabric Integrity Concerns
Moisture and harsh cleaning agents can significantly weaken the stitching and seams of upholstery, which is crucial to consider when tackling blood stains. When you attempt to remove the blood, the fabric integrity is at stake. If you don't act quickly, the blood stains can compromise the fibers, leading to fraying or unraveling. Different materials react differently; for example, natural fibers like cotton may be more vulnerable to damage than synthetic fibers like polyester.
To protect your upholstery, avoid excessive scrubbing around the seams, as this can stress the stitching and create small tears. Instead, use gentle blotting techniques and mild cleaning solutions that won't harm the fabric. Always check the care label for specific cleaning instructions related to your upholstery type.
Regular maintenance and prompt stain treatment not only enhance the appearance of your sofa but also help preserve its structural integrity. By being mindful of how you handle blood stains, you can ensure that the stitching and seams remain intact over time, prolonging the life of your furniture. Remember, a little care goes a long way in keeping your upholstery looking its best.
Reupholstering for Enhanced Durability
Reupholstering your sofa not only revitalizes its appearance but also significantly enhances its durability, ensuring that it withstands the rigors of daily use. By selecting high-quality commercial fabric, you can extend the life of your furniture and protect it from wear and tear. Look for materials with higher rub counts, as these fabrics resist fading and fraying, making them ideal for busy households.
Proper upholstery stitching techniques are crucial for durability. Using double stitching or reinforced seams strengthens the fabric, allowing it to endure everyday use more effectively. Additionally, consider utilizing fade-resistant and stain-repellent treatments during the reupholstering process. This way, if a spill occurs, you can often clean the area easily, and once the stain is removed, the fabric maintains its fresh appearance. Furthermore, investing in trusted custodians can provide you with peace of mind and enhance the value of your home furnishings.
Regular maintenance is key to preserving your newly upholstered sofa. Make it a habit to inspect and tighten loose seams, as this will help prevent further damage. With these steps, your reupholstered sofa will not only look great but also provide you with long-lasting comfort and style.
Cozy, Inviting Seating Experience
Creating a cozy, inviting seating experience starts with the details of upholstery stitching and seams. The quality of stitching significantly impacts your sofa's durability and integrity, ensuring it stands the test of time. High-quality upholstery often features double-stitched seams, which not only enhance strength but also give a polished look.
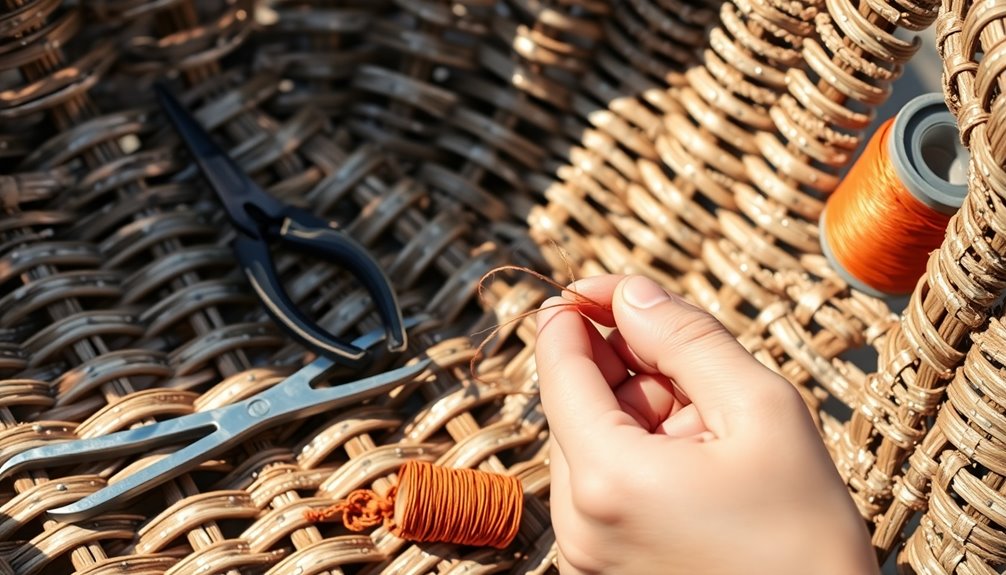
You might notice different sewing techniques, like topstitching and welted seams, reinforcing areas prone to wear and tear. Regularly inspect these stitching details to catch any signs of wear early. If you spot an affected area, prompt repairs can prevent further damage and maintain your sofa's inviting nature.
Choosing the right thread type, such as polyester or nylon, is crucial too. These materials resist fading, keeping colors vibrant even in high-traffic areas. If stains occur, like blood, remember a gentle cleaner can help, but be cautious not to disrupt the stitching. Taking care of your upholstery means more than just cleaning; it's about maintaining the craftsmanship that creates a warm and welcoming environment in your home. Prioritize these details, and you'll enjoy a comfortable, stylish seating experience for years to come. Additionally, using a HEPA filter in your cleaning routine can help reduce allergens and improve the air quality in your home while you maintain your upholstery.
Personalized Fabric Treatments
When it comes to personalized fabric treatments for blood stains on your sofa, knowing your upholstery type is essential. Always check the care label, as different types of fabric require specific cleaning methods—like W, S, SW, or X. If your fabric allows water-based cleaning, mix 80% cold water with 10% glycerin and 10% laundry detergent. This solution effectively lifts blood stains without damaging the material.
For delicate fabrics, you should choose enzyme-based cleaners designed for organic stains. These specialized stain removers can penetrate and break down blood proteins without harming your upholstery. If you have synthetic materials, a simple mixture of dish detergent and cold water works well. Make sure to dab the stained area gently, blotting rather than scrubbing to avoid damage.
Before applying any cleaning solution, always perform a spot test on an inconspicuous area of the fabric. This precaution ensures that the treatment won't cause discoloration or additional damage. By customizing your approach based on your sofa's fabric, you can effectively tackle blood stains while preserving its beauty and integrity.
Stain-Resistant Fabric Options
If you want to simplify your cleaning routine, consider investing in stain-resistant fabric options for your sofa. Stain-resistant fabrics, like treated polyester and acrylic, are designed to repel liquids and resist staining, making them easier to clean. Microfiber is another popular choice due to its tightly woven fibers that prevent spills from penetrating the fabric. If you prefer leather, ensure it's properly treated with protective coatings; this not only adds durability but also allows for easy cleanup of spills.
For high-traffic areas, look into performance fabrics like Crypton and Sunbrella, which are engineered to be water-resistant and stain-repellent. These options can help keep your sofa looking cleaner on your couch, even with regular use. However, remember that regular maintenance is key. Applying fabric protectors and promptly addressing spills will enhance the effectiveness of your stain-resistant fabrics. If you act quickly when a spill occurs, you can often prevent permanent stains, ensuring your sofa remains in great condition for years to come.
Conclusion
In summary, addressing blood stains on your sofa quickly is essential to preserving its appearance and longevity. Fresh stains are much easier to remove than dried ones, so don't hesitate to act immediately. Always use cold water when cleaning blood stains, as hot water can set the stain, making it harder to eliminate.
Before applying any cleaner, test it on a hidden area of the fabric to prevent damage or discoloration. If the stain proves stubborn, consider using enzyme-based cleaners or hydrogen peroxide, ensuring you rinse thoroughly afterward to avoid any residue. Regular maintenance and prompt action can significantly extend your sofa's life and help you avoid permanent staining.
Frequently Asked Questions
How Do You Get Dried Blood Out of a Couch?
To tackle dried blood stains, start by gently loosening the stain with a soft-bristled toothbrush. Dab the area with a dry cloth to lift any flakes. Next, dampen a white cloth with cold water or rubbing alcohol and gently dab the stain, avoiding any rubbing. If needed, mix a tablespoon of dish detergent with two cups of cold water, applying it to the stain, and let it sit for about 30 minutes before blotting it away.
How Do You Get Dried Blood Out of Fabric?
To get dried blood out of fabric, start by gently scraping off any residue with a soft-bristled toothbrush. Then, soak a clean cloth in cold water or rubbing alcohol, dabbing at the stain without rubbing it. For tougher stains, mix 80% cold water, 10% liquid laundry detergent, and 10% glycerin, applying the solution and letting it sit for 30 minutes. Blot with a damp cloth, rinse with cold water, and repeat if necessary.
How Do You Get Blood Out of Fabric Seats?
To get blood out of fabric seats, start by blotting the stain with a clean, damp cloth and cold water. For fresh stains, mix cold water with dish detergent and gently dab the area until the stain lifts. For dried blood, use a soft-bristled toothbrush to loosen it before cleaning. If necessary, apply hydrogen peroxide, let it bubble, then blot and rinse. Always check the care label before applying any cleaners.
Does Dawn Dish Soap Remove Blood Stains?
Yes, Dawn dish soap can effectively remove blood stains. You'll want to mix a tablespoon of Dawn with two cups of cold water. Gently dab the solution onto the stain with a clean cloth, making sure not to scrub, as that can damage the fabric. After you've treated the stain, rinse the area with cold water to eliminate any soap residue. Just remember, avoid hot water to prevent setting the stain.
Interior Design
Unveiling Dance: Themes That Inspire
Keen to explore the profound themes of dance that inspire cultural identity and emotional expression? Discover how these elements intertwine in this captivating art form.
When you delve into the world of dance, you will discover themes that resonate deeply within you. Dance serves as a reflection of cultural identity and helps to preserve traditions through movement. It serves as a powerful tool for expressing emotions that may be difficult to articulate through words alone. Additionally, dance serves as a platform for addressing societal issues, such as gender roles and inequalities. In today’s digital age, technology has brought new dimensions to the art of dance, making it more accessible and interactive. The misconceptions surrounding dance education demonstrate that everyone has the ability to participate, which can enhance creativity and foster self-confidence. Each theme adds a layer of complexity; keep exploring to uncover how these elements seamlessly weave together in the beautiful form of dance.
Key Takeaways
- Dance embodies cultural significance, reflecting traditions and customs that preserve heritage and connect generations.
- Emotional expression through movement allows dancers to convey feelings that words cannot, creating deep connections with audiences.
- Dance serves as a powerful social commentary, critiquing societal norms and addressing issues like inequality and representation.
- Technology enhances dance experiences, fostering global collaboration and making education more accessible through online platforms and virtual reality.
- Misconceptions about dance education limit participation; it promotes discipline, creativity, and emotional well-being for individuals of all backgrounds and skill levels.
Cultural Significance of Dance
Dance is a vibrant tapestry that weaves together the threads of tradition and cultural identity. When you engage in dance, you're not just moving your body; you're participating in a rich history that reflects the values and beliefs of your community.
Each step tells a story, embodying customs and rituals passed down through generations. As you explore various cultural dances, you'll discover how they connect you to your ancestors, preserving the essence of your heritage. The rhythmic movements and vibrant costumes not only entertain but also serve as a living archive of history and identity. From intricate footwork to symbolic hand gestures, these dances offer a glimpse into the heart of a community’s beliefs and traditions. For instance, when planning an event that honors such rich cultural heritage, you might seek out Indonesian wedding decoration ideas, blending the vibrant, sacred elements of the past with modern celebration styles, creating an unforgettable experience that connects past and present. These celebrations become more than just performances; they are vibrant expressions of cultural continuity and pride. By incorporating **Indonesian wedding decoration ideas**, you ensure the aesthetic details also reflect the deep-rooted traditions, using intricate patterns, symbolic colors, and meaningful motifs to enhance the authenticity of the event. Whether through the placement of ceremonial objects or the choice of specific fabrics, such **Indonesian wedding decoration ideas** create a harmonious atmosphere where every element tells part of the larger story of heritage.
The costumes, movements, and music all serve as documentation of cultural evolution, allowing you to appreciate the diverse expressions of human society. By immersing yourself in this art form, you enrich your understanding of the world and celebrate the shared experiences that unite us all.
Emotional Expression Through Movement
When you move to the rhythm, you're not just showcasing technique; you're sharing a piece of your soul. Each gesture, each sway, tells your story and connects you with the audience on a profound level.
Your body becomes an instrument of emotional expression, allowing you to communicate feelings that words often fail to convey.
Here are three powerful ways to evoke emotion through your dance:
- Facial Expressions: Let your face reflect the emotions you're portraying; it draws the audience in.
- Dynamic Movement: Varying your intensity creates a rollercoaster of feelings, keeping the audience engaged.
- Personal Storytelling: Infuse your personal experiences into your dance; it makes your performance authentic and relatable.
Embrace this journey and let your movements resonate deeply.
Dance as Social Commentary
Through the expressive power of movement, you can also shine a light on pressing social issues and inspire change.
Dance serves as a powerful medium for political activism, allowing you to critique societal norms and address inequalities. Through your choreography, you can highlight class dynamics and gender roles, challenging the status quo and provoking thought.
Each movement becomes a statement, reflecting cultural evolution and the values of your community. By drawing from historical contexts, you enrich your dance with layers of meaning that transcend words.
Your performance can evoke empathy and engage audiences, prompting them to contemplate their own roles in societal issues. In this way, dance becomes not just art, but a call to action for change.
Technology's Influence on Dance
The influence of technology on dance has reshaped how you create, perform, and experience movement.
With innovations at your fingertips, you can explore new avenues of expression and connect with audiences like never before.
Here are three powerful impacts technology has on dance:
- Virtual Reality: You can immerse yourself in a 360-degree dance environment, feeling every beat and rhythm as if you're part of the performance.
- Online Classes: Learning from the comfort of your home, you can access world-class instruction, breaking down barriers to entry.
- Social Media: Sharing your dance journey instantly connects you with a global community, fostering inspiration and collaboration.
Embracing these tools can elevate your artistry and broaden your reach, making dance more inclusive and dynamic than ever.
Misconceptions About Dance Education
Many people think dance education is only for those with natural talent or a background in the arts. However, that misconception couldn't be further from the truth.
Dance education welcomes everyone, regardless of their prior experience. It fosters discipline, creativity, and physical fitness, making it beneficial for all individuals.
You'll discover that dance classes can boost your confidence and enhance your social skills, whether you're a beginner or someone with a few years under your belt.
Additionally, dance therapy illustrates that movement can support emotional well-being, reaching a diverse range of participants.
Ethical Issues in Dance
In today's dance landscape, ethical issues demand your attention, particularly when it comes to cultural appropriation and representation. You can't ignore the impact of how cultures are portrayed and shared in dance. Engaging with these themes helps foster respect and understanding within diverse communities.
Here are a few key considerations:
- Cultural Appropriation: Are you honoring the origins of the dances you perform, or are you exploiting them?
- Representation: Does your choreography reflect the voices and stories of the cultures you're engaging with?
- Inclusivity: Are you creating spaces where all dancers feel valued and respected, regardless of their background?
Dance in Educational Settings
Regularly incorporating dance into educational settings can considerably enhance student engagement and creativity. By integrating movement into lessons, you spark curiosity and encourage active participation.
Dance helps you express emotions and ideas, fostering a deeper understanding of subjects like history and literature. It also nurtures teamwork and communication skills as you collaborate on choreography or group performances.
Moreover, dance promotes physical fitness and mental well-being, creating a balanced learning environment. You'll find that students who engage in dance often show improved focus and discipline.
Embracing dance in the classroom not only enriches the curriculum but also cultivates a vibrant culture of creativity and inclusivity, empowering every student to explore their unique voice through movement.
Frequently Asked Questions
How Can Dance Be Integrated Into Everyday Life?
You can integrate dance into your everyday life by incorporating movement during breaks, joining local classes, or dancing at home. It's a fun way to express yourself, relieve stress, and connect with others.
What Are the Health Benefits of Regular Dance Practice?
Dancing's like breathing life into your body; it boosts heart health, enhances flexibility, and lifts your mood. You'll find your strength and endurance growing, while stress melts away, leaving you invigorated and alive.
How Does Dance Influence Personal Relationships?
Dance deepens personal relationships by fostering connection and communication. You share experiences through movement, express emotions, and build trust. This shared activity creates lasting bonds, enhances empathy, and enriches your interactions with others.
Can Anyone Learn to Dance, Regardless of Age?
Absolutely, anyone can learn to dance, regardless of age! You'll discover that dance not only improves your coordination but also boosts your confidence, creating a joyful connection to movement that transcends generations. Just give it a try!
What Role Does Improvisation Play in Dance Performance?
Improvisation in dance performance lets you express spontaneity and creativity. It encourages you to connect with your body, explore emotions, and engage with the audience, making each performance unique and deeply personal.
Conclusion
In exploring the vibrant world of dance, you've discovered its rich cultural significance and emotional depth. Did you know that approximately 75% of adults believe that dance improves their mood? This highlights how movement isn't just an art form; it's a universal language that connects us all. As you continue your journey, remember that dance can inspire change, foster connections, and enrich lives in ways you might not have imagined. Embrace the rhythms and let them resonate within you!
-
Beauty and Grooming3 weeks ago
Embrace Natural Glow With Bronzer-Free Accelerators
-
Beauty and Grooming4 weeks ago
Discover Top Outdoor Tanning Lotions Today
-
Fashion Trends1 month ago
Fall 2025 Fashion Trends: Be Ahead of the Curve!
-
Vetted1 month ago
15 Best Affordable Sustainable Fashion Brands You Need to Know About in 2025
-
Interior Design5 days ago
Mylar vs. Foil Balloons: The Ultimate Showdown
-
Beauty and Grooming3 weeks ago
Unlock Flawless Tanning With Skin Prep
-
Interior Design3 weeks ago
Create Your Dream Cottagecore Home Office Now!
-
Vetted1 month ago
15 Best Women's Fashion Trends of 2025 You Need to Know About