Connect with us

Interior Design

How to Clean Fabric Sofa With Vinegar

Imagine restoring your fabric sofa’s freshness with just vinegar—discover the simple steps to transform your upholstery today!

Published

on

vinegar fabric sofa cleaning

To clean your fabric sofa with vinegar, start by mixing equal parts white vinegar and warm water in a spray bottle. Optional: add a tablespoon of liquid soap for extra cleaning power. First, vacuum the sofa to remove dirt. Lightly spray the solution on stained areas and let it sit for a few minutes. Gently scrub with a soft cloth in circular motions. Allow the sofa to air dry completely. For residual odors, sprinkle baking soda on the cleaned areas and then vacuum. You might find even more tips for effective cleaning techniques and further enhancing your sofa's look.

Key Takeaways

  • Mix equal parts white vinegar and warm water in a spray bottle for an effective cleaning solution.
  • Vacuum the sofa thoroughly before applying the vinegar solution to remove dirt and debris.
  • Lightly spray the vinegar solution on stained areas and let it sit for a few minutes.
  • Gently scrub the stains in circular motions using a soft cloth until they lift.
  • Allow the sofa to air dry completely, then sprinkle baking soda to absorb any residual odors.

Benefits of Using Vinegar

versatile health and cleaning

When it comes to cleaning your fabric sofa, using vinegar offers numerous benefits that make it a top choice. First off, vinegar is a natural disinfectant, boasting antibacterial properties that effectively sanitize your upholstery.

You'll appreciate the peace of mind knowing it's a safe alternative to harsh chemical cleaners, especially in homes with children and pets. Additionally, vinegar is an excellent way to maintain the freshness of your home, much like how butter enhances flavor in cooking.

Vinegar's eco-friendly and biodegradable nature means you're making a sustainable choice for your cleaning routine. It doesn't just stop at sanitizing; vinegar excels at eliminating stubborn odors and stains, helping your sofa maintain that fresh, inviting look.

Another great aspect is its cost-effectiveness. Compared to commercial upholstery cleaners, vinegar provides a wallet-friendly solution that works just as well, if not better.

You'll save money on regular maintenance without sacrificing quality.

Advertisement

Preparing Your Cleaning Solution

mixing effective cleaning agents

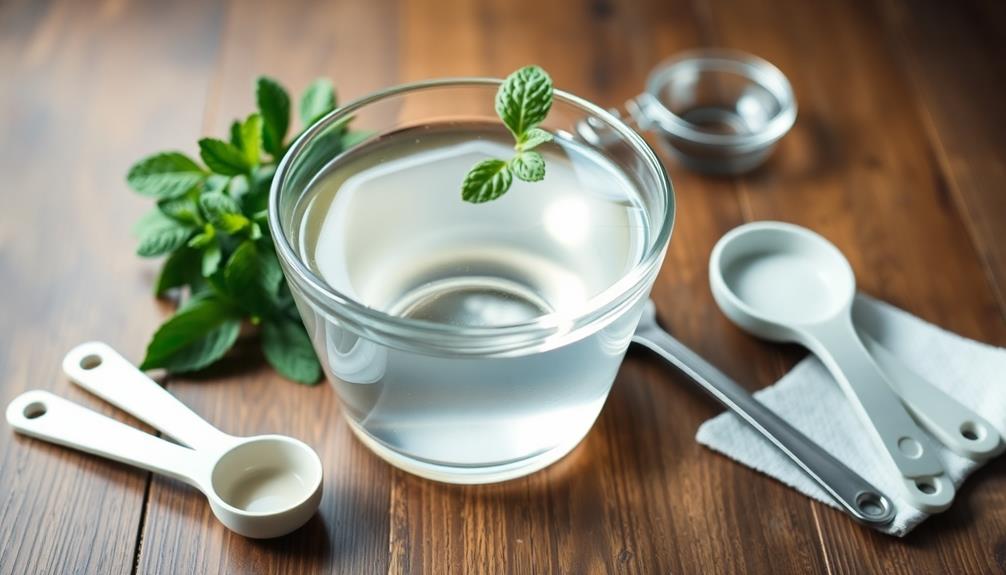
To prepare your cleaning solution for a fabric sofa, start by mixing equal parts white vinegar and warm water in a spray bottle. This balanced formula is effective for cleaning and deodorizing your upholstery.

For enhanced cleaning power, add a tablespoon of natural liquid soap to the mixture. This helps break down grease and grime that may have accumulated on your sofa. Additionally, you might consider incorporating a few drops of essential oils for a revitalizing scent, as certain oils can also offer antimicrobial benefits.

If you want to make the cleaning process more enjoyable, consider adding a few drops of essential oils. This will provide a pleasant fragrance, making your clean home smell fresh and inviting.

Before applying the solution to the entire sofa, always test it on an inconspicuous area. This step is essential to confirm there are no adverse reactions or discoloration on the fabric.

Once you've prepared the cleaning solution, remember to store any unused mixture in a cool, dark place to maintain its effectiveness for future use.

Cleaning Process for Fabric Sofas
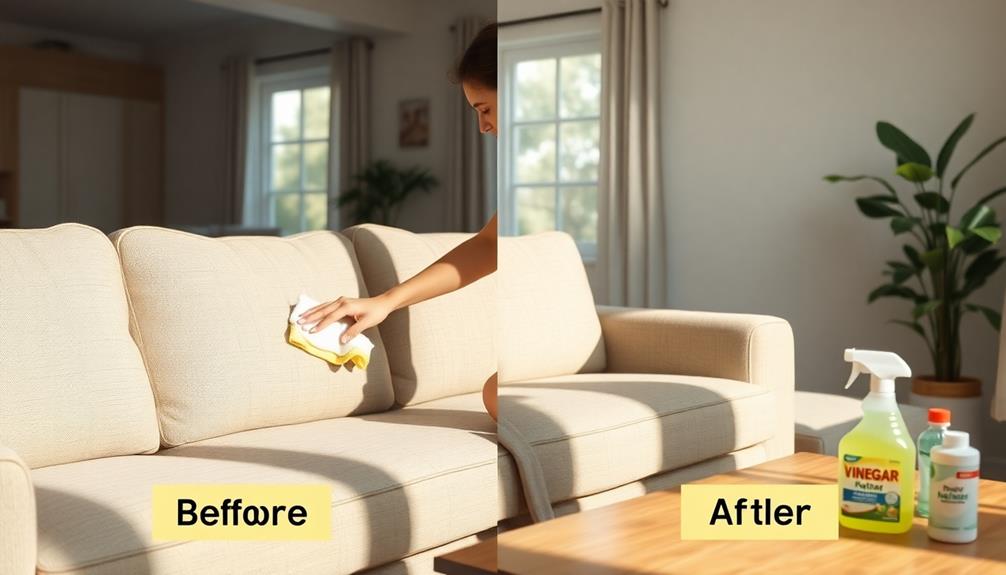
fabric sofa cleaning guide

Now that you've prepared your cleaning solution, it's time to tackle the cleaning process for your fabric sofa. Start by vacuuming your sofa thoroughly to remove loose dirt and debris. This step is essential, as it prevents dirt from mixing with your cleaning solution and making stains worse. For even better results, consider looking into professional cleaning services that specialize in upholstery care.

Next, take your vinegar and water cleaning solution, and lightly spray it onto the fabric, focusing on any stained areas. Allow the solution to sit for a few minutes; this will help it penetrate the fabric and break down the stains.

Advertisement

After that, grab a soft cloth and gently scrub the stained areas in circular motions. Be careful not to soak the fabric, as excess water can cause damage.

Once you've cleaned the sofa, let it air dry completely. To keep your sofa smelling fresh, consider sprinkling some baking soda on the cleaned areas after they dry. This will help absorb any residual odors.

After a few hours, vacuum the baking soda off, and you'll have a clean, refreshed fabric sofa ready for use!

Stain Removal Techniques
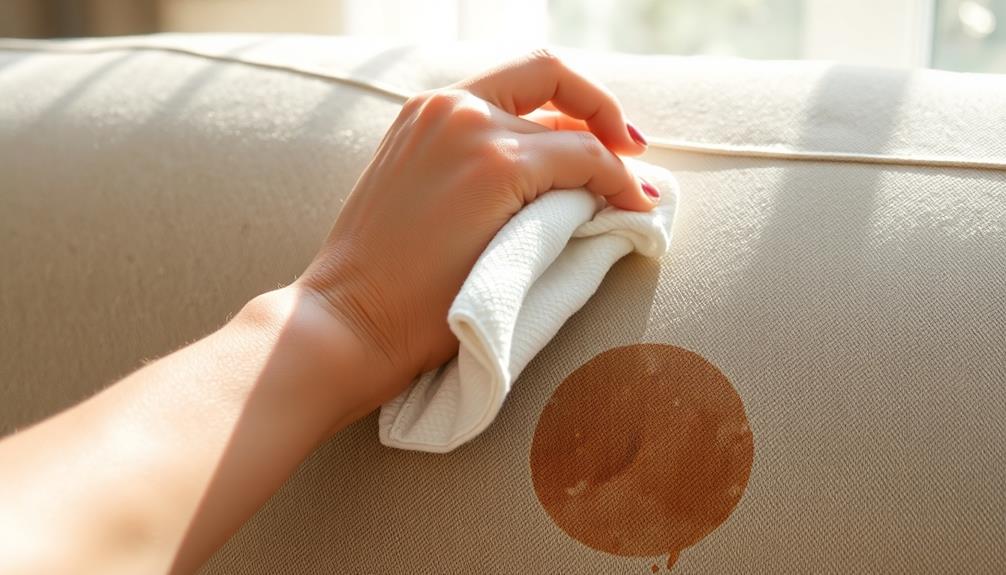
effective stain removal methods

Effective stain removal techniques can make a significant difference in maintaining the appearance of your fabric sofa. To tackle stains effectively, act quickly to prevent them from setting in.

For tough stains, create a vinegar solution by mixing washing-up liquid, white vinegar, baking soda, and warm water. This method can be as satisfying as brewing a perfect cup of coffee, where understanding the mechanics can enhance the experience various brewing methods.

Apply this mixture directly to the stain and let it sit for about 10 minutes. Afterward, use a soft cloth to gently wipe it away.

Advertisement

When using vinegar, always check the furniture code to verify it's safe for your fabric. Not all materials respond well to vinegar, especially water-sensitive ones.

If a stain persists, you can gently scrub the area with a soft cloth or even a toothbrush in circular motions to lift the stain without damaging the upholstery.

Additionally, consider using water in a spray bottle to lightly mist the stained area before applying your cleaning method.

Always test any cleaning solution on an inconspicuous area first to verify it doesn't cause discoloration or damage.

Tips for Effective Cleaning
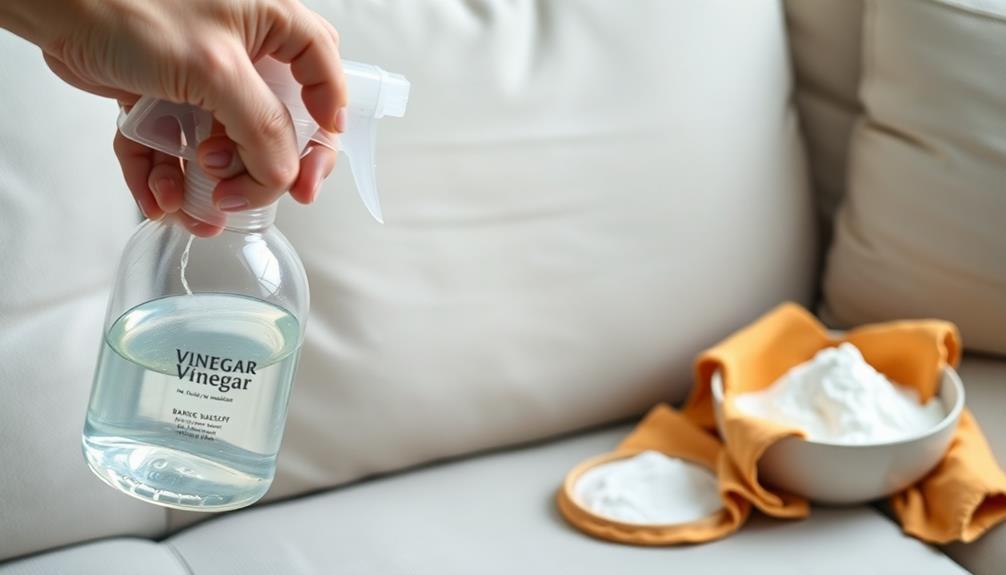
effective cleaning strategies tips

Maintaining a fabric sofa goes beyond just tackling stains; regular cleaning is key to enhancing its longevity and appearance. Start by checking the furniture care tag for cleaning codes to verify that white vinegar is safe for your specific fabric upholstery.

Once confirmed, prepare a cleaning solution by mixing equal parts white vinegar and water in a spray bottle. This effective cleaning solution not only helps remove stains but also neutralizes odors, similar to how home remedies can alleviate other household issues.

Advertisement

When you spot a stain, lightly mist the vinegar solution onto the affected area. Use a soft cloth to scrub gently, as this prevents damage to the fabric. After cleaning, allow the area to air dry completely to avoid mildew. To speed up the drying process, you can use a vacuum.

For persistent odors, sprinkle baking soda on the cleaned area once it's dry. Let it sit for at least an hour, then vacuum it off. This method helps rejuvenate your sofa and enhances freshness.

Frequently Asked Questions

Can I Clean My Fabric Couch With Vinegar?

Yes, you can clean your fabric couch with vinegar. It's a natural disinfectant that effectively removes stains. Just mix it with water, test a small area first, and follow proper cleaning techniques for best results.

What Is Best for Cleaning a Fabric Sofa?

The best way to clean a fabric sofa involves regular vacuuming, using a mild detergent or fabric cleaner, and spot-treating stains. Always check the care label to ascertain you're using safe cleaning methods for your sofa.

How to Deep Clean a Fabric Couch?

Imagine your fabric couch as a canvas, waiting for a fresh masterpiece. To deep clean, vacuum thoroughly, mist with your chosen solution, scrub gently, and let it breathe, ensuring it shines and feels inviting again.

Advertisement

What Is the Best Homemade Upholstery Cleaner?

For the best homemade upholstery cleaner, mix equal parts white vinegar and water in a spray bottle. Add a few drops of natural soap for extra cleaning power, and always test it on a hidden area first.

Conclusion

Incorporating vinegar into your fabric sofa cleaning routine not only saves you money but also helps you avoid harsh chemicals. With the right preparation and techniques, you can revive your sofa's appearance and extend its lifespan. So, why settle for a stained or dingy sofa when a simple vinegar solution can bring it back to life? Embrace this natural cleaning method, and enjoy a fresher, cleaner living space that you can truly be proud of.

Continue Reading
Advertisement

Interior Design

How to Repair Deep Scratches in Wood Furniture

Join us to discover simple steps for repairing deep scratches in wood furniture and learn how to restore its original beauty effortlessly.

Published

on

repair deep wood scratches

To repair deep scratches in wood furniture, start by cleaning the area with mineral spirits to remove any dirt or grease. Next, choose a color-matching wood filler and use a putty knife to fill the scratch completely. Smooth out any excess filler and allow it to dry for about 30 minutes. Sand the patch with 180-grit sandpaper, then follow up with 240-grit for a finer finish, always sanding in the direction of the grain. Finally, apply a sealant like polyurethane to protect your repair. Want tips on preventing future scratches or additional repair techniques?

Key Takeaways

  • Clean the scratched area with mineral spirits and a damp cloth to remove dirt and ensure proper adhesion for repairs.
  • Use a color-matching wood filler to fill deep scratches, applying it with a putty knife to avoid air bubbles.
  • Sand the filled area smoothly following the wood grain, starting with 180-grit sandpaper and finishing with 240-grit.
  • Apply multiple thin coats of sealant, like polyurethane, allowing 24 hours of drying time between each coat for durability.
  • Regularly maintain furniture with pads and coasters to prevent future scratches and damage.

Understanding Deep Scratches

Deep scratches in wood furniture often go beyond just the surface, making them a frequent headache for homeowners. These scratches can be caused by various factors, such as moving furniture, pet claws, or heavy impacts.

Because they penetrate through the finish and into the wood itself, they're more challenging to repair than surface scratches. Regular maintenance, like fuel injection cleaning, can help prevent damage to your furniture by ensuring a clean environment.

To tackle deep scratches effectively, you'll need to start by cleaning the scratched area thoroughly. Use mineral spirits to remove any old finish and grime, ensuring the surface is ready for treatment. This step is essential for proper adhesion of the wood filler, which should match the furniture's color for a seamless look.

Once the area is clean and dry, apply the wood filler, pressing it into the scratch. After the filler has dried completely, you'll need to sand it flush with the surrounding wood. This step helps blend the repaired area with the rest of the furniture.

Tools and Materials Needed

essential supplies required today

To effectively repair deep scratches in your wood furniture, you'll need a few essential tools and materials.

Gathering a putty knife, fine sandpaper, and a specialized wood filler that matches your furniture's color is vital for a successful repair.

Advertisement

Additionally, consider creating a mood board to visualize the desired finish and guarantee color consistency.

Don't forget to prepare the area properly before you start, as this will guarantee a smooth and lasting repair.

Essential Repair Tools

When tackling deep scratches in wood furniture, having the right tools on hand is vital for achieving a smooth and professional finish. You'll want to gather a few key items to guarantee the repair process goes smoothly.

Understanding the importance of a budget can also help you allocate funds for quality materials without overspending financial planning.

  • Putty knife: This tool is perfect for applying wood filler evenly without damaging the surrounding area.
  • Wood filler: Select a wax wood filler stick or putty that closely matches the wood's finish for a seamless blend.
  • Fine sandpaper: Use 180-grit or higher sandpaper to smooth the filled area, making sure it aligns with the wood grain.

Before you start, clean the area with mineral spirits. This step is vital, especially if there's a polyurethane coating that needs to be removed for the filler to adhere properly.

After applying the wood filler with your putty knife, use clean, dry rags to wipe away any excess and dust. This preparation will set the stage for a successful repair, leaving your furniture looking as good as new.

Advertisement

With these vital repair tools, you're well on your way to restoring your wood furniture's beauty.

Recommended Materials Overview

Having gathered your tools, it's time to focus on the materials you'll need for repairing deep scratches in wood furniture.

First, you'll require specialized wood filler that matches your furniture's color. This filler is vital for effectively filling in the scratch and making it less noticeable.

Next, make sure you have fine sandpaper, specifically 240 grit, which will smooth the area after applying the filler. A putty knife or an old credit card will help you apply the filler evenly, ensuring a smooth finish.

Before you begin, grab a clean damp cloth to wipe down the scratched area. This step is important as it removes dust and debris that could interfere with the adhesion of the filler.

Advertisement

If there's an existing finish, consider using mineral spirits to strip it away for better penetration of the filler.

Lastly, once the filler has dried, protect your repair with a quality sealant, like polyurethane or clear lacquer. This not only safeguards the repair but helps blend it seamlessly with the surrounding wood surface.

With these materials on hand, you're set to tackle those deep scratches effectively!

Preparation Before Repair

Before diving into your repair project, it's crucial to gather the right tools and materials for a successful outcome. Having everything ready will make the repair process smoother and more efficient.

Here's what you'll need:

Advertisement
  • Specialised wood filler: Choose a product that closely matches your furniture's color for a seamless finish.
  • Cleaning solution: Mix one tablespoon of dishwashing detergent with a gallon of warm water to remove oil and grease.
  • Fine sandpaper: Get 180-grit or higher to smooth out the repaired area after applying wood putty.

Start by using a lint-free cloth dampened with your cleaning solution to wipe the scratched area. This will help eliminate any excess moisture and promote better adhesion for the wood filler.

Next, clean the surface using mineral spirits to remove any existing finish. As you prepare, make sure your workspace is well-ventilated and free of dust.

With these tools and materials in hand, you're set for a successful furniture repair. Proper preparation is key to achieving a durable and visually appealing result.

Cleaning the Affected Area

sanitizing contaminated surface thoroughly

Before you start the repair, gather your cleaning supplies, including a specialized hardwood cleaner and a clean rag.

Clean the scratched surface thoroughly to remove any dirt or grease, ensuring a smooth area for the repair process.

Gather Cleaning Supplies

To effectively clean the affected area of your wood furniture, start by gathering essential cleaning supplies. Having the right tools on hand will make the process smoother and guarantee you don't damage the wood finish. Here's what you'll need:

  • A specialized hardwood cleaner
  • A damp rag (or damprag)
  • Mineral spirits for removing old finishes

Begin by preparing a gentle cleaning solution, mixing 1 tablespoon of dishwashing detergent with 1 gallon of warm water. This mixture will help you effectively remove any oil or grease from the scratched area.

Before you start cleaning, use a lint-free cloth to wipe down the surface, confirming it's free from dust and debris.

Advertisement

While you're working, consider wearing gloves to protect your hands from any cleaning products. It's essential to avoid harsh chemicals that might harm the wood finish.

Once you've cleaned the area thoroughly, let it dry completely for a few minutes. This step is critical for best adhesion when you move on to repairing those deep scratches.

With your cleaning supplies ready, you're one step closer to restoring your furniture.

Clean Surface Thoroughly

Cleaning the scratched area thoroughly is vital for a successful repair. Begin by using a specialized hardwood cleaner and a damp rag to remove dust, dirt, or grease that could interfere with the repair process. Make certain to use a lint-free cloth dampened with a mixture of warm water and dishwashing detergent. This gentle approach guarantees you eliminate all contaminants without introducing excess moisture, which can further damage the wood or cause swelling.

After cleaning, inspect the surface closely to verify it's free from any residual substances. This step is important, as any leftover debris can affect the filling and finishing processes down the line.

Advertisement

Here's a quick reference table for your cleaning process:

Step Action Notes
1. Gather Supplies Hardwood cleaner, damp rag Confirm lint-free cloth
2. Clean Surface Wipe area gently Remove dust and dirt
3. Inspect Area Check for contaminants Verify no residue remains
4. Prepare for Repair Confirm area is clean and dry Vital for adhesion

Dry the Area

After verifying the scratched area is thoroughly cleaned, it's time to focus on drying it properly. A well-dried surface is essential for a successful repair, as moisture can hinder the effectiveness of wood fillers or sealants.

Start by blotting any excess moisture with a clean, dry cloth. This step helps eliminate any lingering dampness from the cleaned area.

Next, allow the cleaned area to sit for a few minutes, confirming it's completely dry before moving on to the repair process. Don't forget to check the surrounding wood; it should also be dry and free from debris.

Consider the following points to guarantee a successful drying process:

Advertisement
  • Use a specialized hardwood cleaner for best results.
  • Blot any excess moisture thoroughly before proceeding.
  • Inspect the scratched area for any remaining imperfections.

Applying Wood Filler

wood filler application technique

Applying wood filler is an important step in restoring deep scratches on your furniture. First, clean the area around the scratch with a specialized hardwood cleaner to remove any debris. This guarantees the wood filler adheres properly.

Next, choose a color that closely matches your furniture. Once you've selected the right shade, it's time to apply wood filler. Using a putty knife, fill the scratch completely, taking care to avoid air bubbles.

After you've applied the filler, smooth the excess with the putty knife held at a 45-degree angle. This technique helps create an even surface that blends seamlessly with the surrounding wood. Allow the wood filler to dry according to the manufacturer's instructions, which usually takes around 30 minutes.

Once it's dry, you'll want to lightly sand the area with fine-grit sandpaper, preferably at least 180-grit, to achieve a flawless finish. This step is vital for guaranteeing that your repair isn't noticeable.

Be patient and follow these steps carefully, and you'll have your furniture looking as good as new in no time.

Sanding the Repaired Area

smoothening the fixed surface

Sanding the repaired area is vital to achieving a seamless finish. Begin by using fine sandpaper, starting with 180-grit to smooth out the filled scratch. This initial sanding helps level the repair with the surrounding wood.

Next, switch to 240-grit sandpaper for a finer finish, guaranteeing you create a surface that blends well with the existing wood grain.

Advertisement

When sanding, remember to always follow the direction of the wood grain. This technique prevents visible marks that can detract from your repair efforts.

Here's a quick checklist for your sanding process:

  • Start with 180-grit sandpaper for initial smoothing.
  • Switch to 240-grit for a polished, finer finish.
  • Clean the area thoroughly to remove dust and debris.

After sanding, it's essential to clean the area thoroughly to eliminate any dust particles that could interfere with the next steps.

Lightly buff the sanded area with a clean cloth to restore shine and create a smooth shift between the repaired patch and the original wood surfaces.

Allow the area to dry completely before applying any finish to guarantee proper adhesion and appearance.

Finishing Touches

finalizing last details

Achieving a flawless finish is the final step in restoring your wood furniture. After the wood fillers have dried, smooth any excess with a putty knife or an old credit card. This helps create an even surface that blends seamlessly with the surrounding wood.

Once you've confirmed it's dry—typically after about 30 minutes—grab some fine sandpaper (180 grit or higher) to sand the area. This step enhances the repair's appearance and prepares it for sealing.

Advertisement

Before applying a sealant, use a damp cloth to clean the filled area, removing any dust or debris for peak adhesion.

When choosing a sealant, products like polyurethane or clear lacquer spray work well. Apply multiple thin coats, allowing at least 24 hours of drying time between each application for a durable finish.

Preventing Future Scratches

scratch prevention techniques explained

To keep your wood furniture looking pristine, it's vital to take proactive steps in preventing scratches. Implementing a few simple strategies can dramatically extend the life of your furniture.

Start by using furniture pads under heavy items and when moving furniture to prevent scratches from contact with the surface. It's also important to protect your wood from temperature-related damage; avoid placing hot or cold items directly on the wood. Instead, use coasters and placemats.

Set up a consistent cleaning routine that includes soft, non-abrasive cloths and gentle cleaning solutions. This helps maintain the wood finish while avoiding wear and tear.

Regularly inspect high-traffic areas for signs of damage, allowing you to make quick repairs before they require extensive refinishing.

Advertisement

Lastly, consider enforcing a no-shoes policy in your home. This reduces the dirt and debris that can scratch wooden surfaces during daily use.

By following these tips, you'll be well on your way to preventing future scratches and keeping your wood furniture in excellent condition.

  • Use furniture pads under heavy items
  • Implement a regular cleaning routine
  • Enforce a no-shoes policy in your home

Additional Repair Techniques

advanced maintenance methods implemented

Even with the best preventive measures, deep scratches can still occur on your wood furniture. To tackle these, start by cleaning the scratched area with a specialized hardwood cleaner to remove dust and debris.

Once the surface is clean, use wood filler that matches your furniture's color. Apply the filler with a putty knife, ensuring there are no air bubbles trapped beneath the surface.

After the filler dries according to the product's instructions, lightly sand the area with fine sandpaper (240 grit). This step helps you blend the repair seamlessly with the surrounding wood grain.

If the color of the filler doesn't quite match, consider using a stain marker or a wood fill blending pencil to achieve a more precise match.

Advertisement

When to Seek Professional Help

recognizing need for assistance

Recognizing when a scratch goes beyond your DIY repair capabilities is vital for preserving your wood furniture's integrity. If you encounter deep scratches that require extensive sanding, refinishing, or involve structural integrity issues, it's time to seek professional help.

Here are some signs that indicate you should enlist an expert:

  • The scratch affects the stability of the furniture, posing a safety risk.
  • You're struggling with color matching and achieving a seamless finish.
  • You're dealing with large-scale damage across multiple pieces of furniture.

Professionals possess the tools and expertise necessary to address these challenges effectively.

If a scratch is accompanied by additional issues, like water damage or mold, it's important to consult a professional for safe restoration. They can guarantee your furniture maintains its structural integrity while delivering high-quality results.

By opting for professional help in these situations, you not only save time but also achieve consistent, lasting repairs that stand the test of time.

Frequently Asked Questions

Can You Fix Deep Scratches on Wood?

Yes, you can fix deep scratches on wood. Start by cleaning the area, then apply wood filler that matches your furniture's color. Smooth it out, sand it down, and let it dry for a perfect finish.

How Do You Repair Gouges in Wood Furniture?

When gouges mar your wood's beauty, you'll want to clean the area first. Then, fill it with a matching wood filler, sand it smooth, and finish with a protective coat for a seamless repair.

Advertisement

How to Fix Deep Cat Scratches on Wood?

To fix deep cat scratches on wood, start by cleaning the area. Then, apply mineral spirits, use wood filler that matches, sand gently, and finish with a protective sealant to restore your furniture's beauty.

Does Vinegar and Olive Oil Fix Wood Scratches?

Vinegar and olive oil can help minimize minor scratches on wood, but they won't fix deep ones. Test a small area first, then apply the mixture in circular motions for the best appearance.

Conclusion

To sum up, repairing deep scratches in your wood furniture can restore its beauty and extend its life. Did you know that 70% of homeowners have faced furniture damage at some point? By using the right tools and techniques, you can tackle scratches with confidence. Remember to keep your furniture clean and use coasters to prevent future damage. With a little effort, you can maintain the elegance of your pieces for years to come!

Continue Reading

Interior Design

How to Wash Sofa Pillows

If you want your sofa pillows to look fresh and clean, discover the best washing techniques that will leave you amazed.

Published

on

sofa pillows cleaning guide

To wash your sofa pillows, start by checking the care labels for specific instructions. If they're removable, toss them in the washing machine on a gentle cycle with cold water. For non-removable covers, spot clean with a mild detergent and a soft sponge. You can hand wash foam-filled pillows with a mild solution, rinsing thoroughly afterward. Air dry or use a low heat setting in the dryer with dryer balls to fluff them up. Regular maintenance like vacuuming and spot cleaning will help keep pillows looking great. Want to discover even more cleaning tips?

Key Takeaways

  • Check the care label for specific washing instructions and fabric type before cleaning your sofa pillows.
  • Use a vacuum to remove dust and allergens from the pillows before washing.
  • For machine-washable pillows, use a gentle cycle with cold water; for non-removable covers, opt for spot cleaning.
  • Air dry pillows or use a low heat setting in the dryer with dryer balls for fluffing and maintaining shape.
  • Regularly fluff and vacuum pillows to keep them fresh and prevent flattening.

Check Care Labels

inspect fabric care instructions

When you decide to wash your sofa pillows, the first step is to check the care labels. This essential action tells you the appropriate washing method and any specific cleaning instructions.

Look for symbols that indicate whether the pillows are machine-washable, hand-wash only, or require dry cleaning. Fabrics like silk and wool typically need dry cleaning, while cotton and polyester are often safe for machine washing.

It's also wise to take into account the potential for allergens in your pillows, much like understanding the importance of selecting the right cold medication for effective relief.

Pay close attention to any temperature guidelines provided on the label. Following these guidelines helps prevent fabric damage or shrinkage, ensuring your pillows stay in great shape.

If the care label is missing or unreadable, don't panic. You can think about spot cleaning those areas that need attention or consult the manufacturer for proper cleaning recommendations.

Advertisement

Cleaning Methods

effective cleaning techniques explained

To effectively clean your sofa pillows, it's important to choose the right method based on their care labels and construction. Always check the care tag before deciding how to wash your throw pillows. Here's a quick overview of effective cleaning methods:

Cleaning Method Suitable For
Machine Wash Removable covers
Spot Clean Non-removable covers
Hand Wash Foam-filled pillows

For removable covers, machine wash them on a delicate cycle using cold water and a mild detergent to preserve fabric integrity. If your pillows have non-removable covers, spot cleaning works best. Just apply a mixture of mild detergent and water to the stained area, then blot with a clean white towel.

If the pillow contains foam filling, hand wash it using a mild detergent solution. Be sure to rinse thoroughly and air-dry to prevent mildew. By tailoring your cleaning method to each pillow's specific needs, you'll guarantee they stay fresh and in great condition for years to come.

Washing Techniques

effective laundry methods explained

Understanding the right washing techniques for your sofa pillows can greatly enhance their lifespan and appearance. Start by checking the care label to see if your pillows are machine-washable. If they are, use a gentle cycle with mild detergent and wash them in cold water to prevent any damage or shrinking.

For ideal cleaning, consider using a vacuum to remove dust and allergens before washing, as this can help maintain their freshness and hygiene. For more tips on effective cleaning solutions, check out the Best Vacuums for Dust Removal in 2024.

For non-removable covers, you'll need to hand-wash them. Create a solution of cold water and mild detergent, then gently scrub the fabric with a soft brush or cloth. Be careful not to damage the material.

After cleaning, make sure to thoroughly rinse the covers to eliminate any detergent residue, as leftover soap can attract dirt.

Advertisement

Once you've finished washing, it's crucial to air dry your sofa pillows. If you prefer to use a dryer, opt for a low heat setting. Adding dryer balls can help fluff the filling and maintain the pillows' shape during the drying process.

Following these washing techniques will guarantee your sofa pillows remain fresh, clean, and looking their best for years to come.

Drying Instructions

follow garment care guidelines

Drying your sofa pillows properly is essential for maintaining their shape and comfort. Start by checking the care label for specific drying instructions. Most pillows can be dried on a low heat setting in the dryer. For added softness, toss in dryer balls or clean tennis balls to fluff the filling while drying.

If your pillows aren't dryer-safe, opt for air drying. Hang them in a well-ventilated area, and avoid direct sunlight to protect the fabric. Be diligent in ensuring your pillows are thoroughly dried to prevent mildew, which can develop if any moisture remains.

During the drying process, periodically fluff and reshape your pillows to maintain their form.

Drying Method Tips for Best Results Common Issues
Low Heat Setting Use dryer balls for fluffing Mildew development
Air Drying Hang in a well-ventilated area Retained moisture
Periodic Fluffing Reshape to maintain appearance Loss of shape

Maintenance Tips

regular equipment care

Since maintaining your sofa pillows is essential for their longevity and appearance, it's important to incorporate a few simple practices into your routine.

Start by vacuuming your pillows at least once a month to eliminate dust, pet dander, and allergens. This will keep them looking clean and fresh. Consider adding a few decorative touches to your living space, such as DIY Fire Pit Ideas, which can create a cozy atmosphere that complements your pillows.

Advertisement

If you notice any stains, don't wait—spot clean them immediately using a soft sponge and a mild detergent solution. This prevents deep-set stains from forming.

To keep your pillows in shape, shake and fluff them weekly. This simple act preserves their form and prevents the filling from flattening. Consider investing in removable pillow covers that can be machine washed every few weeks. This makes maintenance easier and guarantees your pillows stay clean.

When your pillows aren't in use, store them in a cool, dry place to protect them from moisture and potential mildew growth.

Frequently Asked Questions

Can I Wash Couch Pillows in the Washing Machine?

Yes, you can wash couch pillows in the machine, but check the care label first. If they're machine-washable, remove covers, use a delicate cycle, and balance the load for best results.

How to Clean Couch Pillows Without Removable Covers?

Cleaning couch pillows without removable covers is like unearthing hidden treasures. You'll vacuum, mix a gentle detergent with warm water, scrub stains gently, rinse, and let them air dry, keeping them fresh and fluffy.

Advertisement

Can You Wash Pillows With Stuffing?

Yes, you can wash pillows with stuffing, but always check the care label first. For machine-washable types, use a gentle cycle. For foam-filled pillows, hand wash or spot clean instead to preserve their shape.

Can I Dry Throw Pillows in the Dryer?

Did you know that nearly 80% of people don't realize their throw pillows can go in the dryer? You can dry them on low heat, but check the care label first to avoid damage.

Conclusion

In the end, washing your sofa pillows is like giving them a revitalizing breath of life. Just as a flower blooms brighter after a rain, your pillows will look and feel rejuvenated after a good clean. By following the care labels and proper techniques, you're not just maintaining your furniture but nurturing your home's comfort. Embrace the process, and your space will transform, inviting warmth and coziness that feels as good as a hug on a chilly day.

Continue Reading

Interior Design

Indonesian Decorating Style: Tips to Create a Chic and Cultural Home!

Keen to transform your space with Indonesian flair? Discover essential tips for creating a chic and cultural home that captivates the senses.

Published

on

chic indonesian home decor

To create a chic and cultural home with Indonesian decorating style, embrace natural materials like wood, bamboo, and stone. Use earthy tones for a calming base, and add vibrant accents with traditional textiles like batik and ikat. Incorporate unique cultural accessories, such as handcrafted furniture and art pieces, to tell your story. Open floor plans enhance flow and connect indoor spaces to nature, while large windows invite natural light. Don't forget to include tropical plants to enrich your environment. Keep exploring to discover more tips for crafting your stylish Indonesian oasis!

Key Takeaways

  • Embrace natural materials like wood, bamboo, and stone to create warmth and authenticity in your home decor.
  • Incorporate vibrant textiles, such as batik and ikat, to add color and cultural depth to your living spaces.
  • Design open floor plans with large windows and sliding doors to promote natural light and a seamless indoor-outdoor flow.
  • Use earthy tones balanced with pops of color to create a soothing and harmonious ambiance throughout your home.
  • Include cultural accessories like traditional crafts and artisan pieces to enrich your decor and tell a story.

Overview of Indonesian Decorating Style

indonesian traditional interior design

Embracing natural materials like wood, bamboo, and stone, the Indonesian decorating style creates a warm and inviting atmosphere that reflects the country's rich cultural heritage.

You'll notice how these elements form the backbone of this aesthetic, promoting a connection to nature that feels both soothing and grounded. Earthy tones dominate the color palette, with browns, greens, and whites working together to enhance the feeling of calmness in your space. Adding vibrant accents through Indonesian decorative pillows can elevate the overall look while providing comfort.

The intricate carvings found in furniture and decor pieces add a unique touch, showcasing traditional craftsmanship that tells stories of Indonesian culture.

As you integrate these elements, consider an open floor plan, which encourages a seamless flow between indoor and outdoor areas. This design choice not only enhances livability but also invites natural light to flood your home, creating an airy environment.

Accessorizing with culturally significant pieces, like Javanese Wayang puppets or handcrafted sculptures, further enriches your decor.

Advertisement

Key Elements of the Style

essential aspects of style

When you embrace the Indonesian decorating style, you'll want to start with natural materials that bring warmth and a sense of connection to the outdoors.

Consider using open floor plans to enhance airflow and light, as well as incorporating vibrant color schemes, using rich textiles that showcase local culture and craftsmanship.

These elements not only enhance your space but also create a harmonious and inviting atmosphere, promoting a connection to nature through design choices Balinese design characteristics.

Natural Materials Utilization

Indonesian decorating style thrives on the use of natural materials, creating a warm and inviting atmosphere in your home. By incorporating elements like wood, stone, bamboo, and rattan, you can achieve a genuine connection to nature in your interiors.

Traditional Indonesian homes, or Rumah Adat, often exemplify the use of these materials, showcasing the deep cultural significance and craftsmanship behind each piece. Consider investing in wooden furniture, particularly pieces made from teak, known for its durability and intricate hand-carved designs. This not only adds character but also showcases the craftsmanship inherent in Indonesian decor.

Rattan is another versatile material that can elevate your home decor. Use it for crafting chic furniture or decorative items, infusing your space with an exotic aesthetic.

Advertisement

To enhance the organic feel further, opt for flooring and wall accents made from volcanic rock or river stone; these materials introduce unique textures that enrich the overall design.

Don't forget to incorporate traditional textiles like batik and ikat into your wall decor and accessories. These vibrant fabrics add depth and reflect Indonesia's rich artistic heritage, making your home a true representation of this beautiful culture.

Embrace these natural materials, and you'll create a space that's both stylish and culturally resonant.

Vibrant Color Schemes

Color plays an essential role in creating the vibrant essence of Indonesian decorating style. You'll find that vibrant colors like deep reds, rich yellows, and lush greens reflect the region's natural beauty and cultural significance. These hues can energize your space while paying homage to Indonesia's rich heritage and its stunning cultural decor masks, which often feature intricate designs and vibrant colors.

To achieve a harmonious balance, pair these vibrant colors with earthy tones like browns and beiges. This grounded backdrop allows your bright accents to shine while creating a tranquil atmosphere. A cohesive color palette that blends both vibrant and earthy tones is key to celebrating the dynamic essence of Indonesian design.

Advertisement

Don't forget to incorporate traditional Indonesian textiles, like batik and ikat, which feature bold patterns that infuse energy into your room. Use them for upholstery, curtains, or decorative throws to add layers of visual interest.

Additionally, lively artwork and handcrafted accessories in vibrant hues enhance the cultural ambiance of your home.

Color Schemes and Combinations

vibrant color pairings guide

In creating a harmonious space, choosing the right color schemes and combinations is essential for capturing the essence of Indonesian decorating style. Start with earthy tones, like browns and greens, to establish a soothing and natural ambiance that connects your home to the surrounding environment.

These colors evoke a sense of tranquility, making your space feel warm and inviting. Incorporating natural materials like wood and bamboo can further enhance this connection with nature, creating a truly inviting atmosphere that reflects local culture and promotes relaxation traditional Indonesian style home decor.

You can introduce monochrome shades, such as whites and beiges, to enhance this calm atmosphere. They emphasize simplicity and create a serene backdrop. For a touch of vibrancy, incorporate pops of color sparingly; deep reds and warm yellows can energize a room while reflecting Indonesia's rich culture.

Just be mindful to keep balance in mind—too much contrast can disrupt the overall harmony.

Advertisement

Each room can showcase different styles and color schemes, but make certain they coordinate for a cohesive look throughout your home. This way, you'll maintain a sense of flow and unity.

Integrating Natural Materials

natural materials integration strategy

Natural materials play an essential role in creating an inviting and authentic atmosphere in your space. In Indonesian home design, the use of natural materials like wood, stone, bamboo, and rattan evokes warmth and a connection to nature, promoting sustainability.

Teak wood is a standout choice for hand-carved furniture, providing durability while showcasing traditional Indonesian craftsmanship. Additionally, incorporating pieces from Mahallati Interiors can elevate your tropical aesthetic, as they specialize in luxury designs that harmonize with nature.

Rattan, abundant in Indonesia, can be woven into various furniture pieces, enhancing both style and functionality in your living space. Consider incorporating items like rattan chairs or baskets for a chic yet practical touch.

For flooring and outdoor features, volcanic rock or river stone introduces textural variety, giving your home a grounded feel that aligns with the organic essence of Indonesian design.

Don't forget the impact of traditional textiles! Using batik and ikat, crafted from natural fibers and dyed with plant-based colors, adds cultural depth and vibrant patterns to your interiors, reinforcing the overall Indonesian aesthetic.

Advertisement

Creating Open Spaces

expanding accessible community areas

Creating open spaces

Emphasizing open floor plans is essential for creating a space that feels both spacious and connected to nature, key elements of Indonesian decorating styles. Start by designing your home with large windows and sliding doors to maximize natural light and facilitate a seamless connection between indoor and outdoor spaces. This not only enhances the livability of your home but also invites the beauty of the outdoors inside.

Incorporating features inspired by modern tropical aesthetics allows for a blend of indoor and outdoor environments that elevates your living experience.

Incorporating natural materials like wood and stone in your flooring and furnishings helps maintain an organic feel, aligning perfectly with Indonesian design principles. To reinforce your connection to nature, integrate tropical plants and greenery throughout your living areas. These vibrant touches bring life and freshness, making your home feel like a serene retreat.

Consider adding open-air designs, such as outdoor living areas or patios, to further expand your usable space. These areas provide a tranquil atmosphere where you can relax and enjoy the beauty of the surrounding environment.

Incorporating Cultural Accessories

cultural accessories integration techniques

How can you truly capture the essence of Indonesian culture in your home? By incorporating cultural accessories that reflect the rich traditions and artistic heritage of Indonesia.

Start by adding elements that showcase the beauty of Bali and the unique craftsmanship of local artisans, such as traditional artistry found in vibrant masks.

Advertisement

Here are three ways to enhance your home interior:

  1. Traditional Sumba Ikat Fabrics: Use these stunning fabrics as upholstery or wall hangings. Their intricate motifs won't only beautify your space but also tell a story of local culture.
  2. Javanese Wayang Puppets: Display these striking puppets as wall art or sculptures. They add visual interest and are believed to bring love and harmony into your living space.
  3. Rattan Accessories: Incorporate woven baskets or furniture made from rattan. This versatile material reflects Indonesia's sustainable practices and adds a touch of natural style alongside plants and greenery.

These accessories will transform your home into a chic and cultural oasis, allowing you to celebrate Indonesia's vibrant artistry while creating a warm atmosphere for your family and friends.

Furniture Selection and Arrangement

optimal furniture placement strategy

When selecting furniture, focus on essential pieces like a cozy couch and a durable bed, emphasizing traditional Indonesian materials such as teak or rattan.

Incorporating tropical-themed luxury design can elevate your space, ensuring that each piece reflects the rich cultural heritage of Indonesia.

Thoughtfully arrange these items to create distinct living areas, ensuring easy movement throughout your space.

Essential Furniture Prioritization

Creating a harmonious living space starts with prioritizing essential furniture pieces that enhance both comfort and functionality. In your living room, these choices can greatly influence the atmosphere, adding warmth and a welcoming vibe. Incorporating traditional elements, such as natural materials, can further enhance the aesthetic appeal.

Here are three key items to take into account:

Advertisement
  1. Comfortable Couch: This is the centerpiece of your living room. Choose one that incorporates natural fabrics and offers enough seating for family and friends.
  2. Quality Bed: A bed is crucial for restful sleep. Prioritize a sturdy frame and a comfortable mattress to guarantee you wake up refreshed.
  3. Unique Accent Pieces: Incorporate inherited or second-hand furniture. These items not only add character and charm but also make your space more personal without breaking the bank.

When selecting these essential furniture pieces, remember to avoid overcrowding your space. Each piece should be proportional to the room, promoting ease of movement and a sense of spaciousness.

With careful selection and thoughtful prioritization, you can create a living space that beautifully reflects your style while guaranteeing comfort and functionality.

Thoughtful Space Arrangement

Once you've selected your key furniture pieces, the next step is arranging them thoughtfully to maximize both function and style in your Indonesian-inspired home.

Start by prioritizing essential items like a comfortable couch and a well-sized bed, creating a living space that balances comfort and aesthetic appeal.

Establish distinct living areas to promote flow and accessibility. This enhances your overall Interior Design while ensuring each space feels inviting.

Don't shy away from incorporating inherited or second-hand furniture; these pieces add character and nostalgia, making your decor budget-friendly.

Advertisement

When it comes to wall art, hang it at eye level to create visually appealing focal points in each room.

This not only enhances the cultural essence of your Indonesian decor but also draws the eye, creating interest and depth in your home.

Enhancing Ambiance and Comfort

improving atmosphere and comfort

To enhance the ambiance and comfort of your home, embrace the essence of Indonesian decorating principles. Start by incorporating natural materials like wood, bamboo, and stone. These elements add warmth and character, creating a cozy atmosphere reflective of Indonesian design.

Next, utilize a harmonious color palette with earthy tones such as browns and greens. These colors foster a tranquil environment, promoting relaxation and comfort throughout your space.

Here are three additional tips to elevate your ambiance:

  1. Add Greenery: Strategically place plants throughout your home. They not only improve air quality but also strengthen the connection between your indoor and outdoor environments.
  2. Embrace Handcrafted Details: Incorporate intricate wood carvings and traditional textiles to enrich the ambiance and emphasize cultural authenticity.
  3. Create Open Floor Plans: Maximize natural light with large windows and sliding doors. This promotes a liberating and airy feeling, greatly elevating the atmosphere of your living areas.

Frequently Asked Questions

How to Make Furniture Look Balinese?

To make your furniture look Balinese, incorporate natural materials like teak wood, choose intricate carvings, and use vibrant textiles. Opt for open-air designs, and add rattan elements for a chic, exotic aesthetic.

Conclusion

By embracing Indonesian decorating style, you can transform your home into a vibrant oasis, much like a lush tropical paradise. Remember to blend key elements like natural materials and cultural accessories while keeping the space open and inviting. With thoughtful furniture selection and arrangement, your home will radiate comfort and warmth. So go ahead, infuse your space with these rich traditions and create a chic, cultural sanctuary that reflects your unique taste and personality!

Advertisement
Continue Reading
Advertisement

Affiliate disclaimer

As an affiliate, we may earn a commission from qualifying purchases. We get commissions for purchases made through links on this website from Amazon and other third parties.

Advertisement

Vetted

Vetted2 months ago

Book Review: “The Creative Spark: Unleashing Your Inner Artist”

Reawakening Creativity in the Digital Age The Lost Bookshop: The most charming and uplifting novel for 2024 and the perfect...

sustainable fashion brand recommendations sustainable fashion brand recommendations
Vetted3 months ago

15 Best Brands for Sustainable Fashion You Need to Know About in 2024

Discover 15 pioneering brands in sustainable fashion for 2024 that will transform your wardrobe while making a positive impact—find out...

sustainable fashion book recommendations sustainable fashion book recommendations
Vetted3 months ago

15 Best Books on Sustainable Fashion That Every Eco-Conscious Reader Should Explore

Join the journey through the 15 best books on sustainable fashion that will transform your wardrobe choices and open your...

sustainable fashion reading list sustainable fashion reading list
Vetted3 months ago

15 Must-Read Books About Sustainable Fashion to Inspire Your Eco-Friendly Journey

Here are 15 essential books on sustainable fashion that will transform your perspective and inspire your eco-friendly journey—discover the secrets...

affordable sustainable fashion brands affordable sustainable fashion brands
Vetted3 months ago

15 Best Affordable Sustainable Fashion Brands You Need to Know About in 2024

Join the journey to discover 15 affordable sustainable fashion brands for 2024 that will transform your wardrobe—find out which ones...

men s fashion essentials 2024 men s fashion essentials 2024
Vetted3 months ago

15 Best Men's Fashion Essentials to Elevate Your Style Game in 2024

Get ready to transform your wardrobe with the 15 best men's fashion essentials for 2024 that will elevate your style...

elevate wardrobe with amazon finds elevate wardrobe with amazon finds
Vetted3 months ago

15 Best Amazon Fashion Finds That Will Elevate Your Wardrobe in 2024

You won't believe the must-have fashion finds from Amazon that will transform your wardrobe in 2024—discover the top 15 styles...

stylish bow embellished fashion items stylish bow embellished fashion items
Vetted3 months ago

15 Best Fashion Pieces With Bows That Elevate Any Outfit

Knot your style with these 15 fashionable pieces featuring bows that promise to elevate any outfit—discover the perfect accessory for...

top men s sneakers 2024 top men s sneakers 2024
Vetted3 months ago

15 Best Men's Fashion Sneakers of 2024 – Style Meets Comfort

Looking for the perfect blend of style and comfort in men's fashion sneakers? Discover the top 15 picks for 2024...

stylish comfortable women s sneakers stylish comfortable women s sneakers
Vetted3 months ago

15 Best Women's Fashion Sneakers for Style and Comfort in 2024

Looking for stylish and comfortable women's sneakers in 2024? Discover the top 15 picks that will elevate your wardrobe and...

2024 women s fashion trends 2024 women s fashion trends
Vetted3 months ago

15 Best Women's Fashion Trends of 2024 You Need to Know About

Look ahead to 2024's must-have women's fashion trends that blend comfort and style—discover which pieces you can't afford to miss!

elevate your style game elevate your style game
Vetted3 months ago

13 Best Fashion and Beauty Products You Need to Elevate Your Style Game

Jumpstart your style with these 13 essential fashion and beauty products that promise to transform your routine—discover what you've been...

Trending

Copyright © 2024 StyleGuru.org Affiliate disclaimer As an affiliate, we may earn a commission from qualifying purchases. We get commissions for purchases made through links on this website from Amazon and other third parties.