Interior Design
How to Clean Velour Sofa
Sustain the luxurious look of your velour sofa with simple cleaning tips that will keep it pristine—discover the secrets to effective care inside!
To clean your velour sofa, start with weekly dusting and vacuuming using a soft brush attachment. Always vacuum in the direction of the nap to maintain its texture. For stains, blot immediately with a cloth and use a mild soap solution for gentle cleaning. Test any solution on a hidden area first. Avoid saturating the fabric, and let it air dry completely. Regular maintenance and seasonal deep cleaning keep your sofa looking luxurious. If you're curious about additional tips and strategies for optimal care, there's more to uncover that can help you enhance your cleaning routine.
Key Takeaways
- Regularly dust and vacuum your velour sofa using a soft brush attachment to remove dirt without damaging the fabric.
- Mix mild liquid soap with warm water for a gentle cleaning solution, and test on a hidden area first.
- Blot spills immediately with an absorbent cloth to prevent stains; avoid rubbing to minimize damage.
- Schedule professional cleaning every 6 to 12 months for deep cleaning and maintenance of the fabric.
- Use light steam application to restore the fabric's nap and eliminate creases, allowing it to air-dry completely.
Introduction
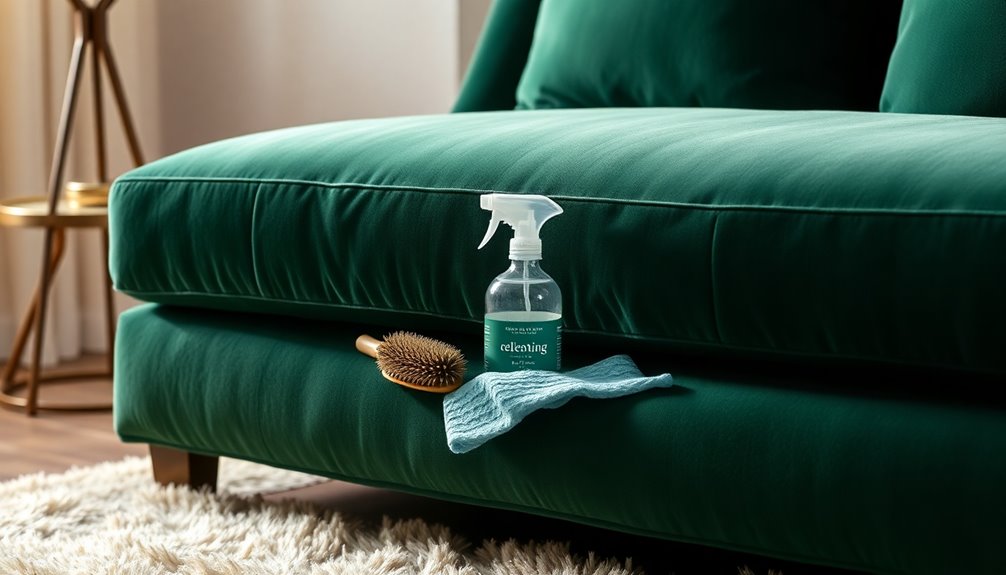
Keeping your velour sofa looking its best starts with regular dusting and vacuuming to prevent dirt buildup. You'll also need to use fabric-specific cleaning techniques for those inevitable spills, like wine and ink stains. With the right care, you can maintain the luxurious feel and appearance of your sofa for years to come.
Weekly Dusting and Vacuuming
To maintain the beauty and integrity of your velour sofa, regular dusting and vacuuming are essential practices. Aim to perform these tasks at least once a week to prevent dirt buildup and keep the fabric looking fresh. Start by using a vacuum cleaner equipped with a soft brush attachment. This tool is designed to gently remove dust and pet hair without damaging the delicate fibers of your sofa.
When vacuuming, always do so in the direction of the nap to avoid flattening those soft fibers. For stubborn dust or lint that the vacuum might miss, you can incorporate a soft bristle brush or a lint roller. These tools are effective at picking up particles that cling to the velour's texture.
Regular maintenance through weekly dusting and vacuuming not only preserves the velour's luxurious appearance but also helps prolong its lifespan by preventing wear and tear. By making these practices a part of your cleaning routine, you'll ensure your velour sofa remains a beautiful centerpiece in your home for years to come.
Fabric-Specific Cleaning Techniques
When it comes to cleaning your velour sofa, using fabric-specific techniques is crucial for maintaining its luxurious look and feel. Start with gentle cleaning methods to avoid damaging the delicate fibers of your upholstery. Use a soft brush to remove surface dirt before vacuuming. This step helps prevent any dirt from embedding deeper into the fabric.
For cleaning stains, mix a mild liquid soap with warm water to create a gentle cleaning solution. Always test this solution on a hidden area first to ensure it won't discolor your velvet. When spot cleaning, act quickly: blot spills immediately with a clean, absorbent cloth, and use a back-and-forth motion to apply your cleaning solution. Avoid rubbing, as this could damage the texture of the fabric.
Regular vacuuming with an upholstery attachment is essential for keeping your velour sofa looking its best. Additionally, consider scheduling professional cleaning periodically to preserve its softness and appearance. By following these fabric-specific cleaning techniques, you'll keep your velour sofa in pristine condition, ready for relaxation and entertaining.
Treating Wine and Ink Stains
Stains from wine or ink can be particularly daunting, but quick action can make a significant difference in preserving your velour sofa. For wine stains, start by gently blotting the area with a clean, absorbent cloth to soak up excess liquid. Avoid rubbing, as this can spread the stain. Once you've blotted, mix a mild dish soap with water and use a damp cloth to gently blot the stained area. Rinse with another damp cloth to remove any soap residue.
When dealing with ink stains, apply a small amount of rubbing alcohol to a cotton ball and carefully dab the area. Make sure not to saturate the fabric, as this can lead to further damage. Always test any cleaning solution on an inconspicuous part of the velour sofa to prevent discoloration.
After treating either type of stain, let the area air dry completely. Once dry, gently brush the fabric in the direction of the nap to restore its texture. These steps will help you effectively clean a velvet couch and keep it looking its best, even after pesky stains.
Shield From Pet Claws
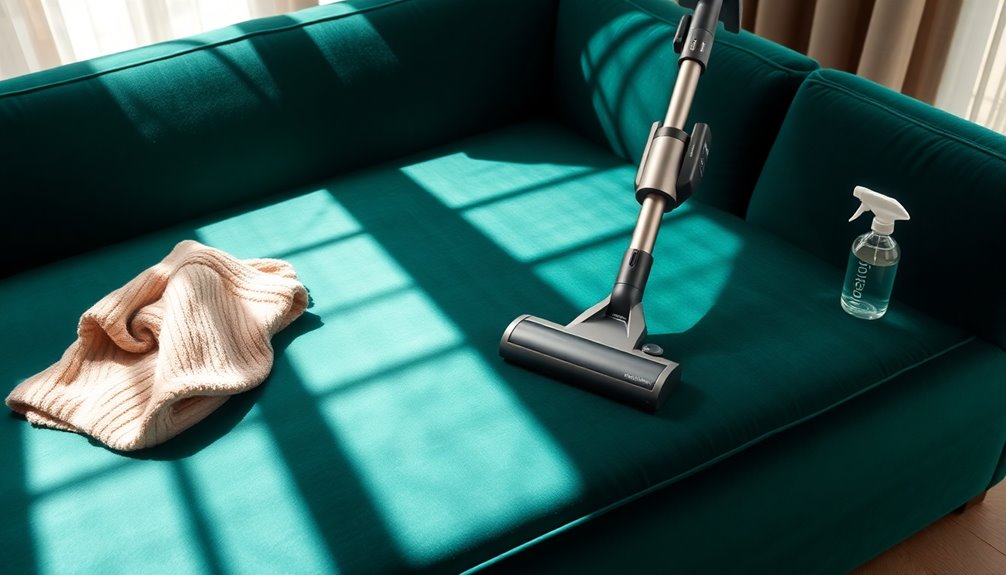
To protect your velour sofa from pet claws, you can explore claw-resistant fabric options that offer enhanced durability. Additionally, decorative fabric protection options not only safeguard your furniture but also maintain its stylish appearance. Minimizing friction on the fabric is key, so consider how your pets interact with the sofa to reduce wear and tear.
Claw-Resistant Fabric Options
Choosing the right fabric for your velour sofa can make all the difference in protecting it from pet claws. Consider opting for synthetic velvet fabrics, which are generally more durable and resistant to claw damage than natural fibers. Look for options with a high Martindale rub count of 40,000 or more; these fabrics offer greater resilience against wear and tear from your pets.
Micro velvet and performance velvet are excellent choices, as their tighter weaves help prevent snagging and pulling from claws. Additionally, some manufacturers provide specialized pet-friendly upholstery featuring reinforced fibers designed to withstand scratches and punctures. These fabrics can significantly extend the life of your sofa.
Regular maintenance is key to keeping your sofa looking its best. Vacuuming regularly removes pet hair and debris, while brushing the fabric helps maintain its integrity, minimizing the impact of claw damage over time. By incorporating these cleaning methods into your routine, you'll enhance the longevity of your sofa while ensuring it remains a comfortable spot for you and your pets. Choose wisely, and enjoy a beautiful, claw-resistant velour sofa!
Decorative Fabric Protection Options
A variety of decorative fabric protection options can help shield your velour sofa from pet claws while enhancing its overall appearance. Start by applying a fabric protector specifically designed for velour. This creates a barrier against damage and increases the fabric's durability. Look for products that are water-repellent and stain-resistant to prevent spills and minimize pet-related stains.
Using slipcovers made from durable, pet-friendly materials offers an additional protective layer while maintaining your living space's aesthetic. Regularly brushing the velour with a soft brush can lift the nap and reduce the visibility of scratches from your furry friends.
Incorporating throw blankets or cushions that can be easily cleaned or replaced is another great strategy. These not only safeguard your velour sofa but also allow you to enjoy the luxurious feel of the fabric without constant worry. Choose decorative fabric that complements your home's style while ensuring it's functional for pet owners. By combining these protective measures, you can keep your velour sofa looking beautiful and extend its life, all while accommodating your beloved pets.
Minimize Friction on Fabric
Protecting your velour sofa from pet claws is key to maintaining its beauty and longevity. To minimize friction on the fabric, consider using a protective cover or throw. This barrier can help keep direct contact to a minimum. Regularly trimming your pet's nails is also essential; shorter nails mean less chance of snagging the velour surface.
Designate specific areas for your pets to sit or lie down, limiting their access to the sofa. This helps reduce wear and tear on the fabric over time. Additionally, utilize pet-friendly cleaning products or fabric protectors designed for velour. These create an extra layer of protection against claws and spills, making it easier to remove stains when they occur.
Establish a routine for brushing your pets regularly to minimize shedding and dust buildup on the velour. Keeping the fabric clean and free from debris also lowers the friction that can lead to damage. With these simple care tips, you can ensure your velour sofa remains a beautiful and comfortable spot for both you and your furry friends.
Upholstery Stitching Reinforcement
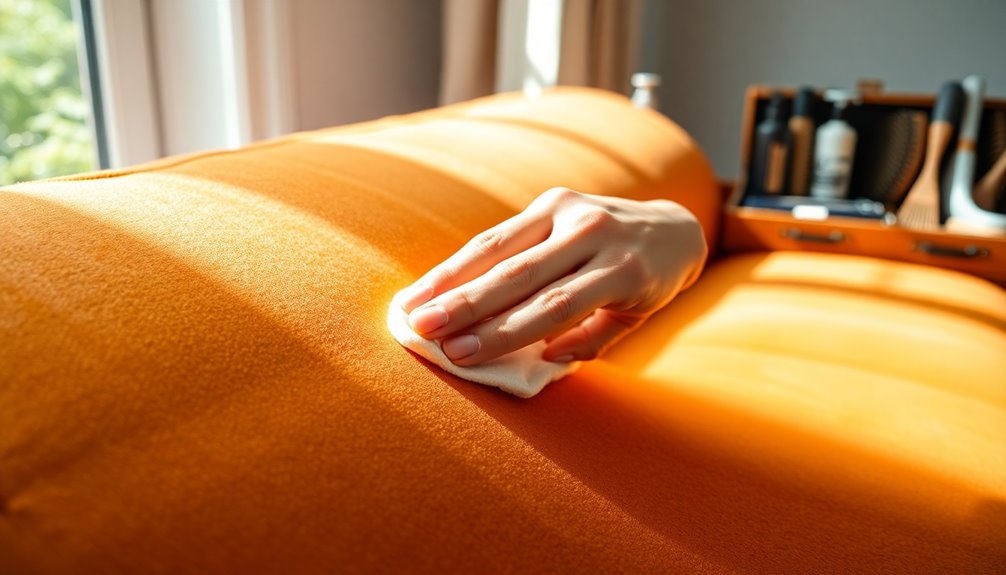
When it comes to maintaining your velour sofa, paying attention to upholstery stitching reinforcement is key. Strong seams not only keep the fabric intact but also enhance the overall aesthetic appeal and longevity of your furniture. By ensuring sewn seam integrity, you can effectively address upholstery color repair techniques and keep your sofa looking revitalized and stylish.
Sewn Seam Integrity
Sewn seam integrity is essential for maintaining the durability and beauty of your velour sofa. Properly sewn seams reinforce the fabric, preventing fraying and unraveling over time. High-quality upholstery stitching typically employs double-stitched or reinforced seams that can handle regular use without compromising their integrity.
To ensure your sofa remains long-lasting, regularly inspect the sewn seams for any signs of wear or loosening. Catching these issues early allows for timely repairs, preventing more extensive damage that could affect the overall appearance of your sofa. When making repairs, always use strong, colorfast thread that matches your velour fabric. This not only maintains aesthetic appeal but also provides the necessary structural support.
Compromised seams can lead to fabric pulling and bulging, resulting in costly repairs and a diminished look. By maintaining sewn seam integrity, you enhance the durability and longevity of your velour sofa, keeping it looking and feeling its best. Remember, taking care of your upholstery stitching now will save you headaches in the future, ensuring your sofa remains a beautiful centerpiece in your home for years to come. Additionally, incorporating a budget-friendly home appliance maintenance plan can help ensure that any necessary cleaning tools are well-maintained and ready for use.
Upholstery Color Repair Techniques
How can you ensure your velour sofa maintains its vibrant look over time? One crucial step is upholstery stitching reinforcement. This technique is essential for preserving the integrity of your sofa, especially in high-use areas that face wear and tear. Regularly inspect seams and stitching for signs of fraying or separation. If you notice any issues, address them promptly to prevent further damage.
When performing stitching repairs, use a heavy-duty needle and upholstery thread that matches your velvet fabric. This ensures durability and a seamless appearance. For added strength, consider employing cross-stitch or double stitch techniques in areas that experience significant stress. This will enhance the longevity of your upholstery.
As you reinforce the stitching, make sure the fabric is taut and flat. Avoid puckering, as it can detract from the overall aesthetic of your velour sofa. If you're unsure or uncomfortable with any of these repair techniques, don't hesitate to seek professional help. Following these cleaning instructions and repair tips will keep your sofa looking fresh and vibrant for years to come.
Revitalizing Softness and Style
To keep your velour sofa looking and feeling its best, it's essential to focus on revitalizing its softness and style. Start by regularly brushing the fabric with a soft bristle brush, making sure to brush in the direction of the pile. This simple velvet cleaning technique lifts dirt and helps restore that luxurious texture you love.
Next, check the upholstery stitching for any fraying or loose threads. Reinforcing these seams is crucial to prevent further damage and maintain your sofa's overall appearance. If the fibers seem a bit flat, using a steamer on low heat can gently revive them, improving the plush feel and restoring the fabric's original shape.
After cleaning, apply a fabric protector specifically designed for velour. This step safeguards against future stains and wear, allowing you to maintain both softness and aesthetic appeal. Additionally, regularly rotate and flip your cushions to distribute wear evenly. This practice not only enhances comfort but also helps preserve your sofa's style over time. By following these steps, you'll keep your velour sofa looking fabulous and feeling soft for years to come. Consider using a robot vacuum cleaner to help maintain cleanliness and reduce manual cleaning effort.
Personalized Fabric Treatments
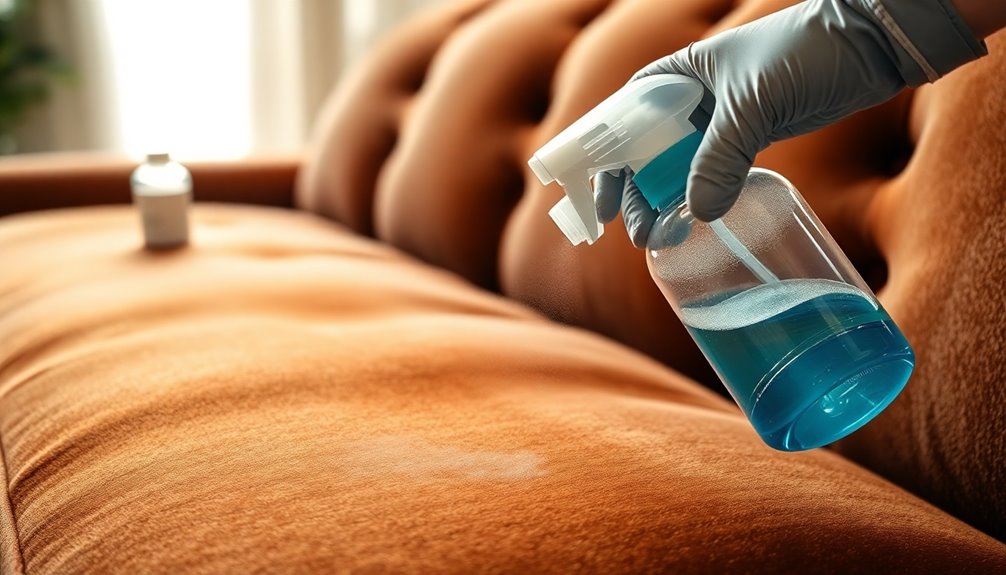
When it comes to caring for your velour sofa, personalized fabric treatments can make a significant difference in maintaining its beauty and functionality. These treatments enhance stain resistance, making it easier to clean up spills and reducing the chances of permanent marks. To keep the softness and appearance of your velour intact, consider selecting a fabric protector specifically designed for this material.
Using a pH-balanced cleaning solution tailored for delicate fabrics ensures you can effectively clean without damaging the velour. Regularly applying a specialized upholstery cleaning spray not only maintains the look of your sofa but also helps prevent grime buildup and prolongs its life.
Before fully applying any personalized fabric treatments, always test them on a small, inconspicuous area. This precaution prevents unwanted discoloration or damage to your velour. By incorporating these personalized treatments into your cleaning routine, you can effectively shield your sofa from dirt and moisture while preserving its luxurious texture. Your velour sofa deserves the best care, and these steps will help you achieve that effortlessly.
Seasonal Deep Cleaning Guidelines
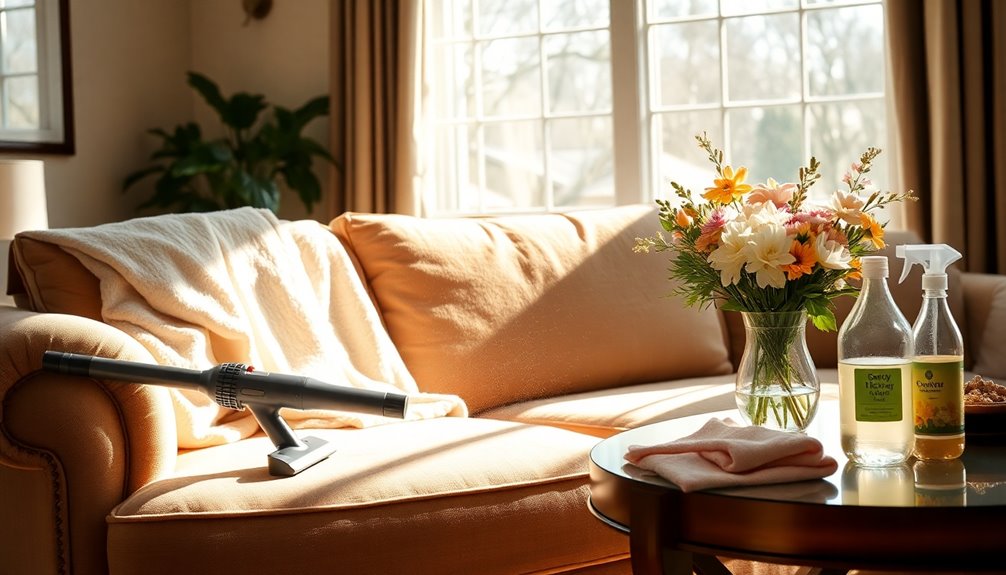
Regularly conducting a seasonal deep cleaning is essential for keeping your velour sofa looking its best and ensuring its longevity. Aim to deep clean every 6 to 12 months, adjusting the frequency based on how much you use the sofa and its exposure to dust and dirt.
Start by using a vacuum cleaner equipped with a soft brush attachment. This helps you thoroughly remove dust and debris, focusing on seams and crevices where dirt tends to accumulate. Next, prepare a cleaning solution by mixing mild liquid soap with warm water. Make sure it's free of additives or colors. Using a damp cloth, apply this solution in a back-and-forth motion to clean the fabric gently.
Once you've cleaned the sofa, use the steam setting on your steamer, applying it lightly to the velour surface. This step helps restore the fabric's nap and eliminates any creases or impressions. Finally, allow your sofa to air-dry completely before using it again. This prevents moisture-related damage, ensuring your velour sofa remains in pristine condition for years to come.
Conclusion
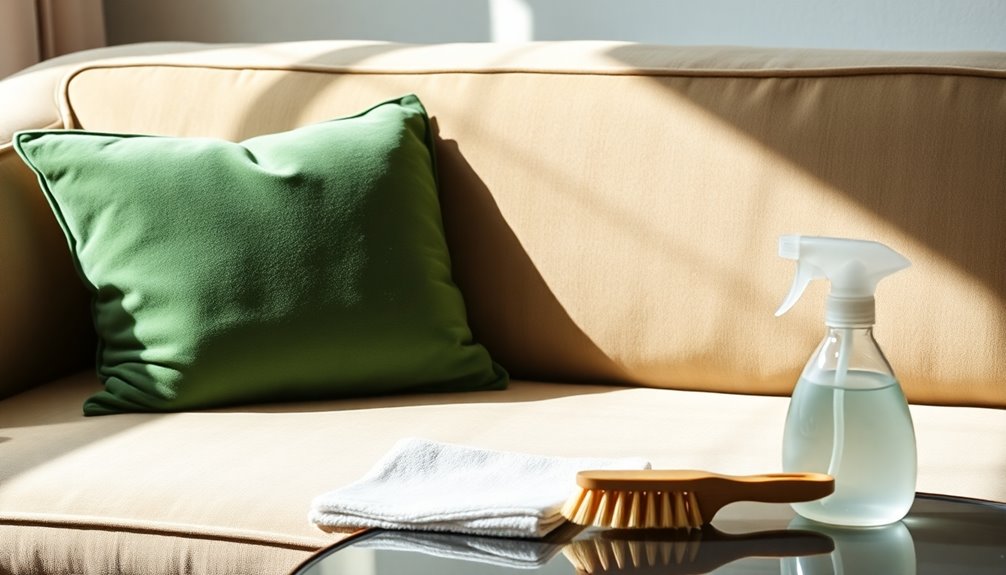
Maintaining your velour sofa through regular cleaning and care not only enhances its appearance but also extends its lifespan. By vacuuming weekly with a soft brush attachment, you can effectively prevent dust and dirt buildup. When spills occur, act quickly by blotting with an absorbent cloth to prevent stains from setting in. For everyday cleaning, a solution of warm water and mild liquid soap works wonders—just apply it with a damp cloth and ensure you let the fabric air dry afterward to maintain its integrity.
To keep your sofa looking plush, consider steaming it on a low setting; this technique can help restore its plush appearance and remove any creases without causing damage. For those tough stains or heavily soiled areas, don't hesitate to seek professional cleaning. These experts can ensure your velour sofa remains in excellent condition while preserving its delicate fabric. Remember, regular maintenance is key to enjoying your beautiful velour sofa for years to come. By following these simple steps, you'll not only clean your velvet but also enhance its longevity and comfort, making it a cozy spot in your home.
Frequently Asked Questions
What Is the Best Way to Clean a Velour Sofa?
To keep your velour sofa looking great, start by brushing the surface with a soft brush to get rid of dirt and lint. Then, vacuum with a soft attachment. Mix mild soap with warm water, blotting stains gently with a damp cloth. For oily spots, sprinkle cornstarch, let it sit, and vacuum. Always test any cleaning solution on a hidden area first, and remember to vacuum weekly to maintain its appearance.
Is a Velour Sofa Easy to Clean?
Yes, a velour sofa's pretty easy to clean. Its synthetic fibers resist stains better than natural ones, which makes maintenance simpler. Regularly vacuuming with a soft brush attachment helps keep dust and dirt at bay. If you spill something, blot it immediately with an absorbent cloth to avoid stains. For deeper cleaning, consider professional services every couple of years, especially if you have pets or use it heavily.
How Do You Get Stains Out of Velour Fabric?
To get stains out of velour fabric, start by blotting spills immediately with an absorbent cloth—don't rub! For oily stains, sprinkle cornstarch or talcum powder and let it sit for several hours. Mix a mild solution of warm water and liquid soap, applying the suds gently with a damp cloth. Always test any cleaning solution on a hidden area first to avoid discoloration. For tough stains, consider hydrogen peroxide, but remember to test it too!
How Do You Clean Velour Seats?
To clean velour seats, start by using a soft brush to gently remove any surface dirt. After that, vacuum the seats to eliminate loose dust. Next, mix mild soap with warm water, avoiding suds, and apply it with a damp cloth in a back-and-forth motion. If you spill something, blot it immediately with an absorbent cloth. Regularly vacuum with a brush attachment to keep the fabric looking fresh and fluffy.
Interior Design
How to Remove Paint From Furniture
To successfully remove paint from furniture, consider essential techniques and safety measures that could transform your project—discover the best methods now.
In order to strip paint from furniture, you should first choose an appropriate method such as chemical stripping, using a heat gun, or sanding. Apply a paint stripper evenly, following the instructions provided by the manufacturer. When using a heat gun, keep it a few inches away from the surface and move it slowly. When sanding, start with coarse grit sandpaper and finish with a finer grit for a smooth finish. Always wear protective gear and ensure good ventilation to avoid inhaling harmful fumes. Clean any residue with denatured alcohol afterwards. It is important to evaluate various factors for a successful outcome and consider the type of wood and paint being used, as different surfaces may react differently to different methods. For more specific advice on how to strip paint from wood furniture, make sure to determine whether the paint is oil-based or water-based, as this can affect your choice of stripper and tools. Taking your time and testing on a small section first can help prevent damage to the wood surface. Consider the age and condition of the wood before proceeding, as older or more delicate pieces may require extra care. Always test your chosen method on a hidden area to ensure it will not cause any damage. By carefully considering these factors, you will be able to effectively remove paint from wood without compromising its integrity or appearance.
Key Takeaways
- Choose the appropriate paint stripper based on your project's needs, considering safety and effectiveness of products like Citristrip or SmartStrip.
- Use a heat gun for detailed areas, maintaining a distance of about 2 inches from the surface to avoid damage.
- Sand surfaces starting with 80-grit sandpaper, progressing to finer grits for a smooth finish while sanding with the wood grain.
- Always wear protective gear and ensure proper ventilation to minimize exposure to harmful fumes and dust during the paint removal process.
- Clean surfaces post-removal with denatured alcohol or mineral spirits to eliminate residue before applying any new finishes.
Overview of Paint Removal Methods
When it comes to removing paint from furniture, you have several effective methods at your disposal. One popular technique is chemical stripping, using products like paint strippers that soften the paint for easy removal. This method works well for detailed areas, as chemical strippers come in various formulations tailored to different surfaces. Another option is sanding, which physically removes layers of paint and can be useful for larger surfaces. Heat guns can also be employed to soften paint, making the task easier. Just as with paint removal, maintaining furniture extends beyond this, as many people also seek effective ways to remove cat hair from furniture, using tools like lint rollers or vacuum attachments designed for upholstery.
For those looking to enhance their cleaning efficiency, consider investing in a vacuum that's designed for dust removal, such as best vacuums for dust removal, which can help in keeping your workspace clean during the paint removal process.
Another effective option is a heat gun. By applying high temperatures, you can loosen paint quickly, but you need to handle it carefully to avoid damaging the wood or creating fire hazards.
If your furniture has flat surfaces, sanding might be the best choice. Utilizing multiple grits of sandpaper helps achieve a smooth finish, but be cautious, especially with older furniture that could contain lead paint.
Regardless of the method you choose, always prioritize safety precautions. Verify you work in a well-ventilated area, wear protective gear, and be aware of the risks associated with lead exposure.
Choosing the Right Paint Stripper
When choosing a paint stripper, you'll want to take into account the type that's best suited for your project, such as Citristrip or SmartStrip.
For instance, using a professional cleaning method can enhance the effectiveness of your paint removal efforts.
Safety is essential, so steer clear of strippers with harmful ingredients like methylene chloride.
Types of Paint Strippers
Choosing the right paint stripper is essential for achieving the best results in your furniture restoration project. With various options available, you'll want to evaluate the specific needs of your project, such as the type of paint and the condition of the furniture.
Additionally, understanding the importance of budgeting can help you allocate funds for necessary supplies and tools, enhancing your overall efficiency in the restoration process.
Here are three popular types of paint strippers:
- Citristrip: This less toxic chemical stripper is great for removing up to 7 layers of paint while leaving a pleasant citrus scent. It's perfect for detailed work on smaller surfaces.
- SmartStrip: If you're tackling a large project, this paste formulation can strip paint from wood effectively, removing up to 15 layers. Just be prepared for a dwell time of 3 to 24 hours for best results.
- Peel Away: Ideal for lead paint removal, this product can handle up to 30 layers and features a paper cover to control evaporation during the stripping process.
When selecting a paint stripper, evaluate factors like the number of paint layers, type of paint, and surface area.
Safety Considerations
Selecting the right paint stripper isn't just about effectiveness; safety should be a top priority as well. When choosing a stripper, always look for non-toxic options that are biodegradable or have low volatile organic compounds (VOCs) to minimize health risks. Avoid products that contain methylene chloride, as they can cause respiratory issues and skin irritation.
Before starting, check the manufacturer's safety data sheet (SDS) for detailed information about chemical components and recommended protective gear. This is essential, especially if you're dealing with lead-based paint, which requires additional precautions.
In the table below, you'll find a quick comparison of various paint strippers and their safety features:
Paint Stripper | Non-Toxic | Recommended Protective Gear |
---|---|---|
Citristrip | Yes | Gloves, mask |
Klean-Strip | No | Gloves, goggles |
EcoFast Gel | Yes | Gloves |
Smart Strip | Yes | Gloves, mask |
Regular Paint Stripper | No | Gloves, goggles |
Always work in a well-ventilated area to further enhance your safety while removing paint.
Application Techniques
Applying the right paint stripper effectively can make all the difference in your furniture restoration project. Choosing a stripper tailored to your specific needs is key. For instance, Citristrip works wonders on detailed work, while SmartStrip can tackle up to 15 layers of paint.
Additionally, understanding the importance of content relevance and authority can help you choose the best products backed by reliable reviews and techniques.
Here are some essential tips for application:
- Application Thickness: Apply a thick, even coat of stripper. A thicker application enhances absorption, ensuring the product works effectively on your furniture.
- Dwell Time: Follow the manufacturer's instructions on dwell time, which can range from 30 minutes to 24 hours. This allows the stripper to loosen the paint properly.
- Observation Indicators: Watch for bubbling paint or color changes; these are signs that it's time to scrape the paint away.
After scraping, don't forget the post-application cleanup. Wipe away any excess stripper promptly to avoid residue buildup.
This step is vital for maintaining the integrity of the wood surface and ensuring a cleaner finish. By following these techniques, you'll set yourself up for success in your furniture restoration journey.
Using a Heat Gun Effectively
When you're ready to use a heat gun, keep it about 2 inches from the surface and move it back and forth until the paint bubbles.
This method can be particularly effective for removing paint from furniture that has intricate details or multiple layers of finish.
Remember to prioritize safety by having a fire extinguisher nearby and working in a well-ventilated area.
Once you've removed the paint, clean the surface with denatured alcohol or mineral spirits to prepare it for finishing.
For a smooth finish, you might also consider using an airless paint sprayer after your furniture is stripped.
Heat Gun Operation Basics
Using a heat gun effectively can make paint removal from furniture a straightforward task. To start, hold the heat gun nozzle about 2 inches away from the painted surface. Move it back and forth to evenly distribute heat, causing the paint to bubble and loosen.
It's important to manage your budget during home improvement projects, as a plan for managing income and expenses can help you allocate funds wisely. Here's a quick guide to help you:
- Heat Application: Keep the heat gun moving to prevent damage to the wood. High temperatures can ignite flammable materials, so stay alert.
- Scraping: Once the paint is softened, use a scraper at a 30-degree angle to push away the loosened paint. Make sure to revisit detailed areas as needed for complete removal.
- Clean Up: After removing the paint, clean the surface with denatured alcohol or mineral spirits to eliminate any remaining residue and prepare for refinishing.
Always work in a well-ventilated area to avoid inhaling fumes generated during the heating process. Following these steps will guarantee an effective and efficient paint removal experience, leaving your furniture ready for its next chapter.
Safety Precautions Required
Operating a heat gun requires careful attention to safety to prevent accidents and guarantee a smooth paint removal process. First and foremost, always wear safety goggles and a respirator. These will protect your eyes and lungs from harmful paint fumes and debris.
It's also essential to work in a well-ventilated area to minimize inhalation of any fumes. Additionally, make sure to keep your workspace free from dust and allergens, as a clean environment can enhance your overall safety and efficiency while working on your project. For further protection, consider using an air purifier to maintain air quality and reduce harmful particles in the air during your task, as mentioned in air quality considerations.
Keep a fire extinguisher nearby, as high temperatures can ignite materials if left unattended. When using the heat gun, maintain a safe distance of about 2 inches from the painted surface. This distance helps avoid overheating and damaging the wood.
Move the heat gun back and forth to evenly distribute the heat, ensuring effective paint removal without risking harm to the furniture.
Once you've finished, remember to clean the surface with mineral spirits or denatured alcohol to eliminate any remaining residue.
Post-Removal Surface Cleaning
After you've successfully stripped away the paint with a heat gun, it's time to clean up the surface to guarantee it's ready for finishing.
You'll want to verify the wood furniture has cooled completely to avoid burns or damage from your cleaning solution.
It's essential to recognize that choosing the right cleaning technique can greatly impact the final appearance of your furniture, much like how different coffee varieties can enhance a brew's flavor profile.
Here's how to tackle the post-removal surface cleaning effectively:
- Choose Your Cleaning Solution: Use denatured alcohol or mineral spirits to eliminate any remaining paint residue. These solvents work well for paint removal and prepare the surface for other treatments.
- Apply with Care: Dampen a clean cloth or rag with your chosen cleaning solution. Wipe the area in the direction of the wood grain to achieve the best results and avoid scratching the surface.
- Let It Dry: Allow the wood to dry thoroughly before proceeding with sanding or applying any finishes. This verifies proper adhesion and a smooth final result.
Sanding Techniques for Paint Removal
When you're ready to tackle paint removal from furniture, sanding is one of the most effective techniques to strip away layers and prepare the surface for refinishing. Understanding the mechanics of brewing methods can also lead to a mindful approach to other DIY projects, like furniture restoration.
Start with 80-grit sandpaper to remove the bulk of old paint. This coarse grit effectively tackles stubborn layers, but be careful not to damage the wood underneath. For smoother results, progress to 150-grit sandpaper, which refines the surface and eliminates rough patches. Finally, finish with 220-grit sandpaper for a fine, polished surface that's ready for staining or sealing.
If you're dealing with large, flat areas, consider using a power sander to speed up the process. Remember to always sand with the grain of the wood; this practice prevents scratches and enhances the final appearance of your furniture. Clean the surface thoroughly before and after sanding to remove dust and promote better adhesion for any subsequent finishes.
While sanding is a straightforward paint stripping method, guarantee you're taking necessary precautions. The quality of your finish will greatly depend on how well you prepare and sand the wood, so take your time for the best results.
Safety Precautions to Consider
Before diving into paint removal, it's essential to prioritize your safety. Here are some vital precautions you should consider:
1. Wear Protective Gear: Always wear safety goggles and a respirator with a chemical cartridge when using paint strippers or heat guns. This protects your eyes from splashes and your lungs from harmful fumes.
Additionally, make sure that your workspace is equipped with proper heating solutions, like the best heat pumps, to maintain a comfortable environment while you work.
2. Guarantee Proper Ventilation: Work outdoors or in a well-ventilated area. This minimizes inhalation of toxic fumes that can arise from chemical strippers or heated paint. Good airflow is key!
3. Be Aware of Lead Paint: If your furniture was painted before 1978, it may contain lead paint. Testing for lead is essential before you start the removal process to avoid exposure.
Additionally, use protective clothing like disposable coveralls and gloves to prevent skin contact with chemicals.
It's also wise to keep a fire extinguisher handy when using heat tools, as heat guns can ignite flammable materials if mishandled.
Taking these safety precautions seriously will help guarantee a safer paint removal experience.
Materials Needed for Stripping Paint
To effectively strip paint from furniture, you'll need a few essential materials on hand. First, invest in a high-quality paint stripper like Citristrip. This product is effective for removing multiple layers and is less toxic than many alternatives.
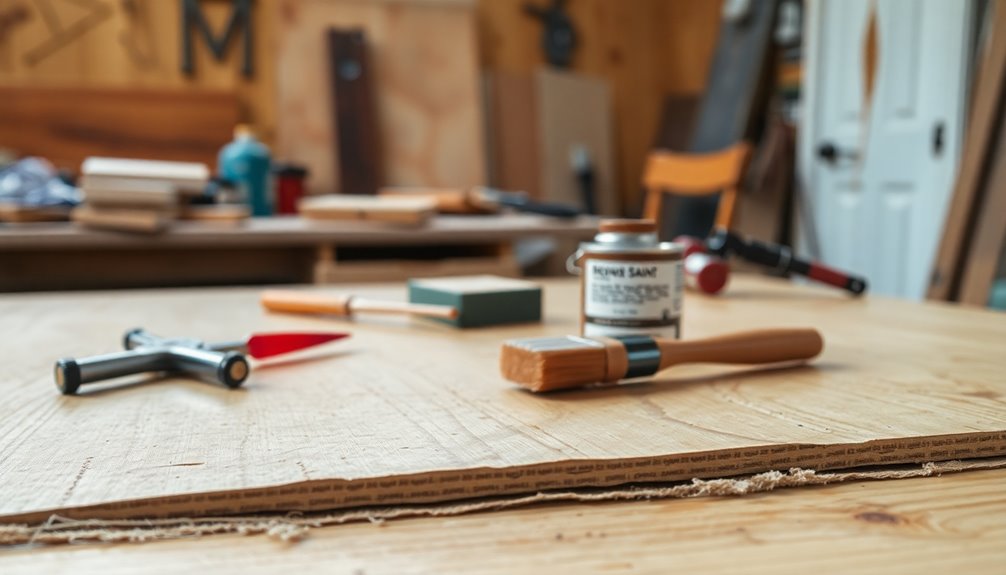
Additionally, consider using a Graco FFLP Fine Finish Low Pressure Reversible Tip for any fine detail work you might need to do after stripping, as it can help achieve a superior finish. You'll also want a paint scraper for scraping off the loosened paint after applying the stripper.
Next, gather steel wool. This is particularly useful for detailed scraping on curved surfaces and intricate designs, ensuring you don't miss any stubborn spots. Remember to protect your skin by wearing rubber gloves, and consider a mask for added safety to shield your respiratory system during the process.
To keep your workspace clean and organized, lay down drop cloths or a tarp to catch any drips or debris. This will protect your work surface and prevent any messy accidents.
Finally, prepare some Saran wrap to cover the treated areas after you apply the paint stripper. This helps maintain moisture and enhances effectiveness, ensuring you get the best results from your paint stripping project.
With these materials ready, you'll be set to start the paint removal process efficiently.
Step-by-Step Paint Stripping Process
Kick off the paint stripping process by choosing a well-ventilated area and laying down a tarp to safeguard your workspace. Grab your old paintbrush and apply a generous coat of Citristrip or your chosen paint stripper to the painted wood surface.
Next, follow these steps:
- Wait for the Stripper to Work: Allow the paint stripper to sit for the recommended time, typically between 30 minutes to 24 hours. Look for bubbling or cracking in the paint; this means it's ready for removal.
- Scrape Away the Paint: Using a metal scraper at a 30-degree angle, gently lift away the softened paint. Work in sections and reapply the stripper as needed for stubborn areas.
- Clean the Wood Surface: After scraping, use mineral spirits to clean the wood surface and remove any remaining residue. Confirm the wood is completely dry before you proceed to sanding.
Cleaning Up After Stripping
After scraping away the paint, it's important to tackle the cleanup process effectively.
Start by misting your drop cloths with water before folding them up. This helps minimize airborne dust and guarantees safe disposal in trash bags.
Next, grab a HEPA-filtered vacuum to clean the area thoroughly, capturing any remaining dust and debris from the paint removal process.
Once you've vacuumed, wipe down all surfaces with a damp cloth and mild detergent. This step removes any residual paint stripper and dust, helping you achieve a clean workspace.
For the rinse water you used, be certain to dispose of it in designated containers to prevent contamination of local water sources.
It's vital to follow local hazardous waste disposal guidelines. If you've collected any chemical strippers or lead paint chips during your cleanup, consult local hazardous waste programs for proper disposal methods.
When to Seek Professional Help
Cleaning up after stripping paint can be a straightforward process, but knowing when to seek professional help is equally important. Here are three situations to ponder:
- Intricate Areas: If your furniture has intricate areas or joints that require disassembly for effective paint removal, it's wise to call in experts. They've the tools and experience to navigate these challenging spots without causing damage.
- Lead Paint Presence: If you find lead paint during testing, don't risk your health. Hiring a professional experienced in safe lead paint removal practices is vital to minimize health risks associated with exposure.
- Valuable or Antique Pieces: For furniture that holds significant monetary or sentimental value, professional help is essential. Incorrect removal methods can diminish their aesthetic appeal and value, making it important to trust specialized skills for restoration.
If you lack the time or confidence to tackle the project, professionals can expedite the process and guarantee quality results.
Frequently Asked Questions
What's the Easiest Way to Remove Paint From Furniture?
If you're looking for the easiest way to remove paint, consider using a paint stripper. It dissolves the paint quickly, making the process less labor-intensive. Just remember to follow safety precautions while you work.
Will Vinegar Remove Paint From Wood?
Vinegar's versatile virtues can indeed help you remove paint from wood. You'll simply heat some up, apply it, and let it sit. Just remember, it's best for water-based paints, not oil-based ones.
Can You Get Dried Paint Out of Furniture?
Yes, you can get dried paint out of furniture. Try using chemical strippers, warm water, a heat gun, or sanding. Just remember to test a small area first to guarantee the finish won't be damaged.
How Do You Remove Paint From a Wooden Couch?
You've got a paint-covered wooden couch? No sweat! Just grab a heat gun and a scraper, and you'll be peeling that paint away like it's nobody's business. Safety first—gear up and get to work!
Conclusion
In the quest to restore your furniture, remember that patience is key—much like Michelangelo chiseling away to disclose his masterpiece. By choosing the right method and taking safety precautions, you can breathe new life into your pieces. Whether you opt for a heat gun or sanding, each step brings you closer to revealing the beauty beneath the layers. Don't hesitate to seek professional help if needed; sometimes, even the greatest artists need a little support along the way.
Interior Design
Transformative Ideas for Women’s Retreats
Inspiring transformative ideas for women’s retreats can foster deep connections and personal growth; discover how to create an unforgettable experience.
Ideas to transform women’s retreats focus on building connections, personal growth, and self-reflection. Incorporating interactive activities like journaling or creative workshops can help cultivate deeper bonds. Choosing meaningful themes such as “Empowerment Through Sisterhood” can guide discussions and activities. Creating a warm atmosphere with natural elements and cozy spaces can enhance the overall experience. Stay connected post-retreat through online communities and regular check-ins. Encourage attendees to set personal goals and celebrate accomplishments together to maintain motivation. These approaches can have a profound and lasting impact, leading to even more ways to foster positive change and strengthen connections.
Key Takeaways
- Incorporate cohesive themes like "Empowerment Through Sisterhood" to guide activities and discussions for personal growth and transformation.
- Engage participants with interactive sessions, such as "Bad Girls of the Bible," to foster insightful conversations and deeper connections.
- Create a welcoming environment with soft lighting, natural elements, and designated reflection spaces to enhance the retreat experience.
- Utilize journaling and goal-setting to empower participants to reflect on their insights and track growth post-retreat.
- Celebrate achievements through ceremonies or visual success boards to strengthen community bonds and reinforce individual progress.
Engaging Activities to Foster Connection
When you step into a women's retreat, engaging activities play an essential role in fostering connection among participants.
You'll find that journaling for self-reflection helps you explore your thoughts and emotions deeply, while creative arts and crafts workshops provide a fun, therapeutic outlet.
Interactive learning sessions, like "Bad Girls of the Bible," spark insightful conversations, allowing you to bond over shared experiences.
Outdoor activities, such as nature walks and scavenger hunts, reconnect you with nature and your spiritual side.
Symbolic rituals like "The Perfect Heart" promote unity and deeper connections.
Team-building exercises and inspirational talks further cultivate a sense of community, motivating you to embrace the transformative journey ahead alongside your new friends.
Meaningful Themes for Transformation
Meaningful themes shape your retreat experience, guiding activities and discussions toward a transformative journey. When selecting a cohesive theme, consider how it resonates with your group's needs and spiritual goals.
Themes like "Empowerment Through Sisterhood" or "Mindfulness and Meditation Oasis" can foster deep connections and personal growth. Aligning your theme with Bible study and prayer sessions strengthens its impact, helping participants reflect and engage.
Explore concepts like community connection and inner strength, using scripture or inspirational quotes to enrich discussions. By focusing on themes that resonate, you'll create an environment where everyone feels valued and encouraged.
Ultimately, these themes set the stage for lasting transformation, ensuring participants leave with renewed purpose and inspiration.
Enhancing the Retreat Environment
Creating a welcoming retreat environment sets the tone for a transformative experience.
You want to foster a space where participants feel at ease and inspired. Here are four key elements to enhance your retreat environment:
- Ambiance and Comfort: Use soft lighting and inviting decor to create a peaceful atmosphere.
- Designated Reflection Spaces: Include quiet areas for contemplation, prayer, and personal reflection.
- Natural Elements: Incorporate outdoor activities and local art to connect participants with nature.
- Comfortable Accommodations: Guarantee restful sleeping arrangements for recharging between activities.
Effective Follow-Up Strategies
After the retreat concludes, implementing effective follow-up strategies is essential for maintaining the connections and insights gained during the experience.
Start by sending out post-retreat surveys to gather feedback, helping you assess what worked and what can be improved.
Creating an online community allows participants to stay engaged and share their experiences, fostering lasting connections.
You might also consider including heartfelt expressions of love to reinforce the emotional bonds formed during the retreat.
Regular newsletters can keep everyone informed about upcoming events and resources.
Schedule follow-up meetings, whether virtual or in-person, to reinforce learning and sustain engagement.
Encourage participants to set personal goals based on their retreat experiences, providing accountability and motivation.
These strategies not only enhance the impact of the retreat but also empower participants to continue their growth journey.
Empowering Participants for Growth
Building on the connections made during the retreat, empowering participants for personal growth is essential for fostering long-lasting change.
You can take actionable steps that will help you integrate your experiences into daily life. Consider these strategies:
- Set Personal Goals: Identify specific objectives you want to achieve post-retreat.
- Practice Daily Reflection: Use journaling to reinforce insights and track progress.
- Engage in Group Discussions: Join or create a community for ongoing support and motivation.
- Utilize Resources: Access tools and materials provided during the retreat to maintain your growth momentum.
Celebrating Achievements and Success
Celebrating achievements and success is essential for reinforcing the growth you've experienced during the retreat and for motivating continued progress.
Take time to acknowledge both individual and collective milestones. Create a space where everyone can share their victories, no matter how small. This practice not only boosts confidence but also fosters a strong sense of community among participants.
Consider incorporating a ceremony or ritual that honors these accomplishments, allowing participants to reflect on their journeys. Use visuals, like a success board, to highlight stories and quotes that inspire.
Measuring the Retreat's Impact
To truly understand the effectiveness of a women's retreat, it's essential to measure its impact.
You can gauge this by focusing on key areas:
- Post-Retreat Surveys: Collect feedback to identify strengths and weaknesses.
- Participation Levels: Monitor engagement during activities to assess interest and connection.
- Success Stories: Highlight individual achievements that emerge from the retreat experience.
- Long-Term Follow-Up: Check in after a few months to see how participants apply what they learned.
Frequently Asked Questions
What Age Groups Are Typically Welcomed at Women's Retreats?
Typically, women's retreats welcome a diverse age range, from young adults in their twenties to seniors in their sixties and beyond. You'll find that inclusivity enriches discussions and fosters connection among participants.
How Can I Prepare for My First Retreat Experience?
To prepare for your first retreat experience, pack comfortable clothing, a journal for reflections, and an open heart. Embrace the opportunity to connect, learn, and grow alongside others in a supportive environment. Enjoy! As you embark on this journey, be mindful of the power in both solitude and shared moments with others. Often, it’s in stillness where profound retreat experiences revealed the inner clarity and peace you’ve been seeking. Trust in the process, for each moment holds the potential for deep transformation and newfound wisdom.
Are Retreats Usually Held In-Person or Online?
Retreats can be both in-person and online, depending on the goals and preferences of the participants. You'll find in-person retreats offer immersive experiences, while online ones provide flexibility and accessibility for everyone involved.
What Is the Typical Duration of a Women's Retreat?
Typically, a women's retreat lasts anywhere from a weekend to a week. You'll find that the duration depends on the goals, activities planned, and the level of engagement desired by participants.
How Much Should I Budget for a Women's Retreat?
When planning your retreat, think of it as planting seeds for growth. Budget around $200 to $500 per participant, covering accommodations, meals, activities, and materials, ensuring a nurturing environment for everyone involved.
Conclusion
As you reflect on your transformative journey, remember that this retreat could be the spark that ignites a thousand flames of personal growth in your life. By embracing connection, exploring meaningful themes, and applying follow-up strategies, you'll not only empower yourself but also inspire others. Celebrate your achievements and carry the lessons learned into your everyday life. Your adventure doesn't end here; it's just the beginning of a vibrant, purpose-driven journey that awaits you. As you move forward, let the themes inspiring modern dance remind you of the fluidity and grace with which you can navigate life’s changes. Just as dance tells a story through movement, so too can you express your personal evolution by integrating these lessons mindfully into your actions. The symphony of growth and creativity you cultivate will resonate far beyond this retreat, shaping your journey ahead.
Interior Design
How to Reupholster Furniture
Keep your furniture looking fresh and stylish by learning the essential steps to reupholster it yourself; discover the secrets to a professional finish!
To reupholster furniture, start by evaluating its condition and making necessary repairs. Check for structural integrity and reinforce any weak spots. Next, choose a durable fabric that fits your style and the piece's purpose. Measure and cut the fabric accurately, using the old fabric as a pattern. When applying the new fabric, use a staple gun to ensure it's tight and wrinkle-free. Secure corners neatly and consider adding decorative touches like trim or buttons for flair. Finally, inspect your work to ensure everything's tight and tidy. There's plenty more to explore to perfect your skills!
Key Takeaways
- Assess the furniture's emotional and practical value before starting the reupholstering process, ensuring you want to invest time and resources.
- Choose durable fabric suitable for the intended use, considering factors like traffic, comfort, and color to complement your space.
- Carefully measure and cut the fabric, ensuring it is square and labeled, using original fabric pieces as patterns for accuracy.
- Securely attach the new fabric using a staple gun, ensuring it is taut, and replace any worn padding before finishing the upholstery.
- Finish with decorative elements and protective undersides, ensuring a polished look while preserving the furniture's longevity and durability.
Evaluation and Disassembly
When you're preparing to reupholster furniture, your first step is to evaluate its condition and disassemble it carefully. Start by assessing the emotional and practical value of the piece. Consider factors like comfort, size, and any sentimental attachments you may have. Check the structural integrity by grasping opposing parts to identify any movement or looseness. Inspect exposed wood or metal for necessary cleaning or refinishing. It's crucial to determine if the furniture has solid 'bones'—a sturdy frame—while keeping an eye out for composite-wood substitutes like particle board, which may not be worth restoring. Additionally, it's important to evaluate potential worth to ensure the investment aligns with your expectations.
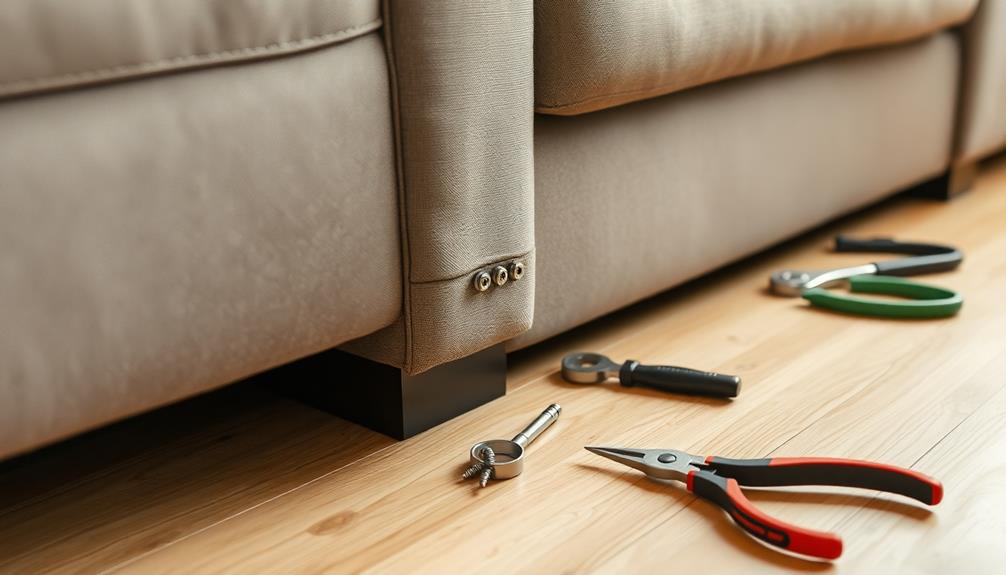
Next, move on to disassembly. Remove cushions and slipcovers to access the underlying structure. Detach legs and arms by unscrewing them, and use tools like staple removers and pliers to carefully take off old fabric. As you disassemble, label and store each component securely to avoid damage. Document the process with photos and notes to aid reassembly later. Remember to protect delicate surfaces with bubble wrap or thick padding during this stage, ensuring you handle everything with care.
Repairs and Preparation
Repairing and preparing your furniture is essential for a successful reupholstering project. Start by inspecting the frame for any damages, like loose joints or broken pieces. If you find weak springs or sagging cushions, reinforce those areas. For wooden frames, use wood filler for any dents or scratches, then sand them smooth, transitioning from medium-grit to fine-grit sandpaper. A clear topcoat will protect your repairs and help them blend seamlessly.
Next, examine the springs and cushions. Replace any springs that are worn out and consider re-padding the cushions with new foam or polyurethane if needed. Make sure to re-tie or replace broken springs for proper support and use high-temp adhesive to secure the new padding. Additionally, choosing high-quality materials for reupholstering ensures enhanced longevity of the furniture.
Check the webbing or strapping for wear and replace it if necessary, ensuring it's tight and evenly spaced. A rawhide mallet can help secure it firmly to the frame.
Finally, clean the entire frame and apply any stain or paint to match the original finish. Allow it to dry completely, and prepare the frame with a tack strip for the new upholstery fabric. With these repairs made, you're ready to reupholster!
Choosing the Fabric
With the frame in solid shape, the next step is choosing the right fabric for your reupholstering project. Consider durability first; fabrics with a higher double rub count are more densely woven and will hold up better over time. Think about the lighting and environment where the furniture will be used—fabrics like cotton and acrylic are easy to maintain and clean, making them great choices for high-traffic areas. Additionally, selecting fabrics that complement your decor style can enhance your overall unique atmosphere in the space.
When you select the fabric, consider its intended use. For example, wool offers durability and insulation, while linen is breathable but may wrinkle. If you're after a luxurious look, velvet can elevate your furniture, but it might require blending with other fibers for added durability. Additionally, understanding fabric characteristics is essential to ensure satisfaction with your final choice.
Don't forget about color and pattern. Choose shades that complement your space and ensure that patterns are straight and correctly oriented. Texture plays a significant role too; plush fabrics can add warmth to a room. Lastly, think about dual-purpose options like those from Liberty's collection, which offer versatility for different styles. Make your fabric choice wisely to ensure both aesthetics and functionality.
Cutting the Fabric
Cutting the fabric is a crucial step in your reupholstering project, as precision determines the final look and fit of your furniture. Begin by ensuring your fabric is square and free from creases. Lay it out on a large, flat surface, like a table or the floor. Use a metal square or straight edge to mark a straight line along the selvage edge. Before cutting, wash or dry clean the fabric according to the manufacturer's instructions to avoid shrinkage.
Next, create a layout chart and cutting list to ensure you have all necessary pieces. Remember to measure twice and cut once. Use original fabric pieces as patterns, tracing them onto the new fabric with chalk. When marking, add a ½ inch margin for easier stapling. Pattern matching is essential to ensure that your fabric aligns correctly across different sections of the furniture.
As you cut, label each piece with sticky notes to avoid confusion later. Avoid flipping pieces to maintain color consistency, and be mindful of patterns—match them carefully for a seamless look. If using bias strips for welt cord, cut those on the diagonal for better flexibility. Take extra care with delicate fabrics, ensuring you cut in the right direction for texture consistency.
Upholstering the Furniture
After you've meticulously cut the fabric, it's time to move on to upholstering the furniture. First, assess the frame to ensure it's sturdy. If you notice any weak spots, repair or replace them before attaching the new upholstery. This will give your furniture a solid foundation. Upholstery craftsmanship requires skill and attention to detail, which will greatly enhance the final outcome.
Using a staple gun, start attaching the fabric to one edge of the frame and work across. Pull the fabric taut as you staple to prevent wrinkles and sagging. Trim any excess fabric but leave enough for a clean finish. Make sure the staples are hidden for a polished look.
Next, inspect the old padding. If it's worn out, replace it with foam or polyurethane padding, cutting it to match the original shape. Align the new padding on the frame and secure it with staples or adhesive. For added support, consider adding webbing or springs.
Finally, enhance the appearance by adding decorative elements like welt cord or buttons. Secure any complex designs with high-temp adhesive and ensure all seams and edges are neat. With these steps, you're well on your way to giving your furniture a fresh, new look!
Securing Edges and Corners
Securing edges and corners is crucial for achieving a polished look in your upholstery project. Start by measuring the straight edge you'll be upholstering and cut a piece of cardboard tack strip to size. Lay your fabric, reverse-side up, over the edge, leaving an inch or two of excess underneath. Push the tack strip into the seam's edge and attach it with tack pins or staples. Fold back the fabric to create a clean, fray-free edge, ensuring everything is tight and even.
For corners, staple around the material, stopping about two inches from each corner. Fold the fabric like you're wrapping a present for neat, symmetrical corners. Alternatively, pinch the excess fabric upwards to create a 45-degree "sail" at the corner and staple it down. Bring the fabric together in the corner and staple along both sides at a 45-degree angle. Leave an inch without staples near the outer edge. Trim the fabric close to the staples, then pull the flap tight and staple it down. Finally, check that all corners are tidy and the fabric is evenly pulled for a professional finish. Using thicker fabrics and leathers can enhance the overall success of your upholstery project.
Finishing Touches
With the edges and corners of your upholstery looking sharp, it's time to enhance the overall appearance with finishing touches. Consider adding trims like gimp braids, nail heads, or tufting to give your piece unique flair. Choose trims that harmonize in color with your upholstery to maintain a cohesive look. Use tacks, nails, or a hot glue gun to attach your trims, starting in inconspicuous areas to ensure a neat finish.
Incorporate decorative details such as fabric-covered buttons or decorative tacks with unique finishes like gemstones for added personality. Expert advice on incorporating these details can help you achieve the best results. Edge roll can also provide comfort while enhancing the furniture's aesthetic. Be sure to keep decorative details aligned symmetrically for a professional appearance.
Don't forget to protect the underside of your furniture. Attach black fabric to shield it from dust and give it a polished look. Cut the new fabric using the old piece as a guide, folding over the edges before stapling securely in place.
Lastly, choose fabrics that reflect your personal style and consider the piece's functionality. Ensure that patterns align at seams to keep everything looking professional. These finishing touches will elevate your reupholstered furniture beautifully.
Final Inspection
Before you finalize your reupholstered furniture, a thorough inspection is essential to ensure quality and safety. Start by checking the materials and construction. Look at the type of wood for knots, warping, and any damage. Assess the upholstery for fabric quality, stitching, and finish. Inspect metal components for rust or sharp edges, and make sure the frame and joints are sturdy and secure.
Next, perform structural stability tests. Ensure your furniture doesn't tip over on a 10-degree incline and can support the intended weight. Apply 75 lbs. of force to each leg and perform a drop impact test for durability. Additionally, it's crucial to perform a stability test to confirm that your furniture can withstand real-life usage scenarios.
Don't forget about safety and compliance. Verify that safety mechanisms work, and check edges and corners for protection against injury. Conduct a static loading test with 300 lbs. for one hour to ensure no deformation occurs.
Lastly, perform quality control by randomly sampling products, testing functionality, and checking surface quality. Conduct carton drop tests to confirm packaging integrity. By completing this final inspection, you'll ensure your reupholstered furniture is both safe and ready for use.
Frequently Asked Questions
How Much Does It Typically Cost to Reupholster Furniture?
When you're considering reupholstering furniture, you'll typically find costs around $650, but they can range from $300 to $2,000, depending on the piece. Sofas usually cost between $1,000 and $4,600, while dining chairs might only be $200 to $400. Factors like size, fabric type, and labor can influence the final price. Keep in mind that luxury pieces can exceed $10,000, so it's wise to budget accordingly.
Can I Reupholster Furniture Without Prior Experience?
You can definitely tackle reupholstering furniture without prior experience. Start with simpler projects like chairs or ottomans to build your confidence. Gather the right tools and materials, and follow step-by-step guides. Patience is key; take your time measuring and cutting fabric. Don't hesitate to seek help or watch tutorials online. You'll learn as you go, and soon enough, you'll have stunning pieces that reflect your personal style!
What Tools Do I Need for Reupholstering Furniture?
To tackle your project, you'll need essential tools like needle-nose pliers for removing staples and a staple remover for old fabric. A heavy-duty stapler or staple gun will help you attach new materials securely. Don't forget cutting tools like sewing scissors and a utility knife for precision. A rubber mallet can protect your furniture while you work. Lastly, protective gear like gloves and a dust mask will keep you safe during the process.
How Long Does the Reupholstering Process Take?
The time it takes to complete a project can vary significantly based on the size and condition of the piece. For instance, removing old fabric from a chair might take you around 8-10 hours, while a sofa could require 16-22 hours. Once you start, you'll also need to factor in the time for repairs, preparation, and reassembly, which can add several more hours to your timeline. So, patience is key!
Where Can I Find Suitable Upholstery Fabric?
You can find suitable upholstery fabric at local fabric stores, home improvement centers, or specialty upholstery shops. Online retailers like Etsy, Amazon, or dedicated fabric websites offer a vast selection too. If you're looking for something unique, check out thrift stores or antique shops. Don't forget to consider your project's specific needs, like durability and style, to ensure you choose the right fabric that fits your vision perfectly.
Conclusion
You've successfully transformed your furniture! By evaluating, disassembling, and repairing it, you laid a solid foundation. Choosing the right fabric and cutting it precisely ensured a perfect fit. As you upholstered and secured edges, you brought your vision to life. With those finishing touches, your piece is now ready to shine in your space. Take a moment to admire your hard work—you've not only revived a piece of furniture but also added a personal touch to your home!
-
Beauty and Grooming1 month ago
Embrace Natural Glow With Bronzer-Free Accelerators
-
Beauty and Grooming1 month ago
Discover Top Outdoor Tanning Lotions Today
-
Vetted1 month ago
15 Best Affordable Sustainable Fashion Brands You Need to Know About in 2025
-
Fashion Trends2 months ago
Fall 2025 Fashion Trends: Be Ahead of the Curve!
-
Interior Design2 weeks ago
Mylar vs. Foil Balloons: The Ultimate Showdown
-
Beauty and Grooming1 month ago
Unlock Flawless Tanning With Skin Prep
-
Interior Design1 month ago
Create Your Dream Cottagecore Home Office Now!
-
Vetted1 month ago
15 Best Women's Fashion Trends of 2025 You Need to Know About