Interior Design
How to Clean Sofa Arms
Learn essential tips for cleaning sofa arms to maintain their beauty and durability, and discover the best methods to keep them looking pristine.
To clean your sofa arms, start by checking the care label for specific cleaning codes. If your upholstery is water-safe, mix a mild detergent with water for a gentle scrub. For solvent-based fabrics, use a dry-cleaning agent. Blot any stains promptly and test any cleaning solution on a hidden area first. Regular vacuuming helps prevent dirt buildup, while adding arm guards can protect against scratches and spills in the future. Keeping your sofa's fabric in good shape enhances its lifespan and appearance. For more tips on maintaining your furniture's beauty, keep exploring effective cleaning strategies.
Key Takeaways
- Check the care label for cleaning codes to determine the appropriate cleaning method for your sofa arms.
- Use a damp cloth with a suitable cleaner for the fabric type; test on a hidden area first.
- Blot stains immediately and apply a mild detergent solution for effective stain removal on water-safe fabrics.
- Consider using arm guards for added protection against scratches and spills, which can be easily washed.
- Regularly vacuum sofa arms to remove dust and debris, prolonging the upholstery's lifespan and maintaining cleanliness.
Introduction
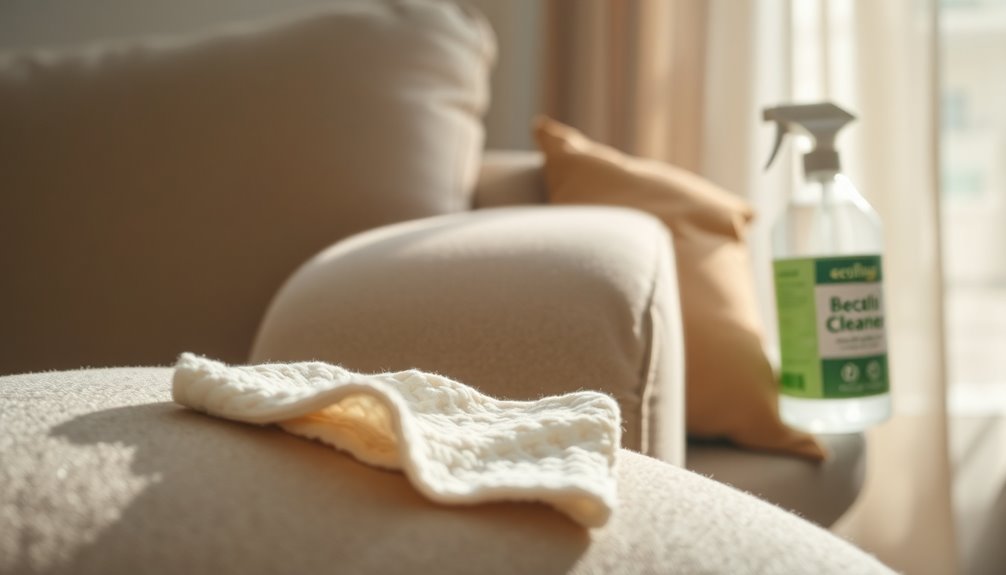
Keeping your sofa arms clean is essential for maintaining their look and hygiene. You'll want to start with routine dusting and vacuuming, then explore fabric-specific cleaning techniques to tackle tougher stains like wine and grease. With the right approach, you can ensure your sofa arms stay fresh and inviting.
Routine Dusting and Vacuuming
Regularly dusting and vacuuming your sofa arms is essential for maintaining a clean and inviting living space. These routine cleaning practices help remove loose dirt, dust, and debris that accumulate from daily use. Not only does this enhance the overall cleanliness of your sofa, but it also improves indoor air quality by reducing allergens like dust mites.
To effectively clean your sofa arms, use a vacuum cleaner with an upholstery attachment. This tool allows you to thoroughly clean the arms and reach crevices where dirt and pet hair often hide. Aim to vacuum the sofa arms at least once a week to prevent dirt buildup and prolong the lifespan of your upholstery.
In addition to vacuuming, you might find that a lint roller is a quick and effective way to remove pet hair and small debris between your deep cleaning sessions. By incorporating these simple steps into your cleaning schedule, you'll not only keep your sofa looking great but also create a healthier environment in your home. So, grab your vacuum cleaner and start tackling those dust bunnies today!
Fabric-Specific Cleaning Techniques
When it comes to cleaning sofa arms, understanding the fabric type is crucial. Always check the care label for cleaning codes like W (water), S (solvent), WS (both), or X (vacuum only) to guide your approach. For water-safe fabrics (W or WS), mix mild detergent with water to create effective cleaning solutions. Gently apply it to clean sofa arms, but avoid over-wetting.
If your sofa arms are made of solvent-based fabric (S), you'll need dry-cleaning agents. Use a soft cloth to apply the solution carefully, and remember to perform a spot test first to avoid damage. Microfiber sofas can benefit from a mixture of water and vinegar. Just blot the stain instead of scrubbing to preserve the fabric's integrity.
For leather sofa arms, a damp cloth works wonders. Follow that up with a specialized leather cleaner and conditioner to prevent drying or cracking, keeping your sofa looking its best. By tailoring your cleaning techniques to the specific fabric, you ensure that your sofa arms remain in top condition for years to come.
Targeting Wine and Grease
Wine and grease stains often sneak up on you, but tackling them doesn't have to be a daunting task. If you find a wine stain on your sofa arms, start by blotting the area with a clean cloth to absorb as much liquid as possible. Next, mix one part dish soap with two parts hydrogen peroxide and apply this solution to the stain. Let it sit for about 30 minutes before rinsing it with a damp cloth. This method works wonders on upholstery without causing damage.
For grease stains, sprinkle baking soda over the affected area to absorb the oil, and let it sit for 15-20 minutes. Afterward, vacuum it up, then clean the area with a mild detergent solution for a thorough finish. Always remember to perform a spot test on a hidden section of your fabric before applying any cleaning solution to avoid discoloration.
Using a soft-bristled brush can help lift those stubborn wine or grease stains from fabric fibers. Regular cleaning and immediate treatment of spills can prevent these stains from setting in, ensuring your sofa arms look great for years to come. Additionally, maintaining regular vacuuming of your upholstery can help remove dirt and allergens, enhancing the longevity of your sofa.
Sofa Arm Guards for Protection
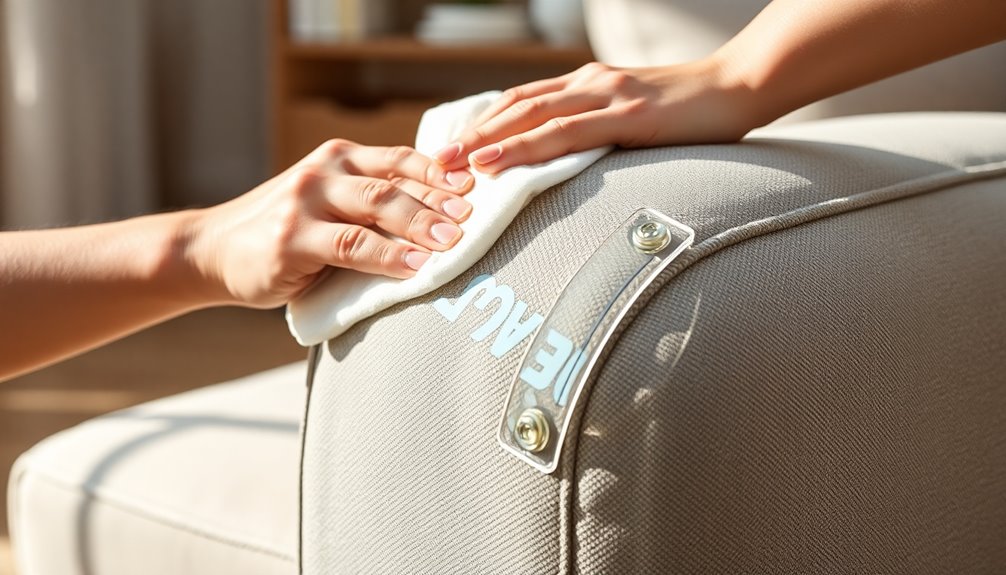
If you want to keep your sofa arms looking new, consider using arm guards for protection. These covers can prevent scratches from pets and protect against spills, making them a smart addition. Plus, you can choose from various materials and styles to match your home decor while ensuring easy maintenance.
Scratching Post Integration
Integrating scratching posts with sofa arm guards is a smart way to protect your furniture while catering to your cat's natural scratching instincts. By installing these guards, you can effectively shield your sofa arms from wear and tear, reducing the need for frequent cleaning and repairs. Made from durable materials like sisal or fabric, these arm guards serve as a barrier against your pet's claws.
When you place scratching posts near your furniture, you encourage your cat to use them instead of the actual sofa arms. This not only protects your sofa but also promotes better furniture maintenance and hygiene in your home. Many arm guards come with adhesive backing or Velcro straps, making installation and removal a breeze. If your pet does scratch the guards, you can easily clean or replace them without hassle.
Incorporating this dual-purpose solution into your home can save you time and effort in the long run, keeping your sofa looking great while satisfying your pet's instincts. With the right setup, you can enjoy a scratch-free sofa and a happy, engaged pet.
Fabric Protectors for Sofa Arms
Protecting your sofa arms from everyday wear and tear is essential for maintaining their appearance and longevity. Fabric protectors like sofa arm guards can be a game-changer. These products are designed to shield your upholstery against stains, spills, and general wear, helping to prolong the life of your sofa. Many arm guards are crafted from durable, washable materials that you can easily remove and clean, keeping your sofa looking fresh over time.
Additionally, applying a fabric protector spray can create a protective barrier against liquid and oil-based stains, allowing you to clean up spills before they set in. Some sofa arm guards even come with added features such as non-slip backing or adjustable straps, ensuring they stay securely in place during use. Regularly using fabric protectors not only enhances the durability of your sofa arms but also contributes to a healthier home environment by reducing allergens and bacteria accumulation.
Moreover, incorporating regular dental visits into your health maintenance routine can help improve your overall well-being. By implementing these cleaning techniques, you'll keep your sofa in top condition and ready for years of comfort. Protect those sofa arms, and enjoy a pristine living space!
Using Arm Covers
Sofa arm covers, also known as arm guards, offer an effective solution for shielding your furniture from everyday damage. These covers protect your sofa's arms from stains, wear, and tear, extending its lifespan significantly. They're typically made from durable, washable materials, so you can easily clean and maintain them, keeping your sofa looking clean and fresh.
Most sofa arm covers feature elastic or adjustable straps, ensuring a snug fit that prevents slipping during use. This means you can relax without worrying about them moving around. Plus, available in various colors and patterns, these covers not only provide protection but also enhance your furniture's aesthetic appeal.
Using sofa arm covers can significantly reduce the need for frequent cleaning of the sofa arms. By creating a barrier against spills and dirt, they simplify your cleaning routine, making it easier to maintain hygiene in your living space. Additionally, investing in protective covers can lead to extended lifespan of your furniture, which is critical for maintaining its value. With less effort spent on cleaning, you can enjoy your sofa more, knowing it's protected. So, consider investing in sofa arm covers for a practical and stylish solution to keep your furniture looking its best.
Upholstery Stitching Reinforcement
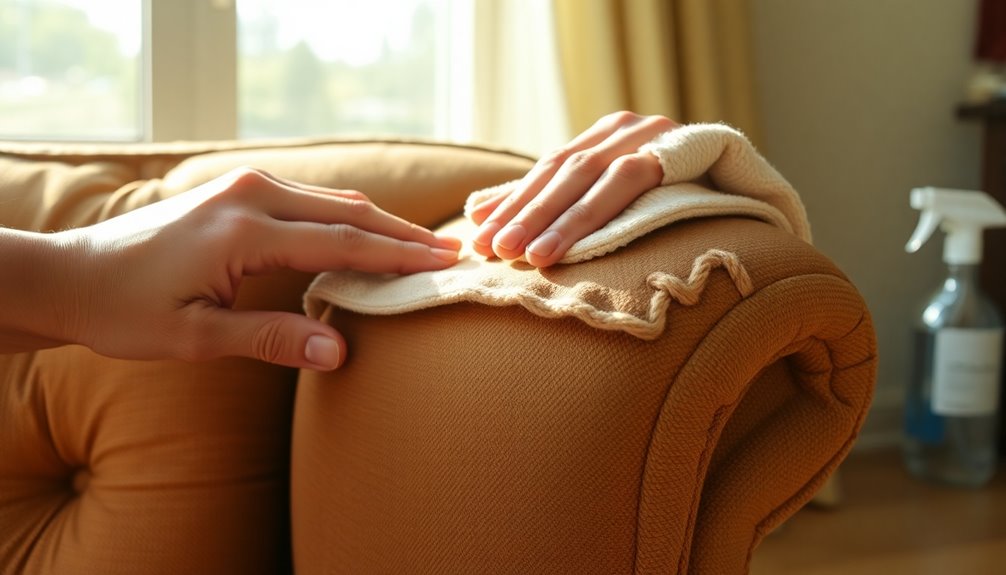
When you inspect your sofa arms, pay close attention to any weak seams and stitching. Strengthening these areas not only revitalizes the fabric or leather but also enhances the overall texture of your upholstery. By addressing these issues promptly, you can ensure your sofa remains durable and visually appealing for years to come.
Weak Seams and Stitching
Frequent use of sofa arms can lead to weak seams and stitching that may eventually cause fabric fraying and separation. To prevent this, it's crucial to regularly inspect the seams for any signs of wear. If you notice weak seams, consider reinforcing the upholstery stitching. Techniques like backstitching or using a heavier thread can significantly enhance durability in these high-stress areas.
If you have a sewing machine, opt for a zigzag stitch; it adds extra strength to seams, especially on fabrics that stretch or pull. When making repairs, ensure that any thread and material match the original to maintain your sofa's aesthetic and integrity.
Another key factor is regular cleaning. Dirt and grime can accumulate over time, potentially compromising the quality of your stitching. By keeping the sofa arms clean, you'll not only improve their appearance but also help prolong the life of the upholstery. So, make it a point to clean your sofa arms regularly and address any weak seams promptly. This proactive approach will ensure your sofa remains both beautiful and functional for years to come.
Fabric and Leather Revitalization
Maintaining the appearance and longevity of your upholstery hinges on effective fabric and leather revitalization. One crucial aspect is upholstery stitching reinforcement, especially for sofa arms that endure daily use. Regularly inspecting the stitching can help you catch frayed or loose threads before they lead to more significant issues, like fabric unraveling.
When reinforcing seams, opt for heavy-duty thread and a robust needle. This ensures your fabric upholstery can withstand the stresses of everyday use. For leather sofas, you'll need specialized leather needles and threads to avoid damaging the material. This attention to detail will maintain the integrity of your sofa arms while preserving their aesthetic appeal.
If you're unsure about your skills, consider hiring a professional upholstery service. They can provide expert reinforcement techniques that match your sofa's original style, ensuring both durability and beauty. Incorporating these cleaning methods into your upholstery care routine will not only enhance the lifespan of your furniture but also keep it looking fresh and inviting. Remember, the effort you put into upholstery stitching reinforcement pays off in the long run!
Revitalized Upholstery Texture
Revitalizing upholstery texture involves paying close attention to the condition of the stitching on your sofa arms. Regularly cleaning your sofa not only removes dirt but also helps maintain the integrity of upholstery stitching. When you neglect this, fraying and wear can occur over time.
Use the right cleaning method based on your fabric type; for instance, "W" coded fabrics can handle water, which preserves the texture and structure of the upholstery stitching. Always start by thoroughly vacuuming the sofa arms to eliminate debris that could snag or pull on the stitching during cleaning.
When it's time to clean, avoid excessive moisture that can weaken the stitching. Instead, opt for a lightly damp cloth to gently wipe surfaces, keeping them fresh without compromising the fabric.
After cleaning, applying fabric protectants can reinforce the upholstery stitching, creating a barrier against dirt and stains. This simple step helps prolong the lifespan of your sofa. By focusing on these details, you ensure your upholstery remains vibrant and resilient, maintaining its beauty and functionality for years to come.
Personalized Fabric Choices

When choosing fabric for your sofa arms, it's essential to consider how each material fits your lifestyle and aesthetic preferences. Microfiber is a fantastic option if you're looking for durability and ease of cleaning. It's stain-resistant and perfect for high-traffic areas, making it ideal for busy households. If comfort is your priority, cotton blends can provide breathability but may require more frequent cleaning to keep them looking fresh and stain-free.
Leather adds a touch of elegance and is easy to wipe down, but it does need specialized care to prevent drying and cracking. If you want to create a luxurious feel, velvet can be enticing, though it's more susceptible to stains and may need professional cleaning to maintain its look.
For pet owners, choosing fabrics with tight weaves or synthetic fibers can make a significant difference. These materials resist snagging and are easier to clean from pet hair and odors. Prioritize what matters most to you—whether it's durability, style, or ease of maintenance—to find the perfect fabric for your sofa arms.
Preventing Sun Damage

Sun damage can quickly fade and deteriorate your sofa arms, but there are several effective strategies to protect your investment. Start by positioning your furniture away from direct sunlight. If that's not possible, use window treatments like blinds or curtains to minimize UV exposure. Installing UV-blocking window films can also be a game-changer, reducing harmful rays by up to 99%, which helps keep your upholstery looking fresh.
Additionally, consider using fabric protectants that include UV inhibitors. These products offer an extra layer of defense against sun damage and can significantly prolong the life of your fabric. It's also wise to regularly rotate your cushions and reposition furniture to ensure even exposure to light. This practice helps prevent uneven fading and wear on your sofa arms.
Lastly, maintain a consistent indoor humidity level between 30% and 50%. This prevents the fabric from drying out, making it more resilient against sunlight damage. By following these strategies for preventing sun damage, you'll help keep your sofa arms looking vibrant and new for years to come.
Conclusion
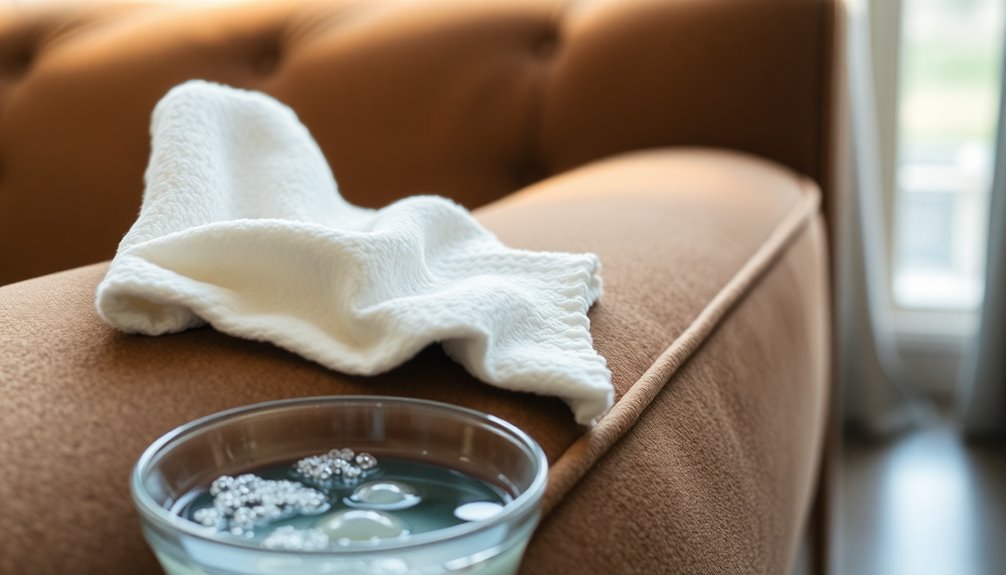
Cleaning your sofa arms is essential for maintaining not just their appearance but also the hygiene of your entire living space. By regularly cleaning them, you prevent the buildup of dirt, dust, and bacteria that can affect overall cleanliness. To achieve the best results, understand the fabric type and always follow the manufacturer's instructions. This knowledge helps avoid damage during the cleaning process.
Start with some solid cleaning tips: use a vacuum with an upholstery attachment to remove loose debris before applying any cleaning solutions. For stubborn stains, a gentle blotting technique with a mild detergent solution or a vinegar-water mixture can lift blemishes effectively without harming the fabric.
Regular maintenance, like vacuuming and applying fabric protectants, is crucial in extending the lifespan of your sofa arms and keeping them looking new longer. Remember, consistency is key. Incorporating these cleaning habits into your routine not only enhances the appearance of your sofa but also contributes to a healthier living environment. So grab those cleaning supplies and give your sofa arms the attention they deserve!
Frequently Asked Questions
How Do You Clean Fabric Chair Arms?
To clean fabric chair arms, start by checking the care tag for cleaning instructions. Vacuum the arms using an upholstery attachment to remove dust and debris. For stains, mix 2 cups of distilled water with 1 tablespoon each of mild dish soap and white vinegar. Dampen a microfiber cloth with the solution and blot the stain. Rinse with a clean cloth dampened in distilled water, then blot dry to prevent moisture buildup.
How to Get Smell Out of Couch Arm?
To get the smell out of your couch arm, start by sprinkling baking soda over the fabric and letting it sit for 20 to 60 minutes. This helps absorb unwanted odors. For a more focused approach, mix equal parts water and white vinegar in a spray bottle, lightly mist the area, and blot with a clean cloth. Regularly using a fabric freshening spray can also keep your couch smelling fresh between deep cleanings.
What Is the Best Thing to Clean a Fabric Sofa With?
When you're looking to clean a fabric sofa, the best solution is a mix of 2 cups of distilled water, 1 tablespoon of dish soap, and 1 tablespoon of vinegar. This combination effectively tackles stains without harming the fabric. Always spot test in an inconspicuous area first. Use a damp microfiber cloth to gently blot stains instead of scrubbing, which can damage the fibers. Regular vacuuming also keeps your sofa looking fresh.
How Do You Clean the Arms of a Microfiber Couch?
To clean the arms of your microfiber couch, start by vacuuming them with an upholstery attachment to remove dirt. Next, mix 2 cups of distilled water, 1 tablespoon of dish soap, and 1 tablespoon of white vinegar. Dampen a microfiber cloth with this solution and blot any stains. Gently scrub with a soft-bristled brush, rinse with distilled water, and blot dry. For freshness, sprinkle baking soda occasionally before vacuuming it off.
Interior Design
How to Take a Sofa Apart
How to take a sofa apart can be daunting, but with the right tips, you’ll uncover secrets to simplify the entire process.
To take a sofa apart, start by removing any cushions and slipcovers. Check for screws or bolts on the sofa's base and armrests, using a wrench or screwdriver to detach them carefully. If your sofa has a wooden frame, gently pry apart the joints, ensuring you don't damage the wood. With reclining sofas, locate the release mechanisms under the seat. Label and store all hardware in a bag for easy reassembly. Always inspect for any loose screws during the process, as this could be vital for reassembly. You'll discover more tips that simplify the entire process.
Key Takeaways
- Begin by removing any cushions, covers, or upholstery to access the frame and internal components easily.
- Check for screws or bolts securing the frame together and use appropriate tools to carefully unscrew them.
- Look for any hidden fasteners or clips, especially under the sofa or in seams, and gently pry them loose if necessary.
- Disassemble the sofa in sections, starting with the backrest, then arms, and finally the seat, keeping track of all removed parts.
- Consider taking photos during disassembly to assist with reassembly and ensure all components are accounted for.
Introduction
When you take a sofa apart, it's essential to understand how to maintain its fabric effectively. Regular dusting and vacuuming can keep your sofa looking fresh, while knowing the right cleaning techniques for different materials helps preserve its quality. Plus, being prepared for spills, like wine, can save you from bigger headaches down the road.
Routine Dusting and Vacuuming
To keep your sofa looking fresh and extend its lifespan, routine dusting and vacuuming are essential. Regularly cleaning your upholstery helps remove dirt, dust, and allergens that can accumulate over time. Aim to vacuum your sofa at least once a month using a vacuum cleaner equipped with an upholstery attachment. This tool allows you to effectively remove debris from the surface and get into those tricky spots between cushions.
In addition to vacuuming, incorporate routine dusting with a microfiber cloth. This method not only removes dust from the sofa's frame but also prevents particles from settling into the upholstery. Pay particular attention to seams and folds, as these areas often trap dirt and require more thorough cleaning.
For optimal results, consider using a fabric-safe upholstery cleaner alongside your vacuuming efforts. This combination helps address any stains while maintaining your sofa's overall appearance. By committing to these simple maintenance tasks, you'll ensure your sofa remains a centerpiece in your living space, providing both comfort and style for years to come.
Fabric-Specific Cleaning Techniques
Understanding fabric-specific cleaning techniques is crucial for maintaining your sofa's appearance and longevity. Different fabrics require distinct methods to keep your upholstery looking fresh. For instance, cotton can often be machine washed, while leather needs a gentler approach—just wipe it down with a damp cloth and apply a leather conditioner.
Always check the manufacturer's care label for specific cleaning instructions. This step is essential, as some fabrics may require professional cleaning or have restrictions on water use. For synthetic fabrics, a mixture of mild detergent and water can tackle stains effectively, whereas natural fibers benefit from a vinegar and water solution.
Before applying any cleaning solution, test it on a hidden area of the fabric first. This precaution helps ensure you don't accidentally cause discoloration or damage. Regular vacuuming and addressing spills immediately will also extend the life of your sofa's fabric. By following these fabric-specific cleaning techniques, you can keep your upholstery in great shape and enjoy your sofa for years to come.
Treating Wine Spills Effectively
Accidents happen, and a wine spill on your sofa can feel like a disaster. Don't panic; you can effectively treat the stain if you act quickly. First, grab a clean cloth or paper towel and blot the spill gently. This helps absorb as much liquid as possible without rubbing it into the upholstery, which could spread the stain.
Next, mix a solution of one part white vinegar, one part dish soap, and two parts water. Apply this solution to the stained area using a clean cloth to help break down the wine. If the stain proves stubborn, sprinkle some baking soda over the area after applying the vinegar solution. Let it sit for a few minutes before vacuuming it up.
After treating the stain, rinse the area with cold water to remove any cleaning solution residue. Blot it dry with a clean towel. Remember to test any cleaning solution on an inconspicuous spot of the fabric first to ensure it won't cause discoloration or damage. Following these steps will help you remove wine stains and keep your couch looking great!
Avoid Direct Sunlight Exposure
When you're taking your sofa apart, keep it out of direct sunlight to protect its materials. Sunlight can cause fabrics to fade and weaken, while wood and metal can warp or discolor. Selecting scratch-resistant fabrics and using protective throws can help maintain its appearance during the process.
Scratch-Resistant Fabric Selection
Selecting the right scratch-resistant fabric for your sofa is crucial, especially if you want it to withstand daily wear and tear. Look for upholstery materials like microfiber or tightly woven synthetic fibers, as these offer enhanced durability against scratches. Fabrics with a higher rub count—over 30,000—are generally more resistant to abrasion, making them perfect for high-traffic areas in your home.
To ensure your sofa maintains its appearance, avoid placing it in direct sunlight. UV exposure can fade colors and weaken fibers, increasing the risk of scratches. Additionally, consider fabrics treated with protective coatings such as Teflon, which repel stains and help reduce scratching.
Regular maintenance is key to preserving the integrity of your scratch-resistant fabric. Make it a habit to gently brush and vacuum your upholstery, as this will help prolong its lifespan and keep it looking fresh. By making informed choices about fabric selection and committing to consistent maintenance, you can enjoy a beautiful and resilient sofa that withstands the demands of everyday life.
Fabric Protection With Throws
A well-placed throw can be a game changer in protecting your sofa's fabric from the harmful effects of direct sunlight. Without proper fabric protection, your upholstery can start fading in just a few weeks of exposure. Light-colored throws are particularly effective; they reflect sunlight, reducing heat absorption and minimizing damage to the fabric underneath.
To maximize the benefits, position throws strategically on high-wear areas, like armrests and seat cushions. This targeted approach not only protects these vulnerable spots but also prolongs the life of your upholstery. If you're serious about shielding your sofa, consider using UV-resistant fabric for your throws. This extra layer of protection can combat harmful rays that lead to discoloration and degradation.
It's also essential to regularly rotate and wash your throws. This practice maintains their protective qualities and helps prevent dust accumulation, which could contribute to fabric wear over time. By incorporating these simple steps, you can effectively safeguard your sofa from fading while keeping your living space stylish and inviting.
Using Furniture Coasters
Protecting your sofa from damage involves more than just using throws; furniture coasters play a significant role during disassembly. By placing sturdy furniture coasters under each leg of your sofa, you can prevent damage to your floors and allow for easier movement as you take it apart. Ensure that the coasters you use are designed to support the weight of your sofa to avoid slipping or breaking during the process.
While you're disassembling, it's crucial to avoid direct sunlight exposure. Sunlight can fade or weaken your upholstery and materials over time. If you're working outdoors, position the sofa in a shaded area or cover it with a tarp to maintain its integrity.
As you work, regularly check that the coasters remain in place to ensure stability and safety. This will help you avoid any mishaps that could lead to damage to your furniture or your floors. Keeping these tips in mind will make your disassembly process smoother and protect your sofa for years to come.
Routine Check for Loose Screws
Regularly checking for loose screws keeps your sofa sturdy and helps prevent any issues with joints and connections. If you notice any instability, it's a good time to inspect the fabric for wear and consider fluffing the cushions for added comfort. Staying on top of these routines can save you from more complicated repairs down the line.
Loose Joints and Connections
Over time, your sofa can develop loose joints and connections that may compromise its comfort and stability. Regularly inspect your sofa for any loose screws and fasteners. These small but crucial components play a significant role in maintaining the overall integrity of your furniture. When you notice any loose screws, grab the appropriate screwdriver and tighten them up. This simple act can make a big difference in prolonging the lifespan of your sofa.
Pay close attention to areas that experience frequent movement, like armrests and reclining mechanisms, as these joints are more prone to loosening. To ensure everything is secured properly, consider using a torque wrench to check the tightness of bolts and screws. Just be careful not to over-tighten, as this can damage the wood or frame material.
Schedule routine checks every 6 to 12 months. This proactive approach can help you catch and address any loose joints early, preventing potential damage and ensuring your sofa remains comfortable and stable for years to come. Keeping your sofa in good shape is essential for a cozy living space.
Fabric Repair and Conditioning
Maintaining your sofa's fabric is crucial for its longevity and appearance. Regularly inspect the upholstery for signs of wear, like fraying or loose seams. Addressing these issues promptly can significantly extend the life of your sofa. If you spot any damage, consider using a fabric repair kit to patch up small tears or snags. This simple step helps preserve both the aesthetics and functionality of your furniture.
Additionally, don't overlook the importance of conditioning your sofa's fabric. Use a suitable fabric conditioner to maintain its texture and prevent fading from sunlight exposure. This routine maintenance keeps your upholstery looking fresh and vibrant.
While you're checking the fabric, take a moment to inspect the frame of your sofa. Loose screws and fasteners can compromise the structure, leading to further damage to the upholstery. Tighten any loose screws with the appropriate screwdriver to ensure stability. By keeping both the fabric and frame well-maintained, you'll enhance your sofa's durability and comfort, making it a staple in your living space for years to come.
Cushion Fluffing Techniques
Although it might seem like a minor detail, regularly fluffing your sofa cushions can make a big difference in both comfort and appearance. Start by inspecting the couch frame for loose screws. Use a Phillips head screwdriver to tighten any fasteners on the arms, legs, or backrest. This is essential for maintaining structural integrity and preventing wobbling or potential collapse.
Once you've ensured everything is securely fastened, move on to the cushions. If you notice any sagging, it could mean the internal support structure needs adjustment. To fluff your cushions, beat or shake them gently, allowing the filling to redistribute. This helps restore their shape and prevents permanent indentations.
If your sofa has removable legs, consider taking them off while you work on the cushions for easier access. Remember, regular maintenance not only enhances comfort but also prolongs the life of your sofa. By incorporating these cushion fluffing techniques and checking for loose screws, you're taking a proactive approach to keeping your sofa in top condition. So, give your cushions the care they need for a cozy, inviting space.
Personalized Fabric Choices
Choosing fabric for your sofa can significantly influence its appearance and longevity, so it's essential to consider personalized options that reflect your style. Start by evaluating fabrics based on durability ratings like the Martindale or Wyzenbeek tests. For residential use, aim for a minimum of 15,000 rubs to ensure your upholstery withstands daily wear.
Opt for stain-resistant treatments, particularly polyester blends, which enhance durability and simplify maintenance. While natural fibers like cotton and linen offer comfort and breathability, they often require more upkeep and can be less resistant to damage.
To truly personalize your sofa, explore custom upholstery options that allow you to select patterns, colors, and textures suited to your tastes and home decor. Always review care instructions for your chosen fabric; some may need professional cleaning, while others can be easily maintained with a damp cloth or mild detergent.
Cushion Replacement Strategies
When it comes to revitalizing your sofa, replacing the cushions can make a significant difference in both comfort and appearance. Start by measuring your existing cushions accurately; use a tape measure for precise dimensions to ensure a proper fit for your new replacements. Consider the density and firmness of the foam you select, as higher density options generally provide better support and durability over time.
When choosing cushion covers, look for ones with zippers, making them easy to remove and wash. This promotes better maintenance and extends the life of your cushions. Don't hesitate to explore different fill types, like down, polyester, or memory foam, to find the comfort level that suits your seating preferences. If you're environmentally conscious, consider eco-friendly options made from recycled materials or natural fibers, which can add a sustainable touch to your home. Additionally, opting for multi-functional furniture can further enhance your space's utility while keeping it stylish.
Conclusion
In summary, taking a sofa apart can be a rewarding project that enhances your furniture's longevity and offers opportunities for renewal. By following a systematic approach, you can efficiently dismantle your sofa, starting with the removal of cushions and upholstery. This allows you to access the frame and fasteners, making the process smoother. On average, expect to spend about 4 to 6 hours on this task, depending on the sofa's complexity and the tools you have at hand.
Utilizing the right tools, like screwdrivers and staple pullers, can make disassembly safer and easier. As you work, keep the removed components organized and labeled so you can easily reassemble or dispose of them later. If you're looking to dispose of your sofa, consider options that are environmentally responsible. You can remove the mattress and donate usable parts or take them to a recycling center. This way, you not only give your sofa a new life but also contribute to reducing waste. Embrace the challenge, and you'll find that taking apart a sofa is both practical and fulfilling.
Frequently Asked Questions
Can Sofas Be Disassembled?
Yes, most sofas can be disassembled, making it easier for you to transport them, especially in tight spaces. You'll find that many sofas have removable parts like legs, arms, and backrests, secured with screws or bolts. Before you start, check the design of your sofa to see if it's modular or has special mechanisms. Gather the right tools, like screwdrivers and wrenches, to ensure the process goes smoothly and efficiently.
Can You Take a Couch Apart to Fit Through a Door?
Yes, you can take a couch apart to fit it through a door. Start by measuring the couch and the doorway to ensure a good fit. Remove cushions, legs, and possibly armrests or backrests. You'll need some tools like a screwdriver and an Allen wrench. Make sure your workspace is clean so you can keep track of the parts you remove. This way, you'll reassemble everything easily once you've maneuvered it through the door.
How to Disassemble a Sofa for Moving?
To disassemble a sofa for moving, start by removing all loose cushions and any detachable parts. Check for hidden items before setting them aside. Use a screwdriver or Allen wrench to unscrew and detach the arms, backrest, and legs, labeling fasteners for easy reassembly. If needed, flip the sofa upside down to access the frame. Finally, carefully wrap the components for protection during transport, and consider getting help for heavy parts.
Do the Backs of Couches Come Apart?
Yes, the backs of many couches do come apart. You'll often find removable backs secured by screws, bolts, or metal strips. Before you start, check for hidden fasteners or upholstery that might need to be removed first. Depending on the design, you might need to lift the back off after releasing levers or unscrewing visible fasteners. Always refer to your sofa's manufacturer guidelines for specific instructions to avoid any damage.
Interior Design
Revamp Your Space With Modern Console Decor
Incorporate sleek designs and personal touches to transform your space with modern console decor—discover how to achieve the perfect blend of style and function.
Renovating your space with beautiful modern console decor is all about combining style with practicality. Opt for a stylish console table with sleek lines, crafted from materials like glass or metal for an elegant feel. Place it in your entryway or living room for a visually appealing look and extra storage. Choose a harmonious color scheme with 2-3 main colors and a few accents for depth. Blend different materials and add personal items for a unique display. Remember to layer textures and use different heights for accessories. Keep on discovering more helpful tips to upgrade your decor! Every detail counts, so why not enhance your space with these simple yet effective ideas?
Key Takeaways
- Choose a modern console table with clean lines and materials like glass or metal for a sophisticated touch in your space.
- Select a color palette that includes 2-3 main colors and 1-2 accent colors to create a cohesive look.
- Accessorize with functional and decorative items, such as stylish lamps and vibrant vases, to enhance visual interest and functionality.
- Layer textures by incorporating fabrics and woven elements to add warmth and depth to your modern decor.
- Personalize your console with unique decor items and family photos to reflect your individual style and create an emotional connection.
Console Table Types
When it comes to console tables, you've got a variety of styles to choose from, each offering unique characteristics to fit your decor.
Modern console tables feature clean lines and materials like glass and metal, giving your space a sophisticated touch. If you prefer elegance, traditional console tables provide timeless appeal that complements classic decor.
For a cozy atmosphere, rustic console tables add organic warmth, perfect for a welcoming environment. When selecting materials, consider wood for warmth, metal for a modern edge, and glass for an airy feel.
Marble tables exude luxury, while woven elements introduce texture. Your choice should reflect your style and functionality needs, ensuring it seamlessly integrates into your design aesthetic.
Finding the Perfect Location
Finding the right location for your console table can greatly enhance its functionality and aesthetic appeal. A well-placed console table not only serves as a focal point but also contributes to the overall flow of the room, balancing beauty with practicality as seen in effective mood boards essential for visualizing design concepts.
Consider placing it in your entryway to create a welcoming atmosphere, or in your living room against a wall or behind a sofa for added storage and display space. Hallways can come alive with a console table, providing visual interest in narrow areas.
If you want to add elegance to your bedroom, a console table can serve as a stylish nightstand or display area. Always guarantee the placement allows for easy access and complements the flow of the room.
Balance form and function by incorporating storage solutions, making your console table both practical and visually appealing.
Color Palette Essentials
A well-chosen color palette can transform your console table into an enchanting focal point in any room. Start by selecting 2-3 main colors that harmonize with your space, and add 1-2 accent colors for an eye-catching contrast. Consider incorporating metallic accents like gold or silver to elevate the sophistication. Below is a handy table to guide your choices:
Color Type | Examples |
---|---|
Main Colors | Navy, Cream, Charcoal |
Accent Colors | Mustard, Coral |
Metallic Accents | Gold, Copper |
Complementary Shades | Turquoise, Blush |
Ensure that your selected palette not only reflects your style but also integrates seamlessly with your room's existing decor. This approach sets the stage for a beautifully styled console.
Styling Techniques to Consider
Styling a console table can elevate the entire room, making it a statement piece. To achieve this, mix various shapes and materials for depth—think sleek metal alongside warm wood.
Aim for height variation; stack books or use decorative boxes to create visual intrigue. Personal touches, like framed photos or unique finds, make the space feel truly yours.
Layer textures by incorporating fabrics such as velvet or woven elements, which add warmth and interest. Don't forget about lighting! A well-placed table lamp not only illuminates but also adds elegance.
Accessorizing for Impact
Accessorizing your console table can transform it from a simple piece of furniture into a stunning focal point. Start by mixing functional and decorative items like a stylish lamp, a vibrant vase, or a chic stack of books.
Incorporate mirrors to reflect light and create a sense of space, which aligns beautifully with the focus on natural materials in modern farmhouse decor. Use trays to corral smaller items, adding organization while maintaining style.
Don't forget to layer textures; woven baskets or fabric accents can add warmth and depth, echoing the vintage charm found in farmhouse aesthetics. Vary the heights of your accessories for visual interest, ensuring they harmonize with your room's aesthetic.
Creating a Curated Display
Creating a curated display on your console table elevates its visual appeal and reflects your personal style. Start by selecting a color palette with 2-3 main colors and a couple of accent shades.
Consider incorporating elements inspired by health benefits of juices to introduce vibrant colors and invigorating motifs. Choose decor items of varying heights and shapes to create depth.
Mix materials like wood, glass, and metal for added texture and interest. Incorporate personal touches, like framed photos or unique finds, to make the display feel authentic.
Balance the arrangement by grouping items in odd numbers, which often looks more visually appealing. Finally, don't hesitate to refresh your decor regularly to keep it dynamic and engaging.
This curated look not only enhances your space but also showcases your creativity and individuality. This approach allows you to experiment with various design elements, making your environment a true reflection of your personality. By thoughtfully arranging your decor, you’re not just decorating—you’re unlocking white space benefits, creating a sense of balance and harmony within your room. The intentional use of negative space can foster clarity and calmness, transforming your space into an inspiring sanctuary.
Seasonal Decor Inspiration
Revitalizing your console table decor with seasonal touches can bring new life to your space and keep it feeling current.
For fall, consider adding rich oranges and deep reds with decorative pumpkins and cozy textiles.
In winter, opt for calming blues and whites, incorporating frosted pinecones and soft lighting for a serene vibe.
Spring invites fresh flowers and pastel accents, while summer can burst with vibrant greens and bright patterns.
Don't forget to include seasonal scents with candles or diffusers!
Each season offers a chance to refresh your decor, ensuring your console table remains a focal point that reflects nature's beauty and your personal style throughout the year.
Tips for Personalization
Your console table can become a true reflection of your personality with a few thoughtful touches. Start by selecting pieces that resonate with you, like unique sculptures or cherished photos. Layer textures by mixing materials, such as wood and metal, to create depth. Don't shy away from experimenting with colors and patterns that match your aesthetic.
Here's a quick guide to help you personalize your console table:
Element | Example | Purpose |
---|---|---|
Personal Items | Family Photos | Emotional connection |
Textures | Woven Baskets | Visual interest |
Decorative Objects | Unique Sculptures | Showcase individuality |
Mix and match these elements to curate a space that truly feels like yours!
Frequently Asked Questions
What Are the Best Materials for Outdoor Console Tables?
For outdoor console tables, you'll want durable materials like teak, metal, or weather-resistant wicker. These options withstand elements while maintaining style. Consider finishes that resist fading and guarantee long-lasting beauty for your outdoor space.
How Do I Clean and Maintain My Modern Console Table?
Did you know that regular cleaning can extend your furniture's life by 30%? To maintain your modern console table, dust it weekly, wipe spills immediately, and use a gentle cleaner to preserve its finish.
Can I Use a Console Table as a TV Stand?
Yes, you can use a console table as a TV stand. Just make sure it's sturdy enough to support the weight and that it fits the dimensions of your television for a balanced look.
What's the Ideal Height for a Console Table?
Most console tables range from 28 to 32 inches high. You'll want to choose a height that complements your space and fits comfortably with surrounding furniture, ensuring it enhances both functionality and aesthetic appeal.
How Do I Choose a Console Table for Small Spaces?
When choosing a console table for small spaces, opt for sleek designs that don't overwhelm. Consider multi-functional pieces with storage, and make certain it complements your existing decor without crowding the area.
Conclusion
Now that you've explored the world of modern console decor, it's time to release your creativity and transform your space. Picture your ideal console table, adorned with accessories that reflect your unique style. Why settle for ordinary when you can curate an extraordinary display that delights the senses? With a little thought and effort, your console table can become a stunning centerpiece, inviting admiration and enhancing your home's charm. So, go ahead, make it yours!
Interior Design
How to Fix Scratches on Wood Furniture
Keep your wood furniture looking pristine with easy scratch repair techniques that will surprise you—discover the secrets to flawless finishes!
You can easily fix scratches on your wood furniture with a few simple techniques. Start by assessing the damage; shallow scratches can be polished while deeper ones might need filler. Try using cooking oil or a mixture of vinegar and oil to darken and blend in the scratches. For deeper repairs, clean the area, apply a matching wood filler, let it dry, and then sand it smooth. If needed, consider using shoe polish to match the color and buff it to a shine. There are many more tips and tricks to keep your furniture looking great, so stick around to learn more!
Key Takeaways
- Assess the scratch's depth; use wood filler for deep scratches and household products for shallow ones.
- Clean the scratched area with a damp cloth before applying any repair products.
- For minor scratches, apply cooking oil or a mixture of vinegar and oil to blend the scratch.
- Sand the area gently with fine-grit sandpaper after filling to ensure a smooth finish.
- Consider professional help for multiple or deep scratches, especially on valuable furniture.
Assessing the Damage
When you notice a scratch on your wood furniture, the first step is to assess the damage effectively. Start by determining if the scratch is shallow or deep. Shallow scratches typically only affect the finish, while deep scratches go beyond the surface, making it impossible to feel the bottom with your fingernail. If the scratch exposes the wood grain, you'll need to consider a more thorough repair.
Next, evaluate the severity of the scratch. Check if it has jagged edges that require smoothing with sandpaper. If the scratch has broken the surface but isn't deep enough for fillers, that's another factor to note. Multiple scratches might mean you'll need to sand and refinish the entire piece. Don't overlook any underlying damage that could compromise the furniture's structural integrity. Timely repair is crucial to prevent further damage that can worsen over time.
Prepare the surface by cleaning it with a damp microfiber cloth to remove dust and debris. This step can raise the grain, so keep that in mind. Make sure the area is free of obstructions and dry before you start your assessment. This careful evaluation will guide you in choosing the right repair method for your wood furniture.
Using Household Products
While it might seem daunting to tackle scratches on your wood furniture, using common household products can simplify the process. You can start with cooking oils like vegetable or canola oil. Just apply a small amount to your fingertips and rub it over the scratches. The oil darkens the area, helping it blend in with the surrounding wood. Canola oil is a budget-friendly choice, and olive oil works too.
For a more effective solution, mix 1/4 parts white vinegar with 3/4 parts oil. Shake it in a jar and use a soft cloth to apply the mixture to the scratches. This not only helps fill in scratches but also gives the wood a nice polish. Always test it on a hidden area first. Maintaining the appearance of wood furniture is essential for ensuring its longevity.
You could also use food items. Peanut butter can fill in scratches—just let it sit for about an hour before buffing. For darker woods, instant coffee mixed with hot water creates a paste that can stain scratches effectively. Lastly, apply a few drops of water to small dents and let them sit. If needed, use a warm iron with a damp cloth to raise deeper dents.
Using Shoe Polish
Shoe polish can be an effective and quick solution for disguising scratches on wood furniture. Start by preparing the area: clean the surface with a cloth and warm water, ensuring it's free of dirt. Once it's dry, test the shoe polish on a hidden spot, like the back leg of a desk, to check the color and reaction.
Next, select a shoe polish that matches your furniture's color. If you can't find an exact match, mix different shades on a paper plate until you achieve the right hue. Again, test this mixture in an inconspicuous area to confirm it blends well. Matching shoe polish color to your wood furniture is essential for effective results.
When you're ready to apply, take a small amount of polish on a paper towel or soft cloth, wrapping it around your finger for precision. Gently rub the polish into the scratch, avoiding the surrounding wood. Add more polish as needed until the scratch is less visible. For extra precision, a Q-tip works wonders.
Finally, wipe off any excess polish immediately to prevent staining, then buff the area with a clean cloth to restore shine. This method can effectively conceal scratches, but remember to avoid applying polish to undamaged areas.
Sanding and Smoothing
To effectively address scratches on wood furniture, sanding and smoothing is a reliable method that can restore the surface's appearance. Begin by using a sanding block to ensure even pressure. Always sand in the direction of the wood grain to avoid causing permanent scratches. For larger imperfections, start with coarse-grit sandpaper, like 80 or 120 grit. Gradually switch to finer grits, such as 180 or 240 grit, to achieve a smoother finish.
Be careful not to press too hard, as this can gouge the wood. Use lower grit sandpaper for deeper scratches and coarser surfaces, then transition to higher grit to blend and minimize imperfections. Don't skip grits; using each one in order is essential for a polished result. For soft woods, begin with a higher grit to prevent damage.
After sanding, thoroughly clean the area to remove dust and debris. Wipe away excess material with a clean cotton rag to smooth the surface. Finally, apply appropriate oil or wax to protect the wood and enhance the finish, as this can help prevent future water stains and buff with a soft cloth to restore shine and blend the repaired area.
Filling Deep Scratches
Filling deep scratches on wood furniture can seem daunting, but with the right approach, you can bring your piece back to life. Start by cleaning the area around the scratch with a damp microfiber cloth to remove dirt and debris. Use the corner of a putty knife to eliminate any loose residue from the scratch, ensuring the surface is completely dry before moving on.
Next, inspect the scratch to determine its depth and choose an appropriate wood filler that closely matches the furniture's color. For medium to deep scratches, wood filler sticks or wax crayons work well. Apply the filler using a putty knife, old credit card, or your fingers, ensuring there are no air gaps. Fill the scratch completely, adding more if needed for deeper gouges, and smooth the surface with the flat end of a palette knife. It's essential to start with initial cleaning to avoid contamination in the repair process.
Allow the filler to dry according to the manufacturer's instructions, which can take anywhere from 30 minutes to 8 hours. Once dry, sand the filled area gently with fine-grit sandpaper, following the wood grain, and remove any excess with a damp cloth. Repeat if necessary to achieve a smooth finish.
Refinishing and Sealing
Refinishing and sealing your wood furniture can dramatically enhance its appearance and longevity. Start by thoroughly cleaning the piece to remove dirt, grime, and old wax. Next, assess the current state of the wood to determine the right refinishing method based on the type of wood and existing finish. To remove the old finish, use chemical strippers or sandpaper, beginning with coarse grit and progressing to finer grits.
When sanding, use long, even strokes along the grain to ensure a smooth surface. Incorporating textured fabrics during the refinishing process can further elevate the piece's overall aesthetic. After sanding, wipe down the area with mineral spirits to eliminate dust and contaminants. Once you achieve a smooth surface, choose a stain that matches the original color of the wood. Apply the stain according to the manufacturer's instructions, allowing it to dry properly.
To seal the repair, select a clear wood finish like polyurethane or lacquer. Applying a protective finish is critical for maintaining the integrity of your wood furniture. Apply the sealer evenly over the repaired area and let it dry as per the instructions. Finally, buff the sealed area with a soft cloth to restore shine and inspect for consistency, applying additional coats if necessary. This process will leave your wood furniture looking refreshed and protected.
Tips for Preventive Care
Caring for your wood furniture can make a world of difference in preserving its beauty and durability. Start by applying felt pads to the bottom of chair and table legs to cushion their contact with the wood. For heavier pieces, use flexible plastic floor protectors. Remember to replace these pads at the first sign of wear. Place rugs under feeding areas to catch spills and protect the wood from damage.
When it comes to pets and children, trim your pets' nails to prevent scratches, and supervise them closely to avoid accidents. Train your pets and establish ground rules for children to minimize risks.
Regular cleaning is crucial, too. Dust your furniture regularly with soft-bristled brushes or microfiber cloths to eliminate abrasive particles. Wipe up spills immediately to prevent moisture damage. Use coasters and mats to protect surfaces from cups and dishes. Additionally, consider using barrier protection methods to safeguard high-traffic areas from potential scratches.
Lastly, be cautious with sharp objects around your wood furniture. Designate trays for items like keys and scissors, and handle your furniture gently during moves. By following these tips, you'll keep your wood furniture looking great for years to come.
Best Practices for Maintenance
To keep your wood furniture in top shape, establish a regular maintenance routine that addresses cleaning, protection, and handling. Start by dusting your furniture frequently to remove abrasive particles that can scratch the surface. Use a gentle wood cleaner or a mild soap-and-water mixture for cleaning, and always wipe up spills immediately to prevent moisture damage. Avoid harsh chemicals and abrasive cleaners, and finish with a soft, dry cloth.
To protect your furniture, apply a quality furniture wax or polish, following the product's instructions for application. Consider using a clear wood finish like polyurethane to create a durable barrier. Regularly inspect this finish and reapply as needed. Use felt pads under objects to prevent scratches. Additionally, you can use natural remedies like the walnut method to help conceal and fill minor scratches.
When handling your furniture, lift items instead of dragging them across the surface. Coasters and placemats are essential for protecting against water marks and spills. Maintain a stable environment to prevent wood from warping, and avoid placing hot items directly on surfaces. Lastly, keep pets' nails trimmed and train them to steer clear of your wood furniture to minimize scratches.
When to Seek Professional Help
Even with diligent maintenance, there are times when scratches on wood furniture require professional intervention. If you notice multiple or deep scratches that penetrate through the clear coat, or if the damage covers a large area, it's best to seek expert help. Deep gouges or significant wood loss, especially if they expose the wood beneath, often need refinishing that's beyond DIY capabilities.
For valuable antiques, family heirlooms, or high-end furniture, hiring a professional is essential. These items often carry historical or sentimental value, and their intricate designs may require specialized skills and tools. If you're unsure about the type of finish or wood used, or if matching colors seems daunting, it's time to call in a pro. Addressing scratches promptly is crucial to maintaining the aesthetic appeal of your furniture.
Consider your time and convenience, too. If you lack the inclination or schedule to perform repairs yourself, a professional can quickly restore your furniture's appearance. They provide guaranteed high-quality results without the risk of further damage. In-home services can offer both efficiency and peace of mind, ensuring your cherished pieces receive the expert care they deserve.
Frequently Asked Questions
Can I Use Vinegar on All Wood Finishes?
You can't use vinegar on all wood finishes. Its acidic nature can damage many surfaces, stripping away protective coatings like varnish or lacquer, which leads to discoloration and deterioration. If you're considering using vinegar, always test it on an inconspicuous area first. For delicate finishes, it's best to avoid vinegar altogether and opt for safer cleaning methods to preserve the integrity and appearance of your wood furniture.
How Often Should I Polish My Wood Furniture?
You should polish your wood furniture based on how often you use it. For high-traffic pieces, aim to polish every six weeks, while less-used items might only need it every six months. Always keep an eye on the shine when buffing; if it isn't shining anymore, it's time to reapply. Regular dusting and occasional deep cleaning will help maintain its appearance and prolong the life of the finish.
Is It Safe to Use Water on Wood Furniture?
You should be cautious when using water on wood furniture. While a damp microfiber cloth can clean effectively, too much moisture can cause warping, swelling, and even mold growth. It's best to avoid excessive water exposure and always wipe the surface dry afterward. If you're looking for alternatives, consider using vinegar mixed with water or a wood polish, which can maintain your furniture's shine without the risks associated with water.
What Are the Best Tools for Repairing Scratches?
When you're tackling scratches, having the right tools makes all the difference. You'll want clean rags to dust off the area, scratch removers that match your wood's color, and fine sandpaper for smoothing. For deeper scratches, consider stain repair pens and a putty knife to fill and smooth any gouges. Don't forget a light layer of finish to protect your work. With these tools, you'll restore your wood beautifully!
Can Scratches Affect the Value of My Furniture?
Yes, scratches can definitely affect the value of your furniture. Minor scratches might lead to a small decrease, but deeper damage can significantly lower its worth. The quality of repairs plays a crucial role in this process; poor repairs may worsen the value loss. To understand the exact impact, it's wise to consult a qualified appraiser who can evaluate your furniture before and after any repairs are made.
Conclusion
Fixing scratches on wood furniture isn't just about aesthetics; it's about preserving the beauty of your pieces. By assessing the damage and using simple household products or polishing techniques, you can often restore their original charm. For deeper scratches, sanding and refinishing might be necessary. Remember to take preventive measures to protect your furniture in the future. If you ever feel overwhelmed, don't hesitate to seek professional help. Your furniture deserves the best care!
-
Beauty and Grooming1 month ago
Embrace Natural Glow With Bronzer-Free Accelerators
-
Beauty and Grooming1 month ago
Discover Top Outdoor Tanning Lotions Today
-
Vetted2 months ago
15 Best Affordable Sustainable Fashion Brands You Need to Know About in 2025
-
Fashion Trends2 months ago
Fall 2025 Fashion Trends: Be Ahead of the Curve!
-
Interior Design2 weeks ago
Mylar vs. Foil Balloons: The Ultimate Showdown
-
Beauty and Grooming1 month ago
Unlock Flawless Tanning With Skin Prep
-
Interior Design1 month ago
Create Your Dream Cottagecore Home Office Now!
-
Vetted2 months ago
15 Best Women's Fashion Trends of 2025 You Need to Know About