Connect with us

Interior Design

How to Drape a Throw on a Sofa

Navigate the art of draping a throw on your sofa to enhance its style and comfort—discover essential tips to elevate your living space.

Published

on

drape throw stylishly on sofa

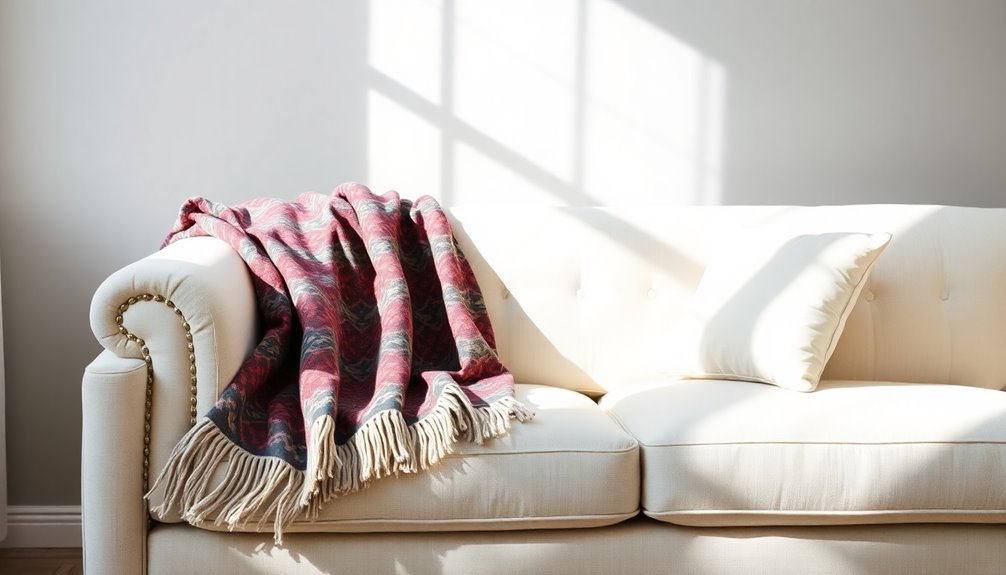
To drape a throw on your sofa, start by folding it in half lengthwise for a clean look. Drape it over the backrest, so it hangs down evenly on both sides. For a cozy vibe, let one end cascade slightly over an armrest, creating an inviting touch. You can also layer different textures to enhance visual appeal. Remember to adjust the throw regularly to maintain its shape and prevent matting. Choosing the right materials adds warmth and durability, ensuring your space feels stylish and comfortable. Discover more tips to elevate your sofa's aesthetic further.

Key Takeaways

  • Choose a lightweight throw for easy draping that won't stretch the fabric of the sofa.
  • Drape the throw over the backrest for a casual, inviting look.
  • Use a waterfall draping style to create elegant folds that enhance visual appeal.
  • Layer throws by placing a heavier one on the back and a lighter one on the armrests for comfort.
  • Regularly reposition and fluff the throw to maintain its aesthetic and prevent matting.

Introduction
introduction to new concepts

When you choose a throw for your sofa, it's important to think about how to care for it. Regular fabric care can keep your throw looking fresh, and knowing specific cleaning techniques can save you from mishaps, like red wine spills. Let's explore some practical tips to ensure your throw stays beautiful and functional.

Routine Fabric Care Tips

Caring for your throw blanket is essential to keep it looking fresh and cozy for years to come. Always check the care label for specific washing instructions, as different fabrics may require different handling. Most throws benefit from a wash with gentle detergent in cold water, since hot water can shrink or damage delicate materials.

If your throw is machine-washable, skip the fabric softeners, which can leave a residue that diminishes the blanket's softness and absorbency. Instead, focus on routine care that preserves its quality. Regularly shaking out and fluffing your throw prevents matting and bunching, helping to maintain its appearance over time.

When drying, air drying is often the best option. High heat from dryers can lead to shrinkage and deterioration of fibers, so lay it flat or hang it up to dry naturally. Following these simple tips will ensure your throw blanket continues to feel inviting and looks beautiful on your sofa. By incorporating these practices into your routine, you'll enjoy the cozy comfort of your throw for many seasons to come. Additionally, maintaining a clean indoor environment with air purifiers can further enhance the overall comfort of your living space.

Fabric-Specific Cleaning Techniques

Understanding the right cleaning techniques for different fabrics is crucial to maintaining the beauty and longevity of your throw blankets. For cotton throws, machine wash them in cold water and tumble dry on low to prevent shrinkage. Always follow the care instructions on the label for the best results. When it comes to wool throws, you should hand wash them in lukewarm water or consider dry cleaning to maintain their shape and prevent felting.

Advertisement

If you have fleece throws, machine wash them on a gentle cycle, but skip the fabric softeners; they can ruin the texture and warmth of the fleece. For throws with embellishments or delicate materials like silk, opt for spot cleaning with a mild detergent to avoid any damage.

Before you start cleaning your throws, always check the specific care instructions on the label, as different brands and materials may have unique requirements. By taking the time to understand and apply these fabric-specific cleaning techniques, you'll ensure your throws remain fresh and beautiful for years to come.

Treating Red Wine Spills

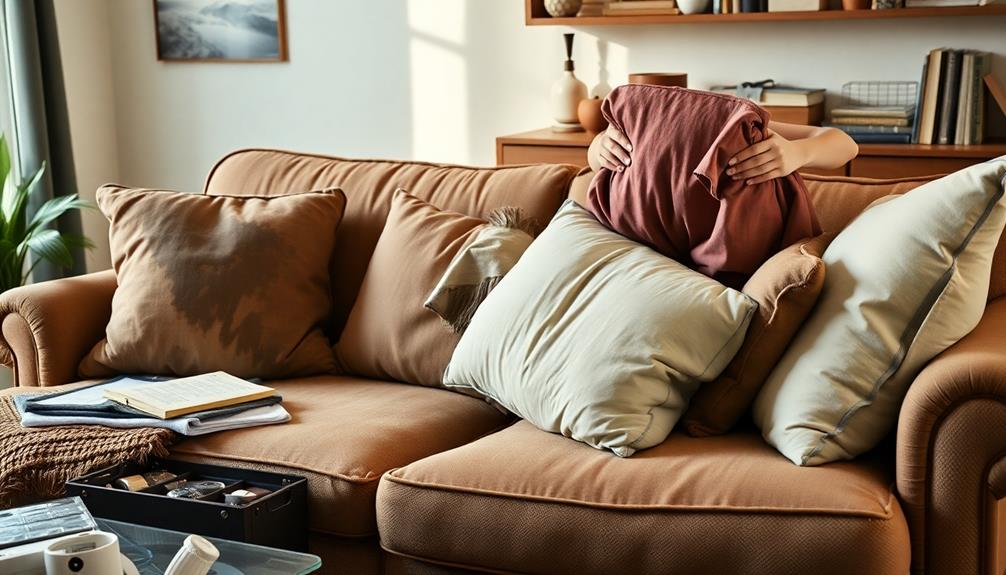
Red wine spills can quickly turn a cozy evening into a stressful situation, but acting fast can save your throw blankets. When you notice a spill on your couch, grab a clean cloth or paper towel immediately. Blot the area gently to absorb the excess liquid—don't rub, as that will only work the wine in deeper.

Next, sprinkle salt or baking soda on the spill. These natural absorbents help lift the wine, so let it sit for several minutes before vacuuming it up. For lingering stains, mix one part hydrogen peroxide with one part dish soap. Apply this solution to the stain and let it sit for 30 minutes before blotting it again with a clean cloth.

If the stain remains stubborn, consider a commercial stain remover designed specifically for wine. Make sure to follow the manufacturer's instructions carefully. Always test any cleaning solution on an inconspicuous area of your throw or couch first to avoid discoloration or damage. By taking these steps, you can maintain the style and coziness of your living space, ensuring your blankets look great and are ready for your next evening in.

Advertisement

Sofa Shielding Techniques

sofa protection methods explained

When it comes to shielding your sofa, choosing scratch-resistant fabrics is key to maintaining its look. Layering for added warmth not only enhances comfort but also boosts protection against wear. Plus, minimizing fabric friction can help keep your throw in place and your sofa looking sharp. Additionally, consider scheduling regular maintenance to ensure your sofa remains in top condition and prolong its lifespan.

Scratch-Resistant Fabric Choices

Choosing scratch-resistant fabrics for your sofa can significantly enhance its longevity and maintain its appearance. When you're looking for the perfect material, consider options like microfiber, leather, or polyester. Microfiber is particularly effective at resisting scratches and stains, making it an ideal choice if you have pets or kids. You can stylishly drape throws over your couch, adding coziness while ensuring the fabric remains protected.

Leather offers a sleek look, and it's relatively resistant to scratches, but keep in mind it requires regular maintenance to stay in top shape. Polyester blends are another great option; they're scratch-resistant, easy to clean, and can mimic the look and feel of natural fibers, giving you versatility in your décor.

Always check the fabric ratings, like the Martindale rub test, to ensure your chosen material can withstand everyday wear and tear. By selecting one of these durable fabrics, you're not just enhancing your couch's aesthetic appeal, but also ensuring it stays looking fresh and stylish for years to come. Additionally, opting for materials that are eco-friendly and safe contributes to a healthier living environment. So, as you drape those throws, you can enjoy both beauty and practicality in your living space.

Layering for Added Warmth

To create a cozy and inviting atmosphere, layering throws on your sofa is a fantastic technique, especially during colder months. By draping heavier throws, like wool or chunky knits, you'll enhance warmth and comfort, effectively trapping heat and shielding against drafts.

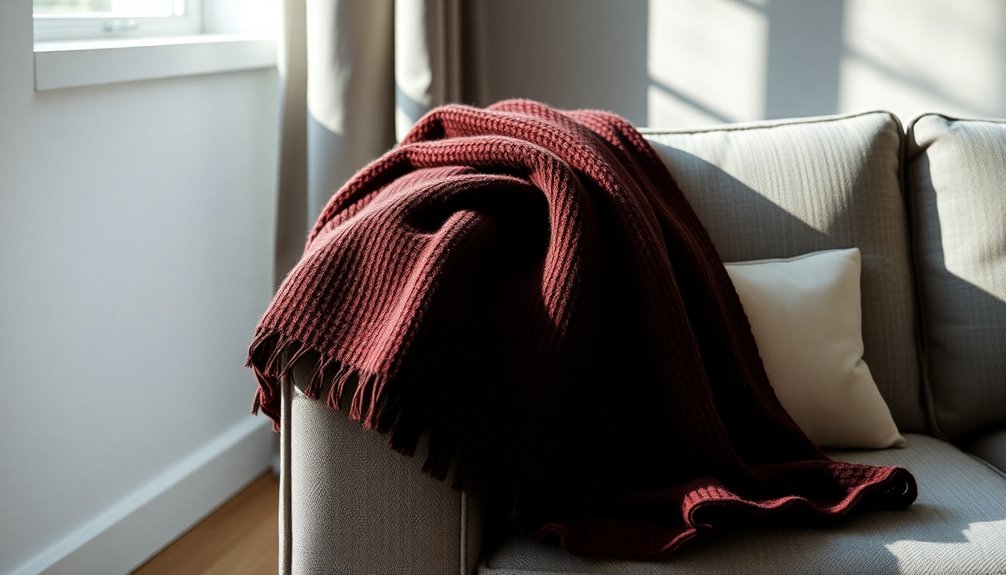
Start by selecting throws of varying textures and weights. Combining these will create a visually appealing look while maximizing warmth. Drape a thick, knitted throw over the backrest for snugness, and add lighter throws across the armrests for an inviting touch. This layering effect not only adds to the aesthetic but also provides additional insulation against temperature variations. Incorporating natural fibers in your throws, such as cotton and linen, can further enhance comfort and texture.

Advertisement

Don't forget to rotate and wash your throws regularly. Keeping them fresh ensures they continue to offer both warmth and a cozy vibe throughout the seasons. You'll find that the right combination of throws transforms your sofa into a perfect retreat, ready to embrace you on chilly days. So go ahead, play with different colors and textures to achieve that inviting look while enjoying the added warmth layering brings.

Minimizing Fabric Friction

Minimizing fabric friction is key to keeping your sofa looking great while enjoying the comfort of your throws. Start by choosing lightweight throws made from materials like cotton or fleece. These fabrics glide smoothly over your upholstery, helping to minimize fabric friction. Additionally, consider using protective covers or sofa shields beneath the throw. This barrier reduces wear and tear, extending the life of both your sofa and throw.

When selecting throws, opt for those with a soft texture and low pile. These features decrease friction, preventing snagging and damage to both the throw and your sofa's fabric. Regular rotation of your throws is a smart styling method, as it avoids uneven wear patterns. By repositioning your throws regularly, you ensure that all areas of the sofa maintain their aesthetic appeal and structural integrity.

Finally, be mindful of how you layer your throws. Excessive weight from multiple layers can increase friction and lead to fabric stretching over time. Stick to one or two lightweight throws to keep things cozy without compromising your sofa's look. Embracing these techniques will help you enjoy your throws while protecting your furniture. Additionally, consider integrating smart home devices that can monitor the environment to help maintain optimal humidity levels, which can also protect your upholstery.

Upholstery Stitching Techniques
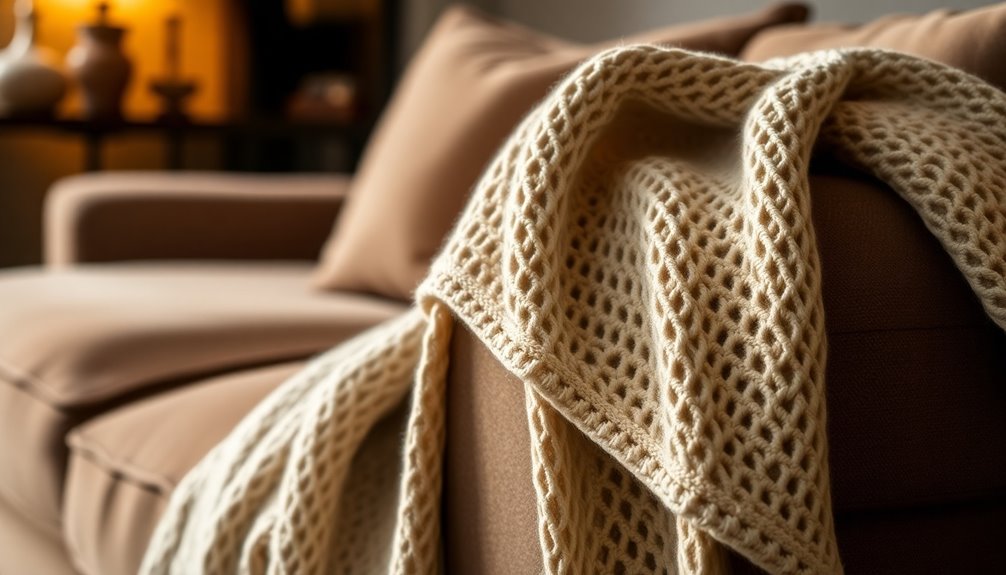
upholstery sewing methods explained

When it comes to upholstery stitching techniques, seam integrity is crucial for ensuring your sofa withstands daily use. You'll want to consider leather repair techniques if your upholstery sustains damage, as well as how cozy texture enhancements can elevate the overall look. Understanding these aspects will help you maintain both the functionality and aesthetics of your furniture.

Seam Integrity Concerns

Ensuring the seam integrity of your upholstery is crucial, especially when draping a throw over a sofa. You want to maintain a polished appearance, and using effective upholstery stitching techniques can help achieve that. For instance, double-stitched seams enhance durability and prevent fabric fraying, which is vital for keeping your throw looking sharp.

Advertisement

Topstitching not only adds a decorative element but also reinforces seam integrity, ensuring the throw stays in place without harming the underlying upholstery. When working with heavier throws, consider employing a zigzag stitch along the edges. This accommodates fabric stretch, helping to prevent distortion of both the throw and the sofa's fabric.

Opt for fabrics with a high thread count, as they're less prone to wear and tear, making them ideal for frequently styled throws. Regular inspection of stitching and seams on both the throw and the sofa is essential. Identifying potential weaknesses early allows for timely repairs, preserving the overall aesthetic and function of your furniture. By paying attention to these seam integrity concerns, you can enjoy a beautifully draped throw that enhances your living space.

Leather Repair Techniques

Leather repair techniques are essential for maintaining the integrity and appearance of your furniture. To ensure durability in your repairs, use a heavy-duty needle and thread specifically designed for leather. Two common stitching techniques you can employ are the whip stitch and the saddle stitch. The whip stitch creates a tight seam by passing the needle through both layers of leather, while the saddle stitch uses two needles for a more secure result.

Before you start stitching, prepare the leather surface by cleaning and conditioning it. This step prevents damage and promotes better adhesion during the repair. As you stitch, it's crucial to maintain consistent tension. Uneven tension can lead to puckering, which not only looks unsightly but can also cause further damage over time.

Additionally, always match the thread color and type to the leather you're repairing. This ensures that your stitching blends seamlessly with the upholstery, making your repair less noticeable. By following these techniques, you can effectively restore your leather furniture, enhancing both its functionality and aesthetic appeal.

Advertisement

Cozy Texture Enhancements

Enhancing the cozy texture of your throw with effective upholstery stitching techniques can transform its appearance and functionality. Throw blankets add warmth and comfort to your sofa, but incorporating stylish stitching can elevate their visual appeal. Techniques like topstitching and piping not only enhance the durability of your throws but also help them maintain their shape and texture while draped over the sofa.

Using contrasting thread colors can create a decorative effect, drawing attention to your throw and adding dimension to the overall look. Quilted stitching is another great option, as it provides added texture that makes your throw more inviting. Reinforced seams in upholstery stitching prevent fraying and wear, ensuring your cozy accents last even with frequent use.

Don't overlook the stitching pattern you choose, either. Whether you opt for straight or zigzag stitches, each can influence how your throw drapes, offering different styling options that enhance your sofa's aesthetic. By applying these cozy texture enhancements, you'll create a visually appealing and inviting space that's perfect for relaxation.

Personalized Throw Blanket Styles
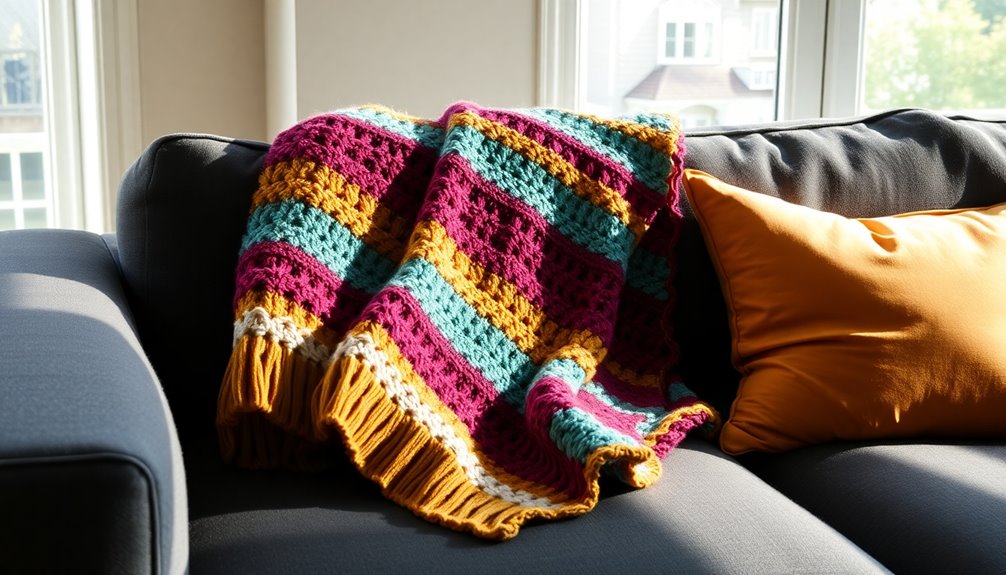
custom cozy blanket designs

Personalized throw blanket styles often reflect your unique tastes and add a special touch to your living space. By choosing throws that showcase colors, patterns, and textures you love, you can enhance the overall aesthetic of your room. Consider fabrics like chunky knit or faux fur, which not only provide a cozy feel but also introduce a touch of luxury to your sofa.

Custom monogramming or embroidery can elevate a throw blanket, creating a distinctive piece that holds sentimental value—perfect for gifts or family heirlooms. Seasonal themes can also inspire your choices; vibrant plaid patterns are great for fall, while lighter fabrics and brighter colors shine in spring and summer.

To further enhance your sofa's look, layer throw blankets with different textures. This approach not only adds visual interest but also creates a warm and inviting atmosphere. By thoughtfully selecting personalized throw blankets that resonate with your style, you can transform your living space into a cozy retreat that feels uniquely yours. Additionally, incorporating personalized throws can contribute to a sense of emotional well-being within your home environment.

Advertisement

Maintenance for Heirloom Throws

care for heirloom throws

Caring for heirloom throws is vital to preserving their beauty and longevity. Always follow the care instructions on the label to avoid damaging delicate fabrics. Regularly inspect your heirloom throws for any signs of wear and tear. If you notice loose threads or minor damages, address them promptly to maintain their quality.

When it comes to cleaning, consider professional dry cleaning for the best results, or hand wash in cold water with a mild detergent if you prefer a DIY approach. This helps ensure their longevity and keeps them looking pristine.

For storage, choose a cool, dry place. Ideally, use breathable cotton bags or acid-free tissue paper to protect your heirloom throws against moisture and pests. Avoid hanging them for long periods, as this can stretch the fabric. Instead, lay them flat or loosely roll them to prevent any distortion.

Conclusion
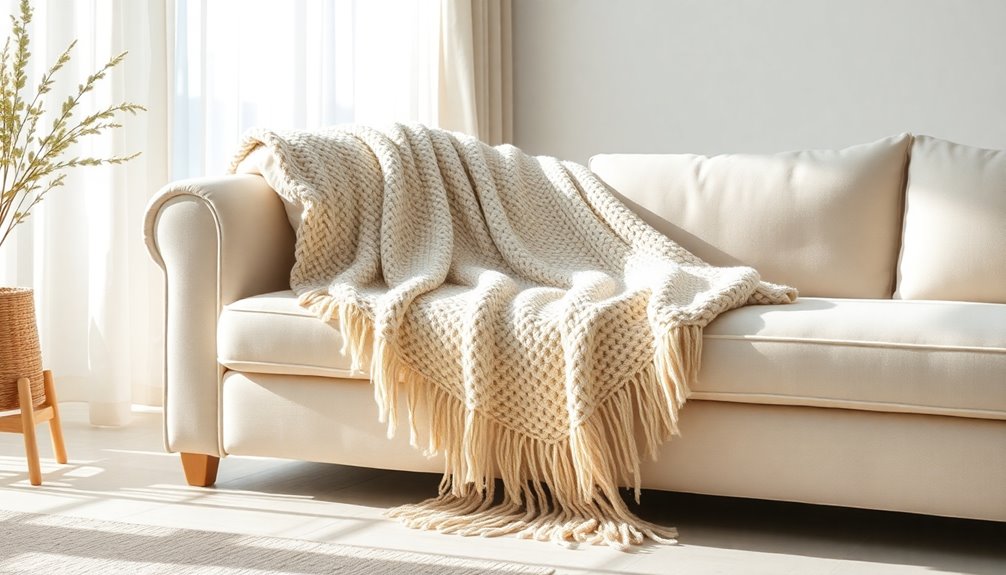
summary and final thoughts

Draping a throw on your sofa not only elevates its visual appeal but also adds comfort to your living space. By choosing the right draping technique, like the waterfall or cozy corner style, you can create a look that reflects your personal style. Remember, the way you fold your throw—whether in thirds or quarters—matters. This maintains a neat appearance while showcasing decorative edges for added flair.

Think about the placement of your throw pillows as well. They can enhance the drape's appearance and contribute to a layered look that radiates coziness. Regularly rotating your throws or experimenting with different draping styles can keep your sofa looking fresh and align with seasonal decor trends. Additionally, consider incorporating soft textiles into your decor to complement the warmth and texture of your draped throws.

Frequently Asked Questions

How Do You Drape a Throw on a Sofa?

When it comes to draping a throw, you've got several stylish options. If you want a structured look, fold the throw into thirds and let it cascade nicely. For a more casual vibe, toss it over one arm with the tassels dangling. You can also use the "Tidy Corner" technique for a polished finish. Don't forget to add decorative pillows to enhance the overall aesthetic and create a cozy atmosphere.

How Can I Make My Sofa Look Better With a Throw?

To make your sofa look better with a throw, start by choosing a color or pattern that complements your existing decor. You can layer it with decorative pillows to add texture and create a cohesive look. Consider using a decorative basket to store extra throws, keeping one corner visible for easy access. Rotating your throws seasonally can also keep the space feeling fresh and inviting, enhancing the overall aesthetic of your living area.

Advertisement

How to Keep a Throw in Place on a Sofa?

To keep a throw in place on your sofa, tuck it behind the cushions to secure it. Choose a weighted throw, like wool or chunky knit, as they tend to drape better. Picking a larger throw can also help it stay put, allowing you to drape it over the arms without it slipping off. If needed, use decorative clips for added security, and remember to adjust and fluff it regularly for a polished look.

How Do You Cover a Couch With a Throw?

To cover a couch with a throw, start by folding the blanket lengthwise into thirds for a tidy appearance. Then, drape it over the back or arm of the couch, letting it cascade down for a cozy vibe. Adjust the placement to showcase any decorative edges or fringes. If you want a structured look, lay it neatly across the seat, ensuring it doesn't hang below the couch for a polished finish.
Interior Design

Master the Art of Dress Design

Master the art of dress design by exploring essential techniques and materials that will transform your creations into stunning masterpieces. Discover more secrets inside!

Published

on

mastering dress design techniques

To excel in the craft of dress design, it is important to seek inspiration from a variety of sources such as nature and the history of fashion. Carefully select fabrics; materials like chiffon and silk are ideal for creating sophisticated looks, while cotton is great for more casual styles. Precision in cutting and sewing techniques is crucial, so investing in the right tools and ensuring accurate measurements is key. Remember to go through the fitting process—building a prototype with muslin can help you achieve the perfect silhouette. Pay attention to flexibility, comfort, and durability in your designs. Keep learning and you will discover even more tips to enhance your skills.

Key Takeaways

  • Draw inspiration from diverse sources such as nature, art, and fashion history to spark creativity in your designs.
  • Select fabrics based on the desired look and feel, considering options like chiffon for maxi dresses and silk for evening wear.
  • Utilize precise cutting and sewing techniques, ensuring accurate measurements and appropriate stitching for different fabric types.
  • Create fitting prototypes to test comfort and silhouette, making adjustments based on the wearer's feedback for the best fit.
  • Incorporate unique design elements and embellishments while ensuring durability and functionality, particularly for specialized costumes.

Design Inspiration and Color Selection

creative palette and concepts

When diving into dress design, finding the right inspiration can spark your creativity and set the tone for your entire project. When diving into dress design, finding the right inspiration can spark your creativity and set the tone for your entire project. Sometimes, ideas can stem from unexpected moments, like scenic landscapes or events filled with energy and emotion. For instance, choir retreat creativity ideas may provide unique color palettes, flowing silhouettes, or melodic themes that can influence the design process in unexpected and harmonious ways.

Begin by exploring various sources like nature, art, or fashion history to ignite your imagination. Consider the occasion for which you're designing; a formal event might call for classic silhouettes and rich hues, while a summer gathering allows for playful patterns and vibrant colors.

Pay attention to your color scheme, ensuring it complements the theme and the wearer's complexion. Don't shy away from unique embellishments like lace or sequins to add flair.

Ultimately, focus on creating a cohesive design that reflects your vision and resonates with the intended audience, making the dress a true standout piece.

Fabric and Material Choices

textile selection and options

Finding the perfect fabric is just as important as choosing the right design inspiration and color scheme. Your fabric choice will greatly impact the dress's overall look and feel. Consider the style you're aiming for—fluid fabrics like chiffon and silk work wonders for maxi dresses, while cotton and wool suit structured styles.

Here's a quick reference table to help you decide:

Advertisement
Fabric Type Best Use
Chiffon Maxi dresses
Silk Elegant evening wear
Cotton Casual wear
Wool Structured styles

Explore sustainable options too, like organic cotton or linen. Always assess the fabric's drape, texture, and weight to make sure it enhances your design.

Cutting and Sewing Techniques

fabric manipulation and assembly

Mastering cutting and sewing techniques is essential for achieving a professional finish in dress design. Start by gathering your tools: sharp scissors, rotary cutters, pins, and a reliable sewing machine.

Accurate measurements with rulers and tape measures will guarantee precision in your cuts. When cutting fabric, always use a flat surface to prevent shifting, and be mindful of the grainline for ideal drape.

Choose appropriate stitching techniques like straight, zigzag, or backstitch for different fabric types. Keep your seams neat by serging the edges to prevent fraying.

Throughout the process, regularly check the fit on a dress form or the intended wearer, making adjustments as needed. This attention to detail sets the foundation for your stunning designs to shine.

Fitting and Alteration Process

tailoring and adjustments procedure

In the fitting and alteration process, accurate measurements are essential for achieving the perfect fit. Start by taking initial measurements, then create a fitting prototype using muslin or similar fabric.

Schedule fitting sessions with the wearer to assess comfort and ease of movement. As you adjust, focus on areas like hems, waistlines, and seams, ensuring each alteration enhances the overall silhouette.

Advertisement

Don't hesitate to make multiple adjustments, as achieving that tailored look often requires several iterations. Always prioritize the wearer's feedback; it's invaluable for fine-tuning the design.

Specialized Design Considerations

tailored design requirements focused

Understanding specialized design considerations is vital when creating garments for specific purposes, such as dance costumes or theatrical attire.

You'll want to prioritize flexibility and movement by selecting fabrics like spandex or chiffon, which allow for ease of motion. Durability is essential, so make certain that your materials can withstand the rigors of performance.

Reflect the performance's theme through color and design elements, integrating functional features like breathability and stretch.

Don't forget to take into account the unique requirements of each specialized costume, such as quick changes or specific character details.

Frequently Asked Questions

How Do I Choose the Right Dress Style for My Body Type?

To choose the right dress style for your body type, identify your shape, embrace your best features, and experiment with silhouettes that enhance your figure. Don't forget to take into account comfort and personal style for confidence!

Advertisement

What Are the Best Online Resources for Dress Design Inspiration?

Finding online dress design inspiration is like discovering a treasure chest! Check out Pinterest, Instagram, or dedicated fashion blogs. They're filled with stunning visuals and ideas that'll spark your creativity and ignite your passion for design!

How Can I Incorporate Sustainable Practices Into My Dress Design?

You can incorporate sustainable practices by choosing eco-friendly fabrics, sourcing materials locally, and minimizing waste. Consider upcycling old garments and using non-toxic dyes to create beautiful, environmentally-conscious designs that reflect your commitment to sustainability.

What Are the Common Mistakes to Avoid in Dress Design?

Designing a dress is like steering through a maze; avoid common mistakes like ignoring fit, neglecting fabric choice, and overlooking details. Trust your instincts, seek feedback, and embrace creativity to guarantee a stunning final piece.

How Do I Market and Promote My Dress Designs Effectively?

To market your dress designs effectively, showcase your creations on social media, engage with followers, collaborate with influencers, attend fashion events, and create visually appealing content that highlights your unique style and craftsmanship.

Conclusion

As you wrap up your journey in dress design, remember, every stitch you make is a step towards your unique masterpiece. Embrace the challenges and triumphs, knowing they're just opportunities in disguise. When you blend creativity with technique, you're not just crafting garments; you're weaving stories that resonate with the heart. So, keep experimenting, learning, and refining your skills. After all, every designer's path is sprinkled with delightful surprises waiting to be uncovered.

Advertisement
Continue Reading

Interior Design

How to Repair Plastic Wicker Furniture

Transform your damaged plastic wicker furniture into a like-new masterpiece with simple repair techniques that will surprise you. Discover the step-by-step process now!

Published

on

repairing plastic wicker furniture

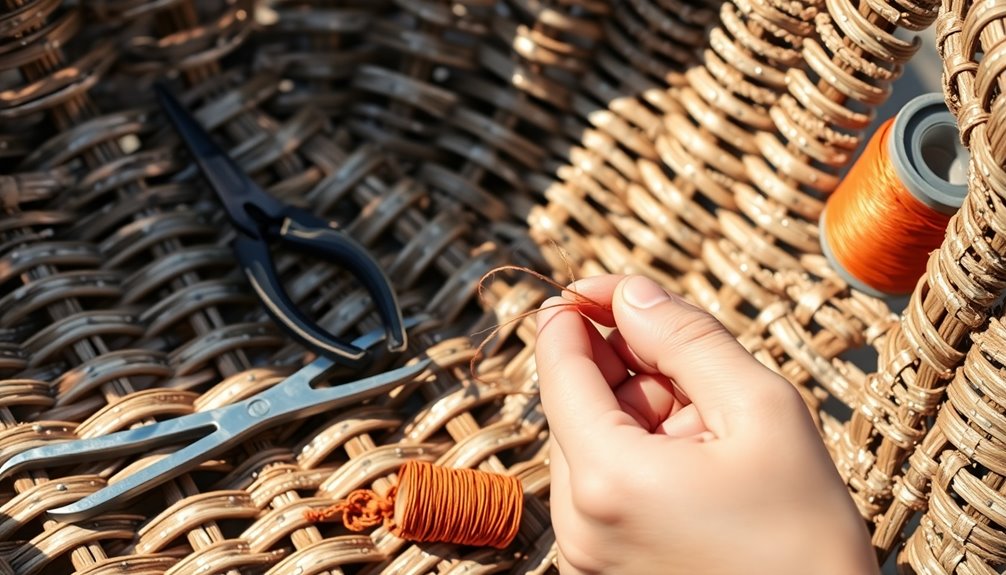
You can easily repair plastic wicker furniture by first inspecting it for any damaged strands or a compromised frame. Gather your tools, including scissors and pliers, and collect replacement strips in matching size and color. Clean the furniture with mild soap and water before removing any frayed strips. Carefully weave in the new strips while maintaining the original pattern. Secure everything with a hot glue gun or resin epoxy. Finally, do a thorough clean and apply a protective sealant. For detailed steps and tips, there's so much more to explore on this topic!

Key Takeaways

  • Inspect plastic fibers for fraying or breaks, and check the frame for cracks to assess repair needs.
  • Gather essential tools and materials, including replacement strips, adhesive, and a hot glue gun for the repair process.
  • Remove damaged strips carefully, noting the weaving pattern, and measure new plastic fibers for replacement.
  • Weave new strips into the furniture, securing them with clamps, and ensure a professional finish by matching color and width.
  • Apply strong adhesive to secure repairs and perform regular maintenance to extend the lifespan of your plastic wicker furniture.

Assessing the Damage

evaluating the impact severity

When assessing the damage to your plastic wicker furniture, you should carefully inspect it for any signs of wear. Start by checking the plastic fibers for fraying, looseness, or breaks. Look closely at the frame for any cracks or splits that could compromise its integrity. Pay attention to the weave pattern, as damaged strands may need replacing. If you notice discoloration or fading, it might indicate areas that require additional repair or painting.

Next, evaluate the extent of the damage. Count the number of affected strands and measure how much new fiber you'll need. Weigh the old material to estimate the amount of new plastic wicker necessary. Check whether the damage is isolated to the weaves or if the frame and joints show signs of wear too. Consider how harsh weather, UV rays, or chemicals may have impacted your furniture. Additionally, synthetic materials like polyethylene or PVC used in resin wicker furniture provide weather resistance that may help in assessing potential durability issues.

Finally, assess the type of wicker. Determine if it's synthetic or natural, as this affects your repair approach. Check the frame material, like aluminum tubing, and identify the weave type to ensure consistency in your repairs. Knowing these details will guide you in deciding the best repair method.

Gathering Tools and Materials

collecting necessary supplies

What tools and materials do you need for repairing your plastic wicker furniture? Start by gathering a few essential tools: scissors or a box cutter for cutting broken rattan strips, needle-nose pliers for precision tasks, and conventional pliers for gripping and manipulating the resin wicker strands. Wire cutters will help you remove any excess or damaged pieces. Additionally, remember that plastic wicker is a weaving style, which means you'll want to pay attention to how the materials are woven during the repair.

Next, collect the materials necessary for the repair. You'll need replacement plastic rattan strips that match the original size and color. For securing these strips, use resin epoxy or high-quality adhesive; wood glue can also be an alternative for some repairs. Don't forget a paintbrush and matching paint to restore the original look, along with a waterproof coating for added protection.

Additional accessories like spring clamps will hold your wicker in place during the repair. Felt furniture glide pads prevent marring, while wire can reinforce the wicker weave. If you're attaching wicker to aluminum frames, a drill and wire nails will be handy, along with a tack hammer to secure everything. With these tools and materials ready, you'll be well-equipped for the repair process ahead.

Advertisement

Cleaning the Furniture

dust and polish furniture

After gathering your tools and materials, it's important to clean your plastic wicker furniture to ensure a successful repair. Start by using a soft brush or a vacuum cleaner with a brush attachment to remove loose dirt and debris. Next, mix a small amount of mild soap with warm water in a bucket to create your cleaning solution. Dip a soft cloth or sponge into the soapy water, wring it out, and gently wipe down the entire surface of the wicker, working in the direction of the weave to avoid damaging the fibers.

For tougher dirt, use a soft-bristled brush or toothbrush to scrub gently. You can also mix equal parts of water and white vinegar for a natural cleaning solution. It's also essential to consider regular maintenance to preserve the beauty and durability of your wicker furniture. Rinse the furniture thoroughly with clean water to remove any soap residue, and use a clean, damp cloth to wipe away remaining suds. Finally, dry the furniture with a soft cloth to prevent water spots. Place it in a well-ventilated area or use a fan to speed up drying. Avoid sitting on the wicker while it's wet to prevent deformation, ensuring your furniture stays in great shape.

Removing Damaged Strips

discarding damaged components safely

Repairing your plastic wicker furniture requires careful attention to detail, especially when it comes to removing damaged strips. Start by inspecting the furniture for any frayed, severed, or chewed-up strands that need replacement. Look closely at the weaves to identify any loose or broken areas that could compromise the structure. Once you've pinpointed the damaged strips, take note of their color and width, as this will help you find matching replacements later. Additionally, remember that synthetic material used in resin wicker is designed to withstand various weather elements, which can enhance the longevity of your repairs.

To remove the damaged strips, use pliers or a sharp knife. Carefully cut away the damaged fibers, ensuring you extract them one at a time to maintain the original weaving pattern. Cut the strands on each side to prepare for replacement, but be cautious not to pull too tightly on surrounding strands to avoid warping. If needed, use needle-nose pliers to handle smaller, intricate pieces.

For cutting damaged ends, use scissors or a box cutter to create clean cuts close to the intact parts of the weave. Remove any frayed or loose segments to create a solid base for your new fibers. This meticulous process sets you up for a successful repair.

Measuring New Fibers

new fiber measurement techniques

With the damaged strips removed, it's time to focus on measuring new fibers for replacement. First, determine the original length by measuring the intact plastic wicker fibers. This ensures the new fibers match perfectly, maintaining your furniture's aesthetic. Use the original strips as a guide, paying close attention to the pattern and shape to ensure accuracy. When measuring, note any variations in length that result from the weaving style, and measure from one end of the weave to the other to capture the full length.

Next, select the right material. Make sure the new plastic fibers match the original in type, color, and texture. If the original furniture used synthetic resin, stick with that material. Also, verify the diameter of the new fibers to ensure they align with the old ones, and ensure they have the same flexibility and durability. Identifying the extent of damage can significantly influence your choice of replacement materials.

Finally, consider the weave pattern. Identify the original weaving style and replicate it accurately, noting the direction and tension. Cut the new fibers slightly longer than measured to accommodate adjustments and reduce waste. Once woven, you can trim any excess material for a neat finish.

Advertisement

Cutting Replacement Strips

trimming new material pieces

Cutting replacement strips is a crucial step in restoring your plastic wicker furniture to its former glory. Start by gathering your tools: scissors or a box cutter, a sharp utility knife, and a craft knife for finer details. You'll also need a cutting mat to provide stability during the process.

Before you begin cutting, make sure the furniture is clean and completely dry. A clear workspace is essential to avoid accidents, so remove any clutter. Use a ruler or straightedge to ensure your cuts are straight and precise. Protect your surface with a drop cloth or old sheets.

When cutting, remove the damaged strips by cutting on each side, then prepare your new rattan strips slightly longer than necessary. If the design requires it, consider using a miter or angled cut. Always cut away from your body to prevent injuries. If you encounter stubborn pieces, pliers can help grip them effectively. Maintaining the integrity of your furniture is important, especially since regular maintenance can prevent further deterioration.

For safety, wear protective gloves and safety glasses, and make sure your cutting tool is sharp to avoid tearing the rattan. Store your cut strips neatly to prevent tangling and keep everything organized.

Weaving New Strips

creating vibrant fabric patterns

Weaving new strips into your plastic wicker furniture is essential for restoring its original look and durability. Start by measuring the length of the new plastic fibers you'll use to replace the old ones, and cut them to size. If the material feels too stiff, soak the new strips in warm water for about 30 minutes to make them more pliable.

When you're ready to weave, insert the new strip from the backside of the weave to hide the cutting end. Follow the original weaving pattern closely to maintain consistency. As you work, use clothespins or small clamps to hold the new strips in place, making it easier to manage the weaving process. Additionally, be sure to use replacement wicker yarn that matches the original material for a seamless look.

Make sure the new strips blend in with the old ones by matching the width and color as closely as possible. Stagger the joining points of the old and new pieces to avoid creating a straight line. Be cautious not to pull too tightly on the new strands, as this can warp other areas. Finally, use needle-nose pliers for precision when tucking the new strips into place, ensuring a neat and professional finish.

Advertisement

Securing the Repairs

repair process assurance needed

Once you've woven in the new strips, securing the repairs is crucial for ensuring your plastic wicker furniture remains sturdy and visually appealing. Start by using a hot glue gun to attach the new plastic fibers to the furniture frame. For a stronger hold, apply resin epoxy to the ends of the new strips and press them into place until the adhesive cures. Trim any excess plastic fibers, and securely attach them to the frame with a nail gun or staples. Make sure the ends of the new strips are on the underside or back of the furniture for a clean look.

Next, reinforce weak joints and connections by using clamps to hold the joints while applying strong glue, like E600, which is waterproof. Ensure that all loose ends are secured and reinforce the connections further by gluing the strips to the frame with resin epoxy. A thorough assessment of the joints can help identify any areas that need additional support. Check for any rust on metal parts and remove it before applying a new topcoat. Finally, inspect all joints to ensure they're tightly secured, preventing any future damage and keeping your furniture in top shape.

Final Cleaning and Touch-ups

cleaning and finishing touches

To achieve a polished finish on your plastic wicker furniture, start with a thorough cleaning. Begin by dusting and vacuuming the surfaces. Use a soft brush attachment or a feather duster to remove loose dirt. A handheld vacuum works wonders for cleaning debris from the weave, especially in the fissures and crevices where dust tends to accumulate.

Next, mix a small amount of mild dish soap with warm water—about one tablespoon of soap to two cups of water. Wipe down the entire surface with a soft cloth or sponge, focusing on stains or sticky spots. For stubborn grime, create a vinegar solution using equal parts white vinegar and water. Apply it with a cloth, gently scrubbing the affected areas. Additionally, remember that proper care is crucial in preventing damage from moisture and environmental factors.

After cleaning, thoroughly rinse the furniture with clean water to eliminate any soap or vinegar residue. Use a garden hose or bucket for rinsing, then dry the furniture with a soft cloth to prevent water spots. Finally, allow it to air dry completely in a well-ventilated area, avoiding direct sunlight, to ensure it's ready for use.

Frequently Asked Questions

Can I Use Regular Glue Instead of a Hot Glue Gun?

You can try using regular glue instead of a hot glue gun, but it might not be the best choice. Regular glue dries slowly, making your repairs take longer and less stable initially. It can also be messier to apply and may not bond well with plastic materials. If you're looking for quick and effective results, a hot glue gun is a more reliable option for your project.

How Long Does the Repair Process Typically Take?

The repair process typically takes a few hours, but it really depends on the extent of the damage. You'll spend about 15-30 minutes inspecting the furniture and gathering tools. Cleaning and identifying damage can take another 20-60 minutes. Removing broken parts and weaving in new ones might take an hour or more. Finally, allow time for adhesives and paint to dry, which could add several hours to the overall process.

Advertisement

Is It Necessary to Repaint the New Strips?

It's often necessary to repaint new strips to ensure they match the original color of your furniture. If there's a noticeable difference, repainting helps maintain a uniform look and keeps your furniture aesthetically pleasing. Additionally, environmental factors can cause fading, making it important to refresh the paint. By repainting, you enhance the overall appearance and prolong the life of your furniture, ensuring it remains as beautiful as when you first got it.

Can I Use Fabric Instead of Plastic for Repairs?

You can't use fabric instead of plastic for repairs. Fabric just doesn't match the durability and weather resistance that plastic wicker offers. It can't replicate the structural integrity or support necessary for the furniture's shape and function. Plus, fabric wears out faster and requires more maintenance. You'd also change the look significantly, which might not be what you want. Stick with plastic for a reliable and long-lasting repair.

What Should I Do if the Damage Is Extensive?

If the damage is extensive, you'll need to assess whether a full replacement is the best option. Inspect the furniture thoroughly to gauge the extent of the wear and tear. If multiple sections are affected, consider replacing the entire piece for a more uniform look. You might also want to consult a professional or look for similar styles to ensure you find a suitable replacement that meets your needs.

Conclusion

Repairing your plastic wicker furniture isn't as daunting as it seems. By assessing the damage, gathering the right tools, and carefully replacing the damaged strips, you can restore your furniture to its former glory. A little cleaning and touch-up work can make a big difference too. Remember, you've not just fixed the furniture; you've also saved money and extended its life. So, get started on those repairs and enjoy your revitalized outdoor space!

Advertisement
Continue Reading

Interior Design

Transform Your Table With a Golf Centerpiece

Find out how to create a captivating golf centerpiece for your table that will leave your guests in awe and eager for more ideas.

Published

on

golf centerpiece table transformation

You can turn your table into a stunning golfing paradise with a captivating golf centerpiece. Begin by choosing a solid base and laying artificial turf or green carpet for a lifelike putting surface. Enhance it with vibrant miniature golf accessories such as colorful balls, small windmills, and even framed vintage scorecards. Include personal details that showcase your love for golf, and elevate the mood with appropriate lighting. Ensure everything is tightly secured to prevent any wobbling during your gathering. By adding unique elements, you will create a captivating atmosphere that delights your guests. There is much more to discover on this creative adventure.

Key Takeaways

  • Use a sturdy flat base, such as artificial turf or green carpet, to create a stable and visually appealing putting surface.
  • Incorporate vibrant miniature golf accessories like colorful balls, tiny windmills, and flags to enhance the playful ambiance.
  • Personalize the centerpiece with signed golf balls and framed vintage scorecards to reflect unique golfing experiences.
  • Utilize effective lighting techniques, such as LED strips and battery-operated tea lights, to create a warm and inviting atmosphere.
  • Ensure stability by securing elements with hot glue and placing heavier items at the base to prevent shifting.

Choosing the Right Materials

selecting suitable materials wisely

When creating a golf centerpiece, selecting the right materials is essential for achieving a realistic and engaging display.

Start with a sturdy and flat base to guarantee stability, preventing any wobbling during your event. For the putting surface, consider using artificial turf or indoor/outdoor green carpet to mimic the lush appearance of a golf course.

Adding green felt or table runners can enhance texture and depth. Don't forget to incorporate floral elements and memorabilia, like fresh greenery and vibrant flowers, to elevate your centerpiece.

These details not only enhance the visual appeal but also create a polished look that resonates with golf enthusiasts. By choosing the right materials, you'll set the perfect stage for your centerpiece.

Crafting the Perfect Putting Surface

creating ideal putting greens

With the right materials in place, you can now focus on crafting the perfect putting surface for your golf centerpiece.

Start by laying out your chosen green carpet or artificial turf, ensuring it's smooth and flat for a realistic look. Cut the material to fit your table size precisely, creating a seamless appearance.

Advertisement

To enhance authenticity, add white lines and small holes to simulate a putting grid and ball targets. Consider introducing playful elements, like mini obstacles, to elevate the design further.

This attention to detail will create an engaging and visually appealing putting surface, setting the stage for the finishing touches that will make your centerpiece truly unforgettable.

Enjoy the process, and let your creativity shine!

Adding Miniature Golf Accessories

enhancing miniature golf experience

To transform your golf centerpiece into an enchanting display, adding miniature golf accessories is essential.

Start by selecting vibrant miniature golf balls that catch the eye and complement your theme. Incorporate fun putting green obstacles like tiny windmills, bridges, and flags to engage your guests and create a playful atmosphere.

You can also use miniature golf clubs and themed items to elevate the overall ambiance. These accessories not only enhance the visual appeal but also spark conversation among your guests.

Advertisement

For a cohesive look, guarantee that all accessories maintain a consistent color scheme or style.

Personalizing Your Centerpiece

customized centerpiece design ideas

Personalizing your golf centerpiece adds a unique touch that resonates with your own golfing experiences.

You can easily make your centerpiece reflect your passion for the sport by incorporating personal elements. Consider these ideas to elevate your design:

  • Showcase signed golf balls: Display them in clear cases, adding a personal touch and sparking conversations.
  • Include vintage scorecards: Frame scorecards from memorable rounds, highlighting significant moments in your golfing journey.
  • Use themed mini decorations: Incorporate tiny golf clubs, flags, or even a replica of your favorite course.

Displaying Memorabilia Creatively

creative memorabilia display techniques

Memorabilia can transform your golf centerpiece into a conversation starter that reflects your passion for the sport.

Start by displaying signed golf balls in clear acrylic cases, allowing guests to admire their authenticity.

Frame vintage scorecards from memorable tournaments in antique frames or shadow boxes to add a touch of nostalgia.

You could also incorporate miniature golf clubs and accessories, enhancing the overall theme while showcasing your personality.

Advertisement

Consider mixing in vibrant floral arrangements with mini flags and themed decor for an engaging visual experience.

This combination of elements not only personalizes your centerpiece but also creates a dynamic display that captures the spirit of golf, inviting stories and discussions among your guests.

Utilizing Effective Lighting Techniques

mastering lighting for impact

Creating an inviting atmosphere for your golf centerpiece involves more than just the arrangement of memorabilia; lighting plays a key role in enhancing the overall aesthetic. Strategically placed soft lighting can highlight key elements of your golf memorabilia, creating a warm and welcoming ambiance that draws attention to the centerpiece. Incorporating LED lights not only offers energy efficiency but also connects to the broader benefits of sustainable fashion by promoting conscious choices that reduce environmental impact. By blending thoughtful design with eco-friendly solutions, your golf display becomes both visually appealing and socially responsible.

Proper lighting can highlight your centerpiece's details and create a warm ambiance for your guests.

Consider these effective lighting techniques:

  • LED Light Strips: These can be placed along the table's edge to cast a soft glow, drawing attention to your centerpiece.
  • Battery-Operated Tea Lights: Scatter these around your display for a charming, flickering effect that mimics candlelight.
  • Small LED Spotlights: Position these to focus on specific elements like signed golf balls or floral arrangements, creating a dramatic impact.

Ensuring Stability and Security

stability and security assurance

Guaranteeing the stability and security of your golf centerpiece is essential for maintaining its visual appeal throughout your event. Start by placing your centerpiece on a sturdy, flat surface to prevent wobbling.

Consider using artificial turf or green carpet as your base, as it provides a solid foundation. Secure all elements using hot glue or floral adhesive to keep them in place. Incorporating heavier items at the base can also help prevent shifting.

Advertisement

If you're adding personal memorabilia, like signed golf balls, use clear acrylic cases for stability and to enhance visibility.

Frequently Asked Questions

What Themes Can I Use for a Golf Centerpiece?

You can explore themes like classic golf courses, miniature tournaments, or even a whimsical garden party. Incorporate vibrant colors, personalized memorabilia, and fun obstacles to create an engaging and memorable centerpiece that reflects your passion for golf.

How Much Time Does It Take to Create a Golf Centerpiece?

Creating a golf centerpiece is like crafting a miniature masterpiece; it usually takes you about two to three hours. You'll gather materials, arrange elements, and add personal touches for a unique display that wows.

Can I Use Real Grass for My Centerpiece?

You can use real grass for your centerpiece, but it requires care and maintenance. It might wilt quickly without proper light and water, so consider using artificial alternatives for a longer-lasting, low-maintenance option.

Where Can I Find Unique Golf Memorabilia?

Oh, because everyone's got a secret stash of unique golf memorabilia, right? Check online marketplaces, local sports shops, or auctions. You'll uncover treasures that'll make any golf enthusiast drool—just don't blame me for the obsession!

Advertisement

What Budget Should I Expect for a Golf Centerpiece?

You should expect to budget between $50 to $300 for a golf centerpiece, depending on materials and customization. Focus on quality elements like artificial turf, accessories, and decorations to truly elevate your display.

Conclusion

As you lay the final pieces of your golf centerpiece, envision your table as a vibrant fairway, where laughter and stories putt around like enthusiastic players. Each accessory is a birdie waiting to happen, and the lighting dances like the sun setting over a perfect round. With your creative touch, you've transformed an ordinary table into a golf haven, inviting all to step up, take a swing at conversation, and celebrate the spirit of the game together.

Continue Reading
Advertisement

Affiliate disclaimer

As an affiliate, we may earn a commission from qualifying purchases. We get commissions for purchases made through links on this website from Amazon and other third parties.

Advertisement

Vetted

unexpected plot twist revealed unexpected plot twist revealed
Vetted2 hours ago

Julia Roberts’ New Movie: The Twist No One Saw Coming

Hold on tight for Julia Roberts' latest film, where a shocking twist awaits—can you handle the emotional depth and societal...

stylish and warm peacoats stylish and warm peacoats
Vetted4 hours ago

15 Best Men’s Peacoats to Keep You Stylish and Warm This Season

Amidst the winter chill, discover the 15 best men's peacoats that blend style and warmth—find your perfect fit to elevate...

oscar isaac s impactful performance oscar isaac s impactful performance
Vetted1 day ago

Oscar Isaac Dune: The Scene That Left Audiences Speechless

Keen to discover how Oscar Isaac's emotional portrayal of Duke Leto Atreides captivated audiences? Dive deeper into this unforgettable cinematic...

best single edge razors best single edge razors
Vetted1 day ago

14 Best Single Edge Razors for a Close, Comfortable Shave

You won't believe the incredible options available for single edge razors that promise a close, comfortable shave—discover your perfect match...

secret black friday deals secret black friday deals
Vetted2 days ago

Black Friday Wireless Earbuds: The Secret Deals You Can’t Miss

Surprising Black Friday deals on wireless earbuds await, promising unbeatable savings and features—discover what you can score this season!

effective core strengthening workouts effective core strengthening workouts
Vetted2 days ago

15 Best Ab Workouts for a Stronger Core: Get Ready to Tone Up

Get ready to discover the 15 best ab workouts that will transform your core, but which one will be your...

chase stokes age revealed chase stokes age revealed
Vetted3 days ago

Chase Stokes Age: The Surprising Truth That’s Shocking Fans

I was shocked to discover Chase Stokes' true age when he starred in "Outer Banks"—you won't believe what this reveals...

stylish and comfortable men s footwear stylish and comfortable men s footwear
Vetted3 days ago

15 Best Men’s Black Dress Shoes That Combine Style and Comfort

Meet the ultimate guide to 15 stylish and comfortable men's black dress shoes that elevate any outfit—discover your perfect pair...

emerging talent reshaping industry emerging talent reshaping industry
Vetted4 days ago

Dominic Sessa: The Unknown Talent About to Change Everything

Learn about Dominic Sessa, the rising star poised to revolutionize Hollywood, as he embarks on a journey filled with unexpected...

gifts for new dads gifts for new dads
Vetted4 days ago

11 Best Gifts for First-Time Dads That Will Make Their Journey Even More Special

Keep the excitement alive with these thoughtful gifts for first-time dads that celebrate their unique journey—discover the perfect present that...

brendan fraser s surprising return brendan fraser s surprising return
Vetted5 days ago

What Happened to Brendan Fraser? The Shocking Comeback You Won’t Believe

The incredible journey of Brendan Fraser reveals shocking struggles and a remarkable comeback that will leave you eager to learn...

top men s duffle bags top men s duffle bags
Vetted5 days ago

15 Best Men’s Duffle Bags for Every Adventure in 2024

Journey through the top 15 men's duffle bags of 2024 and discover which one will elevate your next adventure! You...

Trending

Copyright © 2024 StyleGuru.org Affiliate disclaimer As an affiliate, we may earn a commission from qualifying purchases. We get commissions for purchases made through links on this website from Amazon and other third parties.