Interior Design
How to Ship Furniture to Another State
Get ready to discover essential tips for shipping furniture across state lines—your items deserve the best care and protection during transit.
To ship furniture to another state, start by understanding the costs, which can range from $300 to over $4,000 depending on distance and item size. Prepare your furniture by cleaning it, inspecting for damages, and disassembling larger pieces if needed. Use protective wrapping and sturdy packing materials to avoid damage. Choose a shipping method like Less-Than-Truckload (LTL) for smaller loads or freight shipping for larger ones. Don't forget to compare quotes to save money. With the right preparation and method, your furniture will arrive safely. There's more to consider, so keep exploring your options.
Key Takeaways
- Determine shipping costs based on distance, size, and weight to budget accordingly for interstate furniture transport.
- Disassemble large items and securely wrap fragile parts to minimize damage during shipping.
- Choose the right shipping method, such as LTL or consolidated shipping, for cost-effectiveness based on your load size.
- Research and compare quotes from various carriers to find the best rates and services for long-distance shipping.
- Use tracking tools and maintain communication with the carrier to stay updated on your shipment's status.
Understanding Shipping Costs
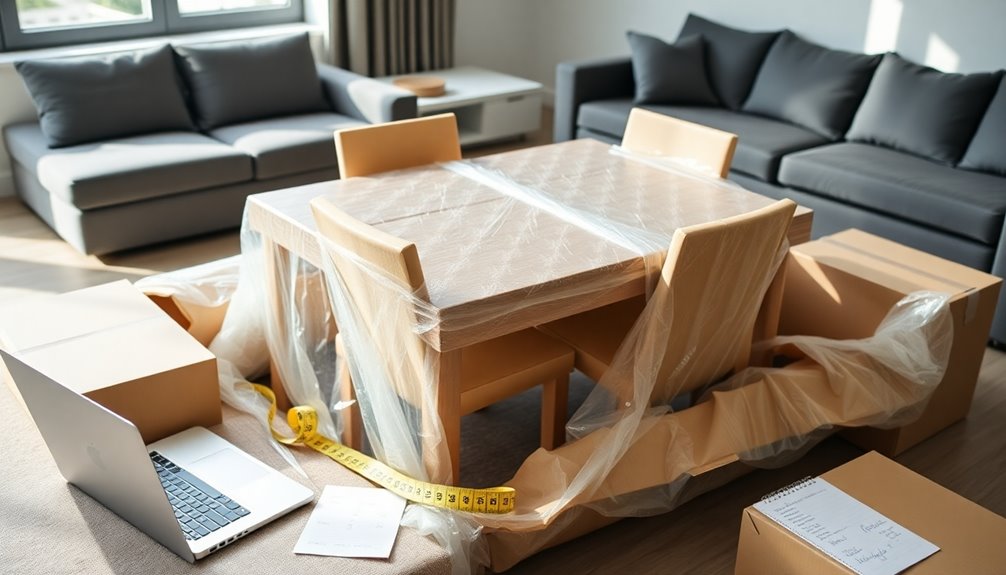
When it comes to shipping furniture, understanding shipping costs is essential for budgeting your move. The distance you're shipping significantly impacts the overall price. Local deliveries typically range from $75 to $250, while long-distance shipping can set you back anywhere from $300 to $600 or more. If you're moving cross-country, be prepared for costs that can soar to $4,000 for multiple pieces.
Freight class also plays a crucial role in determining your shipping costs. This classification depends on the density and contents of your packages. Using Less Than Truckload (LTL) freight can help you save money, especially if you have an existing carrier account, as it often offers lower rates. Additionally, it's important to note that distance significantly impacts shipping quotes, as larger distances typically incur higher costs.
You should also consider additional fees for oversized or fragile items, which might require special handling and packaging. Extra services like expedited shipping or white glove services will add to your expenses. Remember, comparing quotes from different carriers can reveal hidden savings, so don't hesitate to shop around. Understanding these factors will empower you to make informed decisions and manage your budget effectively for your furniture shipping needs.
Factors Influencing Costs
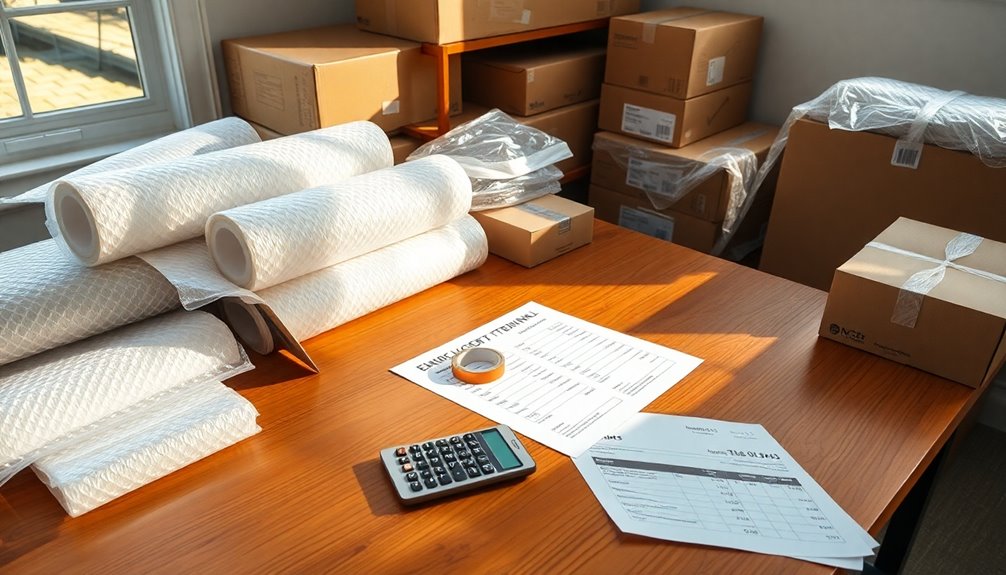
Considering various factors can significantly influence your furniture shipping costs. First, the shipping distance plays a crucial role; longer routes mean increased fuel consumption and labor expenses. If you're shipping across the country, expect costs to soar up to $4,000, with large items ranging from $300 to $800 each. Additionally, remote areas can hike your costs due to challenging logistics.
The size, weight, and fragility of your furniture also impact expenses. Larger and heavier items require more space and effort to handle, often necessitating special insurance. Fragile pieces need extra care, resulting in additional packaging costs. Accurate measurements are essential to avoid surprises.
Pickup and delivery locations matter too. Urban areas usually offer competitive rates, while rural spots incur higher charges due to logistical challenges. Traffic and parking restrictions can further affect delivery costs. Moreover, understanding market dynamics, including peak seasons and demand fluctuations, can also drive prices up.
Lastly, consider any additional services you might need. Expedited shipping or white glove services will increase your total costs. If you can, consolidate shipments for potential savings.
Preparing Your Furniture
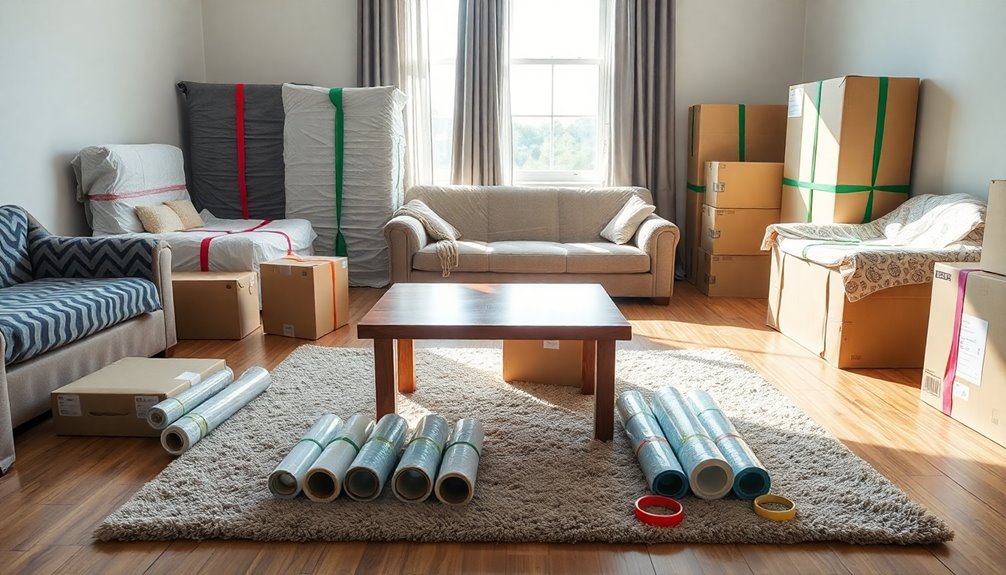
Preparing your furniture for shipping requires careful attention to detail to ensure it arrives safely at its destination. Start by cleaning your furniture to remove any dust and dirt. Inspect each piece for existing damages, noting any scratches or dents. Remove loose or fragile items from within the furniture and dust surfaces to prevent scratches from trapped debris. Taking photos or notes of the furniture’s condition before shipping can be helpful. When disassembling furniture for shipping, keep all hardware and small parts in a labeled bag to avoid losing them during transit. Protect delicate surfaces by wrapping them in bubble wrap or furniture blankets, and consider using corner protectors to prevent damage to edges and corners. If you have a fabric sofa, be sure to research fabric sofa cleaning tips to properly maintain and clean the upholstery before shipping. This will help ensure that your furniture arrives in the best possible condition at its destination.
If you have large furniture, disassemble it if possible. This makes movement easier and minimizes damage. Keep screws, nuts, and bolts in labeled bags. If you're packing dressers or cabinets, consider removing drawers and packing them separately, or keep their contents in place if necessary. Wrap fragile parts like glass tabletops in bubble wrap or packing paper for protection.
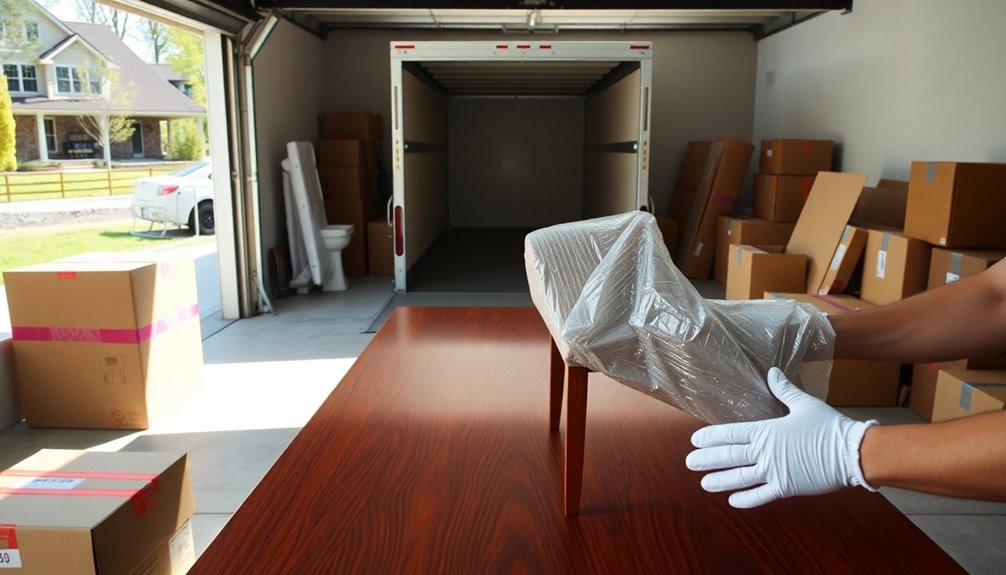
When wrapping larger items, use moving blankets, bubble wrap, or furniture pads, securing everything with packing tape. An "X" pattern with your tape helps ensure stability. Finally, wrap each piece individually, using stretch wrap to keep drawers closed and secure any loose components. This thorough preparation will help your furniture arrive in excellent condition. Proper wrapping significantly reduces the risk of damage during transportation.
Shipping Methods Overview
Choosing the right shipping method for your furniture is crucial to ensure it arrives safely and cost-effectively. There are several options available, depending on your shipment size and budget.
Less-Than-Truckload (LTL) shipping is ideal for smaller loads that don't fill an entire truck. You'll only pay for the space your furniture occupies, making it often the cheapest choice. However, keep in mind that LTL may involve transfers between trucks, which could increase transit time.
Freight shipping includes both full truckload (FTL) and LTL services. FTL suits larger shipments, while LTL is more economical for smaller loads. Freight carriers specialize in handling heavy shipments and can offer expedited options if you need faster delivery. Understanding service differences helps in cost savings.
Consolidated shipping combines multiple shipments going to similar destinations, optimizing routes and reducing costs. It's a great option for smaller loads, as you'll share expenses with other shippers.
Lastly, self-moving gives you complete control but requires more effort. Alternatively, independent transporters can provide discounted rates if you connect with them through platforms like uShip. Each method has its benefits, so choose the one that aligns best with your needs.
Additional Costs to Consider

Shipping furniture involves various additional costs that can significantly impact your overall budget. First, consider the shipping distance. Longer moves often mean higher fuel consumption, which can drive up costs. Labor expenses also increase with longer travel times, leading to more days worked by your moving crew. If you're shipping internationally, be prepared for even steeper costs due to customs and robust packaging requirements.
Next, think about the size and fragility of your items. Oversized or delicate furniture requires extra handling and materials, which can add to your expenses. Antique pieces may need additional protection, and disassembly or reassembly of modular furniture could incur further fees. Additionally, consider that heavier and bulkier items incur higher shipping costs, which can further strain your budget.
Location plays a big role too. Urban areas usually offer competitive rates, while rural locations can lead to increased charges due to longer distances and accessibility challenges.
Lastly, consider timing and additional services. Expedited shipping or guaranteed delivery windows can come with higher fees, and opting for extra services like white glove assistance will raise your costs. By being aware of these factors, you can better manage your shipping budget.
Tracking Your Shipment

Once you've accounted for the additional costs, tracking your shipment becomes a vital part of the process. You'll want to use the tracking number provided by your shipping carrier to monitor your furniture's journey. Most carriers offer online tracking through their websites or dedicated tracking pages, making it easy to stay updated. For long-haul shipments, consider utilizing GPS devices for real-time location data, which can provide peace of mind.
Real-time updates are essential, as they notify you of any changes or issues during transit. If you're shipping sensitive goods, IoT sensors can help you monitor conditions like temperature and humidity. This way, you can address potential delays or problems promptly. Additionally, using advanced algorithms can help optimize delivery routes, ensuring your furniture arrives on time and in perfect condition.
To enhance your tracking experience, explore mobile apps from logistics companies that offer direct communication with the carrier and allow you to track shipments independently. Tools like ShipperHQ and uShip can simplify the process, while advanced logistics software like Locate2u streamlines tracking and dispatch.
Finally, proactive customer communication is key. Keeping your customers informed with automated notifications boosts satisfaction and ensures transparency about the current status and location of their furniture.
Frequently Asked Questions
What Documentation Is Needed for Shipping Furniture to Another State?
When you're preparing to ship furniture, you'll need several key documents. Start by taking clear photos to document the furniture's condition. Create an inventory list detailing all items being shipped. Clearly label each piece with its contents and any special handling instructions. Keep records of how to disassemble the furniture and note any existing damage. This documentation will help protect you and simplify the shipping process.
Can I Ship Assembled Furniture, or Should It Be Disassembled?
You can ship assembled furniture, but disassembling it is often a smarter choice. Assembled pieces are bulkier and more prone to damage during transit, making them harder to maneuver. By taking apart your furniture, you reduce the risk of scratches and breakage, simplify transport, and potentially save on costs. Plus, smaller parts are easier to wrap and protect. Consider disassembling for a smoother, safer shipping experience.
How Do I Choose a Reliable Furniture Shipping Company?
To choose a reliable furniture shipping company, start by researching various options online. Compare prices and services offered by different companies, and read customer reviews for insights. Verify their experience in the industry and check for necessary licenses and insurance. Evaluate their customer service reputation and look for additional services like packing or white-glove delivery. Finally, ensure they keep you updated on your shipment's status throughout the process.
Are There Restrictions on Shipping Certain Types of Furniture?
Yes, there are restrictions on shipping certain types of furniture. Weight and size limitations vary by carrier, with FedEx and UPS having specific maximums. Fragile items need extra protective measures like bubble wrap and foam padding. You should disassemble large pieces to prevent damage, keeping hardware organized. Also, check for any legal requirements before shipping. It's crucial to communicate with your carrier to ensure a smooth pickup and delivery process.
What Should I Do if My Furniture Gets Damaged During Shipping?
If your furniture gets damaged during shipping, act quickly. Document the damage on the delivery receipt and take photos for evidence. Notify the carrier or broker as soon as you can. Keep the damaged items until your claim's resolved, and don't discard anything. Gather necessary documents like the bill of lading and proof of delivery. Submit a claim detailing the loss, including repair estimates, within the required timeframes for a smoother process.
Conclusion
Shipping furniture to another state doesn't have to be stressful. By understanding the costs involved, preparing your items properly, and choosing the right shipping method, you can ensure a smooth process. Don't forget to factor in any additional expenses and keep track of your shipment for peace of mind. With a little planning, you can get your furniture to its new home safely and efficiently. Happy moving!
Interior Design
Man Indonesian Decor: Masculine Design Pieces to Elevate Your Space!
Indulge in masculine Indonesian decor with rich materials and bold colors that transform your space into a sophisticated sanctuary. Discover unique design pieces now!
To enhance the look of your room with Indonesian decor, focus on using luxurious materials and vibrant color combinations. Consider using dark woods such as teak and mahogany along with rich shades like charcoal gray and navy blue. Look for sturdy leather furniture with sleek lines and bold geometric shapes. Add in textured fabrics and modern elements like metal fixtures for an industrial feel. Make sure to include large pieces of art and striking lighting fixtures to make a statement. This mix will not only bring a sense of warmth and elegance but will also showcase a masculine style. Continue to explore to find more one-of-a-kind pieces and design concepts to elevate your space!
Key Takeaways
- Incorporate rich materials like teak and mahogany for a warm and sophisticated masculine atmosphere.
- Choose substantial furniture with clean lines, emphasizing leather and dark colors for a bold visual impact.
- Add textured elements such as carved wooden sculptures and batik textiles to reflect cultural heritage and depth.
- Utilize industrial accents with metal fixtures and unique lighting to blend modernity with traditional charm.
- Enhance the space with large-scale art and layered lighting to create focal points and a cohesive environment.
Key Elements of Indonesian Masculine Decor
When you think of Indonesian masculine decor, rich materials and bold designs come to mind. To create a space that reflects this aesthetic, start with dark wood elements like teak and mahogany. These materials not only evoke warmth but also sophistication, setting the perfect backdrop for your masculine retreat.
Emphasizing natural materials like wood and stone aligns with Balinese design concepts that foster a calming and elegant environment.
Incorporate textured elements such as carved wooden sculptures and batik textiles. They add character and depth while showcasing Indonesia's cultural heritage.
For your design ideas, consider integrating industrial accents like metal fixtures and lighting. These modern touches can seamlessly blend with traditional elements, enhancing the overall ambiance of your space.
Don't forget about natural materials like rattan and bamboo; they contribute to an eco-friendly vibe while maintaining style. By weaving these elements together, you'll create a cohesive look that exudes masculinity and elegance.
Lastly, while you focus on the design ideas, remember that the right furnishings and decor can elevate your space into a stunning representation of Indonesian masculine decor, making it not just a room, but a mesmerizing experience.
Color Palettes for a Bold Impact
Embracing bold color palettes can dramatically transform your space, creating a striking backdrop for masculine Indonesian decor. To achieve this effect, consider incorporating deep tones like charcoal gray, navy blue, and forest green.
These colors foster warmth and coziness while adding sophistication to your surroundings. Additionally, these rich hues complement the intricate designs of Indonesian decor masks, enhancing the cultural essence of your home. The blend of these tones with traditional art pieces creates an inviting yet elegant atmosphere. For those seeking *Indonesian wedding decoration ideas*, incorporating these colors and cultural accents can elevate a celebration, making it both personal and timeless. Consider using traditional fabrics and handcrafted elements to further emphasize the authenticity and beauty of Indonesian artistry.
Here are three ways to effectively use color palettes:
- Rich Hues in Furniture: Choose furniture and accents in these deep colors to create a strong visual impact. This makes your space feel inviting and tailored.
- Balanced Elements: Mix dark colors with lighter elements, such as natural wood finishes. This contrast adds depth and keeps the design from feeling too heavy.
- Accent Colors: Introduce pops of color through art and accessories. This enhances the masculine aesthetic, adding personality and visual interest to the decor.
Layering these bold colors with varying textures like leather and metal can elevate the design even further.
Furniture Choices for Masculine Spaces
Creating a cohesive and masculine space hinges on your furniture choices. Start by opting for large, substantial pieces that feature clean lines. Leather sofas in brown or black are perfect; they signify luxury and durability, essential for a masculine aesthetic.
When it comes to tables, incorporate strong angular shapes to enhance the overall look while keeping a streamlined vibe. Additionally, consider integrating elements of Indonesian Decorative Pillows that infuse vibrant colors and intricate patterns, adding a layer of cultural richness to your design.
Your furniture choices should prioritize robust materials. Select pieces made from natural wood and metal, as these not only add to the masculinity of the space but also guarantee long-lasting durability.
Minimal embellishments are key; aim for a clean, modern design that allows functionality to take center stage without excessive decoration.
Don't overlook versatility in your selections. Choose furniture that serves multiple purposes, like ottomans that double as storage. This enhances both practicality and style, making your space not only visually appealing but also functional.
Textures and Materials That Define
To truly define a masculine space, the right textures and materials play a pivotal role. You want to create an ambiance that feels strong and inviting. Here are three key elements to incorporate:
- Rich Woods: Use dark woods like teak and mahogany. These materials convey strength and durability, instantly elevating the space's character. Incorporating luxury tropical design aesthetics can further enhance the overall vibe.
- Leather Accents: Furniture pieces upholstered in leather, like sofas and chairs, add a rugged yet refined touch. This not only enhances the tactile appeal but also introduces a level of sophistication.
- Textured Fabrics: Introduce materials like wool and velvet through cushions and throws. This balance of softness against harder surfaces creates warmth and comfort, making the space more inviting.
Additionally, don't overlook industrial elements like metal fixtures. They provide a contemporary contrast to natural materials, enhancing the masculine aesthetic.
Layering various textures and materials, from smooth metals to rough woods and soft fabrics, creates depth and visual interest. This dynamic mix makes your masculine space feel cohesive and stylish, ensuring it reflects your personality.
Integrating Art and Lighting
Integrating striking art and purposeful lighting can transform your masculine space into a dynamic sanctuary. Start by incorporating large-scale art pieces like abstract or geometric designs. These bold focal points not only enhance the masculine aesthetic but also draw attention and spark conversation.
Additionally, consider integrating traditional artistry through unique Indonesian decor masks that reflect rich cultural narratives. Vintage maps can add character and sophistication, reflecting a curated style that resonates with masculine design themes.
Next, consider the lighting. Statement chandeliers or sculptural fixtures serve as both functional and decorative elements, bringing a contemporary edge to your decor. Layering different types of lighting—ambient for overall warmth and task lighting for practicality—ensures versatility and a comfortable atmosphere.
This approach showcases your art effectively, allowing it to shine in the best light.
Lastly, maintain symmetry in your arrangement of art and lighting elements. This balance creates a cohesive environment, enhancing the overall visual impact of the space.
Frequently Asked Questions
How Can I Make My Space More Masculine?
To make your space more masculine, incorporate dark colors, choose substantial furniture with clean lines, use natural materials, and display bold artwork. Layer your lighting strategically to create a warm, inviting atmosphere that reflects your style.
How to Make a Living Room Manly?
To make your living room manly, choose deep colors, substantial furniture with clean lines, and a mix of textures. Add bold art pieces and layered lighting to create a warm, inviting atmosphere that reflects your style.
How Do You Soften Masculine Décor?
You can soften masculine décor by weaving in plush textures, like velvet, and earthy tones that evoke nature. Add greenery for life, layer materials for depth, and embrace warm lighting to create a cozy atmosphere.
How to Create a Masculine Bedroom?
To create a masculine bedroom, choose deep colors like charcoal and navy, incorporate sturdy furniture, mix rich textures like leather and wood, add bold art, and use layered lighting for warmth and style.
Conclusion
Incorporating Indonesian masculine decor into your space can transform it into a bold, inviting haven. Remember, "home is where the heart is," so choose pieces that resonate with your personality. From striking color palettes to rugged textures, every element plays an essential role in creating a cohesive look. Don't hesitate to mix art and lighting to add character and warmth. With these tips, you'll craft a space that truly reflects your unique style and strength.
Interior Design
How to Get Rid of Fleas on Furniture
Keep your furniture flea-free with effective cleaning tips and natural remedies; discover the secrets to a pest-free home that you won’t want to miss!
To eliminate fleas from your furniture, begin by thoroughly vacuuming. Pay close attention to seams and crevices, and promptly dispose of the vacuum contents in a sealed bag. Then, utilize natural remedies such as baking soda or lemon citrus spray to dehydrate and repel fleas. For more serious infestations, consider using targeted chemical treatments while wearing gloves for safety. Remember to regularly wash pet bedding and wear protective gear when handling chemicals. Implementing a consistent vacuuming and cleaning schedule will help prevent fleas from returning. If you continue to experience persistent issues, there are additional steps you can take to ensure your home remains flea-free.
Key Takeaways
- Regularly vacuum furniture, focusing on seams and crevices to remove fleas, eggs, and larvae effectively.
- Apply baking soda or salt on carpets to dehydrate and kill adult fleas.
- Use natural remedies like lemon citrus spray to repel fleas safely in pet-friendly areas.
- Consider targeted chemical treatments for immediate relief, ensuring proper ventilation and safety measures during application.
- If infestations persist, contact a professional pest control service for comprehensive treatment and prevention strategies.
Understanding Flea Infestations
Understanding flea infestations starts with recognizing how quickly they can take over your home. A single female flea can lay up to 50 eggs each day, leading to rapid population growth.
Adult fleas often live on your pets but can easily jump onto your furniture and carpets, making infested areas tough to treat. Flea eggs, larvae, and pupae hide in various nooks and crannies, including furniture fabrics and cracks. To effectively get rid of fleas, you need to target all life stages. Regular cleaning and maintenance of your pet's environment is vital to preventing infestations, as well as ensuring a proper diet to keep their immune system strong, similar to maintaining a healthy hamster care routine with proper diet and care.
The flea lifecycle can last from a few weeks to several months, depending on environmental conditions. This variability complicates eradication efforts, so a thorough approach is essential.
Regular vacuuming helps control flea populations by disrupting their lifecycle and removing eggs and larvae. You might also consider using household items like baking soda or salt, which can absorb moisture and kill larvae.
In your pest control efforts, remember that persistence is key. By combining these strategies, you can greatly reduce flea populations in your home and protect your pets, ensuring a flea-free environment.
Essential Tools for Treatment
To effectively tackle a flea infestation on your furniture, you'll need the right tools at your disposal. Start with a high-powered vacuum cleaner; this is vital for removing adult fleas, larvae, and eggs from both furniture and carpets. Make sure to empty the vacuum immediately into an outside bin to prevent re-infestation.
Additionally, consider using natural remedies alongside conventional methods for thorough control, as suggested in cold medications overview.
Next, gather some baking soda and salt. These common household items act as natural dehydrate agents. Sprinkle them on your furniture and vacuum after a couple of days for effective flea control.
You'll also want targeted aerosol sprays designed for flea control. Use these for immediate action on your furniture, but remember to test them on inconspicuous areas first to avoid any staining.
A hard brush is another key tool. A stiff-bristled brush helps work baking soda or salt into fabric furniture, ensuring thorough coverage and enhancing the treatments' effectiveness.
Finally, don't forget protective gear; wearing rubber gloves during the application of any pest control products is essential. This helps safeguard against skin irritation and keeps your treatment process hygienic.
With these essential tools, you'll be well-equipped to tackle that flea problem.
Step-by-Step Vacuuming Technique
To tackle fleas on your furniture, you need the right vacuuming equipment and a solid technique. Regular vacuuming not only helps remove fleas but also dirt and allergens, contributing to a healthier living environment.
Start by focusing on seams and crevices, then properly dispose of the vacuum contents to keep fleas at bay.
For additional pest management tips, consider checking out effective natural ingredients for grout cleaning. Regular vacuuming is key, so make it a habit, especially in pet areas.
Proper Vacuuming Equipment
Effective vacuuming is essential for tackling flea infestations on furniture. To guarantee your vacuuming equipment is up to the task, consider the following:
- HEPA Filter: Use a vacuum cleaner equipped with a HEPA filter to effectively trap fleas, eggs, and larvae while minimizing allergens.
- Strong Suction Power: Choose a vacuum with strong suction power to lift fleas and debris from carpets and upholstery.
- Brush Attachment: Incorporate a brush attachment to agitate and lift fleas from hard-to-reach areas in your furniture.
- Sealed Bags: Confirm your vacuum uses sealed bags for easy disposal of contents, preventing any chance of re-infestation.
When vacuuming, don't forget to target all areas of your furniture, including under cushions and in seams, as fleas like to hide in these spots.
After you've finished, empty the vacuum contents into a sealed bag and dispose of it outside. Regularly vacuuming at least once a week during flea season will help maintain control and reduce the likelihood of re-infestation.
With the right equipment, you'll be well on your way to a flea-free home.
Vacuuming Technique Steps
A thorough vacuuming technique is vital for eliminating fleas from your furniture. Begin by using a vacuum cleaner with strong suction and a HEPA filter. This setup effectively captures fleas, their eggs, and larvae.
Start at the top of your furniture and work your way down, ensuring you cover every surface thoroughly. Pay special attention to seams, crevices, and under cushions, as these are prime hiding spots for fleas.
Use a vacuum attachment specifically designed for upholstery to maximize effectiveness on fabric surfaces. Move slowly, allowing the vacuum to pick up all debris and pests. If there are any stubborn stains or embedded dirt, consider using a fabric cleaner or upholstery shampoo before vacuuming. It’s also important to regularly maintain and clean your upholstery to prevent build-up and prolong its lifespan. Furthermore, if you need to deep clean your upholstery, consider moving a sofa with a dolly to access all sides and corners for a thorough cleaning. This can also make it easier to vacuum underneath and around the sofa for a complete clean.
Once you've vacuumed all affected areas, immediately dispose of the vacuum contents in an outside bin. This step is important to prevent any chance of re-infestation.
To break the flea life cycle and reduce their population, vacuum regularly—ideally every few days—for at least two weeks. Consistency is key in your battle against these pests.
Disposal of Contents
After you've thoroughly vacuumed your furniture to remove fleas and their eggs, it's time to focus on the disposal of the vacuum contents. Proper disposal is vital to prevent re-infestation in your home.
Here's how to do it effectively:
- Seal Vacuum Bags: If you're using a bagged vacuum, seal the bag tightly to guarantee no fleas escape.
- Empty Canister Outdoors: If you have a bagless vacuum, empty the canister directly into an outdoor trash bin. This minimizes the risk of fleas returning to your living space.
- Use a HEPA Filter: If possible, choose a vacuum with a HEPA filter. It'll trap even the tiniest flea eggs and larvae, enhancing your flea control efforts.
- Regular Maintenance: Make a habit of regularly vacuuming upholstered furniture, including crevices and under cushions. This consistently reduces the flea population.
Natural Remedies for Fleas
If you're looking for natural ways to tackle fleas, consider using baking soda and a citrus spray.
Sprinkling baking soda on your furniture can help dry out those pesky pests, while a lemon citrus spray acts as a strong deterrent.
Both methods are simple to apply and can make a noticeable difference in your flea problem.
Baking Soda Application
Many homeowners find baking soda to be an effective natural remedy for tackling fleas on furniture. This simple ingredient works by dehydrating adult fleas, making it a safe pest control option.
Here's how you can use it effectively:
- Sprinkle: Generously sprinkle baking soda on your furniture and carpets.
- Brush: Rub it into the fabric with a hard brush, ensuring it penetrates deep into the fibers.
- Let it Sit: Allow the baking soda to sit for several hours or overnight to maximize its dehydrating effect.
- Vacuum: Vacuum thoroughly to remove both dead fleas and any remaining baking soda residue.
After vacuuming, make sure to dispose of the contents in an outside bin. This step's essential to prevent any lingering fleas from making a comeback in your home.
Regular application of baking soda can help manage flea populations, but remember, continuous treatment is necessary due to the potential for re-infestation from eggs and larvae.
Lemon Citrus Spray
Lemon Citrus Spray is a powerful natural remedy for combating fleas on your furniture. To make it, slice a lemon and boil it in water, allowing the mixture to sit overnight for maximum potency. This simple preparation creates a potent spray that acts as a natural repellent for fleas, making it a safe alternative to chemical treatments, especially in homes with pets and children.
When applying the spray, focus on infested areas like sofas and pet bedding. Make certain the surfaces are dampened but not soaked to avoid damage. Regular application can help manage flea populations effectively, but keep in mind that it may not eliminate eggs and larvae entirely. Ongoing treatment is necessary for thorough control.
Before applying the spray to larger areas, always test it on a small, inconspicuous section of your furniture. This precaution helps prevent potential staining and guarantees your furniture remains in good condition.
With consistent use, Lemon Citrus Spray can be an essential part of your flea control strategy, keeping your home safe and comfortable for everyone.
Application of Chemical Treatments
When tackling a flea infestation on your furniture, applying chemical treatments effectively is essential for success. Here's a quick guide to help you get started:
- Choose the Right Products: Opt for a boric acid and botanically based pesticide mixture that targets both adult fleas and their larvae.
- Use Proper Application Techniques: Employ a dust application method, working the mixture into the fabric of your furniture for maximum effect in infested areas.
- Wear Protective Gear: Always put on rubber gloves during the application to protect your skin from irritation and drying effects.
- Ensure Safety Measures: Test aerosol sprays on a small, inconspicuous area of the furniture to avoid staining. Make sure the room is well-ventilated and keep pets and children away until the treatments have dried and the area is safe.
Following these steps will help you effectively eliminate fleas from your furniture.
Dealing With Severe Infestations
Severe flea infestations can feel overwhelming, but taking decisive action can help you regain control of your home. Start by using an aerosol spray designed for immediate relief. This method effectively targets adult fleas and can provide rapid results.
Avoid foggers or bombs, as they disperse chemicals uncontrollably and mightn't reach all infested areas.
When applying the aerosol spray, focus on spots where fleas are concentrated, like under cushions and in crevices. This targeted approach maximizes the impact of your treatment.
After applying the spray, monitor its effectiveness and be prepared to reapply as needed to fully tackle the infestation.
Regular vacuuming is essential after treatment. It helps remove dead fleas and prevents re-infestation. Make sure to dispose of vacuum bags immediately to eliminate any remaining eggs or larvae.
This proactive step will help break the flea life cycle and keep your home flea-free.
Stay vigilant and consistent with your efforts, as dealing with severe infestations may take time. With the right approach and persistence, you can successfully reclaim your space from these pesky intruders.
Maintaining a Flea-Free Environment
To keep your home free from fleas, you'll want to take a proactive approach with regular maintenance. Establishing a routine will help you stay one step ahead and prevent re-infestation.
Here are four essential steps to maintain a flea-free environment:
1. Vacuum Regularly: Vacuum your furniture and carpets at least once a week to remove adult fleas, larvae, and eggs.
Don't forget to dispose of the vacuum contents in an outside bin.
2. Use Baking Soda or Salt: Sprinkle baking soda or salt on carpets and furniture.
Let it sit for 1-2 days to dehydrate and kill adult fleas, then vacuum thoroughly.
3. Apply Citrus Spray: Create a natural flea deterrent by boiling lemons in water.
Use this citrus spray on infested areas like sofas and pet bedding to repel fleas.
4. Wash Pet Bedding: Regularly wash pet bedding and any removable fabric covers in hot water to eliminate fleas and their eggs.
Safety Measures During Treatment
Ensuring safety during flea treatment is essential for you, your pets, and your family. Start by always wearing gloves when applying flea treatments. This protects your skin from irritation and the drying effects of harsh chemicals.
When using aerosol products, make sure the area is well-ventilated. This helps prevent inhaling harmful fumes that could affect your health.
It's crucial to keep pets and children away from treated areas until they're completely dry. This minimizes their exposure to potentially harmful chemicals.
Store all flea control chemicals in a secure location, away from living areas. Doing so prevents accidental ingestion or contact, keeping your loved ones safe.
When to Call Professionals
When fleas turn your living room into a battleground, it's time to contemplate calling in the professionals. Here are some signs that indicate you should reach out for expert help:
- Severe Infestation: If you notice a high number of adult fleas, a professional can effectively tackle both adult fleas and their immature stages.
- Ineffective Home Remedies: If your attempts at DIY solutions haven't yielded results after several applications, it might be time for a more robust approach.
- Comprehensive Treatment Needs: Professionals employ treatments that not only target visible fleas but also the eggs and larvae hiding in your furniture and carpets.
- Preventative Measures: Experts can offer advice on how to avoid re-infestation, which can be challenging for homeowners to manage independently.
Local pest control companies, like Rentokil, specialize in thorough coverage and monitoring of flea populations.
Don't let fleas take over your home—getting professional help can save you time and hassle, ensuring a flea-free living space in no time.
Frequently Asked Questions
How to Get Rid of Fleas From a Sofa?
To get rid of fleas from your sofa, sprinkle baking soda or salt, rub it in, and vacuum thoroughly. You can also use a citrus spray to target adult fleas without soaking the fabric. Be sure to empty the vacuum canister or dispose of the vacuum bag outside immediately to prevent the fleas from returning. For a more thorough cleaning, you may consider steam cleaning the fabric, which can help eliminate flea eggs as well. While tackling pests, remember that common household remedies, like when removing paint from wood furniture, often require patience and care to avoid damaging surfaces or fabrics. Additionally, it’s a good idea to wash any pet bedding and use flea treatments on your pets to prevent further infestations. If you’re dealing with stubborn smells, such as trying to remove dog gland odor from furniture, specialized cleaning products designed for pet odors may help neutralize the smell without damaging the fabric. Always test any product in a small, inconspicuous area to ensure it won’t cause discoloration or harm to your sofa’s surface.
How Long Will Fleas Live on a Couch?
"Where there's smoke, there's fire." Fleas can live on a couch for several days to weeks, and under ideal conditions, they might survive up to 100 days, so tackling them promptly's essential to prevent infestations.
Can You Spray Something on Furniture to Kill Fleas?
Yes, you can spray specific insecticides on furniture to kill fleas. Just make certain the product's safe for fabrics. Alternatively, homemade citrus sprays work well too. Always test on a small area first for safety.
What Can I Spray on a Mattress to Kill Fleas?
You can spray a citrus solution or a vinegar-water mix on your mattress to kill fleas. For stronger results, consider using a commercial flea spray, but always follow the instructions and guarantee proper ventilation.
Conclusion
In your quest to banish those pesky fleas from your furniture, remember: victory is within reach! With a little grit and a few effective methods, you can reclaim your space from these tiny tyrants. Imagine lounging on your couch, free from those relentless, biting invaders—pure bliss! So grab your vacuum, whip up some natural remedies, or call in the pros if needed. Your flea-free sanctuary awaits, and it's going to feel like a five-star hotel!
Interior Design
How to Repair Leather Sofa
Get ready to restore your leather sofa to its former glory with simple steps; discover the secrets to a flawless repair inside!
To fix your leather sofa, begin by assessing the damage to identify any scratches or tears. Use a leather cleaner and a soft cloth to clean the affected area. For minor scratches, apply leather filler and smooth it out; for larger tears, cut a patch slightly larger than the damage and secure it with leather adhesive. After the repairs have dried, use leather dye to blend the mended area with the rest of the sofa. Lastly, condition the leather every few months to preserve its softness. Continue reading for a more comprehensive step-by-step repair process and helpful resources.
Key Takeaways
- Assess the damage by inspecting for scratches, tears, and discoloration before deciding on a repair method.
- Clean the leather surface thoroughly using a leather cleaner and soft cloth to prepare for repairs.
- Use leather filler for small scratches and secure a patch with adhesive for larger tears.
- Apply leather dye after repairs to blend the color with the surrounding area, sealing with conditioner afterward.
- Consider professional help for extensive damage or color loss beyond simple DIY repairs.
Assessing the Damage
How can you effectively assess the damage on your leather sofa? Start by visually inspecting the surface for visible signs like scratches, tears, or discoloration. Make a note of their locations and severity.
You'll want to use a leather cleaner and a soft cloth to clean around the damaged areas, as this gives you a clearer view and prepares the surface for any leather repair work. Additionally, consider the impact of environmental factors, such as humidity and temperature, which can affect the leather's condition.
For instance, using essential oils for leather care can help maintain the leather's suppleness.
For small scratches and minor tears, determine if they're superficial or if they penetrate deeper into the leather. This assessment will guide you in choosing the right repair method.
If you encounter larger damages, measure the size and shape of the tear or hole. This will help you decide if a patch is necessary and how to cut it properly.
Cleaning the Leather Surface
Regular cleaning is vital to keep your leather sofa looking its best. Start by using a soft cloth and a leather cleaner specifically designed for leather surfaces. This will gently remove dirt and grime without causing damage. Always test the cleaner on a small, inconspicuous area first to verify it doesn't discolor or harm the leather.
For ideal air quality, consider using an air purifier to reduce allergens that can settle on your furniture, as air quality considerations can also impact the maintenance of your leather.
For deeper cleaning, you can use a mixture of equal parts vinegar and water. Apply it with a soft cloth, and make sure to wipe it dry promptly to prevent moisture absorption, which could lead to damage. Remember, avoiding harsh chemicals or abrasive materials is essential, as they can create cracks or discoloration in the leather.
Aim to clean your leather sofa every few months. This routine maintenance won't only enhance its appearance but also prolong its lifespan by preventing the buildup of dirt and oils.
Patching Small Scratches and Tears
When you notice small scratches or tears on your leather sofa, it's important to have the right repair tools on hand.
Using high-quality materials, similar to how one would choose jewelry materials for body piercings, will guarantee a durable fix.
You'll follow a step-by-step process to guarantee a seamless fix that restores the appearance of your furniture.
Let's explore the essential tools and the exact steps you need to take for effective patching.
Essential Repair Tools
Patching small scratches and tears on your leather sofa requires a few fundamental tools to guarantee a seamless repair. First, you'll need a soft cloth to clean the damaged area, removing dirt and oils that could interfere with the process.
Additionally, ensuring your workspace is free from dust and debris can enhance the quality of the repair, similar to how best vacuums for dust removal can improve indoor cleanliness. Next, sharp scissors are essential for trimming any loose fibers around the tear, ensuring a smooth surface for the repair.
A spatula is also necessary; it helps you apply leather filler evenly, contributing to a professional finish. Once the filler has dried, fine-grit sandpaper will smooth out the repaired area, making it blend more naturally with the surrounding leather furniture.
To achieve a uniform appearance, leather dye is critical. It allows you to match the color of the repaired section with the rest of your leather furniture seamlessly.
Investing in a quality leather repair kit can streamline the process, as it typically includes filler, dye, and the application tools you'll need for repairing leather. With these fundamental repair tools on hand, you'll be well-equipped to tackle any small scratches or tears, restoring your leather sofa to its former glory.
Step-by-Step Repair Process
With your repair tools gathered and ready, you can start fixing those small scratches and tears on your leather sofa. First, clean the area around the scratch with a soft cloth and a mild leather cleaner to remove any dirt or debris. Then, apply a leather filler or patch kit, following the manufacturer’s instructions to ensure a seamless fix. If you’re also repairing damaged wicker material on your couch or chair frames, it’s essential to have the proper tools and matching material to restore their original appearance.
Begin by cleaning the damaged area with a soft cloth and a leather cleaner to remove any dirt or oils that might interfere with the repair. It's important to guarantee that your cleaning products are safe for leather to avoid causing further damage, similar to how appliance maintenance plans help in prolonging the life of your appliances.
Next, grab sharp scissors and trim any loose fibers around the tear, ensuring you create a clean edge for better adhesion.
Now, it's time to apply a matching leather filler using a spatula. Make sure to let it dry completely before adding more layers if the scratches or tears are deeper.
Once the filler is dry, take fine-grit sandpaper and gently sand the area to achieve a smooth finish that blends seamlessly with the surrounding leather couch.
Repairing Larger Tears and Holes
If you notice larger tears or holes in your leather sofa, tackling the repair promptly can prevent further damage. Ignoring significant damage may lead to costly replacements or irreversible wear over time. It’s crucial to consult a professional or use specialized leather repair kits to ensure the job is done correctly. While you’re addressing the leather issues, you may also want to check for any sagging or discomfort, and look into *sofa spring repair tips* to enhance both the longevity and comfort of your furniture.
Start by measuring the tear or hole, then cut a leather patch that's slightly larger than the damaged area. This guarantees you have enough coverage for a solid fix. Using a leather-specific adhesive is essential for durability, as it provides a strong bond that can withstand wear and tear, much like choosing the best home printers for quality results assures consistent performance.
Next, use tweezers to insert the patch behind the tear. Make sure it lies flat against the leather surface for a seamless appearance. Once positioned, apply a leather-specific adhesive along the edges of the tear. Press the patch firmly onto the damaged area to secure it in place.
After the patch is attached, fill any gaps or holes with leather filler, smoothing it out as needed. Once the filler dries, sand the area lightly with fine-grit sandpaper to create a smooth and even surface. This step is vital for a polished look.
Applying Leather Dye
Before applying leather dye, you need to prepare the surface by cleaning it thoroughly with a leather cleaner and a soft cloth.
It's essential to recognize that much like individuals with BPD dynamics in relationships, the quality of the leather's surface can considerably affect the outcome of the dye application.
Choosing the right dye is vital, so pick one that matches your sofa's color and is compatible with its leather type.
Once you've got that sorted, you're ready to start the dyeing process for a fresh, vibrant look.
Preparing the Leather Surface
To achieve a successful leather dye application, it's crucial to start with a clean surface. Use a soft cloth and a leather cleaner to wipe away any dust or dirt. This step guarantees that the dye adheres properly to the leather. Next, select a leather dye that closely matches your sofa's original color for a seamless repair. The Leather & Vinyl Complete Repair Kit offers a variety of shades to choose from.
When applying the dye, use a sponge or applicator to spread it in thin, even layers. Let each coat dry completely before adding more for the best color saturation. After dye application, lightly sand the repaired area with fine-grit sandpaper to help blend the texture with the surrounding leather.
Finally, for long-lasting results, seal the dyed area with a leather conditioner once it has dried. This helps maintain flexibility and prevents cracking.
Step | Action |
---|---|
Clean Surface | Wipe with a soft cloth and leather cleaner |
Apply Dye | Use a sponge/applicator in thin layers |
Seal and Protect | Use leather conditioner after drying |
Choosing the Right Dye
After preparing the leather surface, selecting the right dye becomes a key step in achieving a seamless repair. First, make certain you choose a dye that matches the specific type of leather—Aniline, Semi-Aniline, or Pigmented. This compatibility is vital for ideal results, as using the correct dye enhances content quality and topical authority of your repair efforts.
Next, consider using a dye that offers a color matching option. Many kits provide base colors and tints, allowing you to mix and achieve your desired shade. Before applying it to the entire area, always test the dye on a small, inconspicuous spot to check for compatibility and color accuracy.
When you're ready to dye, use a sponge or brush to apply the dye in thin layers. Allow each layer to dry completely before adding more. This method helps you achieve a more even finish.
Preventing Future Damage
How can you guarantee your leather sofa stays in top shape for years to come? Start by keeping it away from direct sunlight and heat sources. These can cause fading and drying, leading to premature wear.
Regular conditioning is essential too; aim to condition your leather every 6 to 12 months to maintain its appearance and prevent cracks. Additionally, consider investing in specialized cleaning tools like a best value vacuum cleaner to help keep your sofa free from dust and debris that can cause damage over time.
Consider using throws or blankets on high-use areas like armrests and headrests. This simple step can protect against everyday wear and tear.
If you notice minor scratches or tears, address them promptly. The sooner you tackle these issues, the less likely they'll escalate into larger, more difficult repairs.
Establish a consistent cleaning schedule to preserve your sofa's quality. Use a leather cleaner and conditioner to keep your sofa looking its best.
Regular maintenance won't only enhance its appearance but also extend its lifespan. By being proactive and attentive, you can guarantee your leather sofa remains a beautiful centerpiece in your home for many years.
Tools and Materials Needed
To successfully repair your leather sofa, you'll need a few essential tools and materials.
Start with a Leather & Vinyl Complete Repair Kit, sharp scissors, and fine-grit sandpaper to guarantee a smooth finish.
Additionally, considering the advanced technology found in high-performance units can provide insights into maintaining the longevity of your sofa's leather.
Don't forget to keep safety in mind while handling these items to prevent any accidents.
Essential Repair Tools
When you're ready to tackle leather sofa repairs, having the right tools at your fingertips is vital for achieving a professional finish. Here's a handy list of essential repair tools you'll need:
Tool | Purpose | Additional Notes |
---|---|---|
Leather Cleaner | Removes dirt and oils | Use before starting repairs |
Sharp Scissors | Trims loose fibers | Keep them sharp for precision |
Fine-Grit Sandpaper | Smooths repaired areas | Ideal for blending repairs |
Leather Filler | Fills scratches and holes | Choose the right color |
Leather-Specific Adhesive | Secures patches behind tears | Guarantees a strong bond |
Leather Dye | Restores color for seamless blending | Match it to your sofa's color |
Spatula or Application Tool | Applies filler evenly | Helps achieve a smooth finish |
Microfiber Cloths | Cleans and buffs the surface | Use for final touches |
Patch Kit | Addresses larger damages effectively | Includes various patch sizes |
With these tools at your disposal, you'll be well-equipped to restore your leather sofa effectively.
Required Materials Overview
With your tools gathered, it's time to focus on the materials required for repairing your leather sofa. First, you'll need a leather-specific adhesive. This is vital for securing any patches and filling gaps, ensuring a strong bond at the damaged site.
For larger tears, a sub-patch made from matching leather is often necessary. It provides structural support beneath the damaged area during repairs.
Next, gather leather dye and colorants from a complete repair kit. These will help restore the original color and blend your repairs seamlessly with the surrounding leather.
You'll also want fine-grit sandpaper for smoothing out any repaired areas, ensuring a more polished finish.
Don't forget sharp scissors; they'll help you trim loose fibers and make clean cuts. A spatula is essential for applying leather filler precisely.
Finally, have some microfiber cloths on hand. You'll use these to clean the damaged area before you begin repairs, as they effectively remove dirt without causing additional damage.
With these materials ready, you're set to tackle your leather sofa repair!
Safety Precautions Needed
Before diving into the repair process, it's important to prioritize safety. Start by wearing gloves whenever you handle leather repair products. This simple step protects your skin from potentially harmful chemicals and dyes.
Next, make sure you're working in a well-ventilated area. This is vital when using adhesives and fillers, as it helps you avoid inhaling any harmful fumes.
When trimming loose fibers, use sharp scissors. Clean cuts will prevent further damage to your leather sofa, making your repair more effective.
Additionally, keep all your tools—like spatulas and sandpaper—organized and within reach. A tidy workspace enhances safety and efficiency, allowing you to focus on your repair.
Lastly, always follow the manufacturer's instructions for your leather repair kit. Proper use of tools and materials not only guarantees a successful repair but also keeps you safe during the process.
Step-by-Step Repair Process
To successfully repair your leather sofa, start by thoroughly cleaning the damaged area. Use a soft cloth and leather cleaner to eliminate any dirt and oils, guaranteeing a clean surface for the repair.
For small scratches and tears, trim any loose fibers around the damage. Then, apply matching leather filler with a spatula and let it dry before sanding it down for a smooth finish.
If you're dealing with larger tears or holes, measure and cut a leather patch slightly larger than the damaged area. Insert it behind the tear and secure it with leather adhesive, filling any gaps with leather filler.
Once you've filled and sanded the area, use leather dye to blend the repaired section with the surrounding leather. Allow the dye to cure for 24 hours before using the sofa to guarantee a seamless look.
When to Call a Professional
Not every leather sofa repair can be tackled with DIY methods. If you're facing large tears, significant holes, or extensive color loss, it's best to call in a professional. These types of damage require specialized skills and materials that you mightn't have access to, guaranteeing a more durable and visually appealing repair.
Take a moment to evaluate the extent of the damage. While minor scratches and scuffs can often be fixed at home, larger structural or aesthetic issues may need the touch of trained professionals. Services like Sofa Disassembly and Movers specialize in leather care and restoration, making them a reliable choice for complex repairs.
Another good reason to seek professional help is if you feel uncertain about matching colors or materials. Professionals can guarantee that the restoration blends seamlessly with your existing leather, maintaining the overall look of your sofa.
Plus, many professional services offer warranties on their work, giving you peace of mind that the repairs will be handled with quality and reliability. When in doubt, don't hesitate to reach out to an expert for assistance.
Additional Resources for Repair
Many helpful resources are available to assist you in repairing your leather sofa. Whether you're a seasoned DIYer or just starting, these tools can make your repair journey easier and more successful.
- Reference guides like "How to Repair a Leather Sofa" provide detailed, step-by-step instructions, making the process manageable.
- The "Leather Sofa Repair: A Step-by-Step Guide" offers insightful tips on evaluating damage and choosing the right repair techniques for various leather types.
- Online communities and social media platforms are great for sharing experiences and seeking advice from others who've tackled similar repairs successfully.
- For larger items or significant damage, consider professional services. Expert teams specialize in leather furniture care and restoration, ensuring exceptional results.
Additionally, don't forget to check customer reviews and recommendations for reliable repair services. This can guide you in selecting trusted professionals if your repairs require advanced skills.
With these resources at your fingertips, you'll feel more confident in your ability to restore your leather sofa to its former glory.
Frequently Asked Questions
Can You Repair a Damaged Leather Sofa?
Yes, you can repair a damaged leather sofa. Depending on the damage, you might use a leather repair kit for small scratches or a patch for larger tears. Regular maintenance helps prevent further issues, too.
Is It Worth Repairing a Leather Couch?
Did you know a well-maintained leather couch can last 10 to 15 years? Yes, it's worth repairing one! Addressing minor damages promptly saves you money and extends your couch's life considerably.
How to Fix a Leather Couch That Is Peeling?
To fix a peeling leather couch, clean the area, trim loose pieces, apply a repair compound, sand it smooth, and finish with matching dye. Don't forget to condition the leather for durability!
Do Leather Repair Kits Actually Work?
Yes, leather repair kits really do work! You'll find they effectively address scuffs, scratches, and tears with ease. Users often appreciate their satisfaction with color restoration, making them a great option for leather maintenance.
Conclusion
In summary, repairing your leather sofa doesn't have to be an intimidating task. With a bit of patience and the right tools, you can breathe new life into your furniture and save yourself some cash in the process. Remember, every cloud has a silver lining—your sofa can look as good as new if you follow the steps carefully. Don't hesitate to seek professional help if the job seems too big. Happy repairing!
-
Beauty and Grooming3 weeks ago
Embrace Natural Glow With Bronzer-Free Accelerators
-
Beauty and Grooming3 weeks ago
Discover Top Outdoor Tanning Lotions Today
-
Fashion Trends1 month ago
Fall 2025 Fashion Trends: Be Ahead of the Curve!
-
Vetted1 month ago
15 Best Affordable Sustainable Fashion Brands You Need to Know About in 2025
-
Interior Design11 hours ago
Mylar vs. Foil Balloons: The Ultimate Showdown
-
Beauty and Grooming3 weeks ago
Unlock Flawless Tanning With Skin Prep
-
Interior Design3 weeks ago
Create Your Dream Cottagecore Home Office Now!
-
Vetted1 month ago
15 Best Women's Fashion Trends of 2025 You Need to Know About