Connect with us

Interior Design

How to Remove Formaldehyde From Furniture

Learn effective ways to reduce formaldehyde emissions from your furniture and discover surprising methods that could transform your living space forever.

Published

on

eliminate formaldehyde in furniture

To remove formaldehyde from furniture, start by improving ventilation in your space. Open windows and use exhaust fans to circulate fresh air. Consider using air purifiers with activated carbon filters, as they effectively reduce airborne formaldehyde. You can also apply non-toxic sealants to particleboard furniture to lock in emissions. Incorporating plants like Boston ferns or using activated charcoal can help absorb pollutants naturally. Lastly, opt for solid wood or bamboo furniture over pressed-wood products in the future. If you're interested in more detailed methods and tips, there's plenty more to explore beyond these basics.

Key Takeaways

  • Allow new furniture to off-gas in a well-ventilated area by opening windows and using exhaust fans to reduce formaldehyde levels.
  • Use air purifiers with activated carbon filters to effectively capture and reduce formaldehyde and other volatile organic compounds.
  • Seal particleboard furniture edges with non-toxic sealants or apply eco-friendly low-VOC coatings to minimize emissions.
  • Incorporate houseplants like Boston ferns or English Ivy that naturally absorb formaldehyde and improve indoor air quality.
  • Regularly monitor indoor air quality with sensors and conduct professional assessments to ensure formaldehyde levels remain safe.

Understanding Formaldehyde Emissions

formaldehyde emission awareness campaign

Formaldehyde emissions are a critical concern when it comes to furniture and household items. You'll often find this chemical used in the production of particle boards, plywood, and medium-density fiberboard (MDF) products. It's also present in upholstery, carpets, and paints, making it a common household exposure. Composite wood products, in particular, are significant sources of formaldehyde emissions in furniture, as it acts as both a preservative and adhesive.

Several factors affect the level of formaldehyde emissions. For instance, high humidity and rising temperatures can accelerate the release of formaldehyde gases, especially in tightly sealed spaces. You might notice that new furniture emits more formaldehyde initially, with emissions decreasing over time. The materials and adhesives used in furniture construction play a crucial role in determining emission levels. Recent evaluations have shown that formaldehyde poses unreasonable health risks, indicating the importance of monitoring these emissions closely.

Regulatory standards exist to manage these emissions. The U.S. EPA, California Air Resources Board, and the European Union all set specific limits to protect your health. Certifications like GREENGUARD and CARB indicate products with lower emissions. By understanding these emissions, you can make informed decisions about the furniture and items you bring into your home.

Importance of Ventilation
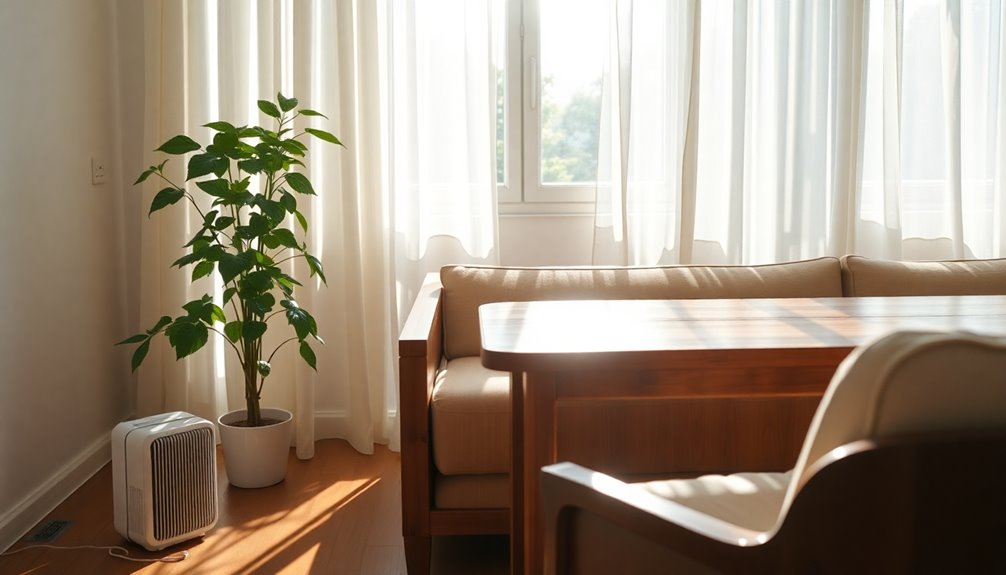
healthy air circulation essential

To effectively reduce formaldehyde concentrations in your home, proper ventilation plays a crucial role. By opening windows and doors, you allow fresh air to circulate, which helps dilute formaldehyde levels. This natural ventilation technique is especially beneficial in environments with low to moderate formaldehyde levels and good outdoor air quality. Make it a habit to regularly open windows, particularly after bringing in new furniture or painting, to disperse any accumulated formaldehyde.

Cross-ventilation enhances this effect by promoting the exchange of indoor and outdoor air, further decreasing pollutant levels. If natural ventilation isn't feasible, consider mechanical systems like exhaust fans or air handling units. These systems effectively introduce fresh air while removing contaminated air, ensuring a consistent exchange even in tightly sealed buildings.

Control temperature and humidity to enhance ventilation's effectiveness. High humidity can accelerate formaldehyde emissions, so using air conditioners or dehumidifiers helps maintain indoor humidity between 30-50%. Cooler temperatures also slow down off-gassing. By focusing on these ventilation strategies, you can significantly improve your indoor air quality and create a healthier living environment. Additionally, it is essential to be aware that prolonged formaldehyde exposure can lead to serious health issues, making effective ventilation even more critical in maintaining a safe home atmosphere.

Advertisement

Utilizing Air Purifiers

air purifier benefits explained

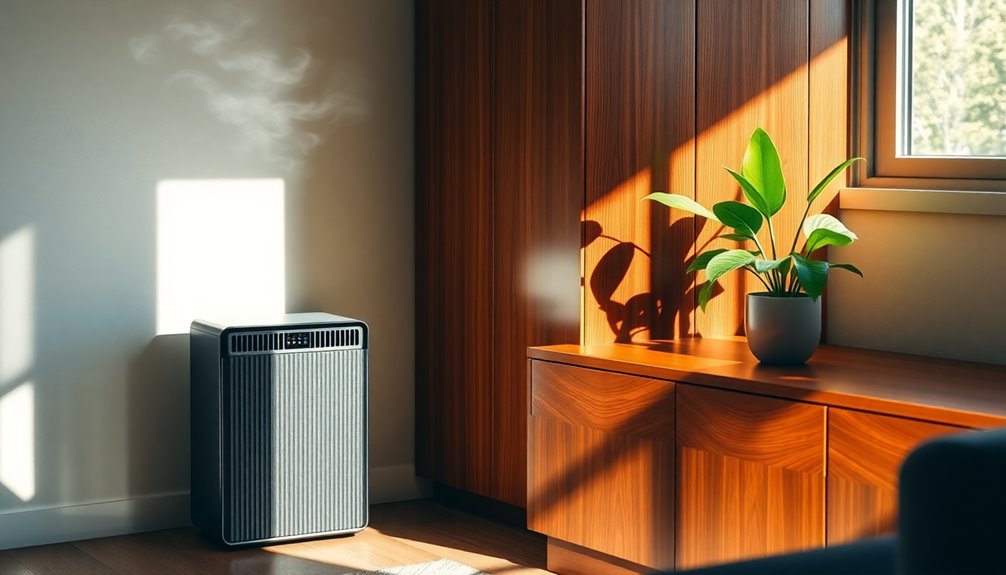
When looking to reduce formaldehyde levels in your home, utilizing air purifiers equipped with activated carbon filters can be highly effective. Activated carbon acts as a universal adsorbent, capturing formaldehyde and other harmful gases through its tiny pores. Keep in mind that HEPA filters alone won't remove gaseous pollutants effectively, so ensure your air purifier has that essential activated carbon filter. Studies have shown that some models can remove up to 90% of formaldehyde from the air, enhancing your indoor environment.

To maximize effectiveness, check the Clean Air Delivery Rate (CADR) of the purifier. A higher CADR value means it can clean more air in a given time, which is crucial for formaldehyde removal. For larger rooms, you might need a more powerful unit or multiple purifiers to ensure proper airflow and circulation.

Remember that activated carbon filters have a limited lifespan. Regular maintenance, including timely replacement, is vital to maintain their effectiveness. If these filters become saturated or exposed to heat and moisture, they could release formaldehyde back into the air. So, keep an eye on your filters and dispose of them properly to avoid further pollution. By taking these steps, you can significantly improve your indoor air quality.

Sealing and Coating Techniques
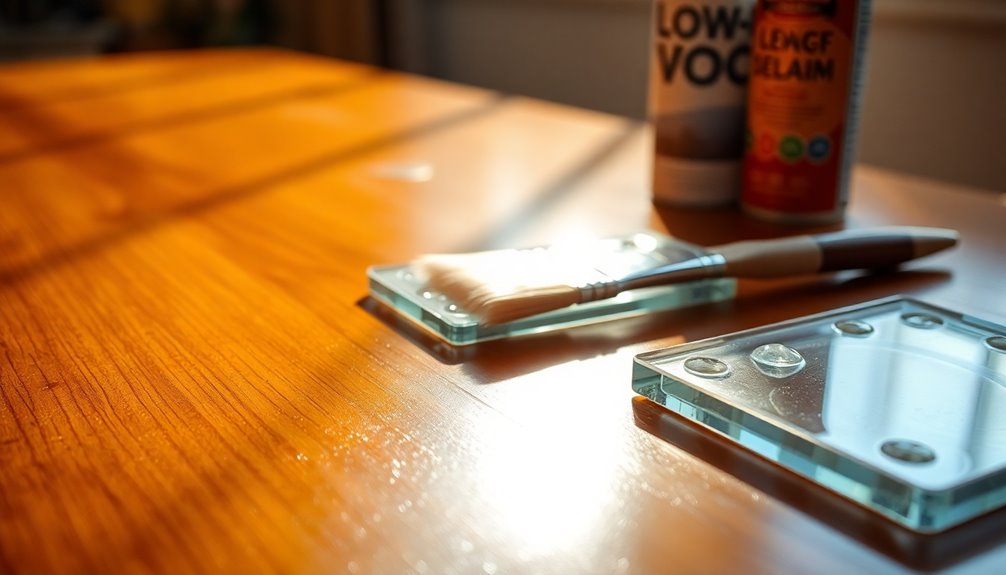
surface protection application methods

Sealing and coating your furniture effectively can significantly minimize formaldehyde emissions in your home. Start by using water-based commercial sealers specifically designed to lock in these harmful emissions. Ensure you apply the sealant to all exposed surfaces, including edges and undersides, and always follow the manufacturer's instructions for application and drying times. Reapply periodically, especially in high-use areas, as sealants can degrade over time.

You can also consider traditional finishes like varnish, shellac, or lacquer, which serve as effective sealants. Apply these finishes evenly and thoroughly to all surfaces to prevent formaldehyde from escaping. Make sure the finish is fully dry before using the furniture, and consider multiple coats for enhanced protection. Additionally, MDF construction often leads to higher emissions, so special attention to sealing is vital.

If you prefer eco-friendly options, choose low-VOC paints or coatings designed to reduce formaldehyde emissions. Apply a layer before using new wooden furniture and let it air out in a well-ventilated area until dry. For fabrics, specialized sprays can create a barrier against formaldehyde. Always follow application instructions and reapply as needed to maintain effectiveness. These sealing and coating techniques can make a noticeable difference in your indoor air quality.

Natural Absorption Methods

natural absorption techniques explained

Natural absorption methods offer effective solutions for reducing formaldehyde levels in your home. One of the easiest ways to tackle this is by using houseplants. Plants like Boston ferns, English Ivy, and Spider Plants naturally absorb formaldehyde from the air, helping to purify your space. Create a "green corner" by grouping several plants together for enhanced air purification. Low-maintenance options like Monstera and Aloe Vera also work well. Additionally, solid wood furniture does not typically contain formaldehyde, making it a safer choice for your home.

Another great option is activated charcoal. Place bowls or bags of activated charcoal near your furniture to absorb odors and VOCs. Just remember, charcoal needs exposure to air, so don't seal it in airtight bags.

Advertisement

White vinegar is another natural absorber; setting out bowls of white vinegar can help eliminate formaldehyde smells from your furniture. You can even add vinegar to laundry cycles to neutralize formaldehyde in fabrics.

Lastly, consider using baking soda. Sprinkling baking soda on fabrics and letting it sit for an hour can effectively neutralize odors. It bonds with VOCs, making it a safe and natural choice. By incorporating these methods, you can create a healthier environment in your home.

Heating and Ventilation Strategies
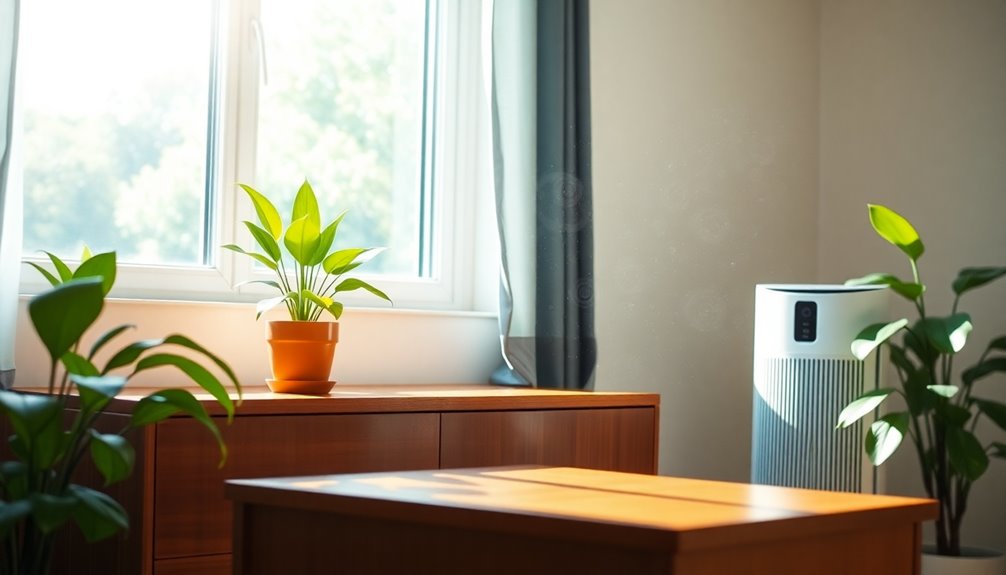
efficient climate control methods

Effective heating and ventilation strategies can significantly reduce formaldehyde levels in your home. Start by opening windows and doors to let fresh air circulate and dilute indoor concentrations. For better results, create cross-ventilation by opening windows and doors on opposite sides of the room.

Make sure to use exhaust fans in kitchens, bathrooms, and laundry rooms to expel contaminated air directly outside. Keep these fans running during and after any renovations to continuously remove pollutants. Additionally, consider installing mechanical ventilation systems like heat recovery ventilators (HRV) or energy recovery ventilators (ERV) to enhance air exchange without losing energy efficiency.

To accelerate off-gassing from new furniture, use the "Cookout Method" by heating the space to 30-40°C for several hours while ensuring proper ventilation. This method helps reduce long-term formaldehyde emissions. Consistent ventilation is essential, especially in the first few weeks post-renovation, to maintain lower indoor levels of this harmful substance. Monitor temperature and ventilation carefully during this process to prevent safety hazards.

Maintenance Practices for Furniture
furniture care and upkeep

Maintaining your furniture is crucial in minimizing formaldehyde emissions and ensuring a healthier living environment. Start by sealing exposed edges of particleboard or pressed wood furniture with non-toxic sealants like water-based polyurethane. This prevents the release of harmful gases. Additionally, treat all surfaces, including undersides, with these sealants to enhance their effectiveness.

Using air purifiers with activated carbon filters can significantly reduce VOC levels in your home. Keep these purifiers running continuously, especially in rooms with new furniture. If you want extra protection, consider models with photocatalytic oxidation technology.

Advertisement

For fabric furniture, regular cleaning is key. Wash new upholstery and curtains with hot water and mild detergent to help remove residual formaldehyde. Adding baking soda or vinegar during washing can further neutralize odors. Air-drying fabric items in sunlight not only freshens them but also utilizes UV rays to break down formaldehyde. Additionally, using effective ventilation techniques can help reduce formaldehyde levels even further by promoting air circulation.

Finally, incorporate natural absorbents like activated charcoal or houseplants such as peace lilies and spider plants. These can effectively reduce VOCs. Using a formaldehyde detector will help you monitor emission levels, ensuring your maintenance practices are working effectively.

Choosing Safe Furniture Options

safe furniture selection tips

Choosing Safe Furniture Options

When selecting furniture, prioritizing safe materials can significantly reduce your exposure to formaldehyde and other harmful chemicals. Start by choosing solid wood or bamboo furniture, as both are natural, durable, and low in formaldehyde. Metal and glass pieces are also excellent options since they don't off-gas harmful substances and are easy to maintain.

Avoid pressed-wood products like particleboard, plywood, and MDF, which often contain formaldehyde glues. Upholstered furniture and laminate flooring can also harbor high levels of formaldehyde, so steer clear of these. Be cautious of cheap furniture made from composite materials that may be loaded with chemicals. Additionally, natural remedies can help mitigate exposure to indoor air pollutants.

Look for certifications and labels that indicate safety, such as GREENGUARD Gold, Global Organic Textile Standard (GOTS), and Global Organic Latex Standard (GOLS). These labels assure you of low VOC emissions, including formaldehyde. Additionally, brands like IKEA, Medley, Urban Natural, Viesso, and Purebond Plywood offer safer options that meet stringent standards. By making informed choices, you can create a healthier living environment free from harmful chemicals. Solid wood is recommended as a preferred material for its low off-gassing compared to alternatives.

Advertisement

Professional Removal Services

expert relocation assistance offered

Professional removal services can provide a comprehensive solution for eliminating formaldehyde from your home. They begin with an initial assessment, conducting indoor air quality tests to determine formaldehyde levels using specialized monitors like RAE® VOC and HCHO Monitors. Based on the results, they customize a treatment plan tailored to your specific needs, identifying sources of formaldehyde emissions, such as new furniture or recent renovations.

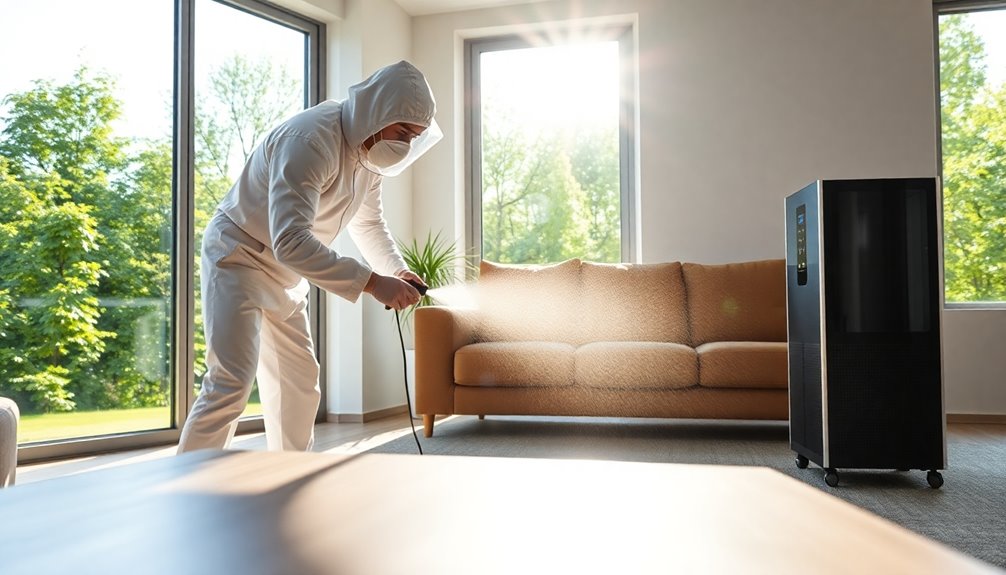
Using advanced equipment, these professionals employ air purifiers with specialized filters designed to trap and neutralize formaldehyde molecules. They also utilize axial fan ventilation kits for thorough air washing and Miele Allergy Vacuum Cleaners for vacuuming wood furniture. Space fogging with SafePRO® Formaldehyde & Odour Remover further enhances the treatment. Moreover, since high concentrations of formaldehyde can cause irritation to eyes, it is crucial to address these levels promptly.

After deep cleaning and applying natural fragrance gels to purify the air, they seal exposed edges of particleboard furniture with non-toxic sealants. Finally, they'll conduct tests to ensure a significant reduction in formaldehyde levels and provide you with a complimentary Formaldehyde and VOCs Test Report. You'll enjoy the benefits of improved indoor air quality, leading to a healthier living environment.

Monitoring Indoor Air Quality
indoor air quality monitoring

To effectively monitor indoor air quality, you can utilize sensors that detect pollutants like formaldehyde. Place these sensors strategically throughout your space; the EPA recommends one sensor for every 10,000 square feet for reliable results. Advanced sensors measure various pollutants, including carbon monoxide, particulate matter, and volatile organic compounds (VOCs), providing real-time data on emission levels. Additionally, understanding the impact of poor indoor air quality on health can motivate you to take action in monitoring and improving your environment.

In addition to sensors, consider investing in high-quality air purifiers equipped with activated carbon filters. These filters can reduce VOC levels by up to 80%, continuously improving your indoor air quality. Position air purifiers in areas where formaldehyde emissions are highest, and use them alongside proper ventilation for maximum effectiveness.

Implementing good ventilation is the simplest way to minimize formaldehyde buildup. Place new furniture in well-ventilated spaces or near open windows to facilitate off-gassing. You can also use fans to enhance airflow and direct emissions away from your living areas. Let new furniture air out in a garage or outdoor area for a few days before bringing it indoors. By combining these methods, you can effectively monitor and improve your indoor air quality.

Frequently Asked Questions

How Long Does Formaldehyde Off-Gassing Typically Last?

Formaldehyde off-gassing can last anywhere from a few months to several years, depending on various factors. You'll notice the highest intensity right after you unpack your furniture. Typically, some items may off-gas fully within a year, while others continue for up to five years or longer. Keep in mind that larger pieces or those made from materials like plywood and MDF tend to off-gas for a longer duration.

Advertisement

Can I Use Essential Oils to Mask Formaldehyde Odors?

You can use essential oils to temporarily mask formaldehyde odors, but don't expect a permanent solution. Oils like citrus, eucalyptus, and thyme have strong scents that might help for a while. However, keep in mind these oils can sometimes contain formaldehyde themselves or worsen indoor air quality. Instead of just masking the smell, focus on improving ventilation and using effective removal methods to tackle the underlying issue of formaldehyde exposure.

Is Formaldehyde Exposure Harmful to Pets?

Yes, formaldehyde exposure can be harmful to pets. It can lead to serious health issues, including respiratory distress, skin irritation, and even cancer. You might notice symptoms like excessive drooling, vomiting, or shallow breathing if your pet's been exposed. Prolonged exposure can also result in neurotoxic effects and chronic health problems. To keep your furry friend safe, it's crucial to minimize their exposure to items containing formaldehyde, especially in enclosed spaces.

What Symptoms Indicate Formaldehyde Sensitivity?

If you're experiencing symptoms of formaldehyde sensitivity, you might notice skin reactions like redness, itching, or swelling. Respiratory issues, such as coughing and a sore throat, can also occur. Additionally, you may deal with eye irritation, including watery or burning sensations. Headaches and nausea can arise too. In severe cases, you could face fatigue, asthma attacks, or even shortness of breath. Keep an eye on these signs to protect your health.

Are There Specific Brands Known for Low-Formaldehyde Furniture?

If you're looking for brands known for low-formaldehyde furniture, consider options like Pottery Barn and West Elm. They offer GREENGUARD Certified products, ensuring low VOC emissions. Burrow Sofas uses formaldehyde-free MDF, while IKEA provides solid wood items without formaldehyde in North America. Brands like Vermont Woods and TY Furniture focus on solid wood with non-toxic finishes. These options can help you create a healthier living environment without compromising on style.

Conclusion

In conclusion, tackling formaldehyde in your furniture doesn't have to be overwhelming. By ensuring proper ventilation, using air purifiers, and applying sealing techniques, you can significantly reduce emissions. Don't forget to explore natural absorption methods and maintain your furniture regularly. When shopping, opt for safer materials to prevent future issues. If you're still concerned, consider professional removal services. Keep a close eye on your indoor air quality, and you'll create a healthier home environment for everyone.
Advertisement

Interior Design

How to Keep Dust off Furniture

Tips to keep dust off your furniture include effective cleaning routines, but there’s a secret trick you won’t want to miss!

Published

on

dust prevention for furniture

In order to prevent dust from accumulating on your furniture, it is important to establish a regular cleaning routine. Using microfiber cloths, preferably slightly damp, can effectively trap dust. Always remember to dust from top to bottom for efficiency and consider incorporating dryer sheets on wooden surfaces to repel dust. Instead of sweeping, opt for vacuuming to minimize dust dispersal, and make sure to keep your air filters clean to reduce recirculation. Don’t overlook regularly vacuuming upholstered items and the surrounding areas to prevent dust buildup. By taking a proactive approach, you can significantly reduce dust accumulation. There are additional steps you can take to improve your dust management practices.

Key Takeaways

  • Use microfiber cloths, slightly dampened, to effectively trap dust on furniture surfaces.
  • Establish a regular cleaning routine and vacuum instead of sweeping to minimize dust dispersion.
  • Limit pet access and brush them frequently to reduce dander accumulation on furniture.
  • Incorporate dryer sheets on wooden surfaces to repel dust and reduce build-up.
  • Maintain clean air filters and use air purifiers to improve overall air quality and reduce dust circulation.

Dusting Techniques for Furniture

When you're ready to tackle dust on your furniture, employing effective dusting techniques can make all the difference. Start by using microfiber cloths, which are excellent for trapping dust particles. If you dampen them slightly, you'll enhance their performance even more.

Additionally, maintaining good indoor air quality can help reduce dust accumulation on surfaces; consider using an air purifier maintenance guide for best results. Remember to dust your furniture surfaces from top to bottom. This technique prevents you from re-dusting lower areas, making your cleaning process more efficient.

For wooden surfaces, consider incorporating dryer sheets after dusting; they not only provide a cleaner look but also help repel future dust accumulation.

When it comes to upholstery, always check care tags for specific instructions. Using stiff brushes alongside baking soda can help lift embedded dust from your fabrics.

Don't forget about light fixtures and ceiling fans! They can gather dust and contribute to overall dust levels on your furniture surfaces. Regularly cleaning these areas guarantees that you minimize the dust settling back onto your furniture.

Advertisement

Preventing Dust Build-Up

minimizing dust accumulation effectively

To effectively prevent dust build-up on your furniture, it's essential to establish a regular cleaning routine and adopt specific habits in your home.

Start by vacuuming your floors and surfaces regularly instead of sweeping, as this minimizes dust dispersion and reduces overall dust build-up. Consider using energy-efficient vacuum cleaners to help lower overall energy consumption while cleaning.

Limit pet access to your furniture, and make it a habit to brush your pets frequently. This reduces the accumulation of animal dander and hair, which can contribute to dust. By integrating smart home automation services into your cleaning routine, you can enhance your efficiency.

Be mindful of the products you use on your wood furniture; avoid oils, as they can attract more dust than untreated surfaces.

Additionally, keep your air filters clean and check your vents in heating or cooling systems. This practice prevents dust from being released back into the air and settling on your furniture.

Implementing doormats at entry points and adopting a no-shoes policy can greatly cut down on the outdoor dust brought into your home.

Advertisement

Maintenance of Upholstered Furniture

upholstered furniture care tips

Maintaining upholstered furniture requires consistent effort and attention to detail to keep it looking fresh and dust-free. Regular vacuuming is essential; use appropriate attachments to capture dust and prevent it from settling into the upholstery.

Don't forget to vacuum nearby areas, as skin cells and hair from sheets and pillowcases contribute to dust accumulation on your furniture. Additionally, consider incorporating professional cleaning services for deep cleaning, which can help remove embedded dirt and allergens.

Consider using protective covers for your upholstered pieces. These can notably limit dust penetration and make cleaning easier, extending the lifespan of the fabric.

If you notice any stains, treat them immediately to prevent dirt and dust build-up, ensuring your upholstery remains clean and well-maintained.

Always follow the care tags on your furniture. They provide specific cleaning methods that can enhance dust management and maintain the integrity of the fabric.

DIY Dust Repellent Spray

homemade dust repellent solution

Keeping upholstered furniture clean isn't just about regular vacuuming and professional cleaning; using a DIY dust repellent spray can greatly enhance your dust management efforts.

This economical solution leverages common household ingredients to create a powerful cleaning tool that's easy to make. By combining basic items like vinegar, baking soda, and water, you can effortlessly tackle tough stains and grime throughout your home. However, it’s important to ensure proper ventilation when using the mixture, as breathing in vinegar fumes can be irritating to some individuals. With just a few affordable materials, this DIY cleaner is both cost-effective and environmentally friendly. Additionally, this natural cleaning solution avoids the use of harsh chemicals, making it a safer alternative for households with children or pets. However, while the ingredients are safe, it’s still essential to be mindful of vinegar fumes health risks, especially in enclosed spaces where fumes can accumulate. Always maintain good air circulation during and after cleaning to minimize any potential irritation.

Advertisement

Here's how to whip up your own dust repellent spray:

  1. Mix: Combine 2 cups of water with 1 cup of vinegar in a spray bottle. Vinegar disinfects surfaces and cuts through grime effectively.
  2. Add: Pour in 2 tablespoons of olive oil. This not only polishes surfaces but also creates a protective barrier that repels dust for longer.
  3. Enhance: Include 1-2 drops of dish soap to boost the cleaning power, breaking down grease and grime.
  4. Apply: Spray the mixture onto a microfiber cloth to avoid over-saturating your furniture.

This simple DIY dust repellent spray not only keeps your furniture looking fresh but also simplifies your cleaning routine.

With just a few steps, you can enjoy a dust-free home while using an effective and budget-friendly alternative to commercial products.

Additional Dust Management Strategies

enhanced dust control techniques

Dust management goes beyond just regular cleaning; it involves adopting a series of proactive strategies that can greatly reduce dust accumulation in your home.

Start by regularly cleaning light fixtures and ceiling fans. This prevents dust from settling on surfaces below, maintaining a cleaner environment.

Installing air purifiers equipped with HEPA filters can considerably enhance your indoor air quality. These devices capture up to 95% of airborne dust particles, helping to keep your space fresh.

Don't forget to schedule seasonal deep cleaning sessions—these are vital for tackling dust build-up in hard-to-reach areas that often get overlooked.

Advertisement

Maintaining ideal humidity levels is another essential strategy. Keeping humidity between 30% and 50% helps reduce the amount of dust that settles on surfaces.

Educate everyone in your household about minimizing dust contribution by implementing simple practices, like removing shoes at the door and managing clothing to decrease shedding.

Frequently Asked Questions

What Repels Dust From Furniture?

To repel dust from furniture, you can use a DIY dust-repellent spray, apply fabric softener sheets, regularly wax wood surfaces, utilize anti-static polishes, and install HEPA filter air purifiers for cleaner air.

How Do I Stop My Furniture From Attracting Dust?

To stop your furniture from attracting dust, avoid using oils, keep your environment tidy, and vacuum regularly using a brush attachment. Air purifiers with HEPA filters can also help reduce airborne dust considerably.

How to Make Your Furniture Dust Free?

To make your furniture dust-free, regularly apply a DIY dust-repellent spray, use microfiber cloths for cleaning, enforce a no-shoes policy, and maintain air filters to capture airborne particles. Wax wooden surfaces for added protection.

Advertisement

What Is the Best Way to Protect Furniture From Dust?

You think dust's just a harmless sprinkle? Think again! To protect your furniture, you can use air purifiers, apply dust-repellent sprays, and embrace microfiber cloths. You'll be amazed at how much easier life gets!

Conclusion

To keep your furniture looking fresh, remember that a single household can accumulate up to 40 pounds of dust each year! By incorporating regular dusting techniques and preventive measures, you can greatly reduce this buildup. Don't forget to maintain your upholstered pieces and try out a DIY dust repellent spray for an extra layer of protection. With these strategies in place, you'll enjoy a cleaner, healthier home and a more inviting space for you and your guests.

Continue Reading

Interior Design

How to Dismantle a Sofa

Master the art of dismantling a sofa with essential tips and tools, but what hidden secrets might you uncover during the process?

Published

on

sofa disassembly step by step

To start dismantling a sofa, you should first assess its type and structure. Make sure your work area is clear and gather necessary tools such as screwdrivers, an Allen wrench, and a staple puller. Start by removing any loose cushions, then proceed to unscrew the hinge arms that connect the mattress frame. Use the staple puller to take off any visible staples from the upholstery, and carefully cut along the seams for a neat removal. After the upholstery is off, disassemble the frame by carefully organizing and keeping track of all screws and fasteners. Don’t forget to check for any hidden fasteners as well. If you would like more detailed instructions on each step, there is plenty more information to explore.

Key Takeaways

  • Assess the sofa type and gather essential tools like screwdrivers, an adjustable wrench, and a staple puller for disassembly.
  • Remove loose cushions and inspect for hidden fasteners before unscrewing hinge arms and upholstery.
  • Use a staple puller to extract visible staples and a box cutter to carefully cut fabric along seams.
  • Organize removed components in labeled bags to facilitate easier reassembly later and maintain a clean workspace.
  • Wrap disassembled parts in protective materials and secure them for safe transport, considering eco-friendly disposal or recycling options.

Preparation for Disassembly

ready for disassembly process

Before you plunge into dismantling your sofa, take a moment to prepare your workspace and gather the right tools. Start by evaluating your couch type and structure, as this will help you identify the best approach for disassembly. Understanding its components is essential to avoid damaging anything during the process.

Additionally, guaranteeing that your workspace is clear of clutter can help you maintain focus on the task at hand. For those interested in maintaining their furniture, top-rated mechanic shops are known for their expertise in cleaning services that can extend the life of your sofa.

Next, clear the area around your sofa. Remove surrounding furniture and obstacles to create a clean workspace that allows for ample movement. This preparation for disassembly will guarantee your safety and efficiency as you work.

Now, gather essential tools like a screwdriver set, Allen wrench, box cutter, staple puller, and handsaw. These tools are necessary for dismantling the sofa effectively.

Before diving in, check for any hidden screws or fasteners. Finding these beforehand prevents frustration and helps you avoid overlooking important components.

Advertisement

Initial Steps to Dismantle

dismantling process initiation steps

With your workspace prepared and tools gathered, you're ready to start dismantling your sofa. Begin by removing any loose cushions and setting them aside to create a clear area for disassembly. If your sofa includes a mattress, extract it first to simplify the process.

It's also wise to confirm your workspace is well-lit and organized, as this can help prevent any mishaps while handling tools and parts. Additionally, it's beneficial to have a budget plan for any potential costs associated with repairs or reupholstering.

Next, locate the hinge arms that connect the mattress frame to the sofa. Unscrew these carefully, making sure you keep track of all fasteners, as you'll need them for reassembly later. Once the mattress frame is removed, focus on the upholstery.

Identify and remove any upholstery fasteners, such as staples or tacks, using a staple puller. This way, you can preserve the fabric if you want to reuse it. If you don't plan on reusing the upholstery, prepare to cut or rip the fabric.

Make sure to carefully note the seams to avoid damaging the underlying sofa frame. Take your time with this step; confirming a clean removal can save you headaches later. By following these initial steps, you'll be well on your way to successfully dismantling your sofa for further repairs or disposal.

Upholstery Removal Techniques

effective upholstery removal methods

When tackling upholstery removal, start by using a staple puller to gently extract any visible staples holding the fabric in place. Be careful not to damage the upholstery if you plan to reuse it.

To help maintain a clean workspace, consider using essential oils for calming effects as you work through this process.

Advertisement

Next, for any attached upholstery, grab a box cutter and cut along the seams and edges. Make clean cuts to guarantee easier removal of the fabric.

As you work, keep an eye out for hidden fasteners or tacks that might be securing the upholstery. Use a screwdriver or pliers to remove these as needed.

Once you've detached the fabric, inspect the foam cushions for any wear or damage. If you find unusable materials, consider recycling options.

To keep your workspace organized, store the removed upholstery materials separately in a designated area. This will help prevent damage and make it easier for you to manage everything, especially if you plan to reuse or recycle the fabric later.

Frame Disassembly Process

frame disassembly procedure steps

To start the frame disassembly process, you'll need the right tools at hand.

It's crucial to verify that your workspace is clean and organized to avoid losing any components during the process.

Advertisement

Additionally, considering the importance of maintaining your surroundings, you might want to keep the area free of dust and allergens, much like the way you'd maintain an efficient air purifier maintenance routine.

Follow a step-by-step dismantling guide to guarantee you take apart the sofa systematically and efficiently. Start by removing any cushions or accessories to ensure a clear workspace before tackling the frame. When taking apart a reclining sofa, be sure to detach the backrest by locating and releasing the locking levers, often found at the base of the sofa. Finally, unscrew or unbolt the armrests and reclining mechanisms, keeping screws and bolts organized for easy reassembly later.

This approach will help you avoid losing any components and make reassembly much smoother.

Tools for Frame Disassembly

Dismantling a sofa requires specific tools to make the frame disassembly process efficient and straightforward.

You'll want to gather the right equipment to tackle screws holding the frame together and make your work easier. For instance, ensuring that you have a proper understanding of the proper diet for hamsters can inform your approach to maintaining any upholstery materials that might attract pests.

Advertisement

Here's a list of essential tools you'll need:

  1. Phillips Head Screwdriver: This tool is essential for removing screws from the arms and seat section of the sofa frame. Most furniture uses these fasteners, so it's a must-have.
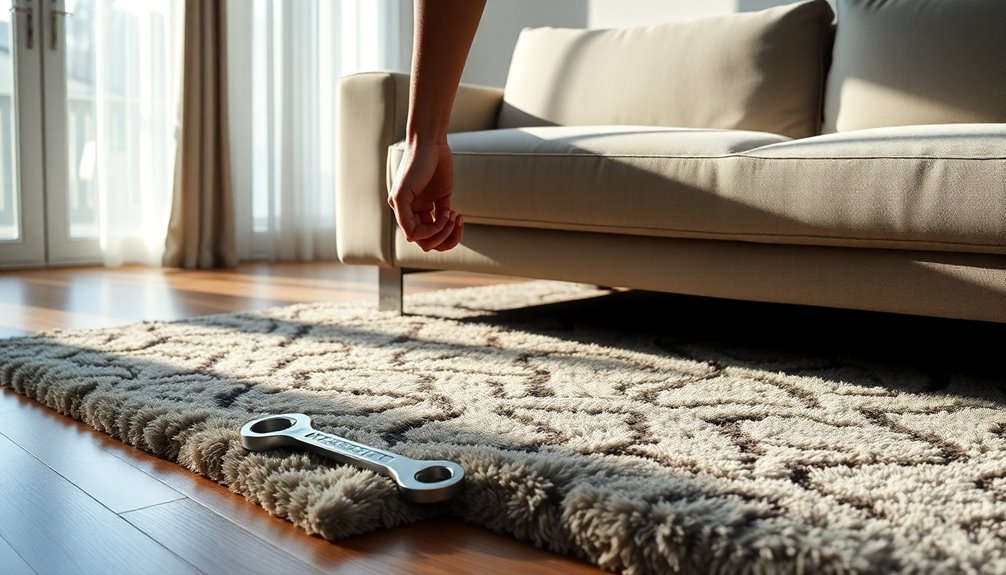
  2. Adjustable Wrench: Use this versatile tool to loosen any nuts and bolts securing the frame components. It'll help you easily disassemble the sofa without excessive force.
  3. Staple Puller: Make sure to have a staple puller on hand to remove any staples securing the upholstery to the frame. This step is important for accessing the internal structure.

Additionally, if you encounter larger frame sections that can't be unscrewed, a handsaw may be necessary.

As you work, organize and label all removed screws and fasteners in plastic bags to simplify the reassembly process later on.

With these tools, you're well-equipped to tackle the sofa frame disassembly.

Step-by-Step Dismantling Guide

Flipping the sofa upside down gives you immediate access to the frame, making it easier to start the disassembly process. First, focus on the legs; you can either twist them counter-clockwise or unscrew any fasteners holding them in place.

Once the legs are off, grab your screwdriver. Use it to systematically unscrew any visible bolts or screws that connect the arms and seat section to the couch's frame. It's also a good idea to reflect on any appliance maintenance plans you might need for other furniture items in your home during this process.

Advertisement

Next, carefully detach the backrest. Locate any locking mechanisms or fasteners securing it and unscrew them. If you encounter larger sections of the frame that seem impossible to disassemble with standard tools, don't hesitate to use a handsaw for those stubborn parts.

As you take apart a sofa, keep things organized. Collect all removed screws and fasteners in plastic bags, labeling them for easier reassembly later.

If your sofa has a mattress, make sure to remove it before you plunge into the frame disassembly. This step-by-step guide will help you efficiently dismantle your sofa for transport or renovation.

Tools Required for Dismantling

dismantling tool requirements list

To dismantle your sofa effectively, you'll need an essential tool kit that includes screwdrivers, an adjustable wrench, and a staple puller.

For added convenience, consider using a vacuum designed for dust removal, as it can help clean up any debris that accumulates during the disassembly process, making it easier to manage your workspace (Best Vacuums for Dust Removal in 2024).

Don't forget to prioritize safety equipment, like gloves and goggles, to protect yourself during the process.

Advertisement

Organizing your disassembly materials will make the entire task smoother and more efficient.

Essential Tool Kit

An effective tool kit is essential when you're ready to dismantle a sofa. Having the right tools on hand will make the process smoother and more efficient.

Just like how airless paint sprayers offer versatility for various surfaces, having the right tools allows you to tackle different parts of the sofa with ease.

Here's a quick list of key items you should gather before you start:

  1. Screwdriver Set: This should include both Phillips and flathead types. You'll need these to remove various screws that hold the sofa together, so having them handy is a must.
  2. Adjustable Wrench: This tool is vital for loosening and tightening nuts that may be part of the sofa's frame. Its versatility will save you time and effort.
  3. Staple Puller: If you plan on reusing the upholstery, a staple puller is necessary. It allows you to remove staples without damaging the fabric, preserving its integrity.

In addition to these, consider a box cutter for cutting through upholstery and other materials.

With these tools in your arsenal, you'll be well-equipped to tackle the dismantling process effectively. Make sure you have everything ready, and you'll find the task much easier to manage.

Advertisement

Safety Equipment Necessity

Having the right tools is only part of the equation when dismantling a sofa; guaranteeing your safety while you work is equally important. To keep yourself protected, you'll need a few essential safety items.

Here's a quick overview of the necessary safety equipment:

Equipment Purpose
Safety Goggles Protects your eyes from flying debris
Gloves Safeguards your hands from cuts and scrapes
Dust Mask Prevents inhalation of dust and particles
Non-slip Footwear Guarantees stability while moving around
Protective Covering Protects your knees during extended work

Always wear safety goggles to shield your eyes from sharp objects while cutting upholstery or disassembling the frame. Use sturdy gloves to avoid injuries when handling tools. A dust mask is vital for preventing inhalation of harmful particles. Additionally, wear non-slip shoes for stability, and consider knee pads or a cushioned mat to protect your knees during prolonged periods on the floor. Prioritizing safety equipment will help you dismantle your sofa without unnecessary risks.

Organizing Disassembly Materials

Before diving into dismantling your sofa, it's important to gather the right tools and materials. Having everything organized before you start will make the process smoother and more efficient. Here are three key items you'll need:

1. Screwdriver Set: Make sure to include both Phillips and flathead screwdrivers to tackle various screws throughout the disassembly. The significance of having the right tools can't be overstated, as it can greatly impact your efficiency and safety during the process.

Advertisement

Many DIY enthusiasts recommend the value of home security systems as a precaution while working on home projects.

2. Adjustable Wrench: This is vital for loosening and tightening nuts that secure the frame components of your sofa.

3. Allen Wrench Set: Many sofas use hex bolts, so having this set on hand will save you time and frustration.

As you gather these tools, also prepare protective materials like blankets or bubble wrap. These will safeguard cushions and delicate parts during dismantling and transport.

Organize small components like screws and fasteners in labeled plastic bags or containers. This will simplify reassembly, ensuring you don't lose any significant pieces.

Advertisement

With the right tools and organization in place, you're set to efficiently dismantle your sofa without any hassle.

Fastener Identification and Removal

identifying and removing fasteners

How can you effectively identify and remove fasteners when dismantling a sofa? Start by inspecting the frame for visible fasteners like screws, bolts, and staples. Make a note of their types and locations to choose the right tools for removal.

Fastener Type Tool Required
Screws Screwdriver or Drill
Bolts Wrench
Staples Staple Puller
Hidden Screws Prying Tool

Begin with screws, using a screwdriver or drill, and keep them organized in labeled bags for easy reassembly later. Next, check under the upholstery and behind cushions for hidden fasteners. Carefully use a staple puller to remove any staples that secure the upholstery, ensuring you don't damage the fabric if you plan to reuse it.

After addressing all visible and hidden fasteners, double-check each section of the frame for any leftovers. This thorough approach will make your dismantling process smoother, allowing you to efficiently move on to the next steps without missing anything essential.

Transportation of Disassembled Parts

disassembled parts transportation logistics

Transporting disassembled sofa parts requires careful planning to avoid damage and guarantee safety. To guarantee a smooth transportation process, follow these steps:

  1. Wrap each component: Use blankets or bubble wrap to protect the disassembled pieces from scratches and damage during transportation. This is especially important for the fabric and wooden parts. Engaging in high-quality content preparation guarantees that your furniture remains in prime condition throughout the move.
  2. Secure bundled parts: Once wrapped, bundle the components together using zip ties or rope. This prevents shifting and guarantees stability while loading them into your vehicle.
  3. Load heavy components first: Start with the heaviest parts, like the frame sections. Loading these first maintains balance, reducing the risk of tipping during transit.

In addition, consider using furniture sliders or a dolly to maneuver those heavy components more easily, minimizing the risk of injury and damage to your floors.

Remember to guarantee all items are secured in the vehicle to comply with safety regulations, preventing movement while driving.

With careful planning and secure packing, your transportation process will be hassle-free, making your furniture disposal or relocation much easier.

Advertisement

Disposal and Recycling Options

sustainable waste management solutions

Once you've successfully transported your disassembled sofa parts, it's time to contemplate the best ways to dispose of or recycle them.

Check your local waste management guidelines for bulk pickup services; many municipalities offer scheduled collection days for large items like sofas. This can simplify your waste removal process considerably.

If your sofa's in decent shape, consider donating it to organizations like Goodwill or Habitat for Humanity. They often accept gently used furniture, allowing your old furniture to find a new home while helping those in need.

For recycling, investigate local recycling programs that accept specific materials from your sofa. Metal frames, foam cushions, and upholstery fabric might be eligible for recycling, so make sure to know what your local centers accept.

If you prefer a hassle-free option, services like 1-800-GOT-JUNK? specialize in responsible disposal. They guarantee your sofa is recycled or donated, minimizing contributions to landfills.

Additionally, look for eco-friendly disposal facilities, which promote material reuse and reduce environmental impact. By considering these options, you can responsibly manage your old furniture's end-of-life journey.

Advertisement

Frequently Asked Questions

Can You Disassemble a Sofa?

Yes, you can disassemble a sofa. Most models allow for easy separation of components. Just check for hidden screws, use basic tools, and keep everything organized for a smoother reassembly process when you're done.

How to Dismantle a Sofa to Fit Through a Door?

You've got a tight doorway, and that sofa's looking stubborn. Measure both carefully, remove cushions, and unscrew the arms. Flip it over to access hidden fasteners, then reassemble it inside. Easy peasy!

How Easy Is It to Break up a Sofa?

Breaking up a sofa can be surprisingly easy. You'll typically remove cushions and legs first. With the right tools and some patience, you can tackle it efficiently, especially if the design allows for straightforward disassembly.

How Do You Tear up a Couch?

Tearing up a couch's like starting a wild adventure! You'll yank cushions, slice through fabric like a superhero, and unearth hidden treasures. Grab your tools, and let's release your inner demolition expert!

Conclusion

As you dismantle your sofa, think of it as peeling away the layers of a cherished memory, revealing the bare bones beneath. Each piece you separate tells a story, just like the fabric of your life woven into its cushions. By the end, you're left with a collection of parts—wood, springs, and fabric—each ready for a new journey, symbolizing not just the end of one chapter, but the beginning of countless possibilities for renewal and transformation.

Advertisement
Continue Reading

Interior Design

Revitalize Your Getaway With Fun Retreat Activities

You can rejuvenate your getaway with exciting retreat activities that spark creativity and connection—discover how to enhance your escape today!

Published

on

exciting activities for retreats

You can turn your vacation into a revitalizing getaway by participating in a range of enjoyable retreat activities. Consider practicing yoga or mindfulness to improve mental clarity and relaxation. Go hiking or kayaking to connect with nature and boost your mood and creativity. Embrace creative arts such as painting or pottery for a fulfilling hands-on experience. Engage in skill development workshops to build connections with others and foster a sense of community. Additionally, therapeutic crafting can help reduce stress and allow for personal expression. Each of these activities will enhance your retreat experience, creating lasting memories. Keep exploring for more inspiration!

Key Takeaways

  • Engage in yoga and mindfulness practices to enhance mental clarity and promote relaxation during your retreat.
  • Explore nature through hiking or kayaking to boost physical fitness and reduce stress while enjoying scenic views.
  • Participate in creative arts workshops to express yourself and cultivate mindfulness through hands-on activities like painting or pottery.
  • Build community connections by collaborating with fellow participants, fostering friendships and shared experiences during group activities.
  • Create personalized souvenirs to capture memories, enhancing emotional well-being and providing a sense of accomplishment from your retreat.

Yoga and Mindfulness Practices

mindful yoga techniques explained

Yoga and mindfulness practices offer powerful tools for enhancing your mental clarity and emotional well-being.

By engaging in these activities, you'll cultivate a deeper self-connection and discover effective relaxation techniques. The combination of physical movement and deep breathing helps you find balance, allowing you to navigate life's challenges with resilience.

As you practice, you'll learn to manage stress more effectively and promote inner peace. These practices also support personal growth, helping you address emotional obstacles that might be holding you back.

Plus, the scientific benefits are undeniable—you'll likely see improvements in your cognitive abilities, sleep quality, and overall wellness.

Embrace these practices to enrich your retreat experience and foster a sense of tranquility.

Advertisement

Exploring Nature and Adventure

nature exploration and adventure

Exploring nature and adventure can invigorate your spirit and enhance your overall well-being. Engaging in activities like hiking, biking, or kayaking allows you to connect with the great outdoors while boosting your physical fitness.

Immerse yourself in the beauty of scenic trails or tranquil lakes, and feel your stress melt away. These experiences not only elevate your mood but also sharpen your creativity and cognitive function.

Whether you're tackling a challenging trail or enjoying a leisurely walk, each moment spent in nature provides a chance for reflection and rejuvenation.

Don't forget to invite friends or fellow retreat-goers to join; shared adventures foster social bonds and create lasting memories. Embrace the thrill of exploration and let nature work its magic!

Engaging in Creative Arts

exploring innovative artistic expression

After soaking in the rejuvenating effects of nature, it's time to turn your focus inward and tap into your creative side. Engaging in creative arts offers you a hands-on way to express yourself and explore various artistic mediums.

Whether you choose pottery, painting, or knitting, each activity lets you release your inner artist while promoting relaxation and mindfulness. You'll find joy in the creative process as you personalize projects that reflect your unique style.

Plus, crafting can greatly reduce stress and enhance emotional well-being. So gather your supplies, let your imagination flow, and immerse yourself in this fun and enriching experience.

Advertisement

You'll leave with not just beautiful creations but a renewed sense of inspiration and fulfillment.

Skill Development Workshops

empowering personal growth opportunities

How can you elevate your creative skills while having fun? Skill development workshops are the perfect way to explore new techniques and release your artistic potential.

Engaging in these workshops can also promote mindfulness and presence, allowing you to engage yourself fully in the creative process. Whether you're a beginner or an experienced crafter, these workshops provide hands-on learning experiences that inspire creativity, much like the benefits of music therapy integration.

You'll enjoy:

  • Guided instruction from experienced instructors who share valuable tips and tricks.
  • Diverse activities, from painting and pottery to jewelry making, catering to all interests.
  • Opportunities for networking with fellow participants, enhancing your creative journey.

These workshops not only help you learn but also allow you to express yourself in a supportive environment.

Building Community Connections

fostering local relationships together

Participating in skill development workshops not only hones your creative abilities but also fosters a sense of community among like-minded individuals.

When you engage in group activities, you'll discover shared interests that can lead to lasting friendships. These interactions create an environment where teamwork and collaboration thrive, enhancing the overall experience.

You'll have the chance to network with local artists and fellow crafters, inspiring each other and sparking new ideas. Additionally, crafting together allows you to support one another, making the process even more enjoyable.

Advertisement

Therapeutic Crafting Benefits

creative healing through crafting

Engaging in therapeutic crafting offers a myriad of mental health benefits that can greatly enhance your overall well-being. By immersing yourself in creative activities, you'll find a natural avenue to reduce stress and express emotions.

Crafting not only fosters a sense of accomplishment but also provides a break from daily routines, allowing you to enter a meditative state.

  • Lowers anxiety levels markedly.
  • Enhances emotional health through art therapy.
  • Cultivates mindfulness and focus in the creative process.

Whether it's painting, knitting, or pottery, each crafting session opens up opportunities for personal growth and relaxation.

Creating Personalized Souvenirs

custom made personalized gifts

Creating personalized souvenirs during your retreat offers a unique way to capture memories and experiences. You can craft items that reflect your journey, whether it's through custom jewelry, painted pottery, or decorated photo frames.

Incorporating elements that symbolize your experiences, such as natural materials or themes, can make your creations even more meaningful, connecting with the essence of your retreat and the joy of ultimate hamster care. These creations not only serve as cherished keepsakes but also showcase your artistic style.

Imagine creating a piece that tells a story of your time spent in nature or with new friends. Each handmade item carries sentimental value, making them perfect gifts for loved ones.

Plus, engaging in this creative process can enhance your emotional well-being and provide a sense of accomplishment. So, gather your materials, let your imagination flow, and create unforgettable souvenirs that will remind you of your special retreat long after it's over.

Embracing Cultural Artistic Exploration

cultural artistic exploration embraced

Exploring cultural artistic traditions during your retreat can deepen your appreciation for diverse perspectives and creative expressions.

Engaging in these activities helps you connect with local communities while broadening your artistic skills. Incorporating strategies that encourage nurturing an imaginative mindset can enhance your creative experience.

Advertisement

Here are some enriching ways to embrace cultural artistic exploration:

  • Participate in workshops that focus on indigenous art forms and techniques.
  • Experiment with various mediums, like painting or pottery, inspired by local culture.
  • Attend exhibitions or local artisan fairs to gain insight into community artistry.

Frequently Asked Questions

What Should I Pack for a Retreat Focused on Relaxation Activities?

For a retreat focused on relaxation activities, pack comfortable clothing, yoga gear, a journal, personal care items, and any favorite crafts. Don't forget a reusable water bottle and a cozy blanket for extra comfort!

Are Meals Provided During the Retreat, and Can Dietary Restrictions Be Accommodated?

Meals are typically provided during retreats, and most places can accommodate dietary restrictions. It's best to inform the organizers in advance, so they can guarantee your needs are met and you enjoy every meal.

How Can I Connect With Other Participants Before the Retreat Begins?

Consider joining a social media group where past participants share experiences. You can introduce yourself and ask questions about the retreat. Engaging early helps build connections, making the experience more enjoyable when you arrive.

Is There a Cancellation Policy for Retreat Bookings?

Yes, there's typically a cancellation policy for retreat bookings. You should check the specific terms when you book. If you need to cancel, do it as soon as possible to minimize potential fees.

What Is the Typical Duration of Activities During the Retreat?

You'll plunge into activities that stretch time itself, with sessions lasting anywhere from a blissful hour to an exhilarating half-day. Each moment's designed to immerse you fully in joy and connection.

Advertisement

Conclusion

As you stand at the crossroads of relaxation and adventure, remember that your retreat can be a transformative odyssey, much like Odysseus's journey home. Embrace the yoga sessions that ground you, the hikes that invigorate your spirit, and the crafts that ignite your creativity. By diving into these enriching activities, you're not just escaping; you're creating lasting memories and connections. So, pack your bags and set sail on this incredible voyage of self-discovery and rejuvenation! Whether you immerse yourself in a serene meditation session by the ocean or explore unique spiritual retreat ideas like sound healing or forest bathing, each experience will leave an imprint on your soul. These moments of stillness and adventure help you reconnect with your inner self while shedding the weight of everyday life. The path you choose is bound to refresh both your mind and spirit, transforming how you view the world around you. As you journey through this immersive experience, remember that *unique spiritual retreats* offer a chance to explore practices you may have never considered before. From silent retreats that encourage introspection to immersive nature journeys that align you with the rhythms of the earth, each opportunity invites you to dive deeper into self-awareness. Let this be a time to not only discover new horizons, but to return home with a renewed sense of purpose and peace.

Continue Reading
Advertisement

Affiliate disclaimer

As an affiliate, we may earn a commission from qualifying purchases. We get commissions for purchases made through links on this website from Amazon and other third parties.

Advertisement

Vetted

brad pitt s unexpected gq reveal brad pitt s unexpected gq reveal
Vetted6 hours ago

Brad Pitt’s GQ Spread: The Shocking Revelation That No One Expected

Mysterious revelations unfold in Brad Pitt's GQ spread, hinting at a transformative journey that will leave you questioning everything you...

denzel washington s top performances denzel washington s top performances
Vetted8 hours ago

7 Best Denzel Washington Movies That Showcase His Incredible Talent

Looking to discover the best of Denzel Washington's cinematic brilliance? Dive into these seven unforgettable films that highlight his exceptional...

john mulaney s candid revelations john mulaney s candid revelations
Vetted18 hours ago

John Mulaney’s GQ Interview: The Raw Confession That Has Fans Buzzing

John Mulaney's GQ interview reveals shocking truths about his life; discover how his candid confessions are reshaping his comedy and...

stylish men s weekend bags stylish men s weekend bags
Vetted20 hours ago

15 Best Men’s Weekend Bags for Stylish Getaways in 2024

Make your weekend getaways stylish and hassle-free with our top 15 men's bags for 2024, but which one will suit...

top men s deodorants reviewed top men s deodorants reviewed
Vetted20 hours ago

15 Best Deodorants for Men That Keep You Fresh All Day Long

Discover the 15 best deodorants for men that promise all-day freshness, but which one will suit your needs perfectly?

pedro meme revival trend pedro meme revival trend
Vetted1 day ago

Vote for Pedro: The Iconic Meme That’s Making a Comeback

From nostalgic roots to modern relevance, discover how the "Vote for Pedro" meme is reawakening conversations about individuality and civic...

comfortable and stylish crew socks comfortable and stylish crew socks
Vetted1 day ago

13 Best Crew Socks for Comfort and Style You Won’t Want to Take Off

Discover the 13 best crew socks that blend comfort and style seamlessly—perfect for elevating your everyday look and keeping your...

secret techniques for rapid results secret techniques for rapid results
Vetted2 days ago

How to Get Ripped Fast: The Secret Techniques Trainers Won’t Tell You

You won't believe the secret techniques trainers keep hidden that can transform your body fast; discover them now!

stylish and comfortable men s shorts stylish and comfortable men s shorts
Vetted2 days ago

15 Best Shorts for Men: Style and Comfort for Every Occasion

Find the perfect blend of style and comfort with our top 15 men's shorts, but which one will elevate your...

best fit gq jeans best fit gq jeans
Vetted2 days ago

The Ultimate GQ Jeans: Discover the Best Fit for Your Style

Just when you thought you found the perfect jeans, discover how the right fit and style can elevate your wardrobe...

rising star in entertainment rising star in entertainment
Vetted2 days ago

Hunter Schafer Young: The Rising Star Everyone’s Watching

Beneath her stunning exterior, Hunter Schafer's journey reveals a powerful blend of talent and advocacy that is just beginning to...

mold consumption health risks mold consumption health risks
Vetted2 days ago

What Happens If You Eat Mold? The Answer Will Terrify and Surprise You

Have you ever wondered what really happens if you eat mold? The shocking truth might just leave you uneasy. Discover...

Trending

Copyright © 2024 StyleGuru.org Affiliate disclaimer As an affiliate, we may earn a commission from qualifying purchases. We get commissions for purchases made through links on this website from Amazon and other third parties.