Interior Design
How to Use Chalk Paint on Furniture
Optimize your furniture transformation with chalk paint; discover essential tips and techniques to achieve a stunning finish that lasts.
To use chalk paint on furniture, start by cleaning and prepping your piece, ensuring it's free of dust and grease. Remove any hardware and fill holes if necessary. Stir your chosen chalk paint well before applying it in smooth, even strokes, allowing each coat to dry thoroughly—typically 1-3 hours apart. If desired, finish with a layer of wax for added protection and shine, buffing lightly to a smooth surface. Remember to maintain your painted furniture with gentle cleaning and periodic wax applications. For tips on techniques and enhancements, there's plenty more you can discover.
Key Takeaways
- Clean and prepare the furniture by removing hardware and filling holes, ensuring a smooth surface for painting.
- Choose a suitable chalk paint, stirring thoroughly, and apply in multiple thin coats for even coverage.
- Lightly sand between coats and allow adequate drying time to achieve the desired finish.
- Seal the paint with a wax or water-based sealer to protect and enhance the surface.
- Maintain the finish by cleaning gently and periodically applying wax to prolong durability.
Preparing Your Furniture
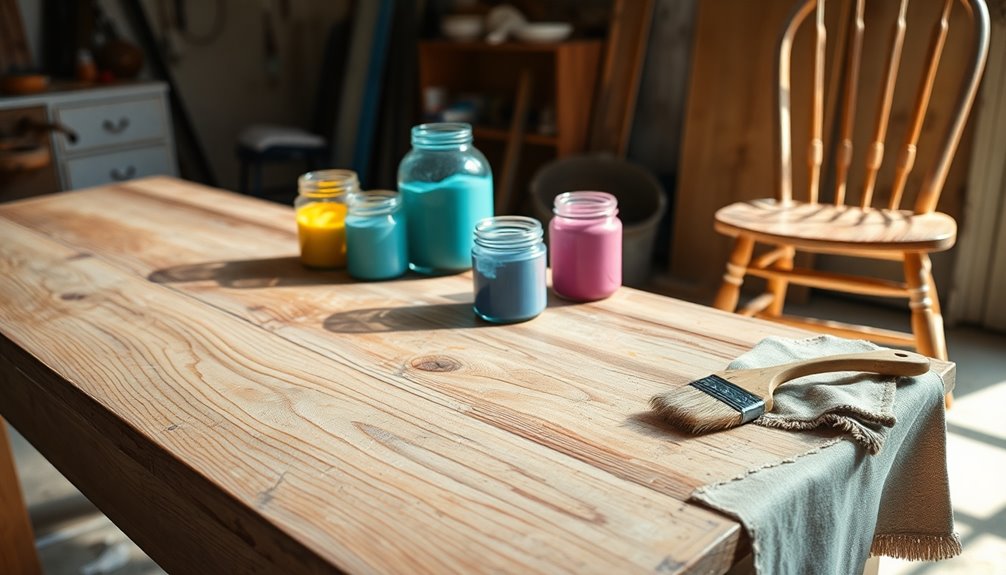
Before you dive into painting, it's essential to set up your furniture properly. Start by cleaning the surfaces with a damp cloth, avoiding harsh chemicals. If you encounter stubborn dirt or grease, mix warm soapy water or use a solution like White Lightning or TSP. Spray it on the surfaces and wipe down with a soft cotton cloth or paper towels. For kitchen cabinets, ensure you remove all grease residue to prevent affecting the finish. Finish up by wiping with clean water to eliminate any leftover cleaning solution.
Next, remove any hardware, such as handles, from the furniture to ensure smooth painting. Fill any holes left by removed hardware with wood filler and sand them smooth. If you prefer to paint over hardware, make sure it's clean and free of grease. Don't forget to take off any other fixings that could interfere with your painting process. Lastly, lightly sand shiny surfaces using 220 grit sandpaper for better paint adhesion. Chalk Paint® adheres well to multiple surfaces, including varnished wood, making it a versatile choice for your project. Wipe away any sanding dust before you begin painting. Following these steps will set you up for a successful chalk paint project!
Assessing Surface Conditions
Once your furniture is prepared, it's time to assess the surface conditions. Start by checking for dust or dirt; if you find any, gently wipe the surface down with a damp cloth. Avoid using harsh chemicals, especially on kitchen cabinets that may have grease. It's essential to ensure the surface is clean and dry before you begin painting.
Next, identify the type of surface you're working with. If it's shiny or laminate, you may need to do some light sanding to improve paint adhesion. Use a fine sanding sponge or block, and test the surface with a scratch test to confirm it's not too smooth or glossy.
Now, check for any previous finishes. Use nail polish remover to determine if it's oil-based or water-based; if color comes off, it's water-based. If it's oil-based, you'll need to apply a primer to ensure the Chalk Paint adheres properly. Remember that Chalk Paint™ adheres well without extensive sanding, which simplifies the preparation process.
Finally, inspect for any potential stains or bleeding, particularly in vintage furniture or untreated pine. Look for mold and be prepared to test for lead or other substances that could affect adhesion. This thorough assessment will set you up for successful painting.
Choosing the Right Paint
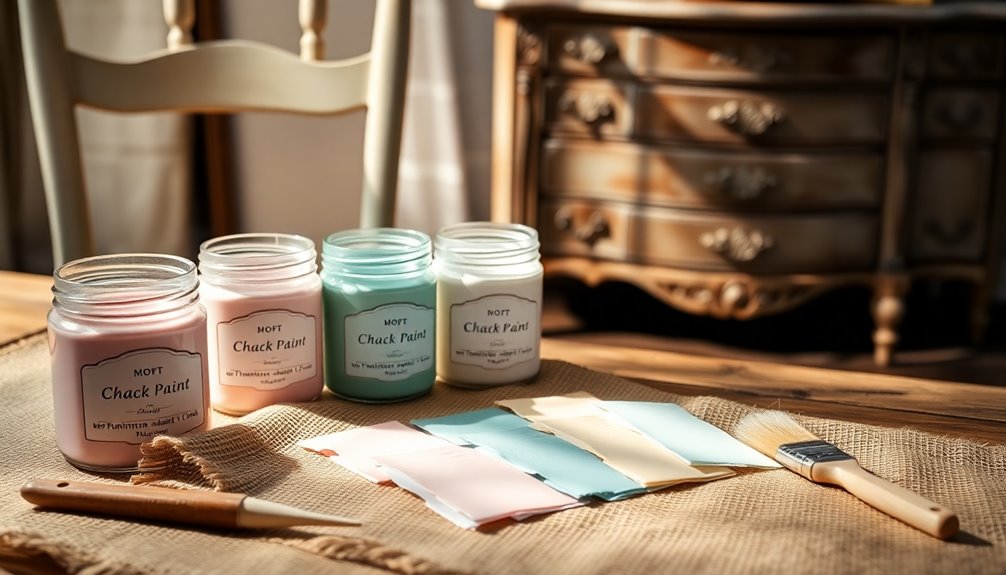
How do you choose the right paint for your furniture project? Start by considering the versatility of chalk paint. It works well on various surfaces like wood, metal, melamine, and even glass. Since chalk paint doesn't require sanding or priming, you can dive right into your project without extensive prep work.
Next, think about color selection. With an extensive palette inspired by historical decor, you'll find shades like Old White, Paris Grey, and Emperor's Silk. If you're feeling creative, you can mix your own bespoke shades. To avoid surprises, grab color cards and samples to test out your choices before committing.
When it comes to brands, Annie Sloan Chalk Paint is a widely recognized option, but don't overlook other cost-effective alternatives available at local hardware or DIY stores. Check online retailers for even more choices. Additionally, remember that Chalk Paint® is designed for both beginners and professionals, making it an excellent choice regardless of your skill level.
Lastly, consider your budget. Prices range from $16 to $45, but remember, you'll save on prep costs. Typically, two coats are enough for full coverage, giving you a durable finish that lasts. With these points in mind, you're set to choose the perfect chalk paint for your furniture project!
Applying Chalk Paint
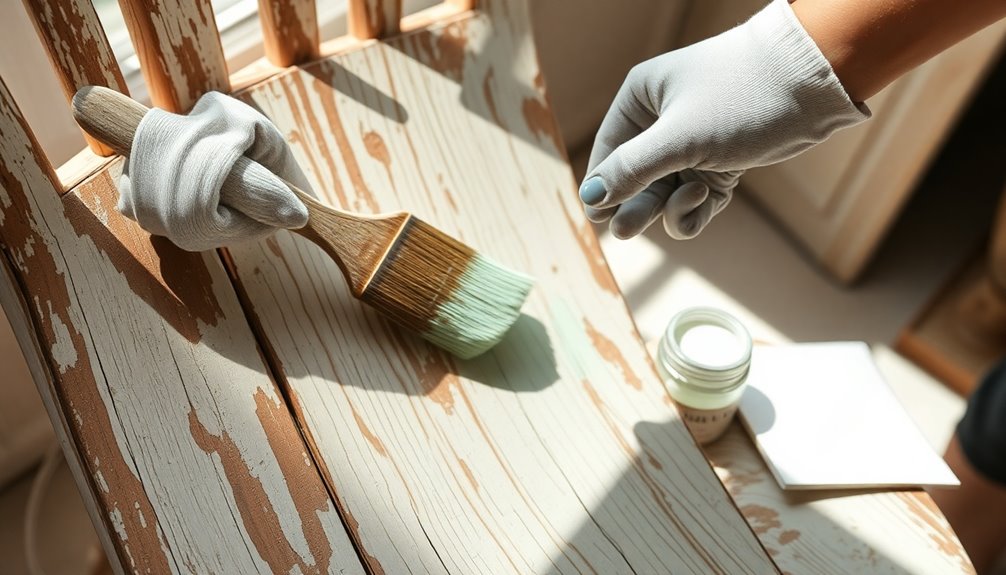
Applying chalk paint can transform your furniture with relatively little effort. Start by stirring your chosen color thoroughly. If you've prepped your furniture by removing hardware and cleaning the surface, you're ready to paint. Dip your brush into the paint and apply it directly onto the furniture. Move the brush in all directions to ensure even coverage. If you prefer a rustic look, apply the paint thickly; for a modern finish, keep it smooth.
Allow the first coat to dry until it's touchable, which usually takes 1-3 hours, depending on your environment. If you feel additional coats are necessary, apply them in the same manner. Remember, each coat should be fully dry before you proceed to the next step.
Once your final coat is dry, you can sand it lightly with very fine sandpaper or a sanding sponge to achieve a smooth finish. Chalk paint's low VOCs make it a great choice for indoor projects, ensuring a safe environment while you work. If you want to create a distressed look, use sanding techniques to expose some of the underlying surface. Make sure the paint is completely dry before moving on to sealing it with wax, ensuring your hard work is protected.
Layering Additional Coats
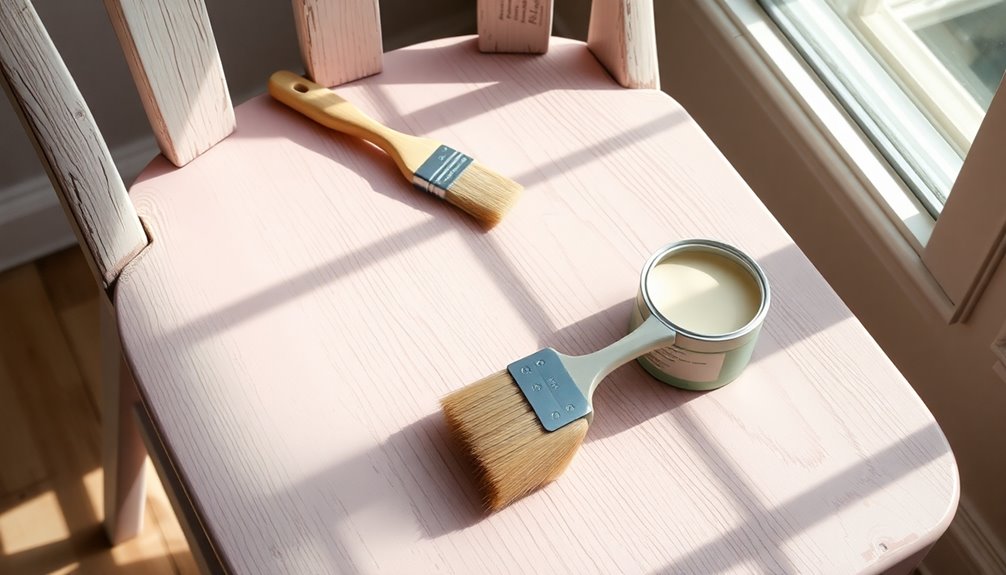
When layering additional coats of chalk paint, it's essential to assess the coverage you desire and the color you're working with. If you're painting a dark piece with white or off-white, you might need three coats for solid coverage. Conversely, darker colors usually only require two coats for excellent results. For a distressed look, you can often achieve it with just two coats, while unfinished wood may need extra layers if staining is involved.
Timing is crucial between coats. Chalk paint dries quickly, typically within 1-3 hours, but you should wait until the first coat is completely dry before adding the next one. For layered effects, waiting 24 hours helps prevent unwanted mixing of colors. Keep an eye on humidity and weather, as these factors can influence drying times. It's also important to consider using a light coat of chalk paint for initial coverage to ensure a smooth finish.
When applying your coats, consider techniques like dry brushing for a textured finish. Use a nearly dry brush with stiff bristles for feathery strokes, concentrating darker shades along edges to create depth. Always test for bleed-through on older woods and apply primer as needed. This preparation ensures a smoother and more vibrant final result.
Waxing Techniques
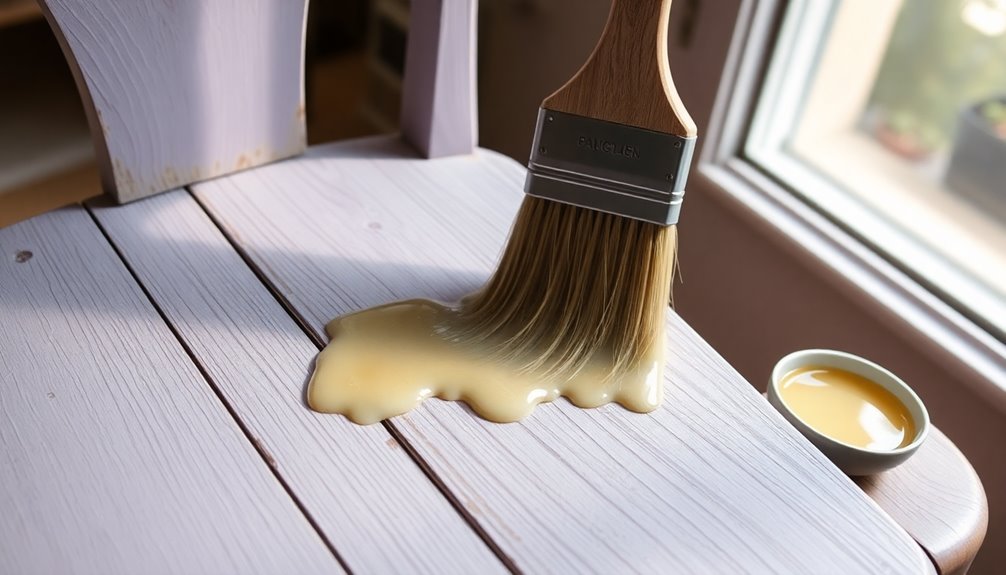
Waxing is a crucial step in achieving a durable and beautiful finish for your chalk-painted furniture. Before you start, make sure the paint is fully dry. Use a fine sanding pad to smooth out any remaining texture, and wipe the surface with a damp cloth to remove dust. It's also wise to remove any hardware to avoid interference during waxing. Always work in a well-ventilated area to keep fumes at bay.
When applying the wax, use a Chalk Paint™ Wax Brush. Charge your brush with Clear Chalk Paint™ Wax and apply it in sections, sweeping it over the paintwork with either brush strokes or a lint-free cloth. Aim for thin, even layers, working in larger areas for better control. Applying wax in sections allows for better control and finish.
After applying the wax, use a clean, lint-free cloth to wipe off any excess while it's still wet. Rub lightly in one direction to minimize marks. Don't forget to check each section and remove any excess wax promptly. Allow the wax to be touch dry within 24 hours, but remember that full curing can take up to 21 days. Be gentle with your piece during this time to avoid damage.
Final Touches and Care
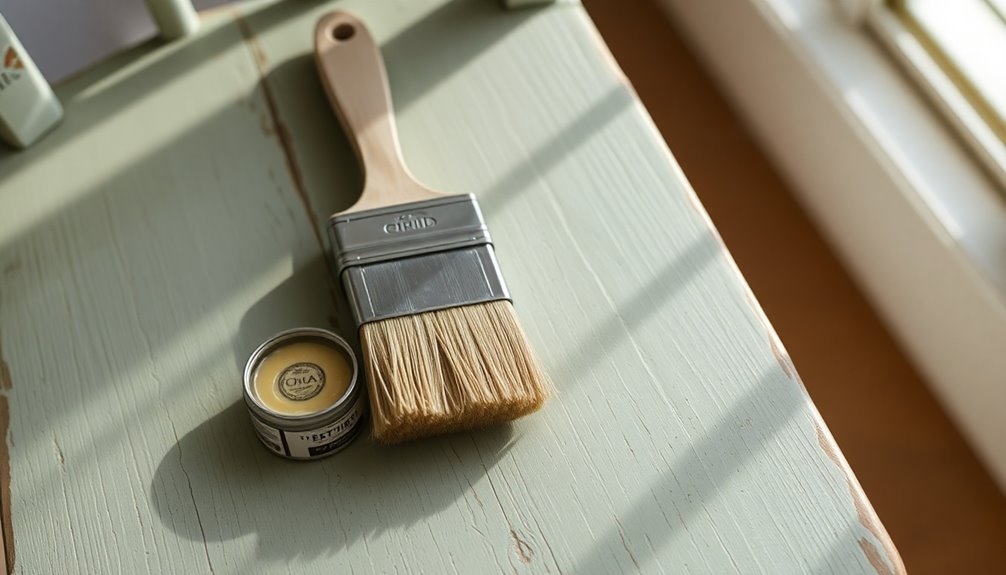
After you've successfully painted and waxed your furniture, it's essential to focus on the final touches and care to ensure your piece remains beautiful and durable. Start by sealing the paint with a water-based sealer or additional wax. Use a clean brush to cover every surface, and let it dry completely before handling. Once dry, buff the surface with a lint-free cloth to achieve a smooth finish.
For everyday cleaning, simply wipe off dust with a dry, lint-free cloth. For deeper cleaning, use a slightly damp cloth, wiping in the direction of the brush strokes. If you encounter tough stains, gently scrub with a mix of dish soap and water. Avoid harsh chemicals that could damage the paint. Remember that proper sealing prolongs the life of your finish, so be diligent in this step.
In case of spills, quickly wipe up any water to prevent spots. For oil spills, use a degreaser and follow with clean water. Remember to maintain your finish by periodically applying wax and addressing scratches or scuff marks as they arise. This way, your chalk-painted furniture will stay looking fresh and vibrant for years to come.
Enhancing With Dark Wax
Enhancing your chalk-painted furniture with dark wax can elevate its character and depth significantly. Start by ensuring your chalk paint is completely dry and has a beautiful texture from your brushwork. Once you're ready, apply a thin layer of Clear Chalk Paint® Wax using a Wax Brush or a lint-free cloth. This step protects the paint and prevents the dark wax from staining too much. Let the Clear Wax absorb and then wipe away any excess.
While the Clear Wax is still wet, grab your Dark Chalk Paint® Wax. Work in small sections, applying the dark wax liberally with a Wax Brush. Don't worry if it looks too dark at first; you can always wipe back the excess with a lint-free cloth to achieve your desired look. Focus on blending the dark wax into crevices and brush marks to enhance texture. Additionally, remember that Black Chalk Paint® Wax is compatible with Clear Chalk Paint® Wax for sealing, ensuring a durable finish.
If some areas become too dark, simply use Clear Wax as an "eraser" to lighten them. Always test on a small, hidden area first if you're unsure. This method allows you to control the darkening effect, giving your furniture a beautifully aged finish. Enjoy the transformation!
Frequently Asked Questions
Can I Use Chalk Paint on Outdoor Furniture?
Yes, you can use chalk paint on outdoor furniture! It adheres well to various surfaces, making it a great choice. Just remember to clean the furniture thoroughly before painting, and apply at least two thin coats for proper coverage. After painting, consider using a protective varnish to seal the paint and provide UV protection. This'll help maintain your furniture's beauty and durability against the elements. Don't forget to inspect and reapply varnish as needed!
How Long Does Chalk Paint Take to Cure Completely?
Chalk paint generally takes at least 24 hours to cure completely, but it can take up to two weeks under certain conditions. Factors like humidity, temperature, and the thickness of your paint layers can affect this time. You'll notice it's dry to the touch in 30 minutes to 2 hours, but don't rush—if the surface scratches easily, it's not fully cured. Patience is key for the best results!
What Is the Best Brush for Applying Chalk Paint?
When you're looking for the best brush to apply chalk paint, consider using an oval brush. Its domed profile and tapered bristles help you achieve a smooth finish. For larger areas, a flat brush can provide even coverage, while a round brush works well in tight spaces. If you're detailing small areas, a detail brush is your best bet. Natural bristles are ideal for chalk paint, ensuring a beautiful application every time.
Can I Mix Different Colors of Chalk Paint?
Absolutely, you can mix different colors of chalk paint! Just choose 2-3 complementary colors for a cohesive look. Experiment with various combinations to see what unique effects you can create. When blending, use a good quality brush and apply thin layers to help the colors merge smoothly. Remember, practice makes perfect, so don't hesitate to try out different techniques until you achieve the desired blend. Enjoy the creative process!
How Do I Remove Chalk Paint if Needed?
If you need to remove chalk paint, you've got several options. You can sand it off using medium and fine grit sandpaper for a smooth finish. Chemical strippers work well too—apply, wait, and scrape. A heat gun can soften the paint for easy removal, but be cautious. For a gentler approach, try warm water and soap to soften the paint before scraping. Always wear protective gear regardless of the method you choose!
Conclusion
Now that you know how to use chalk paint on furniture, you're ready to transform your pieces into stunning focal points. Remember to prep your surfaces well and take your time with each coat for the best results. Don't forget the finishing touches, like waxing, to add durability and a beautiful sheen. With a little practice, you'll master the art of chalk painting and give your furniture a fresh, stylish makeover that reflects your personal taste!
Interior Design
How to Dispose of Sofa
Knowing the best ways to dispose of your sofa can save you time and effort—discover the eco-friendly options available to you.
To properly get rid of your sofa, begin by referring to your local disposal guidelines. Several communities offer bulk item pickup services, which can make the process easier. If your sofa is still in good condition, consider selling it online or donating it to organizations like Goodwill or Salvation Army. You can also recycle the various components or hire junk removal services that promise eco-friendly disposal. If you are unsure of the best course of action, schedule a pickup with local services. Removing cushions and cleaning your sofa beforehand will help simplify disposal. There are multiple methods available, as well as additional helpful tips to be found. Furthermore, it is crucial to educate yourself on how to responsibly dispose of old furniture to avoid fines or improper disposal. Contact your local landfill or recycling center for specific instructions, as they typically provide clear guidelines. By taking the initiative to learn the proper way to dispose of old furniture, you can ensure that removing your sofa benefits both the environment and your community. Additionally, understanding how to dispose of furniture responsibly can prevent contributing to overflowing landfills. Proper disposal not only reduces environmental impact but also promotes responsible waste management in your area. Opting for recyclable solutions can ensure that your old furniture parts are repurposed instead of becoming waste.
Key Takeaways
- Check local disposal guidelines to understand regulations and scheduled bulk item pickup days for sofa disposal.
- Consider selling your sofa through online platforms like Facebook Marketplace or local community groups for extra cash.
- Donate gently used sofas to charities like Goodwill or Salvation Army to support community programs and sustainability.
- Hire junk removal services to handle the heavy lifting and ensure eco-friendly disposal through recycling or donation.
- Prepare the sofa for disposal by cleaning, removing cushions, and disassembling it for easier transport.
Understand Local Disposal Guidelines
When disposing of a sofa, it's vital to regularly check your local disposal guidelines. Local governments often set specific regulations for sofa disposal, so you'll want to familiarize yourself with the options available in your area.
Many municipalities offer scheduled bulk item pickup days that can simplify the process for you. These designated days often allow residents to dispose of large items like sofas without hassle. Additionally, proper disposal can contribute to a safer community, similar to how the presence of security systems can deter crime and enhance peace of mind.
In some regions, there are dedicated disposal days for furniture and appliances, which can help you dispose of your sofa responsibly. Understanding local regulations is important, as improper disposal can lead to fines. Some jurisdictions impose strict rules regarding bulky waste, and you don't want to find yourself facing penalties.
When using local waste management facilities, be prepared to provide proof of residency, like an ID and a utility bill. Having these documents ready can save you time and guarantee a smooth disposal process.
Always remember to check with your city or county office for the most accurate and updated information on sofa disposal services in your area. Being informed helps you dispose of your sofa correctly while avoiding any potential issues.
Options for Selling Your Sofa
Selling your sofa can be a great way to reclaim some space while putting extra cash in your pocket. There are several options available to help you efficiently sell your old couch, including top platforms that cater to various selling needs.
Online platforms like Facebook Marketplace, Craigslist, and OfferUp are excellent choices, allowing you to reach a wide audience. When listing your items, include accurate measurements and high-quality photos to attract potential buyers. This aids them in assessing whether your sofa fits their space.
Be transparent about any flaws or damages in your listing to avoid buyer dissatisfaction. You don't want surprises during the transaction!
Consider using local community groups or neighborhood apps like Nextdoor to connect with individuals nearby who might be interested in purchasing your sofa.
Once you've made a sale, schedule a pickup in a well-lit area to guarantee safety for both you and the buyer.
If you find that selling isn't your preference, junk removal services can help with disposal, but remember that you could also donate your old sofa to local charities. This way, you're not only clearing space but also helping someone in need.
Donating to Local Charities
Donating your sofa to local charities is a fantastic way to give back to the community while responsibly disposing of your furniture. Local charities like Goodwill, Salvation Army, and Habitat for Humanity often accept gently used sofas, which helps those in need and promotes sustainability.
Additionally, similar to investing in trustworthy precious metal options, donating your sofa supports community programs that benefit various social causes. Before you donate, it's crucial to confirm that the charity accepts large furniture items like sofas, as some may have restrictions or specific guidelines.
Make sure your sofa is clean and in good condition. Many charities won't accept items that require extensive cleaning or repairs, so take the time to verify it meets their standards.
Once you're ready, schedule a pickup or drop-off in advance with the donation center. This step guarantees a smooth transfer and allows you to check for any specific requirements they may have.
Additionally, don't forget that donating your sofa can provide tax deductions. Keep a receipt of your donation, as this may offer you potential tax benefits down the line.
Recycling and Upcycling Ideas
If you're looking for an alternative to donating your sofa, consider recycling or upcycling as creative solutions to give your furniture a new life.
Exploring the mechanics of brewing methods can inspire unique DIY projects that enhance your home. Recycling your old furniture can greatly reduce landfill waste. Many upholstery fabrics can be transformed into insulation materials or repurposed for various crafting projects.
The wooden frames of sofas can be dismantled and recycled into new furniture products or used as firewood, promoting sustainable practices.
When you explore local recycling centers, you'll often find that they accept components like metal springs and wood, allowing for responsible disposal and supporting the circular economy. The polyurethane foam from sofa cushions is also recyclable; it can be turned into products like carpet padding, which helps minimize the environmental impact of foam waste.
If you prefer a more hands-on approach, upcycling your old sofa can be a fun and rewarding project. You can repaint or reupholster it, adding a unique touch to your home decor while extending its life.
Hiring Junk Removal Services
When it comes to getting rid of your old sofa, hiring a junk removal service can be a hassle-free solution. These professionals provide on-site quotes, so you'll know the exact cost based on your sofa's size and weight before removal.
If you're unable to manage heavy lifting, junk removal teams take care of all aspects, from transportation to proper disposal, making it a great option for large items. Additionally, this approach can be part of a larger strategy to minimize waste, similar to how composting improves waste management by recycling organic materials.
Furthermore, many services prioritize eco-friendly practices. They often recycle or donate usable sofas to local charities, helping to minimize landfill waste. By choosing a junk removal service, you can guarantee your disposal process is responsible and sustainable.
Scheduling a sofa pickup is usually quick and straightforward, with some companies offering same-day service if you book before a certain time. Most junk removal services operate across broad service areas, making it easy for homeowners like you to access their help.
Scheduling Bulk Item Pickup
Scheduling a bulk item pickup can simplify the process of getting rid of your old sofa without the hassle of transport. Many local government services offer convenient pick-up for large items like furniture, allowing you to dispose of them easily.
To improve your disposal experience, consider the importance of understanding local waste management policies and regulations, as they can vary considerably from one area to another. This can help you avoid any unexpected issues during the pickup process, similar to how cruise guests navigate operational guidelines for a smooth experience cruise industry insights.
To schedule a pickup, start by preparing a list of items you want to dispose of. This helps confirm eligibility and guarantees everything's ready for collection on the designated date.
Check for specific guidelines regarding item placement on the curb to facilitate efficient trash collection. Following these instructions can make a big difference in guaranteeing your old sofa is picked up without any issues.
Some areas even offer free pick-up days annually, which is a great opportunity for cost-effective disposal of bulky items.
If you're unsure about the rules in your area, consider reaching out to a removal company or local services near you. For example, you can contact Texas Disposal Systems at 800-375-8375 to schedule a pickup or inquire about specific bulk item disposal regulations.
Taking these steps will help you clear out space and get rid of that old sofa with ease.
Frequently Asked Questions
How Can I Get Rid of My Old Sofa?
You can get rid of your old sofa by scheduling a bulky item pick-up, donating it to charity, selling it online, checking local recycling programs, or hiring a junk removal service for easy disposal.
How Do I Get Rid of an Old Sofa for Free Near Me?
One man's trash is another man's treasure. To get rid of your old sofa for free, check online marketplaces, local charities, or community clean-up events. You might find someone enthusiastic to take it off your hands!
How Do You Break Down a Sofa for a Dump?
To break down a sofa for the dump, start by removing cushions and legs. Then, cut the fabric, unscrew the frame, and separate materials for recycling. Follow local guidelines for proper disposal of remaining parts.
How to Get Rid of an Old Dirty Couch?
You're battling a monstrous, filthy couch that seems to have taken root in your living room! First, check with local waste management for bulk pickup, or consider donating it if it's still salvageable.
Conclusion
In the end, getting rid of your old sofa doesn't have to be a headache. By following local disposal guidelines and exploring options like selling, donating, or recycling, you can give your sofa a second life or guarantee it's disposed of responsibly. Remember, every piece of furniture has a story, and it's up to you to decide how that story ends. So, roll up your sleeves and let your old sofa find its next adventure!
Interior Design
How to Fix Wicker Furniture
Own your wicker furniture’s beauty by learning effective repair techniques that will leave it looking brand new—discover the secrets to lasting care!
For repairing your wicker furniture, begin by cleaning it with a gentle brush or a mixture of mild soap and water. Check for any broken or loose pieces and use wood glue to fix them. In case you come across damaged reeds, remove them and replace with new ones, following the original pattern closely. It is important to select replacement materials that match the diameter and color of the existing reeds. Consistent maintenance, such as preventing excessive moisture and shielding from sun exposure, will help prolong its lifespan. If you are interested in learning more tips for long-term care, there is plenty of information to delve into.
Key Takeaways
- Inspect wicker furniture regularly for broken or loose pieces and address repairs immediately to maintain structural integrity.
- Clean wicker with a mixture of mild soap and warm water, ensuring it's thoroughly dried to prevent moisture damage.
- Use wood glue for loose ends, holding them together until the glue sets for a secure bond.
- For broken reeds, cut out damaged sections and carefully weave in replacements, matching the original pattern closely.
- Consider using high-quality synthetic materials for replacements to enhance durability and weather resistance in outdoor settings.
Understanding Wicker and Rattan
Wicker furniture is often confused with rattan, but they're not the same. Wicker refers to a weaving technique used to create various types of furniture and decorative items, while rattan is a specific material derived from climbing palms, often employed in wickerwork. Rattan lacks natural water resistance, making it less suitable for outdoor use compared to synthetic wicker, which is designed to withstand the elements.
Additionally, understanding the toilet maintenance and repairs can help you appreciate the craftsmanship behind woven furniture, as both require care to maintain their functionality and aesthetic appeal.
The traditional wicker weaving technique has a rich history, dating back to ancient Egypt. It showcases the artistry and durability that woven furniture can offer.
While rattan furniture can initially handle outdoor conditions, it requires regular maintenance and protective measures to extend its lifespan. Without proper care, you might face issues like splitting or moisture damage, which can compromise the furniture's integrity.
For indoor use, rattan's flexibility is enhanced with cane, contributing to its durability. However, if you choose rattan for outdoor spaces, consider synthetic wicker instead, as it's far more resilient against weather-related wear and tear.
Understanding these differences can help you make informed choices about your furniture, ensuring it lasts for years to come.
Common Wicker Furniture Problems
When you invest in wicker furniture, it's important to be aware of the common problems that can arise over time. These issues can greatly affect the furniture's longevity and appearance, so you need to stay vigilant.
Understanding the financial considerations for elderly care may also help you assess whether investing in durable furniture is a wise choice for your living space.
- Broken or loose pieces: These can compromise the structural integrity of your furniture, making prompt repairs essential to avoid further deterioration.
- Mildew formation: Excessive moisture can lead to mold growth, so keeping wicker furniture dry is vital. Regularly inspect for moisture build-up and use a cleaning solution to maintain its cleanliness.
- Fading and discoloration: Sunlight exposure can cause damaged wicker, but you can mitigate this with protective coatings and regular maintenance.
Additionally, cracks and splits may develop from extreme dryness or harsh elements, highlighting the need for a proper moisture balance.
During inclement weather, covering or storing your wicker furniture can help extend its lifespan. By being proactive about these common problems, you can better enjoy your wicker pieces for years to come.
Cleaning and Preparation Steps
Maintaining your wicker furniture starts with proper cleaning and preparation. Begin by regularly dusting with a soft brush or vacuum to prevent dirt buildup. This simple step extends the life and appearance of your furniture.
For deep cleaning, mix mild soap with warm water. Wipe down the wicker with a damp cloth and thoroughly rinse to avoid moisture retention. Regular cleaning helps prevent damage similar to the significance of fuel injection cleaning for vehicle performance.
Before you start cleaning, make certain to remove cushions. Wash any removable covers in your washing machine and let them air dry to prevent mildew growth. Once the covers are completely dry, you can proceed to vacuum the entire sofa to remove any dust or debris. For a more thorough clean, use a fabric-safe cleaner and a soft cloth to gently wipe down the surfaces. If you’re unsure about how to put sofa cover back on properly, refer to the manufacturer’s instructions to ensure a snug and secure fit. After wiping down the surfaces, allow the sofa to air out before reassembling the cushions. For tips on how to cover a 3seater properly, be sure to smooth out any wrinkles to maintain the sofa’s appearance. A well-fitted cover will not only enhance the look but also protect your furniture from wear and tear.
For disinfecting, prepare a solution of 1L water mixed with 250ml bleach. Wipe down the wicker with this solution to combat mold, then allow it to air dry for about 2-3 hours.
It's essential to guarantee the wicker is completely dry before proceeding with repairs. Trapping moisture can lead to damaged reeds and further issues down the line.
Repair Techniques for Wicker
Before diving into repairs, it's crucial to assess the damage to your wicker furniture carefully. Look for frayed, broken, or missing reeds and evaluate the structural integrity. This initial inspection will guide your wicker furniture repair efforts.
Here are some key repair techniques to take into account:
- Use wood glue for loose ends: Apply a small amount at the base of the loose reed, tuck it back into the wicker pattern, and hold it for about 30 seconds to bond effectively.
- Handle broken reeds: Cut out the damaged sections from the underside. Soak your replacement reed in warm water for flexibility, then weave it into the existing pattern. Secure the ends with glue.
- Focus on reweaving: Start from a less visible area to maintain aesthetics. Follow the original wicker pattern closely for seamless integration, and use pliers for tight spots.
Regular inspection and cleaning of your wicker furniture help prevent further damage. By addressing repairs promptly, you'll maintain the structural integrity and appearance of your beloved pieces.
Choosing Replacement Materials
Selecting the right replacement materials for your wicker furniture is vital for achieving a seamless repair. Start by determining whether you'll use natural rattan, synthetic resin, or vinyl as your replacement materials. Each type has its own benefits and compatibility with your existing furniture.
Before purchasing, measure the diameter and color of the existing reeds to guarantee a close match. Opt for high-quality replacement reeds that are flexible and durable. To enhance their pliability, soak them in warm water before weaving.
When it's time to replace the reeds, pay close attention to the original weave pattern. Accurately replicating this pattern is essential for maintaining both structural integrity and aesthetic consistency.
Here's a quick reference table to guide your selection:
Material Type | Key Considerations |
---|---|
Natural Rattan | Eco-friendly, traditional appearance |
Synthetic Resin | Durable, weather-resistant |
Vinyl | Versatile, easy to maintain |
High-Quality Reeds | Flexible, strong, soak for pliability |
Lastly, always purchase extra materials. Wicker furniture can wear over time, and having supplies on hand will make future repairs easier.
Frequently Asked Questions
Is It Worth It to Repair Wicker Furniture?
Yes, it's worth it to repair wicker furniture. You can save money, restore sentimental pieces, and enjoy the satisfaction of DIY projects. Plus, with proper care, your wicker can last for many more years.
Is There a Way to Repair Wicker?
Imagine your beloved wicker chair, its once-sturdy frame now fraying. You can repair it! By identifying damaged areas, weaving in new reeds, and securing them, you'll breathe new life into that cherished piece.
How to Update Wicker Furniture?
To update your wicker furniture, clean it thoroughly, repaint with quality outdoor paint, and replace old cushions with vibrant outdoor fabrics. Add decorative pillows and regularly apply a protective sealant for lasting beauty and durability.
How to Fix Broken Rattan Furniture?
Did you know that about 60% of furniture damage happens during moving? To fix broken rattan furniture, assess the damage, cut out broken strands, soak replacements, weave them in, and secure with glue for stability.
Conclusion
In the world of furniture repair, "a stitch in time saves nine." By understanding the nature of wicker and addressing common issues promptly, you can extend the life of your beloved pieces. With the right cleaning, preparation, and repair techniques, you'll have your wicker furniture looking as good as new. Don't wait until it's too late—take action now to preserve your investment and enjoy your stylish, comfortable seating for years to come!
Interior Design
Architectural Anarchy: Neo-Eclectic Style Revolutionizes Skylines
Discover how Architectural Anarchy is reshaping skylines with its vibrant mix of styles—what innovative designs await in this evolving trend?
You will notice that Architectural Anarchy in the Neo-Eclectic style is becoming more prominent in city skylines, merging traditional and modern elements in captivating ways. This trend encourages creativity by combining materials such as brick, stone, and foam to add depth and energy to urban areas. Vibrant color palettes and unique fixtures create striking visual effects that enhance architectural details. Sustainable materials play a key role, while personal details bring individuality to each design. This movement is not only reshaping buildings, but also turning entire communities into dynamic works of art. Keep exploring the endless possibilities to see how this trend continues to develop.
Key Takeaways
- Neo-Eclectic architecture blends traditional and modern elements, creating unique structures that redefine urban skylines with character and vibrancy.
- The use of vibrant color schemes accentuates architectural features, transforming cityscapes into visually enchanting experiences.
- Textural diversity, with materials like stone and stucco, adds depth and interest, enhancing the eclectic feel of urban environments.
- Innovative, sustainable materials promote eco-friendly designs while allowing for creativity and customization in construction.
- Architectural anarchy encourages personal expression, combining diverse styles and elements to reflect individuality in urban landscapes.
The Rise of Neo-Eclectic Style
You've probably noticed how the skyline of modern cities is transforming, thanks to the rise of the Neo-Eclectic style. This architectural phenomenon blends traditional elements with contemporary flair, creating visually striking structures that defy conventional design rules.
You'll see an exciting mix of materials, from classic brick and stone to modern extruded foam and stucco, offering endless creative possibilities. The Neo-Eclectic style emphasizes individuality, encouraging homeowners and architects alike to experiment with diverse aesthetics.
As you explore these urban landscapes, you'll discover how this eclectic approach adds character and vibrancy to neighborhoods. With its focus on personal expression and unique design combinations, the Neo-Eclectic style is reshaping our cities into dynamic, enthralling spaces that reflect our evolving tastes.
Vibrant Color Schemes
Vibrant color schemes play an essential role in the Neo-Eclectic style, transforming urban landscapes into enchanting visual experiences. Bold hues, ranging from vivid blues to striking oranges, are commonly paired with intricate architectural details to create a sense of dynamic harmony. These color choices not only reflect personal taste but can also communicate cultural or symbolic meanings, much like the significance behind porch light color meanings. In this way, Neo-Eclectic designs often engage both the viewer’s eyes and emotions, offering a multifaceted aesthetic experience. This vibrant interplay of color and form allows Neo-Eclectic structures to stand out in otherwise monotonous surroundings, making a bold statement while inviting deeper interpretation. Just as porch light color meanings can convey subtle messages or moods, the color palettes in Neo-Eclectic designs similarly evoke specific feelings, creating a dialogue between the built environment and its inhabitants. Through this thoughtful merging of color symbolism and contemporary architectural trends, the Neo-Eclectic style fosters a truly immersive and expressive experience for all who encounter it.
You'll find that these bold palettes can make a striking impact on your surroundings.
Here are three ways to embrace vibrant colors in your designs:
- Accentuate Architectural Features: Use contrasting colors to highlight decorative elements like gables and window trims, drawing attention to unique designs.
- Create Cohesion: Balance earthy tones and soft pastels with bold accents to guarantee a harmonious look that prevents any single element from dominating.
- Experiment with Palettes: Don't shy away from mixing colors; eclectic combinations can lead to intriguing and unexpected results that truly showcase your personal style.
Dive into color, and let your creativity flourish!
Textural Diversity in Architecture
Textural diversity is a key element in Neo-Eclectic architecture, adding depth and visual interest to both interiors and exteriors.
You'll notice how blending various materials creates engaging aesthetics that capture attention. Common choices like extruded foam and stucco veneer mimic traditional looks, while revival elements such as half-timbering and stonework enhance texture and scale.
Varied rooflines and decorative gables contribute to the eclectic feel, making each structure unique. Exaggerated details, even if constructed with lower-quality materials, can give a grander appearance.
Innovative Materials and Sustainability
Incorporating innovative materials into Neo-Eclectic architecture not only enhances aesthetic appeal but also promotes sustainability.
You can create stunning spaces while minimizing environmental impact by choosing the right materials. Here are three options to evaluate:
- Bamboo and Cork: These eco-friendly flooring choices are renewable and harvested sustainably, adding a natural touch to your design.
- Recycled Glass Tiles: Not only do these tiles provide unique aesthetics, but they also reduce waste and contribute to a greener environment.
- Modular Designs: Pre-fabricated components streamline construction, making it faster and less wasteful, while allowing for customization.
Essential Fixtures for Character
Choosing the right materials is only part of creating a distinctive Neo-Eclectic space; the fixtures you select play a significant role in defining the character of your home. Vintage-inspired pendant lights can infuse nostalgia, while sculptural wall sconces add an artistic touch. Mixing styles enhances the overall aesthetic, merging modern and traditional elements.
Here's a quick reference for essential fixtures:
Fixture Type | Style | Impact |
---|---|---|
Vintage Pendant Lights | Nostalgic | Adds warmth and character |
Sculptural Wall Sconces | Artistic | Blends functionality and art |
Artisan Table Lamps | Unique craftsmanship | Showcases individuality |
Thoughtful selection of fixtures creates a cohesive design theme that reflects your personality and enhances your Neo-Eclectic space.
Lighting Techniques for Impact
How can you elevate the ambiance of your Neo-Eclectic space through lighting techniques? You can create a stunning atmosphere with the right choices. Here are three impactful lighting techniques to contemplate:
- Recessed LED Fixtures: These provide a modern, sleek look while being energy-efficient. Choose adjustable color temperatures to match your mood.
- Statement Chandeliers: Transform your space by incorporating a bold chandelier as a focal point. It adds elegance and enhances the overall aesthetic.
- Maximize Natural Light: Use large windows and skylights to flood your space with sunlight, creating an inviting and warm environment.
Decorative Elements That Inspire
Lighting techniques can set the tone for a space, but decorative elements truly bring it to life.
Imagine adding handwoven tapestry wall hangings that introduce warmth and texture, instantly enhancing your walls. Reclaimed wood accent shelves not only offer functionality but also lend character to your decor.
Vintage brass picture frames can elevate your space, showcasing your unique style while telling a story. Each decorative piece you choose reflects your eclectic spirit, creating a cohesive environment that resonates with your personality.
These elements transform your home into a vibrant canvas, allowing you to express individuality. By thoughtfully integrating these details, you create an inspiring atmosphere that encourages creativity and connection, making your space genuinely one-of-a-kind.
Embracing Architectural Anarchy
In embracing architectural anarchy, you open the door to a world where creativity knows no bounds.
This approach invites you to explore diverse styles, materials, and colors, resulting in vibrant environments that reflect your individuality.
Here are three key aspects to contemplate:
- Mixing Styles: Combine vintage, modern, and eclectic elements to create a unique aesthetic that tells your story.
- Creative Lighting: Use statement fixtures and maximize natural light to enhance the mood and highlight architectural features.
- Personal Touches: Incorporate decorative elements, like reclaimed wood or handcrafted pieces, to add warmth and character to your spaces.
Frequently Asked Questions
How Can I Incorporate Neo-Eclectic Style in Small Spaces?
You can incorporate neo-eclectic style in small spaces by mixing vibrant color schemes, utilizing varied textures, and selecting unique fixtures. Embrace smart storage solutions and maximize natural light to create an inviting, cohesive atmosphere.
What Are the Costs Associated With Neo-Eclectic Renovations?
When you immerse yourself in neo-eclectic renovations, costs can skyrocket like a rocket in the sky! From materials to labor, expect expenses to soar, but the stunning results will make every penny worthwhile for your space.
Are There Specific Architectural Styles That Influence Neo-Eclectic Design?
Yes, you'll find various architectural styles influencing neo-eclectic design. Elements from Victorian, Craftsman, and Mid-Century Modern styles often blend, creating unique, visually enchanting spaces that reflect personal tastes and contemporary trends.
How Do Climate and Location Affect Neo-Eclectic Architecture?
Climate and location shape your choices in neo-eclectic architecture. You'll select materials suited for weather conditions, design for energy efficiency, and incorporate features like large windows to maximize natural light in your environment.
What Maintenance Tips Are Recommended for Neo-Eclectic Homes?
To maintain your neo-eclectic home, regularly inspect roofing and siding for damage, clean gutters, and touch up paint. Ascertain your unique fixtures stay functional, and consider seasonal landscaping to enhance your home's overall appeal.
Conclusion
As you stand before a vibrant skyline, let the bold hues and eclectic shapes spark your imagination. Each building tells a story, inviting you to break free from convention and embrace your unique style. Picture the warmth of bamboo underfoot and the soft glow of innovative lighting casting enchanting shadows. In this world of architectural anarchy, you're not just a spectator; you're a creator, reshaping urban landscapes into a tapestry of individuality and expression. Embrace the revolution!
-
Beauty and Grooming4 weeks ago
Embrace Natural Glow With Bronzer-Free Accelerators
-
Beauty and Grooming4 weeks ago
Discover Top Outdoor Tanning Lotions Today
-
Vetted1 month ago
15 Best Affordable Sustainable Fashion Brands You Need to Know About in 2025
-
Fashion Trends1 month ago
Fall 2025 Fashion Trends: Be Ahead of the Curve!
-
Interior Design6 days ago
Mylar vs. Foil Balloons: The Ultimate Showdown
-
Beauty and Grooming4 weeks ago
Unlock Flawless Tanning With Skin Prep
-
Interior Design3 weeks ago
Create Your Dream Cottagecore Home Office Now!
-
Vetted1 month ago
15 Best Women's Fashion Trends of 2025 You Need to Know About