Interior Design
How to Keep Outdoor Furniture Clean
Find out how to keep your outdoor furniture looking pristine and discover essential tips that will make maintenance a breeze!
To keep your outdoor furniture clean, start by removing loose debris with a soft brush. Use mild soap and water to scrub surfaces, adjusting techniques based on material—wood and metal need special care. Rinse thoroughly with a garden hose and allow furniture to dry naturally in a shaded area. Conduct regular checks for rust or loose screws and consider applying protective coatings to extend its life. Storing furniture during harsh weather also helps. For the best results, you might want to explore additional tips and tricks to maintain that fresh look year-round.
Key Takeaways
- Regularly remove debris and dust from surfaces to prevent buildup and staining on outdoor furniture.
- Use mild soap and water to clean different materials, avoiding harsh chemicals that can cause damage.
- Inspect furniture regularly for rust or loose screws and address any issues promptly to maintain integrity.
- Apply protective coatings like rust-resistant finishes for metal and sealants for wood to enhance durability.
- Store furniture in dry areas during off-seasons and use covers to protect against harsh weather conditions.
Preparation and Initial Cleaning
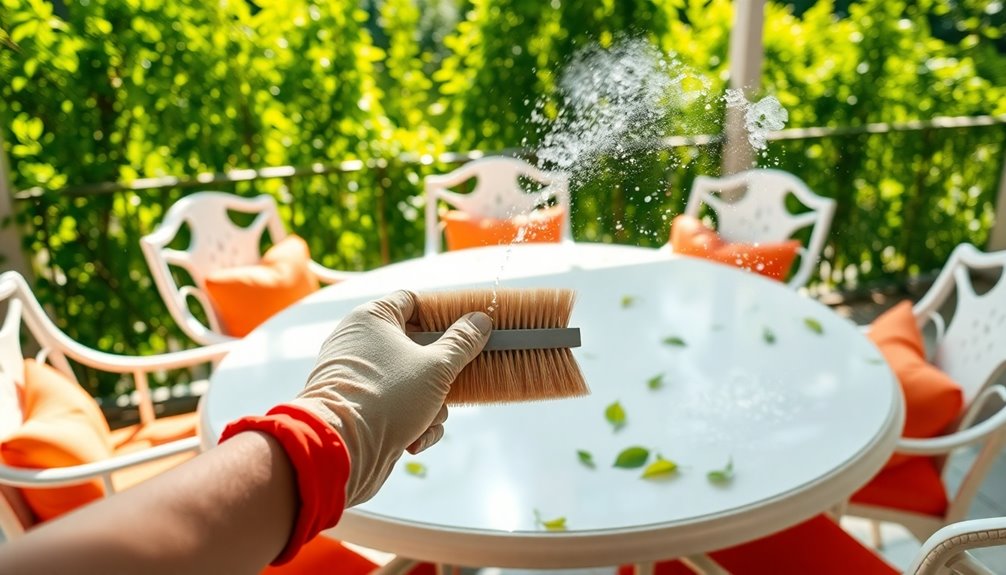
Keeping your outdoor furniture clean starts with proper preparation and initial cleaning. First, gather your supplies: a soft-bristled brush, mild soap or wood-specific cleaner, water, a microfiber cloth, and sandpaper if necessary. Next, remove any loose debris—brush off dirt, leaves, or dust from the surface. Before diving into cleaning, inspect your furniture for stains or areas needing special attention. Make sure your cleaning area is well-ventilated and free of obstacles.
Now, it's time for initial cleaning. Use your soft-bristled brush or a vacuum cleaner with a brush attachment to remove dirt and dust. Mix your cleaning solution according to product instructions and apply it gently with a soft cloth or brush. Be cautious—avoid harsh chemicals that can damage the finish. If you're trying a new cleaner, always test it on a small, inconspicuous area first. Regular cleaning prevents rust formation on metal furniture, which helps maintain its appearance and durability.
For intricate pieces, consider using a toothbrush for tight spaces. In summary, thorough preparation and careful initial cleaning lay the foundation for maintaining your outdoor furniture's beauty and longevity. Regular upkeep will make your cleaning efforts even easier down the line!
Cleaning Specific Materials

When it comes to cleaning outdoor furniture, understanding the material is key to maintaining its appearance and longevity. For wood furniture, start by using a broom or brush to sweep away dirt and debris. Then, mix mild dish soap with water and use a rag to wipe down the surfaces, avoiding harsh chemicals that can harm the wood. Consider applying a waterproofing wood sealant annually and using wood conditioner to prevent drying and cracking. Regular cleaning enhances furniture lifespan, maximizing your investment in outdoor seating.
For metal furniture, a solution of 1 part detergent to 3 parts water works wonders. Use a soft rag to spot-clean scuff marks, and rinse off any excess detergent with a garden hose. After cleaning, dry the surfaces with a cloth to avoid water spots. Regularly apply a rust-preventative coating, especially in humid conditions.
If your furniture is made from plastic or resin, stick with mild dish soap and water. You can sprinkle baking soda on a sponge for tougher stains. No matter the material, always store your furniture in a cool, dry place, and cover it to protect against dust and debris. Regular maintenance will keep your outdoor furniture looking great for years to come.
Scrubbing and Rinsing
To effectively clean your outdoor furniture, start by preparing the area and your cleaning supplies. Remove any cushions and fabric, along with visible debris. Use a vacuum with a dust-brush attachment or a dry paintbrush to get rid of dirt and dust. Fill a bucket with warm water and add a gentle soap or detergent, mixing according to the recommended ratio.
When scrubbing, begin at the top of the furniture and work your way down to avoid spreading dirt. Use a soft-bristled brush for gentle scrubbing, alternating strokes for wicker furniture. For metal surfaces, stick to mild detergents and avoid abrasive materials that could scratch. Make sure to scrub all surfaces thoroughly, changing the bucket water as needed. It's advisable to gather cleaning supplies such as dishwashing liquid, microfiber cloths, and a commercial cleaner before starting the process.
Once you've scrubbed everything, it's time to rinse. Use a garden hose with a high-pressure setting to wash away dirt and soapy water. For delicate surfaces, opt for a softer setting to prevent damage. Rinse thoroughly to remove any soap residue and ensure all areas are clean. This step will help maintain your outdoor furniture's appearance and longevity.
Drying and Maintenance
After rinsing your outdoor furniture, drying it properly is vital for maintaining its condition. For wood furniture, natural drying is your best bet. Place it in a clean, cool, dry, and shady area, stacking the wood on raised foundations to enhance air circulation. Keep in mind that this process may take time, depending on the weather. If you need quicker results, consider artificial drying using controlled kilns, which allows for better temperature and humidity management. Proper drying is essential for the durability and longevity of teak wood furniture.
When drying outdoor cushions, start by squeezing out as much water as possible. You can stand on them to press out water and then blot the remaining moisture with a towel. Hang them on a clothesline or over a railing to let them drain. Position cushions in sunny, yet not overly direct, sunlight to speed up drying while preventing fabric fading. Rotate and flip them periodically to ensure even drying on all sides.
For wood furniture maintenance, apply a sealant or stain annually and store it in a dry place during off-seasons. Regularly inspect for wear, and use covers when not in use to protect against the elements.
Using Commercial Cleaners
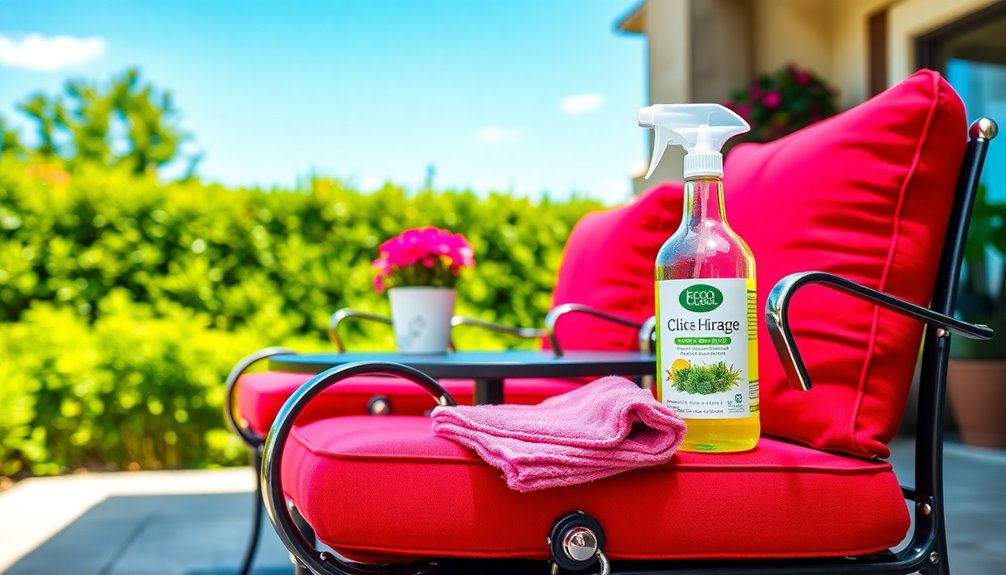
For a quick and efficient way to keep your outdoor furniture clean, using commercial cleaners can be a game-changer. Products like Hauser's Patio Furniture and Fabric Cleaner are safe for various materials, making them ideal for your furniture. CLR Outdoor Furniture Cleaner is specially formulated to tackle dirt and grime on surfaces like resin, wood, and vinyl, ensuring a thorough clean.
When you use these cleaners, the spray-and-wipe method is straightforward. Just spray the cleaner on the affected area, let it sit for a few minutes, and wipe it away with a clean cloth or sponge. If you want a deeper clean, some options are compatible with pressure washers. Plus, their non-abrasive formulas mean you won't damage your furniture while cleaning. Additionally, it's important to consider that seasonal cleaning is recommended to address the accumulation of dust, dirt, and grime after winter exposure.
Eco-friendliness is also a key feature; for example, Hauser's cleaner uses all-natural ingredients, while CLR won't harm your grass. Many of these cleaners effectively remove tough stains and leave no oily residue behind. With options like Nuvera® Patio Furniture Cleaner, you even get UV protection to help maintain your furniture's appearance. Using commercial cleaners makes caring for your outdoor furniture easy and effective.
Preventative Measures
Maintaining your outdoor furniture can save you time and effort in the long run, and implementing preventative measures is key. For wooden furniture, apply a coat of UV-blocker polyurethane, like Varathane Ultimate Spar Urethane, to shield it from sun and moisture. After cleaning and drying, use teak oil or wood polish to keep it looking fresh. Avoid abrasive cleaners or pressure washing, and regularly inspect your pieces to catch any damage early. Regular inspections are essential to ensure you address any issues before they worsen.
With metal and aluminum furniture, apply a coating of paste wax to combat corrosion and rust. If rust does appear, remove it, then use primer and paint before adding wax. Positioning metal items in shaded areas helps minimize sun exposure and prevents movement during high winds.
For plastic furniture, use an outdoor protector to prevent fading and cracking. Clean with a baking soda and water mixture, ensuring you rinse thoroughly. Lastly, for fabric and wicker furniture, spray on a sun and water shield, and store cushions indoors during the off-season. Use a vacuum with a soft-bristled attachment for wicker, and keep it out of direct sunlight to avoid damage.
Tips for Long-Term Care
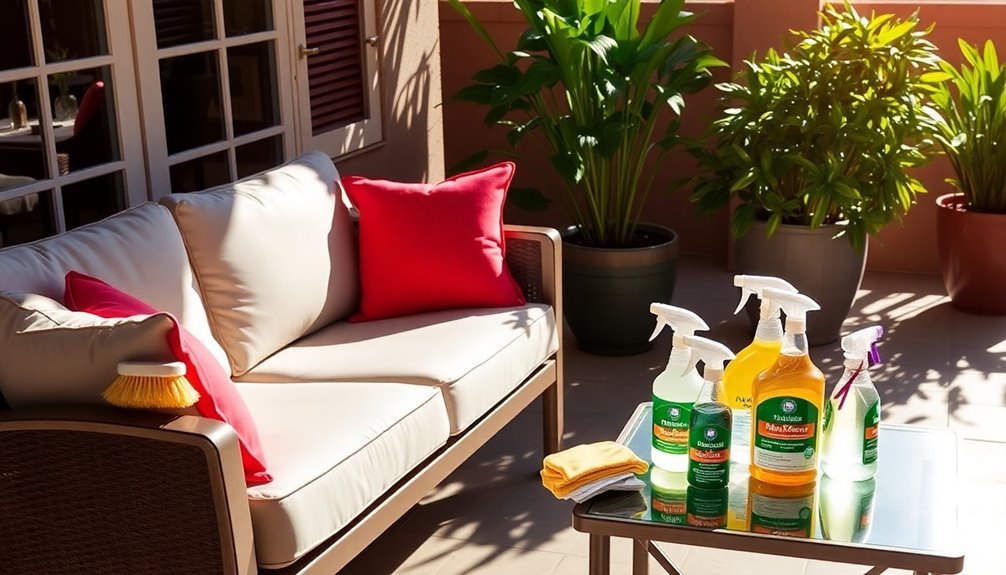
Keeping your outdoor furniture in top shape requires consistent care and attention. Start by cleaning your furniture regularly based on its material. For aluminum, use a damp cloth with mild soap, and polish painted surfaces to maintain their appearance. Woven or resin furniture benefits from a mild detergent wash and UV light stabilizers to resist fading. If you have composite furniture, hose it down and scrub with non-abrasive cleaners to prevent mold growth. Wood furniture needs dusting and an annual application of sealant to guard against weather damage. Additionally, aluminum furniture is particularly ideal for creating low-maintenance outdoor spaces.
Regular inspections are crucial. Check for loose screws or signs of rust, and address these issues promptly. Applying protective coatings, like rust-resistant finishes for metal and sealants for wood, enhances durability. During the off-season, store your furniture in a dry place, and use covers during harsh weather to protect against moisture.
Finally, clean spills immediately to prevent lasting damage. By following these tips, you'll not only preserve the look of your outdoor furniture but also extend its lifespan, ensuring you enjoy it for years to come.
Seasonal Cleaning Checklist
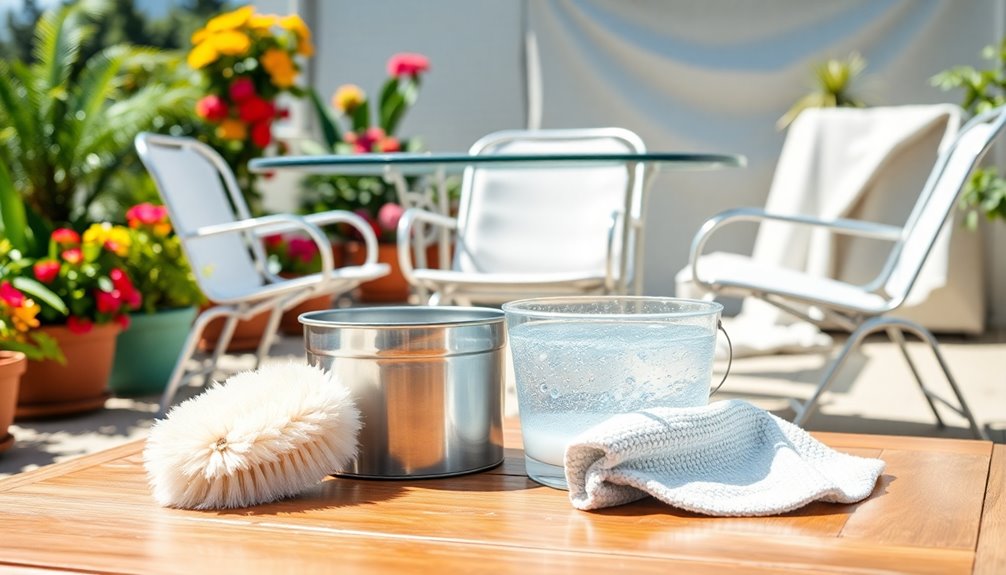
As the seasons change, it's essential to give your outdoor furniture a thorough cleaning to prepare it for use. Start by inspecting each piece for damage or wear from winter storage. Tighten any loose screws or bolts, and clear away debris or dirt that might have accumulated. Use a leaf blower to remove cobwebs, insects, and leaves from your outdoor area.
Next, deep clean your furniture. For metal pieces, wash them with soapy water and a soft brush, then rinse and dry to prevent rust. Clean wooden surfaces with a wood cleaner, and oil them to restore their sheen. If your cushions have removable covers, launder them; otherwise, use fabric cleaner for non-removable ones. Additionally, remember to sweep away debris from your patio area to create an inviting space for relaxation.
You'll want to spot clean wicker furniture and scrub off any light rust from wrought iron. For plastic, a dish soap solution works well, while tougher stains may need bleach. After cleaning, apply a UV protectant to synthetic materials and a water-repellent finish to wood. Finally, cover or store furniture in a dry, shaded place when not in use, and regularly wipe down surfaces to maintain cleanliness.
Frequently Asked Questions
How Often Should I Clean My Outdoor Furniture?
You should clean your outdoor furniture based on its usage and the climate. If you use it frequently or live in a coastal area, aim for every 1-2 weeks. For less frequent use, a quick wipe-down before guests arrive works well. Increase your cleaning during peak seasons like summer, but if you're in a mild climate, you can reduce the frequency. Always deep clean at least once a season to prevent buildup.
Can I Use Bleach to Clean Outdoor Furniture?
Yes, you can use bleach to clean certain outdoor furniture materials, but be cautious. For plastic and resin, mix 1/3 cup of bleach with a gallon of water and apply it. Wood needs to be sealed beforehand. Avoid bleach on metal, especially non-stainless options, and be careful with glass. Always wear protective gear and rinse thoroughly to avoid damage. Test on fabrics first to ensure color safety. Regular cleaning helps maintain your furniture.
What Should I Do for Rust on Metal Furniture?
If you notice rust on your metal furniture, start by scrubbing the affected area with aluminum foil dipped in saltwater to remove the rust. If it's more severe, sand the rusty spots lightly and apply rust-proof touch-up paint. You can also use a solution of equal parts white vinegar and water for aluminum surfaces. After cleaning, make sure to dry everything thoroughly to prevent further rust from forming. Regular maintenance is key!
Is It Safe to Use a Pressure Washer on Outdoor Furniture?
It's generally safe to use a pressure washer on outdoor furniture, but you need to be cautious. For hard-wearing plastic and metal furniture, a lower pressure setting works best. Start from a distance and test a small area first to ensure it's safe. Avoid using a pressure washer on rattan or wooden pieces, as it can cause damage. Always adjust your technique based on the material to prevent any harm.
How Can I Remove Stubborn Stains From Fabric Furniture?
To remove stubborn stains from fabric furniture, start by checking the care label for guidance. Act quickly on stains, gently scraping off dried residues first. For tough spots, dab with rubbing alcohol or use a mixture of water and vinegar. Blot food spills with a clean cloth and apply a mild detergent solution. Rinse thoroughly after cleaning, and let the fabric air dry to maintain its quality and appearance.
Conclusion
Keeping your outdoor furniture clean is essential for its longevity and appearance. By following the steps outlined, like regular cleaning, proper drying, and using the right materials, you can keep your furniture looking great season after season. Don't forget to implement preventative measures to minimize dirt buildup and protect your pieces from the elements. With a little effort, you'll enjoy a beautiful outdoor space that's ready for relaxation and entertaining. Happy cleaning!

Interior Design
How to Refinish Wood Furniture Without Stripping
Step into the world of refinishing wood furniture without stripping and discover secrets that will transform your pieces beautifully and effortlessly.
To refinish wood furniture without stripping, start by cleaning your piece with mineral spirits to remove dirt and grime. Inspect for damage like scratches or dents. For superficial repairs, use wood filler and smooth it out. Enhance the finish with products like Howard's Restor-A-Finish or gel stains for a fresh look without removing the old finish. Apply a protective coat of polyurethane, ensuring you sand lightly between layers for a smooth texture. Finally, maintain your furniture with regular dusting and gentle cleaners. Keep going to discover more tips that will help you achieve the perfect finish!
Key Takeaways
- Clean the furniture thoroughly with mineral spirits to remove grime without water damage to the wood.
- Use Howard's Restor-A-Finish to enhance existing finishes without stripping the surface.
- Apply a liquid deglosser to prepare the surface for refinishing while retaining the original finish.
- Consider gel stains for a new look, which sit on the surface and are easy to apply.
- Finish with a protective coat of oil-based or water-based polyurethane for durability and preservation.
Cleaning the Furniture
Cleaning wood furniture is essential for maintaining its beauty and longevity. Begin by using mineral spirits to tackle heavily soiled areas, especially if your furniture has an oil finish or wax coating. Dampen a soft cloth with mineral spirits to remove dust and grime from bare or freshly sanded wood. Avoid water unless absolutely necessary, as it can damage the wood or raise the grain.
For delicate furniture, test mineral spirits on a small, inconspicuous area before proceeding. You can also use a soft bristle brush dipped in mineral spirits for cleaning hard-to-reach spots around carvings and intricate designs. If you encounter stubborn dirt, consider mild soap solutions like Ivory Flakes or Orvus paste, but steer clear of detergents that leave a film. Avoid soaking wood in water to prevent damage.
Always use clean, soft cotton cloths or microfiber towels to wipe down surfaces. A vacuum with a soft brush attachment can help remove loose dust. After cleaning, ensure the wood is completely dry before applying any new finish. If needed, lightly sand with 220 or 320 grit sandpaper to prepare the surface, ensuring it's smooth for the next steps.
Assessing Damage
Once you've cleaned the furniture, it's time to assess its condition. Begin by looking for signs of damage like deep scratches, dents, or areas where the finish has worn away. Check for any exposed wood due to cracking, flaking, or chipping of the original finish. If the surface feels sticky, that's a clear indicator that refinishing is necessary. It's essential to recognize that persistent feelings of unhappiness can also be a sign that the furniture's wear is beyond just physical damage.
Evaluate the overall wear and tear, noting any discoloration or fading. Pay special attention to any accidental burns or severe damage. Minor scratches can often be smoothed out with sanding or filled with wood filler, while deep dents might require more extensive work. Regular maintenance can help prevent future upholstery issues and extend the life of your furniture.
Next, assess the existing finish. If it's intact but dull, you might opt for a simpler refinement process. However, if you notice flaking or peeling, be prepared for partial removal or repair. Determine the color and condition of the finish to guide your choice of a new finish. Finally, make a list of tools and supplies needed based on the types of damage identified, ensuring you're well-prepared for the refinishing process.
Repairing Dents and Cracks
When you notice dents and cracks in your wood furniture, addressing these imperfections promptly can prevent further damage and restore its beauty. For dents, you can use an iron and steam method. Just apply a damp cloth over the dent, place a hot iron on the cloth for 5-10 seconds, and repeat if necessary. This helps expand the wood fibers to raise the dent. If that doesn't work, apply a few drops of water directly to the dent and let it penetrate for a day. For deeper dents, consider using commercial wood-swelling liquids or creating small pinholes to allow better penetration of the liquid. Additionally, be cautious when using this technique on finished wood, and always test in an inconspicuous area first.
For cracks, first assess their depth. Shallow cracks can often be filled with wood filler. Ensure you clean the area around the crack before applying the filler, and sand it down once dry to blend with the surrounding wood. For deeper cracks, use epoxy or wood glue for reinforcement. Apply it carefully and clamp if needed, letting it dry completely before sanding. Finally, once everything's repaired and sanded, you can apply a stain and a clear coat to protect and match the finish.
Using Restorative Products
Reviving the beauty of your wood furniture can be easily achieved by using restorative products designed to enhance and protect finishes. Start with Howard's Restor-A-Finish, which combines solvents and wood stain to improve existing finishes. For a more updated look, consider using a gel stain that sits on the surface.
If you want to prepare the surface for new stain or paint without stripping, a liquid deglosser will dull the existing finish. An oil-based penetrating stain can add subtle color while keeping the wood grain visible. Remember to apply these products correctly: use 4/0 (0000) steel wool for Restor-A-Finish, and a rag for gel stain.
Always work in a well-ventilated area due to the solvents involved, and wear a cartridge respirator if you're sensitive to chemicals. Protect your surroundings with drop cloths to prevent splatters. After application, allow the product to dry, typically about 30 minutes in warm conditions. Wipe off any excess with a soft cloth, and inspect for uneven areas, applying additional coats as needed. This process is less labor-intensive compared to traditional stripping methods, making it more accessible for DIY enthusiasts.
Applying Polyurethane
After using restorative products to enhance your wood furniture, the next step is applying polyurethane to protect and seal the finish. Begin by ensuring the wood surface is smooth and even. If needed, sand it with 220-grit sandpaper, removing any old finishes and imperfections. Use a tack cloth to wipe away dust.
Next, choose between oil-based and water-based polyurethane, considering their pros and cons. Decide on the desired sheen and stir the polyurethane well before application. Test it on a small, hidden area if you're working with light-colored finishes, and make sure your workspace is well-ventilated. Water-based polyurethane is particularly advantageous for its lower VOCs, making it a safer choice for indoor use.
For application, use a foam brush, synthetic bristle brush, or a rag, and consider an aerosol spray for tricky spots. Apply thin, even coats with long strokes in the direction of the wood grain, avoiding heavy layers and air bubbles. Overlap your brushstrokes for uniform coverage, and catch any drips along the edges.
Allow the first coat to dry completely, which typically takes several hours. Lightly sand the surface again before applying additional coats, following the same process until you achieve the desired finish.
Avoiding Stripping Methods
Although refinishing wood furniture often conjures thoughts of tedious stripping methods, you can achieve excellent results without them. Start by cleaning the surface thoroughly using a gentle cleaner or a mixture of mild soap and water. Liquid Ivory dish soap mixed with water works great—just scrub gently with a sponge, rinse with a wrung-out sponge, and dry with a clean towel. This step ensures the new finish adheres well.
Next, consider using a liquid deglosser instead of sanding. Wipe the deglosser on with a cloth to dull the existing finish, preparing the surface for new stain or paint without the hassle of stripping. It's a quicker alternative that helps create a uniform base. Additionally, evaluating the value of the piece will guide your refinishing decisions, as some items may be better left untouched.
For the actual refinishing, gel stains are fantastic since they sit on top of the surface. Apply them easily with a rag. Alternatively, Howard's Restor-A-Finish can improve the existing finish without removal. Use 4/0 steel wool in small circles to blend in any repairs, ensuring you achieve the desired color and pattern without stripping the old finish.
Blending Repairs Seamlessly
When blending repairs seamlessly into refinished wood furniture, the key is meticulous preparation. Start by cleaning the surface thoroughly to eliminate dust and grime. Assess the furniture's state to identify areas needing repair, and choose a wood filler that matches or can be stained to match the wood color. Overfill the void slightly to account for shrinkage as the filler dries, allowing it to set completely, which could take several hours.
Next, apply a burn-in wood filler for precise color matching. Use a soldering iron to melt the filler into the void, applying multiple tones if necessary. This process is further enhanced by using an assortment of burn sticks to achieve various color options. Once it cools and hardens, buff it with a microfiber cloth.
Now, sand the filled area with medium-grit sandpaper to level it with the surrounding wood, then switch to fine-grit sandpaper for a smooth finish. Always sand in the direction of the grain to avoid scratches. Use sanding sponges for tight corners. Finally, find a stain that matches the surrounding wood and apply it in thin layers, ensuring each layer dries thoroughly before proceeding, until the repair blends seamlessly with the rest of the piece.
Final Touches for Protection
To ensure your refinished wood furniture stands the test of time, applying a protective finish is essential. Start by choosing a stain that requires a separate finish, allowing you to adjust the color as needed. Apply the stain in thin, even coats, letting each coat dry completely before adding the next. Don't forget to wipe off any excess stain with mineral spirits or a clean rag before it dries to achieve an even look.
Next, seal the wood to protect it and create a smooth base for the stain. Use a thick coat of sealant, allowing it to soak into the wood, then wipe off the excess. Depending on your furniture's use, opt for oil finishes, wipe-on varnish, or polyurethane varnish for high-traffic pieces like tables. Engaging in refinishing is a meaningful way to honor the past and appreciate the craftsmanship involved in your furniture.
Finally, protect your refinished furniture from environmental factors. Keep it out of direct sunlight to avoid fading and use curtains or blinds for added protection. Always use coasters and placemats to guard against water rings and heat damage, and lift furniture instead of dragging it to prevent scratches. These final touches will help maintain your beautiful refinished piece for years to come.
Maintaining Your Furniture
After applying the final touches to protect your refinished wood furniture, maintaining its beauty and functionality becomes a priority. Start by cleaning the surface regularly. Use a gentle cleaner or a mixture of mild soap and water to remove dust, dirt, and grime that can affect the finish. Always ensure the wood is completely dry after cleaning, and protect your surroundings with drop cloths to prevent damage.
Next, assess your furniture periodically. Check for any dents, cracks, or damages that may need repair. Knowing whether your furniture is solid wood or veneer can help you determine the best maintenance approach. Additionally, regular dusting is essential to preserve the quality of your furniture.
When touch-ups are necessary, you can use products like Howard's Restor-A-Finish to blend any uneven areas without stripping the existing finish. If you find worn-out spots, a coat of oil-based Minwax wipe-on polyurethane can add protection while enhancing the wood's color.
Lastly, avoid using harsh chemicals that could damage the finish. By following these maintenance tips, you'll keep your refinished furniture looking stunning and extend its lifespan for years to come.
Tips for a Successful Finish
Achieving a successful finish on your refinished wood furniture starts with meticulous surface preparation. First, clean the surface thoroughly to remove any dust, dirt, or grime using a gentle cleaner or a mixture of mild soap and water. Allow the wood to dry completely before proceeding. Protect your surroundings with drop cloths to catch any splatters, and ensure your work area is well-ventilated, especially if you're using chemical-based products.
Next, choose the right products. Howard's Restor-A-Finish is excellent for enhancing the existing finish without stripping it. Select an appropriate shade, and remember that you can blend shades for a custom color. For added protection, apply oil-based Minwax wipe-on polyurethane. Assessing the finish is necessary before restoration begins to determine the best approach.
When applying the finish, use 4/0 (0000) steel wool in small circles with light pressure for Restor-A-Finish, wiping off excess with a soft cotton cloth. Use long, even strokes for any finish application. After the initial coat dries, inspect for uneven areas and apply additional coats if needed.
Finally, allow the finish to dry completely before using the furniture and maintain it with regular cleaning and touch-ups to keep it looking its best.
Frequently Asked Questions
Can I Use Vinegar Instead of Dish Soap for Cleaning?
Yes, you can use vinegar instead of dish soap for cleaning. Vinegar's natural acidity effectively cuts through grime and grease without leaving residues that might harm your wood's finish. Mix equal parts water and white vinegar, and test it on a small area first. Wipe the surface with a soft, damp cloth, following the grain, then dry it with a clean cloth. This method keeps your furniture looking great while being eco-friendly!
What Should I Do Before Starting the Refinishing Process?
Before starting the refinishing process, you should identify the type of wood and existing finish on your furniture. Clean the surface with a damp cloth to remove dirt and grime, making sure it's free of debris. Assess any imperfections or damage that need fixing, and gather all necessary tools like sandpaper and safety gear. Finally, take safety precautions by wearing protective eyewear and gloves to keep yourself safe throughout the project.
How Long Does the Entire Refinishing Process Take?
The entire refinishing process can take anywhere from a couple of hours to a full day, depending on the methods you choose and the condition of your furniture. Quick methods like cleaning and deglossing or using Restor-A-Finish can be done in under an hour. More detailed approaches, like gel staining or conditioning, might require several hours. Plan accordingly to ensure you've got enough time to achieve the desired results.
Can I Use Water-Based Finishes Instead of Oil-Based?
Yes, you can definitely use water-based finishes instead of oil-based ones. They're widely available and easy to apply with a brush or roller. Water-based finishes dry quickly, often within a couple of hours, allowing you to apply multiple coats in a day. They also have less odor and are generally safer to use. Just make sure to clean and prepare the surface properly for the best results. You'll love their clear, non-yellowing finish!
How Often Should I Clean and Maintain Refinished Furniture?
You should clean and maintain refinished furniture regularly to keep it looking its best. Dust daily to prevent buildup, wipe it down weekly with a damp cloth, and condition it monthly with a wax-based product. Every few months, do a deeper clean using a gentle cleaner and #0000 steel wool. Always check for damage and reapply finish as needed to protect your furniture from wear and tear.
Conclusion
Refinishing wood furniture without stripping can breathe new life into your pieces while preserving their character. By cleaning, repairing, and using restorative products, you can achieve a beautiful finish that enhances the wood's natural beauty. Don't forget to apply a protective coat and maintain your furniture regularly to keep it looking its best. With these simple steps, you can enjoy your revitalized furniture for years to come. Now, go ahead and get started on your project!
Interior Design
Ceiling Fan Stuck on High Speed
Struggling with a ceiling fan stuck on high speed? Discover the common causes and essential steps to restore control before it drives you crazy!
If your ceiling fan is stuck on high speed, it is probably because of a faulty capacitor, a malfunctioning speed switch, or loose wiring. Begin by turning off the power at the circuit breaker for safety. Verify if the speed switch is working properly. Then examine the capacitor for any signs of wear or damage, and check for any loose or damaged wires that could be disrupting the electrical flow. Cleaning the fan blades and motor can also be beneficial. To resolve the issue, you may need to replace any faulty components. There is more to learn about maintaining the smooth operation of your ceiling fan.
Key Takeaways
- A malfunctioning speed switch may prevent speed adjustments, causing the fan to remain stuck on high speed.
- Check the capacitor for damage or wear, as a faulty capacitor can lead to high-speed defaults.
- Inspect wiring connections for looseness or damage, which can disrupt electrical flow and cause speed issues.
- Ensure the fan is clean; dust accumulation on blades or motor can affect performance and may cause it to operate at high speed.
- Turn off power at the circuit breaker before troubleshooting to ensure safety while examining components.
Ceiling Fan Basics
Ceiling fans are often essential in creating a comfortable indoor environment. Understanding how they function can help you maximize their benefits. They circulate air, enhancing ventilation and potentially reducing the need for air conditioning, which can save on energy costs. However, it’s important to be aware of ceiling fan safety risks, such as ensuring the fan is properly installed and that the blades remain free of obstructions. Regular maintenance, like tightening loose screws and cleaning the blades, can also help mitigate potential hazards. To further minimize ceiling fan safety risks, make sure to periodically check the wiring, especially if the fan appears to be malfunctioning or making unusual noises. Additionally, avoid hanging any objects or decorations from the fan, as this can create imbalances and increase the likelihood of accidents. Being proactive about identifying and addressing ceiling fan safety risks will ensure a safe and comfortable living space for all.
The speed settings on your ceiling fan depend on the motor's functionality, which is determined by winding configurations and capacitor values. When you increase the speed, more power is delivered to the blades, resulting in stronger airflow. Conversely, lower speeds create gentler air circulation.
The capacitor plays a vital role, providing the initial torque to start the motor and regulating the speed. By knowing these basics, you can make informed decisions about your fan's usage and maintenance, ensuring it operates efficiently and effectively in your space.
Identifying Speed Problems
Experiencing inconsistent airflow can be frustrating and often signals underlying speed problems with your fan. You might notice your fan only runs at high speed or fails to respond to speed adjustments. This could indicate a faulty capacitor, which plays an essential role in regulating motor speed, similar to how modern fans enhance airflow, reducing reliance on air conditioning energy savings and comfort.
Additionally, check for wiring issues, as loose or damaged connections can disrupt performance. A malfunctioning speed switch might also prevent you from adjusting the fan's speed.
Troubleshooting Techniques
To effectively troubleshoot speed issues with your ceiling fan, start by ensuring safety precautions are in place. Turn off the power at the circuit breaker to avoid any electrical shocks.
Next, check the speed switch to see if it's functioning correctly; a faulty switch can prevent speed changes. If that seems fine, inspect the capacitor for any signs of wear or damage. You can use a multimeter to measure its capacitance.
Additionally, clean the fan blades and motor to remove any dust or debris that might impact performance.
Inspecting Electrical Connections
After checking the speed switch and capacitor, it's time to focus on inspecting electrical connections.
Start by turning off the power to your ceiling fan at the circuit breaker. Once it's safe, examine the wiring connections at the fan and the wall switch. Look for any loose or damaged wires that might disrupt the electrical flow.
Make certain all connections are secure, as a loose wire can cause the fan to default to high speed. If you spot any frayed or burnt wires, replace them immediately to prevent further issues.
Don't forget to check the connectors for corrosion, which can also affect performance. Properly securing these connections can guarantee your fan operates smoothly at your desired speed.
Capacitor and Motor Issues
When your ceiling fan struggles with speed issues, the capacitor and motor are often at the heart of the problem. A faulty capacitor can prevent your fan from operating at varied speeds, causing it to stick on high or not work at all.
If you notice this, check the capacitor for wear or damage, as it provides vital torque and regulates speed. Additionally, the motor itself may be overheating, defaulting to high speed as a protective measure.
Inspecting both components is essential for proper functionality. If you find any signs of damage or malfunction, replacing the capacitor or motor may be necessary to restore your fan's performance and regain control over its speed settings.
Maintenance Tips for Longevity
Regular maintenance plays an essential role in extending the life of your ceiling fan and preventing speed-related issues.
Start by regularly cleaning the fan blades and motor to eliminate dust and debris that can hinder performance.
Check the wiring connections for any signs of looseness or damage; secure them if needed.
Don't forget to inspect the capacitor for wear, as a faulty one can cause speed problems.
Monitor the fan for overheating, which may indicate underlying issues.
Additionally, verify the fan is installed according to manufacturer guidelines to prevent vibrations and noise.
Upgrading to Multi-Speed Fans
Upgrading to multi-speed ceiling fans can greatly enhance your comfort and energy efficiency. With adjustable settings, you can easily customize airflow based on your needs, whether you want a gentle breeze or a strong gust.
This flexibility not only keeps your space comfortable but also allows you to save on energy costs by using lower speeds when appropriate.
Additionally, multi-speed fans tend to experience less wear on motors, extending their lifespan. They come in various designs and styles, fitting seamlessly into your home's decor.
By choosing a multi-speed option, you can enjoy both functionality and aesthetics while avoiding the frustration of being stuck on high speed.
Make the switch today for a more enjoyable living environment.
Frequently Asked Questions
Can a Ceiling Fan Be Converted to a Multi-Speed Model?
Yes, you can convert a ceiling fan to a multi-speed model. You'll need to replace the existing switch, install a compatible speed controller, or upgrade the fan motor to achieve adjustable speed settings effectively.
What Tools Are Needed for Ceiling Fan Inspection?
Inspecting a ceiling fan's like peering into a mystery. You'll need a multimeter, screwdriver, and possibly pliers. These tools help you check wiring, test the capacitor, and guarantee everything runs smoothly for peak performance.
How Often Should I Clean My Ceiling Fan?
You should clean your ceiling fan at least once every three months. Regular dusting prevents buildup that can affect performance. If you notice excess dust or debris, clean it more frequently to maintain ideal airflow.
Is It Safe to Operate a Fan With a Faulty Capacitor?
It's not safe to operate a fan with a faulty capacitor. You risk electrical hazards, overheating, or further damage. It's best to address the issue immediately by inspecting or replacing the capacitor to guarantee safe functionality.
Can Environmental Factors Affect Fan Speed Performance?
You might think environmental factors don't matter, but they do impact fan speed. Humidity, temperature, and air pressure can affect motor efficiency, leading to inconsistent performance. Regular checks can help maintain ideal airflow regardless of conditions.
Conclusion
Don't let a ceiling fan stuck on high speed ruin your comfort! By following the troubleshooting techniques outlined, you can easily identify and fix the issue. You might think it's too complicated, but with a little patience and the right tools, you can restore your fan's functionality without calling a professional. Plus, regular maintenance can prevent future problems. Take control of your space again and enjoy the perfect breeze you deserve!
Interior Design
How to Dismantle a Sofa for Disposal
Transform your old sofa into manageable pieces for disposal with these easy steps—discover the secrets to a hassle-free dismantling process!
To dismantle a sofa for disposal, start by removing cushions and covers. Use basic tools like a screwdriver and wrench to unscrew any legs. Check for bolts and screws holding the frame together; carefully remove them. If the sofa has upholstery staples, a staple remover can help. Be cautious to avoid damaging the frame. Once dismantled, separate materials like wood and fabric for more eco-friendly disposal. Make sure you've got a plan for hauling away each part. If you want tips on making the process even easier, there's plenty more to explore ahead.
Key Takeaways
- Remove cushions and any detachable parts to lighten the sofa before dismantling.
- Use appropriate tools, like wrenches and screwdrivers, to loosen and remove legs and frame components.
- Carefully inspect upholstery stitching to avoid damaging the fabric during disassembly.
- Keep coasters handy to protect floors while moving the sofa pieces.
- Organize and label parts as you dismantle to simplify reassembly if needed.
Introduction
When it comes to keeping your sofa in top shape, routine vacuuming and dusting are key. You'll want to use fabric-specific cleaning techniques to tackle stains and maintain its appearance. And if you ever spill wine, knowing how to treat it effectively can save your sofa from permanent damage.
Routine Vacuuming and Dusting
To keep your sofa looking its best and to promote a healthier living environment, routine vacuuming and dusting are essential. Vacuuming your upholstery at least once a week helps remove dust, debris, and allergens, improving indoor air quality. This is especially important in homes with pets or children, where messes can accumulate quickly. Utilize a vacuum attachment designed for upholstery to effectively reach crevices and seams, ensuring a thorough clean.
After vacuuming, follow up with gentle dusting using a microfiber cloth. This technique captures any remaining dust particles without scratching or damaging the surface of your sofa. Regular dusting prevents dirt and grime from building up, which can lead to discoloration and deterioration over time. Additionally, consider designating pet-free zones to further minimize the spread of pet hair and allergens in your living space.
Fabric-Specific Cleaning Techniques
Maintaining your sofa's appearance and longevity requires understanding the specific cleaning techniques for different fabric types. When you're taking apart a couch, it's crucial to know how to properly care for the upholstery. Each fabric, like leather, microfiber, or cotton, has its own cleaning method. For instance, leather needs a damp cloth and a leather conditioner, while microfiber benefits from a vinegar and water mixture.
Before you start, always check the cleaning code tag on your sofa. This tag will guide you on which cleaners are suitable; common codes include "W" for water-based, "S" for solvent, and "WS" for both. If your upholstery is fastened with staples or tacks, carefully remove the upholstery to access the underlying structure.
When it comes to stain removal, act fast. Blot the stain instead of rubbing to prevent it from spreading, and use a cleaner that matches the fabric. Regular vacuuming helps keep dirt at bay, so use an upholstery attachment for those hard-to-reach spots. If you're deep cleaning, consider a steam cleaner designed for upholstery, ensuring it's safe for your specific fabric to avoid damage while allowing you to potentially reuse the fabric later.
Treating Wine Spills Effectively
Cleaning upholstery isn't just about routine maintenance; it also involves tackling unexpected spills, like wine. As soon as you notice a spill, act fast. Blot the wine immediately with a clean cloth or paper towel, starting from the outer edges and working inward to prevent spreading the stain. If you've got old furniture, you might want to remove the cushions to get better access to the stained area.
Next, sprinkle salt or baking soda on the spill to absorb the wine and let it sit for several minutes before vacuuming it up. For tougher stains, mix one part white vinegar with two parts water in a spray bottle. Apply this solution to the stain, then blot it until the wine is gone.
If the stain persists, create a paste of hydrogen peroxide and dish soap, applying it to the affected area for about 30 minutes before rinsing. Always remember to test any cleaning solution on a hidden area of the fabric first, especially if you plan on removing the legs or working on the frame of the couch. This helps prevent unwanted discoloration or damage. Additionally, maintaining optimal performance of your upholstery can help in prolonging its life and resisting stains.
Sofa Care With Fabric Spray
Taking care of your sofa starts with selecting the right fabric options and using fabric spray. By choosing durable, washable materials and applying fabric spray regularly, you can protect your investment from scratches and stains. Don't forget to place furniture coasters under legs to further safeguard your sofa's appearance and longevity. Additionally, consider using energy-efficient options to reduce the environmental impact of your cleaning products.
Scratch-Resistant Fabric Options
When it comes to choosing the right fabric for your sofa, opting for scratch-resistant options can make a significant difference in durability and upkeep. Scratch-resistant fabrics, like microfiber and certain synthetic blends, are designed to withstand damage from pet claws and sharp objects, ensuring your upholstery stays looking good for longer.
To enhance the protective qualities of these fabrics, consider applying a fabric spray specifically formulated for scratch resistance. This creates a barrier that helps maintain the integrity of your upholstery and prolongs its life. High-performance fabrics treated with nanotechnology not only resist scratches but also repel liquids and stains, making maintenance a breeze.
When selecting scratch-resistant fabrics, look for those with a Martindale abrasion rating of at least 30,000. This rating indicates strong wear resistance, ensuring your sofa can handle daily use without showing signs of wear. Regularly using fabric sprays with protective qualities will reduce the need for frequent cleaning or replacement, allowing you to enjoy your durable, stylish sofa for years to come. Prioritizing these options can save you time and money in the long run.
Choose Durable, Washable Fabrics
Choosing durable, washable fabrics for your sofa not only enhances its longevity but also makes maintenance a breeze. When selecting upholstery, opt for durable materials like polyester or microfiber. These fabrics are renowned for their stain resistance and ability to withstand everyday wear and tear.
Washable fabrics can significantly simplify your cleaning routine; look for upholstery that can be easily removed and tossed into the washing machine. This ensures your sofa stays fresh and clean without much effort. Additionally, consider choosing darker colors or patterns, which can help disguise stains and maintain a cleaner appearance over time.
Regularly applying fabric sprays can further enhance the stain resistance of your sofa. These treatments add an extra layer of protection against spills and dirt, prolonging the life of your upholstery. By protecting the fibers from moisture and UV damage, you're reducing the need for deep cleaning or costly replacements. Furthermore, investing in energy-efficient designs can help create a more sustainable home environment.
Investing in durable, washable fabrics not only saves you time but also ensures your sofa remains a stylish and functional part of your home for years to come.
Using Furniture Coasters
Using furniture coasters can make dismantling your sofa a much smoother process. These handy tools distribute weight evenly, which helps prevent damage to the legs of your sofa during removal. By minimizing pressure on the flooring, coasters also reduce the risk of scratches, keeping your home intact while you prepare for disposal.
Before you start taking apart your sofa, consider applying fabric spray to the upholstered surfaces. This not only cleans and refreshes the fabric but also makes it easier to handle, preserving its condition for potential reuse or donation. Regular use of fabric spray can repel dirt and stains, extending the life of your cushions.
When you begin moving the disassembled parts of the sofa, furniture coasters will allow for smoother gliding across the floor. This can greatly reduce the risk of injury or damage, making the process safer for you and your surroundings. Plus, utilizing coasters helps maintain the integrity of your sofa's structure, making reassembly easier if you choose to keep it. Overall, coasters and fabric spray are essential tools for a successful sofa dismantling experience.
Upholstery Stitching Reinforcement
When you're assessing your sofa, don't overlook the importance of upholstery stitching reinforcement. This not only impacts frame stability but can also guide your decision on reupholstering for a fresh look, enhancing your sofa's appeal. Keeping an eye on stitching can help you catch wear before it leads to more significant issues.
Frame Stability Concerns
While dismantling a sofa, you can't overlook the importance of upholstery stitching reinforcement, as it plays a vital role in maintaining the frame's stability. The way your sofa is stitched can significantly impact both the disassembly process and the integrity of the frame. High-stress areas often feature double-stitched seams, providing essential support but complicating the removal of upholstery.
When you're cutting through reinforced stitching, do so carefully to avoid tearing the fabric, which could hinder your reuse or recycling efforts. Zigzag stitching, for example, is generally more flexible, making it easier to detach compared to straight stitches. By handling the upholstery delicately, especially in reinforced zones, you can preserve the frame's integrity and avoid unnecessary damage.
Reupholstering for a Fresh Look
How can you give your old sofa a fresh look while ensuring it lasts for years? When reupholstering, focus on reinforcing upholstery stitching to boost durability. Start by choosing a heavy-duty thread like polyester or nylon; it can withstand wear and tear far better than regular cotton thread. Using a sewing machine with a walking foot attachment helps evenly feed multiple layers of fabric and batting, making your stitching more consistent.
Double-stitching seams in high-stress areas, like corners and edges, is crucial. This technique significantly enhances the upholstery's longevity and prevents tearing down the line. Additionally, consider using strong adhesive or fabric glue in areas under high tension, such as the seat cushions and backrest. This extra layer of support will help your newly upholstered sofa stand the test of time.
Finally, don't forget to regularly inspect and maintain the stitched areas after reupholstering. Keeping an eye on potential issues can prevent minor problems from turning into major repairs, ultimately extending the life of your new upholstery. With these steps, you can enjoy a sofa that looks great and holds up for years to come.
Revitalizing Your Sofa's Appeal
Revitalizing your sofa's appeal starts with the crucial step of reinforcing upholstery stitching. This process can significantly extend your sofa's lifespan by preventing fabric fraying and maintaining its structural integrity. Begin by removing upholstery to access the seams that need attention. For effective reinforcing stitching, consider using a sewing machine with heavy-duty thread or opt for hand-stitching with upholstery needles for durability.
In high-traffic areas, double-stitching seams or applying a zigzag stitch pattern helps distribute stress evenly, improving resilience against wear and tear. Regularly inspect for loose or damaged stitching; tackling minor repairs is much cheaper than full reupholstering.
Using upholstery-grade fabric during the reupholstering process enhances your sofa's durability, given its higher thread count. This makes your sofa, even a sofa bed, more resistant to daily use and wear. By taking these steps, you not only reinforce the stitching but also ensure that your sofa remains a stylish and functional centerpiece in your living space. Remember, a little maintenance goes a long way in keeping your sofa looking fresh and inviting. Additionally, incorporating Indonesian decor masks can further enhance your living space's cultural aesthetic.
Personalized Upholstery Choices
Choosing the right upholstery for your sofa can transform your living space, making it feel more inviting and personalized. When you select upholstery, consider fabrics that not only match your interior decor but also reflect your personal style. Options like leather, microfiber, or cotton offer a variety of durability and maintenance levels, so think about your lifestyle needs as you make your choice.
Custom upholstery allows you to choose from an array of colors, patterns, and textures, giving you the perfect opportunity to express your unique personality. Quality upholstery not only enhances the visual appeal of your sofa but also affects its longevity; higher-quality fabrics typically resist wear and tear better over time.
If you're environmentally conscious, many manufacturers now provide eco-friendly upholstery options, such as organic or recycled materials. This allows you to make sustainable choices while still achieving a personalized look for your furniture. Remember, your upholstery choice can significantly impact your sofa's aesthetics and comfort, making it a crucial factor in your furniture disposal process when the time comes.
Emergency Repair Techniques
When unexpected damage occurs to your sofa, quick emergency repair techniques can save the day. If you notice small tears in the upholstery, using fabric glue or a patch kit can provide a temporary repair. This helps keep the mess minimal as you prepare to disassemble the sofa.
In case a leg is loose, grab a wrench to temporarily tighten it. This prevents the sofa from wobbling and keeps it stable while you work. For sagging areas, placing cushions underneath can offer temporary support and comfort until you're ready to remove them for dismantling.
If you encounter loose frame sections, clamps can be used to stabilize them, which helps prevent further damage during the disassembly process. In more severe situations, like when a section breaks unexpectedly, duct tape becomes your best friend. Use it to hold broken parts together until you can safely disassemble the sofa.
Conclusion
Dismantling a sofa may seem daunting, but with the right approach and tools, you can tackle it efficiently. Start by gathering essential tools like screwdrivers, Allen wrenches, and staple pullers. Systematically remove cushions, upholstery, and frame components to streamline the couch removal process. This method not only simplifies disposal but also opens up opportunities for recycling or donating usable furniture items.
Before you dispose of your sofa, take the time to research local regulations regarding furniture disposal. Adhering to these guidelines helps you avoid fines and ensures proper waste removal practices. Planning ahead is crucial; consider renting a dumpster or contacting junk removal services to make the process smoother.
Frequently Asked Questions
How to Break Down a Couch for Disposal?
To break down a couch for disposal, start by removing cushions and any detachable parts like legs or armrests. Use a box cutter to strip the upholstery, but be careful of sharp edges—gloves are a must! Then, unscrew the backrest and arms, keeping track of all fasteners. Disassemble the frame piece by piece, using a saw if needed. Finally, organize the parts and fasteners in labeled bags for easy disposal.
How to Break up an Old Sofa?
To break up an old sofa, start by removing all loose cushions and pillows to lighten it. Use a box cutter to strip away the upholstery, cutting carefully. Next, detach the legs with a screwdriver or saw if needed. Systematically remove any attached components like armrests and backrests by unscrewing them. Finally, sort the materials for recycling or disposal, ensuring you follow your local waste management guidelines for proper handling.
Can Sofas Be Disassembled?
Yes, you can disassemble most sofas, making it easier to transport them, especially in tight spaces. Many sofas have removable legs, detachable cushions, and separable frame sections. You'll likely need some tools like screwdrivers and Allen wrenches to help with the process. Just keep in mind that some models, like sofa beds or recliners, might have additional complexities, so handle those parts carefully to avoid damage during disassembly.
How to Get Rid of an Old Sofa?
When you're looking to get rid of an old sofa, consider donating it to local charities if it's still usable. If it's not in good shape, check for recycling programs in your area that handle upholstered furniture. You can also schedule a bulk waste pickup or hire a junk removal service for easy disposal. If needed, disassemble the sofa into smaller parts for regular trash collection while separating recyclables.
-
Beauty and Grooming1 month ago
Embrace Natural Glow With Bronzer-Free Accelerators
-
Beauty and Grooming1 month ago
Discover Top Outdoor Tanning Lotions Today
-
Vetted2 months ago
15 Best Affordable Sustainable Fashion Brands You Need to Know About in 2025
-
Fashion Trends2 months ago
Fall 2025 Fashion Trends: Be Ahead of the Curve!
-
Interior Design2 weeks ago
Mylar vs. Foil Balloons: The Ultimate Showdown
-
Beauty and Grooming1 month ago
Unlock Flawless Tanning With Skin Prep
-
Interior Design1 month ago
Create Your Dream Cottagecore Home Office Now!
-
Vetted2 months ago
15 Best Women's Fashion Trends of 2025 You Need to Know About