Interior Design
How to Repair Rattan Furniture
Keep your rattan furniture looking stunning by learning essential repair techniques that will have you wondering what other secrets await.
To repair rattan furniture, start by cleaning it thoroughly with a soft brush and mild soap solution. Inspect for any damaged strands or loose weaves, and trim any frayed ends, leaving some slack for new strands. Use a suitable adhesive for repairs, applying it generously and allowing proper drying time. When weaving new strips, soak them first for flexibility and mimic the original pattern. Finally, finish by stripping and sanding the surface, then applying stain or varnish for protection. Regular maintenance will help keep your furniture looking great. There's a lot more to consider for lasting repairs and care.
Key Takeaways
- Thoroughly clean the furniture before repairs, using a soft brush and mild soap to remove dirt and grime.
- Inspect for damaged rattan strands and trim loose ends, leaving slack for new strand attachment.
- Weave replacement rattan strips by soaking them, replicating the original pattern, and securing the ends with glue.
- Apply appropriate adhesives to ensure strong bonds, allowing sufficient drying time before using the furniture again.
- Protect repaired furniture with UV-resistant sprays and store indoors during severe weather to prevent further damage.
Preparing for Repair
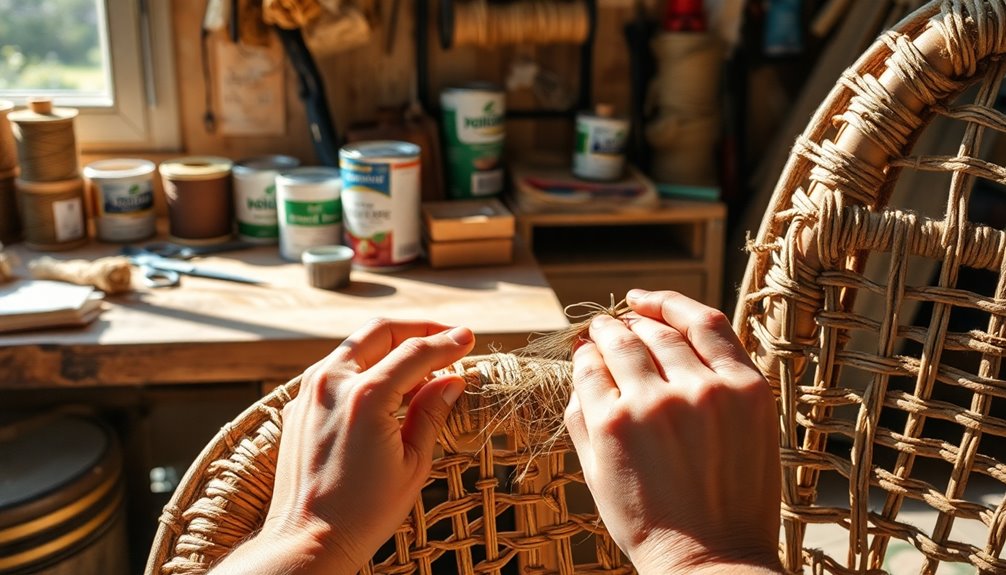
Preparing for repair is crucial to ensure your rattan furniture gets the attention it needs. Start by cleaning the furniture thoroughly. Use a soft-bristled brush to gently remove loose dirt and debris. Then, create a mild cleaning solution with dish soap and water. Wipe down the furniture with a soft cloth soaked in this solution, making sure not to introduce excessive moisture, as that can cause further damage. After cleaning, let the furniture dry completely in the air.
Next, gather all necessary tools and materials. You'll need scissors, pliers, a glue gun, and glue sticks. Collect replacement rattan strips that match the existing pattern and color, along with fine-grit sandpaper for smoothing rough spots. Choose a suitable adhesive for rattan material, and prepare epoxy resin if you have significant breaks to repair. Regular maintenance is essential to prevent further damage to rattan furniture.
Make sure the environment is dry to avoid complications. Allow any applied glue or epoxy resin to dry completely according to the instructions. If needed, you can use a hairdryer to soften the weaves but be careful not to overheat. With everything in place, you're ready to tackle the repairs effectively.
Identifying Damaged Areas
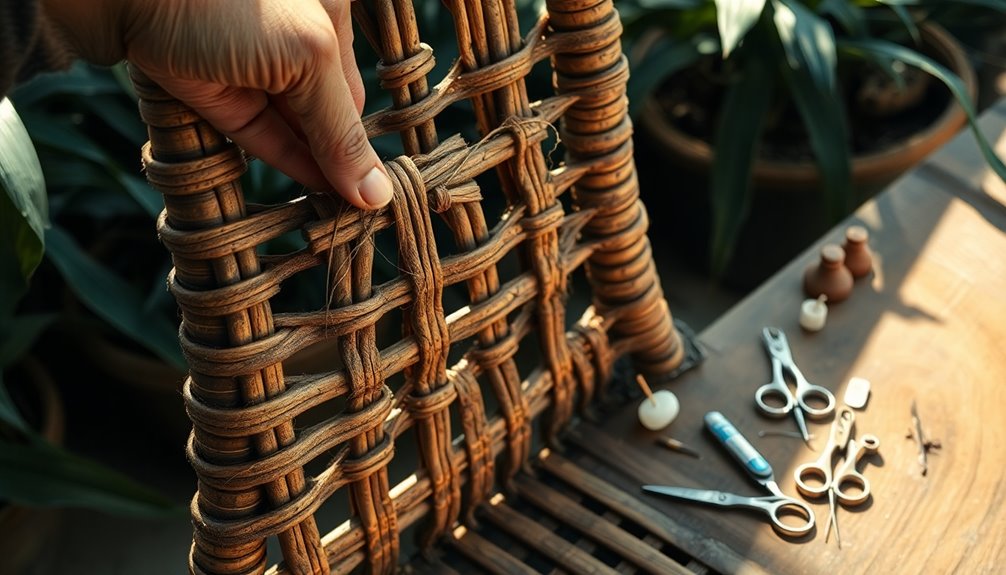
When tackling repairs on rattan furniture, it's essential to identify any damaged areas first. Start by examining the rattan strands for cracks or breaks. Look closely for any splits or fractures, checking the entire piece to ensure you don't miss anything. Make a note of the severity and location of these cracks, as they'll guide your repair efforts.
Next, inspect the weave pattern for loose sections. Identify any disruptions or gaps where the rattan has come undone. Check that no rattan strands are untied or detached from the main structure, as this could affect both stability and aesthetics.
Don't forget to evaluate the frame of your furniture. Ensure it's sturdy and intact, and look for damage to any metal or aluminum components. Check for rust or corrosion that could compromise support; plastic rattan often has a lightweight frame that may be easily damaged.
Finally, look for other forms of damage. Check for fading or discoloration from UV exposure, along with any holes or gaps in the weave. Be mindful of dirt, grime, or stains that may have accumulated, as these elements can signify overall wear and tear.
Trimming Damaged Sections
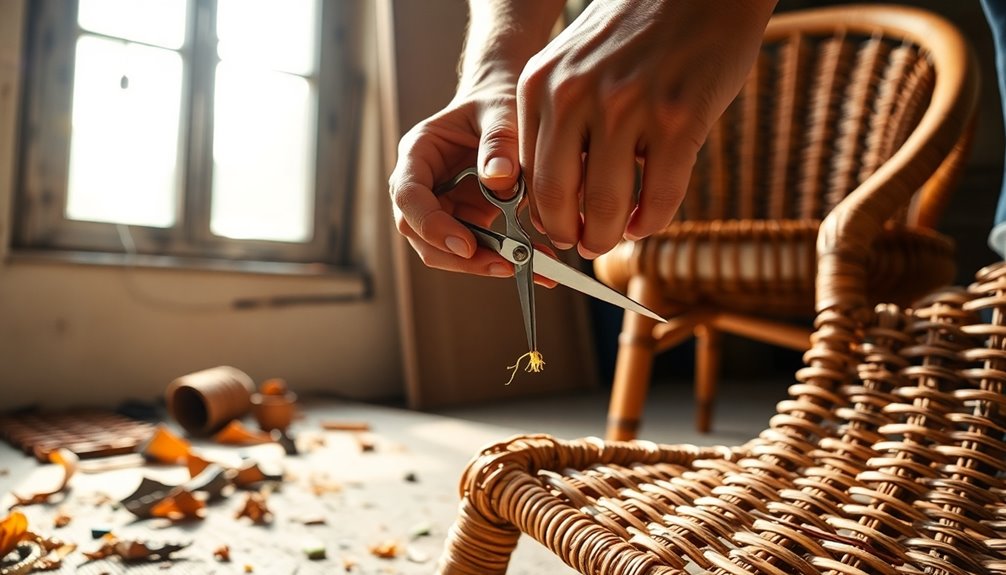
After identifying the damaged areas, it's time to address them directly by trimming any loose or broken sections. Start by cleaning the furniture thoroughly to remove any dirt and debris. Use a soft-bristled brush to clear away loose dust, then wipe down the surface with a mild soap and water solution. Allow the furniture to air dry completely before you proceed.
Next, inspect the damaged area closely. Use scissors or a sharp knife to carefully trim away any loose or frayed ends. Make sure to cut the damaged strands without causing further harm to the surrounding rattan. Aim for even, smooth cuts to facilitate the repair process. Remove any small, loose fragments that could interfere with your work.
For broken strands, cut and discard the damaged sections, leaving about half an inch of slack on either side. Measure and cut a replacement strand slightly longer than the broken one. After weaving it into place, trim the new strand to fit if necessary. Finally, ensure the trimmed ends are secure to prevent unraveling. This preparation sets you up for a successful repair.
It's important to remember that rattan furniture is eco-conscious and sustainable due to its natural materials, which makes it a great choice for those looking to minimize their environmental impact.
Applying Adhesives and Resin
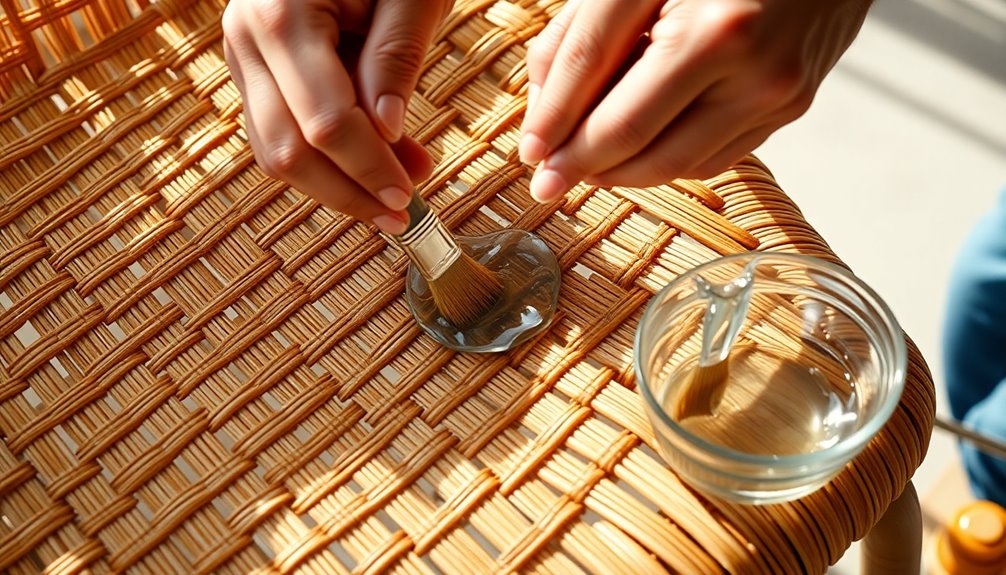
To effectively repair your rattan furniture, applying the right adhesives and resin is crucial for ensuring a strong and lasting bond. Start by selecting the appropriate glue type. For securing new rattan strips, use hot glue or waterproof adhesive. Super glue works well for fixing loose strands, while wood glue is ideal for attaching new strips during the weaving process. If you have broken strands, epoxy resin can be molded into place, providing a robust repair. Additionally, using synthetic materials for repairs can enhance the durability and weather resistance of your furniture.
When applying the adhesive, make sure the area is clean and dry. Apply glue generously to the joining edges, ensuring even coverage on both surfaces. For hot glue, secure the ends of new strips, and for wood glue, spread it on the front side before pressing it into place. Allow sufficient drying time: super glue sets in five minutes, wood glue takes 30 minutes, and Gorilla Glue requires clamping for 20-30 minutes, ideally left overnight. Epoxy resin needs two days to cure completely. Always avoid using the furniture until the adhesive has fully set to ensure a durable repair.
Weaving Replacement Strands
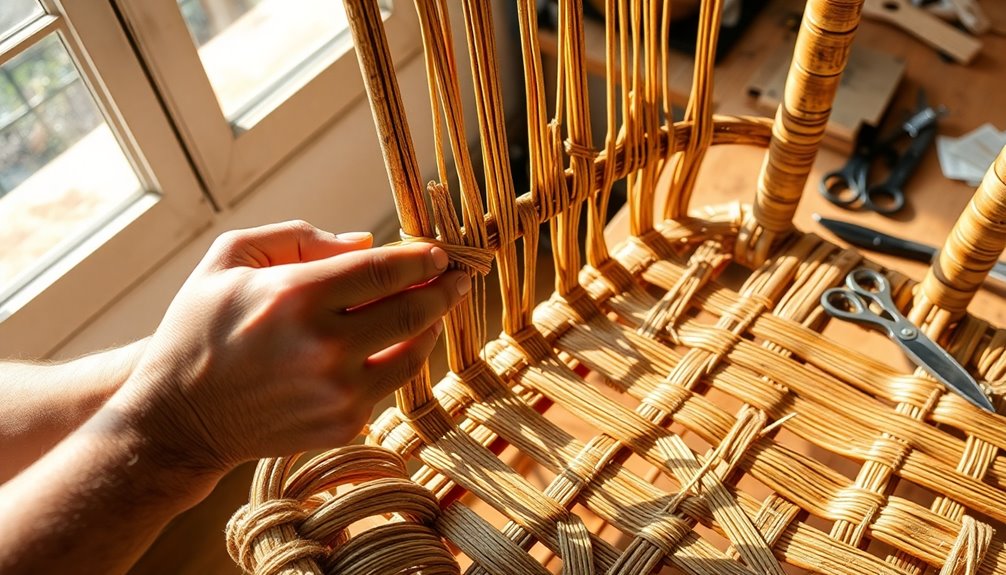
Repairing rattan furniture often involves weaving in replacement strands to restore its original beauty and functionality. Start by identifying the damaged areas, like loose or broken strands, and thoroughly clean the furniture to remove any dirt. Cut out the damaged strands, and capture the original weaving pattern to replicate it accurately.
Next, prepare replacement strands that closely match the existing color and pattern. Soak these new rattan strips in water for 30 minutes to make them pliable. Ensure they're longer than the strands being replaced for easier weaving. If needed, clean them with warm, soapy water, and check for smooth sides to expose during the process. It's also important to conduct regular inspections to identify any wear that may require attention.
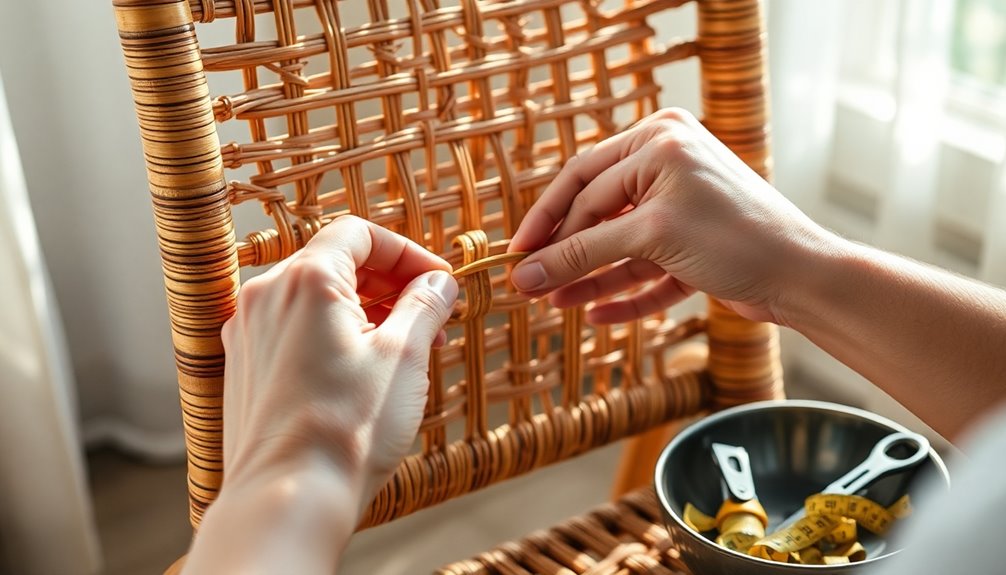
Now, it's time to weave. Insert the soaked replacement strands into the existing weave, following the original pattern. Use pliers or small tools to help push them into tight spots. If you encounter resistance, a hairdryer can soften the surrounding weave. Tuck the ends carefully under the adjacent strands for a neat appearance. Finally, trim any excess material and secure the ends with glue to ensure they stay in place.
Final Touches
Finishing touches can transform your rattan furniture from a simple repair to a stunning centerpiece. Start by removing the old finish with a varnish stripper to dissolve any remnants. Wipe away the residue with a soft cloth and use a wire brush or scrub pad for crevices. If necessary, scrape out the old finish with a putty knife and clean intricate areas with small brushes.
Next, prepare the surface by sanding it with fine-grit sandpaper for a smooth texture. Sand lightly to avoid damaging the rattan fibers, focusing on rough spots, and clean away dust afterward. Choose a suitable stain or paint, applying it evenly with a brush or sponge. Allow each coat to dry completely, aiming for 2-3 coats of varnish or wax for a polished look. Additionally, consider the importance of oiling as it helps prevent fading and strengthens the fibers against elements.
Finally, seal your work with a clear varnish to protect the new finish. Use a high-quality sealant to guard against moisture. Apply it evenly, ensuring you cover all nooks and crannies. Allow the sealant to cure fully before using your revitalized furniture. With these final touches, your rattan piece will shine beautifully in your space.
Protecting Your Furniture

A few simple steps can significantly extend the life of your rattan furniture and keep it looking stunning. Start by applying UV-resistant sprays and sealants specifically designed for rattan. These will shield your furniture from harmful UV rays and moisture. A thin coat of polyurethane varnish can also add a protective layer, while lacquer or shellac helps guard against moisture and pests.
Invest in high-quality waterproof covers to protect your furniture when it's not in use. This reduces the risk of damage from rain and sun exposure. During severe weather, store your rattan furniture indoors or under cover, and ensure good air circulation to prevent mold growth from moisture. Additionally, since rattan is known for its strength and flexibility, proper care will help maintain these properties over time.
Maintaining moderate humidity levels is essential. Avoid prolonged exposure to direct sunlight, as this can cause brittleness and fading. Position your furniture in shaded areas and use curtains to minimize direct sunlight exposure.
Finally, regularly inspect your furniture for signs of wear or damage, and address issues promptly. By taking these protective measures, you'll ensure your rattan furniture remains beautiful and functional for years to come.
Maintenance Tips
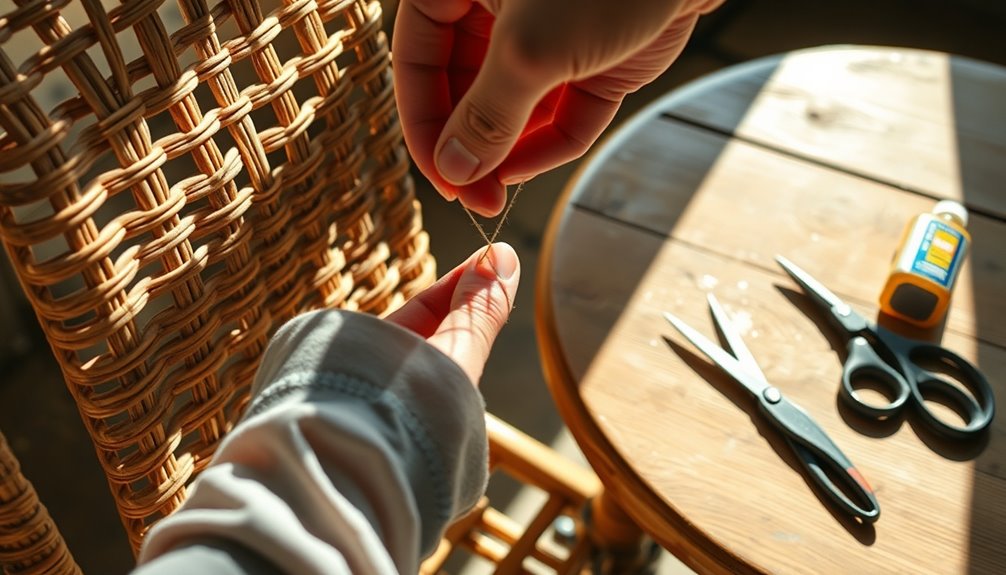
To keep your rattan furniture in top shape, regular maintenance is key. Start by cleaning it with a soft cloth to remove dirt and restore its natural shine. A handheld vacuum or brush attachment works wonders for loosening dust and soil. For deeper cleaning, mix mild detergent in warm water, using a toothbrush to tackle stubborn debris in cracks.
After cleaning, dry your furniture thoroughly, ideally in the sun or a well-ventilated area. Avoid soaking it; if it gets oversaturated, leave it outdoors to dry. Remember to rotate your furniture regularly to prevent uneven fading from sunlight, and keep it away from severe heat to avoid humidity control and warping.
When moving your rattan pieces, lift them instead of dragging, as this prevents splitting the fibers. Protect the feet with felt pads to minimize damage. If you spot mildew, treat it immediately with a strong bleach solution and dry the piece outside. Lastly, check for any loose strands or damage regularly, and use a soft brush to keep it clean. With these tips, your rattan furniture will stay beautiful and last for years.
Frequently Asked Questions
What Tools Do I Need for Rattan Furniture Repair?
To tackle rattan furniture repair, you'll need a few essential tools. Start with a soft-bristled brush and a mild cleaning solution to prep the surface. Scissors or a sharp knife will help you cut rattan strands, while pliers and a weave tool assist in handling tight areas. For adhesives, grab wood glue and super glue to secure loose pieces. Don't forget sandpaper for smoothing rough spots and clamps to hold everything in place while it dries.
Can I Use Regular Glue for Rattan Repairs?
You can't use regular glue for rattan repairs. It often fails to bond effectively, leading to weak adhesion that won't hold up over time. Plus, it may take longer to dry, delaying your project. Regular glue also isn't suitable for outdoor use, as it can degrade in the elements. For best results, opt for stronger adhesives like epoxy resin or super glue, which provide a durable and lasting repair.
How Long Does Rattan Furniture Repair Take?
Repairing rattan furniture can take anywhere from a few hours to a couple of days, depending on the extent of the damage. If you're just fixing minor issues, you might be done in an afternoon. However, if you need to replace several strands or let glue dry, it could take up to 24 hours or more. Make sure to plan for drying time, so you don't rush the repair process.
Is It Possible to Paint Rattan Furniture?
Yes, you can definitely paint rattan furniture! Start by cleaning it thoroughly and letting it dry completely. Lightly sand the surface to improve primer adhesion, then apply a suitable primer. Once that's dry, use acrylic or rattan-specific spray paint, applying thin, even coats. After achieving your desired color, seal it with a clear acrylic to protect your work. Just remember to let everything cure for at least 24 hours before using the furniture.
How Can I Prevent Future Damage to My Rattan Furniture?
To prevent future damage to your rattan furniture, position it in shaded areas to avoid direct sunlight. Use coasters and placemats to protect surfaces from spills and scratches. Keep the furniture away from heaters and air conditioning vents to maintain consistent humidity levels. Regularly clean it with a soft brush and apply a thin coat of furniture wax to shield it from moisture and UV rays. Store it indoors during harsh weather for extra protection.
Conclusion
By following these steps, you can easily repair your rattan furniture and restore its beauty. Remember to regularly inspect for wear and tear, and don't hesitate to tackle minor repairs before they escalate. With a little time and effort, your furniture can continue to provide comfort and style for years to come. So, get started on those repairs, and enjoy your revitalized rattan pieces!
Interior Design
Craft Beautiful Ang Pow Decorations for New Year
Prepare to transform colorful Ang Pow packets into stunning decorations for New Year; discover unique techniques and personal touches that will elevate your celebrations!
To create beautiful Ang Pow decorations for the New Year, begin by gathering colorful Ang Pow packets and essential materials such as scissors and glue. Utilize techniques like the lantern fold or flower fold to craft unique shapes. Make sure to incorporate red and gold colors, as they represent luck and wealth. Customize your decorations with family colors or wishes for the year to add meaning. Get imaginative by hanging lanterns, creating centerpieces, or showcasing fan art on walls. This not only adds brightness to your space but also keeps you connected to treasured traditions—there are plenty of ways to enhance your New Year festivities!
Key Takeaways
- Gather a variety of Ang Pow packets and basic crafting materials like scissors, glue, and string to start your decorations.
- Explore different folding techniques such as lantern, fan, and flower folds to create unique shapes and designs.
- Personalize your decorations by incorporating family favorite colors, meaningful symbols, and heartfelt wishes for the New Year.
- Create vibrant displays by hanging Ang Pow lanterns, arranging flowers in vases, or showcasing wall art to enhance the festive atmosphere.
- Engage with family and friends in crafting sessions to strengthen connections and celebrate cultural traditions together.
Understanding Ang Pow Symbolism
Understanding the symbolism behind Ang Pow decorations adds depth to their festive allure.
These vibrant red packets, adorned with gold designs, represent good fortune and prosperity, making them a staple during Chinese New Year. When you see common motifs like lanterns, lucky fish, or zodiac animals, you're not just admiring art; you're engaging with rich cultural traditions.
Each color plays a role—red invites luck, while gold signifies wealth. Incorporating symbols such as dragons and phoenixes enhances your decorations' significance, tying your celebration to ancestral beliefs.
Essential Crafting Materials
To bring your Ang Pow decorations to life, gathering the right crafting materials is key. Start with a variety of Ang Pow packets in different designs; these will form the foundation of your creations.
You'll also need scissors, glue, tape, and string for assembly. Consider adding embellishments like ribbons, stickers, sequins, or beads to enhance your decorations.
Red and gold paper can serve as supplementary materials, while markers allow you to personalize your decorations with messages or unique designs.
With these essential materials in hand, you're well on your way to crafting stunning Ang Pow decorations that will brighten your home and celebrate the spirit of the New Year. Enjoy the process and let your creativity shine!
Techniques for Folding Ang Pow
Mastering a few key folding techniques can transform your Ang Pow packets into stunning decorations for the New Year.
Start with the Lantern Fold: create a diamond shape, then secure it with glue or tape.
For a playful touch, try the Fan Fold by using accordion-style folding; this creates a charming fan shape.
The Flower Fold involves forming triangle folds, revealing a lovely flower when opened.
If you want something whimsical, use the Butterfly Fold to create wings with folded corners, securing the body with glue. If you want something whimsical, use the Butterfly Fold to create wings with folded corners, securing the body with glue. This delicate design works wonderfully as a decorative element for cards, gift boxes, or party décor. To elevate your crafts, pair the butterfly with vibrant accents or try incorporating creative approaches like the “fill your own balloons tips” for unique, personalized touches.
Finally, the Envelope Fold is straightforward and can be embellished further.
Combine these techniques for eye-catching designs, like interlocking envelopes for flower garlands or cutting packets into fish shapes for a delightful 3D effect.
Creative Display Suggestions
While showcasing your Ang Pow decorations, consider how each piece can contribute to the overall festive atmosphere of your home.
Here are some creative display suggestions to enhance your celebration:
- Lanterns: Hang Ang Pow lanterns from ceilings or doorways to create an inviting ambiance.
- Centerpiece: Arrange Ang Pow flowers in a decorative vase for a stunning dining table centerpiece.
- Wall Art: Create a visual impact by displaying Ang Pow fans on walls or shelves.
- Window Cutouts: Use Ang Pow cutouts in windows to add a vibrant touch to your home.
These displays not only beautify your space but also invite good fortune as you welcome the Lunar New Year!
Cultural Importance of Ang Pow
Ang Pow decorations hold deep cultural significance during the Lunar New Year, as they not only symbolize good fortune and prosperity but also serve as a way to honor traditions and family ties.
When you craft these decorations, you're participating in a time-honored practice that connects you to your heritage. The vibrant red and gold colors reflect happiness and wealth, creating a festive atmosphere that invites positive energy into your home.
Each design, from lanterns to flowers, carries its own meaning, reminding you of the hopes and blessings you wish to attract in the coming year.
Engaging in Community Crafting
Engaging in community crafting during the Lunar New Year is a fantastic way to connect with friends and family while celebrating traditions.
You can gather loved ones, share ideas, and create beautiful Ang Pow decorations together. Here are a few fun activities to contemplate:
- Host a Crafting Party: Invite friends over and set up crafting stations with different materials.
- Collaborative Projects: Work on large decorations, like a giant Ang Pow lantern or a colorful garland.
- Share Techniques: Teach each other folding methods or embellishment ideas to enhance creativity.
- Display Together: Once finished, hang your creations around your homes, showcasing your collective effort and spirit.
Tips for Personalizing Decorations
Add a personal touch to your Ang Pow decorations by incorporating unique elements that reflect your family's style and values. Think about using family colors or symbols that resonate with your heritage. You can also add personal messages or names to each decoration for a special touch.
Here are some ideas to ponder:
Element | Personalization Ideas |
---|---|
Colors | Use family favorite colors |
Symbols | Incorporate meaningful icons |
Messages | Add wishes or quotes for the year |
Names | Include family member names |
These simple adjustments can make your decorations truly one-of-a-kind, enhancing the festive atmosphere while celebrating your family's identity. Enjoy the process and let your creativity shine!
Frequently Asked Questions
Can I Use Ang Pow Packets From Previous Years?
Yes, you can definitely use Ang Pow packets from previous years! They hold sentimental value and can still bring good luck. Just make certain they're in good condition and complement your current decorating style.
What Is the Significance of the Colors Used in Ang Pow?
The colors in Ang Pow packets symbolize good fortune and prosperity. Red represents luck, while gold signifies wealth. Together, they create a vibrant atmosphere, inviting happiness and warding off negative spirits during celebrations.
Are There Specific Symbols to Avoid in Ang Pow Decorations?
When crafting decorations, avoid symbols associated with death, such as white flowers or specific numbers like four, as they carry negative connotations. Focus on positive symbols to guarantee a festive and auspicious atmosphere.
How Can I Involve Children in Crafting Ang Pow Decorations?
You can involve children by encouraging them to choose colors and shapes, guiding them through simple folding techniques, and letting them decorate with stickers or drawings. This makes crafting a fun, collaborative experience for everyone.
What Are Some Eco-Friendly Alternatives to Traditional Ang Pow Packets?
Did you know that around 2 billion single-use packets are produced annually? You can use recycled paper, fabric scraps, or biodegradable materials as eco-friendly alternatives. They're just as festive and much better for the environment!
Conclusion
As you immerse yourself in crafting your Ang Pow decorations, remember that these vibrant creations do more than beautify your home—they symbolize luck and prosperity. Did you know that in Chinese culture, it's believed that red envelopes can bring up to 5 times the luck compared to regular decorations? So, as you fold and design, you're not just celebrating; you're also inviting blessings for the year ahead. Embrace this joyful activity and let your creativity shine!
Interior Design
How to Clean Wood Furniture Naturally
Clean your wood furniture naturally with simple ingredients and techniques that will leave it shining—discover the secrets to maintaining its beauty!
To clean your wood furniture naturally, start by dusting it with a soft microfiber cloth, moving from top to bottom. Mix equal parts vinegar and water in a spray bottle for an effective cleaner. Lightly mist the surface and wipe in the direction of the grain using a damp cloth. For stubborn stains, try a baking soda paste or use a bit of mayonnaise for water marks. Don't forget to apply a little olive oil monthly to enhance shine and protect the wood. There's plenty more to discover about keeping your furniture looking its best.
Key Takeaways
- Dust wood furniture regularly with a soft microfiber cloth to remove debris without scratching the surface.
- Create a natural cleaning solution using equal parts vinegar and water, and apply it with a lightly damp cloth.
- For conditioning, mix vinegar and olive oil to enhance shine and protect the wood.
- Address stubborn stains with a baking soda paste or a vinegar solution, gently rubbing and wiping off.
- Use coasters and hot pads to prevent scratches and spills, promoting longevity and maintaining the furniture's appearance.
Understanding Wood Furniture Needs
Understanding wood furniture needs is essential for keeping your pieces looking their best. Different types of wood respond uniquely to cleaning methods, so identifying whether you have hardwoods like oak and maple or softwoods such as pine and cedar is crucial. This knowledge helps you choose the right cleaning solutions and techniques to avoid damage. Additionally, wood furniture often features finishes like varnish, lacquer, or oil, which protect and enhance its appearance. Each finish has specific cleaning requirements, so testing with mineral spirits can help determine how to clean it properly.
You should also consider the condition of your furniture. Heavily soiled pieces may need more intensive cleaning than lightly soiled ones, and you must check for cracks or flaking finishes before you start. If the finish is damaged, it's better to hold off on cleaning to prevent further harm. Regular maintenance is important as it enhances the visual appeal of your wood furniture and preserves its integrity over time.
Lastly, remember to avoid harsh chemicals and abrasive cleaners. Opt for natural and mild cleaning solutions like mild dish soap or white vinegar to protect the wood and its finish. Prioritizing these factors ensures your furniture stays beautiful and well-maintained.
Importance of Regular Dusting
Why is regular dusting crucial for your wood furniture? Dusting is essential because it removes layers of dust and debris, keeping your furniture looking clean and inviting. When you dust, you eliminate unwanted particles like dirt, pollen, skin cells, and even insect waste that can accumulate over time. This not only enhances the appearance of your furniture but also prevents dust from scratching the surface, which can cause damage.
Moreover, regular dusting contributes to better air quality in your home. It minimizes the circulation of airborne particles that could affect respiratory health, especially if you or someone in your household suffers from allergies or asthma. By keeping surfaces clean, you also reduce the amount of dust that becomes airborne when disturbed. Additionally, reducing airborne particles through regular dusting can significantly benefit those with respiratory sensitivities.
Finally, consistent dusting helps preserve the wood finish. Dust mixed with moisture can lead to stains, warping, or even mildew growth. By maintaining a dust-free environment, you protect the natural beauty of your wood furniture and extend its lifespan. So, make regular dusting a part of your cleaning routine to keep your wood furniture in top shape!
Natural Cleaning Solutions Overview
To keep your wood furniture looking its best, using natural cleaning solutions is a smart choice. Not only are these solutions eco-friendly and safe for kids and pets, but they also effectively clean without harsh chemicals. Vinegar serves as a natural disinfectant and deodorizer, perfect for cutting through grime and restoring shine. Combine it with olive oil, a natural conditioner, to hydrate and polish your furniture. Lemon juice can act as a stain remover, adding a refreshing scent to your cleaning routine. Essential oils like lemon, lavender, and tea tree oil enhance your cleaners with pleasant fragrances and antibacterial properties. Regular maintenance practices, including avoiding direct sunlight, are crucial for prolonging the lifespan of your wood furniture.
You can easily create your own cleaners at home. For a versatile cleaner, mix 1 ½ cups of water with ¼ cup of white vinegar, 2 tablespoons of olive oil, and 20 drops of lemon essential oil. For a polishing solution, try 1 tablespoon of white vinegar mixed with 3 tablespoons of olive oil. Remember to test any solution on a small, inconspicuous area first to ensure it's safe for your specific wood finish. By using these natural options, you'll maintain your furniture's health and appearance effectively.
Effective Application Techniques
When cleaning wood furniture, using effective application techniques is key to achieving a polished finish without damaging the surface. Start by dusting with a soft microfiber cloth or feather duster. Always begin at the top and work your way down to prevent dust from settling on already cleaned areas. For intricate carvings, a soft-bristle brush or vacuum with a brush attachment works wonders.
Next, prepare your natural cleaning solution, mixing equal parts white vinegar and water in a spray bottle. Shake it well to blend. Dip a soft cloth into the solution, wring it out until it's barely damp, and gently wipe the furniture, always following the wood grain. Avoid using excessive moisture, as this can damage the finish, so it's important to remember that excess water can lead to warping and discoloration of wood.
After wiping, use a clean, dry cloth to immediately remove any remaining moisture and prevent watermarks. Make sure to dry thoroughly, especially in corners where solution might collect. Finally, consider applying a wood polish or oil once a month using circular motions to enhance shine and protect the wood. Always test new solutions on a hidden spot first to ensure safety for your furniture.
Tackling Stubborn Stains
Stubborn stains on wood furniture can be frustrating, but with the right natural solutions, you can restore its beauty. Start with a vinegar solution by mixing equal parts water and white vinegar in a spray bottle. Lightly mist the stained area and wipe it with a soft cloth. This method effectively removes water spots and sticky residue.
For tougher stains, create a baking soda paste by mixing baking soda with water. Apply it to the stain and gently rub with a soft cloth or sponge. Let it sit for a few minutes before wiping off with a damp cloth. If needed, repeat this process.
You can also use mineral oil or a mixture of olive oil and vinegar. Douse a clean rag with mineral oil and scrub the stain, allowing it to penetrate for a while. Alternatively, smear mayonnaise on water stains and let it sit for 3-4 hours. Additionally, if the stain remains stubborn, consider using a stripping gel to effectively remove it before applying natural solutions.
If stains persist, consider lightly sanding the area with fine sandpaper, always sanding in the direction of the grain. This helps prepare the surface for further treatment, ensuring your wood furniture looks its best.
Polishing for Added Shine
Polishing wood furniture not only enhances its natural beauty but also protects it from wear and tear. To start, choose a wood polish—either commercial or homemade. For commercial polish, apply a small amount to a soft, lint-free cloth. Gently rub the cloth in long, straight strokes, always following the grain. Avoid circular motions to prevent swirl marks.
If you prefer a natural option, mix 1 cup of olive oil, ½ cup of lemon juice, and 1 teaspoon of white vinegar. Alternatively, combine ⅔ cup of beeswax with 3 cups of jojoba oil for a beeswax-based polish. Always test a small area first to ensure the polish won't damage the wood. Regular dusting is essential to start with a clean surface for effective polish adhesion.
When applying, fold your cloth for a firm grip, and use moderate pressure. Buff the surface in small sections, checking for streaks or unevenness along the way. For the final touch, use a separate clean cloth to remove any residue. This not only enhances shine but also keeps moisture at bay. Regular polishing keeps your furniture looking vibrant and helps maintain its longevity.
Maintaining Wood Furniture
Maintaining wood furniture is essential for preserving its beauty and durability. Start with daily dusting; use a soft microfiber cloth or feather duster to remove dust and debris. Always dust from the top down, ensuring you don't reintroduce dust to cleaned areas. Gently rub in the direction of the wood grain to avoid scratches, and use a soft-bristle brush for intricate carvings and crevices.
For deeper cleaning, prepare natural solutions by mixing equal parts water and white vinegar in a spray bottle. You can also combine 250ml water, 250ml vinegar, and 1 tbsp olive oil for a gentle cleaner. When cleaning, dip a soft cloth into your solution, wring it out until barely damp, and wipe the furniture, always following the wood grain. Regular maintenance is crucial to ensure the longevity of your furniture.
If you encounter stubborn stains, non-gel toothpaste can help with water stains, while a baking soda paste works for heat stains. For ink, use a cotton ball soaked in rubbing alcohol. Always remember to dry the surface immediately with a clean cloth to avoid moisture damage. Regular maintenance makes deep cleaning easier and keeps your furniture looking its best.
Protecting Against Environmental Damage
Protecting your wood furniture from environmental damage is crucial to maintaining its integrity and appearance. Start by shielding your outdoor pieces from moisture. Use waterproof covers or tarps to guard against rain and high humidity. Ensure proper drainage around your furniture to prevent water pooling, and always clean and dry your items before covering them to avoid mold and mildew. Secure covers with ties to withstand strong winds.
Next, be mindful of sun and heat exposure. Avoid placing your furniture in direct sunlight or near uncovered windows and vents. Rotate your furniture locations regularly to give them exposure to shaded areas. Consider using UV-resistant covers or protective finishes to prevent fading, and apply paint or sealants to enhance durability. Additionally, choosing naturally resistant woods can significantly enhance your furniture's ability to withstand the elements.
When it comes to wind and extreme weather, use durable, waterproof covers designed for outdoor use. Secure your furniture to prevent it from being moved by strong winds, and bring it indoors during severe weather conditions.
Lastly, maintain structural integrity by applying clear sealants like polyurethane to protect against moisture and UV rays. Regularly inspect your furniture for signs of damage, addressing any issues promptly to ensure longevity.
Choosing Safe Cleaning Products
Keeping your wood furniture in great shape goes beyond just protecting it from environmental damage; it also involves using the right cleaning products. When choosing cleaners, look for biodegradable formulations that are water-based or soy-based. These options avoid harsh chemicals, making them safer for both you and your furniture. Ensure the products are free from solvents, caustic substances, and flammable materials.
Opt for non-damaging formulas that work on all types of wood surfaces, whether modern or antique. You want a cleaner that doesn't leave a film or residue and won't dry out or damage the wood. Effective cleaning action is key, so select products that can tackle dust, dirt, grease, and stubborn stains without harshness. Additionally, consider using products that are suitable for daily or deep cleaning to ensure thorough maintenance of your wood surfaces.
Finally, consider user and eco-friendly practices. Look for products recognized by environmental programs like the US EPA's Safer Choice or USDA's BioPreferred Program. These options are safe for greywater and septic systems and eliminate hazmat shipping concerns. Always remember to use masks and gloves when needed, ensuring a safe cleaning experience while caring for your wood furniture.
Tips for Long-lasting Care
To ensure your wood furniture stands the test of time, it's essential to adopt a few long-lasting care practices. Start by protecting your furniture from environmental factors. Keep it away from heating and cooling vents to prevent warping. Use curtains or blinds to shield it from direct sunlight, which can cause fading. Maintaining a humidity level of 40 to 45 percent is crucial—consider using a humidifier in dry air and a dehumidifier or air conditioner in humid conditions. Consistent humidity control can significantly enhance the longevity of your wood pieces.
Regular cleaning is key, too. Dust your furniture with a soft, lint-free cloth or feather duster to avoid scratches. Wipe it down weekly with a damp microfiber cloth, and clean deeper with a mild dish soap solution. Always dry the wood immediately after cleaning to prevent moisture damage.
To protect surfaces, use coasters, hot pads, and placemats to prevent scratches and spills. Tighten loose screws periodically and inspect for signs of wear. Lastly, use a soft-bristle brush for intricate details and avoid harsh cleaners. By implementing these practices, you'll help your wood furniture maintain its beauty and integrity for years to come.
Frequently Asked Questions
Can I Use Furniture Polish Instead of Natural Cleaners?
You can definitely use furniture polish instead of natural cleaners, but it depends on your preference and the wood type. Furniture polish often provides a quick shine and protective layer, making it convenient. However, natural cleaners are eco-friendly and safer for homes with kids and pets. If you choose polish, ensure it's suitable for your specific wood finish to avoid damage. Ultimately, it's about what works best for you and your furniture.
How Often Should I Clean My Wood Furniture?
You should clean your wood furniture regularly to keep it looking its best. Dust it at least once a week, and if it's in a high-traffic area, consider doing it every few days. For deep cleaning, aim for every couple of weeks, especially for frequently used pieces. Remember to inspect for signs of wear and treat any issues promptly to maintain its beauty and integrity over time.
Is It Safe to Use Essential Oils on Wood Furniture?
Yes, it's safe to use essential oils on wood furniture, but you should always take precautions. Dilute the oils with a carrier oil to prevent any damage and conduct a patch test first. Oils like lemon, orange, and cedarwood not only clean but also protect your furniture. Just remember to apply them using a soft cloth, following the wood grain, and avoid soaking the surface to keep it in great condition.
What Should I Do if My Wood Furniture Has Scratches?
If your wood furniture has scratches, you've got some effective options. For minor scratches, try applying vegetable oil or peanut butter; let it sit, then buff it out. For deeper scratches, sand the area smooth and use wood filler. You can also mix white vinegar and olive oil, applying it to the scratch and buffing afterward. Always test any solution on an inconspicuous area first to avoid discoloration.
Can I Use Water to Clean Antique Wood Furniture?
You shouldn't use water to clean antique wood furniture, as it can damage the finish and lead to swelling or buckling. If you do choose to use a damp cloth, make sure it's barely wet. Always test any cleaning solution on an inconspicuous area first to ensure it won't harm the wood. Instead, consider safer alternatives like oil soap or vinegar mixed with water for effective cleaning without the risk.
Conclusion
In conclusion, keeping your wood furniture clean and well-maintained doesn't have to be complicated. By dusting regularly and using natural cleaning solutions, you can preserve its beauty and integrity. Remember to tackle any stubborn stains promptly and protect your pieces from environmental damage. With a few simple tips and safe products, you'll ensure your furniture looks great for years to come. Embrace these practices, and enjoy the timeless elegance of your wood furnishings!
Interior Design
How to Protect Sofa From Cat
You can safeguard your sofa from cat damage with simple strategies, but what innovative tips will truly keep your furniture intact?
To protect your sofa from your cat, start by using durable, washable covers and placing scratching posts nearby. Regularly trim your cat's nails to reduce damage. Choose tightly woven fabrics like microfiber that resist scratching, and avoid delicate materials like silk. You can also apply protective films and use Sticky Paws tape on vulnerable areas. Lastly, inspect your sofa frequently for wear and keep it clean to discourage scratching. By employing these methods, you can keep your sofa safe while creating a cozy space for your cat. There's so much more you can discover to enhance your efforts!
Key Takeaways
- Use durable, washable sofa covers to shield against cat claws and reduce damage.
- Install transparent Clawguard Furniture Shields on vulnerable areas to prevent scratching.
- Place scratching posts nearby to redirect your cat's scratching behavior away from the sofa.
- Regularly trim your cat's nails every two to three weeks to minimize potential damage.
- Apply Sticky Paws double-sided tape on furniture surfaces to deter scratching effectively.
Introduction
Taking care of your sofa goes beyond just protecting it from scratches; it also involves regular inspections and proper cleaning techniques. By understanding fabric-specific care and knowing how to treat cat urine stains, you can keep your furniture looking fresh and new. Let's explore some practical steps to ensure your sofa remains safe from your feline friend.
Routine Upholstery Inspections
To keep your sofa in top shape and protect it from your cat's antics, regular upholstery inspections are essential. Schedule routine inspections every few weeks to catch any signs of wear and tear, like frayed threads or loose seams, before they worsen. Pay special attention to scratching marks or areas where your cat frequently scratches; these spots might need additional protective measures to prevent damage.
Assess the fabric type of your sofa, as tightly woven materials tend to resist scratching better than delicate fabrics. If you notice any scratches or signs of wear, consider installing furniture guards or using slipcovers to shield your upholstery. Also, keep an eye out for debris or hair buildup on your furniture. This can attract your cat and encourage scratching behavior, so it's crucial to maintain a clean environment.
Fabric-Specific Cleaning Techniques
When it comes to preserving your sofa's appearance and longevity, understanding fabric-specific cleaning techniques is crucial. For microfiber sofas, a simple mixture of water and vinegar in a 1:1 ratio works wonders for removing stains. This fabric is moisture-resistant, making maintenance easy. Velvet fabric, on the other hand, requires a gentler touch; use a soft brush to lift dirt and a damp cloth to dab at stains, being careful not to over-saturate, which can ruin its texture.
If you have tightly woven fabrics, a vacuum with an upholstery attachment is your best bet for removing cat hair without causing damage. For stains, spot cleaning with a mild detergent should do the trick. When dealing with leather upholstery, wipe it down with a damp cloth and condition it regularly to prevent drying and cracking. Remember that while leather is less prone to scratching, it can still suffer from excessive moisture.
Finally, with delicate fabrics like silk or linen, always test any cleaning solution on a hidden area first. These materials are sensitive to harsh chemicals, and you want to avoid any discoloration or damage.
Treating Cat Urine Stains
Even with the best cleaning techniques, accidents can happen, especially when you have a cat. Cat urine stains can quickly become a nightmare if not treated promptly, leading to lasting odors and damage to your upholstery. The first step is to act fast. Blot the affected area with paper towels to absorb as much cat urine as possible before applying any cleaning solution.
For effective removal, use enzymatic cleaners. These specialized products break down urine proteins and eliminate odors rather than just masking them. Follow the instructions on the cleaner for the best results. If you encounter stubborn stains, a natural alternative is a mixture of vinegar and water. Just remember to rinse the area thoroughly afterward to prevent any residue from forming.
Before applying any cleaning solution, always test it on a small, inconspicuous area of your upholstery to ensure it won't cause discoloration or damage. By addressing the stains quickly and effectively, you can protect your sofa and maintain a fresh-smelling home, keeping your feline friend and your furniture happy.
Sofa Guarding Techniques
To keep your sofa safe from your cat's claws, you'll want to explore effective furniture scratch resistance techniques. Consider using decorative fabric protection solutions that not only guard against scratches but also enhance your living space. Additionally, opting for durable fabrics can provide long-lasting protection while maintaining the look you love.
Furniture Scratch Resistance Techniques
Protecting your sofa from cat scratches can be achieved through several effective techniques. Start by using durable, washable sofa covers that can withstand cat claws, acting as reliable furniture protectors from cats. You can also install transparent Clawguard Furniture Shields on your sofa's corners and sides for an effective barrier against scratching, all while keeping your furniture's aesthetic intact.
To redirect your cat's natural scratching behavior, place scratching posts near the sofa. This encourages them to use these designated areas instead of your furniture. Additionally, applying Sticky Paws double-sided tape on your sofa creates a deterrent that discourages scratching due to its sticky sensation. It's easy to remove without leaving any residue.
Regularly trimming your cat's nails every two to three weeks can significantly reduce the potential for furniture damage. Consider using nail caps as a temporary, non-invasive solution to further protect your sofa. These simple yet effective furniture scratch resistance techniques will ensure your sofa remains in pristine condition while keeping your feline friend happy.
Decorative Fabric Protection Solutions
Incorporating decorative fabric protection solutions can significantly enhance your sofa's resilience against cat scratches while adding style to your living space. One effective method is utilizing sofa covers made from durable, tightly woven fabrics. These covers not only shield your furniture from scratching but also come in various colors and patterns, allowing you to maintain an appealing aesthetic.
Another option is applying transparent protective films, like the FTSTC Anti Cat Scratch Furniture Protector, to vulnerable areas of your sofa. These films create an invisible barrier against claw damage without compromising the overall look of your furniture. Additionally, consider using cat scratch guards or placing scratching posts nearby to redirect your cat's scratching behavior, minimizing wear and tear.
Regularly trimming your cat's nails can also play a crucial role in protecting your sofa. Shorter nails are less likely to puncture or snag decorative fabric. By combining these protective measures with the right choice of materials, you can create a stylish yet resilient environment that keeps both your furniture and feline friends happy.
Using Durable Fabrics
Choosing durable fabrics is essential for safeguarding your sofa from cat damage. Opt for tightly woven materials like microfiber or canvas; these are more resistant to claw penetration than delicate fabrics such as silk or velvet. When selecting your upholstery, consider darker colors or patterns that can better camouflage wear and tear caused by scratching and daily use.
Durable synthetic materials, like polyester blends, are another great option. They're designed to withstand scratching and are easier to clean than traditional fabrics. Additionally, you should look for upholstery treated with stain or scratch-resistant coatings that enhance durability and protect against claw damage.
It's also crucial to check the fabric's rub count—aim for at least 30,000 rubs. This number indicates the durability and resistance to wear from both pets and regular use, ensuring your sofa remains in great shape despite your cat's playful antics. By focusing on these durable fabrics, you'll create a more pet-friendly environment while keeping your furniture looking its best.
Upholstery Seam Reinforcement
When reinforcing upholstery seams, you should also consider frame stability, as a sturdy base helps maintain the integrity of your sofa. Leather conditioning treatments can protect the surface while cushioning with eco-friendly materials provides comfort without compromising durability. These elements work together to ensure your sofa withstands your cat's antics while looking great.
Frame Stability Concerns
A strong upholstery seam is crucial for maintaining your sofa's frame stability, especially when you have a curious cat around. Cats love to scratch, and if your upholstery seams aren't reinforced, they can quickly become a weak point in your furniture. To enhance the durability of your sofa, use heavy-duty thread and double stitching for your seams. This extra reinforcement will help withstand potential claw damage.
Consider adding a layer of fabric or canvas underneath the upholstery to provide additional strength and support. This layer can act as a buffer, further preventing your cat's claws from reaching the frame. Don't forget to use upholstery adhesive to secure any loose seams—this ensures there are no gaps where claws can penetrate and cause damage.
Regularly inspect your sofa's seams for any signs of wear and tear. Catching these issues early allows for timely repairs, preventing further damage and preserving your sofa's integrity. When reupholstering, choose tightly woven fabrics that resist snagging and tearing. By prioritizing seam stability, you can protect your furniture and keep your sofa looking great for years to come.
Leather Conditioning Treatments
Maintaining your leather sofa involves more than just regular cleaning; conditioning treatments play a vital role in keeping it looking its best. Leather conditioning treatments help maintain the flexibility and suppleness of your leather upholstery, preventing unsightly cracks and wear that can result from your cat's scratching. By regularly applying a high-quality leather conditioner, you create a protective barrier that makes it harder for cat claws to penetrate the surface, ultimately protecting your furniture.
You should condition your leather every 6 to 12 months, depending on usage and exposure to elements, for optimal protection against wear and tear. Additionally, consider reinforcing the upholstery seams with durable thread and adhesives. This not only enhances the strength of your leather furniture but also makes it more resistant to tearing and damage.
Utilizing a protective leather spray can provide an extra layer of defense against scratches and stains, prolonging the life of your upholstery. By investing in these leather conditioning treatments and seam reinforcements, you can ensure your sofa remains a beautiful centerpiece in your home, despite the antics of your feline friend.
Cushioning With Eco-Friendly Materials
Durability and sustainability come together when you choose eco-friendly materials for your sofa upholstery. By opting for fabrics like organic cotton or hemp, you create a durable surface that can withstand your cat's scratching. These materials not only reduce your environmental impact but also provide comfort and resilience.
To further enhance the durability of your upholstery, reinforce seams with extra stitching or use heavy-duty thread. This extra support can prevent fraying and tearing caused by feline claws, ensuring your sofa lasts longer. Additionally, consider upholstery treated with stain-resistant coatings. This will protect your sofa from spills and pet-related messes while maintaining an eco-conscious approach.
Incorporating recycled polyester into your upholstery can offer a resilient option that stands up to daily wear and tear, blending comfort with sustainability. Choosing tightly woven fabrics, like canvas or microfiber, minimizes the risk of claws snagging, providing a softer surface that both you and your pets will enjoy. With these eco-friendly strategies, you can create a stylish, pet-friendly space that doesn't compromise on durability. Moreover, selecting woods like oak for your furniture frame can further ensure longevity and strength against wear from pets.
Custom Fabric Choices
Choosing the right fabric for your sofa can make a significant difference in protecting it from your cat's claws. Opt for tightly woven fabrics like microfiber or canvas; they're more resistant to claw penetration and can withstand regular scratching. These durable upholstery choices hold up better against feline antics, ensuring your sofa remains intact.
Consider velvet as well. Its looped threads don't just provide a luxurious feel; they also make it less appealing for cats to scratch compared to delicate materials. Avoid fabrics like silk or thin cotton, which can easily snag and tear under a cat's claws. You want something that looks good but can also handle wear and tear.
Darker colored fabrics or those with patterns are smart choices too, as they can camouflage any minor damage caused by scratching, making it less noticeable. When selecting fabric, prioritize options that balance durability and aesthetic appeal. Investing in the right upholstery will not only protect your sofa but also provide a comfortable, stylish space for you and your furry friend. With the right fabric choices, you can enjoy your sofa while minimizing the impact of your cat's playful behavior.
Ongoing Fabric Maintenance Tips
To keep your sofa looking its best and protect it from your cat's antics, regular maintenance is key. Start by vacuuming your sofa regularly to remove cat hair and debris. This simple step helps maintain its appearance and prolongs its lifespan. If your cat leaves a mark, don't wait—spot clean any stains immediately with a mild detergent and a soft cloth. This prevents stains from setting in and becoming tougher to remove later on.
Consider applying a fabric protector spray designed for upholstery. This creates a barrier against spills and stains, enhancing the fabric's resistance to damage. It's a proactive measure that can save you a lot of trouble down the line. Additionally, schedule routine professional cleaning every 6 to 12 months. This deep clean removes embedded dirt and allergens, keeping your sofa fresh and inviting.
Finally, make it a habit to inspect the fabric regularly for signs of wear or damage. By addressing any issues promptly, you can ensure timely repairs or treatments that extend the life of your upholstery. Consistent care will keep your sofa in top shape, even with a playful feline around!
Conclusion
Protecting your sofa from your cat's playful tendencies requires a combination of proactive measures and regular maintenance. Start by investing in scratch guards for furniture, which can effectively redirect your cat's scratching behavior to designated surfaces. Placing scratching posts near your cat's favorite lounging areas will help satisfy their natural scratching instincts while keeping your sofa safe.
Regular nail trimming also plays a crucial role. Aim to trim your cat's nails every two to three weeks to significantly reduce potential damage. Additionally, consider applying double-sided tape or adhesive protectors on your sofa. The sticky sensation is unappealing to cats, acting as a deterrent against scratching.
When choosing your sofa, opt for durable fabrics like tightly woven materials or microfiber. These fabrics can withstand claw damage much better than delicate materials, which are more prone to tearing. By combining these strategies—using scratching posts, applying double-sided tape, and selecting durable fabrics—you'll create a harmonious living environment for both you and your feline friend. With consistent effort, you'll successfully protect your sofa while allowing your cat to express their playful nature.
Frequently Asked Questions
How Do I Protect My Sofa From My Cat?
To protect your sofa, start by using durable, washable furniture covers that can handle scratches and spills. Place scratching posts nearby to redirect your cat's natural instincts and keep them from targeting the sofa. Applying double-sided tape can make the fabric less appealing for scratching. Regularly trim your cat's nails every couple of weeks to reduce damage. With these steps, you'll maintain your sofa's appearance while keeping your cat entertained.
How to Make Your Sofa Cat Proof?
To make your sofa cat-proof, start by choosing durable fabrics like microfiber or tightly woven materials that resist claw damage. Add scratching posts nearby to redirect your cat's natural behavior. Use double-sided tape on the sofa to create an unappealing surface for scratching. You might also invest in furniture shields or protective covers. Regularly trim your cat's nails to minimize damage and keep your furniture looking great.
How Do I Keep Cats off My Couch?
To keep cats off your couch, start by placing scratching posts nearby to redirect their energy. Use double-sided tape or sticky paw protectors on the couch to deter them from scratching. Consider protective furniture shields that won't alter your couch's look. Regularly trim your cat's nails to minimize damage, and try natural deterrents like citrus-scented sprays to keep them at bay. These strategies can help maintain your couch's integrity while satisfying your cat's instincts.
How Do I Protect My Fabric Couch From Pets?
To protect your fabric couch from pets, you can use durable, washable sofa covers that fit snugly and look great. Consider installing transparent furniture guards on vulnerable areas to shield against scratches. You might want to apply double-sided tape, as the sticky sensation can deter pets from scratching. Regularly trimming your pet's nails and providing designated scratching posts nearby can also help redirect their natural behavior away from your couch.
-
Beauty and Grooming1 month ago
Embrace Natural Glow With Bronzer-Free Accelerators
-
Beauty and Grooming1 month ago
Discover Top Outdoor Tanning Lotions Today
-
Vetted2 months ago
15 Best Affordable Sustainable Fashion Brands You Need to Know About in 2025
-
Fashion Trends2 months ago
Fall 2025 Fashion Trends: Be Ahead of the Curve!
-
Interior Design2 weeks ago
Mylar vs. Foil Balloons: The Ultimate Showdown
-
Beauty and Grooming1 month ago
Unlock Flawless Tanning With Skin Prep
-
Interior Design1 month ago
Create Your Dream Cottagecore Home Office Now!
-
Vetted2 months ago
15 Best Women's Fashion Trends of 2025 You Need to Know About