Interior Design
How to Move Heavy Furniture Down Stairs
Overcome the challenges of moving heavy furniture down stairs safely and efficiently—discover essential tips that will transform your moving experience.
To move heavy furniture down stairs safely, start by assessing its weight and dimensions. Clear the pathway of obstacles and use sliders to protect floors. If disassembly is possible, remove drawers and shelves to lighten the load. It's best to have a partner; one should guide from the top while the other supports from the bottom. Maintain a firm grip and lower the furniture slowly, keeping it balanced. Wrapping the furniture in blankets will help avoid scratches. For more tips and effective techniques, stick around to explore additional strategies for a smoother move.
Key Takeaways
- Assess the weight and size of the furniture, and choose the appropriate descent method for safe handling.
- Clear the pathway of obstacles and communicate a moving plan with all participants to ensure smooth movement.
- Use moving straps and a stair-climbing dolly, ensuring they can handle the load and are secured properly.
- Maintain a firm grip and lower furniture slowly, keeping it balanced while navigating stairs to prevent tipping.
- Take breaks as needed to avoid fatigue, and inspect furniture for damage after moving to address any issues.
Planning the Descent
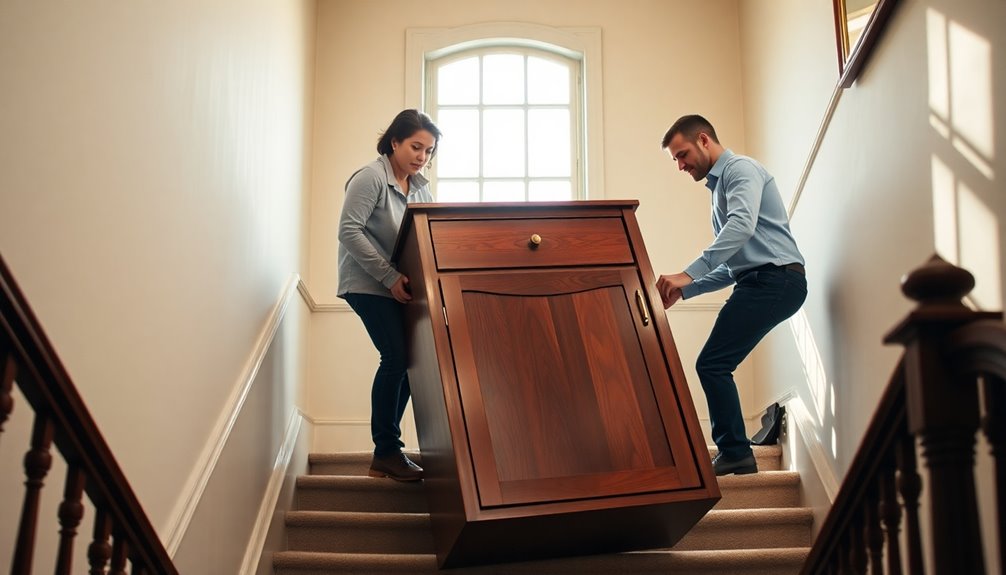
When moving heavy furniture down stairs, careful planning is essential to ensure a smooth and safe descent. First, you'll want to decide the optimal position for the furniture. Depending on the size and shape, it might be best to maneuver it horizontally, vertically, or diagonally. Next, choose your descent method—consider sliding the furniture on its back or bottom, using a stair-climbing dolly, or controlling its descent with a partner.
Before you start, empty the furniture to lighten the load and prevent items from falling out. Remove any protruding elements that might snag on railings or make turns difficult. Ensure all doors are tightly closed to avoid accidental openings during the move. It's also important to assess couch weight and dimensions to ensure proper handling during the descent.
Using proper equipment can make a huge difference. Furniture sliders can help reduce friction, while a hand truck or shoulder dolly will distribute weight evenly. Secure the furniture with ratchet straps, and use blankets or protective covers to prevent damage to both the furniture and the staircase. Finally, keep the heavier end going down first to minimize tipping risk, and always ensure you have enough manpower for the task at hand.
Disassembling the Furniture
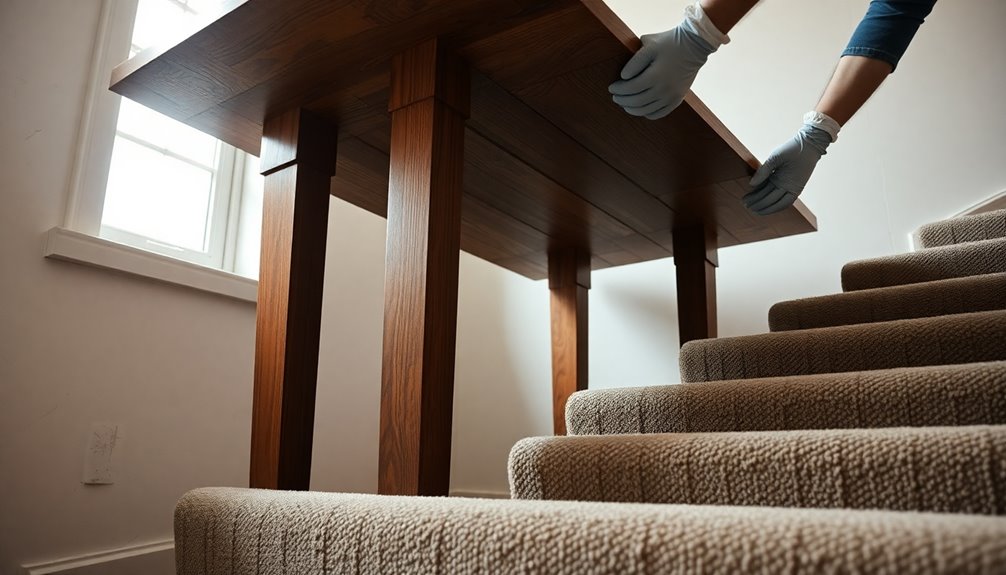
Disassembling heavy furniture can make your move down the stairs much simpler and safer. Start by measuring your furniture, doorways, hallways, and the moving truck to identify what needs disassembly. Accurate measurements help you avoid surprises during the move, so take your time here.
Next, clean and empty the furniture, which makes disassembly easier and reduces its weight. Remove drawers, shelves, and detachable panels to lighten the load. Don't forget to detach legs from sofas, dressers, and tables, and unscrew hinges to take off doors. Wrap these fragile parts in blankets or bubble wrap for protection.
When it comes to complex pieces, use tools like screwdrivers and pliers to carefully disassemble frames. Use resealable bags to keep screws and bolts organized in labeled bags to avoid confusion later.
Finally, take a photograph of each furniture piece before disassembly, so you have a guide for reassembly. By storing disassembled parts together with their corresponding furniture items, you'll streamline the entire moving process.
Using Furniture Sliders
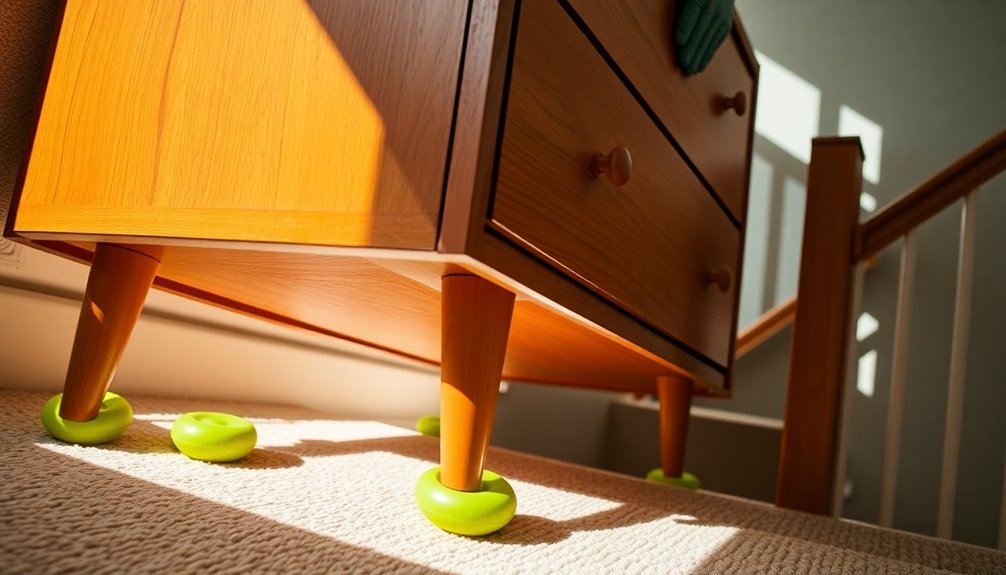
Using furniture sliders can transform the daunting task of moving heavy items down stairs into a more manageable process. Start by gathering the necessary tools, including sliders made of plastic, rubber, or felt. Make sure to choose the right type for your floor surface—felt for hard floors and foam for carpet. Before you begin, remove any items from the furniture to lighten the load and prevent damage.
Next, tilt or lift the furniture gently to slip a slider under each leg, ensuring they're centered to prevent slipping. If available, use metal handles to help push or pull the furniture, and check that the sliders are aligned for even weight distribution. These sliders are designed to protect carpets and hard floors during the moving process.
As you move the furniture down the stairs, assess its weight and the dimensions of the stairwell. Make sure to measure doorways and landings to avoid getting stuck. Push the furniture from the lower section to reduce friction and keep the heaviest end going down first to minimize tipping. Communicate clearly with any partners and take slow, deliberate steps. This method not only protects your furniture but also safeguards your floors from damage.
Utilizing Moving Straps
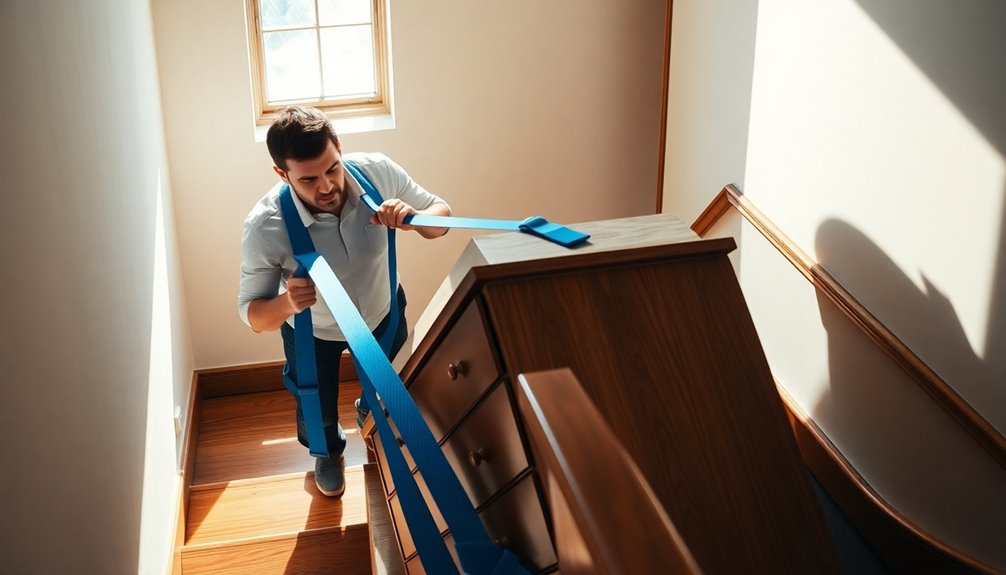
After you've prepared your furniture with sliders, consider employing moving straps to enhance your lifting technique. These straps can significantly ease the burden of moving heavy items down stairs. Start by positioning the straps correctly; place them under the object, centering them near the outside edge for stability. If your furniture has legs, run the straps parallel along the inner side. For lopsided pieces, use an x-pattern to secure everything.
When you're ready to lift, communicate with your moving partner. Use leverage to distribute the weight, which minimizes bending and the risk of injury. Always keep the heaviest end of the furniture going down first to prevent tipping. Remember to bend your knees and keep your back straight as you move. Using moving straps can significantly decrease the risk of injury during moving.
As you lower the item, do it in tandem with your partner, maintaining that same posture. Once down, carefully remove the straps, ensuring you don't trip over anything. Stay aware of your surroundings to avoid obstacles. If you start feeling fatigued, take a break—moving heavy furniture is a marathon, not a sprint. Following these steps will make your moving experience much more manageable.
Employing a Stair-Climbing Dolly
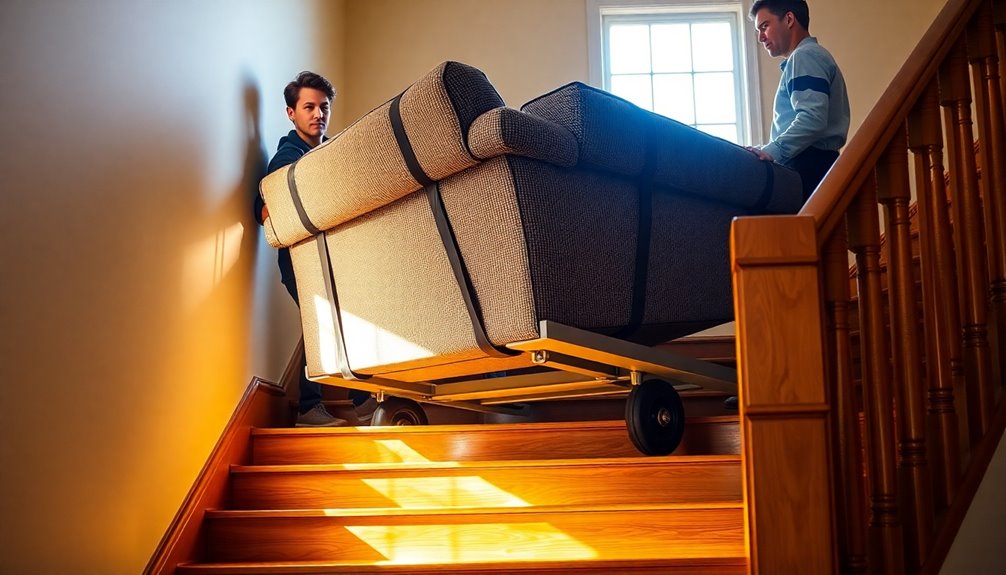
Moving heavy furniture down stairs can be daunting, but employing a stair-climbing dolly makes the task much easier and safer. These specialized dollies come in various types, including powered models with electric motors that can handle loads up to 1,200 pounds. Brands like Escalera, New Haven, and Zonzini offer options with unique features such as tank-like treads and automatic load leveling, allowing you to navigate stairs of any height with ease. Additionally, using equipment beyond its capacity increases the risk of injury, so always choose a dolly that suits your specific load.
When using a stair-climbing dolly, ensure the load is centered and secured with tie-down straps. For ascending, roll the dolly backward toward the stairs and pull it up. While descending, stand behind the dolly, tilting it toward you. It's wise to have helpers assist, especially for larger items.
Be cautious on curved staircases, as they can be trickier to navigate. Additionally, consider using accessories like big wheel attachments for improved stability. With the right dolly and careful operation, you can significantly reduce the risk of injury and the effort required, making your move much more efficient.
Controlled Lowering Techniques

When it comes to safely lowering heavy furniture down stairs, controlled techniques are crucial to prevent accidents and injuries. Start by assessing the staircase for any hazards and measuring both the furniture and stairway to ensure a smooth descent. Communicate clearly with your team, assigning roles to maintain balanced control—one person at each end is ideal.
As you begin the descent, utilize gravity to your advantage. Tilt the furniture back slightly, allowing gravity to assist while you maintain a firm grip. Use your body weight to counterbalance the load, bending your knees to act as shock absorbers. This technique not only reduces strain but also helps you control the descent more effectively. Additionally, it's essential to seek assistance from at least two people to ensure a safe and efficient moving process.
It's important to coordinate actions with your team. Have a helper a few steps ahead to guide the process and communicate any adjustments. Take breaks as needed, setting the furniture down securely on the stairs to regroup. Lastly, ensure safety by covering banisters and corners with padding and wrapping the furniture to prevent damage. With these controlled lowering techniques, you'll successfully navigate the stairs without risking injury or damage.
Frequently Asked Questions
What if My Furniture Won't Fit Through the Door?
If your furniture won't fit through the door, don't panic. First, measure the furniture and doorframe to identify the issue. You might want to try different angles or temporarily remove the door for more space. Disassembling the furniture can also help, so take off any detachable parts. If all else fails, consider calling in professional movers who have the experience and tools to handle tricky situations safely and efficiently.
How Do I Protect My Walls During the Move?
To protect your walls during the move, start by using blankets or cardboard as buffers in tight spots. Tape cardboard sheets to the walls to prevent scratches, and consider installing temporary corner guards in high-traffic areas. Cover banisters and corners with padding to absorb impacts. Wrap any sharp edges of your furniture in protective materials, and use furniture sliders to minimize dragging, ensuring your walls stay safe throughout the process.
Can I Move Heavy Furniture Alone?
You can try moving heavy furniture alone, but it's risky. You might strain your muscles or injure your back, especially if the weight catches you off guard. It's easy to underestimate how cumbersome heavy items can be. If you decide to go solo, use proper lifting techniques, take breaks, and consider using tools like a dolly. However, enlisting help from friends or hiring professionals is a much safer and smarter option.
What Tools Should I Have on Hand for the Move?
When you're preparing for a move, it's essential to have the right tools on hand. Start with hand trucks and dollies to easily transport heavy items. Lifting straps can help distribute weight and reduce strain. Don't forget moving blankets to protect your furniture and floors. If you're dealing with stairs, consider stair rollers or portable ramps for easier navigation. These tools will make your move smoother and safer, ensuring everything arrives intact.
How Do I Prevent Injury While Moving Furniture?
To prevent injury while moving furniture, you should always lift with your legs, not your back. Keep the furniture close to your body for better stability, and avoid twisting while lifting. If the load feels too heavy, don't hesitate to ask for help or use tools like dollies. Take regular breaks, stay hydrated, and wear sturdy shoes to reduce tripping hazards. Listening to your body is crucial, so know your limits.
Conclusion
Moving heavy furniture down stairs can be a daunting task, but with the right preparation and tools, you can do it safely and efficiently. Remember to plan your descent, disassemble when possible, and use furniture sliders or moving straps for extra support. If you have a stair-climbing dolly, take advantage of it to ease the load. By employing controlled lowering techniques, you'll protect both yourself and your furniture, making the process much smoother. Happy moving!
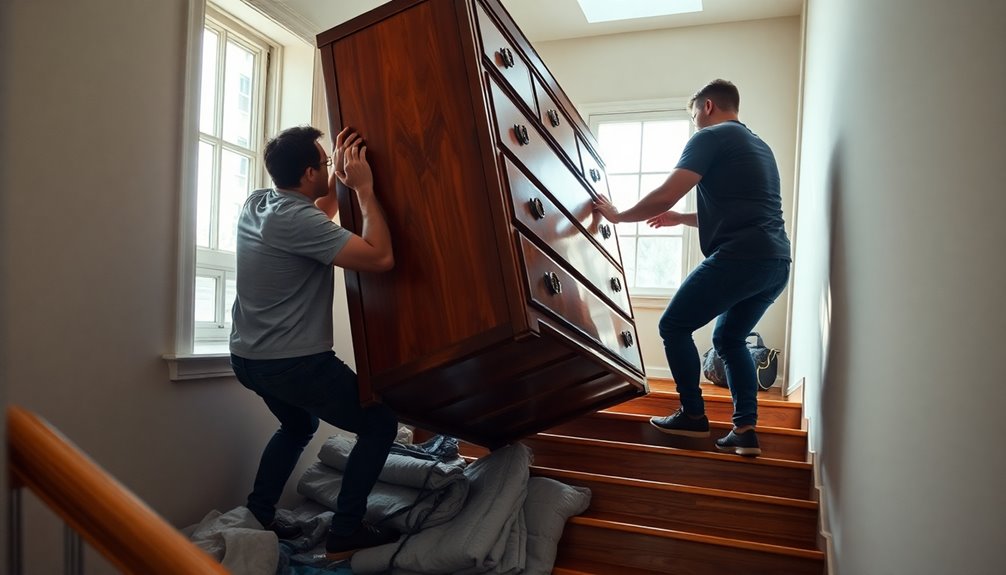
Interior Design
How to Fix Scratches on Wood Furniture
Keep your wood furniture looking pristine with easy scratch repair techniques that will surprise you—discover the secrets to flawless finishes!
You can easily fix scratches on your wood furniture with a few simple techniques. Start by assessing the damage; shallow scratches can be polished while deeper ones might need filler. Try using cooking oil or a mixture of vinegar and oil to darken and blend in the scratches. For deeper repairs, clean the area, apply a matching wood filler, let it dry, and then sand it smooth. If needed, consider using shoe polish to match the color and buff it to a shine. There are many more tips and tricks to keep your furniture looking great, so stick around to learn more!
Key Takeaways
- Assess the scratch's depth; use wood filler for deep scratches and household products for shallow ones.
- Clean the scratched area with a damp cloth before applying any repair products.
- For minor scratches, apply cooking oil or a mixture of vinegar and oil to blend the scratch.
- Sand the area gently with fine-grit sandpaper after filling to ensure a smooth finish.
- Consider professional help for multiple or deep scratches, especially on valuable furniture.
Assessing the Damage
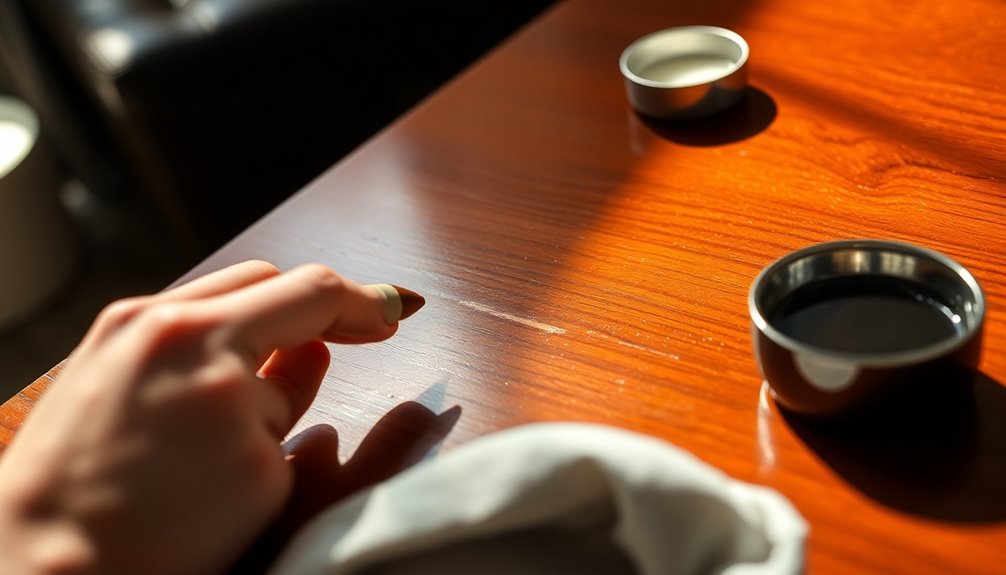
When you notice a scratch on your wood furniture, the first step is to assess the damage effectively. Start by determining if the scratch is shallow or deep. Shallow scratches typically only affect the finish, while deep scratches go beyond the surface, making it impossible to feel the bottom with your fingernail. If the scratch exposes the wood grain, you'll need to consider a more thorough repair.
Next, evaluate the severity of the scratch. Check if it has jagged edges that require smoothing with sandpaper. If the scratch has broken the surface but isn't deep enough for fillers, that's another factor to note. Multiple scratches might mean you'll need to sand and refinish the entire piece. Don't overlook any underlying damage that could compromise the furniture's structural integrity. Timely repair is crucial to prevent further damage that can worsen over time.
Prepare the surface by cleaning it with a damp microfiber cloth to remove dust and debris. This step can raise the grain, so keep that in mind. Make sure the area is free of obstructions and dry before you start your assessment. This careful evaluation will guide you in choosing the right repair method for your wood furniture.
Using Household Products
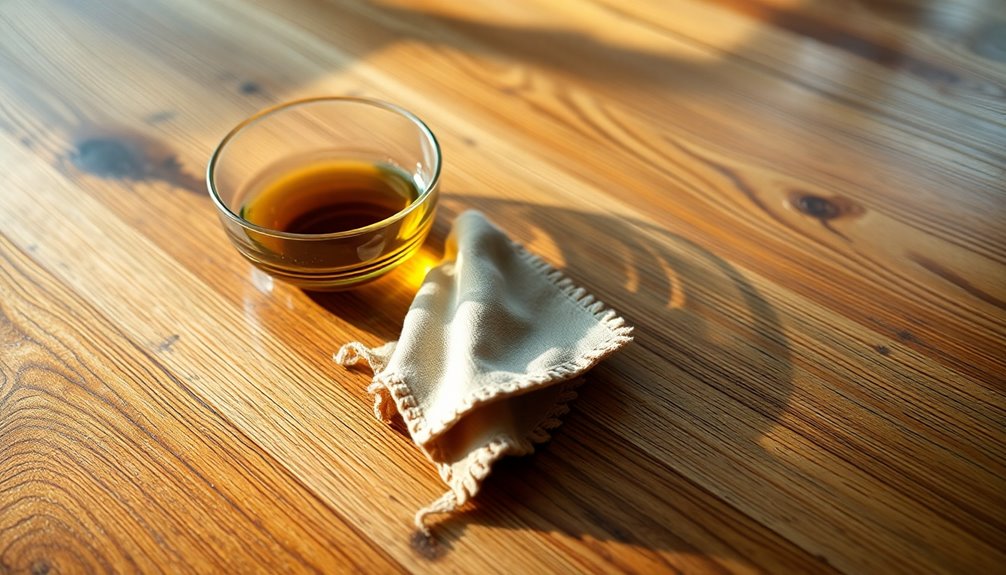
While it might seem daunting to tackle scratches on your wood furniture, using common household products can simplify the process. You can start with cooking oils like vegetable or canola oil. Just apply a small amount to your fingertips and rub it over the scratches. The oil darkens the area, helping it blend in with the surrounding wood. Canola oil is a budget-friendly choice, and olive oil works too.
For a more effective solution, mix 1/4 parts white vinegar with 3/4 parts oil. Shake it in a jar and use a soft cloth to apply the mixture to the scratches. This not only helps fill in scratches but also gives the wood a nice polish. Always test it on a hidden area first. Maintaining the appearance of wood furniture is essential for ensuring its longevity.
You could also use food items. Peanut butter can fill in scratches—just let it sit for about an hour before buffing. For darker woods, instant coffee mixed with hot water creates a paste that can stain scratches effectively. Lastly, apply a few drops of water to small dents and let them sit. If needed, use a warm iron with a damp cloth to raise deeper dents.
Using Shoe Polish
Shoe polish can be an effective and quick solution for disguising scratches on wood furniture. Start by preparing the area: clean the surface with a cloth and warm water, ensuring it's free of dirt. Once it's dry, test the shoe polish on a hidden spot, like the back leg of a desk, to check the color and reaction.
Next, select a shoe polish that matches your furniture's color. If you can't find an exact match, mix different shades on a paper plate until you achieve the right hue. Again, test this mixture in an inconspicuous area to confirm it blends well. Matching shoe polish color to your wood furniture is essential for effective results.
When you're ready to apply, take a small amount of polish on a paper towel or soft cloth, wrapping it around your finger for precision. Gently rub the polish into the scratch, avoiding the surrounding wood. Add more polish as needed until the scratch is less visible. For extra precision, a Q-tip works wonders.
Finally, wipe off any excess polish immediately to prevent staining, then buff the area with a clean cloth to restore shine. This method can effectively conceal scratches, but remember to avoid applying polish to undamaged areas.
Sanding and Smoothing
To effectively address scratches on wood furniture, sanding and smoothing is a reliable method that can restore the surface's appearance. Begin by using a sanding block to ensure even pressure. Always sand in the direction of the wood grain to avoid causing permanent scratches. For larger imperfections, start with coarse-grit sandpaper, like 80 or 120 grit. Gradually switch to finer grits, such as 180 or 240 grit, to achieve a smoother finish.
Be careful not to press too hard, as this can gouge the wood. Use lower grit sandpaper for deeper scratches and coarser surfaces, then transition to higher grit to blend and minimize imperfections. Don't skip grits; using each one in order is essential for a polished result. For soft woods, begin with a higher grit to prevent damage.
After sanding, thoroughly clean the area to remove dust and debris. Wipe away excess material with a clean cotton rag to smooth the surface. Finally, apply appropriate oil or wax to protect the wood and enhance the finish, as this can help prevent future water stains and buff with a soft cloth to restore shine and blend the repaired area.
Filling Deep Scratches
Filling deep scratches on wood furniture can seem daunting, but with the right approach, you can bring your piece back to life. Start by cleaning the area around the scratch with a damp microfiber cloth to remove dirt and debris. Use the corner of a putty knife to eliminate any loose residue from the scratch, ensuring the surface is completely dry before moving on.
Next, inspect the scratch to determine its depth and choose an appropriate wood filler that closely matches the furniture's color. For medium to deep scratches, wood filler sticks or wax crayons work well. Apply the filler using a putty knife, old credit card, or your fingers, ensuring there are no air gaps. Fill the scratch completely, adding more if needed for deeper gouges, and smooth the surface with the flat end of a palette knife. It's essential to start with initial cleaning to avoid contamination in the repair process.
Allow the filler to dry according to the manufacturer's instructions, which can take anywhere from 30 minutes to 8 hours. Once dry, sand the filled area gently with fine-grit sandpaper, following the wood grain, and remove any excess with a damp cloth. Repeat if necessary to achieve a smooth finish.
Refinishing and Sealing
Refinishing and sealing your wood furniture can dramatically enhance its appearance and longevity. Start by thoroughly cleaning the piece to remove dirt, grime, and old wax. Next, assess the current state of the wood to determine the right refinishing method based on the type of wood and existing finish. To remove the old finish, use chemical strippers or sandpaper, beginning with coarse grit and progressing to finer grits.
When sanding, use long, even strokes along the grain to ensure a smooth surface. Incorporating textured fabrics during the refinishing process can further elevate the piece's overall aesthetic. After sanding, wipe down the area with mineral spirits to eliminate dust and contaminants. Once you achieve a smooth surface, choose a stain that matches the original color of the wood. Apply the stain according to the manufacturer's instructions, allowing it to dry properly.
To seal the repair, select a clear wood finish like polyurethane or lacquer. Applying a protective finish is critical for maintaining the integrity of your wood furniture. Apply the sealer evenly over the repaired area and let it dry as per the instructions. Finally, buff the sealed area with a soft cloth to restore shine and inspect for consistency, applying additional coats if necessary. This process will leave your wood furniture looking refreshed and protected.
Tips for Preventive Care
Caring for your wood furniture can make a world of difference in preserving its beauty and durability. Start by applying felt pads to the bottom of chair and table legs to cushion their contact with the wood. For heavier pieces, use flexible plastic floor protectors. Remember to replace these pads at the first sign of wear. Place rugs under feeding areas to catch spills and protect the wood from damage.
When it comes to pets and children, trim your pets' nails to prevent scratches, and supervise them closely to avoid accidents. Train your pets and establish ground rules for children to minimize risks.
Regular cleaning is crucial, too. Dust your furniture regularly with soft-bristled brushes or microfiber cloths to eliminate abrasive particles. Wipe up spills immediately to prevent moisture damage. Use coasters and mats to protect surfaces from cups and dishes. Additionally, consider using barrier protection methods to safeguard high-traffic areas from potential scratches.
Lastly, be cautious with sharp objects around your wood furniture. Designate trays for items like keys and scissors, and handle your furniture gently during moves. By following these tips, you'll keep your wood furniture looking great for years to come.
Best Practices for Maintenance
To keep your wood furniture in top shape, establish a regular maintenance routine that addresses cleaning, protection, and handling. Start by dusting your furniture frequently to remove abrasive particles that can scratch the surface. Use a gentle wood cleaner or a mild soap-and-water mixture for cleaning, and always wipe up spills immediately to prevent moisture damage. Avoid harsh chemicals and abrasive cleaners, and finish with a soft, dry cloth.
To protect your furniture, apply a quality furniture wax or polish, following the product's instructions for application. Consider using a clear wood finish like polyurethane to create a durable barrier. Regularly inspect this finish and reapply as needed. Use felt pads under objects to prevent scratches. Additionally, you can use natural remedies like the walnut method to help conceal and fill minor scratches.
When handling your furniture, lift items instead of dragging them across the surface. Coasters and placemats are essential for protecting against water marks and spills. Maintain a stable environment to prevent wood from warping, and avoid placing hot items directly on surfaces. Lastly, keep pets' nails trimmed and train them to steer clear of your wood furniture to minimize scratches.
When to Seek Professional Help
Even with diligent maintenance, there are times when scratches on wood furniture require professional intervention. If you notice multiple or deep scratches that penetrate through the clear coat, or if the damage covers a large area, it's best to seek expert help. Deep gouges or significant wood loss, especially if they expose the wood beneath, often need refinishing that's beyond DIY capabilities.
For valuable antiques, family heirlooms, or high-end furniture, hiring a professional is essential. These items often carry historical or sentimental value, and their intricate designs may require specialized skills and tools. If you're unsure about the type of finish or wood used, or if matching colors seems daunting, it's time to call in a pro. Addressing scratches promptly is crucial to maintaining the aesthetic appeal of your furniture.
Consider your time and convenience, too. If you lack the inclination or schedule to perform repairs yourself, a professional can quickly restore your furniture's appearance. They provide guaranteed high-quality results without the risk of further damage. In-home services can offer both efficiency and peace of mind, ensuring your cherished pieces receive the expert care they deserve.
Frequently Asked Questions
Can I Use Vinegar on All Wood Finishes?
You can't use vinegar on all wood finishes. Its acidic nature can damage many surfaces, stripping away protective coatings like varnish or lacquer, which leads to discoloration and deterioration. If you're considering using vinegar, always test it on an inconspicuous area first. For delicate finishes, it's best to avoid vinegar altogether and opt for safer cleaning methods to preserve the integrity and appearance of your wood furniture.
How Often Should I Polish My Wood Furniture?
You should polish your wood furniture based on how often you use it. For high-traffic pieces, aim to polish every six weeks, while less-used items might only need it every six months. Always keep an eye on the shine when buffing; if it isn't shining anymore, it's time to reapply. Regular dusting and occasional deep cleaning will help maintain its appearance and prolong the life of the finish.
Is It Safe to Use Water on Wood Furniture?
You should be cautious when using water on wood furniture. While a damp microfiber cloth can clean effectively, too much moisture can cause warping, swelling, and even mold growth. It's best to avoid excessive water exposure and always wipe the surface dry afterward. If you're looking for alternatives, consider using vinegar mixed with water or a wood polish, which can maintain your furniture's shine without the risks associated with water.
What Are the Best Tools for Repairing Scratches?
When you're tackling scratches, having the right tools makes all the difference. You'll want clean rags to dust off the area, scratch removers that match your wood's color, and fine sandpaper for smoothing. For deeper scratches, consider stain repair pens and a putty knife to fill and smooth any gouges. Don't forget a light layer of finish to protect your work. With these tools, you'll restore your wood beautifully!
Can Scratches Affect the Value of My Furniture?
Yes, scratches can definitely affect the value of your furniture. Minor scratches might lead to a small decrease, but deeper damage can significantly lower its worth. The quality of repairs plays a crucial role in this process; poor repairs may worsen the value loss. To understand the exact impact, it's wise to consult a qualified appraiser who can evaluate your furniture before and after any repairs are made.
Conclusion
Fixing scratches on wood furniture isn't just about aesthetics; it's about preserving the beauty of your pieces. By assessing the damage and using simple household products or polishing techniques, you can often restore their original charm. For deeper scratches, sanding and refinishing might be necessary. Remember to take preventive measures to protect your furniture in the future. If you ever feel overwhelmed, don't hesitate to seek professional help. Your furniture deserves the best care!
Interior Design
How to Dispose Sofa
Out with the old and in with the new—discover the best ways to dispose of your sofa responsibly and efficiently!
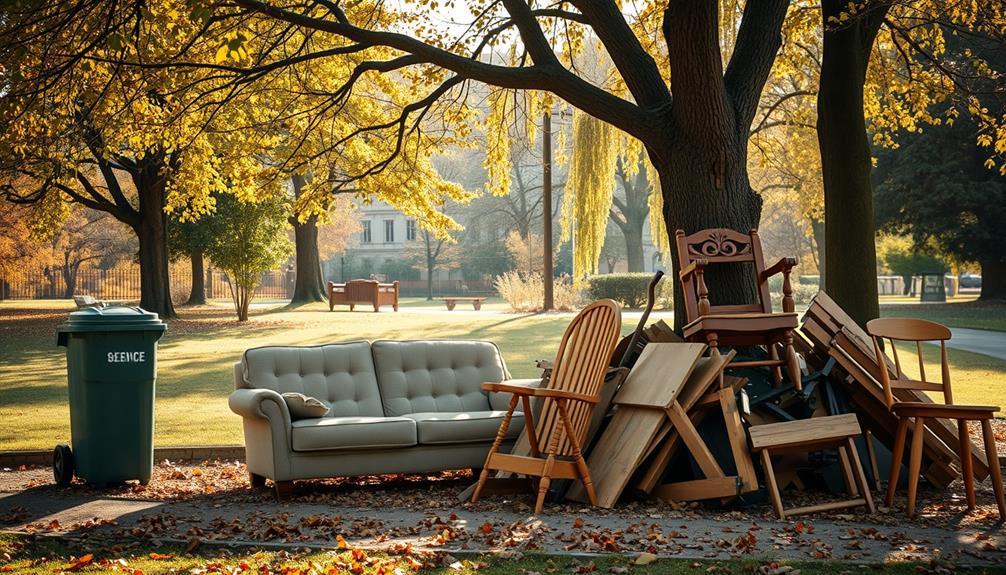
To dispose of your old sofa, start by assessing its condition. If it's still in good shape, consider donating it to local charities like Goodwill or Salvation Army. Many organizations offer pickup services, making it easy for you. If the sofa's damaged, you might need to check with your local waste management about bulk item disposal. Some stores also offer removal services when you purchase a new sofa. Lastly, recycling options might be available in your area. Want to find out more clever ways to manage your old furniture? There's plenty more to explore!
Key Takeaways
- Check local regulations for sofa disposal, as many areas have specific guidelines for bulky items.
- Consider donating your sofa to local charities like Goodwill or Salvation Army if it's in good condition.
- Research if any local furniture recycling programs accept sofas to promote sustainability.
- Arrange for curbside pickup with your waste management service if they offer bulky item collection.
- Explore online marketplaces or community groups to sell or give away your sofa to someone in need.
Introduction
When it comes to keeping your sofa looking its best, knowing how to treat stains and spills is key. You'll want to use routine spot treatments and fabric-specific cleaning techniques to maintain its appearance. And if you ever find yourself facing a red wine spill, having the right approach can save your furniture from permanent damage.
Routine Spot Treatment
Addressing stains promptly on your sofa is crucial for maintaining its appearance and longevity. A routine spot treatment can significantly improve your sofa's lifespan by preventing stains from setting in. When a spill occurs, grab a clean cloth and a suitable cleaning solution. Always test the solution on a hidden area of the fabric first to ensure it won't cause discoloration or damage.
Gently blot the stain with the cloth, avoiding any rubbing, as that can spread the stain and harm the fabric fibers. For water-based stains, a mixture of mild soap and water works well. If you're dealing with oil-based stains, you may need a specialized solvent for effective stain removal.
After treating the stain, allow the area to air dry completely. This step is essential, as it helps prevent further damage and ensures that the cleaning solution is adequately absorbed. To protect your sofa from future stains, consider applying a fabric protector after the area has dried. Implementing these routine spot treatment steps can keep your sofa looking fresh and extend its life, saving you from costly replacements.
Fabric-Specific Cleaning Techniques
Cleaning a sofa isn't a one-size-fits-all process; different fabrics demand tailored techniques to maintain their look and feel. For cotton upholstery, a simple mixture of mild soap and water works wonders. If you've got a microfiber sofa, consider using a blend of vinegar and water to tackle stains effectively. Leather sofas require regular conditioning to keep them supple; a damp cloth and pH-balanced cleaner help in maintaining their finish.
Synthetic fabrics like polyester are more durable and can handle rigorous cleaning methods, such as steam cleaning or solvent-based cleaners. Always check the manufacturer's care label for specific instructions, and don't forget to test any cleaning solution on a small, inconspicuous area first.
If your gently used sofa requires deeper cleaning or has stubborn stains, professional upholstery cleaning services can be a lifesaver. They're equipped with fabric-specific cleaning techniques that ensure your sofa gets the care it needs without causing damage. When the time comes for disposal services, remember that it's vital to consider the fabric type and condition to determine the best disposal method for your sofa. Regular maintenance of upholstery can significantly extend its lifespan and keep it looking fresh.
Tackling Red Wine Spills
Red wine spills can be a nightmare for any sofa owner, especially after you've put in the effort to keep your upholstery looking great. To effectively tackle the situation, act quickly. Start by blotting the excess wine with a clean, dry cloth. This prevents the stain from spreading further into the fabric.
Next, create a cleaning solution using one part dish soap, one part white vinegar, and two parts water. Apply this mixture to the stain with a cloth, gently dabbing rather than rubbing to lift the wine from the fabric. If the stain proves stubborn, consider using a commercial upholstery cleaner tailored to your sofa's fabric type, following the manufacturer's instructions.
After treating the stain, rinse the area with cold water and blot it dry. This step helps remove any soap residue and prevents further staining. Before you proceed with any cleaning solution, always test it on a discreet area of the sofa to ensure it won't damage or discolor the fabric. By following these steps, you can effectively tackle red wine spills and keep your sofa looking its best.
Sofa Stain Resistance Treatments
When choosing a sofa, consider using stain-resistant fabric to keep it looking fresh. There are protective fabric options available that repel spills, making clean-up a breeze. Plus, regularly rotating your cushions can help maintain their shape and prolong the effectiveness of any stain treatments.
Using Stain-Resistant Fabric
A sofa made with stain-resistant fabric can be a game changer for busy households. These fabrics create a protective barrier that repels liquids and stains, making your life easier when spills happen. Treatments like Teflon and Scotchgard coat the fibers, preventing absorption and allowing for quick clean-up. You can choose to have these treatments applied professionally or tackle it as a DIY project with easy-to-use products available for home application.
Regular maintenance is crucial to keep your sofa looking great. Vacuuming and promptly blotting any spills will enhance the effectiveness of the stain-resistant fabric. Keep in mind that these treatments might need reapplication over time, especially after deep cleaning or with heavy use.
If you're looking to replace old furniture, consider investing in a sofa with stain-resistant fabric. It can save you the hassle of furniture removal and the stress of dealing with stains. When it's time to dispose of your sofa, remember to check local recycling centers, as they may accept furniture donations or offer recycling options to reduce waste. Additionally, maintaining a clean home environment supports a healthier lifestyle by promoting cleanliness and hygiene.
Protective Fabric Options Available
Protective fabric options for sofas can significantly enhance your furniture's durability and ease of maintenance. One popular choice is protective fabric treatments like Teflon or Scotchgard, which create a barrier around the fibers. This barrier allows liquids to bead up, making spills easy to wipe away rather than being absorbed, keeping your sofa looking fresh and clean.
Many manufacturers offer pre-treated fabrics, but if you've already purchased a sofa, you can still apply after-market treatments at home. Regular reapplication of these stain resistance treatments is crucial, typically every 6 to 12 months, to maintain their effectiveness.
Consider opting for sofas made from inherently stain-resistant materials, such as microfiber or synthetic blends. These fabrics naturally resist wear and tear, providing an added layer of protection.
If your sofa's seen better days, and you plan to upgrade, think about donating it to local donation centers. They often accept old appliances and furniture, ensuring your old sofa finds a new home while you enjoy the benefits of protective fabric treatments on your new piece.
Regularly Rotate Cushions
Regularly rotating your sofa cushions is a simple yet effective way to maintain their shape and extend the life of your furniture. By making it a habit to rotate cushions every few weeks, you'll help distribute wear evenly, preventing one area from becoming excessively stained or flattened. This practice not only keeps your sofa looking fresh but also contributes to overall comfort and aesthetics.
Some manufacturers even recommend flipping the cushions to expose different sides, which can further mitigate the effects of spills and stains. If you've invested in stain-resistant treatments or fabric protectors, rotating cushions can enhance their effectiveness, providing an extra layer of defense against dirt and spills. Additionally, using essential oils for stain resistance can offer a natural way to keep your sofa fresh and clean.
When it's time to dispose of items that are too worn out, consider donating your sofa to a local donation center, especially if it still has life left in it. You can also shop for new furniture online to find a replacement that fits your style and needs. Regularly rotating your cushions is just one step in caring for your sofa, ensuring that it remains a cherished part of your home for years to come.
Upholstery Seam Reinforcement
When considering upholstery seam reinforcement, you should also think about the overall frame integrity of your sofa. Strengthening seams can help maintain the cushion's shape, but if the frame is compromised, it can affect the entire piece. Plus, don't forget about leather conditioning and repair to keep your sofa looking its best.
Frame Integrity Concerns
Assessing the integrity of your sofa's frame is crucial for maintaining its stability and longevity. You should inspect the joints and connections for any signs of weakness or damage. A compromised frame can lead to instability, making your sofa less safe to use. If you notice any warping or loosening, consider reinforcing it with corner blocks or braces to enhance durability.
As you check the upholstery seams, make sure they're tightly stitched with heavy-duty thread. This reinforcement helps prevent tearing and increases the sofa's lifespan. Regularly keeping an eye on these seams will allow you to catch any wear early, giving you a chance to make timely repairs.
If you find that the frame is beyond repair, it might be time to consider whether to throw away the sofa. You can contact junk removal services to assist in proper disposal, or think about donating it to a local charity if parts are still usable. Ensuring that frame integrity is intact not only saves you money but also contributes to sustainable practices in furniture disposal.
Leather Conditioning and Repair
Your sofa's leather deserves proper care to ensure it remains both beautiful and durable. Regular leather conditioning is crucial; it helps maintain the material's suppleness, preventing cracks and extending the lifespan of your sofa upholstery. When you condition the leather, you keep it moisturized and protected from wear and tear.
If you notice any fraying or tearing, it's time for some repair work. Upholstery seam reinforcement is essential, especially in high-stress areas. You can achieve this using a strong adhesive or stitching techniques. Always opt for leather-specific products for these tasks, as they're formulated to work with the unique properties of leather.
When reinforcing seams, make sure the thread color matches your leather to maintain a cohesive appearance and avoid noticeable repairs. For the best results, follow the manufacturer's guidelines on leather care and repair. This not only preserves the aesthetic appeal but also ensures the structural integrity of your sofa. By investing time in leather conditioning and repair, you can keep your sofa looking great and functioning well for years to come.
Cushion Fluffing Techniques
Fluffing your sofa cushions regularly is essential for maintaining their shape and extending the life of your upholstery. Start by using a combination of hand fluffing and a vacuum cleaner with an upholstery attachment. This helps remove dirt while redistributing the fill evenly, ensuring your cushions stay comfortable and supportive.
Next, inspect the seams of your upholstery for any fraying or weakness. If you find any loose areas, grab a sewing machine or a needle and thread to secure them. This reinforcement prevents further damage and prolongs the life of your cushions.
To enhance comfort, consider adding extra batting or foam inserts to your cushion covers. This addition not only improves support but also helps maintain their original structure. Don't forget to periodically rotate and flip your cushions. This simple action promotes even wear and prevents uneven compression, keeping your seating area plush and inviting.
Cushion Firmness Adjustments
Adjusting the firmness of your sofa cushions can significantly enhance your comfort and support. If you've got a used sofa and find the cushions too soft or too firm, don't fret—you can easily make adjustments. To increase cushion firmness, consider replacing worn-out foam with higher-density foam. This upgrade will provide better support and durability over time.
If you prefer softer cushions, adding a layer of plush polyester or down can enhance your comfort while keeping some structural integrity. You can also experiment with inflatable inserts, allowing you to customize the cushion's air content for a perfect fit.
Regularly flipping and rotating your cushions is another key strategy. This practice helps maintain their shape and firmness, preventing uneven wear. If you're getting rid of your sofa soon, remember these tips can also apply to donation items. Ensuring the cushions are in good condition not only boosts your comfort but can make your sofa more appealing to potential new owners. With these adjustments, you'll maximize the life of your cushions, making your sofa an even more enjoyable place to relax.
Seasonal Maintenance Tips
Maintaining your sofa goes beyond just adjusting cushion firmness; regular seasonal upkeep is key to preserving its appearance and comfort. Start by inspecting your sofa for signs of wear and tear, like stains or structural issues, especially during seasonal changes when humidity and temperature fluctuate. Clean and condition the upholstery every few months with suitable cleaners for the fabric type to maintain its longevity.
Rotate cushions and pillows periodically to ensure even wear and prevent sagging, particularly after heavy use during gatherings or holidays. Scheduling a professional deep cleaning at least once a year will help remove dirt, allergens, and odors that accumulate over time, enhancing your sofa's lifespan.
If you live in a humid area, consider using a dehumidifier to prevent mold and mildew growth, particularly if your sofa's made of natural materials. With these seasonal maintenance tips, you can keep your used furniture looking its best. Should you ever decide to part with it, local charities often accept gently used sofas, allowing you to dispose of it quickly and efficiently while helping others in your community.
Conclusion
Disposing of a sofa can seem daunting, but with the right approach, it can be straightforward and rewarding. Start by evaluating your sofa's condition. If it's still in good shape, consider donating it to local charities like Goodwill. Many of these organizations offer pickup services, making it easy for you to part with your furniture.
If your sofa is beyond repair, don't worry. Scheduling a pickup with a junk removal service can provide a hassle-free, environmentally friendly solution. Just make sure to check your local regulations regarding waste disposal to avoid any fines.
For those who want to be more environmentally conscious, look for recycling centers that accept upholstered furniture. They can ensure proper dismantling for material recovery.
Lastly, if you want to make a little money or help someone in your community, consider utilizing online marketplaces like Facebook Marketplace or hosting a garage sale. These options not only clear your space but also connect you with people who might appreciate your sofa. With these strategies in mind, you can dispose of your sofa responsibly and efficiently.
Frequently Asked Questions
How to Get Rid of an Old Sofa?
Getting rid of an old sofa can be straightforward. First, check its condition—you might be able to donate it or sell it online. If it's beyond repair, consider junk removal services that handle large items. You can also contact your local waste management for curbside pickup on designated days. If you're feeling handy, disassemble it for easier transport to a landfill or recycling center. Just make sure to follow local disposal regulations.
How Do I Get Rid of a Large Couch in My House?
To get rid of a large couch in your house, start by scheduling a pickup with a junk removal service for a quick solution. You can also check local charities for donation options—they often pick up for free. If you're up for it, list your couch on resale platforms like Facebook Marketplace. Finally, if it's too damaged, contact waste management for bulk pickup or visit a landfill for responsible disposal.
What Can You Do With a Broken Couch?
You can do several things with a broken couch. If it's not too damaged, consider reupholstering or replacing the cushions to make it suitable for resale or donation. Local charities like Goodwill might accept it for parts. Alternatively, you could place it on your curb with a "For Free" sign, attracting neighbors interested in DIY projects. If all else fails, junk removal services can help dispose of it for a fee.
How to Get Rid of a Couch in LA?
If you're looking to get rid of a couch in LA, you've got several options. You can schedule a bulky item pickup through the sanitation department for a convenient curbside collection. If your couch is in good shape, consider donating it to local charities like Goodwill or the Salvation Army. You might also sell or give it away on platforms like Craigslist or Facebook Marketplace for a quick solution.
Interior Design
Transform Your Wedding With DIY Terracotta Decor
Open the door to enchanting DIY terracotta decor for your wedding, where every detail can reflect your unique style and love story. Discover how to create magic!
Enhancing your wedding decor with DIY terracotta decor is both easy and impactful. Begin by choosing terracotta items such as pots and vases that align with your theme. Opt for colors that will elevate the mood, and mix and match textures for added visual appeal. Remember to add a personal touch to your decorations by incorporating hand-painted details and items of significance. Set a beautiful tablescape with terracotta plates and coordinating accessories for a cohesive aesthetic. By incorporating unique centerpieces featuring lush greenery or fragrant flowers, you’ll set a truly enchanting atmosphere. Looking to take your wedding decor to the next level? There’s plenty more inspiration to discover!
—
A rewrite of the text has been completed.
Key Takeaways
- Choose terracotta decor pieces that match your wedding theme to create a cohesive and beautiful ambiance.
- Prepare and paint terracotta items using creative techniques to personalize them for your special day.
- Arrange table settings with terracotta dinnerware, vases, and candles for an earthy, inviting atmosphere.
- Craft unique centerpieces with painted terracotta pots filled with fresh flowers or succulents for a modern touch.
- Incorporate personal elements like monogrammed items or DIY projects to enhance the uniqueness of your wedding decor.
Selecting Terracotta Decor Pieces
When planning your wedding decor, choosing the right terracotta pieces can make all the difference in achieving your desired ambiance.
Start by considering your wedding theme and the overall vibe you want to create. Look for pots, vases, or planters that not only fit your design elements but also complement your table settings.
Pay attention to size and shape; you'll want pieces that can hold flowers, candles, or other decor items effectively. To add visual interest, mix and match different finishes.
This variation can create a dynamic tablescape that captivates your guests. Ultimately, the right terracotta decor can enhance the atmosphere, making your wedding day feel even more special and personalized.
Preparing Decor for Painting
To prepare your terracotta decor for painting, it's essential to guarantee the surfaces are clean and smooth.
Start by following these steps:
- Wipe down each piece with a damp cloth to remove dust and grime.
- Allow the terracotta to air dry completely to prevent moisture from affecting the paint.
- Lightly sand the surfaces to create a smooth base, focusing on any rough edges or imperfections.
- Apply a high-quality primer to enhance paint adhesion, ensuring a flawless finish.
Creative Painting Techniques
Exploring creative painting techniques can transform your terracotta decor into stunning focal points for your wedding.
Start with water-based paint mixed with baking soda to create a textured finish. Apply two coats for better coverage, letting the first coat dry overnight before adding the second.
Experiment with various colors to match your theme—soft pastels for a romantic vibe or bold hues for a modern touch. You can also try sponging or stippling for unique patterns.
Don't forget to distress the surface for an aged look, enhancing the rustic charm. These techniques not only elevate your decor but also add a personal touch that guests will admire.
Get creative, and let your terracotta pieces reflect your wedding vision!
Personalizing Your Decor
Personalizing your decor adds a unique touch that makes your wedding truly special. By infusing personal elements, you create meaningful connections for your guests.
Here are some ideas to get you started:
- Monogrammed Items: Use napkins or table runners featuring your initials for a classy touch.
- Family Heirlooms: Incorporate cherished items like vintage vases or frames that tell your story.
- DIY Projects: Hand-paint table numbers that reflect your personality or wedding theme.
- Custom Signage: Create signs that showcase your journey as a couple, guiding guests to different areas.
These personalized touches not only enhance the decor but also celebrate your unique love story, making your wedding unforgettable.
Arranging Table Settings
With your personalized decor in place, arranging table settings becomes a delightful task that enhances the overall ambiance of your wedding. Start with terracotta dinner plates as a base, pairing them with matching glassware and cutlery in earthy tones. Layer in floral arrangements in terracotta vases for a natural look, punctuated by terracotta-colored candles that add a romantic glow. Use coordinating linen napkins and table runners to tie everything together, and consider adding terracotta pots with flowers among the decor.
Element | Detail |
---|---|
Dinner Plates | Terracotta-colored |
Glassware | Earthy tones |
Centerpieces | Floral arrangements in vases |
Candles | Terracotta-colored |
Color Combinations and Styles
When it comes to selecting color combinations and styles for your terracotta decor, consider how the hues will interact to create a cohesive and inviting atmosphere.
Think about blending the warmth of terracotta with complementary colors to elevate your wedding's aesthetic. Here are some stunning combinations to inspire you:
- Earthy sage green paired with dusty rose for a natural vibe.
- Crisp ivory to elegantly highlight the terracotta's rustic charm.
- Deep navy blue for a striking modern contrast.
- Warm tones like burnt orange to enhance the overall warmth.
Experiment with these combinations to find the perfect palette that reflects your personal style and creates a welcoming environment for your guests. Consider integrating pops of color or subtle metallic accents to bring depth and sophistication to your design. You could also explore stunning cocktail decor ideas to elevate your space and make gatherings more memorable. By blending thoughtful details with your unique aesthetic, you’ll craft a setting that leaves a lasting impression on everyone who visits.
Crafting Unique Centerpieces
Creating unique centerpieces is a fantastic way to infuse your wedding decor with personal touches and creativity. Start by selecting terracotta pots or vases that reflect your theme. Fill them with fresh flowers, greenery, or even succulents for a modern twist.
Don't forget to layer in textures by incorporating candles or decorative stones. You can paint the terracotta pieces in colors that match your palette, adding a personal flair.
Play with different heights and arrangements to keep things visually interesting. Finally, consider adding small details like hand-painted table numbers or personalized elements that tell your story.
This approach not only enhances the aesthetic but also makes your centerpieces memorable and meaningful.
Frequently Asked Questions
What Tools Do I Need for DIY Terracotta Projects?
For your DIY terracotta projects, you'll need paintbrushes, plastic trays, water-based paint, baking soda for texture, a damp cloth for cleaning, sandpaper for smoothing surfaces, and a high-quality primer for a flawless finish.
How Do I Clean Terracotta Pieces Before Use?
Imagine a painter preparing a canvas. You clean your terracotta pieces with a damp cloth, letting them air dry. Sand lightly for smoothness, then apply primer, ensuring your creativity flows flawlessly onto this earthy backdrop.
Can I Use Outdoor Terracotta Decor Indoors?
Absolutely, you can use outdoor terracotta decor indoors! Just make certain it's clean and dry. Consider its size and style to match your indoor space, creating a seamless blend between indoor and outdoor aesthetics.
How Far in Advance Can I Prepare Terracotta Decor?
It's wise to get a jump on things! You can prepare terracotta decor about a month in advance. This gives you time to perfect your designs, ensuring everything's ready for a stunning display on your big day.
Where Can I Find Affordable Terracotta Items for My Wedding?
You can find affordable terracotta items for your wedding at local craft stores, garden centers, and online marketplaces like Etsy or Amazon. Don't forget to check thrift stores for unique and budget-friendly options!
Conclusion
By embracing DIY terracotta decor, you'll create a charming and cohesive celebration that captures your personality. Your wedding will radiate warmth and whimsy with carefully crafted centerpieces and personalized pieces. So, gather your supplies, set free your creativity, and let your imagination run wild! With each lovely layer of terracotta, you'll transform your special day into a memorable masterpiece that your guests will rave about long after the last dance. Happy crafting, and enjoy your enchanting event!
-
Beauty and Grooming1 month ago
Embrace Natural Glow With Bronzer-Free Accelerators
-
Beauty and Grooming1 month ago
Discover Top Outdoor Tanning Lotions Today
-
Vetted2 months ago
15 Best Affordable Sustainable Fashion Brands You Need to Know About in 2025
-
Fashion Trends2 months ago
Fall 2025 Fashion Trends: Be Ahead of the Curve!
-
Interior Design2 weeks ago
Mylar vs. Foil Balloons: The Ultimate Showdown
-
Beauty and Grooming1 month ago
Unlock Flawless Tanning With Skin Prep
-
Interior Design1 month ago
Create Your Dream Cottagecore Home Office Now!
-
Vetted2 months ago
15 Best Women's Fashion Trends of 2025 You Need to Know About