Connect with us

Interior Design

How to Refinish Wood Furniture Without Stripping

Step into the world of refinishing wood furniture without stripping and discover secrets that will transform your pieces beautifully and effortlessly.

Published

on

refinishing wood furniture easily

To refinish wood furniture without stripping, start by cleaning your piece with mineral spirits to remove dirt and grime. Inspect for damage like scratches or dents. For superficial repairs, use wood filler and smooth it out. Enhance the finish with products like Howard's Restor-A-Finish or gel stains for a fresh look without removing the old finish. Apply a protective coat of polyurethane, ensuring you sand lightly between layers for a smooth texture. Finally, maintain your furniture with regular dusting and gentle cleaners. Keep going to discover more tips that will help you achieve the perfect finish!

Key Takeaways

  • Clean the furniture thoroughly with mineral spirits to remove grime without water damage to the wood.
  • Use Howard's Restor-A-Finish to enhance existing finishes without stripping the surface.
  • Apply a liquid deglosser to prepare the surface for refinishing while retaining the original finish.
  • Consider gel stains for a new look, which sit on the surface and are easy to apply.
  • Finish with a protective coat of oil-based or water-based polyurethane for durability and preservation.

Cleaning the Furniture
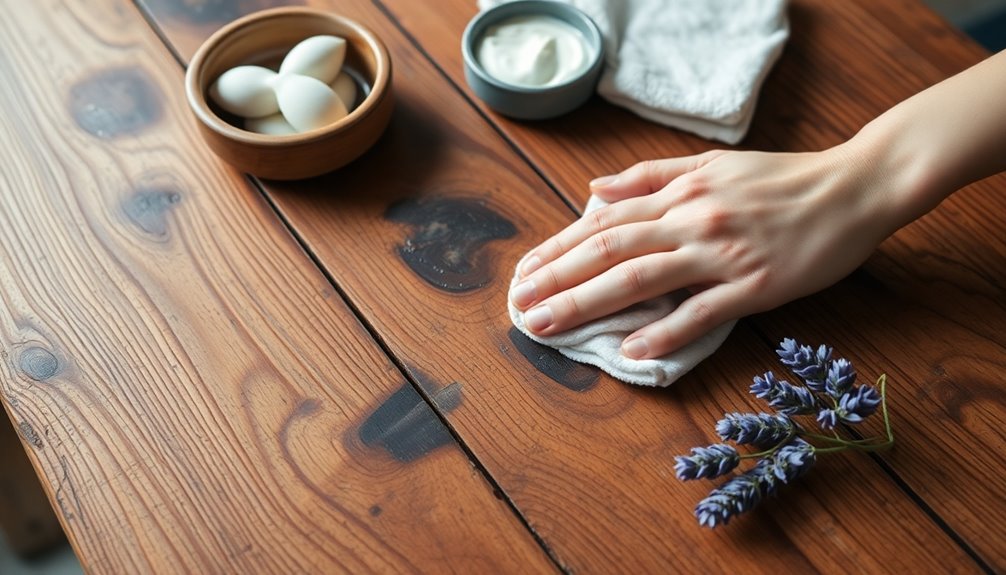
dusting and polishing surfaces

Cleaning wood furniture is essential for maintaining its beauty and longevity. Begin by using mineral spirits to tackle heavily soiled areas, especially if your furniture has an oil finish or wax coating. Dampen a soft cloth with mineral spirits to remove dust and grime from bare or freshly sanded wood. Avoid water unless absolutely necessary, as it can damage the wood or raise the grain.

For delicate furniture, test mineral spirits on a small, inconspicuous area before proceeding. You can also use a soft bristle brush dipped in mineral spirits for cleaning hard-to-reach spots around carvings and intricate designs. If you encounter stubborn dirt, consider mild soap solutions like Ivory Flakes or Orvus paste, but steer clear of detergents that leave a film. Avoid soaking wood in water to prevent damage.

Always use clean, soft cotton cloths or microfiber towels to wipe down surfaces. A vacuum with a soft brush attachment can help remove loose dust. After cleaning, ensure the wood is completely dry before applying any new finish. If needed, lightly sand with 220 or 320 grit sandpaper to prepare the surface, ensuring it's smooth for the next steps.

Assessing Damage
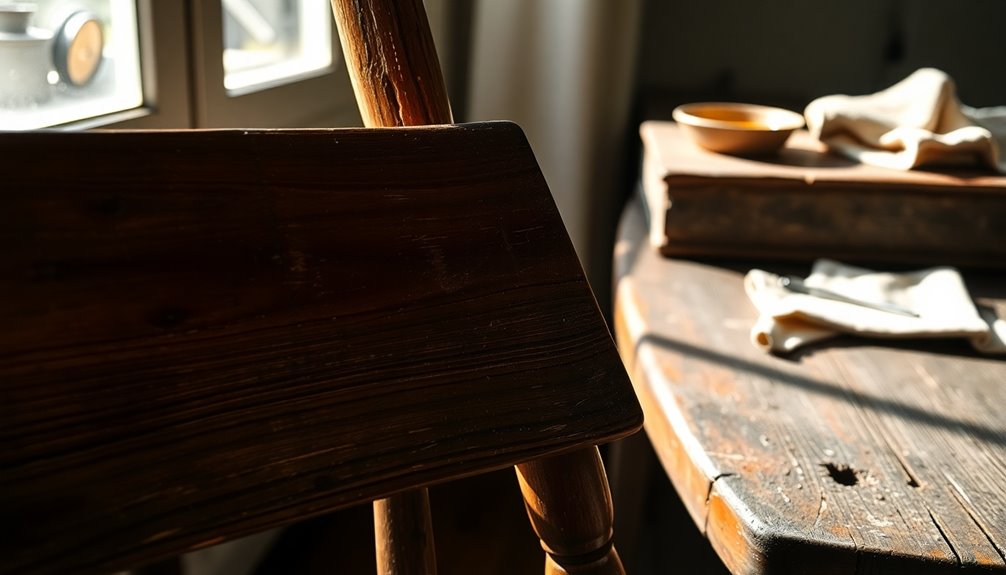
damage evaluation process underway

Once you've cleaned the furniture, it's time to assess its condition. Begin by looking for signs of damage like deep scratches, dents, or areas where the finish has worn away. Check for any exposed wood due to cracking, flaking, or chipping of the original finish. If the surface feels sticky, that's a clear indicator that refinishing is necessary. It's essential to recognize that persistent feelings of unhappiness can also be a sign that the furniture's wear is beyond just physical damage.

Evaluate the overall wear and tear, noting any discoloration or fading. Pay special attention to any accidental burns or severe damage. Minor scratches can often be smoothed out with sanding or filled with wood filler, while deep dents might require more extensive work. Regular maintenance can help prevent future upholstery issues and extend the life of your furniture.

Next, assess the existing finish. If it's intact but dull, you might opt for a simpler refinement process. However, if you notice flaking or peeling, be prepared for partial removal or repair. Determine the color and condition of the finish to guide your choice of a new finish. Finally, make a list of tools and supplies needed based on the types of damage identified, ensuring you're well-prepared for the refinishing process.

Advertisement

Repairing Dents and Cracks

fixing surface imperfections effectively

When you notice dents and cracks in your wood furniture, addressing these imperfections promptly can prevent further damage and restore its beauty. For dents, you can use an iron and steam method. Just apply a damp cloth over the dent, place a hot iron on the cloth for 5-10 seconds, and repeat if necessary. This helps expand the wood fibers to raise the dent. If that doesn't work, apply a few drops of water directly to the dent and let it penetrate for a day. For deeper dents, consider using commercial wood-swelling liquids or creating small pinholes to allow better penetration of the liquid. Additionally, be cautious when using this technique on finished wood, and always test in an inconspicuous area first.

For cracks, first assess their depth. Shallow cracks can often be filled with wood filler. Ensure you clean the area around the crack before applying the filler, and sand it down once dry to blend with the surrounding wood. For deeper cracks, use epoxy or wood glue for reinforcement. Apply it carefully and clamp if needed, letting it dry completely before sanding. Finally, once everything's repaired and sanded, you can apply a stain and a clear coat to protect and match the finish.

Using Restorative Products
restorative product application tips

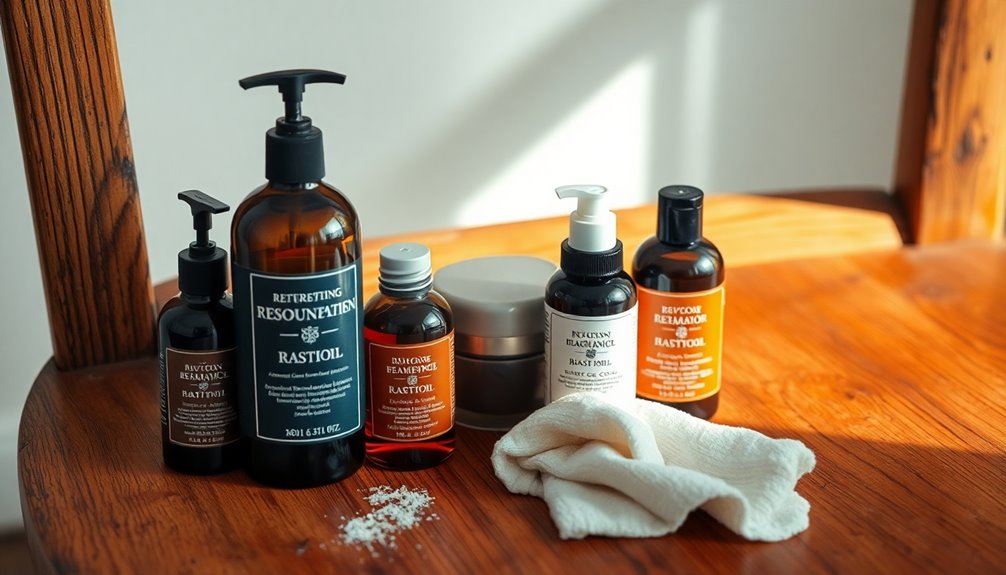
Reviving the beauty of your wood furniture can be easily achieved by using restorative products designed to enhance and protect finishes. Start with Howard's Restor-A-Finish, which combines solvents and wood stain to improve existing finishes. For a more updated look, consider using a gel stain that sits on the surface.

If you want to prepare the surface for new stain or paint without stripping, a liquid deglosser will dull the existing finish. An oil-based penetrating stain can add subtle color while keeping the wood grain visible. Remember to apply these products correctly: use 4/0 (0000) steel wool for Restor-A-Finish, and a rag for gel stain.

Always work in a well-ventilated area due to the solvents involved, and wear a cartridge respirator if you're sensitive to chemicals. Protect your surroundings with drop cloths to prevent splatters. After application, allow the product to dry, typically about 30 minutes in warm conditions. Wipe off any excess with a soft cloth, and inspect for uneven areas, applying additional coats as needed. This process is less labor-intensive compared to traditional stripping methods, making it more accessible for DIY enthusiasts.

Applying Polyurethane
applying protective polyurethane coating

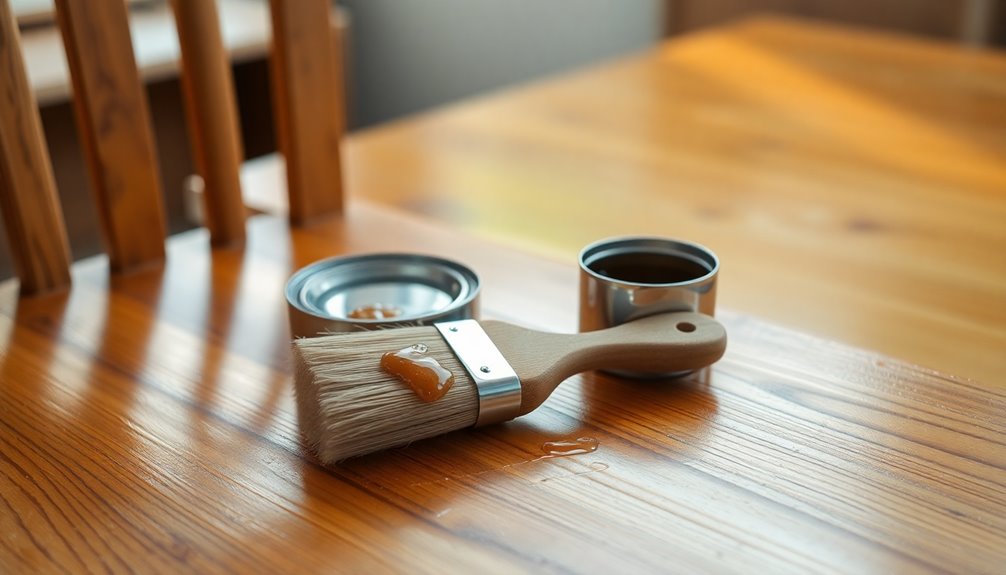
After using restorative products to enhance your wood furniture, the next step is applying polyurethane to protect and seal the finish. Begin by ensuring the wood surface is smooth and even. If needed, sand it with 220-grit sandpaper, removing any old finishes and imperfections. Use a tack cloth to wipe away dust.

Next, choose between oil-based and water-based polyurethane, considering their pros and cons. Decide on the desired sheen and stir the polyurethane well before application. Test it on a small, hidden area if you're working with light-colored finishes, and make sure your workspace is well-ventilated. Water-based polyurethane is particularly advantageous for its lower VOCs, making it a safer choice for indoor use.

For application, use a foam brush, synthetic bristle brush, or a rag, and consider an aerosol spray for tricky spots. Apply thin, even coats with long strokes in the direction of the wood grain, avoiding heavy layers and air bubbles. Overlap your brushstrokes for uniform coverage, and catch any drips along the edges.

Advertisement

Allow the first coat to dry completely, which typically takes several hours. Lightly sand the surface again before applying additional coats, following the same process until you achieve the desired finish.

Avoiding Stripping Methods
methods to prevent stripping

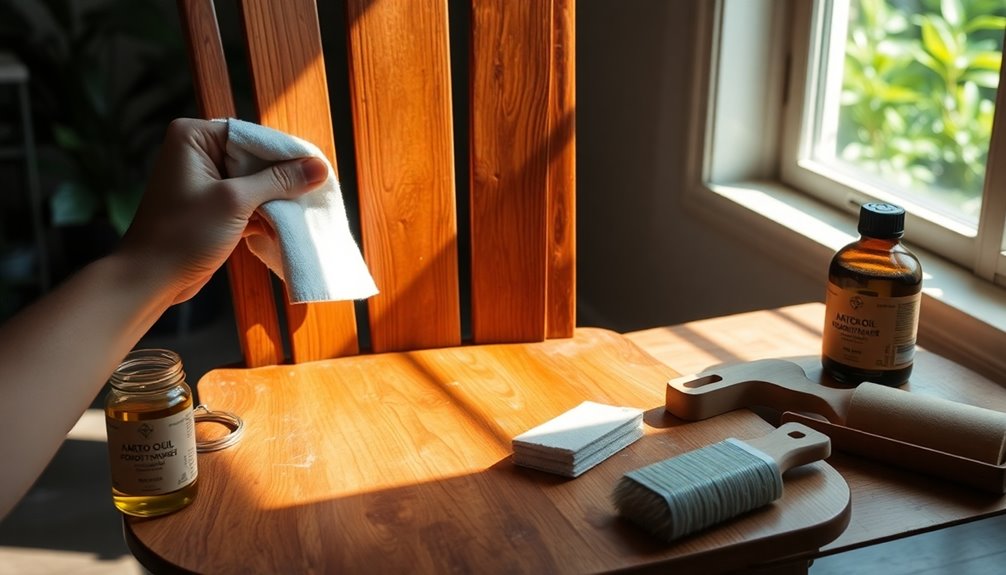
Although refinishing wood furniture often conjures thoughts of tedious stripping methods, you can achieve excellent results without them. Start by cleaning the surface thoroughly using a gentle cleaner or a mixture of mild soap and water. Liquid Ivory dish soap mixed with water works great—just scrub gently with a sponge, rinse with a wrung-out sponge, and dry with a clean towel. This step ensures the new finish adheres well.

Next, consider using a liquid deglosser instead of sanding. Wipe the deglosser on with a cloth to dull the existing finish, preparing the surface for new stain or paint without the hassle of stripping. It's a quicker alternative that helps create a uniform base. Additionally, evaluating the value of the piece will guide your refinishing decisions, as some items may be better left untouched.

For the actual refinishing, gel stains are fantastic since they sit on top of the surface. Apply them easily with a rag. Alternatively, Howard's Restor-A-Finish can improve the existing finish without removal. Use 4/0 steel wool in small circles to blend in any repairs, ensuring you achieve the desired color and pattern without stripping the old finish.

Blending Repairs Seamlessly
seamless blending of repairs

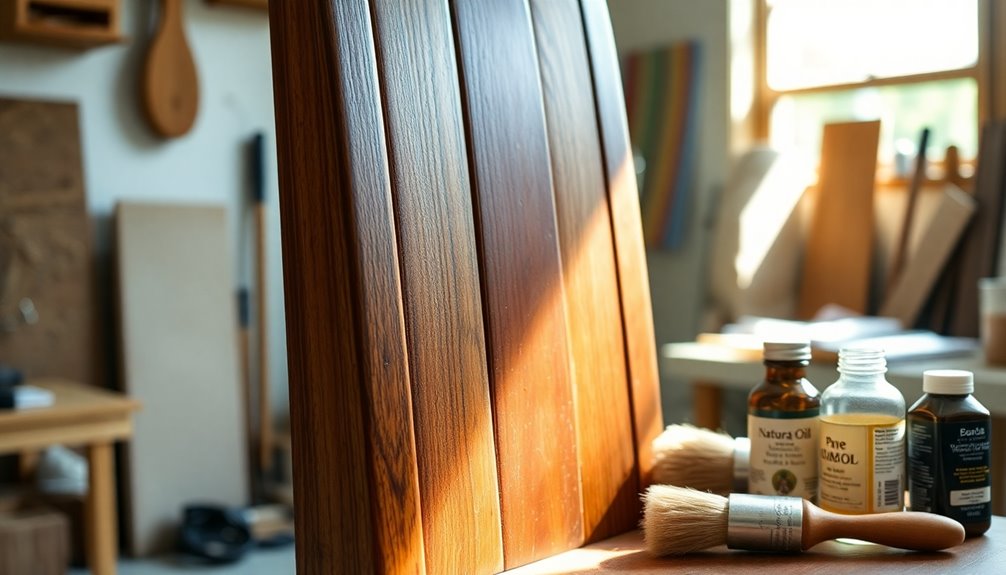
When blending repairs seamlessly into refinished wood furniture, the key is meticulous preparation. Start by cleaning the surface thoroughly to eliminate dust and grime. Assess the furniture's state to identify areas needing repair, and choose a wood filler that matches or can be stained to match the wood color. Overfill the void slightly to account for shrinkage as the filler dries, allowing it to set completely, which could take several hours.

Next, apply a burn-in wood filler for precise color matching. Use a soldering iron to melt the filler into the void, applying multiple tones if necessary. This process is further enhanced by using an assortment of burn sticks to achieve various color options. Once it cools and hardens, buff it with a microfiber cloth.

Now, sand the filled area with medium-grit sandpaper to level it with the surrounding wood, then switch to fine-grit sandpaper for a smooth finish. Always sand in the direction of the grain to avoid scratches. Use sanding sponges for tight corners. Finally, find a stain that matches the surrounding wood and apply it in thin layers, ensuring each layer dries thoroughly before proceeding, until the repair blends seamlessly with the rest of the piece.

Advertisement

Final Touches for Protection

final adjustments for safety

To ensure your refinished wood furniture stands the test of time, applying a protective finish is essential. Start by choosing a stain that requires a separate finish, allowing you to adjust the color as needed. Apply the stain in thin, even coats, letting each coat dry completely before adding the next. Don't forget to wipe off any excess stain with mineral spirits or a clean rag before it dries to achieve an even look.

Next, seal the wood to protect it and create a smooth base for the stain. Use a thick coat of sealant, allowing it to soak into the wood, then wipe off the excess. Depending on your furniture's use, opt for oil finishes, wipe-on varnish, or polyurethane varnish for high-traffic pieces like tables. Engaging in refinishing is a meaningful way to honor the past and appreciate the craftsmanship involved in your furniture.

Finally, protect your refinished furniture from environmental factors. Keep it out of direct sunlight to avoid fading and use curtains or blinds for added protection. Always use coasters and placemats to guard against water rings and heat damage, and lift furniture instead of dragging it to prevent scratches. These final touches will help maintain your beautiful refinished piece for years to come.

Maintaining Your Furniture
furniture care and upkeep

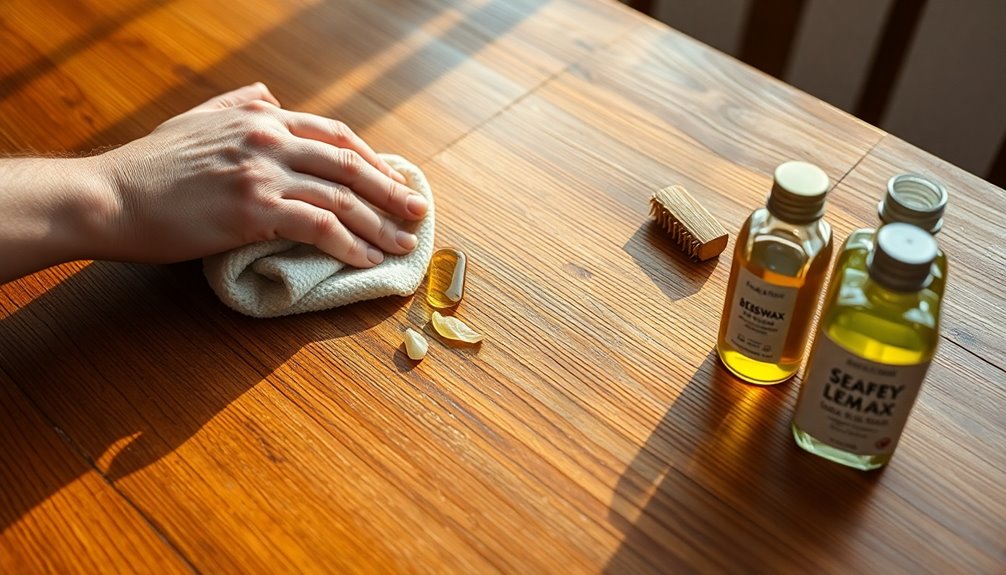
After applying the final touches to protect your refinished wood furniture, maintaining its beauty and functionality becomes a priority. Start by cleaning the surface regularly. Use a gentle cleaner or a mixture of mild soap and water to remove dust, dirt, and grime that can affect the finish. Always ensure the wood is completely dry after cleaning, and protect your surroundings with drop cloths to prevent damage.

Next, assess your furniture periodically. Check for any dents, cracks, or damages that may need repair. Knowing whether your furniture is solid wood or veneer can help you determine the best maintenance approach. Additionally, regular dusting is essential to preserve the quality of your furniture.

When touch-ups are necessary, you can use products like Howard's Restor-A-Finish to blend any uneven areas without stripping the existing finish. If you find worn-out spots, a coat of oil-based Minwax wipe-on polyurethane can add protection while enhancing the wood's color.

Lastly, avoid using harsh chemicals that could damage the finish. By following these maintenance tips, you'll keep your refinished furniture looking stunning and extend its lifespan for years to come.

Advertisement

Tips for a Successful Finish

achieve your goals successfully

Achieving a successful finish on your refinished wood furniture starts with meticulous surface preparation. First, clean the surface thoroughly to remove any dust, dirt, or grime using a gentle cleaner or a mixture of mild soap and water. Allow the wood to dry completely before proceeding. Protect your surroundings with drop cloths to catch any splatters, and ensure your work area is well-ventilated, especially if you're using chemical-based products.

Next, choose the right products. Howard's Restor-A-Finish is excellent for enhancing the existing finish without stripping it. Select an appropriate shade, and remember that you can blend shades for a custom color. For added protection, apply oil-based Minwax wipe-on polyurethane. Assessing the finish is necessary before restoration begins to determine the best approach.

When applying the finish, use 4/0 (0000) steel wool in small circles with light pressure for Restor-A-Finish, wiping off excess with a soft cotton cloth. Use long, even strokes for any finish application. After the initial coat dries, inspect for uneven areas and apply additional coats if needed.

Finally, allow the finish to dry completely before using the furniture and maintain it with regular cleaning and touch-ups to keep it looking its best.

Frequently Asked Questions

Can I Use Vinegar Instead of Dish Soap for Cleaning?

Yes, you can use vinegar instead of dish soap for cleaning. Vinegar's natural acidity effectively cuts through grime and grease without leaving residues that might harm your wood's finish. Mix equal parts water and white vinegar, and test it on a small area first. Wipe the surface with a soft, damp cloth, following the grain, then dry it with a clean cloth. This method keeps your furniture looking great while being eco-friendly!

What Should I Do Before Starting the Refinishing Process?

Before starting the refinishing process, you should identify the type of wood and existing finish on your furniture. Clean the surface with a damp cloth to remove dirt and grime, making sure it's free of debris. Assess any imperfections or damage that need fixing, and gather all necessary tools like sandpaper and safety gear. Finally, take safety precautions by wearing protective eyewear and gloves to keep yourself safe throughout the project.

Advertisement

How Long Does the Entire Refinishing Process Take?

The entire refinishing process can take anywhere from a couple of hours to a full day, depending on the methods you choose and the condition of your furniture. Quick methods like cleaning and deglossing or using Restor-A-Finish can be done in under an hour. More detailed approaches, like gel staining or conditioning, might require several hours. Plan accordingly to ensure you've got enough time to achieve the desired results.

Can I Use Water-Based Finishes Instead of Oil-Based?

Yes, you can definitely use water-based finishes instead of oil-based ones. They're widely available and easy to apply with a brush or roller. Water-based finishes dry quickly, often within a couple of hours, allowing you to apply multiple coats in a day. They also have less odor and are generally safer to use. Just make sure to clean and prepare the surface properly for the best results. You'll love their clear, non-yellowing finish!

How Often Should I Clean and Maintain Refinished Furniture?

You should clean and maintain refinished furniture regularly to keep it looking its best. Dust daily to prevent buildup, wipe it down weekly with a damp cloth, and condition it monthly with a wax-based product. Every few months, do a deeper clean using a gentle cleaner and #0000 steel wool. Always check for damage and reapply finish as needed to protect your furniture from wear and tear.

Conclusion

Refinishing wood furniture without stripping can breathe new life into your pieces while preserving their character. By cleaning, repairing, and using restorative products, you can achieve a beautiful finish that enhances the wood's natural beauty. Don't forget to apply a protective coat and maintain your furniture regularly to keep it looking its best. With these simple steps, you can enjoy your revitalized furniture for years to come. Now, go ahead and get started on your project!
Advertisement
Advertisement

Interior Design

How to Paint a Sofa

Painting your sofa can transform your space beautifully, but do you know the secret steps to achieve a stunning finish?

Published

on

sofa painting step by step guide

To paint your sofa, start by choosing a high-quality fabric paint, like Dixie Belle, known for its vibrant colors. Lightly mist the fabric to help the paint absorb better. Use stencils or paint freehand for unique designs, testing any patterns on a small area first. Once you're satisfied with the look, seal it using Easy Peasy Spray Wax for added protection. Make sure to vacuum the painted fabric regularly to keep it clean and fresh. With these tips in mind, you're on your way to a beautifully refreshed sofa, and there's even more to explore!

Key Takeaways

  • Choose high-quality fabric paint, such as Dixie Belle, for vibrant and long-lasting results on your sofa.
  • Lightly mist the fabric with water before painting to enhance paint absorption and adhesion.
  • Use stencils or freehand techniques to create intricate designs; practice on small areas first.
  • Once painted, seal the fabric with Easy Peasy Spray Wax or water-based polyurethane for added protection.
  • Regularly vacuum the painted fabric to prevent dirt accumulation and maintain its appearance.

Introduction

training data up to october

When it comes to keeping your sofa looking fresh, routine fabric care is key. You'll want to know the right cleaning techniques for different materials and have a plan for tackling stubborn stains, like red wine. By mastering these basics, you'll set the stage for a successful painting project. Additionally, maintaining a clean environment with an air purifier can help reduce allergens that may settle on your furniture, ensuring a more effective air quality improvement.

Routine Fabric Care Tips

Maintaining your painted sofa is essential for keeping it looking fresh and vibrant. Start with regular vacuuming using a soft brush attachment; this helps remove dirt and debris, preserving the appearance of painted fabric and extending its lifespan. If you experience spills, act quickly—use a damp cloth to gently blot the area. Avoid harsh rubbing, as this can damage the paint finish.

For tougher stains, you can use mild soap and water, but always test any cleaning solution on a small, inconspicuous area first to ensure it won't harm the paint. Over time, you may notice the surface feeling rough; lightly sanding the painted fabric can help maintain a smooth texture and enhance its look.

Lastly, keep leftover paint on hand for touch-ups. This allows for prompt repairs of any chips or scratches, ensuring your sofa remains well-maintained. By following these routine care tips, you'll protect your investment and enjoy your beautifully painted sofa for years to come.

Fabric-Specific Cleaning Techniques

Cleaning your painted sofa effectively requires understanding the fabric it's made from, as different materials respond to cleaning methods in various ways. Start by thoroughly vacuuming your sofa to remove loose dirt and debris. This step is crucial since any leftover particles can affect both the cleaning process and paint adhesion.

Advertisement

For natural fabrics like cotton and linen, mix a mild soap with water. Use this solution to gently blot stains, but be careful not to oversaturate the fabric, as excessive moisture can damage it. When you have synthetic fabrics, always test a small, hidden area first with a fabric-safe cleaner to avoid potential damage or discoloration.

If your sofa has delicate materials like velvet, opt for a soft brush or cloth. Lightly agitate the surface instead of scrubbing, as scrubbing can harm the fibers. After you've cleaned the fabric, ensure it dries completely before painting. This is vital for optimal paint absorption and helps prevent mold or mildew from developing. By understanding your sofa's fabric and applying these cleaning techniques, you'll maintain its beauty while preparing it for a fresh coat of paint. Additionally, ensure that the area surrounding the sofa is free from flammable objects to promote a safe environment during the cleaning process.

Stain Removal for Red Wine

Red wine stains can be a nightmare, but tackling them quickly makes all the difference. Start by grabbing a clean cloth or paper towel to gently blot the stain, absorbing excess wine without rubbing, which can spread the stain further. If the stain is fresh, consider sprinkling a generous amount of salt on it; this will help absorb the wine. Let it sit for several minutes before vacuuming it up.

Next, mix dish soap and hydrogen peroxide in a 1:1 ratio and apply it to the stain. Dab gently with the cloth until you see the stain lifting, then rinse the area with cold water. If you still notice remnants of the stain, don't worry. You can turn to a commercial upholstery cleaner specifically designed for different fabric types. Just follow the manufacturer's instructions for the best results.

Water-Resistant Fabric Treatments

waterproofing for textile materials

To keep your painted sofa looking fresh, consider using water-resistant fabric treatments. These options not only protect against spills but also enhance durability, ensuring your work lasts longer. You can also explore scratch-resistant fabrics, decorative blankets, and fabric protectant sprays for added defense.

Scratch-Resistant Fabric Options

When selecting a sofa fabric that can withstand the rigors of daily life, scratch-resistant options become essential, especially if you have pets or children. Opt for tightly woven materials like microfibers, which are durable and less prone to wear and tear. These fabrics not only resist scratches but also maintain their appearance over time.

Advertisement

It's wise to look for upholstery labeled as "performance" or "high durability." These fabrics are specifically engineered to provide enhanced resistance against scratching, making them ideal for busy households. Additionally, consider applying water-resistant treatments like Teflon or Scotchgard, which create a protective layer that repels moisture and stains, further extending the life of your upholstery.

Regular maintenance is crucial for preserving the integrity of scratch-resistant fabrics. Make it a habit to vacuum and spot clean your sofa to remove debris and prevent damage. By choosing the right materials and committing to ongoing care, you'll enjoy a beautiful, functional sofa that stands up to everyday challenges. With these considerations in mind, you'll find a fabric that not only looks great but also meets your family's needs.

Furthermore, selecting materials with high durability can contribute to the overall longevity of your furniture.

Protect With Decorative Blankets

Decorative blankets are a smart way to protect your newly painted sofa from spills and stains. By choosing blankets made from water-resistant fabrics, you can effectively extend your sofa's lifespan while maintaining its aesthetic appeal. Look for options treated with water-repellent finishes, like polyester or acrylic, which help repel moisture and prevent absorption into the fabric.

To maximize protection, make sure the decorative blankets are large enough to cover high-use areas of your sofa, such as the seating and backrest. This will help shield your paint job from wear and tear. In households with pets or children, consider layering multiple blankets to create a sturdy barrier against potential damage.

Advertisement

Regularly wash and maintain these blankets according to their care instructions to keep them fresh and effective at protecting your sofa's painted surface. This practice not only enhances the longevity of your protective coverings but also helps maintain the vibrant colors of your newly painted sofa. With the right decorative blankets, you can enjoy your stylish seating without the constant worry of spills and stains.

Using Fabric Protectant Sprays

Applying fabric protectant sprays is a crucial step in safeguarding your newly painted sofa from spills and stains. These water-resistant fabric treatments create a protective barrier that helps repel liquids, enhancing the durability of your painted upholstery. After allowing a 24-hour drying period for the paint, you can confidently apply a fabric protectant to maintain the sofa's appearance.

When using a fabric protectant, make sure to follow the manufacturer's instructions for optimal results. Achieve even coverage, and ensure the fabric treatments dry completely before using the sofa again. Most fabric protectants are safe for painted upholstery, so you won't have to worry about compromising the color or texture of your newly painted piece.

To keep that protective barrier effective, schedule regular reapplication every 6-12 months. This routine maintenance will help prolong the life of your painted sofa, allowing you to enjoy its beauty without the stress of potential stains. With these simple steps, your sofa will remain a stylish and functional centerpiece in your home for years to come.

Upholstery Seam Reinforcement Techniques

seam reinforcement upholstery methods

To ensure your sofa's seams hold up well, you'll want to focus on seam integrity and support techniques. Using a sewing machine with a heavy-duty thread can enhance durability, while proper upholstery repair methods will keep your fabric looking fresh. Don't forget that adding cushioning can enhance relaxation, making your newly painted sofa even more inviting.

Seam Integrity and Support

Seam integrity is crucial for maintaining the durability and longevity of your upholstered sofa. To reinforce upholstery seams effectively, consider using a strong adhesive or fabric glue to bond raw edges. This approach provides additional strength and helps prevent fraying. Additionally, employing zigzag stitching can enhance seam durability by allowing for flexibility. This technique accommodates the fabric's movement without compromising integrity.

Advertisement

For a quick reinforcement solution, you can use seam tape or fusible bonding web. Simply apply heat to bond the fabric layers securely, creating a lasting hold. If your sofa experiences heavy use, adding a fabric backing or interlining to the seams is a wise choice. It offers extra support, reducing strain on the main fabric.

Don't forget the importance of regular inspection. By checking seams for wear and tear, you can identify potential issues early on. This proactive approach allows for timely repairs, ultimately maintaining the overall structural integrity of your upholstery. By reinforcing seams properly, you ensure your sofa not only looks great but also stands the test of time, providing comfort and style for years to come.

Upholstery Repair Techniques

After ensuring your sofa's seams are reinforced, it's time to focus on upholstery repair techniques that can further enhance its durability. Start by using a heavy-duty sewing machine equipped with a heavy-duty needle and thread specifically designed for upholstery. This ensures your repairs are strong enough to withstand daily wear and tear.

Before sewing, consider applying seam tape or fabric adhesive to strengthen weak seams. Once you've prepared the area, use a zigzag stitch along the edges to prevent fraying and provide extra strength. This technique creates a durable barrier that holds the fabric together.

While stitching, secure the fabric layers with clips or pins. This keeps everything aligned, ensuring a clean and precise finish. Regularly inspect your upholstery seams for signs of wear. Early reinforcement can prevent further damage, extending the life of your furniture. Additionally, understanding common issues in automotive repairs can help you apply similar proactive care techniques to other areas, including furniture maintenance.

Advertisement

Cushioning for Enhanced Relaxation

Enhancing your sofa's comfort starts with choosing the right cushioning materials. To ensure your upholstery withstands daily use, focus on reinforcing the upholstery seams. Begin by selecting a strong, durable thread that matches your fabric. This simple choice can significantly enhance the longevity of your sofa and prevent tearing under stress.

For added strength, consider double-stitching seams, especially in high-use areas. This technique maintains the integrity of the fabric over time. When sewing, use a walking foot attachment on your sewing machine; it prevents the fabric from shifting, ensuring even stitching for a polished finish.

Before you start sewing, apply a fabric adhesive to the seam edges. This will help prevent fraying and enhance the durability of the seam, making your paint upholstery project more successful. Regularly inspect your seams for wear and perform preventative maintenance, such as re-stitching or applying additional fabric glue, to prolong the life of your upholstery.

Personalized Fabric Paint Designs

customizable fabric paint patterns

While personalizing your sofa with fabric paint designs can seem daunting, it's an exciting way to express your creativity and transform your space. Start by selecting a high-quality paint like Dixie Belle Paint, known for its vibrant, highly pigmented colors that work beautifully for painting fabric furniture. Before applying your first coat, lightly mist the fabric to open the pores, enhancing paint absorption for a smoother application.

For intricate designs, you'll want to use stencils or freehand techniques with high-quality brushes to achieve detailed effects. Always test your chosen design on a small area first to ensure you're happy with the outcome. Layering different colors can create stunning depth and dimension in your personalized designs, so don't hesitate to apply multiple thin coats for the best results.

Once you've completed your masterpiece, finish it off by sealing the design with Easy Peasy Spray Wax. This step is crucial, as it protects your artwork while maintaining the fabric's softness and enhancing durability. With these techniques, your sofa will not only look unique but also feel inviting and comfortable. Enjoy the creative process!

Advertisement

Fabric Longevity Maintenance Tips

fabric care for durability

Maintaining the beauty and longevity of your painted sofa is key to enjoying your creative work for years to come. To ensure fabric longevity, start by regularly vacuuming the painted fabric with a soft brush attachment. This helps prevent dirt accumulation and keeps your sofa looking fresh. If you spill something, clean spills immediately with a damp cloth and mild soap. Avoid harsh chemicals, as they can damage the paint finish.

Inspect your sofa periodically for any signs of wear. If you notice scuffed or scratched areas, lightly sand them before repainting. When touching up, apply paint in thin layers to achieve a smooth finish. For added protection and durability, consider applying a water-based polyurethane sealant after the paint dries. Make sure to allow thorough drying between each coat to maintain appearance. Additionally, keeping your living space clean can help reduce allergens and pollutants that may settle on your sofa, improving overall indoor air quality.

Conclusion

final thoughts and summary

Successfully painting your sofa can transform your living space and showcase your creativity. By following the right painting techniques, you can achieve a beautiful finish that breathes new life into your furniture. Start with a specialized paint, like Dixie Belle Chalk Mineral Paint, which acts almost like a dye and requires about 50 ounces for full coverage on a standard sofa.

Prepare your fabric by lightly misting it with water to open the pores for better paint absorption. Applying two coats of paint, with light sanding between layers, will ensure a smooth finish while keeping the fabric soft and textured. Don't forget to seal your painted fabric with Easy Peasy Spray Wax after your final coat; this adds durability and protection, allowing your painted sofa to handle everyday use.

Finally, regular maintenance is key. Clean the surface with a damp cloth and promptly address any paint transfer to preserve your painted sofa's appearance. By investing time and effort into these steps, you will enjoy a stunning, customized piece that reflects your personal style for years to come. Happy painting!

Frequently Asked Questions

What Kind of Paint Do You Use to Paint a Couch?

When you're looking to paint a couch, consider using chalk mineral paint, like Dixie Belle Chalk Paint. It penetrates fabric, offering rich color without making it stiff. Mix about 3/4 water with 1/4 paint for better absorption. Always apply a fabric medium to keep the material flexible. Natural fibers like cotton and linen do best, so test a small area first to ensure the paint works well with your fabric choice.

How Do You Paint Fabric Without It Getting Stiff?

To paint fabric without it getting stiff, you'll want to mix 3/4 water with 1/4 paint for better absorption. Adding a fabric medium helps maintain softness too. Lightly mist the fabric with water before you start painting, allowing the fibers to open up. Apply multiple thin layers instead of one thick coat, and gently sand between coats to keep the texture soft. This way, you'll achieve a flexible finish without losing the fabric's feel.

Advertisement

How Do You Change the Color of a Fabric Sofa?

To change the color of a fabric sofa, start by cleaning the upholstery thoroughly. Next, mist the fabric with water to help the paint absorb better. Mix three parts water with one part high-quality chalk mineral paint for best results. Work in sections, allowing 2-4 hours for drying between coats. Once you're done, seal it with Easy Peasy Spray Wax for a protective finish. It's a cost-effective way to refresh your sofa!

Does Fabric Paint Last on Fabric?

Yes, fabric paint can last on fabric if you apply it correctly. When mixed with a textile medium, it bonds permanently while staying flexible. To enhance durability, mist the fabric lightly before painting and use multiple thin layers. Regular maintenance, like gentle cleaning with a damp cloth, will help preserve the paint's appearance. Many people find that with proper care, the finish remains vibrant and intact for years, ensuring long-lasting satisfaction.

Continue Reading

Interior Design

Revamp Your Shower Into a Spa Retreat

Harness the power of simple upgrades to transform your shower into a luxurious spa retreat that invites you to unwind and rejuvenate after a long day.

Published

on

transform shower into spa

You have the ability to easily turn your shower into a spa-like retreat with some key upgrades. Begin by assessing your space and budget in order to prioritize essential features such as a rain showerhead, relaxing body jets, or a steam option. Set the mood with calming colors, soft lighting, and a sound system for peaceful music. Add spa elements like built-in benches and heated flooring for maximum relaxation. Select easy-to-clean materials to simplify maintenance. By incorporating these tips, you can establish a sanctuary at home that is ideal for unwinding after a busy day. Explore additional ways to enhance your shower experience even more!

Key Takeaways

  • Assess your space and budget to ensure a comfortable fit for new shower features and necessary upgrades.
  • Choose showerhead options like rain or handheld models, and consider eco-friendly designs that enhance your experience.
  • Enhance ambiance with dimmable lighting, calming color palettes, and soothing sound systems for a serene environment.
  • Incorporate spa features such as body jets, steam showers, and heated flooring for luxury and relaxation.
  • Opt for easy-clean materials and establish a maintenance routine to keep your spa retreat in pristine condition.

Assessing Space and Budget

evaluating space and finances

When planning your shower revamp, clarity about your space and budget is crucial.

Start by evaluating your available bathroom space, considering any existing plumbing and electrical setups that could affect installation. Measure the area to guarantee your new shower features fit comfortably without crowding the space.

Next, determine your budget constraints to guide your choices. Research average costs for desired upgrades, such as tiles or spa features, and prioritize essential elements based on what you can afford. This way, you can create a luxurious atmosphere without overspending.

Choosing Showerhead Options

selecting showerhead features wisely

Choosing the right showerhead can considerably improve your shower experience, creating a more enjoyable and invigorating environment. You'll want to explore various types, like handheld, rain, or multi-function options, each offering unique benefits. Assess your water pressure to guarantee compatibility, and consider eco-friendly models that conserve water without sacrificing performance.

Here's a quick overview of popular showerhead options:

Type Features
Handheld Flexible, easy to use
Rain Wide coverage, soothing feel
Multi-function Adjustable settings
Eco-friendly Water-saving technology
Ceiling-mounted Space-saving, modern design

Check user ratings and installation requirements before making your choice. With the right showerhead, you're one step closer to your spa retreat!

Advertisement

Enhancing Ambiance

creating inviting atmospheres

Transforming your shower into a soothing sanctuary starts with enhancing the ambiance.

You can create a tranquil atmosphere that encourages relaxation and rejuvenation. Here are four ways to elevate your shower's vibe:

  1. Soft Lighting: Install dimmable LEDs or sconces to create a warm glow, perfect for unwinding.
  2. Color Palette: Choose calming colors for tiles and walls, such as soft blues or earthy tones, to promote serenity.
  3. Sound System: Set up a sound system to play soothing music or nature sounds, enhancing your escape from daily stress.
  4. Aromatic Elements: Incorporate essential oil diffusers or candles, filling the air with calming scents like lavender or eucalyptus.

With these enhancements, you'll set the perfect mood for your spa-like retreat.

Incorporating Spa Features

integrating wellness spa elements

Incorporating spa features into your shower can elevate your daily routine into a luxurious experience. Incorporating spa features into your shower can elevate your daily routine into a luxurious experience. Imagine stepping into a space that embraces revolutionary medical spa design ideas, combining functionality with cutting-edge relaxation techniques. From rainfall showerheads and steam therapy to integrated aromatherapy and chromotherapy systems, these enhancements can transform your bathroom into a private wellness retreat.

Start by installing body jets or wall-mounted sprays to enjoy a soothing massage while you wash away the stresses of the day.

Consider adding a steam shower option for a sauna-like retreat that invigorates your senses.

Built-in benches offer comfort, giving you a place to relax and unwind.

Heated flooring brings warmth and luxury to your space, making every step a pleasure.

Advertisement

Finally, include smart storage solutions for your towels and spa products, ensuring everything you need is within reach.

With these enhancements, your shower transforms into a rejuvenating oasis, providing the ultimate escape every time you step inside.

Maintenance and Upkeep

regular care and repair

While enjoying your upgraded shower experience, don't overlook the importance of maintenance and upkeep to guarantee it remains a serene retreat.

Regular attention will keep your spa-like oasis in top shape. Here's a quick checklist to make it easier:

  1. Choose Easy-Clean Materials: Opt for glass or tile that resists stains and grime.
  2. Establish a Cleaning Routine: Schedule weekly cleanings to prevent mold and mildew buildup.
  3. Inspect Fixtures: Regularly check for leaks or damage in plumbing and fixtures to avoid bigger issues.
  4. Use Water Softeners: If you have hard water, consider a water softener to prolong the life of your fixtures.

Frequently Asked Questions

What Are the Best Colors for a Calming Shower Environment?

For a calming shower environment, you'll want soft, neutral colors like pale blues, greens, or warm grays. These shades create a serene atmosphere, helping you relax and rejuvenate while you enjoy your shower experience.

How Can I Make My Shower More Eco-Friendly?

You can transform your shower into a green oasis by installing low-flow showerheads, using biodegradable soaps, and incorporating a water-saving system. It's not just eco-friendly; it's an invigorating way to enjoy your daily routine.

What Are the Top-Rated Shower Products for a Spa Experience?

To enhance your shower experience, consider top-rated products like multi-function showerheads, body jets, and essential oil diffusers. They'll create a luxurious atmosphere and provide relaxation, making your daily routine feel like a mini retreat.

Advertisement

How Can I Maximize Small Bathroom Space for a Shower?

You might think a small bathroom limits your options, but you can maximize space by choosing compact fixtures, using glass doors, and incorporating vertical storage. Prioritize essentials, and create a functional yet stylish shower experience.

What Accessories Enhance the Luxury Feel of a Shower?

To enhance the luxury feel of your shower, consider adding a rain showerhead, soft lighting, plush towels, and aromatic candles. Incorporating natural materials and sound systems can also elevate the overall experience considerably.

Conclusion

Transforming your shower into a spa retreat is more than just a luxury; it's a way to enhance your well-being. Did you know that studies show a relaxing shower can reduce stress levels by up to 30%? By thoughtfully evaluating your space, selecting the right features, and maintaining your oasis, you can create a daily escape that rejuvenates your mind and body. So go ahead, indulge in the tranquility you deserve every time you step in.

Continue Reading

Interior Design

Indonesian Art Decor: How to Make Your Home a Creative Masterpiece!

Transform your home into a vibrant masterpiece with Indonesian art decor that captivates and inspires; discover the endless possibilities within!

Published

on

indonesian art home decor

Transform your home into a work of art with Indonesian art decor by incorporating batik. Add colorful batik wall art as focal points, mix and match batik cushions for a unique touch, and complement your space with stunning table decor featuring intricate runners and placemats. Batik curtains can enhance the elegance of your space while filtering light beautifully. Use sculptural elements and soft lighting techniques to showcase your art, and add natural materials and plants for a harmonious feel. This lively decor style not only honors culture but also showcases your personal style, opening up exciting possibilities.

Key Takeaways

  • Incorporate vibrant batik wall art to infuse your space with Indonesian culture and unique patterns that serve as focal points in any room.
  • Use batik cushions to mix patterns and textures, creating a personalized look that can be updated with seasonal color themes.
  • Enhance dining experiences with stunning batik table runners and unique placemats that reflect your individual style and celebrate cultural heritage.
  • Include sculptural elements in your decor, utilizing natural materials and Indonesian art to create visual interest and depth in your spaces.
  • Embrace nature by integrating earthy color palettes and indoor plants, while displaying batik artwork to connect your decor with the outdoors.

Exploring Batik Traditions

batik craftsmanship and heritage

Exploring the rich heritage of batik, you'll discover a traditional Indonesian fabric that has captivated hearts for over a millennium. Recognized as an Intangible Cultural Heritage by UNESCO, batik's origins trace back over 1,000 years in Java.

The beauty of batik lies in its intricate patterns, created through a wax-resist dyeing technique. As heated wax is applied to the fabric, it prevents dye penetration in specific areas, resulting in stunning designs that often reflect Indonesian mythology and natural elements. Many of these designs, much like Indonesian decor masks, serve to tell stories of local traditions and cultural heritage.

Bright colors symbolize happiness, while earthy tones evoke stability and nature, each choice reflecting deep cultural significance. When you incorporate batik into your decor, these vibrant fabrics can become a focal point in your home, drawing attention and sparking conversations.

If you're intrigued by this craft, consider joining workshops or classes that teach batik-making. Not only will you learn the art, but you'll also gain a deeper appreciation for local craftsmanship and Indonesian culture.

Engaging with this beautiful tradition allows you to connect with the rich history and artistry behind every piece, making your home not just a living space, but a tapestry of cultural expression.

Advertisement

Incorporating Batik Wall Art

batik inspired wall art design

Incorporating batik wall art into your home decor instantly brings a touch of Indonesian culture and vibrant color to your space. These unique pieces, made from traditional Indonesian fabric, can be customized to reflect your personal style.

Whether you frame them or stretch them over canvas, batik wall hangings enhance the aesthetic appeal of any room. The intricate designs and vibrant colors found in Indonesian decor masks can also complement batik art, creating a harmonious blend of cultural elements in your home.

Consider placing batik art in key areas like your living room, bedroom, or hallways, where they can serve as striking focal points. The cultural richness and vibrant colors of these artworks can elevate the atmosphere, making your home feel warm and inviting.

Plus, with the versatility and durability of batik fabric, you can trust that your wall art will remain a long-lasting element of your home decor.

If you're feeling creative, try your hand at DIY batik wall art projects. Mixing and matching patterns not only allows for personal expression but also adds a layer of authenticity to your decor.

Creative Batik Cushion Ideas

unique batik cushion designs

You can transform your living space with creative batik cushions by mixing patterns and textures for a unique look. Incorporating vibrant colors and intricate designs can enhance the cultural heritage of your home while adding comfort.

Consider seasonal color themes to keep your decor fresh and vibrant throughout the year. If you're feeling crafty, DIY cushion projects can add a personal touch that reflects your style and appreciation for traditional Indonesian art, which offers versatility for various interior styles traditional fabrics.

Advertisement

Mixing Patterns and Textures

Mixing different batik patterns in cushion covers brings a vibrant and eclectic flair to your home decor. You can express your personality and creativity by combining traditional batik designs with contemporary motifs. This blend not only celebrates Indonesian culture but also creates a visually dynamic look that captivates the eye.

Additionally, incorporating elements of traditional Indonesian style home decor can enhance the overall atmosphere of your space, promoting a relaxed environment that reflects local heritage.

When selecting your cushion covers, consider using varying textures. For instance, pairing cotton batik with linen or plush velvet adds depth and comfort to your space. This thoughtful mix enhances the tactile experience while enriching the overall aesthetic.

Don't forget that you can easily refresh your decor as the seasons change. By swapping out your cushion covers for different batik designs and colors, you can keep your home feeling fresh and inviting.

Remember, batik cushion covers are machine washable, making them a practical choice for maintaining a clean and stylish environment.

Advertisement

Incorporating these creative cushion ideas won't only elevate your space but also keep it uniquely yours. So, immerse yourself in the world of batik, mix those patterns and textures, and watch your home transform into a creative masterpiece!

Seasonal Color Themes

Bright and vibrant batik cushion covers can transform your living space with seasonal color themes that reflect the spirit of each time of year. By choosing batik fabrics in colors that resonate with the season, you can effortlessly update your décor.

Incorporating unique elements such as Indonesian decor masks alongside your batik cushions adds a rich cultural touch to your design. For example, opt for bright florals during spring, warm earth tones in autumn, and cool blues for winter.

To elevate your seasonal theme, consider these creative ideas:

  • Mix and Match: Combine various batik patterns to create an eclectic and personalized style.
  • Seasonal Motifs: Incorporate designs featuring leaves, flowers, or other seasonal elements to enhance the theme.
  • Practicality: Enjoy the ease of machine-washable batik covers, making maintenance a breeze as you switch out designs.
  • Cohesive Look: Choose a color palette that ties together your batik cushions with other decorative elements in your home.

With batik cushion covers, you can't only refresh your space but also express your creativity. Embrace the changing seasons, and let your home reflect the beauty of each one!

DIY Cushion Projects

Creating your own batik cushion covers is a rewarding DIY project that brings a splash of Indonesian artistry into your home. Not only do these covers add a pop of color, but they also allow you to showcase traditional craftsmanship in a modern way.

Advertisement

Incorporating vibrant colors and patterns inspired by Indonesian culture can enhance the overall aesthetic of your living space, making it truly unique and reflective of your personality. Mixing and matching different batik patterns can create an eclectic style, enhancing the visual interest of your living space.

For additional inspiration, consider exploring Indonesian Wedding Decor Ideas that highlight the beauty of batik in a celebratory context. For additional inspiration, consider exploring Indonesian Wedding Decor Ideas that highlight the beauty of batik in a celebratory context. These traditional elements can be seamlessly blended with modern touches to create a truly unique atmosphere. Activities like crafting ang pow decorations can also add a creative and personal touch, allowing your guests to engage with the cultural theme while contributing to the festive ambiance.

To start, pick some vibrant batik fabrics that resonate with your decor theme. Cut them to your desired size, and sew or use fabric glue to create the cushion covers.

The great thing about batik is that it's machine washable, making maintenance a breeze. You can easily update your home's look with the changing seasons or current trends by switching out the covers.

Stunning Batik Table Decor

beautiful batik table decor

When you think about enhancing your dining experience, vibrant batik table runners can make a striking statement.

These traditional fabrics, rich in cultural significance, can be paired with intricate floral arrangements featuring local blooms for added elegance.

Advertisement

You can also create unique placemat combinations that reflect your personal style and the season.

Let's explore some tips for setting a stunning table that showcases the beauty of batik, including traditional motifs and patterns to enhance the overall aesthetic.

Vibrant Table Runner Ideas

Batik table runners instantly transform your dining space with their vibrant colors and intricate designs, showcasing the beauty of traditional Indonesian artistry.

These stunning pieces not only enhance your dining experience but also serve as a conversation starter for guests. By pairing batik runners with solid-colored dinnerware, you create a visually appealing contrast that highlights the unique patterns of the fabric.

Incorporating batik decor can also complement the luxurious tropical designs often found in Bali, where expert tropical design blends natural elements with modern aesthetics.

Advertisement

Here are some ideas to incorporate batik table runners into your home decor:

  • Casual Family Dinners: Use a bright, playful batik pattern to add warmth and liveliness to your everyday meals.
  • Formal Gatherings: Opt for elegant, subdued colors that complement your fine china and create a sophisticated atmosphere.
  • DIY Customization: Make your own table runner in a size and design that fits your specific style and occasion.
  • Eco-Friendly Choice: Support traditional artisans by choosing batik fabrics made from sustainable materials that are machine washable for easy maintenance.

Embrace the cultural richness and artistic flair that batik table runners bring, and elevate your dining experience today!

Unique Placemats Combinations

Transform your dining experience with unique placemat combinations that showcase stunning batik designs. Batik fabric brings cultural richness and vibrant visual appeal to your table, reflecting the diverse traditions of Indonesian housing and culture.

By mixing and matching different batik patterns, you can create an eclectic style that turns each table setting into a personalized work of art. This cultural significance of housing is evident in how traditional elements can be integrated into modern decor, creating a harmonious blend of past and present traditional Indonesian housing.

Whether you're hosting a casual gathering or a formal dinner, batik placemats elevate any dining arrangement effortlessly. Their intricate designs pair beautifully with solid-colored dinnerware, creating a striking contrast that highlights the beauty of the batik patterns.

This combination not only enhances your table's aesthetic but also invites conversation among your guests.

Advertisement

If you're feeling creative, consider making DIY batik placemats. They're easy to create and can be customized in size and shape to fit your specific table setting needs.

This versatility allows you to change your decor with the seasons, ensuring your dining area always feels fresh and inviting. So, embrace the charm of batik and let your table setting reflect your unique style, making every meal a delightful experience.

Seasonal Table Setting Tips

Creating a stunning table setting for any season can be effortless with batik decor. This vibrant fabric not only adds color but also infuses cultural richness into your dining experience.

Batik decor aligns beautifully with the principles of tropical-themed luxury interior design, offering a unique touch that resonates with the inviting ambiance of Bali. Whether for a casual meal or a formal gathering, batik can elevate the atmosphere.

Here are some tips for incorporating batik into your seasonal table settings:

Advertisement
  • Use batik fabric as table runners or placemats to create a lively foundation.
  • Mix and match different batik patterns and colors to showcase your unique style.
  • Add seasonal elements like autumn leaves or spring flowers to enhance the theme.
  • Pair batik decor with solid-colored dinnerware to let the intricate designs shine.

Don't hesitate to explore DIY options, crafting custom sizes and shapes that fit your unique dining space perfectly.

Batik Curtains for Elegance

elegant batik curtains collection

When you want to add a touch of elegance and cultural flair to your home, batik curtains are an inspired choice. Their intricate, handcrafted designs showcase the beauty of Indonesian artistry, instantly transforming any room. With a variety of patterns and colors available, you can easily find batik fabric that complements your decor, whether it's traditional or modern.

One of the great advantages of batik curtains is their lightweight nature, which makes them perfect for DIY projects. If you enjoy sewing, you can modify existing curtain panels to create the perfect fit for your space. Not only do these curtains provide privacy, but they also allow natural light to filter through, creating a warm and inviting atmosphere in your living areas.

Maintaining batik curtains is a breeze, too. They're machine washable, so you won't have to worry about their vibrant colors fading over time. With regular care, these beautiful fabrics will continue to enhance your home's aesthetic.

Sculptural Elements in Decor

artistic design in interiors

How can you elevate your home decor with sculptural elements? By strategically incorporating sculptures, you can create stunning focal points that draw the eye and add visual interest to any room.

Sculptures made from natural materials like wood or stone not only enhance the organic feel of your space but also harmonize beautifully with your existing decor.

Here are some ideas to reflect upon:

  • Mix heights and sizes: Varying the dimensions of your sculptures can add depth and create a dynamic visual flow throughout your room.
  • Embrace cultural heritage: Use sculptures that reflect Indonesian art, such as those featuring batik motifs, to infuse your space with rich storytelling and artistic expression.
  • Play with placement: Position sculptures in various areas, like shelves, tabletops, or even as standalone pieces, to create engaging visual dialogues.
  • Focus on textures: When choosing sculptures, reflect on those with intricate textures that invite touch and curiosity.

Lighting Techniques for Art

artistic lighting techniques explained

Art's visibility and impact heavily rely on effective lighting techniques. One powerful method is uplighting, which creates dramatic shadows on artworks, emphasizing textures and details while enhancing the overall ambiance of your space.

You can also use soft wash lighting to illuminate sculptures and paintings, highlighting their form and color without causing harsh glare that might detract from their beauty.

Advertisement

To guarantee a comfortable viewing experience, position your lights at angles that avoid direct eye contact with the source. This way, you can enjoy your art without straining your eyes.

If you have outdoor art installations, consider solar-powered lights for an eco-friendly option. They provide sustainable illumination without relying on electricity.

Don't shy away from experimenting with colored lights; they can noticeably alter the mood of an artwork. This dynamic approach can change how viewers perceive and emotionally respond to your pieces, adding an exciting layer to your decor.

Embracing Nature in Design

nature inspired design aesthetic

Often, embracing nature in design transforms your living space into a serene retreat.

You can create a harmonious connection with the environment by incorporating natural materials like wood and stone. This not only promotes sustainability but also enhances the aesthetic appeal of your home.

Adopting biophilic design principles, such as maximizing natural light and integrating plants, can greatly improve your well-being and reduce stress levels.

Advertisement

Consider these elements to bring nature indoors:

  • Natural materials: Use wood, stone, and other organic materials in your furniture and decor.
  • Plant life: Incorporate indoor plants to enhance air quality and add vibrant life to your space.
  • Earthy color palettes: Choose colors inspired by nature, like browns and greens, to evoke tranquility and balance.
  • Nature-inspired artwork: Display art that reflects landscapes or wildlife, creating a seamless connection between your indoor and outdoor environments.

Personalizing Your Art Space

customized artistic environment design

Personalizing your art space can truly transform it into a reflection of your unique style and heritage. One way to achieve this is by incorporating batik wall art, which adds cultural richness and vibrant colors to your living area. This creates a focal point that celebrates traditional Indonesian craftsmanship.

You can also enhance your comfort and style with a mix of batik cushion covers in various patterns, allowing for easy seasonal updates that keep your decor fresh.

For dining experiences, design personalized table settings by using batik fabric as table runners or placemats, giving your table a unique touch for both casual and formal occasions.

Don't forget about your windows! Batik curtains not only provide privacy but also let natural light filter through, enhancing the overall aesthetic of your room.

Frequently Asked Questions

What Are the Best Places to Buy Authentic Indonesian Art Decor?

You'll find authentic Indonesian art decor at local galleries, artisanal markets, and online platforms like Etsy. Don't forget to explore cultural festivals where local artists showcase their work—it's a great way to support them directly.

Advertisement

How Do I Care for Batik Fabrics and Items?

To care for batik fabrics, you should hand wash them in cold water using mild detergent. Avoid direct sunlight to prevent fading, and iron them on low heat to maintain their vibrant colors and intricate patterns.

Can Batik Decor Fit Into Modern Home Styles?

Batik decor can seamlessly blend with modern home styles. Its vibrant patterns and rich history add unique character, enhancing minimalist designs while providing a touch of cultural sophistication that complements contemporary aesthetics beautifully.

What Is the History Behind Indonesian Wood Carvings?

Indonesian wood carvings date back centuries, reflecting cultural beliefs and traditions. You'll notice intricate designs often representing nature and spirituality, showcasing artisans' skills. These pieces serve not just as decor, but as storytelling elements in your space.

Are There Any DIY Projects for Indonesian Art Decor?

Absolutely, you can create DIY projects like wooden wall hangings or intricate carvings. Gather some local wood, tools, and inspiration from traditional designs. You'll transform your space while honing your artistic skills and celebrating culture!

Conclusion

Incorporating Indonesian art decor transforms your home into a vibrant masterpiece. Like a painter's brush on canvas, each piece of Batik adds color and character, wrapping your space in cultural richness. Whether it's a stunning cushion or elegant curtains, let your creativity flow. Embrace the beauty of nature and personalize your art space, making it a reflection of you. With these touches, you won't just decorate—you'll create a home that tells a story.

Advertisement
Continue Reading
Advertisement

Affiliate disclaimer

As an affiliate, we may earn a commission from qualifying purchases. We get commissions for purchases made through links on this website from Amazon and other third parties.

Advertisement

Vetted

brendan fraser s surprising return brendan fraser s surprising return
Vetted9 hours ago

What Happened to Brendan Fraser? The Shocking Comeback You Won’t Believe

The incredible journey of Brendan Fraser reveals shocking struggles and a remarkable comeback that will leave you eager to learn...

top men s duffle bags top men s duffle bags
Vetted10 hours ago

15 Best Men’s Duffle Bags for Every Adventure in 2024

Journey through the top 15 men's duffle bags of 2024 and discover which one will elevate your next adventure! You...

fat burning bodyweight exercises fat burning bodyweight exercises
Vetted21 hours ago

No Equipment Workout: The Secret Routine That’s Melting Fat Everywhere

I discovered the ultimate no equipment workout that torches fat in just 20 minutes—find out how to elevate your fitness...

natural men s body washes natural men s body washes
Vetted1 day ago

13 Best Natural Men’s Body Washes for a Refreshing Cleanse

Discover the perfect blend of nature and cleanliness with these 13 best natural men's body washes—your skin deserves a refreshing...

top men s shavers 2024 top men s shavers 2024
Vetted1 day ago

15 Best Shavers for Men in 2024 – Smooth and Effortless Grooming

Navigate through the 15 best shavers for men in 2024 for a smooth and effortless grooming experience, and discover which...

david krumholtz s hidden cameo david krumholtz s hidden cameo
Vetted2 days ago

David Krumholtz Oppenheimer Role: The Cameo Everyone Missed

Prepare to uncover the hidden depth of David Krumholtz's role in *Oppenheimer*—a performance that might just redefine your understanding of...

comfortable and stylish sweatshirts comfortable and stylish sweatshirts
Vetted2 days ago

14 Best Heavyweight Sweatshirts That Combine Comfort and Style

Join us as we explore the 14 best heavyweight sweatshirts that effortlessly blend comfort and style, revealing must-have options for...

fierce belgian malinois breed fierce belgian malinois breed
Vetted2 days ago

Belgian Malinois: John Wick 3’s Fierce Dog Breed Everyone’s Googling

You won't believe what makes the Belgian Malinois the perfect companion for action heroes; discover their extraordinary traits and why...

new balance shoes 2024 new balance shoes 2024
Vetted2 days ago

12 Best New Balance Shoes of 2024 – Comfort Meets Style

Uncover the top 12 New Balance shoes of 2024, where comfort meets style, and discover which pair might elevate your...

top rotary shavers 2024 top rotary shavers 2024
Vetted2 days ago

15 Best Rotary Shavers of 2024 – Effortless Grooming for Every Skin Type

Discover the perfect rotary shavers of 2024 for effortless grooming—find out which models will transform your shaving experience!

optimal duration for intimacy optimal duration for intimacy
Vetted2 days ago

How Long Should Sex Last? The Answer Will Blow Your Mind

In exploring how long sex should last, you might discover surprising insights that challenge common beliefs about intimacy and satisfaction....

effective home ab workouts effective home ab workouts
Vetted3 days ago

15 Best Ab Exercises You Can Do at Home for a Stronger Core

Optimize your home workout with these 15 ab exercises for a powerful core; uncover transformative techniques that will elevate your...

Trending

Copyright © 2024 StyleGuru.org Affiliate disclaimer As an affiliate, we may earn a commission from qualifying purchases. We get commissions for purchases made through links on this website from Amazon and other third parties.