Interior Design
How to Paint Laminate Furniture Without Sanding
I discovered a simple way to paint laminate furniture without sanding, and the results might surprise you—let’s dive into the process!
You can easily paint laminate furniture without sanding by first cleaning the surface with a degreaser like Krud Kutter. Next, use a suitable primer—oil-based or shellac-based—for better adhesion. Apply two thin coats of primer, letting it dry overnight. Choose a durable, water-based latex paint for the top layer and work in sections with foam rollers to avoid drips. Finish with a protective topcoat like Minwax Polycrylic for extra durability. Make sure to work in a well-ventilated area for safety. If you want more tips on achieving the best results, there's plenty more to explore!
Key Takeaways
- Clean the laminate surface thoroughly using a degreaser and TSP to remove dirt and grease for better paint adhesion.
- Use Krud Kutter Gloss-Off to dull the shine on the laminate, enhancing primer and paint bonding.
- Apply at least two thin coats of a suitable primer, like oil-based or chalk paint, to prepare the surface for painting.
- Choose durable, water-based latex or acrylic paint for a smooth finish and excellent adhesion on the primed surface.
- Finish with a protective topcoat, such as Minwax Polycrylic, to guard against wear and extend the life of your painted furniture.
Preparing the Surface
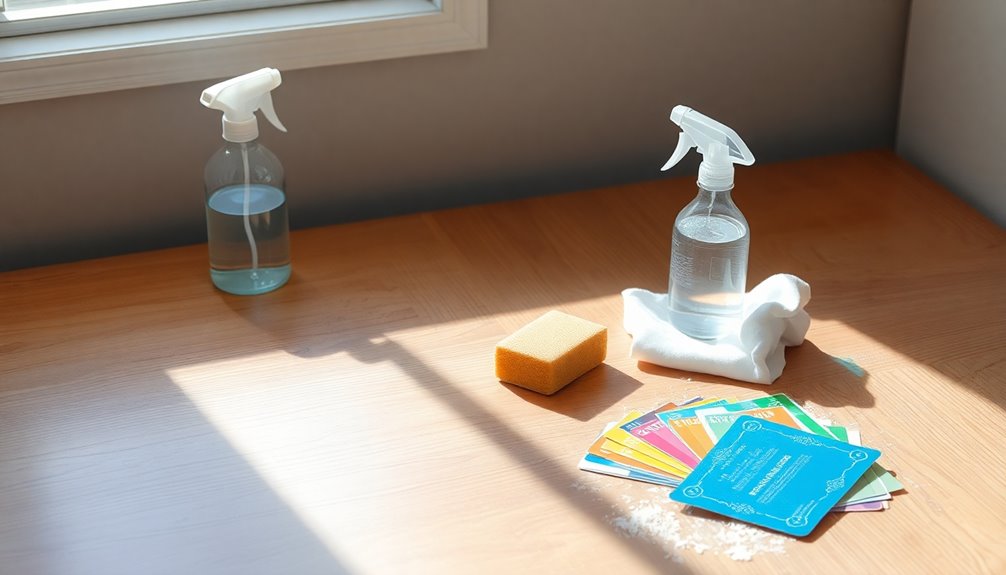
Before you dive into painting your laminate furniture, it's crucial to prepare the surface properly. Start by cleaning the surface with a mild cleaner or sugar soap to remove any grease or residue. Scrub it down with a degreaser like Krud Kutter, then thoroughly wipe it with TSP (trisodium phosphate) to ensure it's free from dirt and grime. Don't forget to use a tack cloth to remove any cleaning residue.
Next, you'll need to reduce the shine and gloss of the laminate. Apply a product like Krud Kutter Gloss-Off, let it dry, and wipe off any excess. This step is vital for promoting better paint adhesion. If you prefer, you can use liquid sandpaper as an alternative to traditional sanding.
Lightly scuff the surface with a medium-grit sanding sponge or sandpaper (120-150 grit). This creates a rough texture for the paint to grip onto. Be gentle—there's no need for heavy force or an electric sander. Finally, vacuum or wipe off any dust from scuffing, ensuring the surface is completely dry and clean before you start painting. Remember that using a shellac-based primer is essential for achieving a durable finish when working with laminate furniture.
Choosing a Suitable Primer
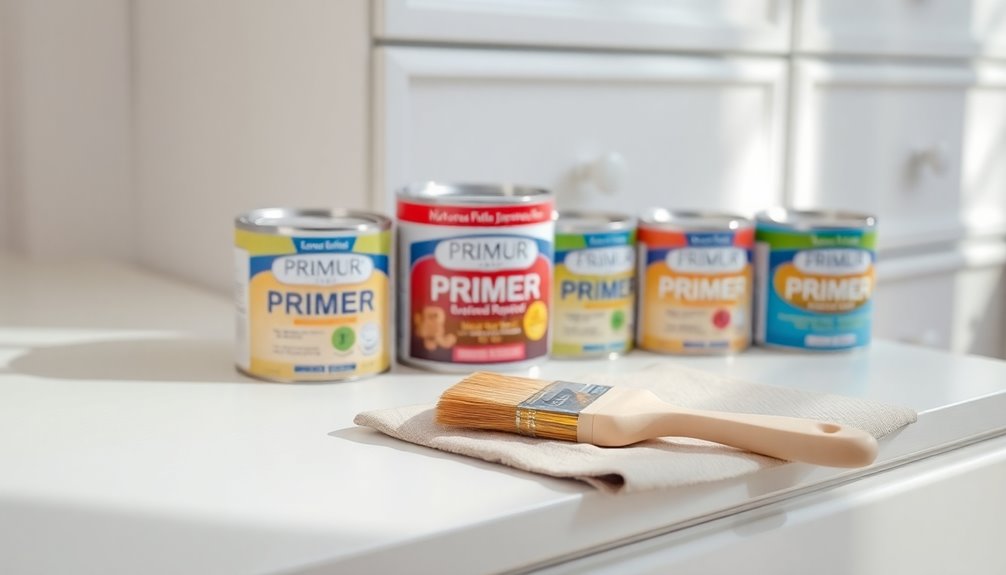
Choosing the right primer is essential for achieving a lasting finish on laminate furniture. You have several excellent options to consider based on your needs. Oil-based primers, like Kilz Original Primer, are a top choice for ensuring strong paint adhesion. They bond well to slick surfaces without requiring any sanding, but be sure to work in a well-ventilated area due to their strong fumes.
Another option is a shellac-based primer, such as BIN, which provides great adhesion and effectively blocks stains. While it's not needed for laminate, it's a solid choice if you're concerned about discoloration. Just remember to clean your brushes with denatured alcohol or ammonia afterward.
If you're looking for a more cost-effective approach, consider using chalk paint as a primer. Mixing latex primer with Plaster of Paris gives you a gritty surface that helps subsequent layers adhere without sanding.
Lastly, Isl-x Stix Primer is a durable alternative that bonds well to laminate and other materials, offering excellent scratch resistance. Whichever primer you choose, make sure it suits your project's requirements for the best results. Additionally, using a high-quality primer can significantly enhance the durability and finish of your painted laminate furniture.
Applying Primer Evenly
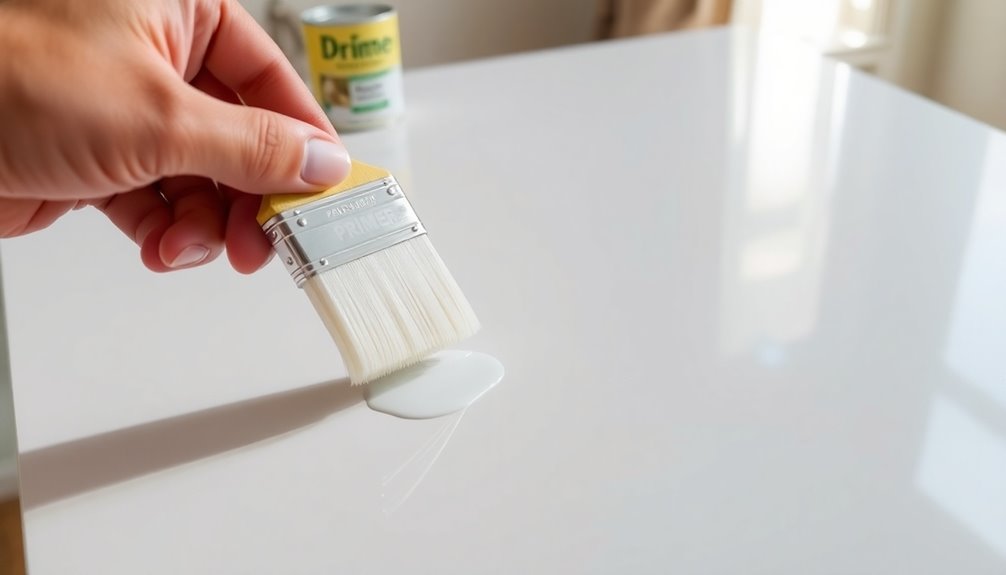
Once you've selected the right primer, applying it evenly is key to achieving a smooth finish on your laminate furniture. Start by thoroughly cleaning the surface to remove dirt and grime. Use a degreaser to eliminate any glossy finish and ensure the surface is free of dust. Don't forget to remove any hardware that might complicate your painting process.
For application, consider using a smooth roller for large areas and a foam roller to minimize splattering. If you're dealing with detailed sections, a high-quality synthetic brush works best. Make sure to mix the primer well, shaking the spray can thoroughly if that's your choice.
Apply at least two thin coats of primer, allowing each one to dry completely overnight for optimal adhesion. Applying multiple thin coats is essential to prevent drips and ensure even coverage. Work in sections to maintain even coverage and avoid drips. Use a paint tray for better control, and always apply with a light touch to prevent pooling. After the first coat, check for missed areas to ensure your base is as flawless as possible. Finally, let the primer set for a full 24 hours before moving on to the next step.
Selecting the Right Paint
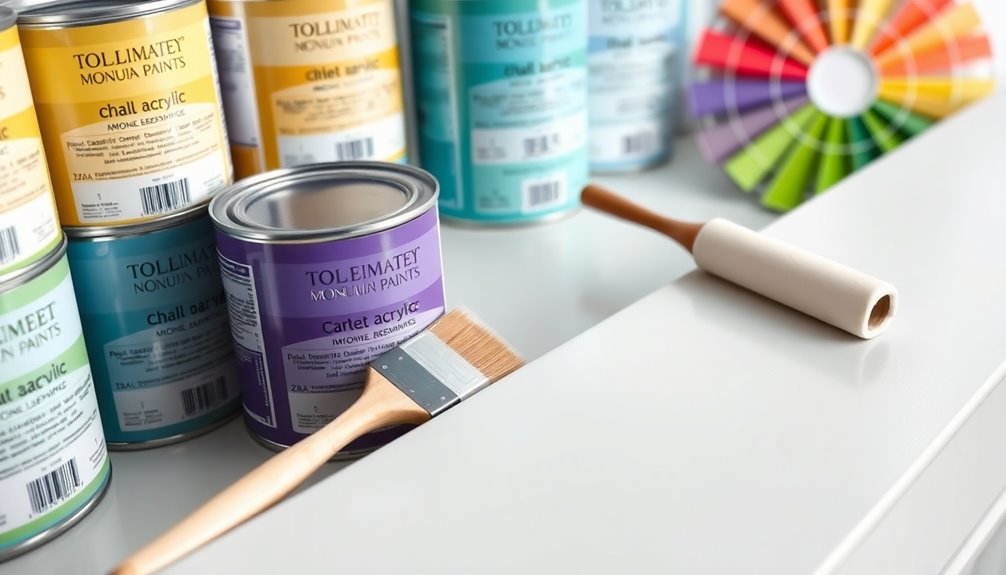
Selecting the right paint for your laminate furniture is crucial for achieving a durable and attractive finish. Start by choosing a topcoat that works well with your primer. Durable, water-based latex paint is a solid option, ensuring a smooth and lasting result. You might also consider acrylic-based paint, which provides good adhesion and durability. For an even tougher finish, waterborne alkyd enamel paint is another excellent choice. Additionally, using energy-efficient technology can help reduce the environmental impact of your painting project.
If you prefer a simpler approach, look into chalk paint. It can serve as both a primer and a topcoat, removing the need for additional products. Rust-Oleum Chalked is a popular brand that adheres well to laminate and offers a beautiful ultra-matte finish. Mixing latex primer with chalk paint ingredients can further enhance adhesion. Choosing the right primer is essential as it significantly impacts the paint's overall adhesion and longevity on laminate surfaces.
Painting Techniques and Tips
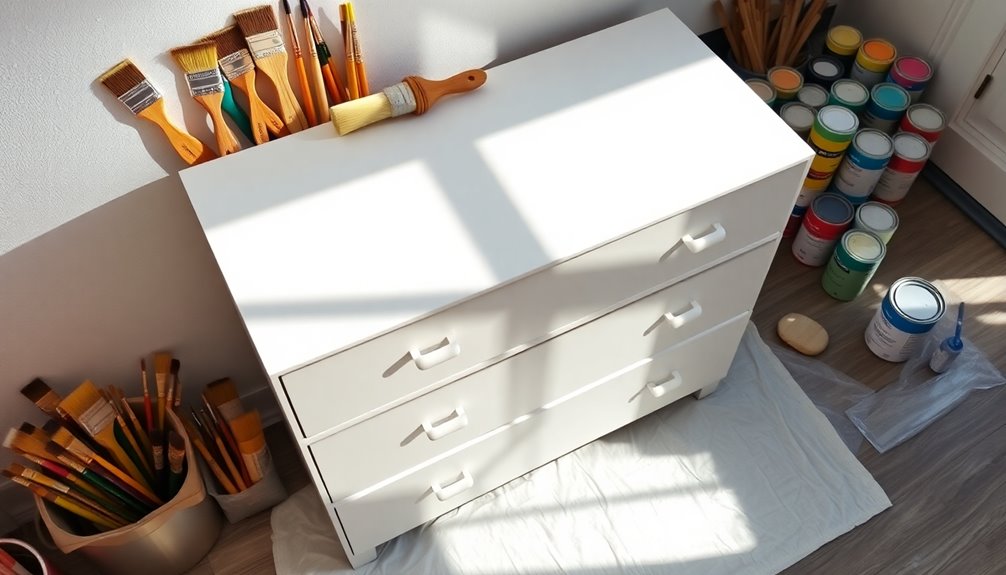
To achieve a professional-looking finish on your laminate furniture, mastering essential painting techniques is key. Start by thoroughly cleaning the surface with a wet rag or mild cleaner to remove any dirt and debris. If your furniture has been in storage or on display, use sugar soap to tackle grease and residue. Don't forget to remove any hardware that might complicate your painting process.
Next, consider using liquid sandpaper, like Klean Strip Liquid Sandpaper, to prepare the surface without traditional sanding. Follow the manufacturer's instructions for application, as this method creates a suitable surface for paint adhesion. Keep in mind that laminate furniture often requires special primers for optimal results.
Once prepped, apply a high-quality bonding primer designed for laminate. Use a synthetic bristle brush or foam roller for a smooth, even coat, and make sure the primer dries completely before moving on to paint.
When painting, apply latex paint in thin, even coats, allowing each coat to dry fully before adding another—waiting a day between coats yields the best results. Finish with a durable topcoat like Minwax Polycrylic to seal the paint and prevent peeling. Regular maintenance will help extend the life of your new finish.
Special Considerations for Laminate
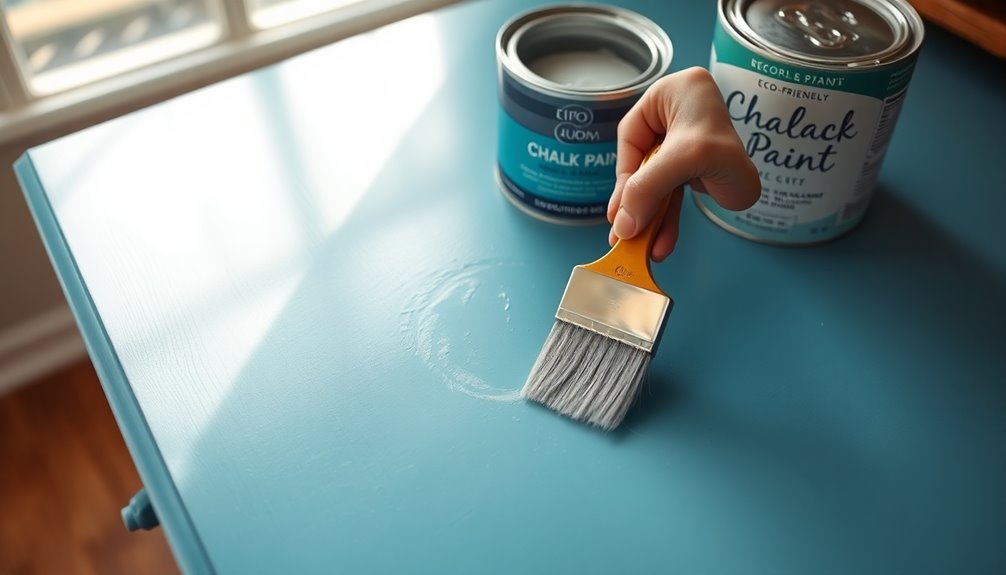
When working with laminate furniture, it's crucial to understand its unique properties to ensure a successful paint job. Start by using a shellac-based primer, as it's essential for proper adhesion to laminate surfaces. This primer dries quickly and effectively seals any stains or knots you may encounter. While you can achieve good results without sanding, lightly scuffing the surface with medium-grit sandpaper is recommended to enhance adhesion. Just be careful not to over-sand, as this could damage the laminate. Additionally, laminate's durability against scratches makes it an ideal choice for high-traffic areas, ensuring your painted furniture remains looking fresh longer.
After scuffing, make sure to clean the surface thoroughly to remove any dust or debris. For cleaning, a TSP substitute with scouring pads works well. When choosing paint, water-based options are easier to manage, but oil-based primers can improve adhesion. Chalk paint is an exception, allowing you to skip priming altogether. Keep an eye on humidity levels while painting, as lower humidity encourages better adhesion. Lastly, always ensure you're working in a well-ventilated space, especially if using oil-based products. These considerations will set you up for a successful and long-lasting finish on your laminate furniture.
Topcoat Options for Durability
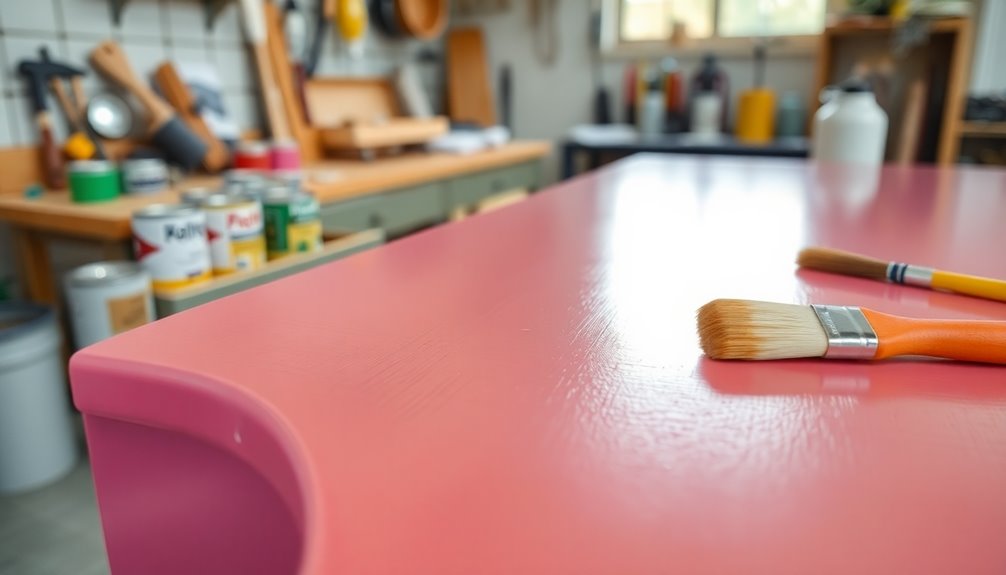
A durable topcoat is essential for protecting your newly painted laminate furniture and ensuring it withstands daily wear and tear. Two excellent options for topcoats are polyurethane and water-based finishes. Polyurethane provides a scrubbable surface that resists fingerprints and smudges. When applying, use a high-quality paint brush or sprayer to achieve an even finish, and make sure to stir the product thoroughly before use. Remember to apply thin layers to minimize bubbles and allow each layer to dry completely. Proper preparation is crucial for achieving the best results with your topcoat. Additionally, selecting a topcoat with energy-efficient options can help in reducing your overall product usage.
Water-based topcoats are particularly recommended for high-traffic areas like kitchens and bathrooms. They're more durable than wax and won't melt in the sun. Products like Minwax Polycrylic offer a clear finish that serves as a protective barrier, while General Finishes High-Performance Topcoat gives extra durability.
Regardless of the option you choose, always ensure good ventilation during application. Prioritize cleaning the laminate surface before topcoating to remove any dust. With proper application and care, your laminate furniture will remain beautiful and resilient for years to come.
Essential Tools and Materials
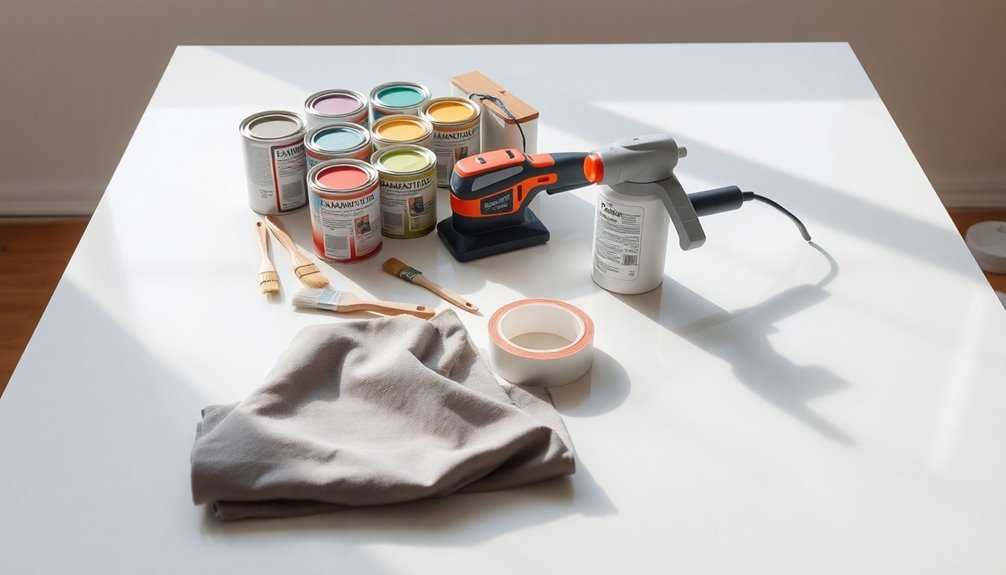
Before diving into painting your laminate furniture, gathering the right tools and materials is crucial for a successful project. Start with primers that adhere well to laminate surfaces. Zinsser BIN Shellac-Based Primer and Kilz Original Primer are excellent choices. If you prefer a chalk paint primer, consider one made from latex primer and Plaster of Paris. Additionally, using a specific primer is essential for ensuring the paint adheres properly to the laminate.
Next, you'll need the right painting tools. A small foam roller and a high-density 4″ foam roller work well for even application. Don't forget disposable foam brushes and a 1.5″ angled brush for corners and edges. A high-quality paintbrush or fine finish roller can enhance the final look.
Prepare your surfaces by cleaning them thoroughly. Use a cleaner like TSP for dirt and a degreaser or microfiber cloth for grime. Have tack cloths or lint-free rags handy for wiping down surfaces, and protect your area with drop cloths or old sheets.
Additional essentials include a respirator mask for safety, and optional tools like a Wagner Flexio 3000 Sprayer for a professional finish. Lastly, don't forget hardware removal tools, like a screwdriver, to make your work easier.
Safety Precautions While Painting
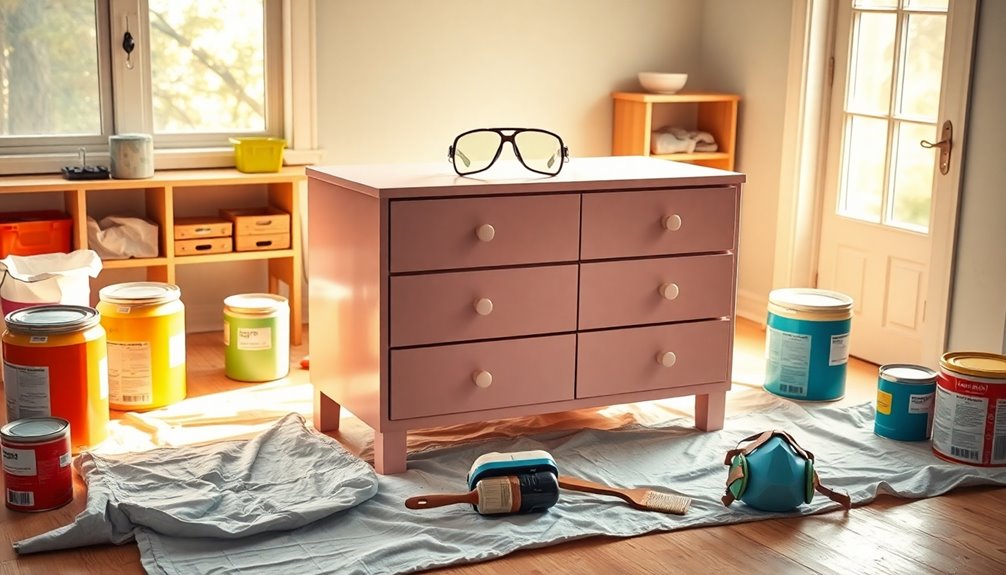
How can you ensure a safe painting experience? Start by painting in a well-ventilated area to avoid inhaling harmful fumes. Choose paints with low VOCs to improve air quality. Always wear gloves and safety glasses to protect your skin and eyes from splashes during the application process. When applying paint, use thin, even coats to minimize drips and ensure a smooth finish. Additionally, remember that painting laminate furniture is a viable option that avoids the challenges of removing laminate.
Next, take care of your work area. Cover it with a tarp or drop cloth to catch any spills. Remove flammable materials from the vicinity, and keep the area clutter-free to prevent accidents. Make sure the lighting is adequate, so you can see what you're doing clearly. It's also crucial to keep children and pets away from your painting space to avoid any mishaps.
Finally, be cautious of hot surfaces and open flames while painting. Store your materials safely, and always follow the instructions on your paint for the best results. By following these safety precautions, you can enjoy a successful painting project while minimizing risks.
Curing and Finishing Touches

Curing and finishing touches are essential steps in transforming your painted laminate furniture into a durable and attractive piece. Start by allowing the paint to dry completely, usually around 24 hours, but ensure it cures for days to months before heavy use. Low humidity will help speed up this process, while high humidity can delay it. During curing, avoid placing hot or sharp items directly on the surface and clean up spills immediately to protect the paint. Additionally, proper prep work is crucial to ensure that the paint adheres as effectively as possible during this process.
Next, apply a durable topcoat like Minwax Polycrylic Protective Finish to seal the paint and prevent peeling. Follow the manufacturer's instructions for application and drying times. Once the topcoat is fully dry, you can enhance your furniture with finishing details. Consider lining drawers with peel-and-stick wallpaper, painting hardware, or using spray paint for small details. Remember to clean and restore any original hardware before reattaching it.
Finally, ensure all finishing touches are completely dry and cured before using the furniture. Regular maintenance is crucial, so wipe up spills promptly, avoid extreme temperatures, and inspect for any signs of wear to ensure your revitalized piece lasts for years to come.
Frequently Asked Questions
Can I Skip Primer When Painting Laminate Furniture?
You might be tempted to skip primer when painting laminate furniture, but it's not a great idea. Without primer, paint often beads up or peels off, leaving you with a messy finish. If you want good adhesion and durability, using a primer is essential. However, chalk paint can act as both a primer and paint, allowing you to bypass traditional primers while still achieving decent results. Always clean the surface first for the best outcome!
How Long Does the Entire Process Take?
The entire process of painting furniture can take several days to a week. You'll spend a few hours on preparation, including cleaning and priming. Once you start painting, allow time for multiple coats, which could take another day. After that, applying a topcoat will take a few more hours. Finally, wait several days for everything to cure properly before using the furniture. Patience is key for a beautiful finish!
What Should I Do if Paint Peels Off?
If paint peels off, first assess the damage to see if you need a complete repaint or just touch-ups. Clean the area with an all-purpose cleaner and let it dry. Use a scraper to remove the peeling paint, then dull the glossy finish with medium grit sandpaper. Reapply primer and paint, ensuring each layer dries completely. To prevent future peeling, focus on thorough surface preparation and use high-quality products.
Can I Use Spray Paint on Laminate Furniture?
Yes, you can use spray paint on laminate furniture, but it's essential to pair it with the right primer for best results. Choose an oil-based primer to ensure good adhesion, and make sure to apply it evenly. Once the primer dries, spray paint your furniture in well-ventilated areas. Follow the manufacturer's instructions and consider multiple coats for complete coverage. With the right preparation, you'll achieve a smooth, attractive finish.
Is It Safe to Paint Indoors Without Ventilation?
No, it isn't safe to paint indoors without ventilation. You risk exposing yourself to harmful VOCs that can cause nausea, headaches, and respiratory issues. Make sure to open windows and use fans to keep the air flowing. If possible, ventilate the area for at least three days after painting to ensure any lingering fumes dissipate. Protect your health by creating a safe environment while you work on your projects.
Conclusion
By following these steps, you can easily transform your laminate furniture without the hassle of sanding. Just remember to prepare the surface, choose the right primer and paint, and apply everything evenly for a smooth finish. Don't skip the topcoat for added durability, and always prioritize safety while you work. With a little patience and creativity, you'll give your furniture a fresh look that lasts. Enjoy your revamped space and the satisfaction of a job well done!
Interior Design
How to Find Furniture Dupes
Optimize your search for stylish furniture dupes and uncover amazing finds that won’t break the bank; discover the secrets to savvy shopping!
To find furniture dupes, start by using online tools like Google Images and specialty sites such as Dupe.com. These platforms help you compare styles and prices, showcasing affordable alternatives that mimic high-end designs. Social media, especially Instagram and TikTok, is a goldmine for trendy recommendations. Don't forget to check local retailers like Target or online marketplaces like Wayfair for budget-friendly options. Always assess quality and materials to ensure durability. By getting savvy with your searching techniques, you'll discover many great options, and there's plenty more to explore if you keep looking.
Key Takeaways
- Utilize image search tools like Google Images and Google Lens to find visually similar furniture items at lower prices.
- Explore social media platforms like Instagram and TikTok for user-recommended furniture dupes using trending hashtags.
- Compare prices using websites like Dupe.com and Spoken.io to identify the best deals on similar furniture styles.
- Research customer reviews and blogs to assess the quality and durability of potential furniture dupes before making a purchase.
- Consider local retailers and online marketplaces like Wayfair and IKEA for budget-friendly alternatives to high-end furniture designs.
Understanding Furniture Dupes
Understanding furniture dupes can transform your shopping experience by making stylish designs more accessible. A furniture dupe is a product that closely imitates the design and aesthetic of a more expensive item, allowing you to achieve high-end looks without breaking the bank. These alternatives cater to those who want stylish furniture but either can't afford the originals or prefer not to spend a fortune.
When exploring dupes, remember they vary in quality, materials, and price. You'll find some that closely resemble the luxury item, while others may differ significantly. It's essential to consider the appearance, cost, and quality of the dupe. Look for pieces that mimic the original design, but keep in mind that cheaper materials might affect durability. Some dupes may even exceed the quality of the originals, so it's worthwhile to do thorough research before making a purchase.
You should also check reviews to gauge the quality and performance of potential dupes. Understanding the difference between dupes and white-labeled furniture is crucial, as dupes offer independent alternatives rather than slight variations of the same product. By being informed, you can make smart purchasing decisions and enjoy fashionable furniture without overspending.
Online Search Techniques
Finding the right furniture dupes can be a game-changer in your quest for stylish home decor. Start by utilizing online image searches. Tools like Google Images let you upload a photo of the furniture you desire, helping you find visually similar items. You can also use Spoken's Search by Image feature to discover duplicate furniture pieces across various retailers. Just upload images from magazines or Instagram to kick off your search.
Another effective technique is using URLs and product links. Simply copy and paste the URL of your desired item into Spoken's Search by URL feature. This will scan multiple retailers for similar, more affordable alternatives, allowing you to compare prices and styles with ease. Dupes may vary in materials and craftsmanship, affecting quality and durability, which is an important consideration when exploring options.
Don't forget the power of social media and blogs. Follow influencers on platforms like Instagram and TikTok, and use hashtags like #affordablefurniture to uncover budget-friendly options. Engage with online communities to share and discover user-recommended dupes.
Finally, utilize comparison shopping tools to find and compare prices across various retailers, ensuring you snag the best deals available. Happy hunting!
Recommended Tools and Websites
When it comes to discovering furniture dupes, a variety of dedicated tools and websites can simplify your search. Start with Dupe.com, where you can modify the URL of your desired item to find visually similar replicas at a fraction of the cost. Spoken.io lets you search by image or URL, helping you compare prices and styles across multiple retailers. Additionally, employing a growth mindset can enhance your ability to find creative alternatives that fit your budget.
For a broader scope, check out Houzz, featuring articles on high-end dupes, or use Google Lens to upload images and find similar items online. When browsing, consider using Spoken's browser extension to snag the best deals effortlessly. This reflects the growing trend of dupe culture, where consumers seek affordable alternatives to luxury items.
Social media is also invaluable. On Instagram and TikTok, follow influencers who showcase affordable furniture alternatives using hashtags like #furnituredupes. Pinterest is perfect for discovering and saving dupes shared by others.
Lastly, don't forget comparison tools like Google Shopping, PriceGrabber, and Shopzilla, which help you find the best prices. By utilizing these resources, you'll make your hunt for stylish yet affordable furniture much more manageable.
Best Shopping Platforms
As you explore tools and websites for discovering furniture dupes, knowing where to shop is just as important. Online marketplaces like Wayfair and Overstock provide a vast selection of affordable alternatives to high-end pieces. AllModern specializes in modern dupes, while Amazon offers competitive pricing and customer reviews for a variety of options. Don't overlook IKEA, which is famous for its budget-friendly furniture that can mimic pricier designs. Utilizing reverse image search can also help you find similar products based on shape, color, and style.
Social media platforms are invaluable too. On Instagram and TikTok, influencers showcase trendy dupes with hashtags like #furnituredupes, making it easy to find inspiration. Pinterest is another great resource for discovering and saving images of dupes.
Dedicated furniture websites like Spoken, Google Shopping, and PriceGrabber help you compare prices and find visually similar alternatives. Retail stores, especially big box chains like Target, often carry budget-friendly versions of high-end furniture. Local stores can also surprise you with unique finds.
Key Factors to Consider
Considering key factors is essential for successfully finding furniture dupes that not only look great but also fit your budget and quality standards. Start with the appearance; ensure the materials and colors closely match the original piece. Check photos and read reviews to confirm that the dupe aligns with your desired aesthetic and design style.
Next, evaluate the cost. Compare prices across various retailers to uncover the best deal, but be wary of lower prices that may compromise quality. Use price comparison tools like Spoken or Google Shopping to make informed decisions.
Quality is another critical factor. Investigate the materials, such as solid wood or durable fabrics, and review the construction methods used. Look for signs of quality like smooth finishes and solid metal hardware, as authentic products often feature superior quality and durability that ensure longevity.
Finally, conduct thorough research and verification. Utilize online image searches and dedicated dupe blogs for recommendations. Check social media for user reviews and consider ordering samples to ensure the piece meets your expectations in color and texture. By focusing on these key factors, you'll be well-equipped to find beautiful, budget-friendly furniture dupes.
Dupes vs. White-Labeled Furniture
Navigating the world of furniture shopping can be overwhelming, especially when distinguishing between dupes and white-labeled furniture. Dupes are designed to mimic the look and feel of more expensive items, offering similar styles at lower price points. While they aren't identical copies, they may vary in materials and craftsmanship. You can find dupes through image searches, social media, or dedicated websites.
On the other hand, white-labeled furniture consists of identical items sold under different brand names. These products maintain consistent quality, regardless of the retailer. With over 71% of furniture being white-labeled, it's common to see the same item priced differently at various stores. This means you can save significantly by comparing prices.
To find dupes, look for user recommendations on platforms like Instagram and Pinterest, and check blogs for expert tips. For white-labeled furniture, utilize price comparison tools and pay attention to product details to ensure you're getting the same item. Understanding these differences will help you make informed decisions, allowing you to furnish your space without breaking the bank.
Popular Dupes to Explore
Finding the right furniture dupe can elevate your space without emptying your wallet. If you're on the hunt for stylish yet affordable options, start with Amazon. You can find a wide range of dupes, from the Eames Lounge Chair to the Arco Floor Lamp, all at significantly lower prices. Plus, customer reviews and photos help you make informed choices. Amazon offers a variety of chic furniture pieces at competitive prices, making it an excellent starting point for your search.
Another great platform is Spoken, which offers unique features like Search by Image and Search by URL. Here, you can upload images or paste links to find similar items, ensuring you snag the best deals across multiple retailers. Their browser extension is a handy tool for discovering dupes.
Don't overlook Google Images or other search tools, as they let you upload photos to find visually similar pieces. Sites like dupe.for provide affordable alternatives, while Google Lens can assist in identifying cheaper versions of specific items.
Finally, dive into social media platforms like TikTok, Instagram, and Pinterest. By following hashtags like #affordablefurniture, you'll uncover trending dupes and budget-friendly finds recommended by influencers and fellow users.
Tips for Smart Shopping
Smart shopping involves setting a realistic budget and sticking to it, ensuring you can make the most of your furniture investments. Start by determining the maximum amount you're willing to spend on each piece. Prioritize essential items to avoid impulse buying, and remember to factor in long-term value and durability. Adjust your budget based on sales, promotions, and clearance events to make your money stretch further.
Next, research and compare prices before making a purchase. Use online comparison websites and apps to find the best deals, and don't hesitate to visit multiple stores both online and in-person. Tools like Google Images and Google Lens can help with visual searches to identify the best options. Additionally, consider using your budget as a guide for decision-making throughout the process to ensure you stay on track.
Explore alternative options as well. Check out secondhand furniture from thrift stores or online marketplaces for unique finds. Consider multi-functional furniture and timeless designs that can adapt to changing trends. Don't forget to negotiate prices, especially when buying multiple items or floor models, and inquire about price matching policies. Take advantage of loyalty programs and discounts on slightly damaged pieces for additional savings.
Frequently Asked Questions
Are Furniture Dupes Worth the Investment?
When considering if furniture dupes are worth the investment, you should weigh cost against quality. Dupes can save you money while still achieving a stylish look, but they might not always last as long as luxury pieces. Make sure you read reviews and check materials to ensure you're getting a good deal. If you're on a budget or experimenting with design, dupes can be a practical choice that fits your needs without breaking the bank.
How Do I Spot a High-Quality Dupe?
To spot a high-quality dupe, start by examining the materials used. Look for detailed photos that showcase color and texture, ensuring they match the original piece. Read reviews to gauge durability and craftsmanship, and check for any warranties. Compare prices across retailers to find the best value while keeping quality in mind. Finally, consider seeking recommendations from friends or experts to ensure you're making a well-informed choice.
Can I Return Furniture Dupes if Unsatisfied?
Yes, you can usually return furniture if you're unsatisfied, but it depends on the retailer's policies. Most have a 30-day return window, requiring items to be in as-new condition with original packaging. Keep in mind, return shipping fees may apply, and restocking fees could be deducted from your refund. Always check the specific return guidelines for the retailer before making a purchase to avoid any surprises later.
Do Dupes Have Warranties Like Original Furniture?
Dupes often don't have warranties like original furniture. You'll find that many duplicates come with shorter warranty periods, sometimes just a year or less. Coverage can be limited, focusing on specific defects or materials. Some retailers might offer in-house warranties, but these can vary widely. If you're considering dupes, always check the warranty details and compare them to the originals to ensure you know what protection you're getting.
Are There Eco-Friendly Dupes Available?
Yes, there are plenty of eco-friendly dupes available! You can find furniture made from sustainable materials like reclaimed wood, bamboo, and organic cotton. Check out online marketplaces or social media platforms for user-recommended options. Look for brands that prioritize sustainability, like Burrow or Greenington, and always verify certifications like FSC. By choosing these alternatives, you'll not only save money but also contribute to a healthier planet.
Conclusion
Finding furniture dupes can transform your space without breaking the bank. By using online search techniques and exploring recommended tools and websites, you can discover stylish alternatives that fit your budget. Remember to consider key factors like quality and style, and distinguish between dupes and white-labeled options. With smart shopping tips in mind, you're ready to uncover the perfect pieces that'll elevate your home décor while saving you money. Happy hunting!
Interior Design
The Timeless Beauty of Spanish Stucco
Find out how Spanish stucco’s rich history and stunning aesthetics create an inviting atmosphere that captivates modern and traditional homes alike.
Spanish stucco captivates with its deep-rooted history and breathtaking aesthetics. You will admire how the warm, earthy tones and textured surfaces create a cozy ambiance. Authentic arches and rich wooden details bring depth and sophistication to your living space. Each finish narrates a story of skilled artistry, embracing the cultural blend of various architectural designs. Whether in the sun-drenched South of Spain or lively coastal areas, Spanish stucco effortlessly blends in, mirroring its environment. Its resilience makes it a classic option for both contemporary and classic residences. Uncover the mysteries that make this style timeless and attractive in today’s architectural world.
Key Takeaways
- Spanish stucco features distinctive design elements such as true arches and barrel tiles, enhancing its elegant aesthetic.
- The earthy color palette, including terracotta and creamy whites, creates a warm and inviting atmosphere.
- Various textured finishes, achieved through traditional techniques, showcase exceptional craftsmanship and authenticity.
- Its historical significance reflects a rich cultural fusion from ancient Rome to Spanish colonial architecture.
- Regular maintenance ensures the longevity of Spanish stucco, preserving its timeless beauty for generations.
Characteristics of Spanish Stucco
When you first encounter Spanish stucco, its distinctive design elements immediately draw you in. The barrel or S-shaped reddish roof tiles create a striking silhouette against the sky, while true arches on windows and doors enhance both tradition and elegance.
You'll notice how dark colors, like black oil-rubbed bronze, contrast beautifully with light stucco walls, adding depth and sophistication. Gable vents and various stucco textures enrich the authenticity of the style, showcasing meticulous attention to detail that enhances visual appeal.
Reddish roof tiles complement the walls perfectly, while dark window colors create striking contrasts. Together, these elements evoke a sense of warmth and history, making Spanish stucco a timeless choice for any architectural design.
Earthy Color Palette
The warm, earthy color palette of Spanish stucco plays an essential role in creating an inviting atmosphere. The rustic tones of terracotta, ochre, and sienna effortlessly blend to evoke a sense of timeless charm and comfort. Complemented by soft lighting and natural textures, this style provides endless inspiration for cozy winter escape ideas that transform any space into a retreat from the chill. Whether accented with lush greenery or layered with warm textiles, Spanish stucco invites relaxation year-round.
You'll find hues like terracotta, beige, and creamy whites that beautifully echo the natural tones of Spanish landscapes. These colors evoke warmth and welcome, complementing traditional terracotta roof tiles and wooden accents.
Earth tones such as ochre and soft browns enhance the home's connection to the environment. You can also incorporate brighter colors like turquoise and yellow to reflect regional influences, adding a vibrant touch to your space.
White stucco symbolizes purity and is common in Mediterranean designs, while natural pigments derived from minerals enrich the color's vibrancy, making your home feel both timeless and alive.
Textured Finish Techniques
With a range of textured finish techniques, Spanish stucco adds depth and character to your home's exterior. You can explore various finishes like smooth surfaces, sand textures, and intricate lace patterns. Each option contributes to the unique charm of your walls.
Traditional methods, such as hand-troweling and layering, create authentic textures, while lime-based stucco offers breathability and flexibility. If you're looking for durability, modern techniques may include synthetic additives, ensuring your stucco withstands the test of time.
You can choose to integrate color during the mixing process or apply it as a final coat for a stunning effect. Whichever technique you select, your home will surely reflect the timeless beauty of Spanish stucco.
Historical Significance
Building on the textured finishes that define Spanish stucco, understanding its historical significance reveals how this architectural choice has evolved over centuries.
Originating in ancient Rome, stucco gained prominence during the 16th century in Spanish colonial architecture, embracing cultural influences from Moorish, Renaissance, and Baroque styles.
As you explore traditional Spanish architecture, you'll notice how textured stucco walls, often adorned with true arches and dark wood accents, create an authentic aesthetic.
This architectural element not only showcases craftsmanship but also tells a story of cultural fusion and adaptation.
Traditional Architectural Features
When you step into a traditional Spanish architectural space, the distinctive features immediately draw you in, reflecting a rich cultural heritage.
You'll notice the elegant true arches that frame windows and doors, inviting natural light while enhancing the aesthetic. The reddish barrel tiles on the roof create a striking contrast against the light-colored stucco walls, drawing your eye upward.
Dark wood accents provide warmth and depth, while gable vents add both function and charm. Each textured stucco finish tells a story, showcasing meticulous craftsmanship.
You can't help but appreciate the darker tones used for windows and doors, which emphasize the overall design. These traditional elements come together to create an inviting atmosphere that truly embodies the beauty of Spanish architecture.
Regional Variations
Regional variations in Spanish stucco reflect the diverse landscapes and cultural influences across different areas.
In southern Spain, you'll notice warmer hues that mirror the sun-baked earth, while coastal regions often opt for lighter shades to maximize sunlight reflection.
Urban settings may embrace bolder colors, adding a vibrant touch, while rural designs typically favor muted tones that harmonize with nature.
Each region's unique climate and environment shape these choices, showcasing the adaptability of stucco.
You might find terracotta accents in traditional homes, which pair beautifully with earthy stucco finishes.
This diversity enriches the aesthetic appeal, making Spanish stucco not just a building material, but a reflection of the culture and character of its surroundings.
Maintenance and Preservation
Proper maintenance and preservation of Spanish stucco is essential to guarantee its longevity and aesthetic appeal. You should inspect your stucco regularly for cracks or fading, addressing any issues promptly to prevent further damage.
Repainting every 5-10 years is vital, especially in harsh climates. Use environmentally-friendly paints that honor traditional colors and textures. To maintain the unique character, make certain any restoration techniques match the original materials, following historic preservation guidelines.
Additionally, keep your stucco clean by washing it gently with water and mild detergent to remove dirt and grime. This will preserve its beauty and charm.
Frequently Asked Questions
What Are the Benefits of Using Stucco Over Other Siding Materials?
Using stucco offers durability and low maintenance compared to other siding materials. Its energy efficiency keeps your home comfortable, while the unique textures and colors enhance curb appeal, giving your property a distinct aesthetic charm.
Can Stucco Be Used in Modern Architectural Designs?
Yes, you can absolutely use stucco in modern architectural designs. Its versatility allows for various textures and colors, adding depth and character while maintaining a contemporary aesthetic that complements other materials beautifully.
How Does Stucco Perform in Different Weather Conditions?
You might be surprised to learn that stucco excels in various weather conditions. Its breathability prevents moisture buildup, while durability withstands harsh climates, making it an adaptable choice for both hot and cold environments.
What Is the Cost Comparison Between Stucco and Other Exterior Finishes?
When comparing costs, stucco tends to be more affordable than brick or stone but can be pricier than vinyl siding. You'll appreciate its durability and low maintenance, making it a worthwhile investment in the long run.
Are There Eco-Friendly Stucco Options Available on the Market?
Yes, there are eco-friendly stucco options available. You can choose lime-based stucco or synthetic alternatives that incorporate recycled materials. These options reduce environmental impact while providing durability and breathability, perfect for sustainable building practices.
Conclusion
In embracing Spanish stucco, you're not just enhancing your home; you're celebrating history, savoring beauty, and inviting warmth. With its earthy colors, textured finishes, and timeless charm, this architectural style transforms spaces into serene sanctuaries. Whether you're captivated by its rich heritage or drawn to its unique character, Spanish stucco offers a connection to the past while enriching your present. So go ahead, infuse your living space with this enchanting elegance and let your home tell a story.
Interior Design
How to Take Apart Recliner Sofa
Join us as we explore the essential steps to disassemble your recliner sofa effortlessly, ensuring you don’t miss crucial tips for reassembly.
Taking apart a recliner sofa isn't too tricky if you follow some steps. Start by removing any cushions and checking for screws or bolts that secure the frame. Make sure to tighten any loose connections before disassembly for stability. Next, gently separate the reclining mechanism from the frame; it usually slides out. If your sofa has armrests, they may need unscrewing as well. Keep track of all parts and bolts for reassembly. Finally, take care not to damage the upholstery or frame during the process. Want tips on maintaining your sofa's condition after disassembly? You'll find plenty of helpful advice.
Key Takeaways
- Review the warranty terms to avoid voiding coverage during disassembly.
- Document the disassembly process to support future warranty claims.
- Remove cushions and any detachable components before proceeding.
- Unscrew and detach the reclining mechanism from the frame carefully.
- Minimize friction on joints to maintain structural integrity during disassembly.
Introduction
When you take apart your recliner sofa, it's a great opportunity to give the upholstery some care. You'll want to use fabric-specific cleaning techniques to tackle any stains, especially if you've dealt with wine spills or pet accidents. Keeping your sofa in top shape will make the reassembly process even more rewarding.
Routine Upholstery Care Tips
Your recliner sofa is a centerpiece in your living space, so keeping it looking great requires regular care. To start, make sure you regularly vacuum your sofa using an upholstery attachment. This will help you remove dust, dirt, and debris that can accumulate in the fabric and seams. If you encounter any stains, promptly blot the area with a clean, damp cloth and use a mild fabric cleaner to avoid setting the stain or damaging the upholstery.
Additionally, it's a good idea to rotate and fluff the cushions periodically. This practice helps maintain their shape and prevents uneven wear over time. You should also be mindful of where you place your recliner. Keeping it away from direct sunlight is crucial, as this prevents fading and damage to the upholstery material.
Finally, don't forget to check and tighten any loose screws or mechanisms regularly. This ensures the recliner functions properly and maintains its structural integrity. By following these routine upholstery care tips, you can prolong the life of your recliner sofa and keep it looking as good as new for years to come.
Fabric-Specific Cleaning Techniques
Understanding the specific cleaning techniques for different fabric types is essential for maintaining your recliner sofa's appearance and longevity. Fabrics like microfiber, leather, and cotton each require unique care. For example, you can clean microfiber with a damp cloth, but leather needs special leather cleaner to prevent damage. Always check the manufacturer's cleaning code on your sofa's tag to know the appropriate methods and products.
When it comes to stains, act quickly. Use a blotting technique rather than rubbing, as rubbing can cause the stain to spread or embed deeper into the fabric. Regular vacuuming is crucial; it helps maintain fabric integrity and prevents dirt buildup. Make it a habit to vacuum your sofa to keep it looking fresh and clean.
If you need to use a cleaning solution, always test it on a hidden area of the fabric first. This ensures there's no adverse reaction or discoloration before applying it to the visible areas. By following these fabric-specific cleaning techniques, you'll keep your recliner sofa in top shape for years to come.
Tackling Wine and Pet Urine
Dealing with wine and pet urine stains can be daunting, but quick action makes all the difference. When you spot a wine stain on your upholstery, act quickly by blotting the area with a clean cloth. This helps absorb excess liquid before you apply a cleaning solution—a mixture of water and dish soap works effectively to lift the stain away. Remember, avoid rubbing the fabric; it can spread the stain and damage the fibers. Instead, gently dab the area.
For pet urine odors, an enzymatic cleaner specifically designed to break down urine components is your best bet. It not only tackles the stains but also neutralizes lingering smells. Just like with wine, always test your cleaning solution on a hidden area of the fabric first to ensure it won't cause discoloration or further damage.
Regular maintenance is key, too. Vacuuming your upholstery and using fabric protectants can help prevent stains from setting in, making future clean-ups much easier. By following these steps, you'll keep your recliner sofa looking fresh and clean!
Avoiding Direct Sunlight
When you take apart your recliner sofa, keeping it out of direct sunlight is crucial for protecting its materials. Consider using water-resistant fabric options or stylish throws to shield the upholstery from UV rays, which can weaken and fade it. Additionally, minimizing friction on joints during disassembly can help maintain the sofa's integrity while avoiding sun exposure.
Water-Resistant Fabric Options
Choosing water-resistant fabric options for your recliner sofa can enhance both comfort and durability, especially if you take care to avoid direct sunlight. Fabrics like treated polyester, vinyl, and acrylic are designed to repel moisture and prevent stains, making them ideal for homes with kids or pets. By selecting a water-resistant fabric, you significantly reduce maintenance costs since these materials are easier to clean and less prone to damage from spills.
However, it's crucial to keep your water-resistant recliner out of direct sunlight. Prolonged exposure to UV rays can degrade the fabric over time, leading to fading and a loss of those valuable water-resistant properties. Many manufacturers now offer breathable options, ensuring you enjoy comfort while maintaining protection against moisture.
To keep your recliner in top shape, regular cleaning is essential. Apply protective sprays periodically to maintain the water-resistant qualities, which can extend the lifespan of your sofa. By taking these steps, you can enjoy a stylish and functional recliner sofa that withstands the test of time and wear.
Protect With Stylish Throws
Your recliner sofa deserves protection from the damaging effects of direct sunlight, and stylish throws can provide just that. By draping your sofa with UV-protective throws, you not only shield it from harmful rays that cause fabric fading and deterioration, but you also elevate its aesthetic appeal. Opt for durable, fade-resistant materials to ensure your throws maintain their color and quality, even with prolonged exposure to sunlight.
To keep your stylish throws looking fresh, make it a habit to rotate and wash them regularly. This practice will help prevent any sunlight-related wear from becoming evident. Additionally, consider layering throws with varying textures or patterns; this not only adds a fashionable touch but also enhances the overall decor of your home.
Incorporating these protective measures will give your recliner sofa an extra layer of defense while allowing you to express your personal style. So, don't overlook the importance of stylish throws; they're a simple yet effective way to protect your investment and keep your living space looking great.
Minimize Friction on Joints
How can you ensure the longevity of your recliner sofa's joints during disassembly? First, pay attention to the environment where you're working. Avoid exposing the joints to direct sunlight, as prolonged heat can warp or weaken materials over time. Keeping your disassembled parts in a cool, dry place is essential for preserving their integrity.
Next, use a silicone-based lubricant to minimize friction on the joints. This step is crucial for ensuring smooth movement as you take apart and later reassemble your sofa. Regularly inspect the joints for any signs of wear or damage caused by friction, since neglecting this can lead to premature failure of the reclining mechanism.
Additionally, consider using felt pads or furniture sliders on the joints. These tools further reduce friction and protect the sofa's components during handling. By taking these precautions, you'll not only make the disassembly process easier but also extend the life of your recliner sofa. Prioritizing these steps helps maintain the quality of your furniture, ensuring it remains functional and beautiful for years to come.
Regular Joint Lubrication
Regular joint lubrication isn't just about keeping your recliner sofa quiet; it also helps prevent joint alignment problems and can even revive worn leather surfaces. By ensuring smooth movement, you can avoid stressing the couch's structure, which might lead to more significant issues down the line. Plus, with properly maintained joints, you'll make it easier to access and replace cushion foam when needed.
Joint Alignment Problems
Maintaining the joints of your recliner sofa is crucial for ensuring smooth operation and preventing alignment problems. Regular lubrication of these joints stops stiffness from creeping in, which can lead to misalignment over time. When you use a silicone-based lubricant or a similar product designed for furniture, you help reduce friction and wear on the moving parts, promoting longevity.
It's a good idea to inspect and lubricate the joints every six months. Pay special attention to pivot points and areas where metal meets metal, as these spots are most vulnerable to wear and misalignment. If your recliner starts making excessive noise or you notice difficulty in the reclining mechanisms, it's a clear sign that the joints need immediate lubrication or adjustment.
Ignoring these issues can lead to significant damage down the line. By staying proactive with maintenance, you can ensure optimal performance and extend the lifespan of your recliner sofa. Remember, a little lubrication goes a long way in maintaining proper joint alignment and keeping your recliner functioning smoothly.
Reviving Worn Leather Surfaces
Reviving worn leather surfaces on your recliner sofa can breathe new life into its appearance and comfort. One key aspect of this process is regular lubrication of the joints. By using a silicone-based lubricant or a leather conditioner that includes conditioning agents, you can nourish the leather while protecting the moving parts. This maintenance helps prevent friction and wear, ensuring smooth operation and extending the life of your recliner.
When applying lubrication, do it sparingly to avoid excess buildup, which can attract dust and debris. Focus on key joint areas, particularly where the recliner mechanism connects to the frame. This targeted approach not only promotes optimal movement but also prevents annoying creaking or sticking.
It's advisable to perform this maintenance every six months. Consistent lubrication keeps your recliner in good working order, enhancing your overall comfort. By taking the time to care for both the leather and the joints, you'll ensure that your recliner sofa looks great and functions smoothly for years to come. So, grab your leather conditioner or lubricant, and give your recliner the attention it deserves!
Cushion Foam Replacement
To keep your recliner sofa comfortable and supportive, it's essential to inspect the cushion foam periodically for wear and tear. If you notice any damage, you should replace the foam to maintain the sofa's usability. Opt for high-density foam, ideally at least 1.8 pounds per cubic foot, to ensure long-lasting comfort.
When replacing the cushion foam, consider adding a layer of memory foam on top for enhanced comfort and pressure relief. This combination not only improves the overall feel but also prolongs the life of your sofa.
Additionally, don't forget about the joints and reclining mechanisms. Lubricate them with a silicone-based spray or lithium grease every six months to prevent squeaking and ensure smooth operation. Regular lubrication is vital for the overall function of your recliner, and it keeps everything in good shape.
Always follow the manufacturer's guidelines for both cushion foam replacement and lubrication. This helps you avoid voiding warranties or compromising the integrity of your sofa. By staying proactive about these maintenance tasks, you'll keep your recliner sofa feeling like new for years to come.
Reinforcing Frame Stability
When disassembling a recliner sofa, reinforcing frame stability is crucial to ensure a solid structure during and after the process. Start by tightening all screws and bolts connecting the frame components. This step prevents wobbling or damage while you work. As you take apart the sofa, keep an eye out for any loose joints. If you find any, use wood glue or corner braces to enhance the overall structural integrity of the frame.
If your recliner has a reclining mechanism, inspect it for wear or looseness that could compromise stability. Repair or replace any worn parts as needed. Additionally, consider adding reinforcing plates or support brackets in high-stress areas to prevent future instability after reassembly.
Once you've disassembled the sofa, store the frame components carefully. Avoid placing any pressure or weight on the joints, as this can compromise their structural integrity. By taking these precautions, you'll ensure that the recliner sofa remains sturdy and reliable once you put it back together, allowing you to enjoy it for years to come.
Extended Warranty Considerations
Before you start disassembling your recliner sofa, it's essential to understand how your extended warranty might be affected. Extended warranties typically cover defects in materials and workmanship, but they often exclude damage caused by improper disassembly or moving. To avoid losing coverage, review the warranty terms carefully. Some warranties may void protection if you take apart the sofa yourself.
Many extended warranties require you to use authorized service providers for repairs. If you attempt the disassembly process without professional guidance, you could jeopardize any future warranty claims. It's crucial to keep this in mind to ensure you don't accidentally breach the terms of your warranty.
Additionally, if you do need to make a claim, be prepared to provide proof of purchase and possibly documentation of how you disassembled the sofa. This can help confirm you adhered to any warranty guidelines. Before taking apart your recliner sofa, it's wise to consult your warranty provider. They can clarify any specific instructions or recommendations, helping you avoid unintentional violations of the warranty terms that could lead to costly repairs down the line.
Conclusion
Understanding your warranty is just the first step in successfully taking apart your recliner sofa. It's essential to follow the right steps to ensure you don't damage any components. Start by checking for detachable backs, often secured with Velcro or clips. This can take some patience, but it's crucial for a smooth disassembly. Before you begin, remember to unplug any electrical wires connected to powered reclining mechanisms to avoid damage.
Every time you remove the backs, be prepared for dust and debris to fall out, so having a vacuum handy is a smart idea. Once the backs are off, assess the weight distribution of the remaining parts. This will help you maintain control and prevent injury while moving them.
One thing you should always do is inspect the disassembled parts for any damage before and after the process. This ensures your recliner sofa is still going strong for years to come. By following these steps carefully, you can take apart your recliner sofa efficiently and maintain its integrity, allowing you to enjoy it for many more comfortable moments.
Frequently Asked Questions
How Do You Take Apart a Reclining Sofa for Moving?
To take apart a reclining sofa for moving, start by unplugging any electrical components. Next, locate the detachable backs, removing them carefully, as they might be secured with Velcro or clips. It's helpful to have a friend assist you in lifting and maneuvering the sofa to maintain balance. Before you start, measure doorways and obstacles to find the best angles for disassembly. Finally, check for any damage once the sofa is apart.
Do All Reclining Sofas Come Apart?
Not all reclining sofas come apart. Some models are designed as fixed pieces, meaning they can't be disassembled. However, many traditional sofas have removable backs, which you can detach for easier moving. If you've got a modular design, you'll find sections that can be separated. For electric models, remember to unplug any components first. Always check the manufacturer's guidelines to see if your specific sofa can be taken apart safely.
Can a Recliner Sofa Be Dismantled?
Yes, a recliner sofa can usually be dismantled. You'll often find that the backs are detachable, secured with clips or Velcro. Before you start, make sure to unplug any electrical connections to avoid hazards. As you remove the backs, be prepared for some dust and debris to fall out. Lift each section carefully to maintain balance, and check for any damage before and after disassembly to ensure everything's in good shape.
Can You Take a Recliner Apart to Move It?
Yes, you can take a recliner apart to move it. Many recliners have detachable parts, which makes the process easier. Start by checking for any clips or Velcro that secure the back. Before you begin, unplug any electrical components to avoid hazards. As you dismantle, be ready for dust and debris to fall out. Remember to assess the weight distribution to lift safely and prevent injury or damage during the move.
-
Beauty and Grooming1 month ago
Embrace Natural Glow With Bronzer-Free Accelerators
-
Beauty and Grooming1 month ago
Discover Top Outdoor Tanning Lotions Today
-
Vetted2 months ago
15 Best Affordable Sustainable Fashion Brands You Need to Know About in 2025
-
Fashion Trends2 months ago
Fall 2025 Fashion Trends: Be Ahead of the Curve!
-
Interior Design2 weeks ago
Mylar vs. Foil Balloons: The Ultimate Showdown
-
Beauty and Grooming1 month ago
Unlock Flawless Tanning With Skin Prep
-
Interior Design1 month ago
Create Your Dream Cottagecore Home Office Now!
-
Vetted2 months ago
15 Best Women's Fashion Trends of 2025 You Need to Know About