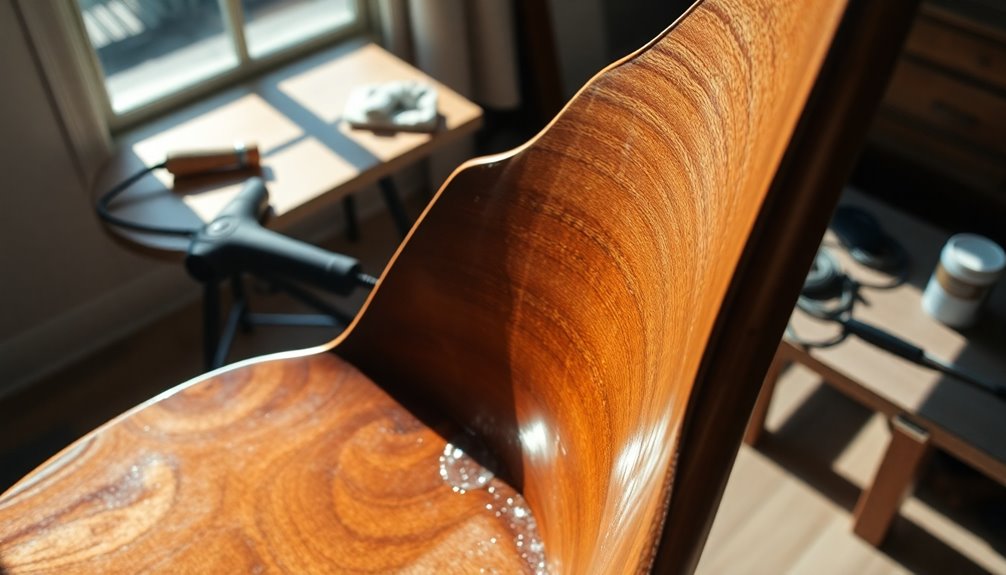
Interior Design
How to Fix Water Damaged Swollen Wood Furniture
Unlock the secrets to restoring your water-damaged wood furniture and discover essential techniques that will leave your pieces looking brand new.
To fix water-damaged, swollen wood furniture, start by assessing the damage. Dry the furniture in sunlight for a few hours, using fans and a dehumidifier for better circulation. Eliminate any water bubbles with a low-heat iron or hair dryer. Sand swollen areas with medium-grit sandpaper, then smooth with finer grit. Clean any mold with a mild solution and keep your space well-ventilated during this process. Finally, apply a sealant to prevent future damage. Each step is crucial for restoring your furniture's beauty and integrity, and there's more you can learn to enhance your restoration skills.
Key Takeaways
- Assess the damage by checking for discoloration, warping, and moisture content using a moisture meter to determine severity.
- Dry the furniture in a well-ventilated area, utilizing electric fans and dehumidifiers, and limit direct sunlight exposure to three hours.
- Eliminate water bubbles using a low-heat iron or hair dryer, ensuring to maintain a safe distance to avoid further damage.
- Sand swollen areas with medium-grit sandpaper, then finish with finer grit, ensuring to fill any cracks or gouges with wood filler.
- Apply waterproof sealants and maintain humidity levels between 30-50% to prevent future moisture-related issues.
Assessing Water Damage
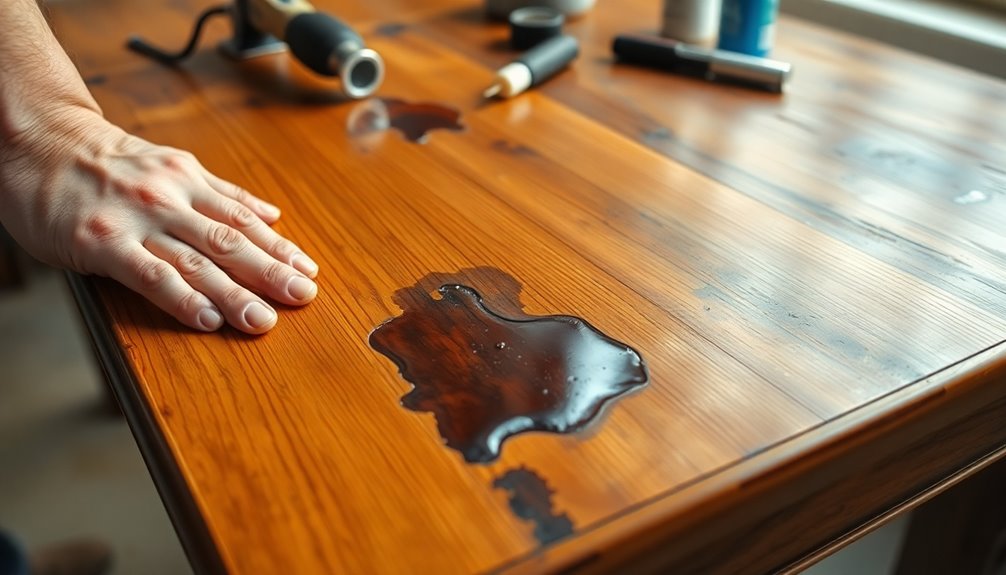
When you notice signs of water damage on your wood furniture, it's crucial to assess the situation promptly. Start by identifying visible signs like discoloration, which can appear as cloudy or darker spots on the surface. Look for warping or swelling, as wood absorbs moisture, leading to uneven surfaces that may affect functionality. Inspect for bubbling or peeling paint, which often signals prolonged exposure to water.
Next, determine the severity of the damage. Minor issues might only involve slight swelling or small bubbles, while severe damage could include large discolored areas and extensive warping. Check joints and connections for any signs of separation due to water-induced expansion. Using a moisture meter can help quantify the moisture content in the wood, giving you a clearer picture of the damage.
Additionally, be aware that different types of wood react variably to water exposure, which can affect the restoration process. Don't forget to evaluate the wood type and finish, as these factors will influence your restoration approach. Finally, feel for soft spots, which indicate moisture saturation, and inspect for structural integrity by looking for splits, cupping, or gaps. This thorough assessment will guide you in deciding the best steps to take next.
Drying the Furniture
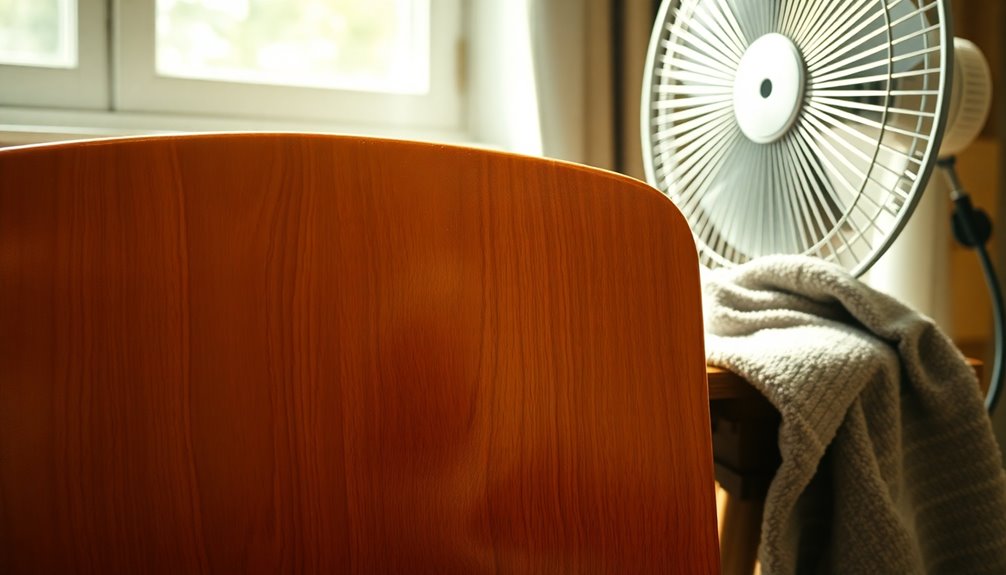
Drying water-damaged wood furniture is essential to restore its integrity and appearance. Start by placing the furniture in direct sunlight for a quick drying process. Rotate the pieces periodically to ensure even drying and prevent warping, but limit exposure to no more than three hours at a time to avoid cracking. Be mindful of the weather; avoid extreme cold or heat.
If sunlight isn't an option, position the furniture in a well-ventilated area. Use electric fans to enhance air circulation, blowing air directly onto the furniture for at least 24 hours while keeping the fans at a moderate distance. Open windows to promote airflow. Additionally, employing a dehumidifier can significantly aid in reducing moisture levels in the air, further supporting the drying process.
For an alternative approach, you can employ heating appliances. Use an iron on the lowest heat setting, covering the wood with a clean cloth. Alternatively, use a hair dryer, moving it constantly to prevent overheating. Apply heat gradually, repeating the process until the wood is fully dry.
Lastly, consider using a dehumidifier to lower humidity levels in the room and place the furniture in a warm, dry environment. This helps prevent further swelling and promotes effective drying.
Removing Water Bubbles
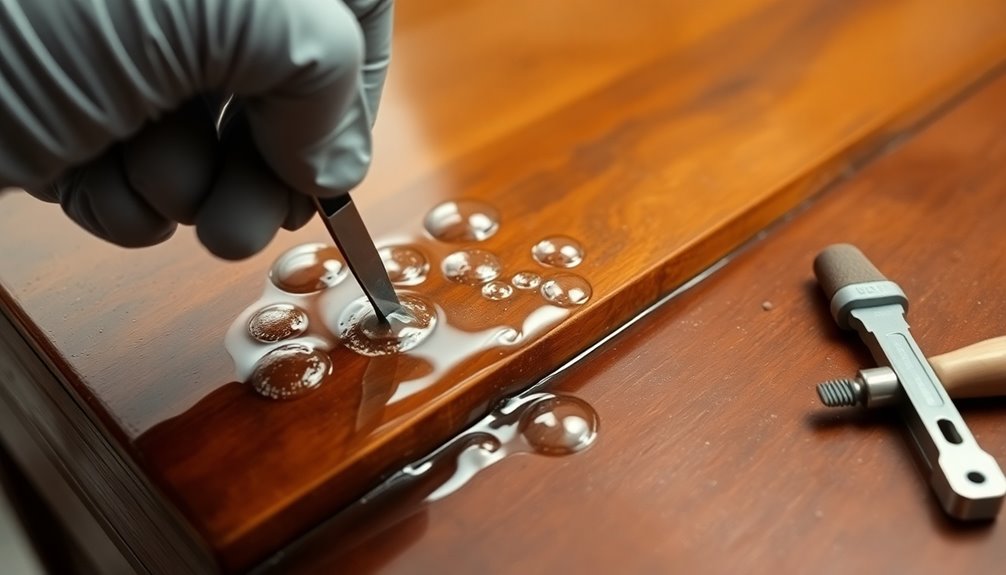
After ensuring your water-damaged wood furniture is thoroughly dried, the next step involves tackling any unsightly water bubbles that may have formed. One effective method is using an iron. Set it to the lowest heat setting, then cover the swollen area with a wet rag to protect the wood. Hold the iron on the rag for a few seconds, lift, and repeat until the bubbles disappear. Remember to keep the iron moving to prevent scorching.
Alternatively, you can use a needle or a printer. Poke it through the water bubble to let the air and water escape, a quick and heat-free solution that won't damage the wood. Repeat until all bubbles are gone.
Another option is a hair dryer. Set it to the lowest heat and hold it about six inches away, moving it constantly. This method also helps evaporate the trapped water. Keep in mind that humidity in the air can contribute to the formation of new bubbles if the furniture is not kept in a controlled environment.
Regardless of your chosen method, allow the furniture to air dry for a few hours afterward. Ensure the wood is completely dry before proceeding to any other steps. Keep your workspace well-ventilated to help speed up the drying process.
Cleaning the Furniture
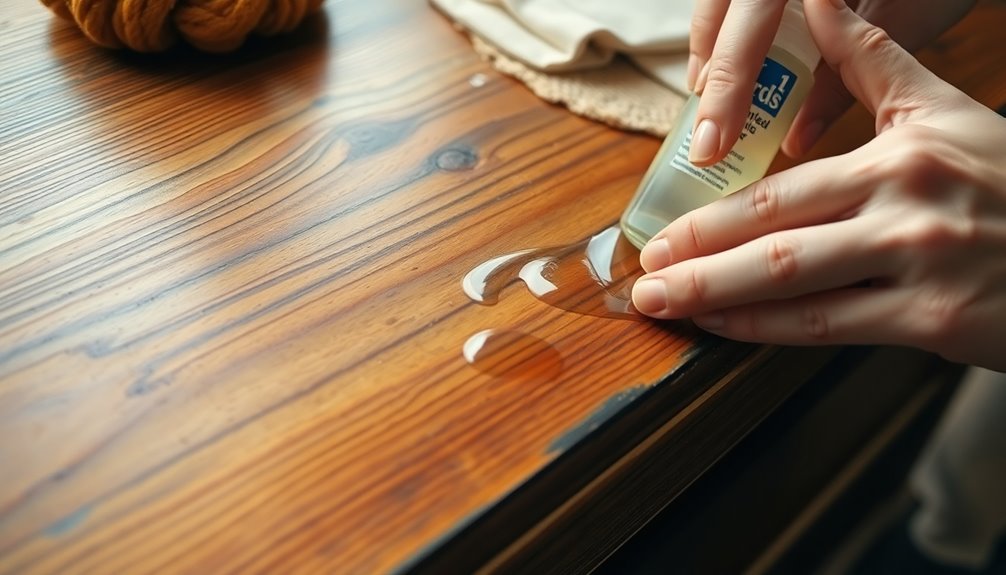
Cleaning your water-damaged wood furniture is essential to restore its appearance and prevent further issues. Start by identifying any areas with mold, mildew, or black spots, as these often appear after water exposure. When you find them, wear protective gear like gloves, eyewear, and a face mask. Use a diluted bleach solution, cleaning vinegar, or dish soap to gently scrub the affected areas with a soft-bristled brush. Rinse thoroughly with clean water, then let the furniture dry completely.
Next, wipe off any residue or debris from the wood's surface using a clean microfiber cloth. A vacuum can help remove standing water and debris from the furniture and surrounding area. Make sure the furniture is in a well-ventilated space to prevent further moisture buildup; electric fans can aid in the drying process, but avoid using heat to prevent cracking or warping. Additionally, it's important to remove excess water to prevent further absorption, which can lead to swelling and long-term structural issues.
Finally, keep the area well-ventilated after cleaning. Wipe down the furniture surface to eliminate excess moisture. With these steps, you'll set the stage for effective restoration and protect your wood furniture from future damage.
Sanding the Wood
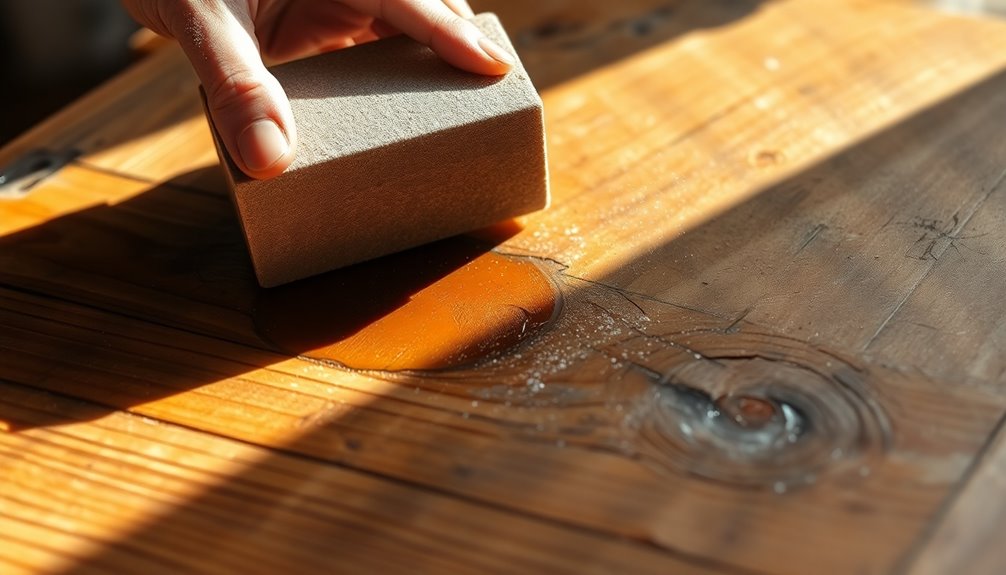
Once you've cleaned your water-damaged wood furniture, it's time to address any swelling or rough spots through sanding. Start with medium to coarse-grit sandpaper, around 80-120 grit, to tackle the swollen areas. Sand in the direction of the wood grain to avoid scratches, using a hand-sanding tool or sanding by hand for even results. Apply gentle to moderate pressure depending on how much swelling there is.
Once the surface is more level, switch to finer-grit sandpaper (180-220 grit) to smooth out any filled areas. Finish with a final sanding using fine-grit sandpaper (220-320 grit) for a smooth finish. Remember, using very fine grit initially can clog your sandpaper, so progress from coarser to finer grits.
Before you start, don safety glasses, rubber gloves, and a dust mask, and make sure your workspace is well-ventilated to avoid inhaling dust. After the initial sanding, inspect for cracks or gouges. If you find any, apply wood filler, let it dry, and lightly sand those areas to blend them into the surrounding wood. It's essential to recognize early signs of water damage to prevent further issues. Check for any imperfections, ensuring everything is smooth and even.
Applying Finishes
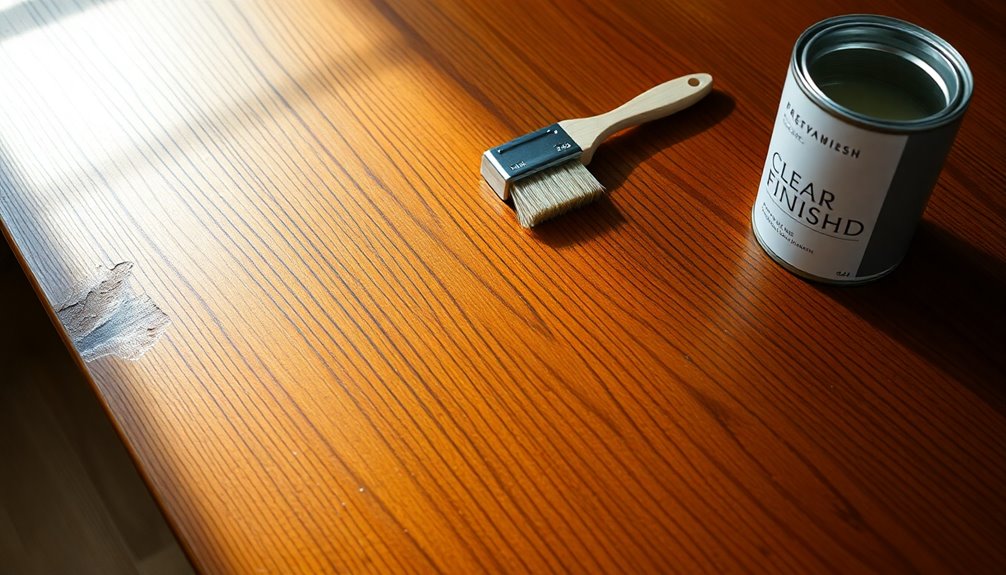
Applying a new finish to your water-damaged wood furniture is essential for restoring its beauty and protecting it from future damage. Start by selecting a finish that matches the original type used on your furniture. Consider the wood type and its initial finish; compatibility is crucial for a successful application. If you're using a high-performance finish like catalyzed varnish, ensure you follow any special care requirements. Remember that smart home device integration can also enhance your home environment, making it easier to monitor conditions that could affect your furniture.
Before applying the finish, prepare the surface. Clean it thoroughly to remove dust, residue, or old finish. Use fine sandpaper (#320 grit or finer) to scuff the surface for better bonding, and remove any loose finish. If needed, wipe it with mineral spirits and ensure it's completely dry. Remember that applying waterproof sealants can enhance the durability of your finish against future moisture damage.
When applying the finish, do so in thin, even coats to prevent blistering. If you're using lacquer, a spray gun is best; consider a retarder to avoid blushing. For shellac, lightly wipe the surface with a cloth dampened in denatured alcohol. Allow each coat to dry fully before applying more. Once done, inspect the finish regularly to maintain its protective qualities and extend the life of your furniture.
Preventing Future Damage
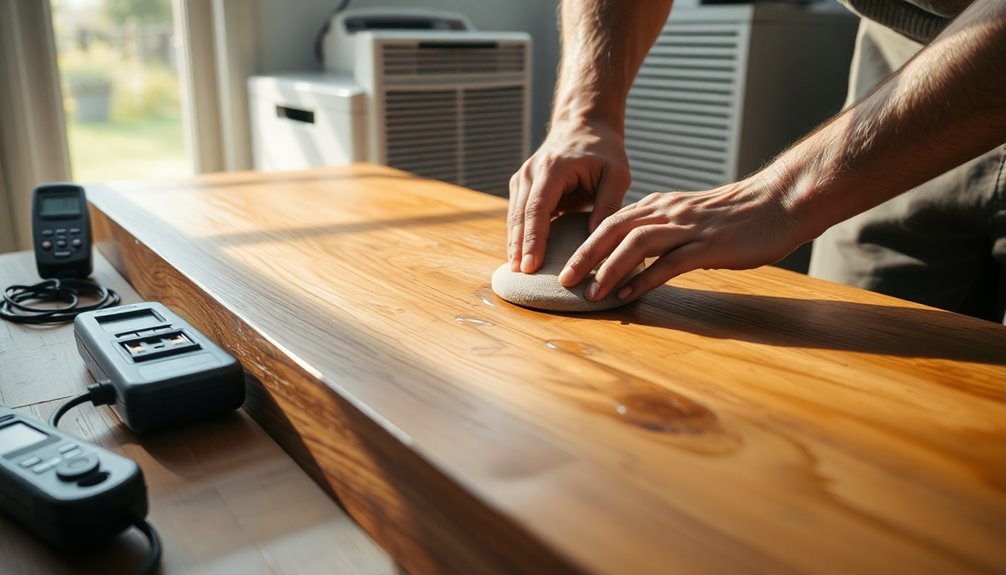
To keep your wood furniture looking its best and prevent future damage, maintaining a controlled environment is crucial. Aim for humidity levels between 30 and 50 percent to stop the wood from swelling or drying out excessively. If you live in a dry climate, consider using a humidifier to stabilize those levels. Avoid placing your furniture in high-moisture areas like basements or near bathrooms, and ensure the room temperature remains steady and moderate. Additionally, regularly applying sealants can provide an added layer of protection against moisture. Using an air purifier can also help maintain optimal indoor air quality, further protecting your furniture.
Daily care is equally important. Always use coasters under drinks to prevent spills from penetrating the wood. Wipe up any spills immediately to avoid absorption. For plants, place mats or rugs underneath to catch drips. Regularly dust your furniture to prevent buildup, and clean surfaces with a damp microfiber cloth and white distilled vinegar if needed.
Protect your furniture from direct elements by keeping it out of strong sunlight and away from heating vents or air conditioning units. Use curtains or blinds to filter sunlight, and ensure your furniture stays dry by avoiding exposure to rain or snow. Regularly inspect your pieces for damage, and apply wood moisturizer or sealants as recommended to maintain their integrity.
Tools and Materials Needed
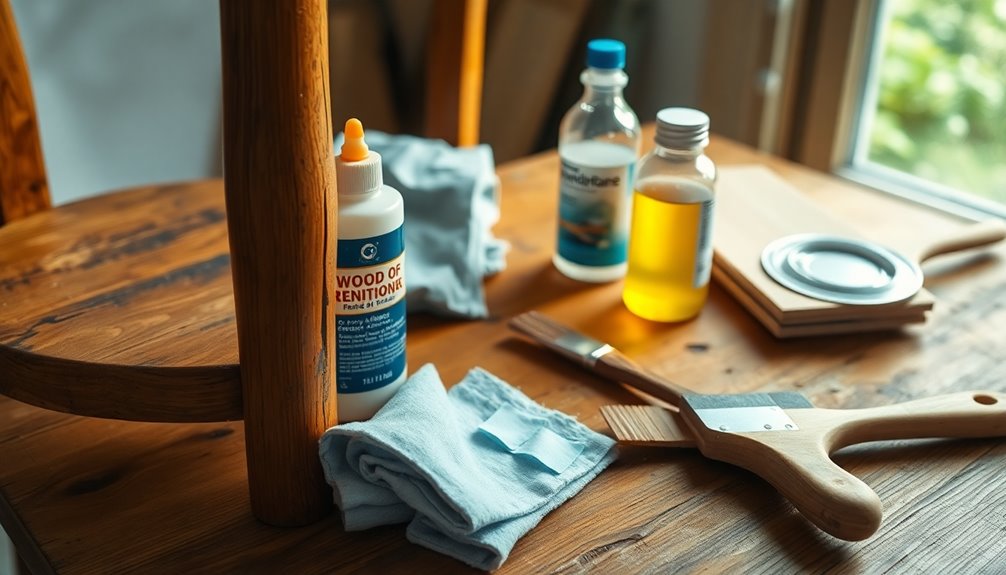
When tackling water-damaged wood furniture, having the right tools and materials on hand is essential for effective restoration. First, ensure your safety by wearing goggles, gloves, and a dust mask. You'll need buckets and towels to collect any excess water and moisture. For drying, gather fans and a dehumidifier, and consider a moisture meter to check the wood's dryness. It's important to remember that early detection of water damage can significantly reduce the extent of repairs needed. Additionally, maintaining a clean and safe environment around your workspace will help prevent accidents while restoring furniture.
You'll also want cleaning tools like a lint-free rag, a scrubbing brush, detergent, and bleach to tackle any mold or mildew. Make sure all electrical sources are unplugged before you start. When it comes to smoothing the wood, have sandpaper of various grits ready, along with a power sander and hand-sanding tool.
For filling gaps, get wood putty or filler, and have paintbrushes and sealant on hand for refinishing. Furniture oil, wood stain, and clamps or weights will help you achieve a protective finish. Finally, a wet rag and iron can assist with swollen areas, while a soft brush helps clear away dust. With these tools and materials, you'll be prepared to restore your furniture effectively.
Tips for Effective Restoration
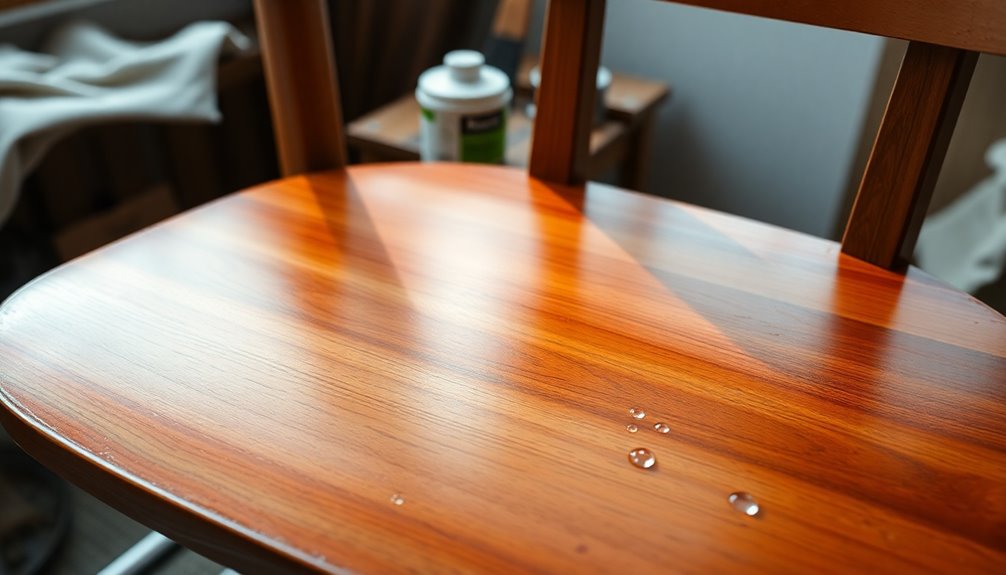
Restoring water-damaged wood furniture requires a careful approach to ensure the best results. Start by drying the furniture. Place it in the sun, rotating it regularly to prevent uneven drying and cracking. Use electric fans and a dehumidifier to speed up the process while avoiding high heat, which can warp the wood. Wipe down surfaces with a clean microfiber cloth to remove excess moisture.
Next, tackle any water bubbles. Use an iron set to its lowest heat with a cloth to absorb bubbles, or apply a hairdryer on low, moving it constantly to prevent overheating. Clean any mold or black spots to avoid further damage.
Once the surface is dry, sand down swollen areas using medium to coarse-grit sandpaper, working with the grain. After sanding, brush off the dust and follow up with fine-grit sandpaper for a smooth finish.
Finally, protect the wood by applying furniture oil to the sanded areas. Fill any cracks or holes with wood filler, sand it once dry, and finish with a coat of oil or varnish to enhance and protect the wood's appearance.
When to Seek Professional Help
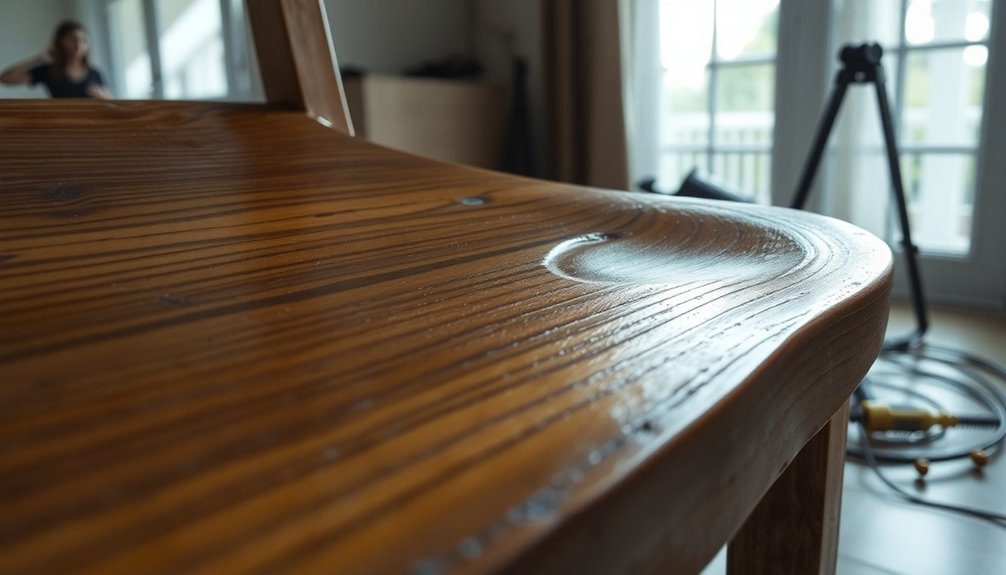
Recognizing the limits of your DIY skills can be crucial in restoring water-damaged wood furniture. If you notice severe swelling, warping, or large discolored areas, it's time to call in a professional. When multiple components, like drawers and doors, are affected and hard to open, expert intervention is recommended. Complex restoration tasks, such as sanding and refinishing, often require specialized tools and techniques that you might not have.
If you're facing risks of further damage while attempting to fix the furniture, it's safer to seek help. Professional help has the experience to handle advanced techniques properly, including drying methods that could otherwise damage the wood. Additionally, if mold or mildew is present, professionals can remove it safely.
Consider the value of your piece; if it has significant sentimental or monetary worth, a professional restoration can justify the cost. Restoration can also be time-consuming, so if you lack the patience or space to manage the process, let someone else handle it. Finally, if insurance covers the damage, professionals can help navigate the claims process effectively, ensuring your furniture is restored and protected.
Frequently Asked Questions
How Can I Tell if Wood Is Still Wet Inside?
To tell if wood is still wet inside, check for signs like a soft, soggy texture or visible cracks and gaps. Use a moisture meter for precise readings. If the wood feels cooler when you touch it or reacts to heat, that's a clue it might still be wet. Also, pay attention to any musty odors or prolonged drying times. These indicators can help you assess the wood's moisture content effectively.
What Are the Best Types of Wood Fillers for Water Damage?
When dealing with water damage, you'll want wood fillers that can handle moisture effectively. For this, consider using Elmer's ProBond Wood Filler for its strong bond and durability. Gork's Goodfilla Wood & Grain Filler is another great option due to its resistance to shrinking and cracking. If you're looking for versatility, Gorilla High Performance Wood Filler works well outdoors and can withstand the elements, ensuring a long-lasting repair.
Can I Use Vinegar Instead of Turpentine for Cleaning?
Yes, you can use vinegar instead of turpentine for cleaning. It's less toxic and gentler on wood surfaces. Mix equal parts of vinegar and water, then apply it with a soft cloth, wiping in the direction of the grain. This solution effectively removes water spots and helps restore wood color. Just remember to test a small area first to ensure there's no damage, and avoid using it on sensitive or old finishes.
How Long Should I Wait Before Applying Finishes?
You should wait until the wood is completely dry before applying finishes. This can take several days to weeks, depending on the environment and how wet the wood was. Check for any moisture by touching the surface; it should feel dry to the touch. If you've used wood fillers, ensure they're fully cured as well. Rushing this step can lead to trapping moisture, which can damage your finish and the wood itself.
Is It Safe to Use Heat Tools on Antique Furniture?
Using heat tools on antique furniture isn't safe. Heat can soften finishes and damage the underlying glue, especially in older pieces. You risk burning the wood or causing uneven fading and cracking. Instead of heat, consider letting the furniture dry naturally or using safer methods like sanding and applying furniture oil. Always keep your antique pieces away from direct heat sources to preserve their value and integrity.
Conclusion
By following these steps, you can effectively restore your water-damaged, swollen wood furniture and bring it back to life. Remember, patience is key during the drying and sanding processes. Always keep an eye out for signs of future damage and take preventive measures. If the damage is too extensive or you're unsure about tackling it yourself, don't hesitate to reach out to a professional. Your furniture deserves the best care, so give it the attention it needs!
Interior Design
Master Your LiftMaster Garage Opener Today
Unlock the secrets to mastering your LiftMaster garage opener and discover features that will revolutionize your daily routine. Get ready to elevate your experience!
You can easily control your LiftMaster garage door opener by following these simple steps. Start by locating the Learn button near the antenna on the motor unit. Press this button to enter programming mode, then sync your remote controls by holding down their buttons for three seconds. Watch for the LED lights to flash, indicating successful syncing. With Security Plus 2.0, you’ll have increased protection against unauthorized access. Make sure to regularly test your remote functionality to ensure smooth operation. Mastering these basics will enhance your overall experience, and there are even more advanced features to explore for getting the most out of your opener.
Key Takeaways
- Familiarize yourself with the Security Plus 2.0 Encryption for enhanced protection against unauthorized access.
- Follow the manual programming instructions meticulously to sync remotes and set access codes accurately.
- Use the Learn button on the motor unit to initiate programming and connect your remote controls easily.
- Ensure you monitor the LED lights during setup to confirm successful syncing of your remote controls.
- Test the functionality of your remotes after programming to guarantee secure and convenient access to your garage.
Key Takeaways
When you master your LiftMaster garage opener, you'll often find that the key takeaways can greatly enhance your experience.
First, activate the Security Plus 2.0 encryption. This feature guarantees maximum code security, protecting your garage from unauthorized access.
Next, sync your remote controls for authorized access, making it simple for family members to enter.
It's vital to follow the manual instructions for efficient programming; over 70% of garage door opener remotes are programmed manually, so take your time to get it right.
Finally, enjoy the peace of mind that comes with advanced security features.
Setting Up the Opener
To kick off the setup of your LiftMaster garage opener, start by locating the Learn button, which is usually positioned near the antenna wire on the motor unit.
Once you've found it, press the Learn button to enter programming mode. This step is essential for syncing your opener with remote controls and setting unique access codes.
Remember, Security Plus 2.0 technology encrypts each code, enhancing your opener's security.
It's important to follow the manual's instructions diligently to guarantee accurate setup. Take your time and double-check each step, as a precise setup leads to smooth operation and peace of mind.
Now you're ready to move forward and enjoy the benefits of your newly set up LiftMaster garage opener! With your LiftMaster garage opener up and running, you’ll experience greater ease and convenience every time you access your garage. While you’re reveling in your upgraded home setup, why not take a moment to explore other ways to freshen up your life, like browsing short bob styling ideas to revamp your look? A chic new hairstyle, combined with the seamless functionality of your garage door, can make everything feel effortlessly modern.
Programming Remote Controls
Programming remote controls for your LiftMaster garage opener is a straightforward process that guarantees seamless access to your garage.
Start by pressing and releasing the Learn button on the opener, which puts it into programming mode. Next, grab your remote control and hold down the button you want to use for about three seconds.
Watch for the LED lights on the opener; if they flash, you've successfully synced the remote. If you have more remotes, just repeat this process for each one.
Once you're done, test the remotes to verify they're functioning properly. With this simple programming, you'll enjoy secure and convenient access to your garage every time.
Frequently Asked Questions
How Can I Troubleshoot a Malfunctioning Garage Door Opener?
To troubleshoot a malfunctioning garage door opener, check the power source, inspect the remote control batteries, verify the safety sensors are aligned, and confirm the opener's settings are correct. Follow the manual for guidance.
What Should I Do if My Remote Control Is Lost?
Isn't it ironic how losing your remote can lock you out? You should reprogram your opener's access codes for security, then get a new remote. Remember, follow the manual for hassle-free setup and peace of mind.
Can I Use My Smartphone With the Garage Opener?
Yes, you can use your smartphone with the garage opener. Download the app, connect it to your opener, and enjoy convenient access. Just follow the setup instructions for seamless integration and enhanced control over your garage.
How Often Should I Change the Batteries in My Remote?
You should change the batteries in your remote every 6 to 12 months, or whenever you notice reduced functionality. Keeping fresh batteries guarantees smooth operation and reliable access to your garage whenever you need it.
Are There Any Safety Features to Prevent Door Accidents?
Yes, there're safety features to prevent door accidents. Your opener likely includes photoeyes that detect obstructions and auto-reverse functions, ensuring the door stops and reverses if something is in its path. Always check these features.
Conclusion
By mastering your LiftMaster garage opener, you're not just securing your home; you're fortifying your own castle. Think of it like a knight donning armor before battle—every adjustment and feature you employ adds another layer of protection. With your newfound skills, you can confidently safeguard your property while enjoying the convenience of modern technology. So go ahead, embrace these tips, and transform your garage into a stronghold that keeps your home safe and sound.
Interior Design
Winter to Spring Room Makeover: Aesthetic Transitions
Aesthetic transitions from winter to spring can breathe new life into your space; discover simple yet impactful ways to transform your home today.
To transition your space from winter to spring, begin by replacing heavy textiles with lighter materials such as linen and cotton. Add pastel colors and floral patterns to refresh your decor. Rearrange furniture to take full advantage of natural light and create comfortable seating areas. Introduce fresh flowers and scents seasonally to uplift your surroundings. Think about incorporating vibrant houseplants for added liveliness. Declutter unnecessary items for a more streamlined look, and if you’re eager to elevate your space even more, explore additional inspiring ideas for achieving the ideal spring makeover.
Key Takeaways
- Swap heavy winter textiles for lighter fabrics like cotton and linen, incorporating pastel colors and floral patterns for a fresh spring look.
- Rearrange furniture to maximize natural light, creating cozy seating areas that promote relaxation and connection with the outdoors.
- Introduce seasonal decor by replacing winter ornaments with floral designs and fresh flowers, enhancing vibrancy in your space.
- Choose vibrant spring plants like pansies and herbs for indoor and outdoor spaces, while maintaining them with mulch and staggered planting.
- Engage in community initiatives such as decor swaps and gardening projects to refresh your space sustainably and connect with neighbors.
Seasonal Décor Changes
As you shift from winter to spring, it's essential to refresh your home decor to reflect the new season. To successfully change your home, start by replacing heavy fabrics with lighter materials like linen and cotton. This alteration creates an airy atmosphere that welcomes the warmth of spring.
Incorporating color schemes in modern farmhouse design with pastel colors—soft pinks, greens, and yellows—can brighten up your space and evoke the essence of the season.
Next, swap out winter-themed ornaments for floral designs and fresh flowers. This adds a vibrant, seasonal touch that instantly uplifts your home. You can also utilize natural elements like branches in your arrangements or as decor pieces. This enhances your connection to the outdoors and brings a fresh, organic feel inside.
To complete the subtle change, introduce lightweight throws and decorative pillows featuring spring motifs. These not only enhance comfort but also refresh your aesthetic.
Color Palette Transition
As you shift your decor from winter to spring, consider swapping deep hues for softer shades that bring a revitalizing vibe.
Pairing complementary colors can enhance the visual appeal of your space, making it feel alive and inviting.
Don't forget to incorporate techniques like color blocking to add dynamic contrasts and elevate your seasonal look.
Seasonal Color Changes
Changing your room's color palette from winter to spring can breathe new life into your space, inviting warmth and freshness.
Winter's deep blues, grays, and whites can feel heavy, while spring brings a vibrant renewal with soft pinks, greens, and yellows. Embracing these seasonal color changes will create an uplifting atmosphere that reflects the energy of the new season.
To help you shift your decor, consider these tips:
- Incorporate floral patterns through throw pillows and artwork for a cheerful touch.
- Lighten the color palette by replacing darker textiles with lighter shades that evoke spring's essence.
- Experiment with color blocking to add visual interest, pairing contrasting colors to energize your room.
Complementary Hue Pairing
To create a harmonious look in your room, pairing complementary hues is essential. As you shift from winter to spring, you'll want to move away from deep blues and grays, embracing soft pinks, greens, and yellows that reflect the vibrant colors of the season. A color wheel can help you identify these complementary hues, ensuring your room feels cohesive and intentional.
Consider incorporating elements of boho chic decor to further enhance the seasonal shift and create a sense of warmth and individuality.
Incorporating pastel shades through accessories like cushions, throws, and artwork can lighten your space and add those invigorating spring touches. Mixing different textures, such as pairing airy linens with pastel accents, not only enhances the aesthetic but also creates a fresh and inviting atmosphere.
Consider using color blocking techniques by placing bold colors side by side to create visual interest and depth in your decor. This approach allows you to experiment with various combinations while maintaining a balanced look.
Visual Impact Techniques
While shifting your room's color palette, employing visual impact techniques can truly elevate the space. Changing from winter's deep blues and grays to spring's soft pinks and greens can greatly enhance your room's ambiance.
To achieve this, consider using color blocking techniques, which create visual interest and make your space feel more dynamic. Incorporating natural elements, such as plants, can further enrich the seasonal change and promote a revitalizing atmosphere creating seamless indoor-outdoor flow.
Here are some effective strategies to incorporate:
- Pastel Accents: Integrate pastel colors into your decor through throw pillows, art, and accessories. These hues reflect spring's freshness and uplift your mood.
- Floral Patterns: Add floral patterns in textiles or wall art to evoke the essence of the season, bringing life into the room.
- Complementary Hues: Use complementary colors from the color wheel to balance your design, ensuring a cohesive look that smoothly shifts from winter to spring.
Additionally, embracing seasonal trends like light, airy textiles can make your space feel brighter and more open.
Furniture Arrangement Tips
Your furniture arrangement plays an essential role in altering a space, especially as the seasons shift from winter to spring. To maximize the natural light at the end of winter, consider positioning your seating away from windows. This allows for more daylight to fill your room, creating a brighter, more vibrant atmosphere.
As you adapt to early spring, create cozy seating areas with lighter throws and cushions. This not only aligns with the invigorating aesthetic of the season but also encourages relaxation and comfort.
Multi-functional furniture, like ottomans or coffee tables with storage, is a great investment. They provide flexibility in your arrangement while helping maintain a clutter-free environment.
Don't forget to experiment with outdoor seating arrangements as the weather warms up. This can extend your living space, making it feel more connected to the outdoors.
Seasonal Accessories Swap
As you rejuvenate your furniture arrangement for spring, it's the perfect time to give your accessories a seasonal update. A seasonal accessories swap can transform your space, making it feel lighter and more inviting.
Start by swapping out those heavy winter throws for lightweight options in pastel colors or floral patterns. This simple change instantly brightens your atmosphere.
Next, replace winter-themed ornaments, like pinecones and snowflakes, with fresh floral designs and natural elements. Think branches and cheerful spring-themed decor.
Adding decorative pillows featuring spring motifs not only enhances comfort but also injects vibrant colors into your seating areas.
To elevate your Spring Home Decor, introduce glass or ceramic vases filled with seasonal blooms, such as tulips or daffodils. These flowers bring the essence of spring indoors and add visual interest.
Don't forget to incorporate seasonal scents through candles or diffusers; opt for fresh fragrances like citrus or floral notes to invigorate your home.
Here are some essential items to reflect on for your seasonal accessories swap:
- Lightweight pastel throws
- Decorative pillows with spring designs
- Fresh floral arrangements in elegant vases
These updates will create a revitalizing spring ambiance throughout your home.
Outdoor Space Preparation
To get your outdoor space ready for spring, start by rearranging your furniture to create inviting conversation areas.
Choose seasonal plants that add color and life to your garden or patio, making it a welcoming spot for relaxation.
With the right setup, you'll transform your outdoor area into a vibrant extension of your home.
Outdoor Furniture Arrangement
A well-arranged outdoor space can transform your backyard into a cozy retreat. Start by cleaning your outdoor furniture to remove any winter debris or grime; this guarantees everything's ready for use.
Once your furniture is freshened up, it's time to arrange seating. Position your chairs and benches around a central table or fire pit to create an inviting atmosphere that encourages conversation and relaxation.
To enhance the aesthetic of your space, add color with outdoor cushions and throw pillows in spring colors or floral patterns. These not only provide comfort but also make your setting visually appealing.
Consider setting up outdoor lighting, such as string lights or lanterns, to create a warm ambiance for evening gatherings. This can really elevate your outdoor experience.
Here are some quick tips for your outdoor furniture arrangement:
- Use an area rug to define the seating space.
- Incorporate potted plants or seasonal flowers around seating areas.
- Keep pathways clear for easy movement.
With these simple steps, you'll have a beautifully arranged outdoor area, ready for spring enjoyment.
Seasonal Plant Selection
After you've arranged your outdoor furniture for maximum comfort and style, the next step is selecting the right seasonal plants to enhance your space.
Start with vibrant seasonal flowers like pansies, petunias, and snapdragons, which thrive in cooler spring temperatures and will add a splash of color.
To elevate your outdoor experience, incorporate herbs such as basil, parsley, and mint. Not only do they flourish in spring's mild climate, but they also provide culinary delights and aromatic benefits.
Consider adding native plants to your garden. These plants are well-adapted to local soil and weather conditions, promoting biodiversity and reducing maintenance efforts.
To keep your garden thriving, use mulch in your garden beds. It helps retain moisture and suppresses weeds, which is essential as temperatures rise and rainfall becomes unpredictable.
Lastly, plan for staggered planting of annuals and perennials, ensuring a continuous bloom throughout spring and into summer.
This strategy creates a dynamic and colorful outdoor environment that feels alive and inviting. With the right seasonal plant selection, your outdoor space will flourish beautifully, complementing your carefully arranged furniture.
Transitional Decor Elements
There's something invigorating about shifting your decor to reflect the changing seasons. As early spring arrives, you can seamlessly adapt your space using transitional decor elements that breathe new life into your home.
Start by swapping out heavy winter textiles for lighter materials like linen and cotton. This simple change creates an airy atmosphere, perfect for welcoming the season.
Consider incorporating pastel colors and floral designs in your decor and accessories. These vibrant hues help move away from the deep winter tones you've grown accustomed to.
Add decorative pillows and throws with spring motifs to your seating areas for comfort and seasonal flair. Choose soft pastel tones, floral patterns, or playful designs to evoke the freshness of the season. Pair your updated seating areas with a charming tablescape featuring circusthemed culinary delights, like colorful popcorn, cotton candy cupcakes, or mini caramel apples. These whimsical touches will not only impress your guests but also bring a sense of fun and celebration to your spring décor.
To truly embrace the essence of spring, bring in natural elements. Use branches and fresh flowers as focal points in your decor, showcasing renewal and life.
Here are a few ideas to inspire your alteration:
- Layer soft throws and light pillows for warmth and style.
- Display unique decor pieces that celebrate nature's beauty.
- Create clusters of houseplants to enhance the "undone" aesthetic.
With these transitional decor elements, your home will reflect the spirit of early spring beautifully.
Houseplant Selection Guide
When choosing houseplants, think about popular options like pothos for air purification and fiddle leaf figs for a striking look.
Seasonal recommendations can help you select plants that thrive in your space, while care tips will keep them healthy and vibrant.
Let's explore how to make the most of your indoor greenery this spring.
Popular Houseplant Choices
Choosing the right houseplants can transform your space into a vibrant oasis. As you shift from winter to spring, consider incorporating some popular houseplant choices that not only enhance your decor but also improve air quality and bring a touch of nature indoors.
- Pothos: This easy-care option thrives in various light conditions and is known for its air-purifying qualities, making it perfect for any room.
- Topiaries: Offering a stylish, structured look, topiaries like boxwood or rosemary work well both indoors and outdoors, adding a refined touch to your space.
- Angel Vine: This delicate trailing plant adds elegance and thrives in bright, indirect light, requiring minimal maintenance—ideal for busy lifestyles.
You might also consider cypress trees for their aromatic foliage, providing a fresh element to your home or patio.
When selecting houseplants, remember to explore local nurseries for unique varieties and support your community. Alternatively, big-box retailers offer more common selections.
Embrace the beauty of spring by bringing these lively houseplants into your home and enjoy the rejuvenation they bring!
Care Tips Overview
Selecting houseplants can be an enjoyable journey, especially when you know what to look for. As you shift from winter, consider your lifestyle and the care tips for maintaining your new greenery. Here's a quick guide to help you choose:
Houseplant | Light Requirements | Maintenance Level |
---|---|---|
Pothos | Bright, indirect light | Low |
Fiddle Leaf Fig | Bright, indirect light | Moderate |
Snake Plant | Low to bright light | Very low |
Peace Lily | Low to bright, indirect | Low |
When selecting houseplants, opt for hardy varieties like Pothos for air purification or Fiddle Leaf Figs for dramatic flair. If you're looking for structure, consider topiaries or cypress trees. Angel vine is a versatile choice, adapting well to various light conditions. Remember, sourcing your houseplants from local nurseries supports small businesses, while big-box retailers can offer budget-friendly options. By following these care tips, you'll create a vibrant indoor space that thrives through the seasons!
Seasonal Plant Recommendations
As spring approaches, it's the perfect time to refresh your indoor garden with seasonal plant recommendations that thrive in warmer weather.
Adding houseplants not only beautifies your space but also enhances your indoor air quality and boosts humidity levels, promoting overall well-being.
Here are some seasonal selections to evaluate:
- Pothos: This hardy plant is known for its air-purifying qualities and ease of care, making it an ideal choice for any room.
- Cypress Trees: Bring a fresh, vibrant touch to your home with these stunning trees, perfect for adding height and greenery.
- Angel Vine: This unique option offers trailing growth, ideal for hanging pots, creating a lovely cascading effect that draws the eye.
Visiting local nurseries gives you the chance to explore unique plants that flourish during warmer months.
Don't forget big-box retailers like Home Depot and Lowe's, which provide a variety of houseplants tailored to different light and care needs, ensuring you find the perfect fit.
Embrace the season and let your indoor garden thrive!
Home Purging and Cleaning
A cluttered home can feel overwhelming, but tackling the purging and cleaning process room by room can transform your space and mindset. Start by sorting items into three categories: keep, donate, and discard. This home purging method not only declutters but also helps you decide what truly matters.
After purging, jump into cleaning. Dust surfaces, vacuum or mop floors, and wash windows to refresh each room. Don't forget to swap out heavy winter decor and textiles for lighter, spring-themed alternatives. This not only lightens your space but enhances your overall ambiance, improving mental clarity and reducing stress.
Here's a simple table to guide your decluttering journey:
Room | Items to Purge | Cleaning Tasks |
---|---|---|
Living Room | Old magazines, unused decor | Dust, vacuum, wash windows |
Bedroom | Winter blankets, old clothes | Change bedding, dust surfaces |
Kitchen | Expired food, unwanted gadgets | Wipe counters, clean floors |
Bathroom | Empty bottles, old towels | Clean mirrors, scrub sink |
Office | Unused stationery, old files | Organize, dust surfaces |
Regular maintenance during this change supports a positive mindset as you embrace spring!
Styling Tips for Spring
With the arrival of spring, it's time to breathe new life into your home by embracing fresh styling tips. Shifting from winter to spring décor involves lightening up your space and inviting in the season's vibrant energy.
Start by swapping out heavy winter textiles for lighter materials like linen and cotton. This creates an airy atmosphere that feels fresh and inviting.
Consider incorporating pastel colors and floral patterns through decorative pillows and throws to reflect spring's aesthetic. Here are some key styling tips to enhance your decor:
- Use natural elements, like fresh flowers in glass or ceramic vases, to add vibrancy and a touch of nature.
- Rearrange your furniture to create cozy seating areas that emphasize natural light, making your room feel more open.
- Introduce seasonal scents with candles or essential oils that evoke the renewal of spring.
Don't forget to engage in spring cleaning to declutter your space as you embrace these new styles.
With these simple yet effective tips, you'll effortlessly transform your home into a spring sanctuary, highlighting the beauty of the season.
Community Engagement Ideas
Spring brings not only a chance to refresh your home but also an opportunity to engage with your community. By participating in local events, you can foster connections while beautifying your surroundings. Here are some ideas to get you started:
Activity | Description | Benefits |
---|---|---|
Seasonal Decor Swap | Exchange decor items with neighbors for a fresh look. | Refresh your space sustainably. |
DIY Spring Decor Projects | Join workshops to create unique decor pieces. | Learn new skills and meet others. |
Community Garden Initiative | Collaborate to plant flowers and herbs in shared spaces. | Beautify the neighborhood together. |
You can also kick off a neighborhood book club or an online group to share seasonal decor ideas and tips. Another great option is to partner with local businesses to host a spring open house, showcasing your decor while enjoying local products. These activities not only enhance your home but also build a sense of community, making spring even more vibrant and enjoyable. So, gather your neighbors and start planning!
Frequently Asked Questions
How Do You Transition From Winter to Spring Decor?
To shift from winter to spring decor, start by decluttering winter items. Then, introduce lighter fabrics, swap dark colors for pastels, add fresh flowers, rearrange furniture for light, and incorporate seasonal scents for a revitalizing ambiance.
How to Transition From Winter to Spring?
As winter's chill melts away, you can embrace spring by decluttering your space. Swap heavy textiles for light fabrics, add fresh blooms, and rearrange furniture to welcome warmth and joy into your home.
When Should I Decorate for Spring?
You should start decorating for spring around mid-February. Introduce fresh florals and live plants gradually. By early March, embrace lighter aesthetics to align with the warmer weather and lift your spirits as spring approaches.
How to Decorate Your Home for Spring?
Did you know that spring decor can boost your mood by 30%? To decorate your home for spring, swap heavy fabrics for light ones, incorporate soft colors, and add fresh flowers for a vibrant atmosphere.
Conclusion
As you shift from winter gloom to spring bloom, remember: your home isn't just a shelter; it's a canvas for your ever-changing whims. So go ahead, swap those thick blankets for light throws and pretend you're an interior designer. After all, who needs a professional when you've got Pinterest? Embrace the chaos of spring cleaning—it's just your home shedding its winter weight. And don't forget, a houseplant is basically a pet that doesn't judge your life choices!
Interior Design
Balinese Style House: How to Achieve Luxury and Tranquility at Home!
Get ready to transform your home into a serene Balinese retreat—discover the secrets to luxury and tranquility that await you!
You can turn your house into a serene sanctuary by embracing Balinese style. Begin by integrating natural materials such as wood, bamboo, and stone to create a warm atmosphere. Stick to an earthy color scheme with whites, browns, and greens, adding pops of color for a lively touch. Design spacious layouts that blur the lines between indoors and outdoors, allowing for better airflow and natural light. Include calming water features to represent tranquility and harmony. By combining these components, you’ll achieve a luxurious yet peaceful ambiance. As you delve deeper, you’ll uncover additional strategies to master this style.
Key Takeaways
- Incorporate natural materials like wood, bamboo, and stone to create a serene and luxurious atmosphere in your home.
- Design open floor plans that promote indoor-outdoor integration, enhancing natural light and airflow for tranquility.
- Use an earthy color palette with vibrant accent colors to establish a calming yet lively ambiance throughout your space.
- Include water features, such as fountains or ponds, to symbolize tranquility and enhance the overall aesthetic of your home.
- Embrace eco-friendly practices and sustainable materials to align with Balinese philosophy and promote energy efficiency in your design.
Overview of Balinese Design Principles
In Balinese design, the emphasis on natural materials like wood, bamboo, and stone creates a seamless connection with the environment around you. These elements not only enhance the aesthetic appeal but also foster a sense of harmony and tranquility within your living space.
The integration of indoor-outdoor elements further enriches this connection, allowing nature to become a part of your home. Open floor plans play a vital role in this design philosophy, allowing natural light to flood in and promoting airflow, which keeps your home feeling fresh and inviting.
The color palette, dominated by earthy tones such as whites, browns, greens, and terracotta, complements the natural materials, creating a serene atmosphere. You can add splashes of vibrant colors from tropical plants to breathe life into the space.
Water features, like ponds or fountains, are essential in Balinese design, symbolizing tranquility and fertility while enhancing the peaceful ambiance.
Essential Materials for Balinese Decor
Natural materials are the cornerstone of Balinese decor, creating spaces that resonate with beauty and tranquility. To achieve this aesthetic, focus on incorporating bamboo and rattan, two materials that bring both functionality and style to your home.
Bamboo's sustainability makes it a popular choice for structural elements and decorative items like lampshades and furniture. Rattan, with its rich history in Bali, is often used in modern furnishings, providing lightweight, stylish options perfect for any setting.
Additionally, you can enhance your decor with vibrant textiles such as Indonesian Decorative Pillows, which add comfort and cultural richness.
Don't overlook the charm of intricate wood carvings, which reveal the cultural significance found in Balinese craftsmanship. These carvings can add depth and character to your decor, often depicting scenes from local mythology.
Lastly, consider the role of natural textures in your design. Smooth stones, rough woods, and soft fabrics can be layered to create a warm and inviting atmosphere.
Cultural Significance of Wood Carvings
Wood carvings in Balinese decor aren't just decorative elements; they embody the island's rich spiritual heritage and cultural identity.
These intricate Balinese wood carvings serve as cultural focal points, often depicting Hindu deities and mythological creatures. Dating back to the arrival of Hinduism in the eighth century, these carvings play a crucial role in religious ceremonies and rituals, reflecting the Tri Hita Karana philosophy that emphasizes harmony among humans, nature, and the divine.
Additionally, Balinese artisans often incorporate elements of traditional craftsmanship, such as the vibrant designs seen in Indonesian decor masks, to further enhance the cultural significance of their work.
Imagine:
- A majestic wooden gate adorned with intricate patterns, welcoming guests with a sense of reverence.
- Elegant furniture pieces carved from local woods, showcasing the artistry and craftsmanship of Balinese artisans.
- Stunning wall panels that tell stories of spirituality and nature, infusing your home with tranquility.
Using local woods like teak and mahogany, artisans create detailed carvings that enhance the aesthetic appeal of your space while carrying deep symbolic meanings.
Balinese Color Palette and Textures
When you think about a Balinese color palette, earthy tones like whites, browns, and greens come to mind, creating a calming backdrop.
These colors echo the natural landscapes and promote a sense of harmony with the environment, which is essential in traditional Indonesian style home decor.
You can enhance this serene vibe with vibrant accent colors inspired by tropical flowers, adding energy to your space.
Layering different textures, from smooth stones to rough wood, not only enriches the aesthetic but also invites a tactile experience into your home.
Earthy Tones Emphasis
The Balinese color palette embraces warm, earthy tones that instantly create a serene atmosphere in your home. Imagine walking into a space adorned with soothing whites, rich browns, soft greens, and terracotta hues that echo Bali's natural landscape.
These earthy tones not only promote tranquility but also invite a sense of harmony with nature. To achieve a truly authentic aesthetic, you might consider consulting with experts in expert tropical design who can guide you through the nuances of blending these colors effectively.
To enhance this serene vibe, consider incorporating:
- Smooth stones that blend effortlessly with rustic wood elements
- Soft fabrics that add warmth and comfort to your furnishings
- Lush greenery that brings the beauty of the outdoors inside
Natural materials like teak and suar wood are essential in achieving the Balinese design aesthetic. Their rich textures and warm colors evoke rustic landscapes while enhancing the depth of your interiors.
Layering different materials, such as combining raw wood flooring with stone accents, creates visual interest and promotes a seamless shift between indoor and outdoor spaces.
Vibrant Accent Colors
Incorporating vibrant accent colors into your Balinese-style home can transform the serene ambiance into a lively oasis. By layering these colors with your existing earthy tones, you can create a dynamic yet harmonious space. Think rich reds, sunny yellows, and deep blues that reflect the tropical flora around you. These vibrant accent colors can be introduced through textiles and decor elements, adding character and warmth to your Balinese home decor.
Here's how you can visualize the color palette:
Color | Decor Elements |
---|---|
Rich Red | Throw pillows, wall art |
Sunny Yellow | Rugs, vases |
Deep Blue | Curtains, table runners |
Earthy Green | Plants, woven baskets |
Natural fibers like rattan and bamboo can complement these vibrant accents, enhancing the organic feel while maintaining the core color palette. Seasonal updates with fresh textiles or accent pieces allow you to keep your decor lively without straying from the Balinese aesthetic. Embrace the natural beauty of your surroundings and let vibrant accent colors breathe life into your sanctuary.
Textural Layering Techniques
Balinese homes thrive on textural layering, creating a rich tapestry that draws you in and connects you to nature. By combining various natural materials and earthy tones, you can achieve a serene and luxurious atmosphere.
Incorporate elements that evoke the essence of Balinese culture while enhancing your interior spaces. Consider these ideas to enrich your design:
- Smooth stones underfoot for a calming effect
- Rough wood accents that introduce a rustic ambiance
- Soft textiles featuring vibrant patterns that celebrate local artistry
Utilizing tropical-themed luxury interior design can elevate your approach, allowing you to create unique spaces that resonate with the beauty of Bali. This design approach blends natural materials, earthy tones, and lush greenery to emulate the serene atmosphere of a tropical paradise. By incorporating Bali style interior design photos into your planning and inspiration process, you can draw ideas from authentic Balinese aesthetics to craft spaces that exude comfort and elegance. With the right balance of textures, patterns, and lighting, your interiors can transport anyone to an exotic getaway without ever leaving home.
Using a palette dominated by whites, browns, greens, and terracotta, you can create harmony while adding pops of color with accents inspired by the tropical flora, like reds and yellows. The textural layering achieved through these combinations not only adds depth and visual interest but also promotes a sense of tranquility.
Furniture made from teak and suar wood can ground your space, while stone accents can mimic stunning beach scenes. To maintain freshness, adjust your textiles seasonally, allowing vibrant patterns to breathe new life into your home while keeping the Balinese vibe intact.
Modern Integration of Balinese Style
Embracing modern integration of Balinese style brings together the beauty of tropical aesthetics with contemporary living. You can create a seamless flow between indoor and outdoor spaces by opting for open floor plans and fluid layouts that enhance natural light and airflow.
Incorporating natural materials like bamboo, teak, and stone not only fosters a warm and serene atmosphere but also reflects the tropical essence of Bali. This approach is essential in achieving modern tropical aesthetics, where lush greenery harmonizes with architectural elements.
To capture that relaxed vibe, consider using low-profile furniture and oversized cushions, which encourage social interaction while maximizing your space. Vibrant accents inspired by Bali's lush flora, combined with neutral earthy tones, will create visually striking interiors that maintain a tranquil atmosphere and culturally rich environment.
Moreover, eco-friendly practices are essential in this modern integration. Using locally sourced materials and integrating sustainable technologies, like solar panels, not only aligns with the Balinese philosophy of harmony with nature but also enhances your home's comfort and appeal.
Sustainability in Balinese Home Design
Balinese home design emphasizes sustainability through the use of eco-friendly materials like bamboo and volcanic stone, which cut down on transportation emissions.
Incorporating sustainable design practices further enhances the connection between the home and its natural surroundings.
You'll find that energy-efficient practices, such as open-air layouts, keep your home cool naturally, slashing energy bills.
Plus, integrating water conservation techniques, like rainwater harvesting, not only supports the environment but also enhances your self-sufficiency.
Eco-Friendly Materials Usage
Sustainability is at the heart of modern home design in Bali, where eco-friendly materials are thoughtfully integrated into every aspect of construction. By utilizing locally sourced materials, you not only support the local economy but also minimize your carbon footprint.
Traditional Balinese architecture showcases the beauty of traditional Indonesian housing:
- Bamboo and teak, providing natural strength and elegance
- Thatched roofs made from palm fronds, offering durability and a tropical aesthetic
- Water features like ponds and pools, enhancing biodiversity and tranquility
Open-air designs are another hallmark of Balinese homes, promoting passive cooling and reducing reliance on air conditioning.
This approach fosters a lifestyle rooted in eco-friendly living while maintaining comfort. Additionally, solar panels and rainwater harvesting systems can easily be incorporated, further enhancing your home's sustainability.
Energy Efficiency Practices
Incorporating energy efficiency practices into your home design complements the eco-friendly materials already being used. You can achieve this by embracing passive cooling techniques, such as open-air layouts and high ceilings. These features reduce the need for artificial air conditioning, ultimately lowering your energy costs. Additionally, using locally sourced materials like bamboo and thatched roofs enhances sustainability, as they have a lower carbon footprint compared to imported options.
Integrating solar panels into your design provides renewable energy, which boosts energy efficiency while decreasing reliance on fossil fuels. Thatched roofs not only add aesthetic appeal but also offer excellent insulation and durability against tropical storms, minimizing long-term maintenance and energy expenses.
Here's a quick overview of energy efficiency practices:
Feature | Benefits | Impact on Sustainability |
---|---|---|
Passive Cooling | Reduces energy costs | Lowers reliance on artificial cooling |
Solar Panels | Provides renewable energy | Decreases fossil fuel dependency |
Thatched Roofs | Excellent insulation, durability | Utilizes sustainable, natural materials |
Water Conservation Techniques
Water conservation techniques are essential in modern home design, especially in regions like Bali where water resources can be scarce. By integrating these methods, you can create a luxurious yet eco-friendly living space.
Traditional Indonesian houses often incorporate natural materials and sustainable practices, which can inspire your own design choices for traditional housing designs.
- Rainwater harvesting systems collect and store rainwater for irrigation, reducing your overall water consumption.
- Permeable materials for pathways and patios encourage groundwater recharge, minimizing runoff and supporting local ecosystems.
- Drought-resistant landscaping featuring native plants not only beautifies your home but also cuts down on irrigation needs, aligning with sustainable practices.
Many Balinese homes include ponds and water gardens, which serve as a natural irrigation system for surrounding landscapes.
Traditional thatched roofs are designed to channel heavy rainfall into storage systems, ensuring you have water when you need it.
By embracing these water conservation techniques, you not only enhance your home's aesthetic appeal but also contribute to the preservation of Bali's unique environment.
Implementing these sustainable practices helps you enjoy a tranquil lifestyle while nurturing the land around you.
Frequently Asked Questions
What Are the Principles of Balinese Architecture?
Balinese architecture emphasizes open spaces, natural materials, and high ceilings. You'll notice intricate carvings, large windows for airflow, and water features promoting tranquility. These elements create harmony between your living space and the surrounding environment.
What Are the Characteristics of Balinese Houses?
Picture a serene sanctuary; Balinese houses blend open spaces, natural materials, and intricate carvings. You'll find courtyards inviting harmony, while water features whisper tranquility, creating a unique connection with nature and cultural heritage.
What Does a Typical House in Bali Look Like?
A typical house in Bali features an open layout, natural materials like bamboo and teak, and vibrant wood carvings. You'll find courtyards and water elements that create a serene, inviting atmosphere for relaxation and gatherings.
What Is the Balinese Theme?
The Balinese theme embraces natural materials like wood and stone, creating harmony with nature. You'll find earthy colors, intricate carvings, and open spaces that promote tranquility, inviting a serene atmosphere into your living environment.
Conclusion
Incorporating Balinese style into your home creates a beautiful contrast between luxury and simplicity. You'll find tranquility in its serene design, while still enjoying the richness of cultural details. By blending essential materials and a thoughtful color palette, you can achieve a space that feels both grounded and elevated. Embrace the elegance of wood carvings and sustainable practices, and you'll transform your living environment into a peaceful oasis that reflects both your style and values.
-
Beauty and Grooming1 month ago
Embrace Natural Glow With Bronzer-Free Accelerators
-
Beauty and Grooming1 month ago
Discover Top Outdoor Tanning Lotions Today
-
Vetted2 months ago
15 Best Affordable Sustainable Fashion Brands You Need to Know About in 2025
-
Fashion Trends2 months ago
Fall 2025 Fashion Trends: Be Ahead of the Curve!
-
Interior Design3 weeks ago
Mylar vs. Foil Balloons: The Ultimate Showdown
-
Beauty and Grooming1 month ago
Unlock Flawless Tanning With Skin Prep
-
Interior Design1 month ago
Create Your Dream Cottagecore Home Office Now!
-
Vetted2 months ago
15 Best Women's Fashion Trends of 2025 You Need to Know About