
To create stunning DIY boho tiles for floors or backsplashes, choose versatile, eclectic patterns with geometric, floral, or abstract motifs, and select durable, eco-friendly paints in complementary shades. Prepare your surface by cleaning and priming, then use firm stencils and gentle dabbing techniques for precision. Mix patterns and solids for a lively look, and focus on symmetry and consistency. Proper sealing and maintenance will keep your design vibrant and lasting—if you’re enthusiastic to master these tips, you’ll find it all right here.
Key Takeaways
- Select versatile, eclectic patterns like geometric, floral, or abstract motifs using durable Mylar or plastic stencils.
- Prepare surfaces thoroughly with cleaning, repairs, and primer for optimal stencil adhesion and vibrant results.
- Secure stencils firmly, use gentle dabbing techniques, and regularly check alignment for precise, symmetrical designs.
- Incorporate a cohesive color palette with contrasting shades and mix textures to create a lively boho aesthetic.
- Seal and maintain your tiled surface with high-quality sealant and regular cleaning to preserve vibrancy and durability.
As an affiliate, we earn on qualifying purchases.
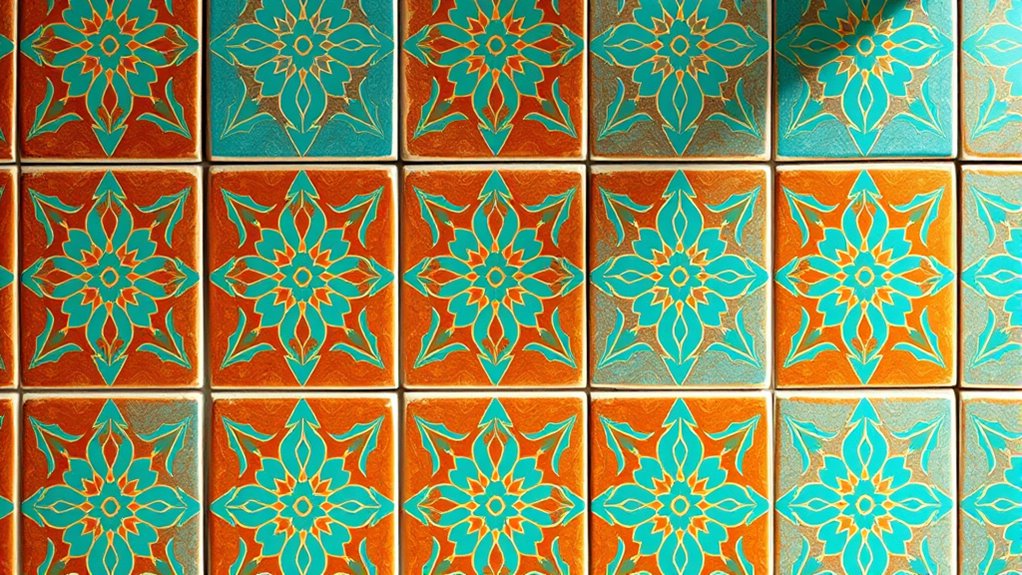
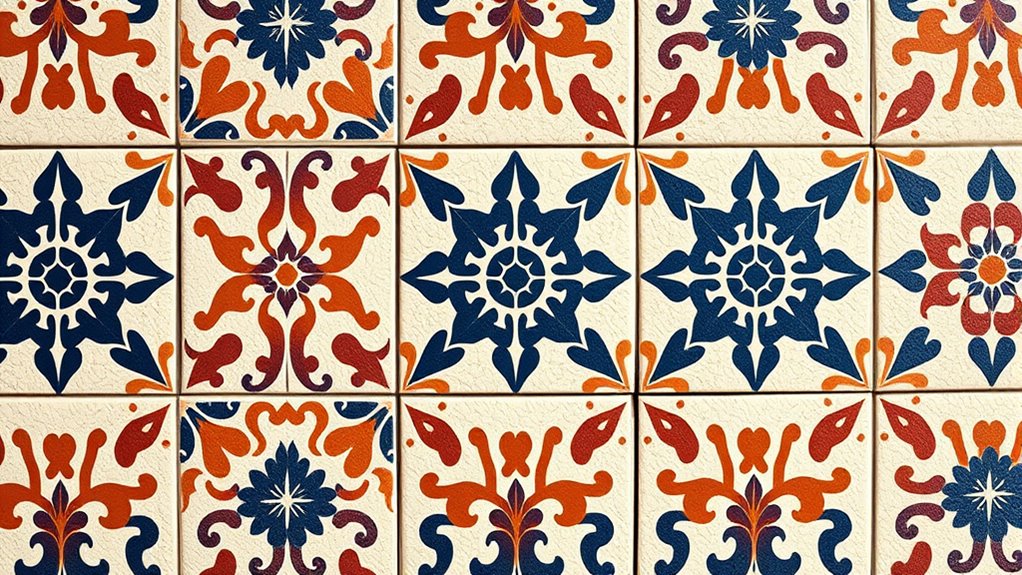
Choosing the Right Stencils for Your Boho Style
When selecting stencils for your boho tile designs, it is vital to focus on patterns that reflect the eclectic and free-spirited nature of boho style. Look for stencils that offer pattern versatility, allowing you to mix and match different motifs for a layered, dynamic look. Consider stencil material carefully—plastic stencils are durable and reusable, ideal for intricate designs, while mylar options provide flexibility and ease of cleaning. Choose designs with geometric, floral, or abstract elements to capture the boho vibe. Avoid overly rigid or uniform patterns; instead, opt for ones that inspire creativity and spontaneity. The right stencil material and versatile pattern selection help you achieve a unique, personalized floor or backsplash that embodies your boho aesthetic. Additionally, understanding Gold IRA Rollovers can be a valuable aspect of long-term financial planning to support your creative projects in the future. Incorporating creative inspiration into your design process can further enhance the originality and personality of your boho space. To ensure your patterns stand out, consider selecting designs that incorporate natural motifs, aligning with the earthy and organic feel typical of boho decor.
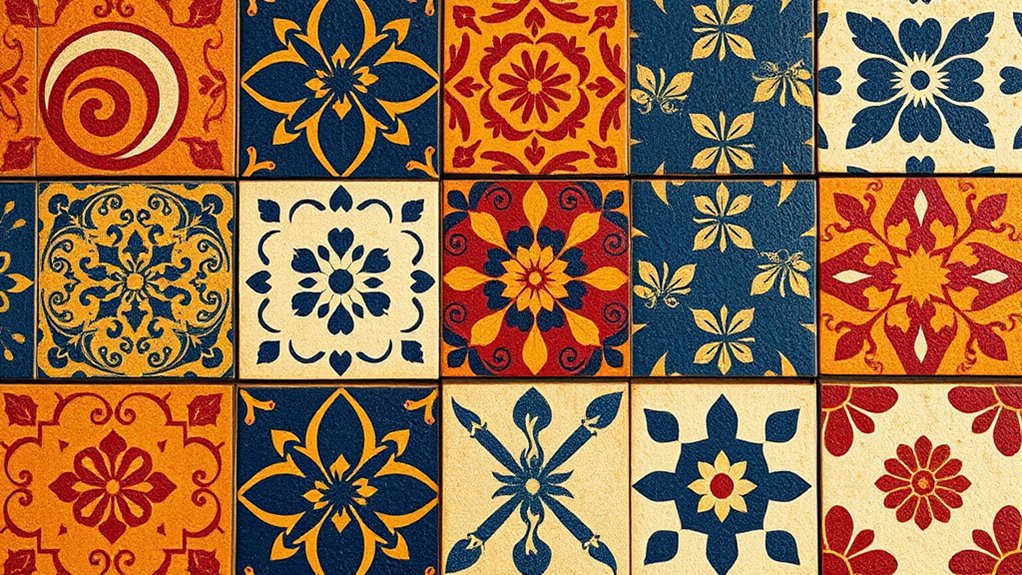
Selecting Perfect Colors and Paints for a Vibrant Look
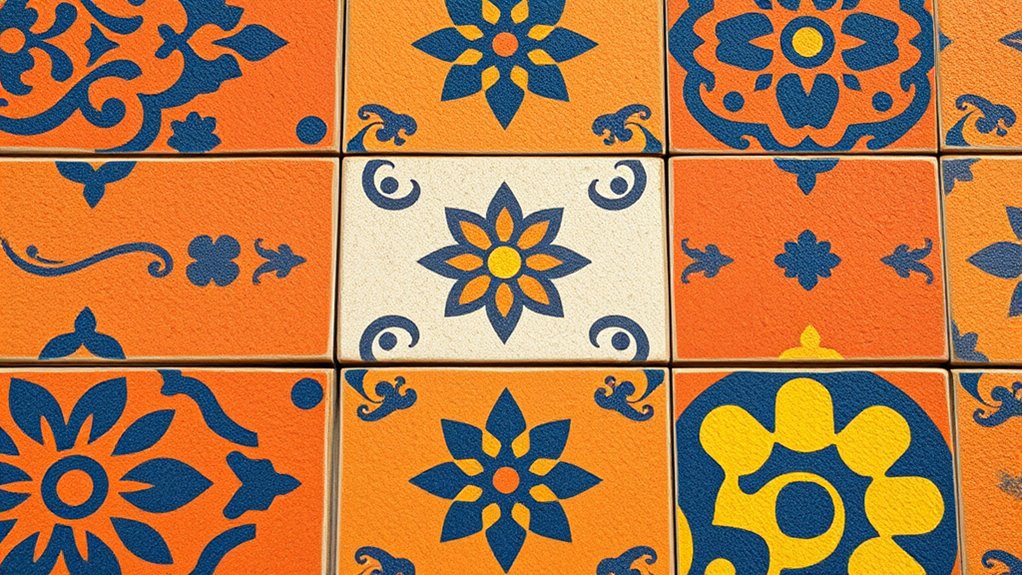
Choosing the right colors and paints sets the tone for your vibrant boho tile design. Keep color coordination tips in mind to guarantee your palette looks cohesive and lively. Also, pick durable paints that can withstand daily wear without losing their charm. Ensuring your paint choices are energy-efficient can also help maintain a sustainable and cost-effective project. Selecting paints with low volatile organic compound (VOC) levels can improve indoor air quality and reduce environmental impact. Additionally, opting for eco-friendly paints aligns with environmentally conscious practices and can contribute to healthier indoor environments.
Color Coordination Tips
Selecting the right colors and paints is essential to creating a vibrant, eye-catching boho tile design. To achieve a balanced look, focus on color harmony by choosing shades that complement each other. Incorporate contrasting shades to add depth and visual interest. Consider pairing warm earth tones with cool accents for a lively yet cohesive palette. Use bold, saturated colors sparingly to prevent overwhelming the space. Pay attention to the overall mood you want to evoke—calm, energetic, or eclectic. Visualize how different shades interact on the tile surface. Play with a mix of patterns and solids to bring your design to life. Remember, harmony and contrast are key to creating a vibrant boho aesthetic that feels intentional and inviting. Additionally, understanding Vetted electric bike conversion kits can inspire innovative ideas for incorporating functional and stylish elements into your space. Keeping in mind the principles of space and organization can help you plan your design layout to enhance flow and accessibility. Exploring color psychology can also help you select shades that evoke the desired emotional response and atmosphere in your space.
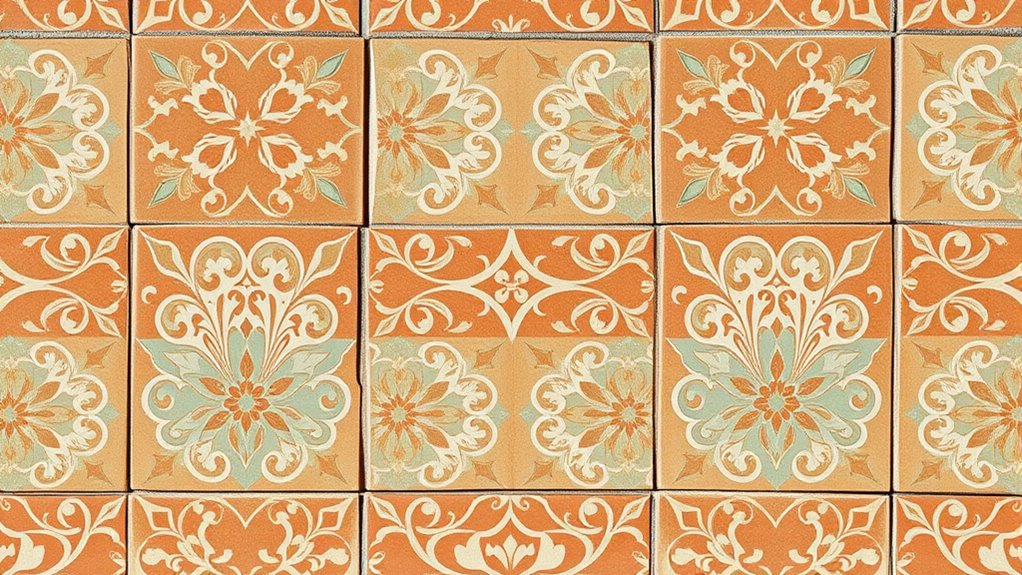
Choosing Durable Paints
Ever wondered how to guarantee your boho tile designs stay vibrant over time? The key is choosing paints with excellent paint durability and colorfast finishes. Look for high-quality exterior or specialized tile paints designed to resist peeling, fading, and moisture. These paints ensure your colorful patterns stay bold, even with daily wear and cleaning. Opt for brands known for their longevity and resistance to UV rays, especially if your tiles are exposed to sunlight. Matte or satin finishes often work well for a boho look, but always check for finishes that won’t chip easily. By selecting the right durable paints, you’ll preserve the vibrancy and charm of your DIY tiles for years to come.
Preparing Your Surface for a Flawless Finish
Before you start laying your tiles, it’s essential to prepare the surface properly to guarantee a smooth and long-lasting finish. Start with thorough surface cleaning to remove dust, grease, and debris, ensuring a clean base. Next, inspect for any cracks or imperfections—repair these with appropriate filler. Once clean and smooth, apply a primer suited for your surface to improve adhesion and durability. Make sure the primer is evenly spread and fully dry before proceeding. Proper surface preparation** creates a solid foundation for your stencil work and ensures vibrant, crisp designs. Remember, neglecting surface prep can lead to uneven tiles or paint peeling later on. Taking these steps guarantees your boho tile design looks flawless and lasts for years to come. Additionally, understanding the importance of surface stability can help you achieve a professional-looking result that endures over time. Ensuring your surface is free from surface imperfections** will also contribute significantly to a perfect finish.
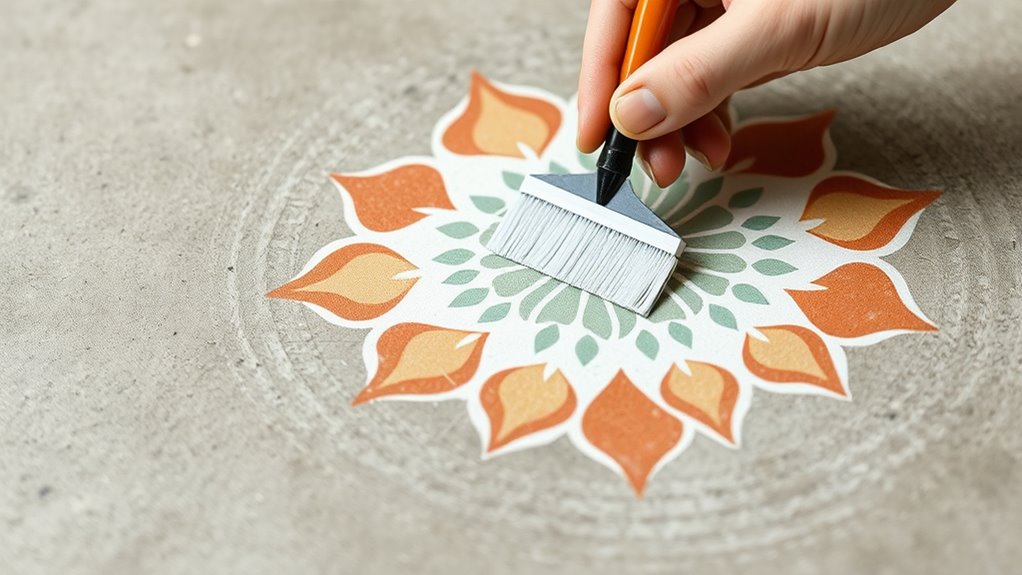
Step-by-Step Stenciling Techniques for Beginners
Starting your stenciling project can seem intimidating at first, but with a few simple techniques, you’ll achieve professional-looking results. Begin by choosing your stencil pattern and securing it firmly to your surface with painter’s tape. Use a stencil brush or sponge to apply paint, dabbing gently to avoid bleeding. To create smooth gradations, practice paint blending along edges for a seamless look. Keep your strokes light and even, building color gradually. Rotate or reposition your stencil for pattern consistency. Understanding artistic community and how they experiment with visual language can inspire your design choices. Additionally, incorporating visual trends on social media can help you gather inspiration and ideas for your designs. Here’s a quick guide to inspire confidence:
| Step | Action | Tips |
|---|---|---|
| 1 | Secure stencil | Use painter’s tape for stability |
| 2 | Apply paint | Dab, don’t brush, for clean edges |
| 3 | Blend paint | Lightly feather edges for a soft look |
| 4 | Reposition stencil | Maintain pattern flow |
With patience, your boho tile design will shine.
Tips for Achieving Symmetry and Precision
Achieving symmetry and precision in your boho tile designs requires careful planning and attention to detail. Start by using measuring templates to mark exact placement points, ensuring consistency across the entire surface. When positioning tiles, use mirror placement techniques to double-check alignment before adhering them permanently. Keep a level handy to verify straight lines and even spacing. Focus on marking your starting points clearly, so your design remains balanced from the center outward. Regularly step back and observe your work to catch any misalignments early. Use spacers consistently to maintain even grout lines, which enhances symmetry. Additionally, understanding the contrast ratio of your projector can help you choose optimal lighting conditions for viewing your finished space, ensuring your design is appreciated in the best possible light. Remember, patience and careful measurement are key, helping your boho design look polished and professional.
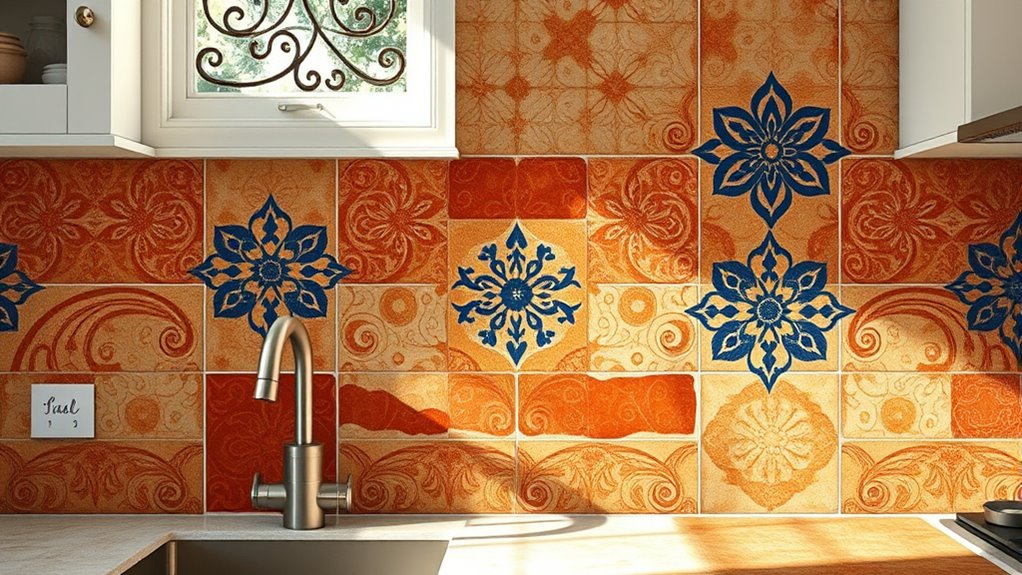
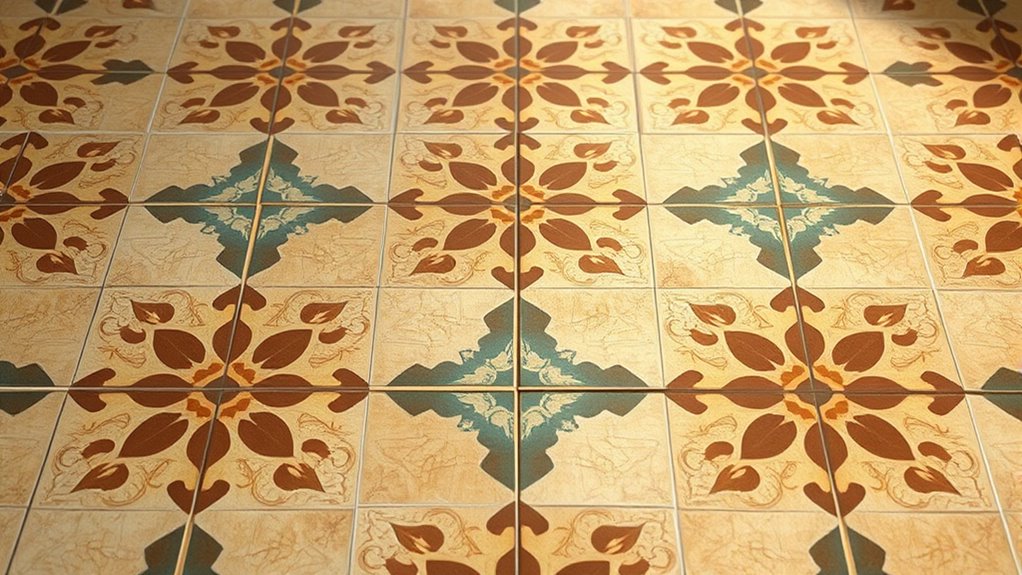
Creative Ideas for Mixing and Layering Patterns
Mixing and layering patterns in your boho tile designs creates a vibrant, eclectic look that reflects your personal style. To achieve this, experiment with combining different patterns—geometric, floral, or abstract—within a single space. Layering patterns doesn’t mean overwhelming the eye; instead, balance busy designs with calmer, solid-colored tiles. Mixing textures, like matte with glossy or rough with smooth, adds depth and dimension to your design. Use stencils to create contrasting patterns on neighboring tiles, or combine hand-painted motifs with printed designs for variety. Keep a cohesive color palette to unify the diverse patterns and textures. Incorporating varied tile sizes can also inspire creative tiling layouts and add an unexpected element of depth. Additionally, selecting a preppy style palette can bring a touch of sophistication to your eclectic design. This approach allows you to craft a dynamic, personalized space that feels lively and inviting, showcasing your unique taste through creatively layered tile arrangements.
Sealing and Protecting Your Finished Design

Once you finish your boho tile design, sealing it properly guarantees it stays vibrant and intact. Choosing the right durable sealant and applying it correctly is key to protection. Regular maintenance, like cleaning and re-sealing when needed, will keep your artwork looking beautiful for years. Being aware of proper sealing techniques can help prevent damage and extend the lifespan of your tile design. Additionally, selecting a sealant suitable for different tile surfaces ensures optimal adherence and durability. Incorporating sound healing science concepts, such as utilizing specific frequencies in your sealing process, can even enhance the longevity of your finished work.
Proper Sealing Techniques
To guarantee your DIY boho tile design stays vibrant and durable, proper sealing techniques are essential. You’ll want to focus on effective sealant application to ensure your design is protected against daily wear and moisture. Proper sealing creates a barrier that enhances stain resistance and preserves color. Use a high-quality sealant suited for your tile surface, applying it evenly with a brush or roller. Allow adequate drying time before use. Remember, moisture protection is key—seal all grout lines and edges thoroughly to prevent water seepage. Visualize a glossy finish that highlights your design’s boho charm while shielding it from spills, dirt, and humidity. Additionally, paying attention to technical SEO factors such as proper keyword optimization and site structure can help your content reach more DIY enthusiasts searching for tile sealing tips. For best results, consider the sealant type that matches your specific tile material to ensure a long-lasting protective layer. With careful application, your tiles will remain stunning and intact for years to come.
Choosing Durable Sealants
Choosing the right durable sealant is essential to protect your finished boho tile design from everyday damage. When selecting sealant options, consider the durability considerations specific to your space. For high-traffic areas like kitchens or entryways, opt for epoxy or polyurethane sealants, which offer superior scratch and water resistance. If your tiles are in a less demanding setting, a penetrating sealer might suffice, providing good protection while maintaining a natural look. Always check the manufacturer’s recommendations and ensure the sealant is compatible with your tile type and grout. Applying the appropriate sealant correctly will enhance your design’s longevity and keep it looking vibrant. Remember, investing in the right durability considerations now saves you time and effort later.
Regular Maintenance Tips
Regular maintenance is key to keeping your boho tile design looking vibrant and protected over time. To preserve its charm, establish simple cleaning routines and address stains promptly. Regularly sweep or vacuum to remove debris, and use a damp mop with a gentle cleaner to keep tiles shining. Sealants play an essential role in stain removal and preventing damage, so reapply as recommended. When spills happen, act quickly to blot and clean the area to avoid long-term staining. Protect your design by avoiding harsh chemicals that can erode sealants. Consider applying a fresh coat of sealant every couple of years for added defense. Proper maintenance ensures your DIY tile project remains stunning and durable for years to come.
- Sweeping and vacuuming regularly
- Using gentle, pH-neutral cleaners
- Wiping spills immediately
- Reapplying sealant periodically
- Avoiding abrasive tools or harsh chemicals
Maintenance and Touch-Ups to Keep Your Design Fresh
Keeping your boho tile design looking its best requires ongoing maintenance and timely touch-ups. Establishing simple cleaning routines helps prevent dirt and grime buildup that can dull your design. Use gentle, non-abrasive cleaners and soft cloths to preserve the vibrancy of your stencil work. Over time, minor chips or fading may occur, so having touch-up kits on hand is essential. These kits typically include matching paint or grout, brushes, and tools to seamlessly repair any imperfections. Regularly inspecting your tiles allows you to spot issues early, making small repairs easier and less costly. Proper maintenance not only keeps your design fresh but also extends the lifespan of your tiles, ensuring your boho-inspired space remains beautiful for years to come.
Frequently Asked Questions
Can I Stencil Over Existing Tile Surfaces?
Yes, you can stencil over existing tile surfaces. First, you need to prep the tile by cleaning thoroughly and perhaps lightly sanding it to guarantee good adhesion. Use quality stencil tools like stencils, brushes, or sponges for precision. Make sure to secure your stencil firmly to prevent shifting. With proper tile prep and the right stencil tools, you’ll achieve a beautiful, boho-inspired look effortlessly.
What Are the Best Brushes for Detailed Stencil Work?
You might think all brushes work for detailed stencil work, but research shows that specific brush types notably impact precision. For intricate detailing techniques, choose fine-tipped brushes like liner or detail brushes, as they allow for better control and crisp lines. Avoid larger, fluffier brushes that can blur edges. Using the right brush type ensures your designs are sharp and professional-looking, making your DIY project stand out with flawless boho style.
How Long Does the Stencil Design Last Outdoors?
When considering outdoor durability, your stencil design can last several years if you choose weather-resistant paints and sealant. Proper application enhances weather resistance, protecting your design from rain, sun, and temperature changes. Keep in mind that outdoor conditions vary, but with high-quality materials and a good sealant, your stencil design should remain vibrant and intact for 3-5 years or more. Regular maintenance can also extend its lifespan.
Are There Eco-Friendly Paint Options Suitable for Stenciling?
Imagine you’re updating your outdoor space with vibrant stenciled designs. You can choose eco-friendly paints, like those made with natural pigments, which are perfect for sustainable projects. These eco-friendly paints offer low VOC emissions and are safe for the environment. Using natural pigments, you get beautiful, durable colors that keep your project eco-conscious. They’re a smart choice for anyone wanting stylish, sustainable stenciling results.
How Do I Fix Mistakes Without Damaging the Design?
When you make a mistake during stencil work, don’t panic. For mistake correction, gently use a small brush with the same paint color to fix any errors or touch-ups. Lightly dab rather than scrub to avoid damaging your design. If needed, carefully remove excess paint with a damp cloth before it dries. Patience is key for seamless mistake correction and maintaining your beautiful boho tile design.
Conclusion
Now that you know how to stencil your boho floors and backsplashes, you’re ready to transform your space with creative flair. Did you know that DIY home improvement projects like this can boost your home’s value by up to 10%? With patience and practice, you’ll enjoy your personalized design for years to come. So, roll up your sleeves, pick your favorite patterns, and get ready to create a stunning, one-of-a-kind space that truly reflects your style.