Interior Design
Combining Aesthetic and Witchcore Room Decor: Create a Mystical Space That Will Leave You Spellbound!
Prepare to transform your space into a captivating sanctuary where witchcore charm meets aesthetic elegance, inviting enchantment at every turn.
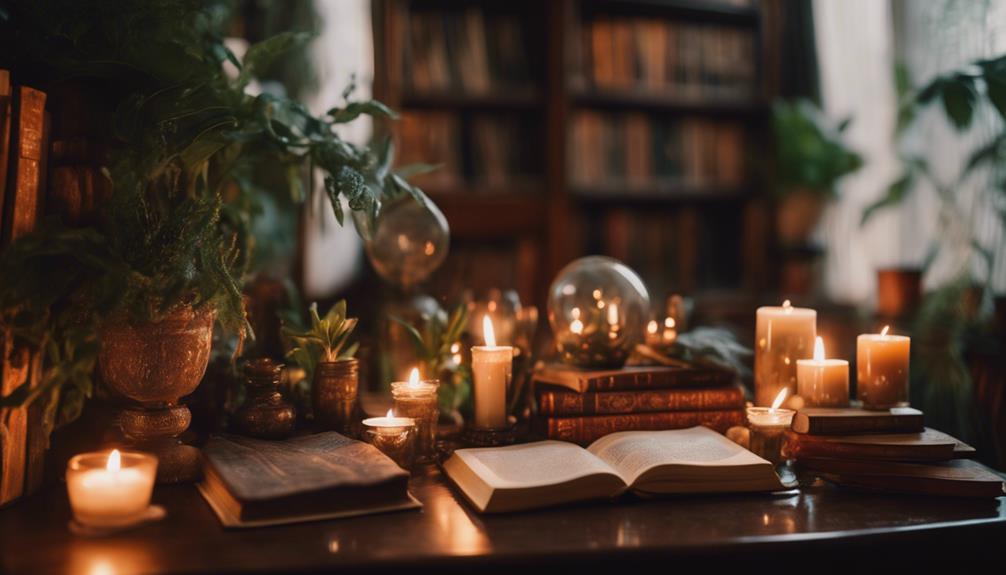
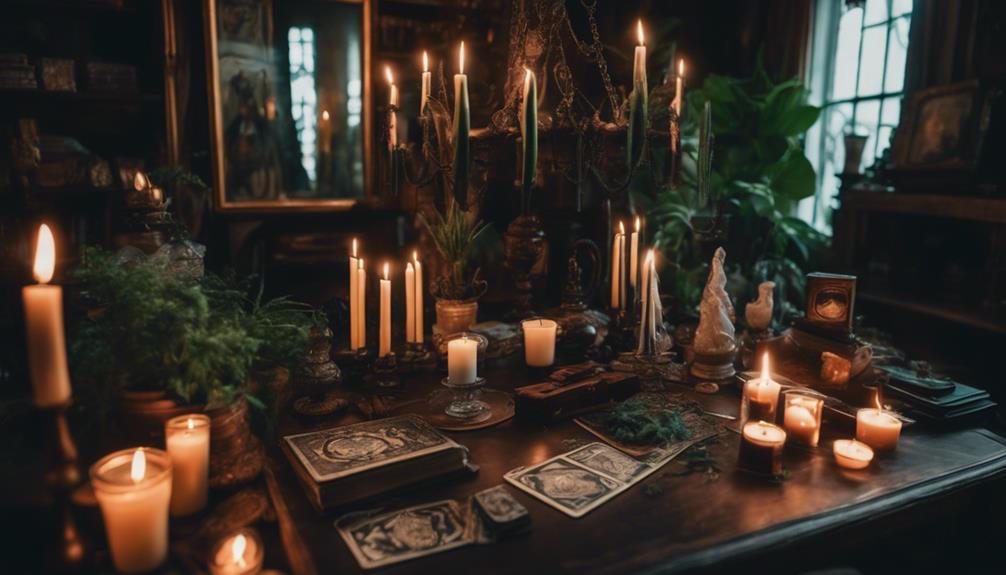
To create a spellbinding space, combine witchcore and aesthetic decor with deep purples, greens, and earthy tones. Use natural materials like dark wood and stone for furniture, and layer rich textures like velvet and lace to enhance comfort and mystique. Incorporate essential fixtures like antique bookshelves and candlelit lanterns for ambiance, while decorative elements such as moon phase hangings and vintage tarot displays add character. Don't forget unique lighting, like hanging crystal chandeliers and string fairy lights, to set the mood. Embrace these elements, and you'll uncover even more enchanting ideas to elevate your mystical haven.
Key Elements
When creating your witchcore room, the color scheme, materials, and textures play an essential role in setting the mood.
You'll want to incorporate dark hues and natural elements to cultivate that enchanting atmosphere.
Let's explore how these key elements can transform your space into a mystical haven.
Color Scheme
How can you create an enchanting atmosphere with a Witchcore color palette that features deep purples, blacks, and forest greens?
Start by embracing these moody hues to establish a mystical vibe in your space. Incorporate earthy tones like browns and muted yellows to connect your decor with nature, enhancing the organic feel of your room.
Don't shy away from mixing in metallic accents like gold, silver, and bronze. These striking elements contrast beautifully against darker shades, adding a touch of elegance and allure.
For a whimsical touch, consider soft pastels like lavender, mint, and blush. These lighter colors can help balance the overall aesthetic while maintaining the enchanting essence.
You might also explore monochromatic schemes by layering varying shades of a single color. This technique creates depth and cohesion, making your Witchcore aesthetic even more intriguing.
Materials
To create a truly enchanting Witchcore space, incorporate natural materials like dark wood, stone, and clay that ground your decor in rustic charm.
Think of sturdy wooden furniture that brings a sense of warmth and connection to nature. Add stone accents, perhaps a small stone altar, to enhance the earthy vibe. Clay pottery can serve as both functional and decorative pieces, housing your favorite herbs or crystals.
Don't forget to introduce potted plants throughout the room. They not only purify the air but also add life and color to your mystical haven. Choose plants that resonate with the aesthetic, like snake plants or pothos, to keep the space feeling fresh and vibrant.
For lighting, opt for warm fairy lights that twinkle softly, creating a magical ambiance without overpowering the room. String them along shelves or drape them over your bed to evoke a cozy, inviting atmosphere.
Combine these materials and elements, and you'll effortlessly weave together a space that invites both comfort and enchantment, leaving anyone who enters spellbound by your perfectly curated Witchcore decor.
Textures
Textures enrich your Witchcore space, blending rich fabrics like velvet and silk with natural elements to create a layered, opulent atmosphere that feels both inviting and mystical. By incorporating materials such as wood and stone, you introduce an earthy quality that complements the witchcore aesthetic, deepening your connection to nature.
Think about adding rustic accents with burlap, which can contrast beautifully against delicate lace or tulle. This mix adds depth and visual interest to your home decor. Textured textiles like embroidered throws or woven wall hangings not only enhance the cozy ambiance but also serve as artistic focal points that draw the eye.
Don't shy away from mixing various textures. Pair smooth glass potion bottles with rough-hewn wooden shelves to create a dynamic environment that captivates the senses. Each texture contributes to the overall enchanting vibe, making your Witchcore space feel like a magical retreat.
Embrace the art of layering textures and let your creativity flow as you curate a home that resonates with the mystical energy of witchcore style.
Essential Fixtures and Furniture

When it comes to essential fixtures and furniture for your witchcore room, you'll want pieces that reflect both style and purpose.
Think about incorporating an antique wooden bookshelf to display your favorite tomes, a vintage cauldron side table for a unique touch, and a crystal ball coffee table to spark a sense of magic.
Each of these items won't only enhance the aesthetic but also serve functional roles in your enchanting space.
Antique Wooden Bookshelf
An antique wooden bookshelf becomes an enchanting centerpiece in your witchcore room, effortlessly combining rustic charm with practicality for displaying your favorite grimoires and mystical decor. This essential fixture not only serves as a focal point but also enhances the moody atmosphere characteristic of witchcore aesthetics. The rich, dark wood tones create a backdrop that adds depth and warmth to your space.
When you incorporate a vintage or distressed bookshelf, you evoke a sense of history and mystique, both crucial for perfect witchcore room decor. It's the ideal place to layer decorative elements like crystals, dried herbs, and unique artifacts, enriching your room's aesthetic experience.
Plus, the versatility of antique wooden bookshelves allows for artistic expression. You can style them with various lighting solutions, such as candles or fairy lights, to create an inviting ambiance that draws the eye. This enchanting piece not only holds your cherished books but also tells a story, making it a significant component of your witchcore sanctuary.
Embrace the charm and practicality of an antique wooden bookshelf, and let it transform your space into a magical retreat.
Vintage Cauldron Side Table
Building on the enchanting atmosphere created by an antique wooden bookshelf, a vintage cauldron side table adds a distinctive touch to your witchcore room, serving both as a practical surface and a mesmerizing focal point. Often crafted from cast iron or brass, these tables evoke a magical ambiance that sparks conversation. You can easily source them from antique shops, thrift stores, or online marketplaces, allowing you to discover that perfect piece with rustic charm.
The unique cauldron design offers creative uses, such as storing potions, crystals, or herbs, while also providing a sturdy surface for displaying candles and decorative items. Incorporating a cauldron side table with darker wood or wrought iron accents enhances your room's witchcore aesthetic, harmonizing beautifully with deep greens, blacks, and purples.
To elevate the enchanting vibe even further, consider pairing your cauldron side table with layered textiles like velvet or lace runners. This combination adds softness and texture, making your space feel inviting and mystical.
Ultimately, the vintage cauldron side table not only fulfills functional needs but also serves as an evocative centerpiece in your magical sanctuary.
Crystal Ball Coffee Table
A crystal ball coffee table instantly transforms your witchcore room into a mesmerizing space, blending functionality with an enchanting aesthetic. This striking fixture serves as a focal point, featuring a glass top supported by a decorative crystal ball base. You can choose a design made from dark wood or wrought iron to complement the moody color palette typical of witchcore decor.
To enhance the mystical atmosphere, look for tables with intricate designs or occult symbols on the base. These elements not only add visual interest but also act as conversation starters for your guests. To elevate the enchanting vibe, accessorize your coffee table with candles, tarot cards, or crystals, creating an inviting area perfect for rituals or gatherings.
Additionally, a crystal ball coffee table symbolizes divination and intuition, reinforcing the spiritual themes present in witchcore aesthetics. This unique design element doesn't just serve a practical purpose; it also deepens the connection to the mystical world, making your space all the more enthralling.
Lighting Ideas
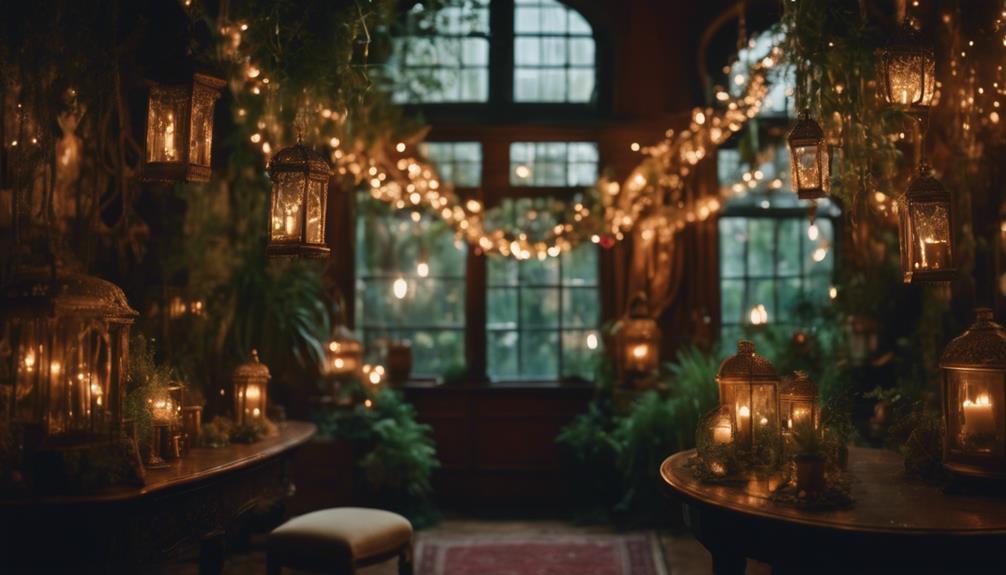
When it comes to witchcore lighting, you can transform your space with a hanging crystal chandelier that sparkles like starlight.
Add candlelit lanterns for a cozy ambiance and moonlit string fairy lights to create a magical vibe.
Don't forget about illuminated crystal orb sconces to enhance the enchanting atmosphere in your room.
Hanging Crystal Chandelier
Hanging crystal chandeliers instantly transform your witchcore room into a magical haven, casting enchanting reflections that enhance the mystical vibe. These stunning fixtures serve as a striking focal point, drawing the eye and creating a mesmerizing atmosphere.
When choosing a chandelier, look for intricate designs that feature a combination of crystals and dark metal finishes. This selection resonates beautifully with the moody color palette typical of witchcore aesthetics.
To elevate the ambiance further, consider chandeliers with multiple tiers. They add depth and complexity to your space, harmonizing with the rich textures present in your decor. The warm glow from the chandelier's bulbs can be complemented by dimmable lighting options, letting you adjust the brightness to suit your mood or activity perfectly.
Moreover, incorporating a chandelier adorned with crystals amplifies the energy in your room, as crystals are thought to promote healing and positivity. With the right chandelier, you'll not only illuminate your space but also create an enchanting sanctuary that invites inspiration and magic into your life.
Embrace the charm of a hanging crystal chandelier, and let your witchcore room shine!
Candlelit Lanterns for Ambiance
Building on the enchanting atmosphere created by hanging crystal chandeliers, candlelit lanterns add a warm, flickering glow that further enhances the mystical vibe of your witchcore room.
These lanterns not only illuminate your space but also create a cozy and inviting ambiance. To truly embody the witchcore aesthetic, opt for lanterns made of wrought iron or aged brass; their rustic charm complements the dark, magical elements of your decor perfectly.
Choose lanterns with glass panels to allow the light to diffuse softly, reducing harshness and contributing to a calming environment. You can elevate the experience even further by incorporating scented candles within these lanterns. Aromas like sandalwood, patchouli, or lavender will envelop your space, enhancing the magical atmosphere.
Grouping multiple lanterns of varying heights creates visual interest and a layered lighting effect, making your room feel even more enchanting. Position them on shelves, tables, or even the floor to cast dancing shadows that evoke a sense of wonder.
With the right candlelit lanterns, your witchcore room will transform into a spellbinding sanctuary that invites relaxation and inspiration.
Moonlit String Fairy Lights
Creating an enchanting atmosphere in your witchcore room is effortless with moonlit string fairy lights that cast a soft, magical glow reminiscent of the moon's light. These lights enhance the mystical ambiance, making your space feel like a starlit night. Available in various styles, you can choose warm white or colored bulbs to perfectly match your room's color palette and decor theme.
Drape them over furniture, walls, or weave them into nature-inspired decor to create a whimsical, dreamlike environment. The gentle illumination invites a sense of tranquility and wonder, ideal for any witchcore aesthetic. Many options are energy-efficient LED lights, providing a sustainable, long-lasting lighting solution that adds charm without a hefty electricity bill.
You can also incorporate moonlit string fairy lights into DIY projects. Illuminate potion shelves or accentuate floral displays to enhance the overall vibe of your room. The possibilities are endless, and with a little creativity, you can transform any ordinary corner into a magical retreat.
Illuminated Crystal Orb Sconces
How can illuminated crystal orb sconces transform your witchcore room into an enchanting haven? These stunning lighting fixtures provide a soft, warm glow that enhances the mystical ambiance you crave. With intricate metal designs, they allow light to filter through, casting mesmerizing shadows on your walls—perfect for creating that witchy vibe.
You'll appreciate the versatility these sconces offer, as many come with adjustable brightness settings. Whether you need a gentle nightlight for quiet reflection or a vibrant glow for rituals and gatherings, you can easily set the mood. For an added touch of magic, consider incorporating colored bulbs in deep purples or greens. These hues complement the dark, moody palette often found in witchcore decor.
Positioning your sconces strategically near mirrors or other reflective surfaces can amplify light and create a fascinating visual display. This not only adds depth to your mystical space but also enhances the overall enchanting feel of your room.
Decorative Elements
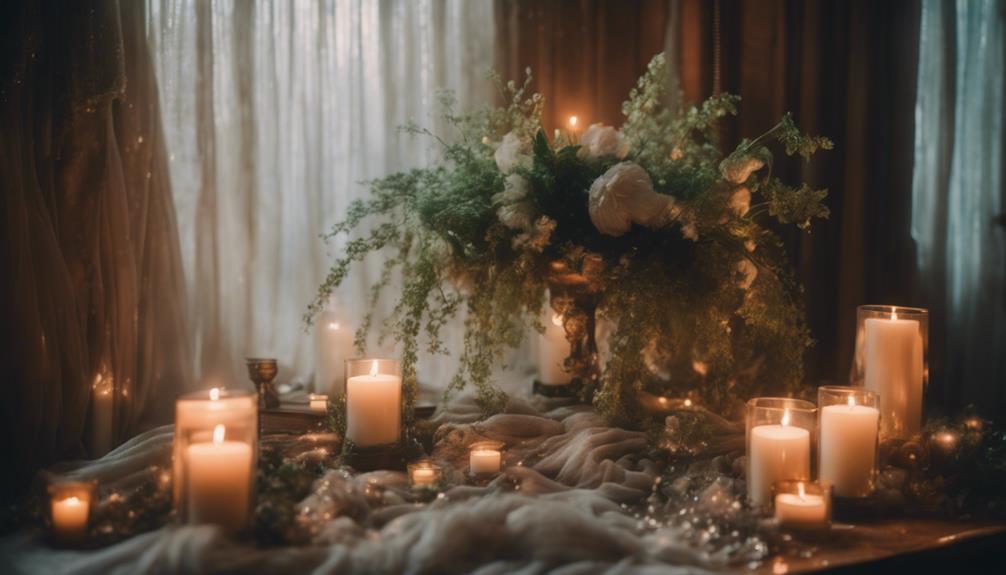
To elevate your witchcore aesthetic, consider adding a moon phase wall hanging that captures the celestial essence of your decor.
An herb-infused dreamcatcher not only adds a mystical touch but also promotes positive energy in your space.
Moon Phase Wall Hanging
A moon phase wall hanging, with its enchanting designs, acts as a mesmerizing centerpiece in any witchcore room, embodying the mystical essence of lunar cycles. These stunning pieces often showcase the different phases of the moon—new, waxing, full, and waning—each symbolizing unique aspects of intention, manifestation, and release in your spellwork.
You can choose materials that resonate with your aesthetic, whether it's wood, metal, fabric, or ceramic, allowing for a personalized touch that enhances your space's vibe. By hanging it at eye level, you promote a deeper connection to lunar energies, making it a powerful tool for meditation, rituals, and setting intentions aligned with the moon's cycles.
To amplify its visual appeal and deepen your connection to nature, consider pairing your moon phase wall hanging with elements like crystals or dried flowers. These additions not only enhance the beauty of your decor but also celebrate the traditions of witchcraft.
As you embrace this celestial charm, you'll create an atmosphere that's both mystical and inviting, leaving you and your guests spellbound.
Herb-Infused Dreamcatcher Wall Hanging
Herb-infused dreamcatcher wall hangings blend traditional craftsmanship with the calming properties of natural herbs, creating a stunning focal point for your witchcore decor. These unique pieces combine the classic dreamcatcher design with dried herbs like lavender, sage, and chamomile, known for promoting relaxation and warding off negative energy.
To craft your dreamcatcher, gather a circular frame, some sturdy string, and your chosen herbs. Weave the herbs into the webbing to enhance both aesthetics and functionality. For added protection, consider incorporating crystals like amethyst or clear quartz, turning your creation into a spiritual tool as well as a beautiful decoration.
Choose a color palette that resonates with the witchcore aesthetic—deep greens and purples work beautifully—while using natural twine or leather for a rustic touch.
Once completed, hang your herb-infused dreamcatcher in a well-lit area. Sunlight filtering through won't only create enchanting shadows but will also allow the herbs to release their calming scents, enhancing the atmosphere of your mystical space. This combination of beauty and intention makes it a magical addition to your decor.
Vintage Tarot Card Display
Crafting a vintage tarot card display not only adds a mystical touch to your decor but also invites conversation and exploration of their rich symbolism.
To create this enchanting focal point, consider using shadow boxes or ornate frames that protect the cards while transforming them into fascinating wall art. The intricate illustrations and deep meanings behind each card can spark curiosity and provide inspiration for your guests.
Choose antique or uniquely styled frames to elevate the elegance of your display, ensuring it aligns with your overall witchcore aesthetic. You can arrange the tarot cards in a fan or stacked formation to add dynamic energy to the space. This setup encourages viewers to investigate the meanings and stories behind the cards.
To further enhance the ethereal vibe, combine your vintage tarot cards with natural elements like crystals or dried herbs. This integration not only amplifies the mystical ambiance but also ties the display into the broader witchcore theme.
Flooring
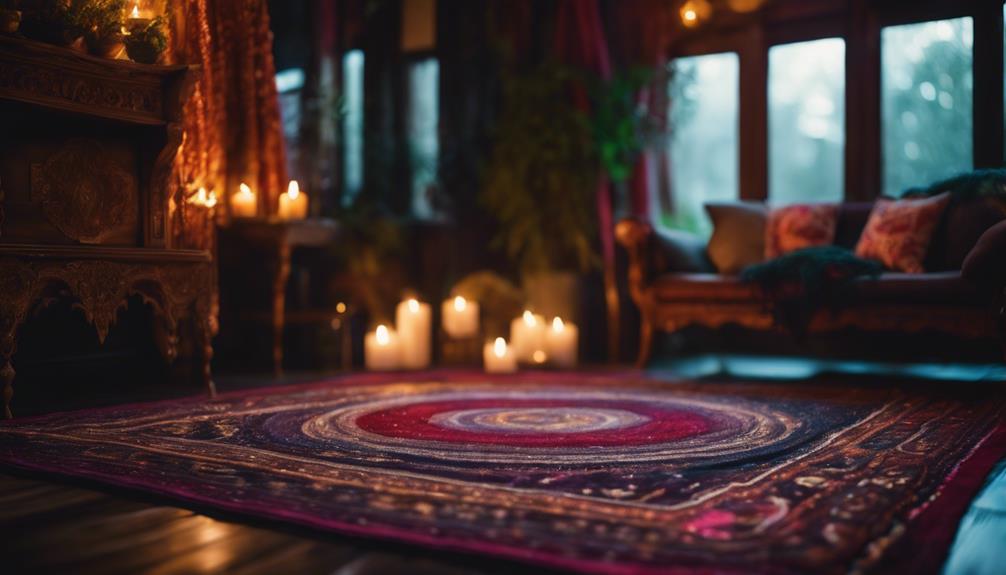
When choosing flooring for your witchcore space, dark stained hardwood adds a rich, moody foundation.
Pair it with a soft, plush velvet rug to create a cozy vibe that invites relaxation.
Alternatively, weathered stone tile can bring an earthy, mystical touch that perfectly complements your decor.
Dark Stained Hardwood Floor
Dark stained hardwood floors set a rich, moody foundation that perfectly complements the Witchcore aesthetic. When you choose darker wood tones like walnut or ebony, you create a striking contrast against lighter decor elements. This balance not only enhances the visual appeal but also deepens the mystical ambiance of your space.
Hardwood is durable and easy to maintain, making it a practical choice for showcasing rustic furniture and various decorative accents that embody the Witchcore vibe. Plus, dark stained floors absorb light, contributing to a cozy and intimate atmosphere—ideal for an enchanting environment filled with candles and soft lighting.
As you explore your decor options, consider how area rugs with intricate patterns can further enhance the magical feel of your room. They add warmth and texture while complementing your dark stained hardwood floors.
This combination creates an inviting atmosphere, perfect for curling up with a spellbook or hosting a witchy gathering.
Soft, Plush Velvet Rug
A soft, plush velvet rug adds a luxurious layer to your witchcore decor, enhancing both comfort and the enchanting atmosphere of your space. The deep, rich colors of these rugs, like dark purples or emerald greens, beautifully complement the moody palettes typical of witchcore aesthetics. As you step onto the velvety surface, you'll feel the plush comfort underfoot, creating a cozy environment perfect for relaxation.
In addition to comfort, the layered texture of a velvet rug contributes to the richness of your room, inviting you and your guests to sink into its warmth. The reflective quality of the fabric catches light from candles and fairy lights, producing a shimmering effect that elevates the overall ambiance.
To truly embrace the witchcore theme, consider choosing a rug adorned with intricate patterns or mystical motifs. This not only serves as a functional element but also transforms it into a statement piece within your decor.
Weathered Stone Tile Flooring
How does weathered stone tile flooring enhance the rustic charm of your witchcore decor? This type of flooring introduces an organic, earthy element that perfectly complements the mystical atmosphere of your space. The natural textures of the stone create a warm, inviting feel, echoing the deep greens and blacks often found in witchcore aesthetics.
Weathered stone tiles aren't only visually appealing but also practical. They're durable and easy to maintain, making them ideal for a stylish yet functional setting. Imagine stepping onto cool, uneven tiles that evoke the essence of an ancient, enchanted environment—it's like walking through a magical domain.
Pair your flooring with warm lighting and natural elements like potted plants or candles to enhance the eerie ambiance. The juxtaposition of the stone's rugged surface against soft furnishings creates an enchanting contrast, inviting curiosity and wonder.
How Can I Combine Witch Room Ideas with Aesthetic Decor for a Mystical and Captivating Space?
Transform your space with mystical charm by combining witch room ideas with aesthetic decor. Use rich, dark colors like deep purples and blacks, incorporate crystal ball accents, and add velvet cushions. Hang ornate tapestries, place vintage candles, and add pops of metallic accents for a captivating and mystical ambience.
Conclusion
By blending aesthetic and witchcore decor, you can transform your space into a mystical haven that resonates with your unique style.
Incorporate key elements like essential fixtures, enchanting lighting, and decorative touches that spark joy and curiosity.
Don't forget to pay attention to your flooring—it sets the foundation for your magical retreat.
Embrace your creativity and let your space reflect your inner sorceress.
With a little imagination, you'll create a room that truly leaves everyone spellbound!
Interior Design
How to Build Furniture
Wondering how to create your own stunning furniture? Discover essential tips and techniques that will elevate your woodworking skills to the next level.
To build furniture, start by outlining a clear design plan. Determine the dimensions, materials, and joinery you'll use. Choose appropriate wood, with softwoods being ideal for beginners. Precision cutting is essential, so make certain you have sharp tools and maintain safety practices. Assemble your pieces with wood glue and screws, conducting a dry fit first to check everything aligns. Finish with sanding and applying stain or sealant for a polished look. With the right tools and techniques, you can create impressive furniture that suits your style. Keep going, and you'll discover even more tips and tricks for successful projects.
Key Takeaways
- Start with a detailed project design, including dimensions and materials, to guide your furniture build effectively.
- Select appropriate materials, like softwoods for beginners or plywood for stability on flat surfaces.
- Utilize precision cutting techniques, ensuring accurate measurements and safe tool usage for quality pieces.
- Organize the assembly process by dry fitting components first to check alignment and fit before securing them.
- Finish with sanding and applying a protective coat, inspecting for imperfections under good lighting for a polished result.
Project Design
When it comes to project design, having a clear plan in hand is vital for your furniture build. Start by specifying dimensions, fixtures, joinery, and finishes. This detailed plan helps guarantee that you're on the right track from the get-go.
For those looking to incorporate unique elements into their designs, consider exploring unique planter designs to add a touch of creativity. Sketching your designs, whether by hand or using software like Sketchup, lets you visualize the final product, making adjustments before you start cutting wood.
Once you've nailed down your design, it's time to create a detailed cut list. This list is essential as it allows for accurate material estimation and keeps you organized during the building process. By knowing exactly what you need, you can minimize waste and save time.
Also, think about the style you want—modern, rustic, or traditional. Aligning your furniture design with the intended aesthetic and functional purpose will guide your decisions throughout the project.
Material Selection
After finalizing your project design, the next step is material selection. Choosing the right wood is essential. If you're a beginner, softwoods like pine are more manageable due to their workability.
On the other hand, hardwoods such as oak and walnut provide durability but can be trickier to work with and costlier. For flat surfaces, consider using plywood; it's strong, stable, and less prone to warping, making it perfect for tabletops or shelving.
Incorporating natural materials like reclaimed wood can also enhance the rustic charm of your furniture, aligning with the modern farmhouse decor trends.
Don't overlook sustainable materials like reclaimed wood or certified wood products. They not only lessen your environmental impact but also bring unique character to your furniture.
Additionally, understanding the properties of different materials is essential. For outdoor projects, opt for rot-resistant wood to enhance longevity and functionality.
As you navigate your material selection, always weigh the cost against quality. Investing in higher-quality hardwoods or finishes can lead to improved durability and aesthetic appeal in your final product.
With the right tools in hand, you'll be well-equipped to bring your furniture vision to life, ensuring that your selections meet both your needs and your style.
Cutting Techniques
When you're cutting your materials, precision is key to achieving a polished final product.
To guarantee you're equipped for the best results, consider utilizing tools that offer superior dust and allergen elimination during your workspace cleanup.
Always prioritize safety by using the right protective gear and tools.
With the right techniques, you can guarantee clean cuts and a perfect fit during assembly.
Precision Cutting Methods
Achieving precision in cutting is essential for any furniture-building project, as it directly impacts the overall quality and fit of your pieces. Start by milling your lumber properly; guarantee it's flat and straight to maintain accuracy during the cutting process. Use jigs or guides to achieve precision cuts, which helps maintain consistent lengths and widths for all project parts, guaranteeing uniformity in assembly.
Employ a radial saw for your initial cuts to manageable lengths and check for cupping, guaranteeing that panels are cut to appropriate widths. Before you cut, mark all pieces on the lumber with chalk to avoid mistakes and guarantee accurate measurements throughout the project.
Here's a quick reference table to highlight the emotional aspect of precision:
Emotion | Importance in Cutting | Outcome |
---|---|---|
Frustration | Poor measurements | Wasted materials |
Satisfaction | Accurate cuts | Perfect fit |
Confidence | Consistent lengths | Smooth assembly |
Pride | Quality craftsmanship | Beautiful furniture |
Relief | Avoiding mistakes | Successful project |
Using these precision cutting methods will elevate your furniture-building experience and lead to stunning results.
Safety During Cutting
Prioritizing safety during cutting is essential to secure a successful and injury-free furniture-building experience. Always wear appropriate safety gear, including goggles, gloves, and a dust mask, to protect yourself from flying debris and harmful dust.
Before you begin, verify that all cutting tools are sharp and well-maintained. This minimizes the risk of accidents and helps you achieve cleaner cuts.
When using table saws or band saws, employ push sticks or push blocks to keep your hands at a safe distance from the blades. A clear workspace is vital; make sure all materials are secured and stable to prevent slips or unexpected movements while cutting.
Additionally, familiarize yourself with the specific safety protocols and operational guidelines for each cutting tool you'll be using. Different tools may have unique safety requirements that are important to follow.
By taking these precautions, you'll not only protect yourself but also enhance the quality of your work. Remember, a safe cutting environment leads to better results and a more enjoyable furniture-building experience.
Stay safe and focused, and you'll find that cutting can be both efficient and rewarding!
Assembly Process
Before you start assembling your furniture, make sure to organize all your parts for an efficient workflow.
Conduct a dry fit of the components to check their alignment and fit—this step can save you a lot of time later.
Efficient Workflow Organization
When tackling furniture assembly, organizing your workflow can make all the difference in efficiency and effectiveness. Start by gathering all project parts and grouping similar components together. This not only streamlines your workflow but also minimizes time spent searching for pieces during the process.
Before you plunge into assembly, perform a dry fit of all components to guarantee proper alignment and fit. This step allows you to make any necessary adjustments before applying adhesives or fasteners.
When you're ready to build furniture, utilize appropriate adhesives and fasteners, like wood glue and screws, to confirm strength and stability in your assembled piece.
Employ clamps to secure parts during the drying or setting phase. This keeps joints aligned and square while the adhesive cures, preventing any mishaps.
Throughout the assembly process, continuously check for square and alignment. This vigilance helps you avoid structural issues that may arise from misalignment.
Dry Fit Components
To guarantee a successful assembly, dry fitting your components is essential. This process involves putting together your furniture parts without adhesive or fasteners, allowing you to check for proper alignment and fit. By doing this, you can spot any gaps or inconsistencies in joints and make adjustments before the final assembly.
Start by using your Kreg pocket hole jig to create precise joints. Once you've prepared your components, assemble them using your hand tools. Don't forget to measure diagonally across the frame; equal measurements will confirm that everything is square and aligned. If you notice any discrepancies, adjust your pieces accordingly.
Clamps are vital during the dry fit. They'll hold your components in place, simulating the pressure you'll apply during the final assembly. This step can save you time and materials by preventing mistakes that could lead to costly rework or wasted supplies.
In the end, a thorough dry fit sets the foundation for a smoother assembly process, ensuring your furniture turns out exactly as you envisioned.
Finishing Touches
Finishing touches are essential for transforming your furniture project from a basic build to a polished masterpiece. To achieve a smooth finish, start by sanding all surfaces using progressively finer grits, beginning with 80 and moving up to 220. This step removes imperfections and preps the wood for staining.
If you're working with blotchy woods like cherry or pine, I highly recommend applying a pre-stain wood conditioner. This guarantees even absorption of stain and prevents unsightly splotches. Use a foam brush or lint-free cloth to apply your stain, always following the wood grain for a natural look.
After applying each coat of finish, let it dry fully—typically at least 24 hours—before adding the next layer. Lightly sand with fine grit sandpaper between coats to improve adhesion. Finally, inspect your finished piece under good lighting to catch any imperfections. If you find rough spots, smooth them out with fine-grit sandpaper for that perfect touch.
Step | Action | Recommendation |
---|---|---|
Sanding | Use grits 80 to 220 | Guarantee a smooth surface |
Pre-Stain | Apply wood conditioner | For even stain absorption |
Finishing | Follow grain with a foam brush | Achieve a natural appearance |
Essential Tools
Having the right tools at your disposal can make a significant difference in your furniture-building experience. For successful furniture making, essential tools include a miter saw for making crosscuts, a cordless drill for drilling holes and driving screws, and clamps to secure pieces during assembly.
These clamps help create strong joints, guaranteeing your furniture holds up over time. A Kreg pocket hole jig is a game-changer, simplifying the process of creating strong, hidden joints. It's an invaluable tool for both beginners and seasoned woodworkers.
To achieve precise angles and squareness in your cuts, invest in a speed square and a framing square. These tools are vital for achieving professional-looking results.
Don't overlook the importance of a measuring tape for obtaining accurate dimensions and a level to guarantee that your assembled furniture is stable and properly aligned.
Investing in high-quality power tools not only improves durability and performance but also enhances your overall woodworking experience. By equipping yourself with these essential tools, you'll set a solid foundation for your furniture-making projects, paving the way for success.
Overcoming Challenges
How do you tackle the challenges that come with building furniture? Start by overcoming any intimidation you might feel toward power tools. Choose simpler projects initially to build your confidence and become familiar with tools like the circular saw. This hands-on experience is essential.
Consider engaging in online tutorials or local workshops; they provide practical learning opportunities that tackle specific obstacles you may face.
Next, focus on accurate measuring and planning. Measure multiple times and create a detailed plan, including a cut list, to minimize errors and prevent wasting materials. This thorough preparation sets a solid foundation for your project.
Don't hesitate to tap into community resources, such as forums and social media groups. These platforms offer invaluable support and advice from experienced DIYers who've encountered the same challenges.
Aesthetic Considerations
What makes furniture truly stand out? Aesthetic considerations play an essential role in elevating your piece of furniture from ordinary to extraordinary.
First, maintaining square cabinets is critical for inset door installation, which enhances the overall look. Understanding the difference between inset and overlay cabinet doors can greatly impact both design and functionality.
Next, think about your choice of colors and textures. Finishing touches can dramatically influence the visual impact and perceived value of your furniture. Incorporating contrasting materials, like wood and metal, adds visual interest and depth, making your piece more appealing.
Don't overlook the importance of consistent grain flow across the pieces. This not only contributes to a cohesive look but also showcases the quality of craftsmanship involved.
Using a miter saw guarantees precise cuts that align perfectly, which is necessary for achieving that polished finish.
By focusing on these aesthetic elements, you'll create furniture that not only serves a purpose but also enhances the beauty of your space.
Prioritize these considerations, and you'll find your work resonates with style and sophistication.
Frequently Asked Questions
Is It Cheaper to Buy or Build Your Own Furniture?
It's generally cheaper to build your own furniture than to buy it. By sourcing materials wisely and investing time in DIY projects, you'll save money while creating customized pieces that suit your style and needs.
How Hard Is It to Build My Own Furniture?
You might think building your own furniture's impossible, but it's not that hard. With some patience, practice, and the right tools, you'll find yourself creating pieces that reflect your style and save you money.
How to Build Furniture Out of Wood?
To build furniture out of wood, start by selecting your lumber. Plan your project with detailed drawings, cut lists, and gather tools. Cut accurately, assemble with strong joints, and finish with sanding and protective coatings.
What Is the Most Profitable Furniture to Build?
Did you know custom-made furniture can yield profits between 50% to 300% above material costs? To maximize earnings, focus on unique designs, eco-friendly materials, or outdoor pieces, appealing to consumers' desires for quality and style.
Conclusion
Building your own furniture can not only save you money but also allow you to express your personal style. Did you know that DIY furniture projects can boost your home's value by an average of 10%? By following the steps we've discussed—from design to finishing touches—you can create pieces that are both functional and beautiful. So grab your tools, release your creativity, and enjoy the rewarding experience of making furniture that's uniquely yours!
Interior Design
How to Fix a Sagging Sofa
Transform your sagging sofa into a comfortable haven with simple fixes that could extend its lifespan—discover the essential steps to revive your furniture!
If your sofa's sagging, start by inspecting the cushions for wear. Rotate or reverse them to help restore shape. If they're too flat, consider replacing the foam with high-density options. Next, check the serpentine springs; if they're loose or broken, reattach or replace them for better support. You might need tools like a staple gun and pliers for repairs. To prevent future sagging, flip and rotate your cushions every two weeks and check the frame monthly. Maintaining your sofa properly can extend its life, and there's more to discover about keeping it in great shape!
Key Takeaways
- Inspect and assess the cushions for wear; rotate or fluff them to help restore their shape and support.
- Replace sagging foam with high-density options for better support, adding Dacron wrap for extra cushioning.
- Check and repair serpentine springs; reattach loose springs or replace broken ones to maintain structural integrity.
- Regularly rotate and flip cushions every two weeks to distribute wear evenly across the sofa.
- Conduct monthly inspections of the couch frame and joints, tightening any loose screws for added stability.
Causes of Couch Sagging
Couch sagging often happens as a result of several factors that you mightn't even notice at first. One primary reason is the deterioration of the seat cushions. Over time, the foam inside them can lose its shape and support, leading to an uncomfortable, sagging couch. Regular use compresses the cushions, and eventually, they may not bounce back.
Additionally, it's vital to evaluate the implications of wear and tear on the overall structure of your furniture, similar to how financial considerations for elderly care can impact long-term comfort and safety in living situations.
Another common culprit is the springs. If your couch has loose or broken serpentine springs, they won't provide the necessary support for the cushions. This lack of support can greatly contribute to the overall sagging.
Additionally, the quality of materials used in your couch plays a critical role. Lower-quality materials are more likely to sag after repeated use, while higher-quality options can offer better longevity.
Regular wear and tear also affects both the cushions and springs. As weight accumulates over time, the pressure can lead to a noticeable dip in the seating area.
It's important to assess both the cushions and the frame of your couch when diagnosing sagging issues, as problems can arise in multiple components.
Assessing and Repairing Cushions
To tackle the issue of sagging, start by evaluating your cushions. Remove them from the sofa and lay them flat. Check for visible indentations or wear in the foam. If your cushions look uneven, you can often fix this by reversing or rotating them. Regularly fluffing your cushions can also help maintain their shape.
Cushion Condition | Recommended Action |
---|---|
Slightly sagging | Rotate or reverse cushions |
Moderately sagging | Fluff regularly and add a wrap |
Excessively sagging | Replace foam with high-density options |
If your cushions are excessively sagging, consider replacing the foam with high-density alternatives to enhance support and longevity. Another effective strategy is to add a Dacron or polyester wrap around the foam, providing additional structure and cushioning to prevent further sagging.
Fixing Serpentine Springs
Sagging sofas often owe their discomfort to worn-out serpentine springs, which can lose their tension or even break over time. To fix a couch effectively, you need to start by inspecting the frame for any loose or broken springs. If you find loose serpentine springs, use pliers to reattach them to their clips, guaranteeing they fit tightly. A snug connection is essential for providing the support your sofa needs.
Additionally, consider the importance of maintaining a clean environment by regularly using best vacuums for dust removal to eliminate allergens that can affect your overall comfort.
In cases where a spring is broken, you'll need to replace it entirely. Make sure to source the correct size and type of serpentine spring, as using the wrong one can compromise your couch's integrity.
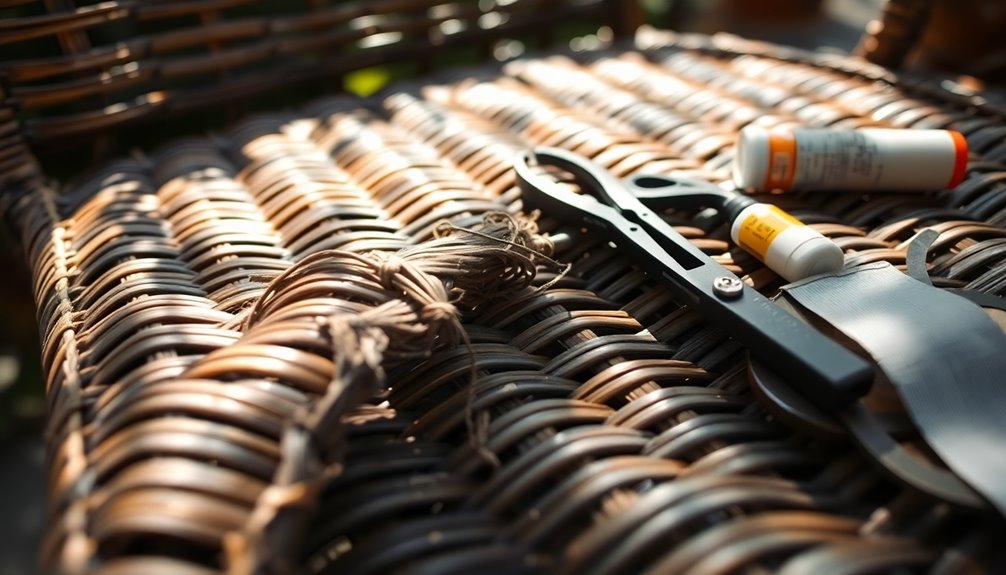
When you install new or repaired springs, secure them with twine or paper-wrapped wire in a Z-shape. This method helps maintain the necessary tension and support for your sofa.
Additionally, regularly checking the condition of the springs can prevent future sagging. By addressing issues promptly, you can save on more extensive repairs later. Taking these steps guarantees that your sofa remains comfortable and supportive for years to come.
Tools and Materials Needed
When tackling a sagging sofa, having the right tools and materials on hand makes all the difference. Start with essential tools like a staple gun for reattaching upholstery, pliers for adjusting springs, and a utility knife for cutting new foam or batting. These will help you effectively address the sagging issue.
Additionally, preparation is key to maximize your repair efforts, much like effective consultation in interior design basics.
You'll also need replacement materials. High-density foam is vital for providing the support your sofa needs, so make sure to source it from local upholstery supply stores or online retailers.
Don't forget to grab some batting and upholstery fabric to finish off your repair.
If you're working on the springs, serpentine springs and matching clips are necessary to guarantee proper support and stability for your couch. A drill can be helpful for removing or securing couch legs and for any frame repairs, enhancing overall stability.
Lastly, safety gear like gloves and a dust mask is recommended. This will protect you against debris and dust while you perform your repair tasks.
With these tools and materials needed, you're well-equipped to restore your beloved sofa!
Maintenance Tips for Longevity
Maintaining your sofa's comfort and appearance is essential for longevity, and a few simple habits can make a big difference. Start by regularly rotating and flipping your sofa cushions to evenly distribute wear. This not only prolongs their lifespan but also keeps your seating comfortable.
Next, inspect the couch frame and joints periodically. Tighten any loose screws and address minor issues before they turn into major repairs. Additionally, clean your upholstery with manufacturer-recommended products and vacuum frequently to prevent dust accumulation and maintain fabric condition.
Schedule routine maintenance checks to assess the condition of springs. Replace any loose or broken ones to guarantee consistent support. Finally, implement preventive measures by using cushion covers to protect against stains and exposure to sunlight, which can fade and damage upholstery over time.
Here's a quick reference table for your maintenance routine:
Maintenance Task | Frequency | Purpose |
---|---|---|
Rotate & Flip Cushions | Every 2 weeks | Even wear |
Inspect Couch Frame | Monthly | Prevent major repairs |
Vacuum & Clean Upholstery | Weekly | Maintain fabric condition |
Check Springs | Every 6 months | Guarantee support |
Use Cushion Covers | As needed | Protect against stains |
Frequently Asked Questions
How to Firm up a Sagging Sofa?
To firm up your sofa, try inserting plywood beneath the cushions for support. You can also replace old foam, rotate cushions regularly, and add batting for extra comfort, ensuring a more comfortable seating experience.
How Can I Make My Sofa Firm Again?
To make your sofa firm again, consider replacing the foam, adding a plywood board for support, or using a sofa topper. Regularly fluffing and rotating the cushions also helps maintain their shape and comfort.
How Do You Fix a Dropped Couch?
Isn't it frustrating when your couch sags, leaving you feeling unsupported? To fix a dropped couch, check the springs, add plywood for support, and consider replacing worn-out foam for a firmer, more comfortable seat.
How to Prevent a Couch From Sinking?
To prevent your couch from sinking, regularly rotate and flip cushions, use additional support underneath, limit heavy loads, and maintain it by cleaning and fluffing cushions. Regular maintenance checks can help you catch issues early.
Conclusion
By addressing the causes of your sofa's sagging and taking the time to repair it, you can extend its life and enjoy your favorite spot again. You might think these fixes are too complicated, but with the right tools and a bit of patience, you'll find they're quite manageable. Investing some effort now will pay off in comfort and savings later. So roll up your sleeves and give your sofa the attention it deserves!
Interior Design
Old Homes vs. Modern Homes: Key Contrasts
Discover the striking contrasts between old and modern homes, from architectural charm to smart technology—what will ultimately influence your choice?
When comparing old homes to modern ones, you'll notice stark contrasts in style, technology, and maintenance. Older homes boast intricate architectural details and historical charm, while modern designs focus on clean lines and open spaces. Functionality differs too; modern homes come equipped with smart systems and energy-efficient appliances, making your life easier. You'll also find that structural integrity varies, with older homes often needing more repairs due to aging materials. Intrigued by how these differences can impact your choice? There's much more to uncover about the benefits and challenges of each style.
Key Takeaways
- Traditional homes feature intricate designs and historical significance, while modern homes prioritize clean lines and open spaces.
- Modern homes incorporate advanced technology and energy-efficient appliances, unlike older homes that often lack these conveniences.
- Structural integrity is enhanced in modern homes through advanced construction methods, whereas older homes may suffer from aging materials and weaker walls.
- Foundations in modern homes use reinforced materials for durability, while older homes may have settling issues due to outdated construction techniques.
- Maintenance needs differ significantly, with older homes requiring more frequent repairs and upgrades compared to the warranties and durability of modern homes.
Architectural Style Differences
When you compare old homes to modern ones, the differences in architectural styles stand out. Traditional houses often showcase classic designs like Victorian or Colonial, emphasizing intricate details and distinct room separations.
You'll notice ornate moldings, high ceilings, and unique craftsmanship that reflect their historical significance. In contrast, modern homes focus on clean lines and simplicity. They prioritize functionality and open spaces, using industrial materials like steel and concrete that create a stark contrast to the local materials found in older constructions.
This evolution in architecture mirrors society's changing needs, embracing sustainability while discarding some of the ornate features of the past. Ultimately, these style differences highlight the diverse approaches to home design across time.
Technology and Amenities Variances
In today's homes, technology and amenities are game-changers that set modern residences apart from their older counterparts.
You'll find modern houses equipped with smart home systems that allow for convenience and control at your fingertips. Features like energy-efficient appliances, central heating, and smart thermostats help save on utility bills while enhancing comfort.
High-speed internet connectivity is standard in contemporary homes, enabling seamless communication and entertainment.
In contrast, older homes often lack these modern conveniences, requiring extensive upgrades to meet today's standards. Retrofitting an old home can improve its amenities but may involve significant effort and cost.
Structural Integrity Variances
Structural integrity varies considerably between old and modern homes, impacting their safety and longevity.
In older homes, you might notice weaker wall construction techniques and aging materials that can compromise stability. Traditional roofing materials may also suffer from wear and tear, leading to leaks or structural issues.
On the other hand, modern homes utilize advanced construction methods and materials that enhance durability. With innovations in design, you'll find better overall structural integrity, thanks to engineered wood and steel reinforcements.
Additionally, maintenance needs differ; older homes often require more frequent repairs. Understanding these variances helps you assess the safety and longevity of your living space, whether you're considering an upgrade or simply weighing your options between old and new.
Foundation Strength Differences
Foundation strength plays an essential role in the stability of a home, and there's a marked difference between old and modern constructions.
Modern foundations typically utilize reinforced concrete and steel, providing enhanced durability that meets stringent building codes. This guarantees your home can withstand various environmental factors over time.
In contrast, older foundations, often made from stone, brick, or wood, can be more susceptible to settling and decay, leading to potential structural issues.
The advanced construction techniques used today not only increase foundation lifespan but also improve overall safety.
If you're considering purchasing or upgrading a home, understanding these foundation differences can help you make informed decisions about long-term stability and maintenance.
Roofing Materials Evolution
As you explore the differences between old and modern homes, consider how roofing materials have evolved alongside foundational advancements.
Traditional roofs often relied on materials like wood shingles, slate, or clay tiles, which, while beautiful, may not offer the durability you need today.
Modern roofing options have emerged, providing enhanced performance and longevity. Here are some key advancements:
- Asphalt shingles: Affordable and widely used.
- Metal roofing: Durable and weather-resistant.
- Solar panels: Sustainable energy generation.
- Synthetic materials: Mimic traditional styles with better durability.
- Green roofs: Promote insulation and biodiversity.
This evolution in roofing not only boosts weather resistance but also contributes to the overall structural integrity of your home.
Choosing the right roofing material can greatly impact your home's longevity and maintenance needs.
Energy Efficiency Differences
Recognizing the importance of energy efficiency in today's world, modern homes markedly outperform older houses in this aspect.
They incorporate advanced insulation technologies and energy-efficient appliances that considerably reduce utility costs. You'll find features like smart thermostats and LED lighting, which further enhance energy savings.
In contrast, older homes often lack these modern upgrades, leading to higher energy consumption and costs. Sustainable design practices in modern architecture also minimize environmental impact, making them more appealing to eco-conscious homeowners.
If you own an older home, consider an energy audit; upgrading to current standards can greatly improve efficiency and comfort.
Embracing these improvements can't only save money but also contribute positively to the environment.
Maintenance and Upkeep Considerations
When it comes to maintenance and upkeep, older homes often demand more attention due to aging materials and potential wear and tear.
You'll likely find yourself investing time and money into repairs. In contrast, modern homes generally require less maintenance, thanks to newer materials and technologies.
Here are some key considerations:
- Frequent inspections are essential for older homes to catch issues early.
- Upgrading systems (like plumbing and electrical) can be a significant expense.
- Landscaping and exterior maintenance might be more demanding for older properties.
- Modern homes typically have warranties on materials and appliances.
- Energy efficiency upgrades can mitigate long-term costs in older homes.
Choosing between old and modern houses involves weighing these upkeep factors carefully.
Frequently Asked Questions
How Do Historical Home Prices Compare to Modern Homes?
When you compare historical home prices to modern homes, you'll often find that older properties can be more affordable upfront, but renovation costs and maintenance can add up, making modern homes more appealing long-term.
What Are the Common Renovation Costs for Old Homes?
Renovating an old home can feel like unearthing buried treasure. You'll likely face costs from plumbing upgrades to roof replacements, ranging from $15,000 to $100,000, depending on the home's condition and your vision.
Are There Tax Benefits for Restoring Historic Homes?
Yes, you can often receive tax benefits for restoring historic homes. These incentives might include property tax reductions or credits, encouraging you to preserve the architectural heritage while minimizing your financial burden during the renovation process.
How Do Neighborhood Aesthetics Differ Between Old and Modern Homes?
Like a patchwork quilt, neighborhood aesthetics blend old and modern homes, creating unique visual stories. You'll notice traditional designs evoke nostalgia, while sleek, modern lines offer freshness. Each contributes distinct charm to the community's character.
What Challenges Exist When Selling an Old Home?
When selling an old home, you might face issues like outdated features, maintenance concerns, and potential buyer apprehension. Highlighting charm and character can help, but you'll need to address necessary repairs and upgrades.
Conclusion
In exploring old homes versus modern homes, you uncover a fascinating blend of history and innovation. Did you know that homes built before 1950 typically have 30% more wood in their construction compared to modern homes? This not only reflects the craftsmanship of the past but also highlights the structural differences between eras. Whether you're drawn to the charm of vintage architecture or the sleekness of contemporary design, both styles offer unique stories and experiences worth appreciating.
-
Beauty and Grooming3 months ago
Embrace Natural Glow With Bronzer-Free Accelerators
-
Beauty and Grooming3 months ago
Discover Top Outdoor Tanning Lotions Today
-
Fashion Trends3 months ago
Fall 2024 Fashion Trends: Be Ahead of the Curve!
-
Vetted3 months ago
15 Best Affordable Sustainable Fashion Brands You Need to Know About in 2024
-
Beauty and Grooming3 months ago
Unlock Flawless Tanning With Skin Prep
-
Vetted3 months ago
15 Best Women's Fashion Trends of 2024 You Need to Know About
-
Vetted3 months ago
15 Best Fashion Trends for Girls in 2024 That You'll Want to Try
-
Fashion Trends3 months ago
Fashion Nova Kids: Stylish Outfits for Your Little Ones!