Beauty and Grooming
Essential Prep for Tanning Bed Success
Tanning bed success starts with knowing your skin type—discover essential tips to achieve that perfect glow without the burn!
To achieve success with tanning beds, it is important to understand your skin type! Fair skin is prone to burning quickly, so it is recommended to start with shorter tanning sessions. Remember to shower and exfoliate before tanning to ensure clean, smooth skin for an even glow! Using a non-oil moisturizer can also be beneficial. Protective goggles are essential for safety. Choose a bronzer that complements your skin tone to enhance your tan, and start with brief sessions. Maintain hygiene by wiping down the tanning bed before use. Are you ready to shine? There is so much more to learn about achieving the perfect tan!
Key Takeaways
- Shower and exfoliate before tanning to remove dead skin cells for a smooth, even tan.
- Hydrate your skin with a non-oil based moisturizer to ensure a uniform application.
- Remove all makeup and personal care products to enhance tanning lotion effectiveness.
- Wear protective goggles to shield your eyes from harmful UV rays during tanning sessions.
Understanding Skin Type
Understanding your skin type is essential for achieving a safe and effective tanning experience.
Think of your skin type as a personal tanning guide, helping you avoid unwanted burns while maximizing your glow.
If you've got fair skin, you might feel like a lobster after just a few minutes under the sun, while light brown or caramel skin usually tans like a pro!
Hair and eye color can also offer clues about how your skin reacts to UV rays.
Ever tried to bake cookies with too much heat? It's a disaster! Similarly, knowing your skin type helps tailor your tanning routine, ensuring you get the perfect sun-kissed look without the painful aftermath.
Skin Preparation Steps
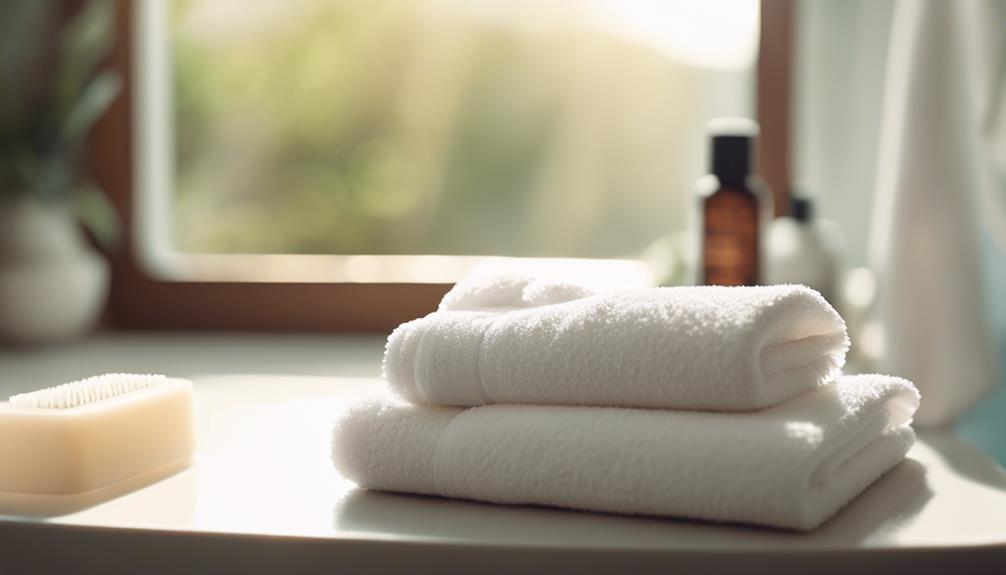
Preparing your skin properly is essential for achieving an even and long-lasting tan.
First things first, always shower and exfoliate to get rid of those pesky dead skin cells. Think of it like prepping a canvas before painting!
Next, hydrate your skin with a non-oil based moisturizer—dry skin can lead to patchy tanning.
If you're planning to shave, do it at least 24 hours in advance, so your skin has time to calm down.
Oh, and don't forget to check your makeup; it's got to go!
Finally, applying a tanning lotion beforehand will help you achieve that golden glow.
Are you excited to see how amazing your tan can look? Let's get you glowing!
Choosing the Right Bronzer
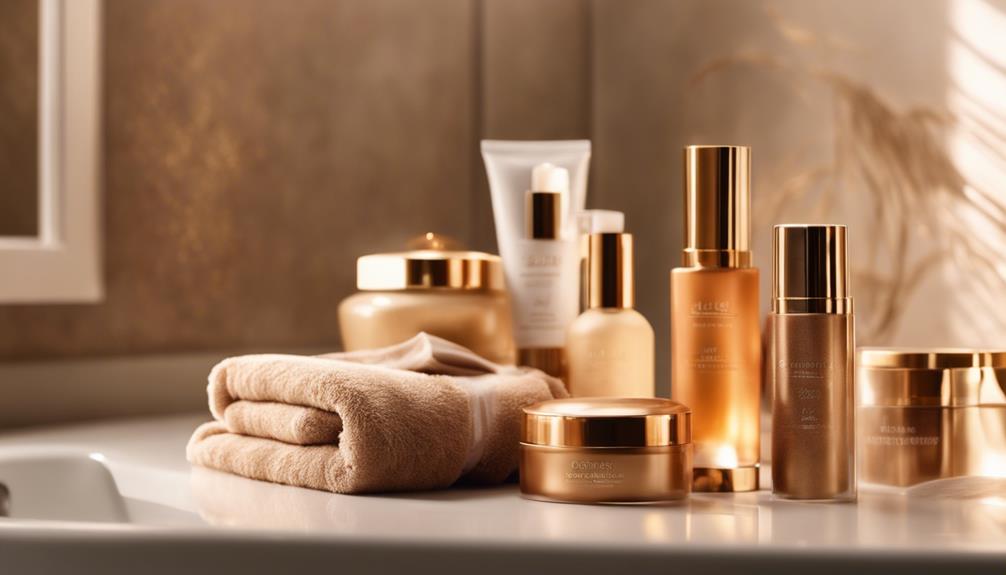
Selecting the right bronzer can make a significant difference in enhancing your tan and achieving a natural glow.
Think of bronzer as the icing on your tanning cake—without it, things might look a bit flat!
You'll want to find a bronzer that matches your skin tone, ensuring you look sun-kissed instead of like a shiny disco ball.
If you have oily skin, matte bronzers work wonders, while shimmering ones are perfect for those with dry skin.
Don't forget to test a bit on your skin before diving in—nobody wants a surprise!
Customizing Tanning Bed Settings
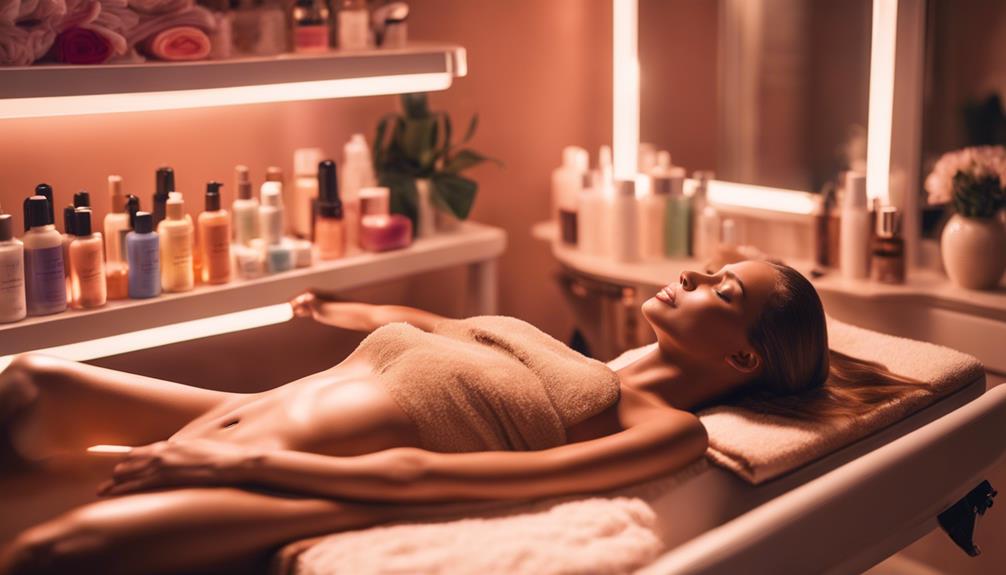
Adjusting your tanning bed settings to match your skin type guarantees a personalized and effective tanning experience. If you've got fair skin, start slow and short! It's like easing into a cold pool, right? On the other hand, if you're a seasoned tanner, you can crank it up a notch. Check out the table below for a quick guide:
Skin Type | Recommended Session Time |
---|---|
Fair Skin | 5-10 minutes |
Light Skin | 10-15 minutes |
Medium Skin | 15-20 minutes |
Olive Skin | 20-25 minutes |
Dark Skin | 25-30 minutes |
Experiment with these settings to find what works best for you. Tanning should be fun, not a guessing game!
Essential Safety Precautions
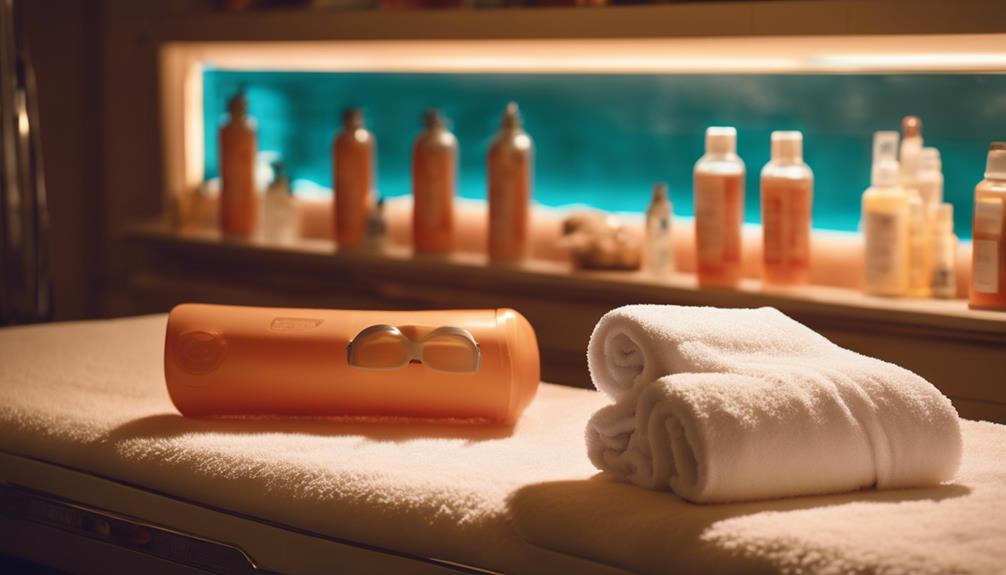
Before you hop into the tanning bed, it's important to take some safety precautions to guarantee a positive tanning experience.
First, remember to chat with the salon staff about your tanning goals—they're like your tanning GPS!
Next, always wear protective goggles to shield your eyes from those sneaky UV rays.
If your skin's sensitive, a quick check-up with a healthcare provider is a smart move.
Don't forget to slather on SPF lip balm—your lips deserve some sun protection too!
Keep your tanning sessions short, especially if you're just starting out.
Staying hydrated before and after tanning helps your skin stay happy.
With these tips, you'll be on your way to a safer, sun-kissed glow! Ready to shine?
Tanning Bed Hygiene Practices

Maintaining proper hygiene in tanning beds is essential to prevent the spread of bacteria and guarantee a safe tanning experience.
Imagine stepping into a tanning bed that feels fresh and clean—awesome, right? To achieve that, always use disinfectant wipes made for tanning beds before you hop in.
Don't forget to clean those high-contact areas, like handles and cushions, both before and after your session. It's like wiping down a gym machine—nobody wants to share germs!
Also, consider bringing your own towel to lay on the bed, just for that extra layer of protection.
By keeping things clean, you're not just protecting yourself but also helping others enjoy the same sun-kissed glow safely.
Exploring Healthy Tanning Alternatives
Exploring healthy tanning alternatives lets you achieve a bronzed look without the risks associated with UV exposure.
Think of sunless tanning lotions as your magic potions; they can give you that sun-kissed glow without baking in the sun or a tanning bed.
Spray tans are like instant makeovers, providing a customizable color that dries quickly, so you can be out the door in no time!
If you're always on the go, self-tanning wipes are super handy—just swipe and shine!
Gradual tanning moisturizers let you build your tan slowly, like adding layers to your favorite cake.
With these options, you can glow confidently while keeping your skin safe.
Ready to give them a try? Your skin will thank you!
Importance of Tanning Bed Goggles
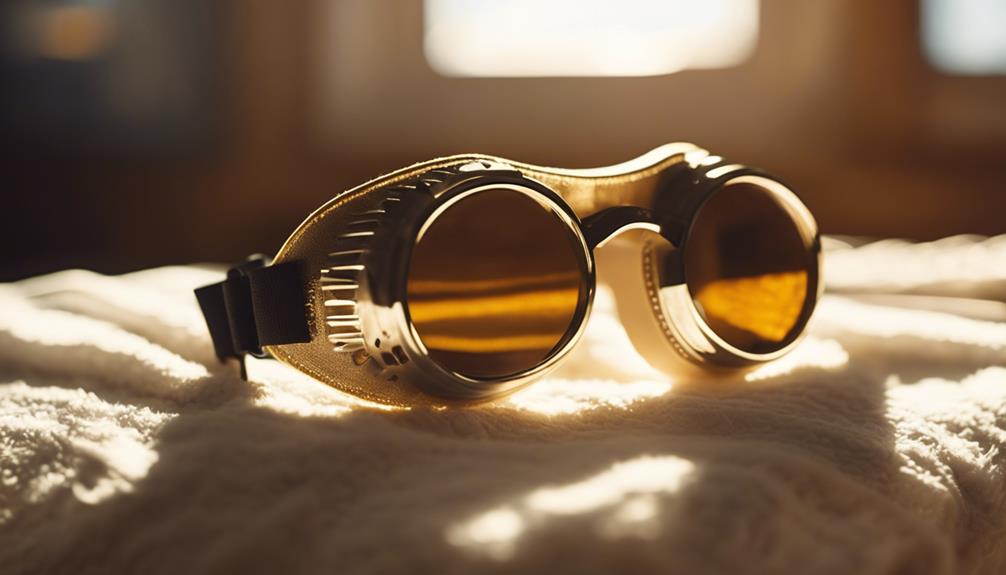
Wearing tanning bed goggles is essential for protecting your eyes from harmful UV rays during your tanning sessions.
Think of your eyes like delicate flowers; they need shielding from the harsh sun! Without goggles, you risk damaging your vision, and that's no fun at all. Plus, most tanning salons require you to wear them, so it's a win-win situation.
Look for goggles that offer 100% UV protection and are comfy to wear. Some even come with anti-fog features to keep your view clear while you soak up those rays!
Frequently Asked Questions
How Often Should I Tan in a Tanning Bed?
You should tan in a tanning bed about once or twice a week, depending on your skin type. Listen to your body, and adjust frequency if you notice any signs of irritation or burning.
Can I Tan if I Have a Sunburn?
You shouldn't tan if you have a sunburn. Your skin's already damaged, and tanning can worsen it. Focus on healing first, then assess your skin's readiness for tanning afterward to avoid further irritation.
What Should I Wear During a Tanning Session?
When it comes to tanning, you want to dress to impress. Wear comfortable, minimal clothing that allows even tanning, like a bikini or shorts. Avoid anything tight that could leave marks, and don't forget your goggles!
How Long Does a Tanning Session Typically Last?
A tanning session typically lasts between 10 to 30 minutes, depending on your skin type and the bed's intensity. Start with shorter sessions if you're new, gradually increasing as your skin adapts to the tanning process.
Can I Use Regular Sunscreen in a Tanning Bed?
You shouldn't use regular sunscreen in a tanning bed. It can block UV rays, preventing you from tanning effectively. Instead, opt for a tanning lotion specifically designed for indoor tanning to enhance results safely.
What Are Some Essential Tips for Tanning Bed Success?
When using a tanning bed, following these essential tanning bed tips can help you achieve the perfect tan. Always wear protective eyewear to shield your eyes, start with shorter sessions to avoid burning, and use a quality tanning lotion to moisturize your skin and enhance the tanning process.
Conclusion
So, as you gear up for your tanning bed adventure, remember to treat your skin like the star it is!
Picture yourself basking in that warm glow, feeling like you just stepped off a sun-soaked beach.
With a little prep—exfoliating, moisturizing, and choosing the right bronzer—you'll be on your way to that gorgeous, sun-kissed look.
Just don't forget your goggles, because nobody wants to squint like a crab in the sun!
Happy tanning!
Beauty and Grooming
Stop a Razor Cut From Bleeding: The Bizarre Hack That Really Works
Apply this surprising hack to stop razor cuts from bleeding quickly and discover the unique solutions that will keep those nicks at bay.
If you ever find yourself with a razor cut, there's a bizarre but effective hack that truly works: apply deodorant with aluminum chloride. This ingredient helps constrict the blood vessels, effectively stopping the bleeding. First, rinse your cut with cool water to reduce blood flow, then gently apply the deodorant. You can also use a cold compress or ice wrapped in cloth for added effect. If that's not available, petroleum jelly can act as a barrier and help seal the wound. Intrigued by other unique solutions? There's more to explore about keeping those nicks at bay.
Key Takeaways
- Apply deodorant containing aluminum chloride to constrict blood vessels and effectively stop bleeding from razor cuts.
- Use mouthwash for its antiseptic properties to clean and help stop bleeding from cuts.
- Apply unused lip balm to create a protective barrier, promoting clotting and reducing blood flow.
- Utilize petroleum jelly to seal the wound, which can help stop bleeding and protect the area.
- Combine a cold compress or ice cubes with gentle pressure to constrict blood vessels and slow bleeding effectively.
Immediate First Aid Steps
When you get a razor cut, acting quickly can make a big difference in stopping the bleeding. First, rinse the cut with cool water to help constrict the blood vessels and reduce bleeding. This also cleans away any debris, preparing the area for further treatment. Avoid hot water, as it can increase blood flow.
Next, consider using an antiseptic solution like hydrogen peroxide or rubbing alcohol to prevent infection. If you have aftershave lotion on hand, it can work too since it contains alcohol and acts as an astringent. Alternatively, a styptic pencil or alum block can help constrict blood vessels and promote clotting. Just be cautious with harsh products that could irritate your skin. Avoid hydrogen peroxide and iodine, as they can damage tissue.
Applying a cold compress or ice wrapped in a cloth can also effectively slow down the bleeding. Hold it against the cut for several minutes until the bleeding stops. This method works best when combined with rinsing and antiseptic applications. Following these immediate steps will set you up for better healing and minimize the risk of infection.
Apply Pressure Effectively
To effectively stop a razor cut from bleeding, start by applying firm pressure directly over the wound. Use a clean cloth or tissue—this keeps everything hygienic. Hold it there for about 3 minutes. This duration helps the blood coagulate, slowing the bleeding and kickstarting the healing process. Make sure the cloth hasn't been used for anything else to avoid any risk of infection.
While applying pressure, be gentle but firm. Think of it like holding a secret; you want to press down without aggravating the wound. Avoid rubbing or wiping the area, as this can make things worse. If the bleeding doesn't stop after 3-5 minutes, pinch the skin surrounding the cut with your thumb and index finger to apply additional pressure. Remember, a cold compress can also help constrict blood vessels and further reduce bleeding.
If you need to, you can also press down on the area below the wound to enhance the effectiveness. Remember, if the bleeding persists despite your best efforts, seek medical help immediately. Keep an eye on the wound afterwards for any signs of infection. Your priority is to control the bleeding and promote healing safely.
Cold Water and Compress Benefits
Cold water and compresses are invaluable tools for managing razor cuts. Rinsing the area with cold water constricts blood vessels, effectively slowing the bleeding. This makes it easier for a clot to form, giving your skin a chance to heal. Plus, splashing cold water on the cut offers a refreshing sensation that calms the skin and tightens pores, providing a crisp, clean finish.
For added effectiveness, apply a cold compress or an ice pack wrapped in a cloth directly to the cut. Holding it there for up to 30 seconds further constricts blood vessels, helping to minimize blood flow. If you don't have a compress on hand, ice cubes work just as well—just remember to wrap them in a cloth to avoid frostbite.
Combining cold water or a compress with firm pressure enhances your efforts to stop the bleeding. You can also use these methods alongside other treatments for even better results. Furthermore, proper preparation before shaving can significantly reduce the likelihood of experiencing cuts in the first place. So, next time you nick yourself while shaving, remember that cold water and compresses can make a significant difference in managing that pesky razor cut.
Using Styptic Pencil or Alum
After managing a razor cut with cold water or compresses, you might want a quick solution to stop the bleeding effectively. A styptic pencil or an alum block can come to your rescue. Styptic pencils, made from aluminum sulfate, act as powerful astringents. To use one, wet the tip and apply it directly to the cut. You'll feel a stinging sensation, which means it's working, and the bleeding should stop within seconds. Rinse your face gently afterward to clear any residue.
Alternatively, you can use an alum block, a crystallized bar made from potassium alum. Simply wet your face, then rub the block over the cut. You may need a few passes to fully close the wound. Both options not only stop bleeding but also provide antiseptic properties reducing the risk of infection.
Styptic pencils work almost instantly and are portable, making them perfect for travel. Alum blocks are slightly less potent but still effective and help prevent razor burn. Both tools are essential for anyone who shaves, ensuring you can tackle minor cuts with confidence.
Natural Alternative Remedies
When you're looking for a natural way to stop a razor cut from bleeding, several remedies can effectively help. One popular choice is witch hazel, which constricts blood vessels and soothes the skin. Aftershave lotion can also work wonders due to its alcohol content, acting as an astringent to clean and constrict the wound. Alternatively, you can try deodorant, as its aluminum chloride helps stop bleeding.
For a quick solution, applying a cold compress or ice pack reduces blood flow to the area. If you have coffee or tea on hand, their caffeine and tannins can constrict blood vessels as well. Cayenne pepper is another potent option, promoting clotting through vasoconstriction. Additionally, using ice treatment can help cool the area, further promoting clot formation. Including turmeric's anti-inflammatory properties might also assist in reducing irritation around the cut.
You might also consider using a tea bag; it absorbs blood while the tannins work to stop bleeding. Petroleum jelly forms a protective barrier, and honey offers soothing properties, though it's not primarily a bleeding stopper. Lastly, aloe vera gel calms the skin and promotes healing, making it a great addition to your natural remedy toolkit. With these alternatives, you can effectively manage those pesky razor cuts without reaching for harsher chemicals.
Infection Prevention Techniques
Infection prevention is crucial for anyone dealing with cuts or scrapes, especially after a razor mishap. Start by washing your hands thoroughly before touching the wound. Rinse the cut with cool water to remove debris and lower the risk of infection. After that, apply an antiseptic solution like hydrogen peroxide or rubbing alcohol to eliminate bacteria. Once the area is clean, use a clean cloth or tissue to apply gentle pressure and stop any bleeding. It's also important to keep the cut clean and dry by washing it daily with mild soap and water.
It's essential to cover the cut with a sterile bandage to protect it from further contamination. Remember to keep the bandage clean and dry, washing the area daily with mild soap and water. Avoid sharing personal items, such as razors or towels, which can spread germs. If you're in a community or athletic setting, shower after practice, wash your uniforms, and report any infections promptly.
Also, remember to use gloves when changing dressings and dispose of them properly to prevent cross-contamination. Following these infection prevention techniques will help you stay safe and keep your cuts from getting worse.
Promoting Healing After a Cut
Proper care following a cut is vital for promoting healing. Start by cleaning the wound with saline solution or sterile water—these closely resemble your body's natural fluids. Avoid soap or tap water with additives, as they can irritate and dry out the wound. After showering, cover the wound and cleanse it again with saline. Maintain a balanced moisture level; it shouldn't be too dry or too wet. A thin layer of antibiotic ointment can help, but steer clear of triple antibiotic ointments that might irritate.
Nourishment plays a crucial role too. Consume a balanced diet rich in vitamin C, zinc, and protein to support healing. Including high-fiber foods like chia seeds can also aid digestion and promote overall health. Drink plenty of water to stay hydrated, as it aids cellular repair. Incorporate fruits, vegetables, and lean proteins into your meals, and include high-fiber foods to prevent constipation from pain medication. Additionally, be aware that healing time can vary, with smaller cuts healing in about a week while larger wounds may take up to a year.
Topically, consider applying aloe vera gel or medical-grade honey for their soothing and antibacterial properties. Avoid picking at the scab, as it can disrupt healing. Regularly change dressings and monitor for signs of infection, seeking medical help if necessary. This proactive care will significantly enhance your healing process.
Long-Term Shaving Prevention Tips
To keep razor bumps and irritation at bay, it's essential to adopt effective long-term shaving prevention tips. Start by understanding the direction of your hair growth. Look in the mirror and pull your skin tightly to identify how your hair grows. Shaving against the grain can lead to irritation, so always shave in the direction of hair growth. If your hair grows in different directions, consider gently brushing it daily with a toothbrush to train it to grow uniformly.
Shave when your hair is soft—ideally right after a warm shower. Use a moisturizing shaving cream to reduce friction and irritation. Make light, short strokes, and avoid pressing too hard on the blade. Rinsing the blade after each stroke helps to keep it clean and is important for preventing skin irritation during the shaving process. Understanding the importance of emotional awareness can also aid in recognizing how stress impacts the skin. Additionally, maintaining a healthy diet that includes essential vitamins can support skin health and resilience. Keep in mind that using high-quality blades can also contribute to a smoother shave.
Post-shaving, apply a soothing aftershave to minimize razor bumps. Rinse off the cream with warm water and use a cool, damp washcloth on your skin. Regularly clean and replace your razors, using high-quality blades to ensure an effective shave. Lastly, consider shaving more frequently, as this can help prevent hair from curving and causing bumps.
The Bizarre Hack Explained
After mastering long-term shaving techniques, you might still encounter the occasional razor cut. When that happens, you can turn to some unconventional products that surprisingly work wonders. For instance, a thin layer of deodorant containing aluminum chloride can constrict blood vessels and stop the bleeding quickly. Just apply it with your finger to the nick.
If you have mouthwash handy, it can also do the trick due to its antiseptic properties. Though it might sting a bit, it's effective in an emergency. Similarly, a dab of unused lip balm creates a protective barrier that promotes clotting while moisturizing the skin. Additionally, applying pressure to the cut immediately is essential for aiding in clotting and minimizing blood loss.
You can even use petroleum jelly for its versatile benefits. A tiny amount placed on the cut can help seal the wound and stop the bleeding.
For immediate relief, a cold compress or ice cubes can constrict blood vessels and slow down the bleeding. Just apply it gently for a few minutes. Firm pressure with a clean cloth is crucial too; hold it down softly over the cut to encourage clotting. With these bizarre hacks, you'll be well-equipped to handle those pesky razor cuts!
Frequently Asked Questions
Can I Use Regular Ice Instead of a Cold Compress?
Yes, you can definitely use regular ice instead of a cold compress. Ice cubes constrict blood vessels, which helps reduce bleeding effectively. Just wrap the ice in a soft cloth to avoid skin damage and hold it against the cut for 20-30 seconds. If you don't have a cold compress handy, this method works quickly to calm the bleeding. Just remember to clean the area afterward and apply antiseptic to prevent infection.
How Long Should I Wait Before Applying Antiseptic Cream?
You should wait until the bleeding has stopped or significantly slowed down before applying antiseptic cream, which usually takes about 5-10 minutes for minor cuts. Make sure to clean the area gently first, and avoid using antiseptic on open wounds with active bleeding. Once the bleeding is controlled, gently apply a thin layer of antiseptic to promote healing while keeping the wound clean and protected from infection.
Is It Safe to Shave Over a Healing Cut?
No, it's not safe to shave over a healing cut. Shaving can irritate the wound, increase the risk of infection, and disrupt the healing process. If you must shave, wait until the cut is fully healed. Always use clean razors and apply gentle pressure to avoid reopening the wound. Consider alternative hair removal methods like trimming or waxing instead to protect your skin and promote faster healing. Your skin will thank you!
What Should I Do if the Bleeding Doesn't Stop?
If the bleeding doesn't stop after applying pressure for 5-10 minutes, it's time to take further action. Pinch the skin around the cut with your thumb and index finger, applying pressure both above and below the wound. If it's still bleeding, consider using a styptic pencil or an astringent to help constrict blood vessels. Don't hesitate to seek medical assistance if the bleeding remains profuse or persistent. Your safety comes first!
Can I Apply Makeup Over a Fresh Cut?
You shouldn't apply makeup over a fresh cut. Doing so can trap bacteria, increasing the risk of infection and prolonging healing. Makeup can dry out the wound, which is harmful since it needs moisture to heal properly. Additionally, applying makeup too soon can irritate the skin and interfere with your body's natural healing process. It's best to wait until the cut has fully closed before resuming your makeup routine.
Conclusion
Next time you nick yourself while shaving, don't panic. By applying pressure, using cold water, or trying a styptic pencil, you can stop the bleeding quickly. Explore natural remedies for extra support, and always keep an eye on your cut to prevent infection. Promote healing with proper care, and consider long-term shaving strategies to avoid future mishaps. With these tips and the bizarre hack in your toolkit, you'll be ready to tackle those razor cuts like a pro!
Beauty and Grooming
Lil Uzi Vert’s Diamond: The Jaw-Dropping Forehead Gem That Shocked Fans
Get ready to explore Lil Uzi Vert’s astonishing forehead diamond that sparked both admiration and controversy—what’s the real story behind this dazzling gem?
Lil Uzi Vert's forehead diamond is nothing short of outrageous! He implanted a stunning 10-carat pink diamond, valued at a jaw-dropping $24 million. This wasn't just for show; Uzi consulted a jeweler and a cosmetic surgeon to ensure it was safely attached. Sure, there are risks—like potential complications during removal and infection—but fans went wild with memes, comparing him to Marvel's Vision! His extravagant choice raises eyebrows about wealth display and personal expression in pop culture. So, if you're curious about the legacy and impact of this iconic gem, there's plenty more to uncover!
Key Takeaways
- Lil Uzi Vert implanted a natural pink diamond in his forehead in 2017, valued at $24 million and weighing nearly 11 carats.
- The diamond's unique marquise cut and rare hue amplify its elegance and contribute significantly to its high market value.
- The procedure involved dermal piercing for secure attachment, ensuring safety was prioritized by cosmetic surgeon Dr. Lepore.
- Public reaction included shock and admiration, with comparisons to Marvel's Vision character and discussions on personal expression in modern fashion.
- Uzi's diamond sparked debates about wealth display and the implications of high-value body art in contemporary culture.
The Implantation Process
In 2017, Lil Uzi Vert decided to take his love for jewelry to the next level by implanting a diamond in his forehead. Sounds wild, right? But before he jumped in, he consulted jeweler Simon Babaev at Eliantte & Co. Uzi spotted the perfect stone and mulled over what to do next. He didn't stop there; he brought in Dr. Lepore, a cosmetic surgeon, to ensure everything was safe and feasible.
The implantation itself was no small feat. It involved a dermal piercing, where small incisions are made in the skin. The process starts by gently raising the skin, then inserting a flat titanium bar beneath it. This bar has holes to securely attach the diamond using a screw mechanism. To support such a big gem, they needed two incisions. And instead of ordinary materials, they used precious metals for safety and style! Notably, the diamond is valued at $24 million, highlighting Uzi's extravagant choice.
After the procedure, Uzi had to take care of the area meticulously. Swelling was normal, and he had to rinse the area with saline twice a day. No touching! This whole journey shows just how far someone will go for a dazzling piece of art—right on their forehead!
Specifications of the Diamond
When it comes to Lil Uzi Vert's forehead diamond, its specifications are nothing short of extraordinary. This stunning gem weighs in at a jaw-dropping 10 carats, but it's just shy of 11 carats—talk about a showstopper! It's a natural pink diamond, showcasing a beautiful hue that makes it incredibly rare. If you didn't know, the marquise cut gives it that elegant, elongated shape, enhancing its visual appeal.
Rarity plays a huge role here; about 90% of pink diamonds come from the Argyle Mine in western Australia, making this one a true treasure. With high clarity, this diamond stands out not only for its color but also for its sheer brilliance. Valued at a staggering $24 million, you can see why it costs around $2 million per carat! To put that into perspective, it can cost up to 20 times more than a white diamond of similar size and clarity! Moreover, the rarity of pink diamonds contributes significantly to their high value.
Lil Uzi's unique choice of a forehead gem has sparked endless conversations. It's not just a piece of jewelry; it's a statement! So, next time you catch a glimpse of it, remember the incredible specifications behind this diamond wonder.
Safety and Maintenance Concerns
Lil Uzi Vert's forehead diamond may be a dazzling spectacle, but it also comes with serious safety and maintenance concerns. First off, you've got to think about the health risks. Blood leakage has been reported from the diamond implant, and if it isn't removed correctly, it could even lead to death. That's pretty intense, right? Plus, the heavy weight of the diamond can cause discomfort, leading to a ripping sensation on the forehead. There's even been an incident where fans accidentally ripped the diamond out during a performance—yikes!
On top of that, maintaining the diamond is crucial. Regular upkeep is a must to ensure the implant stays safe. The mounting's made from precious metals, and the parts are engineered with millimeter precision, so you can't just slap it on and forget about it. You might even need to temporarily remove it to allow your forehead to heal. Interestingly, the diamond itself is valued at $24 million, highlighting the financial commitment involved in this unique choice.
Insurance companies aren't thrilled about this risky venture either, cutting off coverage and raising financial concerns. So, if you ever think about something like this, make sure you consult professionals beforehand. It's not just about looking cool; it's about staying safe!
Public Reaction and Memes
The announcement of Lil Uzi Vert's diamond implant sparked an immediate and intense wave of reactions across social media. Fans flooded platforms like Twitter, expressing everything from shock to admiration. Some couldn't help but joke about the diamond's unusual placement, with many comparing Uzi to Vision from Marvel's Avengers. You know, the superhero with the powerful stone right in his forehead? It was a hilarious comparison, especially when memes started popping up, joking about the value of that $24 million gem and the potential for it to be stolen.
Even Olympic boxer Anthony Ogogo chimed in, humorously threatening to punch the diamond out of Uzi's face. The memes captured the essence of this bold statement—both the uniqueness of the diamond and the risks involved. Fans speculated about the diamond's authenticity, its nearly 11-carat size, and whether it was worth the price tag. They were fascinated yet concerned, especially after Uzi posted a photo showing blood from the implant. This whole saga not only showcased Uzi's wild personality but also became a memorable moment in pop culture, leaving everyone talking!
Complications During Removal
Complications can arise during the removal of Uzi's diamond forehead gem, posing serious medical risks. If not done correctly, you could face some pretty scary outcomes. For instance, blood might ooze from the forehead, and—believe it or not—there's a real threat to your livelihood, even potential death. Skin rejection can lead to oozing pus, redness, and swelling, while a keloid could form, causing an overgrowth of scar tissue.
Let's not forget the physical damage that might happen during removal. If fans pull at the gem during a stage dive, it could dislodge, risking facial injuries. In some cases, the only way out is slicing into the skin to remove the dermal anchor. Sounds intense, right? To avoid complications, you've gotta be careful. Maintaining the area is crucial—rinsing with saline and steering clear of any roughhousing helps keep infections at bay.
Recovery will take time, and you might see some swelling or misalignment initially. It's all about patience, and keeping that diamond in place until healing is complete. So, take care of that sparkle!
Financial Commitment and Insurance
Removing a diamond implant like Uzi's isn't just about the medical risks; it also comes with a hefty financial commitment. Picture this: a dazzling pink gem valued at around $24 million! Uzi's been paying for this rare, 10-11 carat beauty since 2017 through installments, and let's be real, that cost exceeds the value of his cars and home combined. Crazy, right?
The diamond's value arises from the four Cs: clarity, cut, color, and carats. Given that only 1% of pink diamonds weigh over 10 carats, you can see why this gem is a big deal. In fact, a similar 10.65-carat pink diamond sold for nearly $20 million in 2019, showing just how valuable these stones are.
On top of that, Uzi faced insurance hurdles. Initially, his health insurance thought the diamond implant was a risky act, considering canceling his policy! He had to prove that the piercing was done safely, involving the professional who did it to maintain his coverage. Talk about a wild ride! So, if you think it's just a flashy accessory, think again—there's a lot more to it!
The Legacy of the Diamond
With Lil Uzi Vert's diamond forehead gem making waves in the music and fashion industries, its legacy has quickly transformed into a cultural phenomenon. Inspired by Lil B's iconic look, Uzi's bold choice became a defining moment, showcasing his creative flair. The way he embraced this gem not only sparked conversations about personal expression but also raised eyebrows regarding cultural appropriation—something that's hard to ignore in today's world.
When Uzi revealed the diamond, fans erupted with reactions ranging from admiration to playful comparisons to Marvel's Vision. Critics questioned the safety of a $24 million gem anchored to his forehead, especially after reports of blood leaking during the healing process. Despite concerns, Uzi remained unbothered, assuring everyone about the diamond's safety.
The wild incident at Rolling Loud when fans accidentally ripped out the diamond? That was a dramatic twist! Even so, Uzi still cherishes the diamond, marking a legacy that stretches beyond bling. It's a reminder of how art, fashion, and identity collide, leaving an unforgettable mark in pop culture. Whether you love it or hate it, Uzi's diamond will be talked about for years to come!
Frequently Asked Questions
How Did Lil Uzi Vert Choose the Diamond for His Forehead?
You'll find that Lil Uzi Vert chose the diamond after years of searching. He spotted the stunning 10-carat pink gem in 2017 and decided it was perfect for making a bold fashion statement.
What Inspired Lil Uzi Vert to Get a Forehead Implant?
You can see Uzi's inspiration from his favorite shows and characters, especially anime. The forehead implant reflects his unique style and bold fashion choices, allowing him to express himself in a way that's truly one-of-a-kind.
How Does the Implant Affect Daily Activities?
The implant can affect your daily activities by requiring careful maintenance and adjustments. You'll need to avoid high-impact movements to prevent dislodging it, and regular consultations with professionals will help ensure everything remains secure and safe.
What Are the Long-Term Effects of the Implant?
The long-term effects of the implant include potential skin rejection, keloids, and infections if not cared for. You'll need to maintain it regularly, avoiding rough activities to prevent damage and ensure safety.
Will Lil Uzi Vert Replace the Diamond if Lost?
If you're wondering whether Lil Uzi Vert will replace the diamond if lost, it seems unlikely. He's opted for a barbell piercing instead, considering the risks and past incidents surrounding the diamond's implantation.
Conclusion
In the end, Lil Uzi Vert's diamond forehead gem is more than just a flashy accessory; it's a bold statement that's sparked conversations everywhere. From its jaw-dropping specifications to the mixed public reactions, this gem has certainly left its mark. Whether you love it or hate it, you can't deny it's a part of pop culture now. So, what's next for Uzi? Whatever it is, you can bet it'll keep us talking and laughing for a while!
Beauty and Grooming
Broccoli Head Haircut: The Wacky Trend Taking TikTok by Storm
Make a bold statement with the Broccoli Head haircut, the TikTok sensation that’s redefining style trends—discover how to rock this playful look!
The Broccoli Head haircut is taking TikTok by storm, and it's as fun as it sounds! With a bouncy, curly top that resembles a broccoli floret and tapered sides, this trend screams self-expression. Popularized by influencers like Noah Beck, it's beloved by Gen Z for its vibrant, rebellious spirit. The styling often involves a perm to achieve those playful curls, but don't forget to keep up with trims every 4-6 weeks to maintain that iconic shape. Plus, you'll want to use curl-enhancing products to keep your locks looking lively. Stick around, and you'll discover even more about this wacky hairstyle!
Key Takeaways
- The Broccoli Head haircut features a voluminous, curly top with tapered sides, resembling a broccoli floret and appealing to Gen Z's playful aesthetic.
- Influencers like Noah Beck and Bryce Hall popularized the style on TikTok, contributing to its viral status among teens.
- Originating from K-pop boy bands, the haircut embodies a rebellious, nostalgic vibe connected to Y2K trends and internet culture.
- Maintenance involves regular trims and curl-enhancing products to keep the shape and health of the hair intact.
- The trend encourages self-expression and creativity, reflecting Gen Z's shift towards authentic, bold fashion choices.
What Is the Broccoli Head Haircut?
The Broccoli Head haircut, with its unique shape and playful vibe, has quickly become a trendy choice for those looking to make a statement. Picture this: a voluminous, curly top that's 2-4 inches long, tapering down to shorter, often faded or buzzed sides. It's like a broccoli floret landed on your head—fun, right? This haircut is often styled with a perm to achieve those bouncy curls.
To keep those curls looking fresh, you'll want to invest in curl-enhancing shampoos and conditioners. A leave-in conditioner will help keep your curls moisturized, while curl-defining creams or mousses will give that tousled, natural look everyone's after. And here's a pro tip: avoid excessive heat styling to maintain that fabulous shape, and consider switching to a silk or satin pillowcase to reduce frizz overnight.
If you're thinking about going for the perm route, you'll begin with a consultation to nail down your desired curl pattern. After washing, the top section gets the perm solution, wrapped around rods, and processed.
The beauty of the Broccoli Head haircut is its adaptability—it's perfect for various hair types and can fit any style or gender. So, are you ready to embrace this fun trend?
Rise to Popularity
With the power of social media driving trends, the Broccoli Head haircut exploded in popularity, especially among young men and boys. TikTok became a vital platform for this quirky style, with influencers like Noah Beck and Bryce Hall showcasing their new looks. As these TikTok stars flaunted their Broccoli Heads, you couldn't help but notice how quickly the haircut became an Internet meme, sparking endless discussions online.
The hairstyle's roots trace back to K-pop boy bands like BTS and Exo, who embraced similar styles before it hit Western shores. Influencers and celebrities really ramped up the trend, making it a must-try for anyone wanting to stand out. The haircut's association with certain stereotypes, like "gym bros," only added to its allure, making it a hot topic among teens. Additionally, the Broccoli Head is often achieved through a chemical treatment that creates the desired bouncy curls, further enhancing its appeal.
As videos and clips of the haircut spread like wildfire, barbers noticed an uptick in demand. Some even started charging up to $20 for a cut! This surge in popularity reflects Gen Z's flair for embracing unique fashion, making the Broccoli Head a definitive hairstyle of their generation.
Key Characteristics
When you think of the Broccoli Head haircut, its distinct structure immediately stands out. This unique style features tapered sides and back, creating a sharp contrast to the voluminous, curly top that's reminiscent of a broccoli floret. The top showcases short, uneven layered curls, giving an effortless, playful look that's hard to ignore. You might even choose to add a fade on the sides for an extra touch of flair.
Styling this haircut can be achieved with or without a perm, depending on your personal preference. You want that natural-looking, tousled appearance, which can be enhanced using lightweight styling products. Techniques like point cutting and using texturizing shears help create movement and soften harsh lines, making your curls pop. The Broccoli Head haircut is particularly popular among Gen Z for its rebellious aesthetic, making it a trendy choice for young individuals.
To keep your Broccoli Head in top shape, regular trims every 4-6 weeks are essential. Opt for curl-enhancing products and avoid heavy gels that can weigh down your fabulous curls. Moisturizing with leave-in conditioners will keep your hair hydrated. And don't forget to use a diffuser for drying—it's the secret weapon to enhance those gorgeous curls! Embrace the broccoli, and let your hair do the talking!
The Perming Process
How do you achieve those bouncy curls that define the Broccoli Head haircut? It all starts with a thorough consultation. You'll discuss your desired curl pattern and evaluate your hair's health, ensuring it's ready for the perm. Your stylist will wash and section your hair, prepping it for the magic to come.
Next, it's time to apply the perm solution. Your stylist will carefully wrap your hair around perm rods, shaping those luscious curls. They'll make sure the solution is evenly applied, avoiding any gaps or overlaps, because consistency is key to achieving that perfect look.
Once everything's in place, the solution processes for 15-30 minutes. You'll hold your breath in anticipation as the curls start forming! After the timer goes off, a neutralizer is applied to set those curls in stone—well, not literally, but you get the idea. A thorough rinse follows, along with some gentle shampooing and conditioning to keep your hair healthy and shiny.
Finally, you'll get some styling tips to show off those fabulous curls. With the right care, you'll rock the Broccoli Head haircut, turning heads wherever you go!
Maintenance Tips
To keep your Broccoli Head haircut looking fresh and vibrant, regular maintenance is essential. You'll want to schedule trims every 4-6 weeks to maintain that perfect shape and prevent overgrowth. Trust us, regular trims help keep the fade and taper on the sides and back defined while ensuring the volume and texture on top are always on point.
For styling, embrace curl-enhancing products! They'll boost your natural curls without weighing your hair down with heavy gels. Air drying is your friend; it preserves that lovely volume and curl pattern. If you're in a hurry, use a diffuser to encourage definition without the frizz!
Moisturizing is key, too. Incorporate leave-in conditioners to keep those curls hydrated and healthy. Dryness and breakage? No thanks! Your hair will look more vibrant when it's well-moisturized.
Lastly, everyday care matters. Skip the blow dryer and let your hair air dry to maintain its natural state. Don't forget to use a curl-enhancing cream or leave-in conditioner daily. Find a stylist who understands curly hair, and you're on your way to rocking that Broccoli Head with confidence!
Hair Care Essentials
Essential hair care products can make all the difference in keeping your Broccoli Head haircut looking its best. First up, grab a sulfate-free, curl-enhancing shampoo tailored to your hair type. Sulfates can strip away those precious natural oils, so look for shampoos packed with moisturizing ingredients like argan oil or shea butter. Pair it with a conditioner that matches your shampoo for optimal hydration.
Now, don't forget about deep conditioning! Use a deep conditioner or hair mask once or twice a week to repair damage and boost shine. Apply those masks overnight for maximum absorption—trust us, your hair will thank you! Look for ingredients like keratin and avocado oil to keep your locks strong and elastic.
For styling, a leave-in conditioner is your best friend. It detangles, softens, and adds moisture, prepping your hair for those styling tools. Always use a heat protectant spray to prevent damage, and consider curl-defining creams to maintain that fabulous shape.
And hey, if you're in a rush, dry shampoo can save the day by absorbing excess oil. Just remember to use it sparingly to avoid buildup. Keep these essentials handy, and you'll rock that Broccoli Head like a pro! Additionally, staying hydrated is crucial for overall hair health, as adequate water intake can help maintain moisture levels in your hair.
Lifestyle Considerations
What lifestyle factors should you consider when rocking a Broccoli Head haircut? First, check your school's dress code. Some places might not be too keen on such bold styles, so you don't want to end up in trouble! If you're into sports, think about how this fluffy 'do will hold up during practice. Sweating and managing your hair during games can definitely be a challenge.
Next, consider social dynamics. Your peers might have mixed reactions—some will love it, others might not get it. Be prepared for the spotlight! This haircut is all about self-expression, and it's become a fun, cultural statement among Gen Z.
Now let's talk commitment. Maintaining that broccoli shape isn't just a one-and-done deal; it requires regular trims and some specific hair products. If you're not ready for that upkeep, it might not be the best choice for you. Lastly, don't forget to communicate with your parents. Their support—or concerns—can make a big difference in your Broccoli Head journey. So, are you ready to embrace this quirky trend? Let's make it happen!
Alternative Styling Options
When it comes to styling your Broccoli Head haircut, you've got plenty of options to keep your look fresh and fun. First off, try curl-enhancing products if your hair's naturally wavy or curly. They'll help you maintain that iconic broccoli shape! For those with less volume, thickening powders, paste, and mousse work wonders. A little volumizing spray can add that extra oomph too!
If you want a temporary change, consider twist-outs or sponge curls for that curly vibe without the commitment. On busy days, throw on a baseball hat and blow-dry your hair straight up over the brim to create volume and shape—it's a game-changer!
Don't forget layering techniques! Short, uneven layers give your hair that floret-like appearance, while a shaggy bang can elevate your style. For maintenance, you can style your hair into a quiff using pomade or wax, or simply scrunch it with a diffuser to enhance those natural curls. Regular trims will help keep everything in check. Additionally, be mindful of regular grooming as it can also help maintain your broccoli head by keeping stray hairs at bay. So go ahead, experiment with these options, and let your broccoli head shine!
Broccoli Haircut in Pop Culture
The broccoli haircut has burst onto the pop culture scene, becoming a defining hairstyle for Gen Z. With its roots stretching back to the 90s and even the New Romantic movement of the 80s, this quirky cut has evolved into a viral sensation on TikTok and Instagram. Influencers like Noah Beck and Bryce Hall have sported it, helping it gain traction among your peers.
You might've noticed how memes have played a huge role in solidifying its place in internet culture, often poking fun while celebrating its uniqueness. It's not just a hairstyle; it represents a shift towards embracing authentic, less polished looks in fashion.
Plus, who could forget the media frenzy when a school in the UK banned it? That kind of buzz only fueled its popularity! And let's be real—it's hard to resist a style that channels nostalgic vibes while fitting perfectly into the broader Y2K trend. So, whether you love it or laugh at it, the broccoli haircut is here to stay, capturing the essence of what it means to be a Gen Z trendsetter. It's more than just hair; it's a vibe!
Frequently Asked Questions
Can Girls Wear the Broccoli Head Haircut Too?
Absolutely, you can rock the broccoli haircut! It's versatile and suits various face shapes and hair types. Experiment with curls on top and faded sides to create a unique style that reflects your personality.
What Face Shapes Suit the Broccoli Head Haircut?
The broccoli head haircut suits oval, round, square, and heart-shaped faces. It enhances your facial features by adding volume on top while keeping the sides short, creating a balanced and flattering look for various shapes.
How Long Does a Perm for This Haircut Last?
A perm for this haircut can last several months, depending on your hair growth and maintenance. Regular trims and healthy hair are essential to keep the curls defined and looking fresh throughout the perm's lifespan.
Is the Broccoli Head Haircut Expensive to Maintain?
Yes, maintaining this haircut can be expensive. You'll need specific hair care products, regular trims, and possibly styling tools, which can add up. However, investing in quality products often yields better results for your hair health.
Can I Achieve This Look Without a Perm?
Yes, you can achieve that look without a perm! Try curl-enhancing products, temporary styling techniques like twist-outs, or use heat styling tools. Layering your hair can also help mimic the desired volume and texture.
Conclusion
So, whether you're ready to embrace the quirky broccoli head haircut or just enjoy the trend from afar, it's clear that this style is all about boldness and creativity. With its unique look and playful vibe, it's no wonder TikTok can't get enough! Just remember, if you dive in, keep up with maintenance and have fun experimenting with your new 'do. Who knows, you might just become the trendsetter in your friend group!
-
Beauty and Grooming3 weeks ago
Embrace Natural Glow With Bronzer-Free Accelerators
-
Beauty and Grooming4 weeks ago
Discover Top Outdoor Tanning Lotions Today
-
Vetted1 month ago
15 Best Affordable Sustainable Fashion Brands You Need to Know About in 2025
-
Fashion Trends1 month ago
Fall 2025 Fashion Trends: Be Ahead of the Curve!
-
Interior Design5 days ago
Mylar vs. Foil Balloons: The Ultimate Showdown
-
Beauty and Grooming3 weeks ago
Unlock Flawless Tanning With Skin Prep
-
Interior Design3 weeks ago
Create Your Dream Cottagecore Home Office Now!
-
Vetted1 month ago
15 Best Women's Fashion Trends of 2025 You Need to Know About