Beauty and Grooming
Mustache Styles That Will Make You Instantly More Attractive
Outstanding mustache styles can elevate your attractiveness, but which one will truly make you irresistible? Discover the best options inside!
Choosing the right mustache can seriously amp up your attractiveness! Classic styles, like the Chevron or Walrus, ooze masculinity and rugged charm, making you stand out. If you're aiming for sophistication, a Pencil or English mustache adds an elegant touch. Feeling bold? The Handlebar or Fu Manchu will turn heads and start conversations. For a rugged look, try the Horseshoe or Cowboy mustache—perfect for showing off your adventurous side. Remember, a well-groomed mustache speaks volumes about your personality and confidence. Ready to explore even more styles and tips? There's a lot waiting for you just around the corner!
Key Takeaways
- Classic mustaches like the Chevron or Walrus add a rugged charm that enhances masculinity and attractiveness.
- Elegant styles, such as the Pencil or English mustache, exude sophistication and refinement, appealing to those who favor a polished look.
- Bold statement styles, like the Handlebar or Fu Manchu, showcase individuality and can serve as unique conversation starters.
- Rugged looks, such as the Horseshoe or Outlaw mustache, create a commanding presence that elevates overall appeal.
- Unique designs, like the Dali or Lampshade mustache, reflect personality and creativity, making a memorable impression.
Classic and Timeless Styles
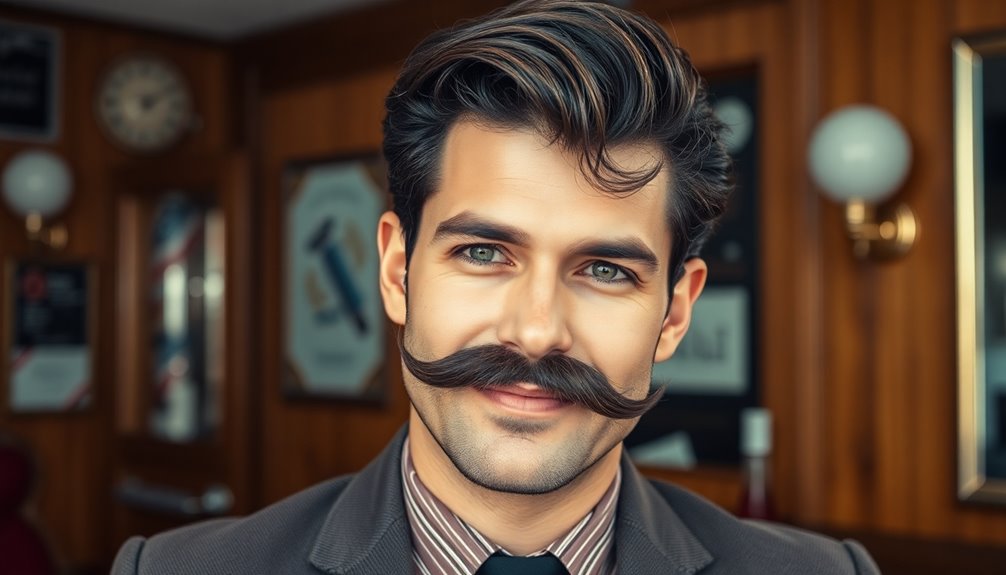
When it comes to mustache styles, classic and timeless options never go out of fashion. If you've got thick facial hair and a strong jawline, you might want to consider the classic mustache. This style fully extends across your upper lip, adding flair and character that exudes masculinity and charm. Think Clark Gable or Tom Selleck—these iconic figures rocked this look, proving it's as versatile as it is stylish.
Now, if you're feeling bold, the chevron mustache could be your go-to. This thick, assertive style extends beyond the edges of your lips, making a statement wherever you go. It's perfect for confident men who aren't afraid to stand out, but don't forget—it'll need some regular grooming to keep its shape. Regular maintenance is essential for all styles to ensure they look their best.
For those who love a bit of whimsy, the walrus mustache brings a bushy, outdoorsy vibe. It covers your upper lip and requires less trimming, but it definitely demands confidence. Lastly, the horseshoe mustache offers an edgy, rebellious flair, ideal for bikers and those with adventurous spirits. Whichever style you choose, you'll add a touch of classic charm to your look!
Elegant and Refined Options
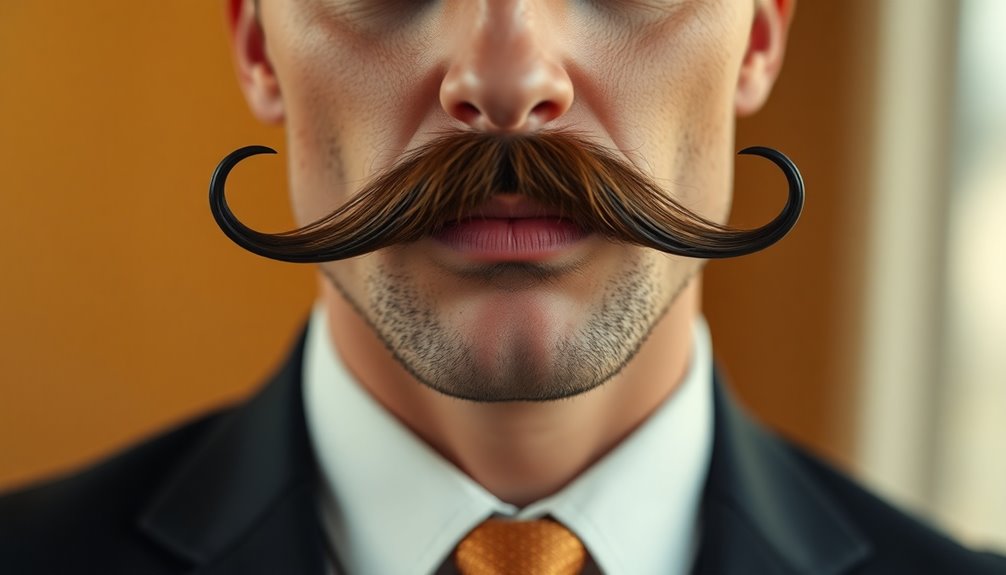
Elegant and refined mustache styles can elevate your appearance, giving you an air of sophistication that's hard to miss. If you want to make a statement without being too loud, options like the Pencil mustache or the English mustache are perfect. The Pencil mustache, with its slim and tidy look, is a classic choice that screams sophistication, while the English mustache requires precision and exudes timeless charm.
Don't overlook the Shadow 'Stache, either; its precise trimming adds understated elegance to your overall vibe. For something a bit fuller, the Painter's Brush is a great option, offering a thick yet neatly trimmed appearance. And if you're feeling adventurous, the refined Imperial mustache can extend outward, but keep it trimmed for that polished look. Regular trimming is essential for maintaining these styles to ensure they look their best.
To maintain these styles, precision trimming is key, so invest in some guide combs and a detail trimmer blade. Regular grooming will keep your mustache looking sharp and stylish. With a little effort, you'll rock a refined mustache that not only enhances your features but also shows off your sophisticated side. So, why wait? Embrace elegance today!
Bold and Statement-Making Choices
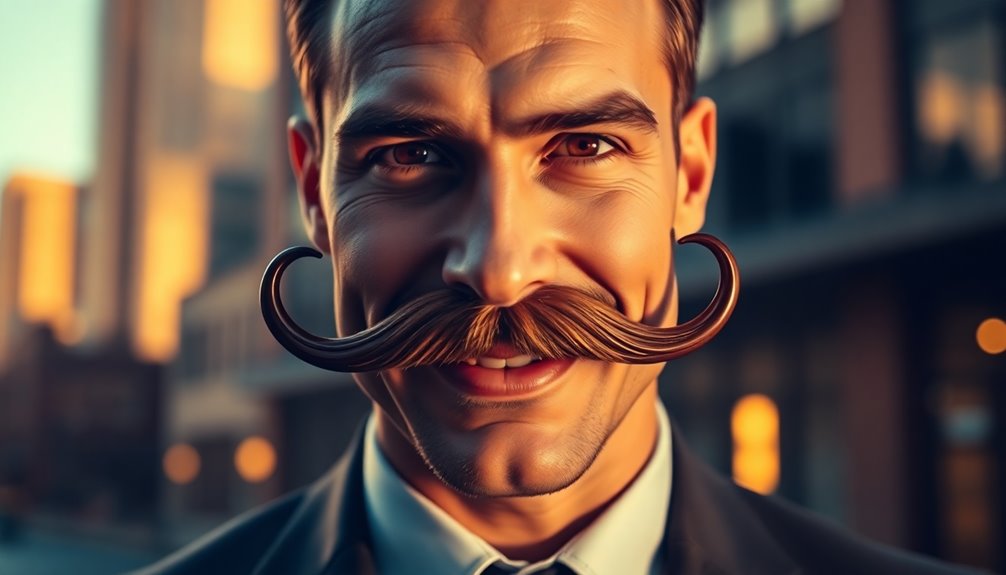
If you're ready to step away from the refined looks and make a bold impression, statement-making mustache styles are the way to go. These mustaches command attention and exude confidence, making them perfect for those who want to stand out. The walrus mustache, with its full, bushy growth, adds a touch of vintage charm while showcasing rugged masculinity. Just picture yourself rocking this look like Sam Elliott or Tom Selleck—talk about a conversation starter! Regular exfoliation helps unclog hair follicles, promoting better growth and enhancing the overall appearance of your mustache.
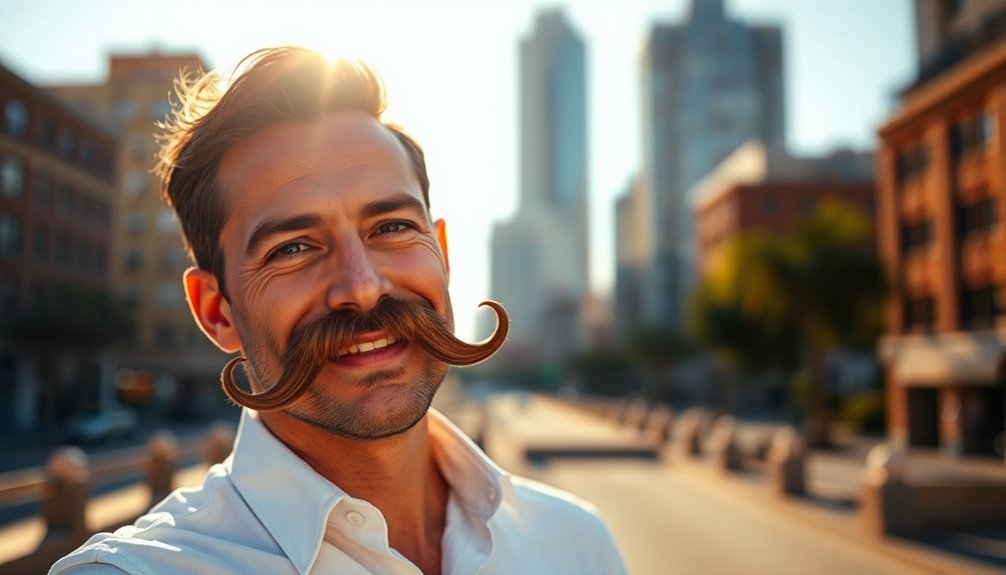
If you're feeling a bit more adventurous, consider the handlebar mustache. Its curled ends scream sophistication and elegance, reminiscent of a bygone era. With a bit of wax and a comb, you'll have everyone asking about your style secrets.
For the truly daring, the Fu Manchu mustache offers a unique silhouette with its long hairs dangling downward, perfect for adding intrigue. Or why not try the pyramid mustache, which features sharp angles and points? This style oozes charm and confidence, just like Burt Reynolds.
No matter which bold choice you make, remember that these mustaches are all about expressing your individuality. So, go ahead—make your mark!
Rugged and Masculine Looks
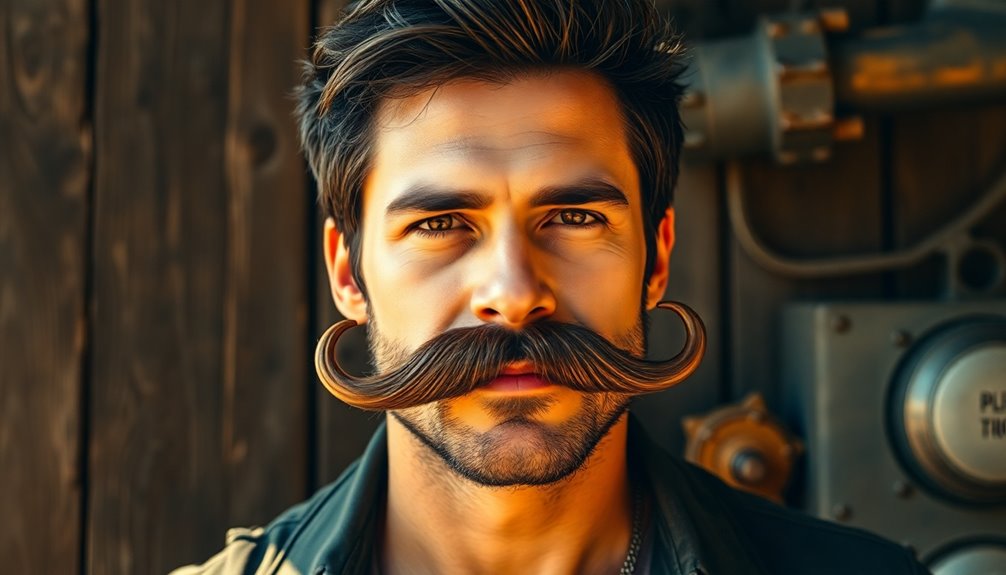
For those looking to embrace rugged and masculine looks, mustaches can be a powerful statement. Picture yourself sporting a Horseshoe Mustache, with its bold, full contours stretching down to your jawline—think Hulk Hogan or Jason Momoa. This style demands regular trimming to keep it in shape, but the effort pays off with an unmistakably commanding presence.
If you prefer something bushier, the Walrus Mustache might be your go-to. With its thick, drooping hair that resembles walrus whiskers, it requires less maintenance—just comb it straight down. It suits various face shapes, making it a versatile choice.
Then there's the Cowboy Mustache, the epitome of rugged charm. This messy style, often seen in Western films, pairs well with longer hair at the sides, creating a look that can even disguise grey hairs.
Lastly, consider the Outlaw Mustache, which strikes a balance between ruggedness and refinement. Its slight drop-down on the sides gives a classic yet rebellious vibe, perfect for those aiming for a versatile, edgy look. Whichever style you choose, a rugged mustache is sure to elevate your attractiveness!
Unique and Exotic Designs
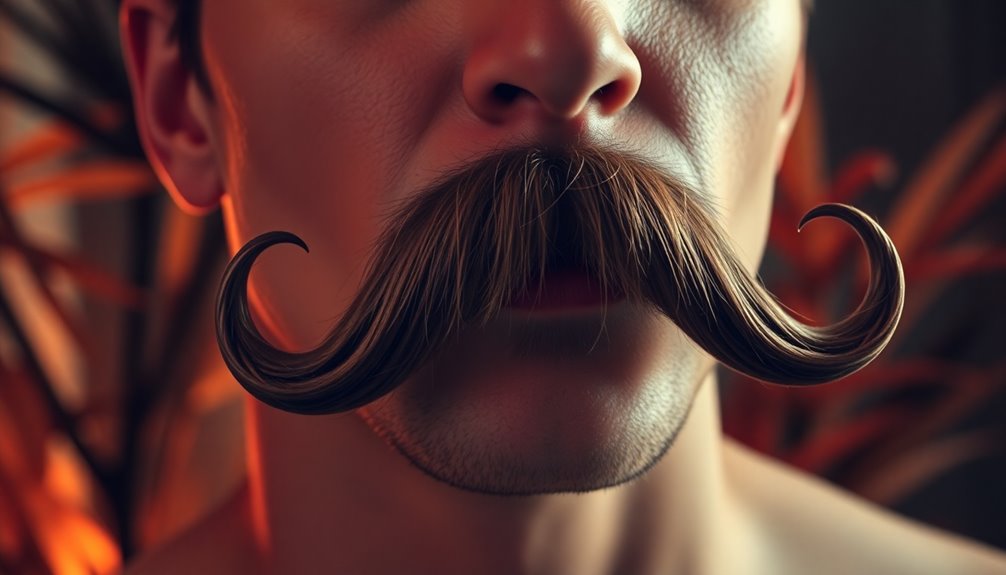
How can a mustache elevate your style to unique and exotic heights? Embrace bold designs that turn heads and spark conversations. Take the Fu Manchu, for instance—those long, downward-growing sides scream confidence. Just remember, keeping it sleek requires some mustache wax and regular grooming. Want to channel your inner artist? The Dali mustache, with its thin, upward-curving ends, is perfect. A little wax will keep those curls in check!
If you're feeling adventurous, try the Handlebar. Its distinctive curled ends add an old-school charm that's hard to resist. Prefer something smaller? The Petite Handlebar still delivers that flair without the volume. For a quirky twist, the Lampshade shape is a fun choice, narrowing under the nose and widening at the corners.
For a rugged look, the Walrus mustache is thick and bushy, covering your upper lip in style. Just remember to trim the edges for a polished finish. Whether you opt for the Horseshoe, Chevron, or even the Imperial, each of these unique styles showcases your personality, making you undeniably attractive. So, which exotic design will you choose to elevate your look?
Frequently Asked Questions
How Do I Choose the Best Mustache Style for My Face Shape?
To choose the best mustache style for your face shape, analyze your proportions. Round faces benefit from elongated styles, while square shapes need softer options. Experiment with different looks to find what complements you best.
What Grooming Tools Are Essential for Mustache Maintenance?
For mustache maintenance, you'll need a razor, comb, and facial hair scissors. A precision trimmer ensures clean lines, while mustache wax and beard oil keep your style polished and hydrated. Don't forget cleansing products!
How Often Should I Trim My Mustache for Optimal Shape?
You should trim your mustache every one to two weeks for optimal shape. Check it weekly to maintain a polished look, adjusting the frequency based on your hair growth and personal length preference.
Can I Dye My Mustache, and What Products Are Safe?
Yes, you can dye your mustache safely using products like No Go Grey Solution or henna-based dyes. They're hypoallergenic, made from natural ingredients, and free from harsh chemicals, ensuring a healthier option for your facial hair.
What Should I Do if My Mustache Is Patchy or Uneven?
If your mustache is patchy or uneven, give it time to grow without trimming. Use beard oils, consider a suitable style, and maintain a balanced diet to promote healthier, fuller facial hair.
Conclusion
So, whether you're going for a classic handlebar or a bold chevron, rocking the right mustache style can really amp up your attractiveness. It's all about finding what fits your personality and vibe best. Don't be afraid to experiment and have fun with it! After all, your mustache isn't just hair—it's a statement. So grab that grooming kit, channel your inner style icon, and let your upper lip do the talking! You've got this!
Beauty and Grooming
Richarlison’s New Tattoo: The Bold Ink the Internet Can’t Stop Discussing
How Richarlison’s striking tattoo of Neymar and Ronaldo is igniting discussions on heritage and resilience after Brazil’s World Cup exit will surprise you!
Richarlison's new tattoo has everyone buzzing! It showcases legendary Brazilian football icons Neymar and Ronaldo, serving as a powerful tribute to both his idols and Brazilian heritage. The timing's intriguing too—he revealed it just four days post-Brazil's World Cup exit, making a bold statement about resilience. Reactions have varied, with Neymar humorously offering cash for its removal, but fans admire Richarlison's artistic expression. This ink reflects his journey and celebrates cultural identity, inviting conversations about sports, heritage, and motivation. Stick around, and you'll uncover even more fascinating details about the colorful narrative behind this bold artwork!
Key Takeaways
- Richarlison's tattoo features Brazilian legends Neymar and Ronaldo, symbolizing his pride in his heritage and connection to the national team.
- The tattoo was revealed shortly after Brazil's World Cup exit, showcasing resilience and inviting personal engagement with fans on social media.
- Mixed reactions followed the reveal, with some fans admiring the tribute while others criticized the self-portrait aspect, prompting discussions on personal representation.
- Tattoos in football often reflect cultural identity and personal milestones, with Richarlison's design honoring his roots and enhancing his public image.
- The tattoo serves as a conversation starter about athletes' motivations and the cultural significance of body art, deepening fan engagement.
The Tattoo Design Explained
Richarlison's new tattoo stands out as a powerful tribute to his footballing heroes. Imagine a striking image of Richarlison himself, flanked by the legendary faces of Neymar and Ronaldo, all beautifully inked across his back. This large piece isn't just for show; it represents his deep admiration for these Brazilian icons who've shaped football history.
Every detail in the tattoo speaks volumes about his pride in being part of the Brazilian national team. You can almost feel the connection Richarlison has to Brazil's rich football legacy, and it's clear he aspires to reach the heights of Neymar and Ronaldo. While Pele isn't directly featured, his spirit looms large over this tribute, reminding everyone of Brazil's glorious past. Richarlison's impressive performance as Brazil's top scorer in Qatar 2022 adds an extra layer of significance to his homage.
Richarlison's collection of tattoos, including a heart with the Brazilian flag on his chest, showcases his love for his country and its culture. This back tattoo isn't just art; it's a personal homage to the legends who've inspired him. So, when you see Richarlison on the pitch, remember, his tattoo tells a story of passion, pride, and an unbreakable bond with Brazilian football!
Timing of the Tattoo Reveal
Often, athletes reveal significant personal milestones during or after major events, and Richarlison chose a poignant moment to showcase his new tattoo. Just four days after Brazil's heart-wrenching exit from the 2022 World Cup, he took to Instagram to unveil his latest ink. The timing was striking, considering the emotions swirling around his team's defeat to Croatia, which left fans and players alike reeling.
By sharing it on his personal social media accounts, Richarlison connected directly with his followers, avoiding the formality of a press conference. This was his moment, and he wanted it to feel personal and authentic. The tattoo isn't just a design; it's a symbol of his journey, tying him to Brazilian football legends in a way that resonates deeply, including headshots of Neymar.
Fans quickly noticed and began discussing the tattoo online, making it a hot topic across various platforms. The choice to reveal it post-World Cup speaks volumes about Richarlison's character, showcasing resilience and self-expression even in the face of disappointment. It's more than just body art; it's part of his personal brand, reflecting his passion for football and a tribute to his roots.
Public Reactions and Responses
In the wake of Richarlison's tattoo reveal, public reactions have been anything but unanimous. While some fans admire his boldness, many others find the tattoo featuring Richarlison, Neymar, and Ronaldo quite inappropriate. Critics argue that including himself alongside such legends feels awkward and even self-promotional. It's like he's saying, "Hey, I belong up there!"—which, let's be honest, rubs some people the wrong way.
Neymar himself didn't hold back, jokingly urging Richarlison to remove his image and even sending him 30 euros for tattoo removal. Micah Richards chimed in too, likening it to having a tattoo of Daniel Sturridge, leaving many scratching their heads in confusion. The overall vibe among celebrities and football players seems to lean negative, with little praise coming from notable figures. This situation highlights how even top athletes can be sensitive about their personal images and how they are represented.
Media outlets have had a field day, covering the mixed reactions and showcasing visuals of the tattoo all over social media. This controversy has certainly sparked debates about self-representation in tattoos, and it might just shift how fans and sponsors view Richarlison moving forward. Will this bold choice define his public image? Only time will tell!
Neymar's Unexpected Gesture
Neymar's unexpected gesture following Richarlison's tattoo reveal has taken many by surprise. After Richarlison shared his new ink featuring Neymar's image, the football superstar didn't exactly celebrate the tribute. Instead, Neymar requested that Richarlison remove the tattoo, citing discomfort with having his likeness permanently etched on someone else's skin. It seems even football icons have their limits!
But Neymar didn't stop there. To sweeten the deal, he offered Richarlison a whopping £26,000 (or about $32,000) to cover the costs of removal. That's quite the financial commitment! It's unclear whether Richarlison will accept the money and actually go through with the removal, but the situation has certainly stirred up conversations among fans and in the media.
Many are buzzing about the whole ordeal on social media, with varying opinions on whether Neymar's gesture is generous or a little over the top. This unexpected twist highlights not just the personal dynamics between these two athletes, but also how their lives play out in the public eye. Who knew a tattoo could spark such a dramatic saga in the football world?
Symbolism Behind the Ink
Richarlison's tattoo is more than just body art; it's a powerful tribute to his idols and heritage. The ink prominently features Neymar and Ronaldo Nazario, two Brazilian legends who've inspired him throughout his career. By including these figures, you can see Richarlison's aspiration to emulate their successes on the pitch. Plus, Neymar's presence is particularly special since they're teammates on the national team, creating a personal connection to his journey.
The Brazilian flag in the background symbolizes his deep national pride and love for Brazil. It reflects Richarlison's commitment to representing his country at the highest international levels, showcasing his patriotism and cultural identity. But it doesn't stop there! The tattoo also portrays scenes from favelas, reminding Richarlison of his humble beginnings and the challenges he's overcome on his path to stardom.
And let's not forget the religious imagery, like the cross and rosary beads, which highlight his Catholic faith and personal values. All these elements combine to create a rich tapestry of meaning that goes beyond football—illustrating a story of ambition, gratitude, and cultural pride. It's not just a tattoo; it's a celebration of who he is!
Richarlison's Tattoo History
Tattoos have become a significant part of Richarlison's identity, marking his journey from a hesitant individual to a proud bearer of meaningful ink. Initially, you might be surprised to learn that he didn't want any tattoos at all! However, after leading Brazil to Olympic gold at the Tokyo Games, his perspective changed dramatically. That monumental achievement inspired his first ink—a tattoo on his left thigh featuring his name, the number 10, and the Olympic medal itself.
Richarlison's early tattoos also showcase his love for Brazil, with a neck tattoo that translates to "he is Brazilian" and a vibrant Brazilian flag. Plus, who can resist a bit of nostalgia? He's got some favorite cartoon characters like Tom and Jerry tattooed on his arm, done by the talented artist Dom Tattoo.
Then there's the back tattoo, which took social media by storm in late 2022. It features Richarlison, Neymar, and Ronaldo Nazario, alongside Brazilian flag motifs and favela scenes. This bold piece stirred up a whirlwind of reactions, sparking discussions about self-expression and cultural identity in the world of football.
Cultural Significance in Football
In the world of football, tattoos have become more than just body art; they serve as powerful symbols of cultural identity and personal achievements. For players like Richarlison, each inked design tells a story—honoring roots and celebrating milestones. Many athletes choose tattoos that reflect their heritage, like Polynesian designs that showcase Pacific Islander traditions. These tattoos create a link to family, inspiring pride in both the athlete and their community.
But it's not just about heritage. Tattoos often commemorate significant victories, whether it's a championship win or an Olympic appearance. They serve as permanent reminders of hard work, resilience, and dedication. Imagine an athlete sporting a tattoo of a trophy or a date that marks a life-changing moment; it's a testament to their journey.
Moreover, tattoos can symbolize motivation and strength, featuring meaningful phrases or symbols like lions and phoenixes that embody courage. Team tattoos foster camaraderie, connecting players through shared experiences. Fans, too, relate to these stories, often getting inked to showcase their loyalty. Ultimately, tattoos in football aren't just decoration; they embody culture, achievement, and the relentless spirit of the game.
Media Coverage and Discussion
The recent buzz around Richarlison's new back tattoo has ignited widespread media coverage and public discussion. You can't scroll through social media without stumbling upon debates about this bold piece of art. While some fans rave about its stunning detail and the story it tells, others raise eyebrows at the timing, especially after Brazil's World Cup exit. It's like watching a reality show unfold, with opinions flying left and right!
Major sports outlets have jumped into the fray, analyzing everything from the tattoo's symbolism—like the Brazilian flag and favela scenes—to insights from his tattoo artist, Dom Tattoo. They even compare Richarlison's ink to that of his fellow footballers, showcasing his unique flair for body art. Fans have flooded online forums, sharing their thoughts and even critiquing the design choices, like the prominent self-portrait.
This tattoo has become more than just body art; it's a statement reflecting Richarlison's journey and personality. So, whether you're a fan or a critic, it's clear this tattoo is more than skin deep, sparking conversations that blend football, culture, and personal expression.
Impact on Richarlison's Image
Richarlison's new tattoo significantly reshapes his image, showcasing not just his artistic expression but also his deep respect for Brazilian football history. By honoring legends like Neymar and Ronaldo, you see his admiration and connection to the sport that shaped him. After his standout performance at the 2022 World Cup, where he scored three goals, this tattoo represents a pivotal moment in his career—a tribute to both his journey and the heartbreak of Brazil's elimination.
Fans can't help but feel an emotional connection to this ink. It's not just a design; it's a heartfelt response that resonates with many who share Richarlison's passion for Brazilian football. The way he expressed his feelings on social media struck a chord, inviting sympathy and support from fans worldwide. This tattoo also amplifies his visibility, potentially attracting new sponsors eager to align with his brand.
Frequently Asked Questions
What Inspired Richarlison to Get This Specific Tattoo?
You can see Richarlison's tattoos reflect his journey, celebrating his roots, achievements, and love for football. Each piece embodies personal memories, influences from idols like Neymar and Ronaldo, and his deep connection to Brazil.
How Does Richarlison Feel About the Tattoo Controversy?
You might sense Richarlison feels mixed about the tattoo controversy. While he values the tribute to his heroes, the negative reactions and Neymar's request likely weigh on him, complicating his emotions surrounding the artwork.
Are There Plans for More Tattoos in the Future?
You might be wondering about future tattoo plans. Right now, there's no information about more tattoos, as Richarlison's focused on the current controversy. His decisions will likely depend on personal choices and public reaction.
What Reactions Have Richarlison's Teammates Expressed About the Tattoo?
You'll find that Richarlison's teammates have mixed reactions about the tattoo. Some admire his boldness, while others express concern about Neymar's discomfort, revealing the complexity of their relationships and the impact on team dynamics.
Has the Tattoo Influenced Richarlison's Performance on the Field?
You might wonder if tattoos influence performance. For Richarlison, they haven't negatively impacted his playing time, discipline, or goal-scoring. Instead, they reflect his personality and commitment, enhancing his presence on the field.
Conclusion
Richarlison's new tattoo has sparked a whirlwind of conversation, blending personal expression with cultural significance. As fans and critics alike weigh in, it's clear that this ink isn't just for show—it's a statement. From Neymar's supportive gesture to the deeper meanings behind the design, Richarlison's bold choice reflects his journey both on and off the pitch. So, whether you love it or hate it, one thing's for sure: this tattoo isn't going anywhere anytime soon!
Beauty and Grooming
Give Yourself a Buzz Cut: The Step-by-Step Shortcut to a Fresh Look
Navigate the simple steps to achieve a fresh buzz cut at home, but what crucial tips will ensure your look is flawless?
To give yourself a buzz cut, start by preparing your tools, including clippers and a hand mirror. Check your scalp for bumps and wash your hair thoroughly. Select the right clipper guard based on your hair type, typically using #2 or #3 for a balanced cut. Start cutting from the front to back in smooth strokes, adjusting guard sizes for the sides. Pay attention to symmetry when trimming sideburns and defining your neckline. Make sure to inspect your work for any uneven spots. Keep your scalp healthy with proper aftercare, and you'll be ready for the next steps to enhance your style.
Key Takeaways
- Inspect your scalp for irregularities and ensure your head shape is suitable for a buzz cut before starting.
- Choose the appropriate clipper guard size based on your hair type and desired length for an even cut.
- Use smooth, upward strokes with the clippers, starting from the front and blending shorter lengths on the sides.
- Define your neckline and sideburns with precision, using a hand mirror for symmetry and clean lines.
- Maintain your buzz cut with regular trims every few weeks and proper scalp care to keep it looking fresh.
Preparing for Your Buzz Cut
Before diving into your buzz cut, it's essential to gear up properly. First, make sure you have dedicated hair clippers on hand, as beard clippers just won't cut it for this style. You'll also need a hand mirror to help you see the back and sides of your head while cutting. Don't forget a vacuum or clean-up tool to manage those pesky hair clippings.
Next, check your scalp for any irregularities like scars or bumps. Run your fingers over your scalp to feel for any abnormalities that could be exposed after your cut. Also, consider your head shape and make sure a buzz cut suits your overall look. Being aware of your scalp condition can inform your haircut decisions and help you avoid potential issues.
Prepare your hair by washing it thoroughly with shampoo, then let it dry completely. Comb your hair forward to align it properly and remove any tangles. Oil the clipper blades to ensure a smooth cut.
Lastly, set up your environment by clearing your workspace and laying out all your tools. Ensure the area has good lighting and is free from distractions. Position your mirrors so you can see every angle, especially the back. With everything ready, you're all set to start!
Selecting Clipper Guards
When you're ready to select clipper guards for your buzz cut, understanding the different numbers and their corresponding hair lengths is crucial. Each guard number corresponds to a specific hair length, starting with Guard 0, which leaves just 1.5mm of hair. If you prefer a bit more length, Guard 1 leaves about ⅛ of an inch (3mm) but might expose your scalp. Guard 2 is a good option for those wanting ¼ of an inch (4.5mm), often used for side fades. For a slightly longer look, Guard 3 leaves ⅜ of an inch (6mm) and is popular for faded hairstyles. If you're leaning towards a crew cut, Guard 4 leaves ½ inch of hair.
Consider your hair type when selecting guards. For thinning hair, higher guard numbers like #4 or #5 are best to avoid scalp exposure. In contrast, if you have thick hair, lower numbers like #2 or #3 can work well. For faded cuts, Guards #2 and #3 are commonly used. Additionally, understanding guard numbers can greatly enhance your ability to communicate with your stylist about your desired look. Experiment with different combinations to find what suits you best, and don't hesitate to communicate your preferences clearly if you're visiting a stylist.
Cutting Techniques to Follow
Once you've selected the right clipper guards, it's time to focus on your cutting techniques. Start by ensuring your hair is clean and dry. Check your scalp for any lumps or scars that could affect the cut. With your clippers fully charged and blades oiled, gather your tools, including a hand mirror and a vacuum.
Begin cutting at the top of your head with your chosen guard size. Move the clippers from front to back in smooth strokes against the direction of hair growth. Make sure to cover the entire area, repeating strokes as necessary. If needed, use an upward rocking motion to achieve an even cut and check for stray hairs, clipping them with the same guard. Remember that regular trims are recommended to keep the style fresh and maintain an even look.
Next, move to the sides, using a guard size one length shorter than the top. Cut from the bottom to the top, blending the lengths smoothly. For the back, stand with your back to the mirror, using the hand mirror to see what you're doing. Finally, use the inverted clipper technique around your neck and ears for clean edges, holding the clippers upside down and making small, precise strokes.
Trimming and Edging Details
Achieving a clean and polished buzz cut involves meticulous trimming and edging details that elevate your look. Start by trimming your sideburns with a #1 guard. Place the clippers flush against your face, just below the sideburns, and slide them up to your desired height, ensuring symmetry by checking in the mirror.
Next, focus on the back of your neck. Use a hand mirror to see what you're doing. If you're flying solo, consider leaving the neckline natural, or ask someone to help. Aim for a straight line across the back, rounding the corners for a polished finish. Angle the clippers straight for a square neckline or curve them for a rounded look. For detailed edges, a razor or fine trimmer works wonders. A buzz cut's simplicity is especially beneficial during warmer months when minimal maintenance is desired.
Now, define your hairline. Create clean lines around your hairline, temples, and sideburns with slow, deliberate movements. Pull the skin taut for precision, paying extra attention to corners. Finally, blend any harsh lines using thinning shears, ensuring smooth transitions, especially if you've created a fade. Regularly check for symmetry in the mirror to make necessary adjustments for a fresh appearance.
Ensuring Uniformity in Length
To ensure uniformity in length, start by selecting the right guard length that complements your personal style and facial features. For a very short buzz, consider a Number 1 or 2 guard, as these will emphasize your face's shape. If you prefer a bit more texture, go for a Number 3 or 4 guard. For a softer look that adds height and elongates rounder face shapes, use a Number 5 or 6 guard.
Next, always clip on completely dry hair to maintain an even length. Employ a hand mirror to check all angles and ensure consistency. Apply the same guard length all around your head, such as a Number 3 for a uniform buzz cut. Remember to blend any harsh lines between different clipper lengths with thinning shears for a polished finish. Additionally, this style is ideal for men with thinning hair, as it minimizes contrast in hair density.
When using the clippers, work in straight, repetitive motions against the grain on top and move upward from the bottom-front near the temple for the sides. If you notice any missed spots, touch them up to achieve that perfect uniform look. Consistency is key for a fresh and clean buzz cut.
Final Touches for a Clean Look
With your buzz cut now uniform, it's time to focus on the final touches that create a polished and clean look. Start by trimming the edges. Use a #1 guard for precise trimming of your sideburns and the back of your neck. Place the clippers flush against the side of your face and slide up to your desired height. For the back, use a hand mirror to see clearly or ask for a friend's help. Round the corners of your neckline for a neat finish, ensuring your hairline is straight and even.
Next, consider creating a fade. Begin with a longer guard at the top and switch to shorter ones as you move down. Maintain a seamless motion to blend the different lengths smoothly. Employ thinning shears to blend any harsh lines where guard sizes meet. Buzz cuts can suit most face shapes with proper variation, so adjust your technique based on your facial features for an ideal finish.
Finally, focus on detailing and blending. Inspect the blend from multiple angles, using light pressure and smooth strokes to achieve a natural look. Don't forget to check the back and sides for any unevenness. With these final touches, you'll achieve that clean, polished appearance you're aiming for.
Aftercare for Your Buzz Cut
After getting a buzz cut, proper aftercare is essential for maintaining a healthy scalp and ensuring your new look stays fresh. Start with washing your hair using a mild and organic shampoo, especially if you're in a hot climate or using hard water. Daily washing might be necessary, but you can reduce it to every 3-5 days to avoid dryness. An acidic rinse can help counteract hard water effects and prevent buildup.
Moisturizing your scalp is crucial. Mix coconut and castor oil, applying a small amount daily, particularly after washing. This not only keeps your scalp hydrated but also promotes healthy hair growth. Just be careful not to over-oil, as it can make your hair look greasy. Additionally, using a hair clipper with a number two guard is recommended for maintaining longer cuts to ensure a more blended look.
Regularly check your scalp for any abnormalities and maintain good hygiene practices to prevent infections or irritation. Consider using a sponge to gently scritch the scalp before washing; this enhances cleanliness and relaxation. Finally, avoid harsh products that could irritate your sensitive scalp. With the right care, your buzz cut will look sharp and fresh while keeping your scalp healthy.
Tips for Maintaining Your Style
Maintaining your buzz cut requires attention and regular upkeep to keep it looking sharp. Start with regular trims every few weeks. Since hair grows about ½ inch per month, these trims prevent awkward stages and ensure a balanced style. Focus on keeping the sides and back shorter than the top for a polished look. Additionally, maintaining proper scalp health is vital, as it can enhance the overall appearance of your buzz cut.
Don't overlook your scalp health. A healthy scalp is crucial for a great buzz cut, so use a gentle shampoo and consider a moisturizer to combat dryness or irritation. This will ensure your hair looks its best, promoting better hair appearance for your buzz cut.
Defining your look is essential too. Ask your barber for a clean edge-up to enhance your hairline. Experiment with different guard sizes to find the perfect length that complements your features. Regularly exfoliating your scalp can also help to keep it healthy and free of dead skin cells.
Finally, use styling products to manage texture. Opt for dry paste or clay wax for a subtle hold, or a small amount of pomade for some length on top. Applying these products evenly will help enhance your natural texture and create a slightly tousled effect. By following these tips, you'll maintain a fresh and stylish buzz cut effortlessly.
Frequently Asked Questions
Can I Buzz Cut My Hair if It's Wet?
You can buzz cut your hair while it's wet, but it's not always the best choice. Wet hair clumps together, making it easier to manage, but it's also more prone to damage and breakage. Clippers might struggle with wet strands, leading to uneven cuts. If you decide to cut wet hair, ensure you use water-resistant clippers and take safety precautions to avoid accidents and equipment damage. Clean, dry hair is usually the safest option.
How Long Does a Buzz Cut Typically Last?
A buzz cut typically lasts about 1 to 2 months before it grows out to a length that no longer qualifies as a buzz. Since hair grows roughly ½ inch per month, you might find yourself needing a trim every 1 to 3 weeks to keep that fresh look. Regular maintenance not only keeps your style sharp but also helps avoid awkward stages as your hair grows. Embrace the journey, and enjoy the change!
What Should I Do if I Make a Mistake?
If you make a mistake while cutting your hair, don't panic. First, assess the uneven areas carefully with a mirror. Adjust your guard size and trim in small sections to even things out. Blend any patchy spots by using a shorter guard and smooth out disconnected layers. If you're struggling with your hairline or edges, take your time or ask someone for help. Remember, it's all about patience and precision!
Is Buzzing My Hair Suitable for All Hair Types?
Buzzing your hair can work well for many hair types, but it's not universally suitable. Straight, wavy, and curly hair often look great with a buzz cut, providing a clean, stylish look. Coarse hair offers a distinctive edge, while thinning hair can benefit too. However, if you have prominent scars, scalp conditions, or an irregular head shape, you might want to reconsider. Always consult a professional for personalized advice before making the cut.
Can I Use Regular Scissors Instead of Clippers?
You shouldn't use regular scissors for a buzz cut. Clippers are designed for precision and speed, ensuring a uniform length that scissors just can't provide. With scissors, you'll struggle to maintain that even cut and waste a lot of time measuring. Plus, the clean finish from clippers gives you that sharp look, while scissors are better suited for longer hair. For a buzz cut, clippers are definitely the way to go.
Conclusion
Now that you've mastered the steps to give yourself a buzz cut, you can enjoy your fresh look with confidence. Remember to regularly maintain your style for the best results and don't hesitate to experiment with different lengths. With practice, you'll become a pro at this quick and easy haircut. So grab your clippers, embrace the change, and rock that buzz cut like a champ! Your new look is just a trim away!
Beauty and Grooming
How to Slick Back Hair: The One Product That Makes It Effortless
Get ready to master the art of slicking back your hair effortlessly—discover the secret product that will transform your styling routine!
To effortlessly slick back your hair, use a high-quality pomade or light styling cream tailored to your hair type. Start with clean, slightly damp hair for optimal product absorption. Warm the product between your palms and evenly distribute it from the ends to the roots, ensuring to focus on the scalp for hold. Use a fine-tooth comb for a sharp look and finish with a spray or serum for extra shine. Remember to set your style with a blow dryer and be prepared for quick touch-ups. There's more to explore about perfecting your slick back technique!
Key Takeaways
- Use a lightweight styling cream or pomade for effortless slicking, suitable for your hair type and texture.
- Ensure hair is clean and slightly damp before applying product for optimal absorption and distribution.
- Warm the product between your palms and apply evenly from ends to roots to avoid clumping.
- Comb hair back against its natural part for a smooth and polished look, using a fine-tooth comb for precision.
- Finish with a light hairspray or serum to lock the style in place and add shine.
Assess Your Hair Type
To achieve the perfect slick back hairstyle, you first need to assess your hair type. Start by evaluating your hair length. If you've got short hair, a full slick back might be tough, but you can try a side part or an undercut. Medium-length hair is ideal, giving you the flexibility for classic or messy styles. Long hair can be slicked back for a polished look, though lightweight products are essential to avoid stiffness. Very long hair may require extra products to keep everything in place.
Next, consider your hair texture. Straight hair is the easiest to style, while wavy hair adds depth but needs products to maintain movement. Curly hair can also work, provided you use the right techniques, such as using curl-defining cream to maintain volume.
Hair density matters too. High-density hair supports elaborate styles, while low-density hair might need extra products to create volume. Lastly, think about porosity. Low porosity hair resists products, while high porosity absorbs them quickly but may lose hold. Knowing your hair type will help you choose the right products and techniques, making your slick back effortless.
Prepare Your Hair Properly
Once you've assessed your hair type, it's time to prepare it for styling. Start by washing your hair with a clarifying shampoo to remove any product buildup, ensuring it's clean and smooth. Follow up with a conditioner to re-moisturize and make your hair more manageable. After washing, towel dry your hair gently—avoid rubbing to prevent damage—and let it air dry until it's slightly damp for optimal product absorption.
Next, tackle any tangles or knots. Use a wide-toothed comb or a fine-toothed comb, and consider applying a leave-in conditioner to protect and hydrate as you comb through. If you have curly or wavy hair, lightly wet it before brushing to make it easier to manage. Completely dry hair is essential for styling success, so make sure to check that it has dried adequately before applying any products.
If you plan to use certain styling products like gel or pomade, ensure your hair is completely dry. For a polished look, blow dry on a low setting while combing, and always use a heat protectant spray. Finally, smooth out any bumps with a fine-toothed comb, and apply a light hair serum for added shine before you start styling.
Select the Right Product
Choosing the right product is crucial for achieving the perfect slick back look. Start by identifying your hair type and needs. If you have thick or curly hair, consider using pomades or strong-hold styling gels. They provide the necessary hold while adding shine. Look for gels with hydrating ingredients like olive oil to keep your hair moisturized. Additionally, using products with beneficial ingredients can enhance both hair health and style longevity, such as those found in best hair styling gels.
For straight hair, you might prefer lighter hold products like styling creams or light hold gels. These options help you achieve a sleek finish without the heaviness of stronger products. If you want a polished look, pomades can also serve you well.
If your hair is textured or coiled, opt for styling creams that tame frizz and add shine. Edge control products are excellent for maintaining a sleek hairline, especially for hair types 3-4c. Ensure you choose products that include beneficial ingredients like castor and coconut oil for added hydration. DesignMe Styling Stick is a great option as it forms a protective barrier while providing moisture.
Finally, always check for cruelty-free and vegan options that are free from harsh chemicals. By selecting the right product, you'll set yourself up for a successful slick back hairstyle that lasts all day.
Apply Styling Products Effectively
Applying styling products effectively is key to achieving a sleek, polished slick back hairstyle. Start by washing and conditioning your hair to ensure it's clean and smooth. Gently towel dry your hair and let it air dry until it's slightly damp; this helps with better product distribution. Avoid applying products to wet hair, as it can lead to an uneven finish.
Warm the product between your palms to create an even film. Rub your hands together and then use your fingertips to work the product through your hair, starting from the ends and moving toward the scalp. Make sure to avoid concentrating product at the roots or front of your hair.
Begin applying the product from the back of your head, where your hair is thickest, and work your way forward. Focus on the roots for a firm hold, especially for a slick back style. Use a comb or your fingers to distribute the product evenly. Remember, it's better to start with a small amount and add more as needed to maintain control and avoid a rigid look. For better results, ensure your hair is damp for optimal product absorption to enhance the effectiveness of the styling process. For added hold, finish with hair spray or serum.
Combing and Styling Techniques
With your styling products in place, it's time to focus on combing and styling techniques that will help you achieve that polished slick back look. Start by ensuring your hair is at least 4 inches long for a classic style. If you have curly or thick hair, straighten it first and use a blow dryer to help guide your strands in the desired direction.
Begin combing by going against your hair's natural part. This technique prevents splits and allows you to create a smooth finish. For a sharper look, opt for a fine-tooth comb; for a more relaxed finish, a wide-tooth comb works wonders. Apply gentle pressure as you smooth out any uneven sections. Additionally, using the right products can be especially beneficial for those with shorter hair to help achieve the desired style.
After each comb pass, use your hand to flatten the hair, avoiding any lumps. A natural boar bristle brush can help achieve a clean finish without adding tension. Remember to divide your hair into sections for even product distribution, especially if your hair is thick. Finally, resist the urge to touch your hair throughout the day to maintain that slick, polished appearance.
Set and Maintain Your Style
To keep your slick back hair looking fresh and polished throughout the day, you'll want to set your style properly right after you finish styling. Begin by using a blow dryer on a low setting while combing your hair to lock your style in place. Next, apply a small amount of hairspray for extra hold. A fine-toothed comb will help ensure your hair is evenly distributed and free of tangles. For added shine, use a light hair serum on the top layer, making sure to distribute it evenly from root to tip. Regular trims every 4-6 weeks are essential for maintaining a polished look and ensuring your hairstyle stays sharp.
Throughout the day, carry a small comb and travel-size hairspray for quick touch-ups. Try to avoid touching your hair too much, as this can disrupt the sleek finish. Opt for products with strong hold to keep everything in place, and remember that regular trims every 4-6 weeks will help maintain your style's shape and length. Finally, keep your hair healthy by washing and conditioning regularly to prevent product build-up. By following these steps, your slick back will stay sharp and sophisticated from morning to night.
Frequently Asked Questions
Can I Slick Back My Hair if It's Very Short?
Yes, you can slick back very short hair, but it might require some extra effort. Start by using a blow dryer to direct your hair back, while applying a strong hold product like gel or hairspray. Focus on the front section first for a polished look. A comb helps smooth everything down, and remember to avoid touching your hair throughout the day to maintain that sleek appearance. Regular trims will keep your style sharp too!
How Often Should I Wash My Hair for Slick Styles?
To maintain slick styles, you should wash your hair about 2-3 times a week. This frequency helps manage oil without stripping your hair of its natural moisture. On non-wash days, consider using dry shampoo to keep your hair looking fresh and styled. Choose lightweight products that suit your hair type, and avoid excessive touching after styling to preserve your look. Regular trims also help keep your hair healthy and manageable.
What if My Hair Gets Greasy Quickly?
If your hair gets greasy quickly, you might want to wash it more frequently, even daily. Just be careful not to overdo it, as that can lead to more oil production. Try using a mild shampoo designed for oily hair, and consider incorporating a clarifying shampoo occasionally to clear product buildup. Also, avoid heavy styling products and keep your hands away from your hair to minimize oil transfer.
Are There Any Alternatives to Traditional Pomade?
Sure, there are plenty of alternatives to traditional pomade! You can try water-based products like Reuzel Clay Matte Pomade for a strong hold without shine. Styling creams, such as Dae Cactus Fruit, are great for frizz control and hydration. If you prefer a lighter touch, structure sprays and gels like Oribe Très Set offer hold while keeping hair soft. For added texture, consider sea salt spray or a strong matte product like Matt Mud.
How Can I Add More Volume to My Slicked-Back Hair?
To add more volume to your slicked-back hair, start by using a volumizing spray before you dry. Blow dry your hair using a round brush, focusing on the roots for lift. Apply lightweight pomade or fibers for hold without heaviness. Distribute products evenly, beginning at the front, and avoid over-combing. Finally, finish with a light hold hairspray to lock in the style while maintaining that desired volume throughout the day.
Conclusion
Now that you know how to slick back your hair effortlessly, it's time to put it all into practice. Remember to assess your hair type, prepare it well, and choose the right product for your styling needs. Apply it effectively and use the right combing techniques to achieve that polished look. With a little practice and the right approach, you'll master the slicked-back style in no time. Enjoy your sleek, confident new look!
-
Beauty and Grooming3 weeks ago
Embrace Natural Glow With Bronzer-Free Accelerators
-
Beauty and Grooming3 weeks ago
Discover Top Outdoor Tanning Lotions Today
-
Fashion Trends1 month ago
Fall 2025 Fashion Trends: Be Ahead of the Curve!
-
Vetted1 month ago
15 Best Affordable Sustainable Fashion Brands You Need to Know About in 2025
-
Interior Design2 days ago
Mylar vs. Foil Balloons: The Ultimate Showdown
-
Beauty and Grooming3 weeks ago
Unlock Flawless Tanning With Skin Prep
-
Interior Design3 weeks ago
Create Your Dream Cottagecore Home Office Now!
-
Vetted1 month ago
15 Best Women's Fashion Trends of 2025 You Need to Know About