
Revamping your floors with painted tiles and stenciled patterns adds a lively boho touch that’s both affordable and customizable. By choosing vibrant colors, tribal motifs, or geometric designs, you can transform plain surfaces into eye-catching focal points. Proper surface prep, high-quality paints, and careful stencil application are key to professional results. Whether you go bold or subtle, you’ll enjoy a unique style. Keep exploring to discover step-by-step tips for achieving stunning, lasting patterns.
Key Takeaways
- Choose boho stencil designs with tribal, floral, or geometric motifs in earthy or bold colors for a personalized look.
- Properly clean, sand, and prime surfaces to ensure smooth, vibrant, and long-lasting painted or stenciled floors.
- Use high-quality paints and secure stencils carefully for crisp, seamless patterns with vibrant or metallic accents.
- Seal your design with water-based polyurethane for durability, and maintain it with regular cleaning and periodic re-sealing.
- Incorporate layering, contrast, and metallic touches for a unique boho aesthetic that transforms dull tiles into stylish focal points.
Choosing the Perfect Boho Floor Stencil Designs
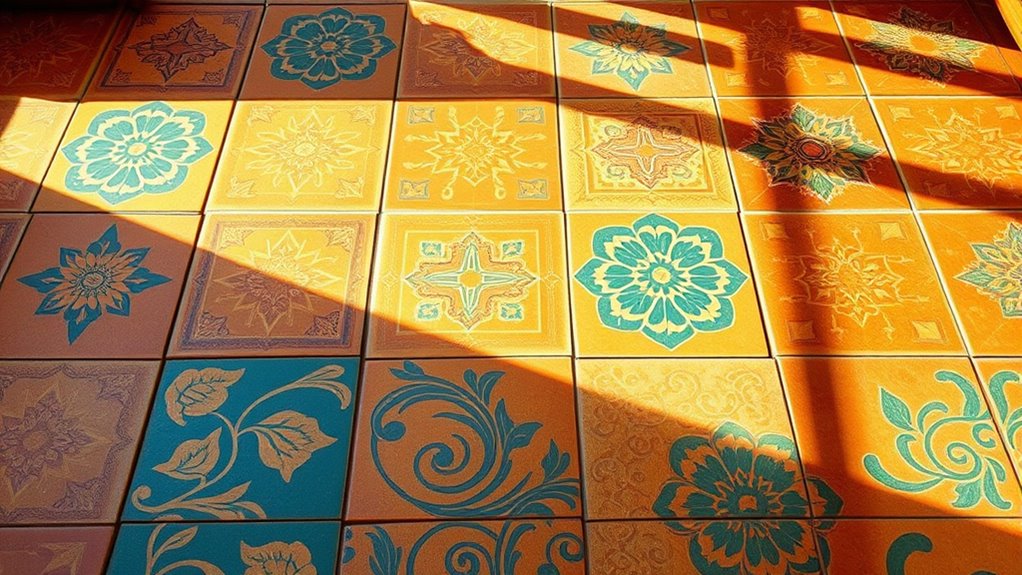
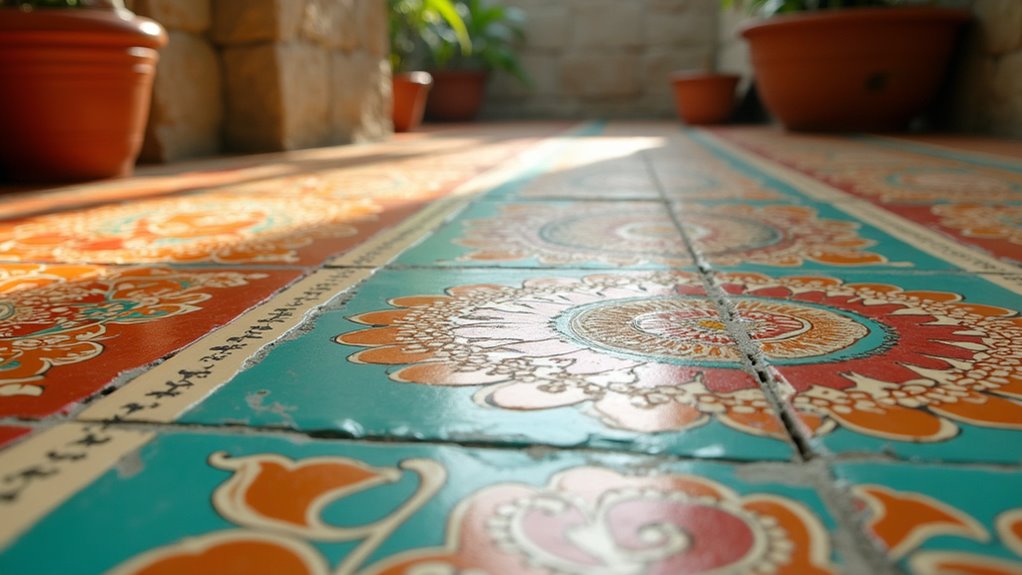
Are you wondering how to pick the ideal boho floor stencil design that complements your space? Start by exploring a variety of boho floor stencil designs, which often feature eclectic tile patterns like tribal motifs, floral accents, and geometric shapes. Choose stencil designs that match your overall decor theme, considering earthy tones and bold colors for a layered, vintage vibe. Sizes vary from small accents to large, allover patterns, giving you flexibility based on your floor’s dimensions and the level of detail you want. Reusable laser-cut mylar stencils ensure crisp, detailed designs and allow for multiple uses, helping you achieve a cohesive boho flooring decor. Remember to select a pattern that harmonizes with your existing furniture and color palette for a truly personalized look.
Easy Steps to Prepare Your Surface for Painting

Before you start painting or stenciling, it is essential to prepare your surface properly. Begin by thoroughly cleaning the area to remove dust, grease, and dirt, ensuring the paint will adhere well. Next, lightly sand any glossy or smooth spots with fine-grit sandpaper to create a better grip for the paint. Inspect the surface for cracks or holes, and repair them using a suitable filler; let it dry completely before moving on. Once repairs are complete, apply a compatible primer to enhance durability and make colors pop. Allow the primer to dry fully, following the manufacturer’s instructions. Proper surface preparation sets the foundation for a flawless finish, making your painted tiles or stenciled patterns look professional and long-lasting. Additionally, considering AI-driven personalization in your choice of colors and designs can help you achieve a more tailored and appealing look. Incorporating cohesive design elements aligned with your overall decor can elevate the visual impact of your project. To ensure safety and avoid electrical issues, it’s also helpful to be aware of the power requirements of your appliances, especially if your project involves any power tools or lighting. Incorporating low-carb and keto-friendly materials in your decorating supplies can also support a healthy lifestyle while enhancing your space. Engaging in sound healing science techniques such as using calming sounds during your project can also promote focus and relaxation throughout the process.
Applying Paint and Stencils for a Professional Look
To achieve a professional look, choose high-quality, water-based paints suited for your surface and consider sealing with a water-based polyurethane for added durability. Use a primer if needed to guarantee proper adhesion, and select stencil brushes or foam rollers based on your design’s complexity. Carefully align and rotate stencils for seamless patterns, and always allow sufficient drying time before sealing your work. Additionally, incorporating self watering plant pots elements can enhance the overall aesthetic and authenticity of your painted tiles and stenciled patterns. Utilizing proper surface preparation techniques, such as cleaning and smoothing your tiles beforehand, can significantly improve the final appearance. Incorporating Water Parks in your area can also inspire vibrant, playful color schemes and lively patterns, enriching your space with a fun, resort-like ambiance. Selecting colors that complement your dog’s names can also personalize your space further.
Surface Preparation Techniques
Achieving a professional-looking finish starts with proper surface preparation. Begin by thoroughly cleaning and degreasing the area to remove dirt, grease, and dust, guaranteeing maximum paint adhesion. If your surface is glossy or smooth, lightly sand it with fine-grit sandpaper to improve grip for the primer and paint. Applying a suitable primer that’s compatible with your surface material helps guarantee even absorption and prevents peeling later on. Use painter’s tape to mask off edges and areas you want to keep free of paint, creating clean, crisp lines. Before proceeding with stencil or paint application, let the primer dry completely following the manufacturer’s instructions. Proper surface preparation sets the foundation for a smooth, durable, and professional finish on your floors. Incorporating vetted tools and materials ensures a successful project outcome. Additionally, understanding surface preparation techniques can significantly impact the longevity and appearance of your painted tiles and stenciled patterns, especially when considering surface adhesion to prevent chipping or peeling over time.
Painting and Stenciling Tips
For a professional-looking finish, applying paint and stencils carefully and methodically is vital. When painting floors or adding stenciled patterns to floor tiles, use high-quality stencil brushes or dense foam rollers to guarantee smooth, even coverage. Keep stencils firmly in place, using low-tack spray adhesive if needed, to prevent shifting and create crisp edges. Apply paint in thin layers, allowing each coat to dry completely before adding the next—this prevents drips and smudging. Proper surface prep, including cleaning and priming, is essential for durability. For a polished look, consider sealing your DIY projects with a water-based polyurethane, which protects the design and enhances longevity. Remember, patience and precision are key to achieving professional results. Additionally, selecting the right paint type can significantly influence the durability and vibrancy of your finished design. Incorporating project management support can also help streamline the process and ensure each step aligns with your overall vision. Paying attention to surface preparation ensures your design adheres properly and lasts longer. Also, understanding high-quality tools can make a noticeable difference in the final outcome. Moreover, choosing an appropriate finish or sheen can enhance the aesthetic appeal and longevity of your painted tiles.
Finishing and Sealing Methods
Once you’ve completed your stenciled design, sealing the surface is essential to protect the pattern and guarantee lasting beauty. Apply a water-based polyurethane sealant to safeguard your work and enhance durability. Use a clear, low-gloss or matte finish to achieve a professional look that minimizes reflections and highlights your painted design. Make sure the paint is fully dry, usually 24-48 hours, before sealing to prevent smudging or smears. For outdoor or high-traffic floors, choose a sealant rated for exterior use to resist weather and foot traffic. Apply the sealant in thin, even coats with a brush or roller, allowing each coat to dry thoroughly before adding the next. This process ensures a smooth, long-lasting finish that protects your artistic efforts. Additionally, being mindful of spiritual energy can help foster a positive environment in your space, enhancing the overall ambiance of your home. Incorporating mindful sealing practices can also contribute to paint durability, ensuring your design remains vibrant over time.
Creative Ideas for Color Combinations and Patterns
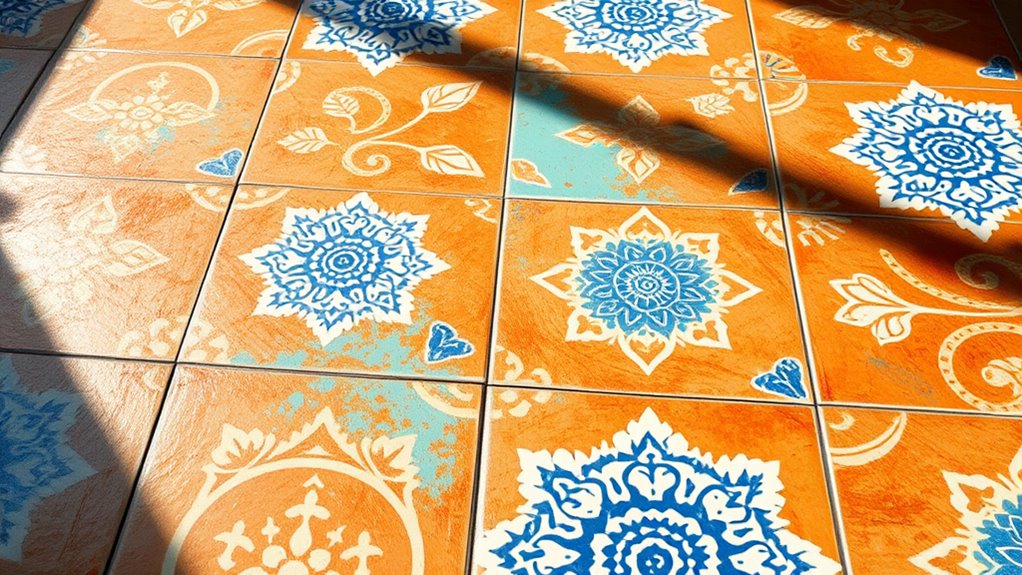
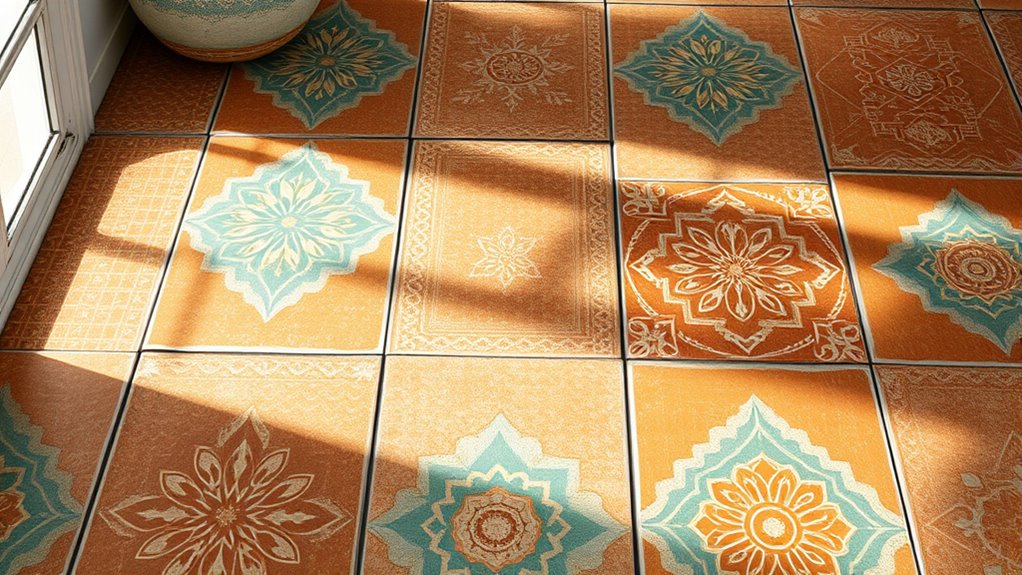
To create eye-catching floors, experimenting with bold color combinations and diverse patterns can make a significant impact. Using floor tile stencils and varied stencil patterns allows you to craft a unique boho tile design that reflects your personality. Play with paint color contrasts like deep navy and crisp white for a striking look or blend warm terracotta with cool turquoise to add depth. Mixing geometric and floral stencil patterns in earth tones such as ochre, rust, and olive creates a relaxed, bohemian vibe. Layer metallic paints like gold or bronze over matte bases for a trendy, luxe finish. You can also explore color blocking or ombré techniques within stencil patterns to personalize your space further. Regularly check the drivetrain components for wear and proper functioning to ensure your bike performs optimally during your creative projects. Proper maintenance is essential to keep your tools and surfaces in top condition, especially when working with layered paints and intricate patterns. Additionally, selecting durable and washable fabrics for your decor can help maintain your design’s freshness over time. Incorporating floral arrangements into your space can complement your artistic floors, adding natural beauty and texture to your decor.
Maintaining and Refreshing Your Stenciled Floors

Keeping your stenciled floors looking their best requires regular maintenance and timely touch-ups. To keep your stenciled floor vibrant, clean it frequently with a damp mop and gentle cleaning solutions to prevent dirt buildup that can obscure your patterns. Every 1-2 years, reapply a water-based polyurethane sealant to protect the paint from wear and moisture, ensuring durability. When you notice chipped or faded areas, perform a paint touch-up using matching paint and a small brush to preserve the design’s integrity. Avoid harsh chemicals or abrasive scrubbers that can damage the painted surface or remove the stencil pattern. Periodically inspect the sealant and reapply or refresh the paint as needed, keeping your floor looking fresh, vibrant, and well-maintained over time. Implementing these practices can also help prevent security vulnerabilities that might compromise your floor’s longevity and safety. Additionally, staying informed about industry transformations like AI automation can inspire innovative ideas for future home renovations or improvements.
Inspiring Before & After Transformations
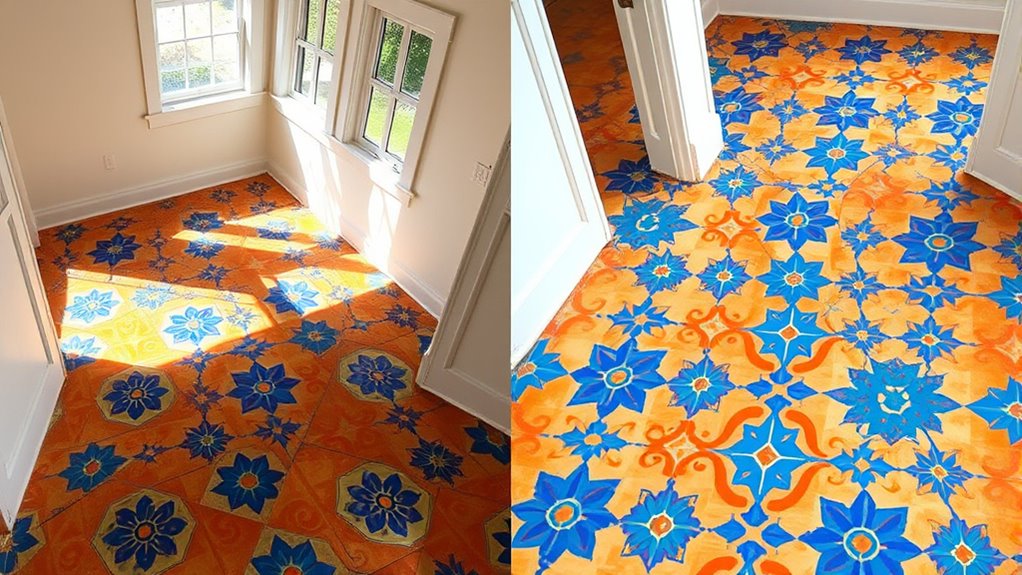
Seeing the dramatic change a fresh coat of paint and clever stenciling can bring to a floor is truly inspiring. Before and after photos reveal how dull, outdated tile floors become stunning focal points with just a stencil and some color. Successful transformations often feature bold geometric or boho tile designs painted with vibrant or metallic paints, giving a modern edge. Multiple stencil sizes and colors create layered, intricate patterns that mimic real tiles, elevating the DIY project. These visual examples show you don’t need a big budget for high-end looks—just creativity and effort.
- Embrace bold patterns to make a statement
- Use layered stencils for depth and complexity
- Choose vibrant or metallic paints for impact
- Transform worn floors into stylish art
- Celebrate your DIY transformation
Tips for DIY Success With Floor Stencils
To get the best results with floor stencils, start by thoroughly cleaning and priming your surface to prevent paint bleed and guarantee sharp lines. Choose high-quality, low-odor paint and apply it in multiple thin coats for a smooth finish. Finally, secure your stencil properly and adjust its position as needed to create seamless patterns across your floor.
Surface Preparation Techniques
Before applying your floor stencil, it’s essential to properly prepare the surface to guarantee clean, sharp results. Proper surface preparation ensures your stencils adhere well and your paint stays crisp. Start by thoroughly cleaning the floor to remove dirt, grease, and loose debris, which can hinder adhesion. If your surface is textured or glossy, lightly sand it to create a smooth base. Applying a high-quality primer compatible with your floor material improves paint adherence and durability. To keep the stencil steady, use painter’s tape or repositionable spray adhesive. Always test your paint and technique on a small area first to check for seepage and coverage. Proper surface preparation sets the foundation for a flawless, long-lasting boho-inspired floor transformation.
Selecting the Right Paint
Choosing the right paint is key to achieving a professional-looking floor stencil. Use high-quality, water-based latex or acrylic paint designed for floors to guarantee durability and easy cleaning. Before painting, apply a suitable primer—like bonding primer for tile or concrete—to improve adhesion and prevent peeling. Select a matte or satin finish to reduce slipperiness and better hide surface imperfections compared to gloss finishes. To achieve an even, smooth look, apply multiple thin coats rather than one thick layer, which helps prevent drips and streaks. Once your design is complete, seal the surface with a water-based polyurethane or clear topcoat to protect your work from wear and extend its lifespan. Proper paint selection and sealing are essential for a lasting, attractive result.
Perfecting Pattern Alignment
Achieving perfect pattern alignment is essential for a professional-looking floor stencil, and careful planning makes all the difference. To guarantee visual consistency, start by marking key reference points on the floor before you begin painting tiles. Use painter’s tape or light pencil lines to create a straight baseline, which helps with pattern repetition. For larger, repeating patterns, consider a registration system—like numbering or lettering sections—to maintain precise pattern alignment. When you notice slight misalignments, rotate or shift the stencil to keep the pattern seamless. Regularly step back and view your work from different angles to catch discrepancies early.
- Mark key reference points for accuracy
- Establish a straight baseline for pattern consistency
- Use registration systems for large designs
- Adjust stencil positioning to fix misalignments
- Continuously assess your progress for visual harmony
Frequently Asked Questions
Do Stenciled Floors Last?
You’re wondering if stenciled floors last. With proper surface prep, high-quality paints, and sealing, your stenciled floors can last 5 to 10 years or more. Regular cleaning and maintenance help preserve their look, while avoiding excessive foot traffic can prevent damage. When applied correctly and sealed well, your stenciled floors stay durable, vibrant, and beautiful, giving you years of stylish, boho charm without frequent touch-ups.
What Paint to Use to Stencil Tile Floor?
You might worry about paint durability on your tile floor, but using water-based acrylic or latex paints makes it easy to get a long-lasting design. For outdoor or busy areas, opt for high-quality exterior paint with UV protection to prevent fading. Remember to apply a bonding primer for adhesion, finish with a matte or satin topcoat, and seal with polyurethane to keep your stencil looking fresh and protected.
How Do You Seal a Stenciled Floor?
You seal a stenciled floor by applying a water-based polyurethane or polycrylic with a clean brush or foam roller. Use thin, even coats, and let each one dry completely before adding the next. Apply 2-3 coats for the best protection against foot traffic, moisture, and stains. Make sure the paint is fully cured, usually 24-48 hours, before sealing, and avoid oil-based sealers to prevent yellowing.
Do Tile Stencils Work?
Did you know that over 80% of DIY tile projects succeed with proper techniques? When you ask if tile stencils work, the answer is yes—if you carefully prepare your surface and choose quality materials. You’ll find it easy to create detailed, professional-looking patterns that mimic real tiles, all while saving money. With patience and the right tools, you can transform your space into a stunning, personalized design that lasts.
Conclusion
Revamping your floors with painted tiles and stenciled patterns is a fantastic way to add a boho flair to your space. With a little creativity and patience, you’ll turn a plain surface into a stunning focal point. Remember, Rome wasn’t built in a day, so take your time and enjoy the process. Before you know it, you’ll be dancing on a beautifully transformed floor that’s uniquely yours!