Connect with us

Interior Design

How to Anchor Furniture to Wall

With simple steps to anchor your furniture securely, you can prevent accidents and ensure safety—find out how to do it right!

Published

on

secure furniture to wall

To anchor furniture to the wall, start by locating studs with a stud finder. Secure brackets or straps to these studs for a robust connection, using a cordless drill for installation. You'll need measuring tape and a pencil to mark spots before drilling. For added stability, consider using two straps for tall items. Regularly check tightness to guarantee ongoing safety. If your furniture is exceptionally heavy or if you're unsure about the install, don't hesitate to call a professional. With these steps, you can create a safer environment at home—stick around for more handy tips!

Key Takeaways

  • Use a stud finder to locate wall studs for secure anchoring, avoiding reliance on drywall anchors.
  • Install furniture straps or wall brackets to connect the furniture to the wall for added stability.
  • Pre-drill holes slightly smaller than the screws to prevent wall or furniture splitting during installation.
  • Regularly check and tighten all straps and screws to ensure ongoing safety and stability of the anchored furniture.
  • For heavy or complex items, consider hiring a professional to ensure proper installation and safety.

Importance of Anchoring Furniture

When it comes to creating a safe home environment, anchoring furniture is vital. Each year, around 22,000 injuries related to furniture tip-over incidents occur in the U.S., with nearly 75% of those affected being children. The Consumer Product Safety Commission (CPSC) highlights the tragic reality that a child dies every two weeks from these accidents, often involving heavy items like dressers and TVs.

Understanding financial considerations for elderly care also underscores the significance of a safe living space, particularly for seniors who may be more vulnerable to accidents.

By securing your furniture with furniture anchors, you can markedly reduce these risks and promote Child Safety in your home. The STURDY Act further emphasizes the need for stricter safety standards for dressers, reinforcing the importance of anchoring furniture.

It's essential to be proactive; awareness of the dangers posed by unsecured furniture can help prevent tragic accidents.

Taking the time to properly anchor your furniture is a simple yet effective way to protect your loved ones. Whether you have toddlers climbing or older kids exploring, secure furniture prevents tip-over incidents that could lead to severe injury or worse.

Advertisement

Prioritizing this safety measure not only safeguards your home but also fosters peace of mind for you and your family.

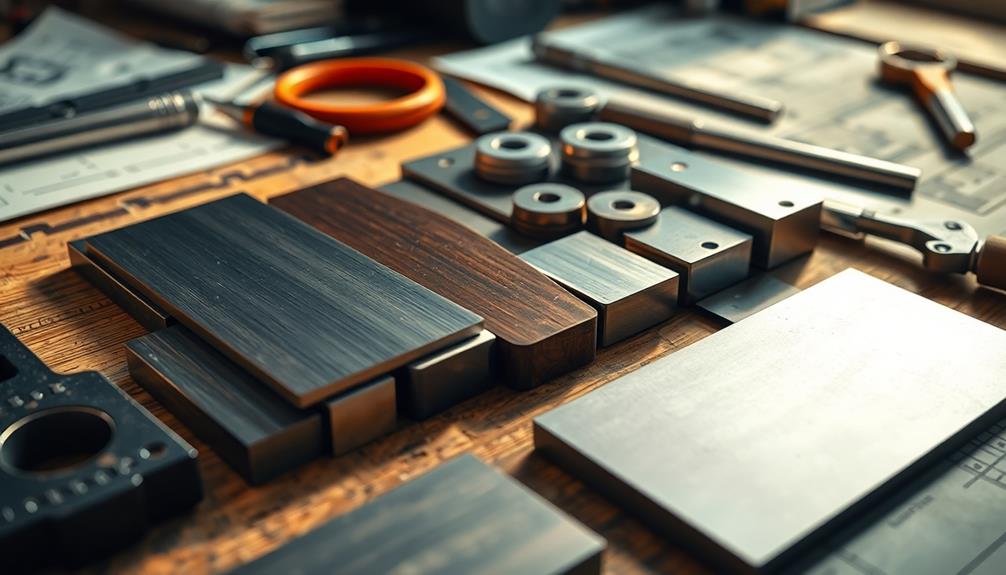
Tools and Materials Needed

essential supplies required here

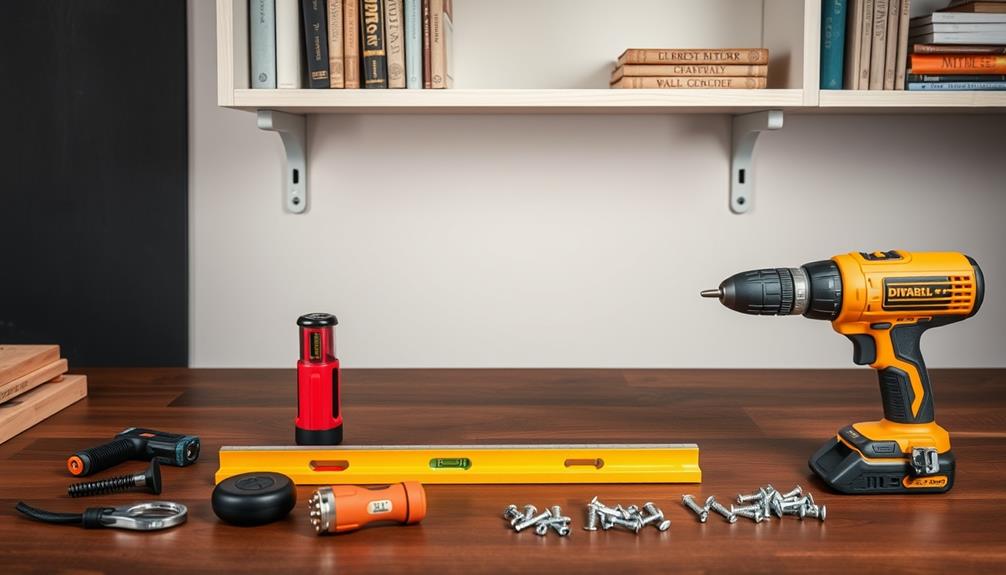
To effectively anchor your furniture and enhance safety, you'll need a few key tools and materials. First and foremost, a stud finder is vital for locating wall studs, which provide the strongest support for anchoring your furniture securely.

It's also beneficial to guarantee good air quality in your space, as air quality considerations can impact your overall environment. Next, a cordless drill or impact driver is recommended for efficiently installing screws and brackets without stripping the wood.

You'll also want to get furniture straps, which usually come in kits that include necessary hardware like brackets and screws. This guarantees you have all components available for proper installation.

To make certain your straps and brackets are placed accurately, a measuring tape is essential. It helps you avoid misalignment during the installation process.

Don't forget to have a pencil handy. It's useful for marking positions on both the wall and the furniture, aiding in precise drilling and bracket placement.

Advertisement

With these tools and materials at your side—stud finder, cordless drill, furniture straps, brackets, measuring tape, and pencil—you'll be well-prepared to anchor your furniture securely and enhance your living space's safety.

Methods to Anchor Furniture

securely fasten furniture safely

Several effective methods exist for anchoring furniture to walls, ensuring stability and safety in your home. First, you can use wall brackets to securely attach furniture. Connect one bracket to the furniture and the other to a wall stud. This method effectively prevents tip-overs. If you prefer flexibility, employ furniture straps for anchoring. For maximum safety, it's recommended to use two straps per item, allowing movement while ensuring stability.

Method Description Benefits
Wall Brackets Securely attach furniture to wall studs Prevents tip-overs
Furniture Straps Flexible anchoring option Allows movement
L-Brackets Added strength for tall/heavy items Increased stability

Always remember to anchor furniture to wall studs instead of relying on drywall anchors, which may not withstand lateral forces. For added security, consider using L-brackets, particularly for heavy items. After installation, test the tightness of screws and straps, and periodically check for looseness to maintain safety and stability over time.

When to Seek Professional Help

knowing when to ask

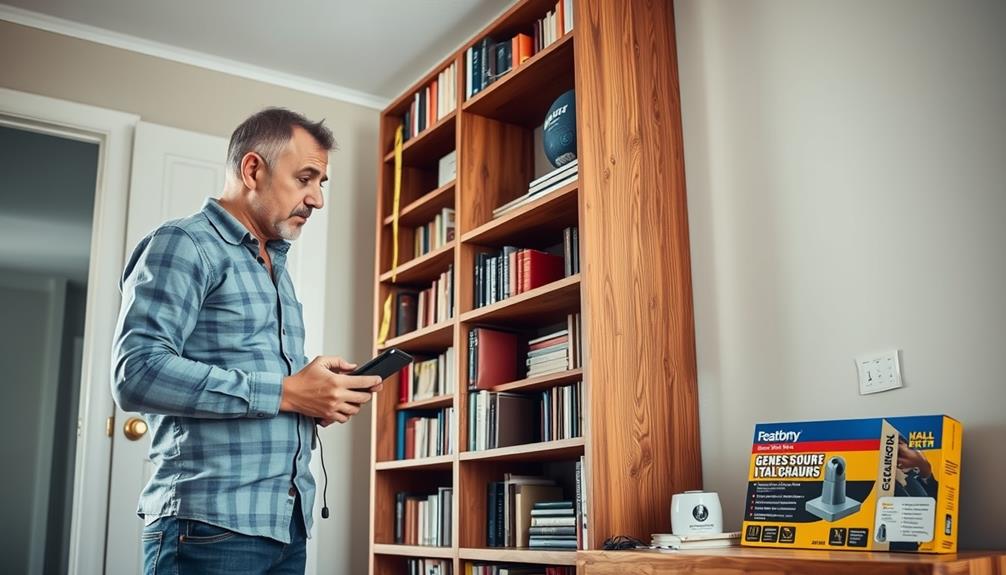
When it comes to anchoring furniture, there are times when you should definitely call in a professional.

If you're dealing with heavy pieces, complex layouts, or tricky wall types like brick or concrete, getting expert help can save you from potential headaches and guarantee safety.

Additionally, if you have young children or pets at home, confirming that furniture is securely anchored can prevent accidents and injuries, making it essential to evaluate cold medications overview when prioritizing safety.

Don't hesitate to seek assistance if you're unsure about your skills or the right tools for the job.

Advertisement

Complex Installation Scenarios

Complex installation scenarios often arise when you're anchoring furniture to challenging surfaces or dealing with heavy items.

If you're facing brick or concrete walls, it's wise to seek professional help, as these require specialized tools like hammer drills and masonry bits. Trying to secure the bracket without the right equipment can lead to improper installation and potential hazards.

If your furniture is unusually heavy or unstable, a professional assessment guarantees that safety measures are followed.

For complex installations involving multiple pieces or intricate layouts, hiring an expert can provide peace of mind and confirm that your anchors are correctly placed.

It's also essential to take into account your DIY skills. If you lack the necessary tools or experience, consulting a professional can prevent issues down the line.

Advertisement

Large entertainment centers or tall bookshelves, for instance, often benefit from expert installation to maintain maximum safety and stability.

Remember, when in doubt, it's better to invest in professional assistance than risk the safety of your home and loved ones.

Taking these steps will help guarantee your furniture is securely anchored and your space remains safe.

Heavy Furniture Considerations

Heavy furniture, like large dressers or entertainment centers, can create serious tipping hazards if not anchored properly. If you're dealing with heavy furniture that seems unstable or tricky to secure, it's wise to seek professional help.

These experts know the best anchoring techniques to minimize tipping risks, ensuring your furniture stays upright.

Advertisement

When considering whether to anchor your furniture yourself, think about the complexity of the installation. For instance, if you're anchoring multiple pieces or dealing with intricate wall structures, professional installation may be necessary.

They've specialized tools, like hammer drills and masonry bits, which are essential for anchoring to brick or concrete walls.

Additionally, if you have active children, ensuring that heavy furniture is safely secured can provide you with peace of mind. A professional can help you secure the bracket correctly and verify that everything is stable.

Wall Type Challenges

If you encounter walls made of brick, concrete, or particularly dense materials like plaster, anchoring furniture can become a challenging task. You might need specialized tools, such as a hammer drill and masonry screws, to get the job done right.

If the wall material is dense, locating wall studs might require a magnetic stud finder, complicating your DIY efforts.

Advertisement

Consider these factors when deciding whether to tackle the project yourself or seek professional help:

  • Furniture weight: If your furniture is excessively heavy, it's essential to guarantee it's anchored securely to prevent furniture tip-over.
  • Complex installations: Multiple pieces of furniture or unique configurations can exceed basic DIY skills, making hiring a professional a smart choice.
  • Safety concerns: In homes with children, safety is paramount. Hiring a professional guarantees that brackets and drywall anchors are installed correctly.

Ultimately, if you feel uncertain about your ability to anchor your furniture safely, don't hesitate to seek professional help. It's better to invest in expertise than risk accidents caused by improperly secured furniture.

Understanding Furniture Tip-Over Risks

assessing furniture safety hazards

When you think about furniture tip-over risks, it's essential to recognize the serious injuries they can cause, especially to children.

Statistics reveal that a child dies every two weeks from these accidents, making it clear that unsecured furniture poses a significant danger.

Understanding these risks can help you take proactive steps to keep your home safe.

Common Injuries Overview

Furniture tip-over incidents can lead to serious injuries, especially in homes with children. Each year, over 22,000 injuries related to furniture tip-overs are reported in the U.S., with children accounting for nearly half of these.

Unfortunately, the risks are significant, as unsecured furniture can result in injuries and even deaths.

Advertisement

To maximize safety, consider these key factors:

  • Anchor furniture: Secure bookshelves, dressers, and heavy items to the wall to prevent tipping.
  • Baby proofing: Implement strategies to minimize risks, such as keeping heavy items off high shelves.
  • Awareness: Stay informed about the dangers of furniture tip-overs and how to prevent them.

With 11 children dying each year from these accidents, it's essential to take action.

Heavy items placed on high shelves can increase the risk of furniture tipping over, particularly for curious kids who might climb or pull on furniture.

Statistics on Fatalities

Understanding the statistics surrounding furniture tip-over fatalities reveals the urgent need for safety measures in homes, especially those with young children. Each year, over 22,000 injuries related to furniture tip-overs are reported in the U.S., a stark reminder of the risks associated with unsecured furniture.

Between 2018 and 2020, there were 581 fatalities linked to these incidents, with children under five accounting for 81% of the deaths. That's a child dying every two weeks due to preventable accidents.

To enhance Wall Safety, it's critical to secure furniture to the wall, particularly in rooms where your first child plays. Using anchoring kits can effectively minimize the risk of furniture tip-overs. When you anchor furniture, you're not just protecting your child; you're also providing peace of mind.

Advertisement

Mark the wall where you intend to install these safety measures, ensuring everything is properly secured. The efforts of safety campaigns have already shown a 55% decrease in emergency medical attention for tip-over incidents, proving that proactive steps can save lives.

Don't wait for a tragedy; take action now to safeguard your home.

Consumer Awareness and Safety Education

empowering informed consumer choices

Safety awareness is essential in preventing tragic accidents related to furniture tip-overs, especially in homes with children. Every year, about 22,000 injuries are reported in the U.S., with children being the most affected demographic.

To combat this serious issue, you need to prioritize consumer awareness and safety education within your home.

Here are some effective safety measures you can implement:

  • Educate family members: Teach everyone about the risks associated with unsecured furniture. Understanding these dangers can encourage responsible behavior.
  • Choose compliant furniture: Look for dressers and other furniture that adhere to the STURDY Act's safety standards to guarantee better stability.
  • Properly anchor furniture: Use a drill to secure your furniture to the wall with appropriate anchors and studs to prevent tip-overs.

DIY Projects for Enhanced Safety

home safety improvement ideas

Anchoring furniture securely can be a rewarding DIY project that enhances your home's safety while giving you a chance to personalize your space. By taking the time to secure heavy items, you're not only making your home safer but also customizing your environment.

Start by gathering essential tools like a stud finder, cordless drill, and screwdrivers.

Advertisement

Next, mark the locations where you'll attach furniture brackets to the wall. This step is essential for ensuring that your furniture stays in place. After marking, drill pilot holes for easy installation.

Using metal brackets or nylon straps, connect your furniture to the wall, providing a robust anchor that reduces the risk of tip-overs.

This DIY project typically takes 30 minutes to an hour, making it a quick yet impactful solution to a significant safety concern.

Remember to conduct regular maintenance checks on your anchored furniture, testing the tightness of straps and fasteners.

Tips for Effective Installation

effective installation best practices

When you're ready to install your furniture anchors, start by locating the wall studs with a stud finder—this step is vital for securing a strong connection. Anchoring into the studs behind your drywall will provide the most stability for your furniture.

Next, pre-drill holes slightly smaller than the screws you'll use. This guarantees a snug fit and prevents the wood from splitting during installation.

Advertisement

After that, attach the bracket on the wall while using a level to guarantee everything's aligned straight. Proper alignment is essential for maintaining stability in your anchored furniture.

Here are a few tips to keep in mind:

  • Always follow the manufacturer's instructions for the specific anchoring kit you're using; different kits may have unique installation requirements.
  • Regularly check and tighten the straps or screws after installation to guarantee ongoing safety.
  • If you're securing large or heavy furniture, consider using multiple anchors for extra support.

Frequently Asked Questions

What Is the Best Way to Secure Furniture to the Wall?

To secure furniture effectively, you should use anchors or straps that attach to wall studs. This method enhances stability, prevents tip-overs, and guarantees safety, especially in homes with children. Regularly check the tightness for ongoing security.

How to Anchor Furniture to a Wall Without a Stud?

When you need to anchor furniture without a stud, use heavy-duty wall anchors like toggle bolts. Pre-drill holes, check alignment with a level, and regularly inspect the anchors for safety and stability.

How Do You Anchor Freestanding Furniture?

To anchor freestanding furniture, use a stud finder to locate studs, then drill pilot holes for screws. Attach brackets securely, align the furniture, and utilize safety straps for added stability and safety against tip-overs.

How to Attach a Dresser to the Wall?

You need security for that dresser, right? Start by finding the studs in your wall. Mark, pre-drill, and attach brackets to both the dresser and wall. Don't forget those safety straps for extra peace of mind!

Advertisement

Conclusion

By anchoring your furniture, you're not just protecting your space; you're safeguarding your loved ones. Imagine the peace of mind that comes with knowing your home is a secure haven. With the right tools and methods, you can easily prevent tragic accidents and create a safer environment. So, take a moment to anchor those pieces today—because in a world full of uncertainty, your home should be a refuge, not a risk.

Continue Reading
Advertisement

Interior Design

How to Restain Wood Furniture

You can transform your old wood furniture into a stunning centerpiece; discover the essential steps to achieve a flawless finish!

Published

on

restoring wood furniture finish

To restain wood furniture, start by gathering essential tools like sandpaper, a quality paint stripper, and safety gear. Work in a well-ventilated area and remove any hardware for easy access. Strip the old finish using either chemical strippers or sanding, beginning with coarse grit sandpaper. Afterward, smooth the surface with finer grit before applying the new stain. Use even strokes with foam brushes, allowing the stain to penetrate for several minutes. Seal the wood with polyurethane, applying multiple coats for durability. Stay tuned for tips on curing and getting that flawless finish!

Key Takeaways

  • Start by evaluating the furniture's condition, inspecting for damage, finish wear, and moisture issues before proceeding with any work.
  • Remove the old finish using either sanding or chemical strippers, ensuring to use protective gear throughout the process.
  • Sand the wood surface with varying grit sandpaper for a smooth finish, always sanding along the grain to avoid marks.
  • Apply stain evenly with a foam brush, allowing it to penetrate for 5-10 minutes before wiping off excess for a uniform color.
  • Seal the stained wood with at least two coats of polyurethane, allowing adequate drying and curing time for durability.

Essential Tools and Materials

When tackling a wood furniture restaining project, you'll need a few essential tools and materials to secure the best results. First, grab medium and fine grit sandpaper to prepare the surface effectively. Sanding helps remove old finishes and smooths out imperfections, guaranteeing the new stain adheres well.

You'll also need a quality paint stripper, like citri-strip, to eliminate any stubborn old finishes. This step is vital for achieving a clean slate. Additionally, understanding the importance of using energy-efficient appliances can help you save on electricity costs while working on your project.

Don't forget to wear safety gear, including rubber gloves and protective goggles, while handling chemicals and during the sanding process. Once the old finish is stripped, use mineral spirits to clean up any leftover residue. This guarantees your surface is pristine and ready for staining.

For applying the new stain, foam brushes work best for achieving an even application. When choosing a stain, consider oil-based options for their deep penetration and rich color. If you prefer a more eco-friendly approach, water-based stains offer quicker drying times without sacrificing appearance.

With these tools and materials at your side, you're all set to bring your wood furniture back to life!

Advertisement

Preparing Your Workspace

optimizing your work environment

Creating an ideal workspace is vital for a successful wood furniture restaining project. First, select a well-ventilated area, like an open garage or outdoor deck, to guarantee proper airflow when you're working with chemicals and finishes. This will help keep you safe and make the process smoother. Incorporating essential oils for respiratory health can further enhance your workspace by providing soothing scents that promote easier breathing.

Next, lay down a drop cloth or tarp secured with masking tape to protect your floor and surrounding areas from stains and spills. Before you begin, remove all drawers, doors, mirrors, and hardware from the furniture to access every surface that needs staining easily. This step is significant for effectively removing the old finish, as it allows you to work on each part thoroughly.

Organize your tools and materials—sandpaper, stain, brushes, and safety gear—within easy reach. This minimizes movement and helps you maintain focus on the project.

Evaluating the Furniture Condition

assessing furniture quality status

After setting up your workspace, it's time to evaluate the condition of your furniture. Start by inspecting it thoroughly for damages like cracks, chips, or loose joints. These issues may need repair before you begin restaining. Next, check the current finish for wear and tear. Identify areas where the finish has faded or chipped, as this will help you determine how much stripping or sanding is necessary.

Additionally, assess the wood type and grain pattern. Different wood species react differently to stain, which affects the final appearance. Look out for signs of moisture damage or warping, as these can compromise the wood's integrity and the stain's effectiveness. Finally, consider the piece's age; older furniture may have multiple finish layers that need addressing.

Here's a quick reference table to help you during your evaluation:

Condition Aspect What to Look For
Damages Cracks, chips, loose joints
Finish Quality Fading, chipping
Wood Type Species and grain pattern
Moisture Damage Signs of warping or water damage

Stripping the Old Finish

removing old surface coating

To effectively strip the old finish from your wood furniture, you have two main options: sanding or using chemical strippers.

Chemical strippers often provide a faster and easier method to remove thick layers of varnish or paint, which is similar to how mechanic shops for fuel injection cleaning handle performance issues efficiently. When opting for chemical strippers, apply the solution in thick, even layers and let it soak for 20-30 minutes. After that, scrape off the softened finish using a plastic scraper, making sure to follow the manufacturer's instructions for the best results.

Advertisement

If you choose sanding, start with medium-grit sandpaper (around 80-120 grit) to remove the bulk of the old finish. Once you've tackled the majority, progress to finer grits (200+ grit) for a smoother surface.

Regardless of the method you choose, always wear rubber gloves and protective goggles to prevent skin and eye irritation. Make certain you work in a well-ventilated area to minimize inhalation of harmful fumes.

After stripping, wipe the surface with mineral spirits to remove any residual stripper. Confirm the wood is fully dry before moving on to the next steps in your refinishing project.

Sanding and Staining Techniques

surface preparation and finishing

When you're ready to sand and stain your furniture, start by selecting the right sandpaper grit to effectively prep the surface.

Use the appropriate staining application methods to guarantee an even finish and enhance the wood's natural beauty.

Sandpaper Grit Selection

Selecting the right sandpaper grit is essential for achieving a smooth and even finish on your wood furniture.

Advertisement

Start with coarse grit sandpaper, around 60-80 grit, for initial sanding. This grit helps you remove old finishes and roughens the surface, preparing it for the refinishing process.

After this, progress to medium grit sandpaper, about 120-150 grit. This stage smooths the surface and eliminates scratches left by the coarse grit.

For the final sanding, switch to fine grit sandpaper, like 180-220 grit. This grit guarantees a smooth surface that not only feels great but also enhances the absorption of the stain you'll apply later.

Remember to always sand along the grain of the wood. This practice prevents unsightly swirl marks that can show up after staining and ruin your hard work.

Once you've finished sanding, you'll want to wipe down the surface with a tack cloth. This step removes dust and debris, securing the best possible finish when you move on to staining.

Advertisement

Proper sandpaper grit selection is key to a successful refinishing project, so take your time and do it right!

Staining Application Methods

Applying stain to wood furniture requires careful attention to detail for the best results. Start by sanding the wood with medium-grit (150) sandpaper to expose bare wood, then follow up with fine-grit (200+) sandpaper for a smooth finish.

Make certain there are no swirl marks left behind. After sanding, use a tack cloth to wipe down the surface, removing dust and debris to guarantee a clean application of stain.

When you're ready to apply the stain, use a staining pad or cloth. Here are some tips to achieve the best finish:

  • Apply the stain with long, even strokes.
  • Work in sections to maintain uniform coverage.
  • Allow the stain to penetrate for 5-10 minutes.
  • Wipe off any excess stain with a clean cloth.
  • Consider applying multiple coats for a richer color.

After staining, seal the wood with a clear coat, such as polyurethane. Apply the coat with smooth strokes along the grain, and lightly sand between coats for a professional finish.

This method will give your furniture a beautiful, long-lasting look.

Advertisement

Drying and Curing Tips

After achieving the desired stain application, drying and curing are vital steps in guaranteeing your wood furniture looks its best and lasts longer. Start by allowing each coat of stain to dry for 30 minutes to an hour before adding more layers. This guarantees proper adhesion and enhances color depth.

To achieve an even finish, lightly sand the wood surface with fine-grit sandpaper (200+) between coats. This helps create a smoother finish and improves the stain's absorption.

Once you've applied the final coat of stain, it's essential to let it cure for at least 24 hours in a well-ventilated area. This allows the stain to fully set and maximizes durability, preventing potential damage. Be sure to wipe off any excess stain with a clean, lint-free cloth to avoid blotchiness and achieve an even color over the surface.

If you're sealing with polyurethane, apply it in thin, even coats. Allow each coat to dry completely, typically within 2-4 hours, before sanding and applying the next.

Following these drying and curing tips will guarantee your refinished furniture stands the test of time.

Advertisement

Applying the Final Coat

final coat application process

Once the stain has fully dried, you're ready to enhance your wood furniture's durability with a clear oil-based polyurethane top coat. This step is essential for protecting the wood and guaranteeing a long-lasting finish.

Begin by using a clean foam brush or a high-quality synthetic brush, applying the final coat in the direction of the wood grain to avoid streaks and achieve an even finish.

Here are some key tips for applying the final coat:

  • Sand lightly with 200-grit sandpaper between coats to improve adhesion.
  • Clean off any dust with a tack cloth after sanding.
  • Apply at least two to three coats of polyurethane for high-traffic areas.
  • Allow proper curing time (typically 24 hours) between each application.
  • Make sure your workspace is well-ventilated to handle any strong fumes.

Following these steps won't only protect your furniture but also enhance its appearance.

Frequently Asked Questions

Can You Restain Wood Without Sanding?

Yes, you can restain wood without sanding. Use gel stains designed for previously finished surfaces. Just clean the furniture well, apply the stain in small sections, and let it dry between coats for the best results.

Do You Have to Remove Old Wood Stain Before Restaining?

You typically need to remove old wood stain before restaining. If you don't, the new stain might not absorb evenly, leading to a disappointing finish. Stripping or sanding the surface guarantees better results.

Can You Stain Over Stain on Wood Furniture?

Staining over existing stain is like painting over a canvas; you can do it, but guarantee the base is solid. Lightly sand, clean the surface, and test on a small area for best results.

Advertisement

Do You Have to Sand Furniture Before Restaining?

Yes, you have to sand furniture before restaining. Sanding guarantees the new stain adheres properly and creates a smooth surface. It's especially important if the finish is glossy or if you're removing an old stain.

Conclusion

You've successfully transformed your old wood furniture into a masterpiece—who knew a little elbow grease could rival a high-end furniture store? Now, as you admire your handiwork, remember: every scratch and stain tells a story, even if that story is about how you tried to DIY and nearly ruined your living room. But hey, at least you didn't have to pay for overpriced "vintage" pieces. Enjoy your newly stained furniture and the inevitable questions about your questionable life choices!

Continue Reading

Interior Design

How to Wash Sofa Cushion Covers

Learn the essential steps to wash your sofa cushion covers effectively, ensuring they stay fresh and vibrant—discover the secrets to optimal care!

Published

on

cushion cover washing guide

To wash your sofa cushion covers, start by checking the care labels for fabric-specific instructions. For machine-washable covers, use a mild detergent and wash at 40°C or lower. Separate your covers by color to avoid dye transfer. Pre-treat any stains with fabric-safe removers and address spills quickly. After washing, air dry them to maintain their shape; avoid the dryer if possible. If your covers require dry cleaning, consult a professional. Following these steps will help keep your cushions looking fresh, and there's plenty more to know about maintaining their appearance and hygiene.

Key Takeaways

  • Always read and follow the care labels on sofa cushion covers for specific washing instructions and fabric types.
  • Use a mild detergent and wash machine washable fabrics like cotton and polyester at 40°C or lower.
  • Separate covers by color to prevent dye transfer and inspect for any repairs needed before washing.
  • Air dry covers to maintain shape and avoid shrinkage; avoid direct sunlight to prevent fading.
  • For non-machine washable fabrics, consult the manufacturer for appropriate cleaning methods, often requiring professional care.

Do's and Don'ts of Washing

washing guidelines best practices

When it comes to washing sofa cushion covers, following some simple do's and don'ts can make all the difference. First, always read the care instructions on the label. This will help you understand the specific fabric type and any special washing methods required.

If the covers are machine washable, you're in luck! Use a mild detergent to avoid damaging the fabric. For ideal cleaning results, consider using a vacuum cleaner with a best vacuums for dust removal in 2024 feature to eliminate dust and allergens before washing.

Now, let's talk about color bleeding. Don't wash different colored covers together; this can lead to unwanted dye transfer. Instead, separate your loads based on color. Before starting the cleaning process, inspect your covers for any small repairs needed. Existing damage can worsen during washing, so it's better to fix those issues first.

Avoid using bleach at all costs, as it can cause discoloration and harm most fabrics. Finally, check the label before opting for dry cleaning—some fabrics may not react well to the chemicals used.

Preparation and Care Instructions

guidelines for safe usage

Before you wash your sofa cushion covers, check the care labels for specific instructions to prevent any damage.

Identifying the fabric type is essential, as it determines the best cleaning method for your covers. For instance, different fabrics may require various approaches, similar to how the effectiveness of cleaning methods can vary based on specific materials.

Advertisement

Taking these steps guarantees a successful and safe washing process.

Care Label Importance

Care labels are essential for ensuring your sofa cushion covers stay in top shape. They provide vital washing instructions tailored to the specific fabric type, helping you avoid damage during cleaning. If you ignore these labels, you could face issues like shrinkage, discoloration, or distortion of the fabric, so it's important to read them thoroughly before washing.

Additionally, understanding the importance of maintaining your home environment, such as using air purifiers for allergen removal, can contribute to a cleaner living space, which in turn can reduce the frequency of washing your sofa cushions.

Typically, care labels detail the recommended washing methods, temperatures, and safe detergents to use, ensuring proper maintenance of the covers. By identifying the fabric type—whether it's cotton, polyester, or a blend—you can determine the most appropriate cleaning technique for your cushions. Following these guidelines helps you maintain appearance and extend the lifespan of your sofa cushion covers.

Regularly checking and adhering to care label instructions not only keeps your cushions looking fresh but also saves you from costly replacements down the line. So, make it a habit to consult the care label before diving into the washing process. This small step can make a big difference in preserving the quality and longevity of your sofa cushions.

Advertisement

Fabric Type Identification

Identifying the fabric type of your sofa cushion covers sets the stage for effective cleaning. Each fabric has its own care requirements, which can greatly impact how you should wash them.

Always check the care label for essential guidance on washability and specific cleaning instructions. Proper cleaning techniques can help maintain the integrity of the fabric while also prolonging its lifespan, much like how cold medications require careful selection for effectiveness.

Here are some common fabric types and their care recommendations:

  • Cotton: Usually machine washable at temperatures up to 40°C.
  • Polyester: Also machine washable at 40°C, but avoid bleach to prevent damage.
  • Velvet: Requires a delicate cycle with cold water to maintain texture and prevent damage.
  • Leather: Often non-machine-washable, requiring special care and cleaning methods.

If your cushion covers are made from non-machine-washable materials or delicate blends, it's important to consult the manufacturer for specific cleaning instructions.

This helps you avoid potential issues like shrinkage or discoloration. Understanding the fabric type not only guarantees your cleaning efforts are effective but also prolongs the life of your sofa cushion covers.

Cleaning Frequency and Maintenance

regular upkeep and cleanliness

To keep your sofa cushion covers looking fresh and clean, it's vital to establish a regular cleaning routine. Aim for a deep wash at least twice a year to maintain hygiene and appearance. If you have pets or kids, you might need to increase your cleaning frequency to once a month.

Additionally, implementing a budget for buying cleaning supplies can help manage costs effectively, guaranteeing you always have the necessary items on hand financial planning tips.

Advertisement

In addition to deep washing, regular vacuuming is fundamental. Vacuum your sofa weekly to remove crumbs, dust, and allergens, preventing buildup that can damage the fabric over time.

Promptly addressing spills is also key; treating stains immediately can stop them from setting and becoming more difficult to remove later.

Between deep cleans, consider spot cleaning with a damp cloth and mild detergent for small stains. This will help maintain the quality of your cushion covers.

Washing Methods for Different Fabrics

fabric specific washing techniques

When it comes to washing your sofa cushion covers, knowing the right method for each fabric type is essential.

For machine washable fabrics like cotton and polyester, you'll want to follow specific guidelines to keep them looking fresh. It's also worth considering the potential benefits of using natural cleaning solutions, such as essential oils, which may offer antimicrobial properties to help freshen up your covers essential oils for cleaning.

On the other hand, delicate materials like silk require a gentler touch, and leather needs special care to maintain its quality.

Advertisement

Machine Washable Guidelines

Understanding the specific washing methods for different fabrics is important for maintaining the quality of your sofa cushion covers. Always check the care label before machine washing to confirm if the fabric is washable and to determine the appropriate washing temperature and cycle.

Proper care is essential, as neglecting to follow these guidelines can lead to fabric damage and reduced lifespan, much like how piercing care and hygiene is significant for maintaining healthy body piercings.

Here are some guidelines for various fabrics:

  • Cotton covers: Wash at 40°C or lower.
  • Polyester covers: Also wash at 40°C, but avoid bleach and wringing.
  • Velvet covers: Use a gentle cycle with a maximum temperature of 40°C to prevent damage to the fabric.
  • Small loads: Washing small loads guarantees proper cleaning and prevents overfilling the washing machine.

After washing, remember to air dry your covers instead of using a dryer. High heat can lead to shrinkage and damage the fabric, so it's best to let them dry naturally.

Dry Cleanable Options

Certain fabrics require special attention to maintain their quality, and dry cleanable options are no exception. You'll typically find an "S" on the care label of these fabrics, indicating they need solvent-based cleaning methods instead of water.

For dry clean-only materials, it's best to seek professional cleaning to prevent any damage, as home cleaning methods may not suffice. If you're unsure about the cleaning process, consider consulting a guide on hamster care and costs, which emphasizes the importance of proper maintenance.

Advertisement

If you're dealing with minor stains, you can use upholstery-friendly solvents. Just remember to test the solvent on an inconspicuous area first to avoid any adverse reactions.

Additionally, a sprinkle of baking soda can work wonders for absorbing odors; let it sit for an hour before vacuuming it off to keep your cushions fresh.

When in doubt about the proper cleaning methods, don't hesitate to contact the manufacturer or an upholsterer. They can provide specific care instructions tailored to your fabric type, ensuring you maintain the integrity and appearance of your sofa cushion covers.

Taking these precautions will help you enjoy your furniture for years to come while keeping it looking its best.

Leather Care Techniques

Maintaining leather sofa cushion covers requires specific techniques to keep them looking their best. Start by vacuuming the surface to remove dust and debris, which prevents scratching the leather. Regular upkeep can greatly enhance the longevity of your furniture, similar to how preventive maintenance can extend appliance lifespan.

Advertisement

Next, use a leather cleaner specifically designed for upholstery. Apply it to a clean, soft cloth, and gently wipe down the cushions in a circular motion.

Here are some essential leather care tips:

  • Always test cleaning products on an inconspicuous area first.
  • For spot cleaning, use a slightly damp cloth to avoid water damage.
  • Follow up with a leather conditioner to maintain suppleness and prevent drying or cracking.
  • Avoid soaking the leather; excess water can lead to staining.

After cleaning, verify you apply the conditioner with a clean cloth to keep the leather nourished.

Regular maintenance like this will help your leather sofa cushion covers stay beautiful for years. Remember, a little care goes a long way!

Stain Treatment Techniques

effective stain removal methods

When tackling stains on sofa cushion covers, it is crucial to act quickly and use effective techniques. Start by pre-treating the stain with a fabric-safe stain remover. Apply it directly to the stain and let it sit for the recommended time. Always test a small, inconspicuous area of the fabric first to avoid any adverse reactions.

For organic stains like food or drink, a solution of mild dish detergent mixed with water can be very effective. After applying the solution, gently work it into the fabric with a soft brush or cloth. Make sure not to rub too harshly, as this could damage the fabric. Once you've treated the stain, rinse the area with cold water to remove any residue.

Here's a quick reference table for your stain treatment techniques:

Advertisement
Stain Type Treatment Method
General Stains Fabric-safe stain remover
Food/Drink Stains Mild dish detergent + water solution
Application Pre-treat, let sit, then rinse
Drying Allow to air dry completely

Drying Techniques and Tips

effective drying methods guide

When it comes to drying your sofa cushion covers, air drying is your best bet to keep them in shape and avoid shrinkage.

Utilizing methods from home security systems can also apply here, as guaranteeing a safe drying environment can prevent damage.

If you must use a dryer, stick to the lowest heat setting and limit the time to protect the fabric.

Remember to keep them out of direct sunlight to prevent fading and always verify they're completely dry before putting them back on your sofa.

Air Drying Benefits

Air drying your sofa cushion covers offers numerous benefits that can enhance both their appearance and longevity. By opting for air drying instead of using a dryer, you can effectively maintain the appearance and quality of your cushion covers while guaranteeing they last longer.

Here are some key benefits of air drying:

Advertisement
  • Prevent shrinkage: Air drying helps keep your covers in their original shape, avoiding the damage often caused by high heat.
  • Gentle on delicate fabrics: This method is ideal for preserving the integrity of delicate fabrics, which can be more susceptible to wear and tear.
  • Protect colors: Avoid direct sunlight during air drying to prevent colors from fading and fabric degradation.
  • Prevent mold growth: Make sure that your covers are completely dry before use, as damp fabrics can lead to mold issues.

Low Heat Recommendations

To keep your sofa cushion covers looking their best, using low heat settings during drying is fundamental. A low heat setting on your dryer helps prevent fabric melting and shrinking, especially for synthetic fibers.

Make certain to opt for a short drying duration to minimize exposure to heat, which can damage delicate fabrics.

If you prefer a gentler approach, consider air drying. Lay the cushion covers flat or hang them to help maintain their shape and fit. This method allows you to control the drying process better and reduces the risk of any heat-related damage.

Regardless of the drying method you choose, it's essential to guarantee the covers are completely dry before putting them back on the sofa. This step is critical to prevent mold growth and maintain cleanliness in your living space.

If you're uncertain about the drying time, periodically check the covers to verify they're fully dry. By following these low heat recommendations, you can keep your sofa cushion covers in top condition, extending their lifespan and preserving their appearance.

Avoiding Direct Sunlight

Protecting your sofa cushion covers from direct sunlight is essential for maintaining their vibrant colors and overall integrity. Prolonged exposure to sunlight can lead to fading and discoloration, weakening the fabric fibers over time.

Advertisement

To guarantee your cushion covers stay in top shape, focus on avoiding direct sunlight during the drying process.

Here are some effective tips:

  • Air dry in a shaded area: This helps preserve color and prevents heat damage.
  • Use a low heat setting if you must use a dryer. This minimizes the risk of damage while avoiding sunlight exposure.
  • Check for even drying: Regularly inspect the covers to guarantee they're drying evenly, which helps prevent mold growth.
  • Store cushion covers away from sunlight when not in use, to maintain their quality.

Importance of Care Instructions

essential handling guidelines provided

Ignoring care instructions can set you up for major problems with your sofa cushion covers. Each care label is designed for specific fabric types, guiding you on the right cleaning methods and maintenance practices. If you overlook these guidelines, you risk irreversible issues like shrinkage, fading, and distortion, all of which can greatly shorten the lifespan of your covers.

By following the care instructions, you not only preserve the fabric's integrity but also maintain the aesthetic appeal of your sofa covers. This attention to detail helps keep your living space looking clean and inviting.

In addition, proper care can prevent costly repairs or replacements, saving you time and money in the long run. Implementing these care instructions enhances the overall hygiene of your sofa environment, ensuring it remains a comfortable spot for you and your guests.

Best Practices for Washing

effective laundry washing techniques

When it comes to washing sofa cushion covers, following best practices can make all the difference. Start by checking the care labels on your covers. They'll guide you on the appropriate washing methods and temperatures to prevent damage.

When you're ready to wash, use a mild, dye-free detergent to avoid harsh chemicals that could fade the fabric.

Advertisement

Here are some essential tips for effective washing:

  • Always pre-treat stains with a fabric-safe stain remover before washing.
  • Use cold water on a gentle cycle to minimize the risk of shrinking and fabric distortion.
  • Avoid using a dryer; instead, air dry the cushion covers to maintain their shape.
  • Regularly check the care labels for specific washing instructions tailored to your fabric.

Additional Resources and Products

supplementary tools and materials

To keep your sofa looking its best, consider exploring additional resources and products designed for cushion cover care and maintenance.

One great option is the Magic Sofa Cover – Classic, priced at $16.99 and boasting a 4.8-star rating. This cover offers durability and style, making it a fantastic choice for protecting your couch.

If you're after something trendy, the Magic Sofa Cover – Checkered is also available for $16.99 and has a solid 4.6-star rating.

For those who value airflow and comfort, the Magic Sofa Cover – AirFlow is priced at $18.99 and features a 3.5-star rating, ensuring breathable coverage for your cushions.

Additionally, take advantage of guides that compare slipcovers versus reupholstering. These resources can help you make informed decisions about how to best care for your sofa.

Advertisement

Don't forget to look for guides on measuring your couch accurately. A snug fit is essential for maintaining the clean look of your covers, ensuring they not only protect your cushions but also enhance your living space's aesthetic.

With these resources and products, your sofa will remain stylish and well-kept.

Featured Sofa Covers

stylish sofa protection solutions

Discovering the right sofa cover can transform your living space while protecting your furniture. With a variety of options available, you can easily find a cover that matches your style and meets your cleaning needs.

Here are some featured sofa covers you might consider:

  • Magic Sofa Cover – AirFlow: Starting at $18.99, this budget-friendly option has a 3.5-star rating and offers breathable comfort.
  • Magic Sofa Cover – Checkered: Priced at $16.99, this stylish design boasts a 4.6-star rating, perfect for complementing various decor styles.
  • Magic Sofa Cover – Classic: At $16.99 and with a 4.8-star rating, this best-seller is known for its durability and timeless appeal.
  • Material Variety: Each cover is crafted from different fabrics, ensuring you can choose based on texture, style, and maintenance preferences.

When it comes to cleaning, make sure to check the specific washing instructions for each cover.

Use a gentle detergent to wash your covers, and follow the guidelines to maintain their quality.

With the right cover, your cushions will look great and stay protected.

Advertisement

Frequently Asked Questions

Can I Put My Couch Cushion Covers in the Washing Machine?

You can often machine wash your couch cushion covers, but check the care label first. If they're machine safe, wash in cold water on a gentle cycle to keep them looking fresh and vibrant.

How Do I Know if My Couch Cushion Covers Are Washable?

Did you know that nearly 70% of people neglect to check care labels? To know if your couch cushion covers are washable, always inspect the label for wash instructions, fabric type, and care symbols before deciding.

Do You Wash Couch Cushion Covers Inside Out?

Yes, you should wash couch cushion covers inside out. It protects the fabric from fading and abrasion, guarantees a thorough clean, and maintains their appearance. Always check the care label for specific washing instructions.

Are Sofa Cushions Machine Washable?

Imagine your cushions dancing in the washing machine. To find out if they're machine washable, check the care label. Fabrics like cotton usually are, but delicate ones need special attention. Always separate colors to avoid chaos!

Conclusion

By following these tips, you can breathe new life into your sofa cushion covers, making them look as good as new. Treat them with care and respect, like cherished friends that brighten your living space. Remember, regular cleaning isn't just about looks; it's about creating a cozy, inviting atmosphere in your home. So roll up your sleeves, grab those covers, and let your sofa shine with freshness and comfort!

Advertisement
Continue Reading

Interior Design

Inspiring Women’s Retreat Activities Await You

Lifelong connections and transformative experiences await at our inspiring women’s retreat—discover the powerful activities that will uplift and empower you.

Published

on

empowering women s retreat activities

Inspiring women's retreat activities await you, offering a unique blend of creativity, personal reflection, and spiritual growth. You'll enjoy outdoor collage creation using natural materials and engaging workshops for crafting personalized home decor. Participate in prayer and meditation sessions to deepen your faith, while enjoying group discussions that foster connections. Embrace mindfulness through nature walks and yoga by the beach. Together, you'll experience the bonding moments of community service and shared stories around bonfires. Each activity is designed to empower and uplift you, inviting connections with others. Stay with us to discover even more enriching experiences waiting for you.

Key Takeaways

  • Engage in outdoor collage creation using natural materials to express creativity and appreciate nature's beauty.
  • Participate in prayer and meditation sessions designed to deepen faith connections and promote personal growth.
  • Explore the stories of courageous women from the Bible through group discussions and activities that inspire and resonate with personal journeys.
  • Enjoy community bonding through shared experiences like hiking, beach yoga, and team challenges that foster camaraderie and connection.
  • Experience hands-on DIY projects to create personalized home décor, enhancing artistic expression and relaxation during the retreat.

Creative Expression Activities

engaging art and performance

Creative expression activities at women's retreats offer a wonderful opportunity for participants to engage their artistic sides while fostering mindfulness and connection to nature.

You might find yourself creating an outdoor collage, using leaves, flowers, and branches to blend art with the environment. This activity encourages you to be present and appreciate the beauty around you.

Alternatively, you could immerse yourself in a DIY home décor project, crafting personalized decorations that reflect your unique style. Workshops focusing on personalized wall art or customized throw pillows allow you to express your creativity while bonding with others.

These activities not only spark joy but also inspire relaxation and a sense of accomplishment, enriching your retreat experience.

Home and Community Enhancement

community improvement and development

While enhancing your home and community, you'll discover the joy of incorporating handmade art and upcycled furniture into your living space. These unique touches not only reflect your personality but also create a warm atmosphere for bonding with family and friends.

As you explore color schemes and textures, you'll foster a sense of ownership in your environment. Consider initiating a boutique shopping excursion to find one-of-a-kind pieces, all while supporting local businesses.

Advertisement

Additionally, engaging in community service can strengthen connections and create a positive impact around you. Whether it's organizing outreach programs or participating in collaborative projects, you'll find fulfillment in making a difference, enriching both your home and your community with love and creativity.

Personal Reflection and Growth

self discovery and transformation journey

Building a supportive home and community sets the stage for personal reflection and growth. Here, you'll have the opportunity to explore your self-worth through engaging activities that encourage the power of imagination.

Take time to embrace your unique qualities and recognize your intrinsic value. Participate in creative journaling sessions, where you can express your thoughts and emotions freely. This safe space allows you to process feelings and enhance your creativity.

Additionally, join group discussions to share personal reflections and gain insights from others. These conversations foster a deeper understanding of your experiences and promote critical thinking.

With each activity, you'll not only connect with yourself but also with others, creating a nurturing environment that inspires personal growth and empowerment.

Spiritual Practices and Themes

exploring spirituality and tradition

Engaging in spiritual practices and themes can profoundly enrich your retreat experience.

These activities invite you to connect deeply with yourself and others, fostering personal growth and community.

Advertisement

You'll explore various elements that enhance your spiritual journey, such as:

  • Prayer and Meditation: Participate in guided sessions and group circles to deepen your connection to faith.
  • Focused Retreat Themes: Examine empowering themes like "Courageous Women of the Bible" and "Strength in Community."
  • Worship Music: Incorporate uplifting songs that resonate with your spiritual exploration.
  • Silent Retreats: Experience moments of stillness to reflect and find inner peace.

Outdoor and Physical Activities

adventure and fitness exploration

Outdoor and physical activities can transform your retreat experience, offering a revitalizing break from routine and a chance to connect with nature and each other. Imagine hiking through scenic trails or practicing beach yoga, where you not only enhance your physical well-being but also bond with fellow participants. Group bonfires provide a perfect setting for meaningful conversations and shared laughter, while volunteer initiatives allow you to engage with the community.

Here's a snapshot of activities you can experience:

Activity Benefits
Hiking Boosts physical health, fosters camaraderie
Beach Yoga Enhances relaxation, promotes mindfulness
Group Bonfire Encourages storytelling, strengthens connections
Team Challenges Builds teamwork, creates lasting memories
Community Volunteering Empowers, gives back, deepens bonds

Biblical Women: Lessons and Inspirations

empowering biblical women s insights

Throughout history, biblical women have consistently inspired countless individuals with their remarkable stories of strength, resilience, and faith.

Their experiences offer valuable lessons that resonate even today. You can draw motivation from these women and their distinct qualities:

  • Ruth: Showed unwavering loyalty and commitment to family.
  • Esther: Demonstrated courage and advocacy, risking everything to save her people.
  • Mary: Embodied faith and obedience, accepting her divine calling with grace.
  • Deborah: Exhibited leadership and wisdom, guiding Israel through tough times.

Community Bonding Experiences

shared local connection events

Building on the inspiration drawn from biblical women, community bonding experiences play an essential role in fostering connections among participants. Engaging in activities like a Salt Covenant Ceremony creates a powerful symbol of unity, encouraging trust and communication.

Sharing stories around a group bonfire allows you to reflect, laugh, and forge lasting memories with fellow participants. Volunteering together on community service projects not only strengthens your bonds but also empowers you to make a positive impact.

These experiences remind you of the importance of collaboration and shared purpose, enhancing your sense of belonging. By participating in these activities, you'll cultivate a supportive environment that echoes the lessons of resilience and community found in biblical teachings.

Advertisement

Mindfulness and Well-Being

mental health awareness practices

Mindfulness and well-being are essential components of a fulfilling retreat experience. Engaging in activities that promote self-reflection and mental clarity can greatly enhance your journey.

Here are some ways you can cultivate mindfulness during your retreat:

  • Reflection on Self-Worth: Embrace your unique qualities and recognize your intrinsic value.
  • Creative Journaling Session: Explore your thoughts and emotions in a safe space, facilitating personal reflection.
  • Guided Meditation: Focus your mind and find inner peace with structured meditation sessions.
  • Nature Walks: Connect with the environment, allowing the tranquility of nature to ground you.

Collaborative and Supportive Environments

teamwork and community engagement

Creating a collaborative and supportive environment enriches your retreat experience, fostering deeper connections and shared growth. Engaging in group discussions allows you to share personal reflections and explore the applications of biblical lessons, enhancing your understanding and community spirit.

Participating in community service initiatives not only helps local women but also strengthens your bonds with fellow attendees. These outreach programs encourage teamwork and collective action, giving you a sense of purpose.

When you collaborate on projects or share insights, you cultivate trust and encouragement, which are essential for personal development. Embrace these opportunities to connect, uplift, and inspire each other as you navigate your retreat journey together.

Empowerment Through Learning

knowledge is power

As you engage in collaborative and supportive environments, you'll find that empowerment through learning becomes a powerful catalyst for personal growth.

You'll discover new skills and insights that resonate with your journey, fostering a sense of community and shared purpose.

Consider these enriching opportunities:

Advertisement
  • Creative Workshops: Participate in hands-on activities like journaling, cooking, and art inspired by biblical stories.
  • Focused Themes: Explore topics such as "Courageous Women of the Bible" and "Strength in Community" to deepen your understanding.
  • Interactive Discussions: Engage in meaningful conversations that stimulate critical thinking and personal reflections.
  • Music and Worship: Connect through hymns and songs, enhancing your spiritual experience.

These experiences not only uplift you but also strengthen your bond with others.

Frequently Asked Questions

What Should I Bring to the Women's Retreat?

When you pack for the women's retreat, bring comfortable clothing, a journal for reflection, personal items that inspire you, and any craft supplies you might need. Don't forget your open mind and heart!

Are There Accommodations Available for Overnight Stays?

Are you wondering about overnight accommodations? Yes, there are options available! You'll find cozy rooms and shared spaces, ensuring a comfortable stay. Just check with the organizers to reserve your spot and enjoy the experience!

How Can I Prepare for the Retreat Activities?

To prepare for the retreat activities, you should pack comfortable clothing, a journal for reflections, and any personal art supplies. Think about topics you'd like to discuss and embrace an open mindset for growth.

Is There a Cost Associated With Attending the Retreat?

Yes, there's usually a cost associated with attending the retreat. You may want to check the retreat's website or contact organizers for specific pricing details, including any potential discounts or scholarships available.

Can I Attend the Retreat Alone or With Friends?

Whether you choose to fly solo or bring friends along, you'll find the retreat's welcoming atmosphere embraces everyone. You'll connect deeply, share experiences, and create lasting memories, making it a journey worth taking together.

Advertisement

Conclusion

As you step into this transformative journey, think of yourself as a canvas, ready to be filled with vibrant colors of creativity, connection, and growth. Each activity is a brushstroke, adding depth and beauty to your experience. Embrace the friendships you'll forge and the insights you'll gain, allowing them to shape your spirit. This retreat isn't just an escape; it's a chance to paint a masterpiece of empowerment and joy in your life.

Continue Reading
Advertisement

Affiliate disclaimer

As an affiliate, we may earn a commission from qualifying purchases. We get commissions for purchases made through links on this website from Amazon and other third parties.

Advertisement

Vetted

Vetted1 month ago

Book Review: “The Creative Spark: Unleashing Your Inner Artist”

Reawakening Creativity in the Digital Age The Book Thief Amazon The Pumpkin Spice Café: TikTok Made Me Buy It (Dream...

sustainable fashion brand recommendations sustainable fashion brand recommendations
Vetted2 months ago

15 Best Brands for Sustainable Fashion You Need to Know About in 2024

Discover 15 pioneering brands in sustainable fashion for 2024 that will transform your wardrobe while making a positive impact—find out...

sustainable fashion book recommendations sustainable fashion book recommendations
Vetted2 months ago

15 Best Books on Sustainable Fashion That Every Eco-Conscious Reader Should Explore

Join the journey through the 15 best books on sustainable fashion that will transform your wardrobe choices and open your...

sustainable fashion reading list sustainable fashion reading list
Vetted2 months ago

15 Must-Read Books About Sustainable Fashion to Inspire Your Eco-Friendly Journey

Here are 15 essential books on sustainable fashion that will transform your perspective and inspire your eco-friendly journey—discover the secrets...

affordable sustainable fashion brands affordable sustainable fashion brands
Vetted2 months ago

15 Best Affordable Sustainable Fashion Brands You Need to Know About in 2024

Join the journey to discover 15 affordable sustainable fashion brands for 2024 that will transform your wardrobe—find out which ones...

men s fashion essentials 2024 men s fashion essentials 2024
Vetted2 months ago

15 Best Men's Fashion Essentials to Elevate Your Style Game in 2024

Get ready to transform your wardrobe with the 15 best men's fashion essentials for 2024 that will elevate your style...

elevate wardrobe with amazon finds elevate wardrobe with amazon finds
Vetted2 months ago

15 Best Amazon Fashion Finds That Will Elevate Your Wardrobe in 2024

You won't believe the must-have fashion finds from Amazon that will transform your wardrobe in 2024—discover the top 15 styles...

stylish bow embellished fashion items stylish bow embellished fashion items
Vetted2 months ago

15 Best Fashion Pieces With Bows That Elevate Any Outfit

Knot your style with these 15 fashionable pieces featuring bows that promise to elevate any outfit—discover the perfect accessory for...

top men s sneakers 2024 top men s sneakers 2024
Vetted2 months ago

15 Best Men's Fashion Sneakers of 2024 – Style Meets Comfort

Looking for the perfect blend of style and comfort in men's fashion sneakers? Discover the top 15 picks for 2024...

stylish comfortable women s sneakers stylish comfortable women s sneakers
Vetted2 months ago

15 Best Women's Fashion Sneakers for Style and Comfort in 2024

Looking for stylish and comfortable women's sneakers in 2024? Discover the top 15 picks that will elevate your wardrobe and...

2024 women s fashion trends 2024 women s fashion trends
Vetted2 months ago

15 Best Women's Fashion Trends of 2024 You Need to Know About

Look ahead to 2024's must-have women's fashion trends that blend comfort and style—discover which pieces you can't afford to miss!

elevate your style game elevate your style game
Vetted2 months ago

13 Best Fashion and Beauty Products You Need to Elevate Your Style Game

Jumpstart your style with these 13 essential fashion and beauty products that promise to transform your routine—discover what you've been...

Advertisement

Trending

Copyright © 2024 StyleGuru.org Affiliate disclaimer As an affiliate, we may earn a commission from qualifying purchases. We get commissions for purchases made through links on this website from Amazon and other third parties.