Chalk painting furniture can be a straightforward and fulfilling project. Begin by taking off any hardware and cleaning the surface with a moist cloth or degreaser. Fix any flaws and gently sand down any glossy areas. Make use of a brush for intricate spots and a foam roller for flat surfaces, applying 2-3 coats with drying time in between. To achieve a polished finish, lightly sand in between coats. Once satisfied with the layers, safeguard your work with a clear wax. It’s crucial to let the wax fully cure. If you want to experiment with creative methods and troubleshoot common issues to enhance your project even more, think about trying techniques such as distressing, layering different colors, or using stencils to infuse some character into your piece. In case you encounter any problems like brush strokes or uneven coverage, don’t hesitate to seek advice from online communities or forums. And if you’re feeling confident in your chalk painting abilities, why not challenge yourself by attempting to paint wicker furniture? The same fundamental steps apply, but make sure to utilize a flexible paint specifically designed for wicker to ensure enduring results.
Key Takeaways
- Start by removing hardware and cleaning the furniture with a damp cloth or degreaser for a smooth painting surface.
- Apply 2-3 coats of chalk paint using a brush for details and a foam roller for flat areas, allowing drying time in between.
- Lightly sand between coats with 220 or 320-grit sandpaper to achieve a smooth finish before applying the final coat.
- Protect your painted surface with clear wax or sealer, applying it in various directions and removing excess for an even finish.
- Troubleshoot issues like bleed-through by using a shellac-based primer and ensure proper cleaning and sanding for durability.
Preparation for Chalk Painting
When you're getting ready to chalk paint your furniture, proper preparation is key to achieving a smooth and lasting finish. Start your prep work by removing all hardware, like handles and knobs, to guarantee a clean painting surface.
Next, clean the piece thoroughly with a damp cloth or a degreaser, such as Dixie Belle's White Lightning, to eliminate dirt and oils that could affect paint adhesion. Incorporating natural materials and a neutral color palette can also enhance the overall aesthetic of your furniture, aligning with current modern farmhouse decor trends.
If there are any gouges or scratches, use wood filler to repair imperfections, and then lightly sand those areas smooth with 220 grit sandpaper.
Don't forget to lightly sand glossy surfaces as well; this helps improve paint adherence. Remember, chalk paint typically requires less prep work compared to traditional paints, but taking these steps will make a difference.
Before diving into painting, it's smart to conduct a small area test, especially on dark woods, to check for bleed-through. If you notice any issues, consider using a shellac-based sealer to prevent it.
With these preparations, you'll set yourself up for success and achieve a beautiful finish on your furniture.
Applying Chalk Paint
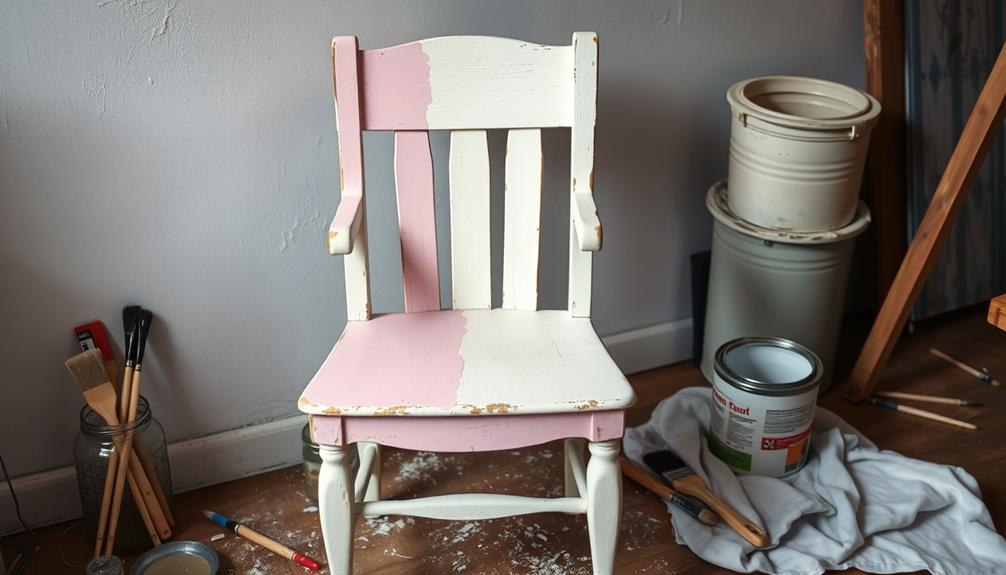
With your furniture properly prepared, it's time to apply the chalk paint. Start by using a brush for detailed areas and a foam roller for flat surfaces. This combo helps you achieve an even coat with minimal brush strokes. When applying the chalk paint, make sure to use long, even strokes to avoid an uneven finish. If you are painting wooden chairs, be sure to properly prepare the surface by cleaning wood chairs with a damp cloth and allowing them to dry completely before applying the paint. This will help ensure that the paint adheres properly and the finished result is smooth and professional-looking.
Begin applying the paint from the bottom to the top, using long, sweeping strokes that follow the grain of the wood to avoid lap marks. For an even more enjoyable DIY project, consider pairing your newly painted furniture with a delicious cup of coffee made using a French press coffee to keep your energy up.
Expect to apply 2-3 coats of chalk paint, especially when you're working with lighter colors over darker bases. Allow each coat to dry fully for 1-3 hours before applying the next.
For a smooth finish, lightly sand the surface between coats with 220 or 320-grit sandpaper. This removes imperfections and helps the next coat adhere better.
Once you've applied your final coat and it's completely dry, you can protect your work with a clear wax or sealer. This not only enhances durability but also gives a lovely matte finish to your old furniture.
Remember to work in sections to keep your application consistent and guarantee the best possible outcome!
Waxing and Sealing
After your final coat of chalk paint has dried, it's time to protect your hard work with waxing and sealing. Start by applying Chalk Paint® Wax generously with a brush or a lint-free cloth. Work it into the paint in various directions to guarantee even coverage. This step is vital for achieving a smooth finish and long-lasting protection for your furniture.
To maintain your painted furniture's appearance over time, consider regular cleaning and maintenance similar to how you'd care for an air purifier, guaranteeing longevity and efficiency in both cases. For peak air quality, remember to check and clean filters regularly.
Once you've applied the wax, remove any excess with a clean lint-free cloth. This prevents buildup, which can lead to a sticky finish or discoloration over time. Remember, the wax takes about two weeks to cure fully, reaching its best hardness and durability. During this curing period, it's important to avoid heavy use of the furniture to allow the wax to set properly.
For added protection against marks and wear, consider applying a second layer of wax after the first one has cured. If you're using colored wax, apply it sparingly to enhance the finish without overwhelming the underlying chalk paint color. This controlled application will give your furniture a beautiful, professional look while guaranteeing lasting durability.
Troubleshooting Common Issues

Even with careful application of chalk paint and proper waxing, issues can sometimes arise. Here's a quick guide to troubleshoot common problems you might encounter:
| Issue | Cause | Solution |
|---|---|---|
| Bleed-through | Dark woods or varnished surfaces | Use a shellac-based primer |
| Chipping/Peeling | Insufficient surface preparation | Clean thoroughly and sand glossy finishes |
| Dull finish | Over-waxing or insufficient buffing | Light buffing with fine steel wool |
| Chalky/Uneven Finish | Poor sanding | Apply a coat of wax to smooth out |
If you notice bleed-through, don't panic; a primer will help seal that. For chipping or peeling, verify you've adequately prepped the surface before applying paint. If your finish looks dull, a little buffing can work wonders. Finally, if you come across any imperfections, consider spot treating with fine sandpaper before repainting to create a clean surface for your next layer. By addressing these common issues, you'll achieve a beautiful finish that enhances your furniture's appearance.
Creative Techniques and Resources
When it comes to chalk painting furniture, creativity knows no bounds. You can experiment with distressing techniques by focusing on natural wear areas like edges and corners. Try using Vaseline to prevent paint adhesion in spots where you want a worn look.
Enhance your projects with decorative elements such as stencils, transfers, or Rub n Buff to give your chalk-painted furniture a unique flair that reflects your personality.
Utilizing layering techniques is another way to elevate your work. Apply different colors of chalk paint and lightly sand between coats to create depth and dimension.
Don't forget to explore resources like online tutorials and community forums for tips on advanced techniques such as dry brushing and blending. These methods can help you achieve that professional finish you desire.
Moreover, consider applying chalk paint to various surfaces beyond furniture, like metal frames and decor items. This approach will help you create a cohesive style throughout your space, tying everything together beautifully.
With these creative techniques and resources at your disposal, you're well-equipped to transform your furniture into stunning pieces of art. Enjoy the process and let your creativity shine!
Frequently Asked Questions
Do You Have to Sand Before Using Chalk Paint?
You don't have to sand before using chalk paint, but if you're working with shiny surfaces or deep imperfections, light sanding can enhance adhesion and improve your final finish. Just make sure to clean thoroughly first.
What Is the Best Way to Paint Furniture With Chalk Paint?
You won't believe how easy it is to transform your furniture! Just clean, apply thin coats of chalk paint, and let it dry. Experiment with colors and techniques for an eye-catching, unique masterpiece that's all yours!
What Are the Disadvantages of Chalk Paint?
Chalk paint has its drawbacks. It can require extra sealing to prevent scuffs, is prone to bleeding from dark woods, and might not be durable enough for high-traffic or moisture-prone areas without proper preparation.
Do I Need to Seal Chalk Paint on Furniture?
Yes, you should seal chalk paint on furniture to protect its finish and enhance durability. Using a quality sealer will keep it looking fresh and prevent marks, especially for high-traffic pieces you frequently use.
Conclusion
To summarize, chalk painting can transform tired furniture into stunning statement pieces. With proper preparation, passionate application, and protective sealing, you'll create enchanting results. Don't shy away from troubleshooting; every mishap can lead to mastery. Embrace your creativity and explore exciting techniques to personalize your projects. So grab your brushes and plunge into the delightful world of chalk paint—your furniture deserves a fabulous makeover that reflects your unique style!