Connect with us

Interior Design

How to Clean Velour Sofa

Sustain the luxurious look of your velour sofa with simple cleaning tips that will keep it pristine—discover the secrets to effective care inside!

Published

on

clean velour sofa effectively

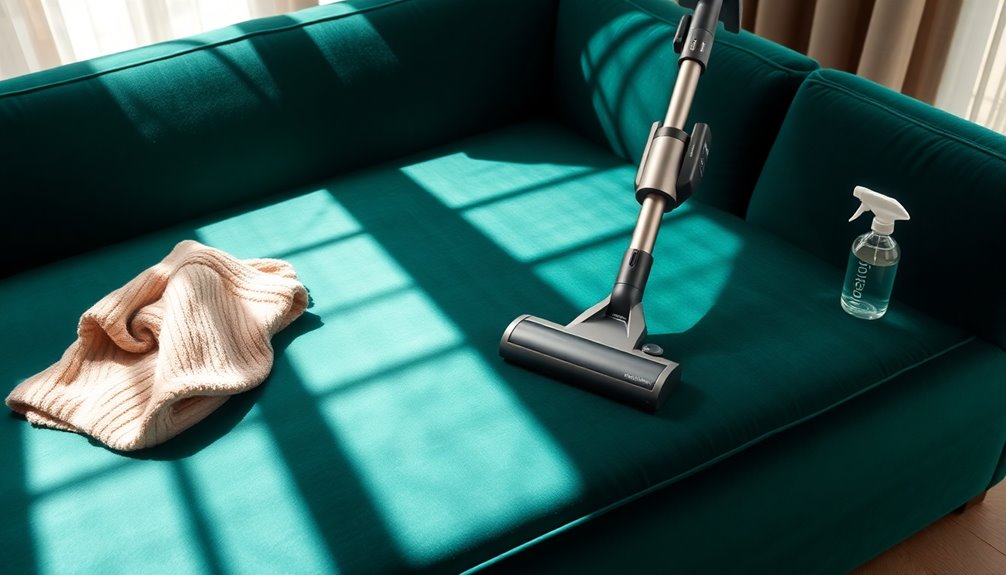
To clean your velour sofa, start with weekly dusting and vacuuming using a soft brush attachment. Always vacuum in the direction of the nap to maintain its texture. For stains, blot immediately with a cloth and use a mild soap solution for gentle cleaning. Test any solution on a hidden area first. Avoid saturating the fabric, and let it air dry completely. Regular maintenance and seasonal deep cleaning keep your sofa looking luxurious. If you're curious about additional tips and strategies for optimal care, there's more to uncover that can help you enhance your cleaning routine.

Key Takeaways

  • Regularly dust and vacuum your velour sofa using a soft brush attachment to remove dirt without damaging the fabric.
  • Mix mild liquid soap with warm water for a gentle cleaning solution, and test on a hidden area first.
  • Blot spills immediately with an absorbent cloth to prevent stains; avoid rubbing to minimize damage.
  • Schedule professional cleaning every 6 to 12 months for deep cleaning and maintenance of the fabric.
  • Use light steam application to restore the fabric's nap and eliminate creases, allowing it to air-dry completely.

Introduction
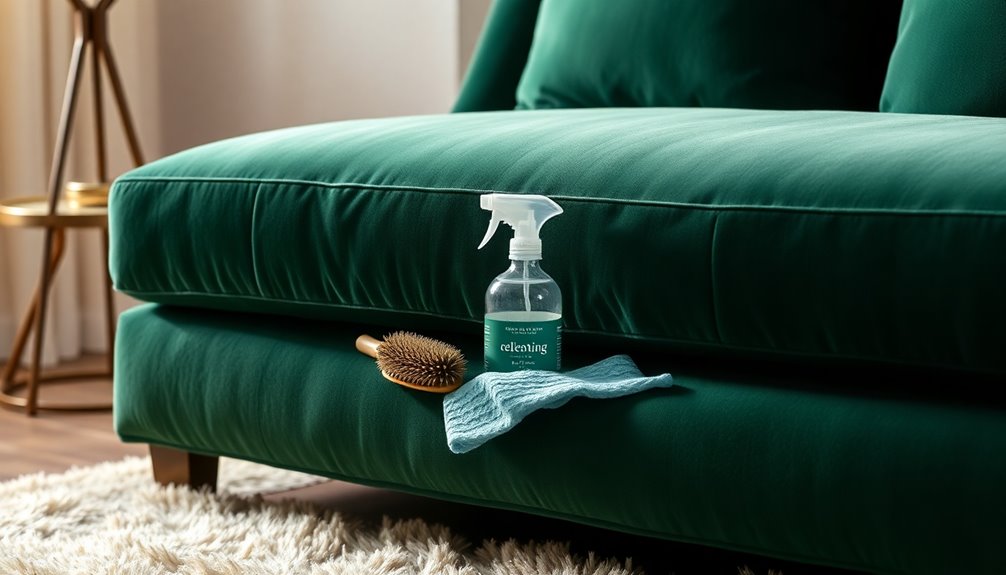
introduction to the topic

Keeping your velour sofa looking its best starts with regular dusting and vacuuming to prevent dirt buildup. You'll also need to use fabric-specific cleaning techniques for those inevitable spills, like wine and ink stains. With the right care, you can maintain the luxurious feel and appearance of your sofa for years to come.

Weekly Dusting and Vacuuming

To maintain the beauty and integrity of your velour sofa, regular dusting and vacuuming are essential practices. Aim to perform these tasks at least once a week to prevent dirt buildup and keep the fabric looking fresh. Start by using a vacuum cleaner equipped with a soft brush attachment. This tool is designed to gently remove dust and pet hair without damaging the delicate fibers of your sofa.

When vacuuming, always do so in the direction of the nap to avoid flattening those soft fibers. For stubborn dust or lint that the vacuum might miss, you can incorporate a soft bristle brush or a lint roller. These tools are effective at picking up particles that cling to the velour's texture.

Regular maintenance through weekly dusting and vacuuming not only preserves the velour's luxurious appearance but also helps prolong its lifespan by preventing wear and tear. By making these practices a part of your cleaning routine, you'll ensure your velour sofa remains a beautiful centerpiece in your home for years to come.

Fabric-Specific Cleaning Techniques

When it comes to cleaning your velour sofa, using fabric-specific techniques is crucial for maintaining its luxurious look and feel. Start with gentle cleaning methods to avoid damaging the delicate fibers of your upholstery. Use a soft brush to remove surface dirt before vacuuming. This step helps prevent any dirt from embedding deeper into the fabric.

Advertisement

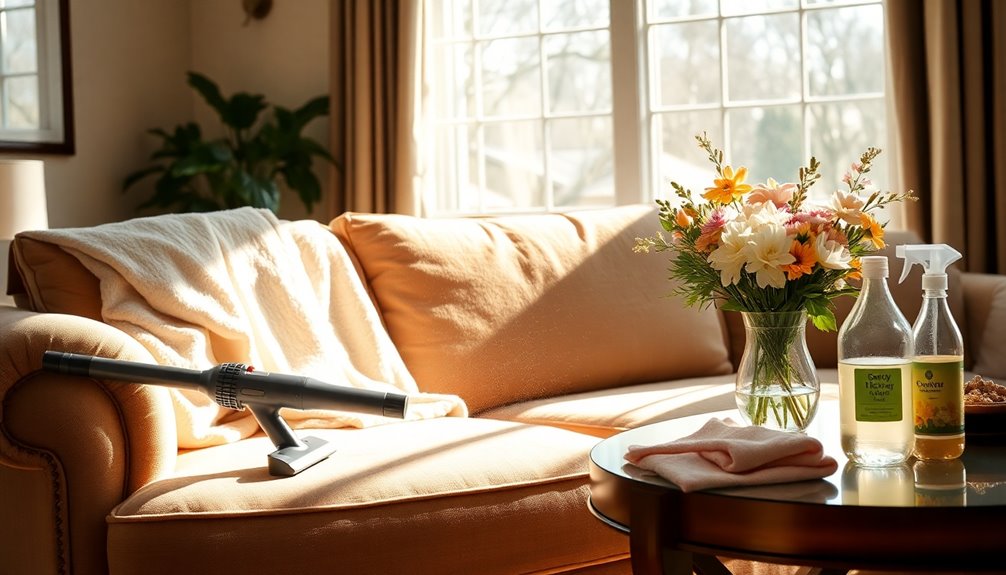
For cleaning stains, mix a mild liquid soap with warm water to create a gentle cleaning solution. Always test this solution on a hidden area first to ensure it won't discolor your velvet. When spot cleaning, act quickly: blot spills immediately with a clean, absorbent cloth, and use a back-and-forth motion to apply your cleaning solution. Avoid rubbing, as this could damage the texture of the fabric.

Regular vacuuming with an upholstery attachment is essential for keeping your velour sofa looking its best. Additionally, consider scheduling professional cleaning periodically to preserve its softness and appearance. By following these fabric-specific cleaning techniques, you'll keep your velour sofa in pristine condition, ready for relaxation and entertaining.

Treating Wine and Ink Stains

Stains from wine or ink can be particularly daunting, but quick action can make a significant difference in preserving your velour sofa. For wine stains, start by gently blotting the area with a clean, absorbent cloth to soak up excess liquid. Avoid rubbing, as this can spread the stain. Once you've blotted, mix a mild dish soap with water and use a damp cloth to gently blot the stained area. Rinse with another damp cloth to remove any soap residue.

When dealing with ink stains, apply a small amount of rubbing alcohol to a cotton ball and carefully dab the area. Make sure not to saturate the fabric, as this can lead to further damage. Always test any cleaning solution on an inconspicuous part of the velour sofa to prevent discoloration.

After treating either type of stain, let the area air dry completely. Once dry, gently brush the fabric in the direction of the nap to restore its texture. These steps will help you effectively clean a velvet couch and keep it looking its best, even after pesky stains.

Advertisement

Shield From Pet Claws

protective cover for furniture

To protect your velour sofa from pet claws, you can explore claw-resistant fabric options that offer enhanced durability. Additionally, decorative fabric protection options not only safeguard your furniture but also maintain its stylish appearance. Minimizing friction on the fabric is key, so consider how your pets interact with the sofa to reduce wear and tear.

Claw-Resistant Fabric Options

Choosing the right fabric for your velour sofa can make all the difference in protecting it from pet claws. Consider opting for synthetic velvet fabrics, which are generally more durable and resistant to claw damage than natural fibers. Look for options with a high Martindale rub count of 40,000 or more; these fabrics offer greater resilience against wear and tear from your pets.

Micro velvet and performance velvet are excellent choices, as their tighter weaves help prevent snagging and pulling from claws. Additionally, some manufacturers provide specialized pet-friendly upholstery featuring reinforced fibers designed to withstand scratches and punctures. These fabrics can significantly extend the life of your sofa.

Regular maintenance is key to keeping your sofa looking its best. Vacuuming regularly removes pet hair and debris, while brushing the fabric helps maintain its integrity, minimizing the impact of claw damage over time. By incorporating these cleaning methods into your routine, you'll enhance the longevity of your sofa while ensuring it remains a comfortable spot for you and your pets. Choose wisely, and enjoy a beautiful, claw-resistant velour sofa!

Decorative Fabric Protection Options

A variety of decorative fabric protection options can help shield your velour sofa from pet claws while enhancing its overall appearance. Start by applying a fabric protector specifically designed for velour. This creates a barrier against damage and increases the fabric's durability. Look for products that are water-repellent and stain-resistant to prevent spills and minimize pet-related stains.

Using slipcovers made from durable, pet-friendly materials offers an additional protective layer while maintaining your living space's aesthetic. Regularly brushing the velour with a soft brush can lift the nap and reduce the visibility of scratches from your furry friends.

Advertisement

Incorporating throw blankets or cushions that can be easily cleaned or replaced is another great strategy. These not only safeguard your velour sofa but also allow you to enjoy the luxurious feel of the fabric without constant worry. Choose decorative fabric that complements your home's style while ensuring it's functional for pet owners. By combining these protective measures, you can keep your velour sofa looking beautiful and extend its life, all while accommodating your beloved pets.

Minimize Friction on Fabric

Protecting your velour sofa from pet claws is key to maintaining its beauty and longevity. To minimize friction on the fabric, consider using a protective cover or throw. This barrier can help keep direct contact to a minimum. Regularly trimming your pet's nails is also essential; shorter nails mean less chance of snagging the velour surface.

Designate specific areas for your pets to sit or lie down, limiting their access to the sofa. This helps reduce wear and tear on the fabric over time. Additionally, utilize pet-friendly cleaning products or fabric protectors designed for velour. These create an extra layer of protection against claws and spills, making it easier to remove stains when they occur.

Establish a routine for brushing your pets regularly to minimize shedding and dust buildup on the velour. Keeping the fabric clean and free from debris also lowers the friction that can lead to damage. With these simple care tips, you can ensure your velour sofa remains a beautiful and comfortable spot for both you and your furry friends.

Upholstery Stitching Reinforcement
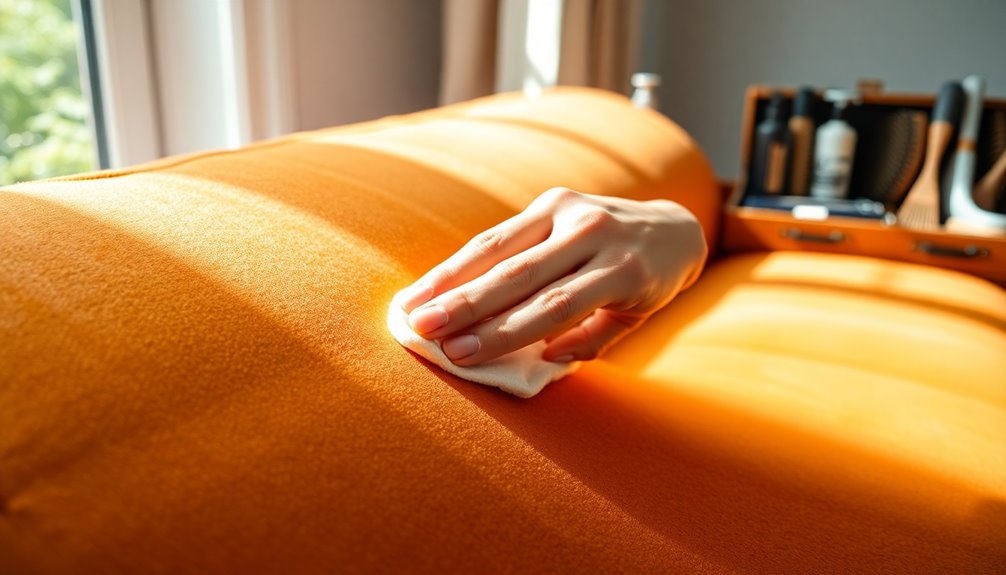
stitching support for upholstery

When it comes to maintaining your velour sofa, paying attention to upholstery stitching reinforcement is key. Strong seams not only keep the fabric intact but also enhance the overall aesthetic appeal and longevity of your furniture. By ensuring sewn seam integrity, you can effectively address upholstery color repair techniques and keep your sofa looking revitalized and stylish.

Sewn Seam Integrity

Sewn seam integrity is essential for maintaining the durability and beauty of your velour sofa. Properly sewn seams reinforce the fabric, preventing fraying and unraveling over time. High-quality upholstery stitching typically employs double-stitched or reinforced seams that can handle regular use without compromising their integrity.

Advertisement

To ensure your sofa remains long-lasting, regularly inspect the sewn seams for any signs of wear or loosening. Catching these issues early allows for timely repairs, preventing more extensive damage that could affect the overall appearance of your sofa. When making repairs, always use strong, colorfast thread that matches your velour fabric. This not only maintains aesthetic appeal but also provides the necessary structural support.

Compromised seams can lead to fabric pulling and bulging, resulting in costly repairs and a diminished look. By maintaining sewn seam integrity, you enhance the durability and longevity of your velour sofa, keeping it looking and feeling its best. Remember, taking care of your upholstery stitching now will save you headaches in the future, ensuring your sofa remains a beautiful centerpiece in your home for years to come. Additionally, incorporating a budget-friendly home appliance maintenance plan can help ensure that any necessary cleaning tools are well-maintained and ready for use.

Upholstery Color Repair Techniques

How can you ensure your velour sofa maintains its vibrant look over time? One crucial step is upholstery stitching reinforcement. This technique is essential for preserving the integrity of your sofa, especially in high-use areas that face wear and tear. Regularly inspect seams and stitching for signs of fraying or separation. If you notice any issues, address them promptly to prevent further damage.

When performing stitching repairs, use a heavy-duty needle and upholstery thread that matches your velvet fabric. This ensures durability and a seamless appearance. For added strength, consider employing cross-stitch or double stitch techniques in areas that experience significant stress. This will enhance the longevity of your upholstery.

As you reinforce the stitching, make sure the fabric is taut and flat. Avoid puckering, as it can detract from the overall aesthetic of your velour sofa. If you're unsure or uncomfortable with any of these repair techniques, don't hesitate to seek professional help. Following these cleaning instructions and repair tips will keep your sofa looking fresh and vibrant for years to come.

Advertisement

Revitalizing Softness and Style

To keep your velour sofa looking and feeling its best, it's essential to focus on revitalizing its softness and style. Start by regularly brushing the fabric with a soft bristle brush, making sure to brush in the direction of the pile. This simple velvet cleaning technique lifts dirt and helps restore that luxurious texture you love.

Next, check the upholstery stitching for any fraying or loose threads. Reinforcing these seams is crucial to prevent further damage and maintain your sofa's overall appearance. If the fibers seem a bit flat, using a steamer on low heat can gently revive them, improving the plush feel and restoring the fabric's original shape.

After cleaning, apply a fabric protector specifically designed for velour. This step safeguards against future stains and wear, allowing you to maintain both softness and aesthetic appeal. Additionally, regularly rotate and flip your cushions to distribute wear evenly. This practice not only enhances comfort but also helps preserve your sofa's style over time. By following these steps, you'll keep your velour sofa looking fabulous and feeling soft for years to come. Consider using a robot vacuum cleaner to help maintain cleanliness and reduce manual cleaning effort.

Personalized Fabric Treatments

custom textile care solutions

When it comes to caring for your velour sofa, personalized fabric treatments can make a significant difference in maintaining its beauty and functionality. These treatments enhance stain resistance, making it easier to clean up spills and reducing the chances of permanent marks. To keep the softness and appearance of your velour intact, consider selecting a fabric protector specifically designed for this material.

Using a pH-balanced cleaning solution tailored for delicate fabrics ensures you can effectively clean without damaging the velour. Regularly applying a specialized upholstery cleaning spray not only maintains the look of your sofa but also helps prevent grime buildup and prolongs its life.

Before fully applying any personalized fabric treatments, always test them on a small, inconspicuous area. This precaution prevents unwanted discoloration or damage to your velour. By incorporating these personalized treatments into your cleaning routine, you can effectively shield your sofa from dirt and moisture while preserving its luxurious texture. Your velour sofa deserves the best care, and these steps will help you achieve that effortlessly.

Advertisement

Seasonal Deep Cleaning Guidelines

seasonal cleaning best practices

Regularly conducting a seasonal deep cleaning is essential for keeping your velour sofa looking its best and ensuring its longevity. Aim to deep clean every 6 to 12 months, adjusting the frequency based on how much you use the sofa and its exposure to dust and dirt.

Start by using a vacuum cleaner equipped with a soft brush attachment. This helps you thoroughly remove dust and debris, focusing on seams and crevices where dirt tends to accumulate. Next, prepare a cleaning solution by mixing mild liquid soap with warm water. Make sure it's free of additives or colors. Using a damp cloth, apply this solution in a back-and-forth motion to clean the fabric gently.

Once you've cleaned the sofa, use the steam setting on your steamer, applying it lightly to the velour surface. This step helps restore the fabric's nap and eliminates any creases or impressions. Finally, allow your sofa to air-dry completely before using it again. This prevents moisture-related damage, ensuring your velour sofa remains in pristine condition for years to come.

Conclusion
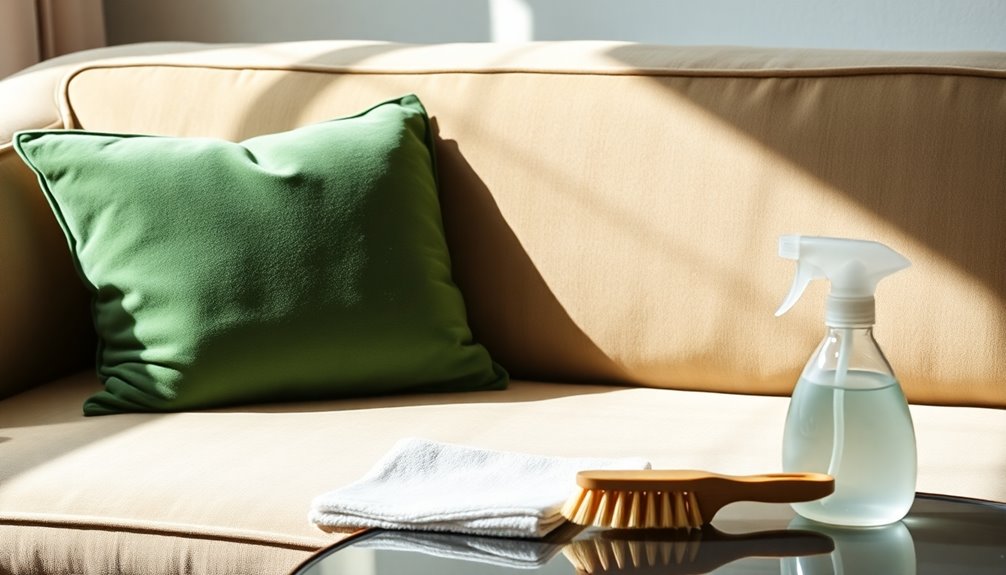
final thoughts and summary

Maintaining your velour sofa through regular cleaning and care not only enhances its appearance but also extends its lifespan. By vacuuming weekly with a soft brush attachment, you can effectively prevent dust and dirt buildup. When spills occur, act quickly by blotting with an absorbent cloth to prevent stains from setting in. For everyday cleaning, a solution of warm water and mild liquid soap works wonders—just apply it with a damp cloth and ensure you let the fabric air dry afterward to maintain its integrity.

To keep your sofa looking plush, consider steaming it on a low setting; this technique can help restore its plush appearance and remove any creases without causing damage. For those tough stains or heavily soiled areas, don't hesitate to seek professional cleaning. These experts can ensure your velour sofa remains in excellent condition while preserving its delicate fabric. Remember, regular maintenance is key to enjoying your beautiful velour sofa for years to come. By following these simple steps, you'll not only clean your velvet but also enhance its longevity and comfort, making it a cozy spot in your home.

Frequently Asked Questions

What Is the Best Way to Clean a Velour Sofa?

To keep your velour sofa looking great, start by brushing the surface with a soft brush to get rid of dirt and lint. Then, vacuum with a soft attachment. Mix mild soap with warm water, blotting stains gently with a damp cloth. For oily spots, sprinkle cornstarch, let it sit, and vacuum. Always test any cleaning solution on a hidden area first, and remember to vacuum weekly to maintain its appearance.

Is a Velour Sofa Easy to Clean?

Yes, a velour sofa's pretty easy to clean. Its synthetic fibers resist stains better than natural ones, which makes maintenance simpler. Regularly vacuuming with a soft brush attachment helps keep dust and dirt at bay. If you spill something, blot it immediately with an absorbent cloth to avoid stains. For deeper cleaning, consider professional services every couple of years, especially if you have pets or use it heavily.

Advertisement

How Do You Get Stains Out of Velour Fabric?

To get stains out of velour fabric, start by blotting spills immediately with an absorbent cloth—don't rub! For oily stains, sprinkle cornstarch or talcum powder and let it sit for several hours. Mix a mild solution of warm water and liquid soap, applying the suds gently with a damp cloth. Always test any cleaning solution on a hidden area first to avoid discoloration. For tough stains, consider hydrogen peroxide, but remember to test it too!

How Do You Clean Velour Seats?

To clean velour seats, start by using a soft brush to gently remove any surface dirt. After that, vacuum the seats to eliminate loose dust. Next, mix mild soap with warm water, avoiding suds, and apply it with a damp cloth in a back-and-forth motion. If you spill something, blot it immediately with an absorbent cloth. Regularly vacuum with a brush attachment to keep the fabric looking fresh and fluffy.

Interior Design

How to Fix Sagging Sofa Cushions

Bring your sofa back to life with simple fixes for sagging cushions, and discover expert tips that will leave you wanting to know more!

Published

on

revive sagging sofa cushions

To repair sagging sofa cushions, begin by unzipping the cushion covers. Remove the old stuffing and replace it with polyester fiberfill for added support. Be sure to fill the corners to maintain the cushion’s shape. Regularly flip and rotate the cushions to prevent uneven wear, and consider placing plywood underneath for extra firmness. Fluff the cushions regularly by shaking them out and lifting the corners to maintain their volume. Consistent maintenance, like vacuuming and cleaning, also helps extend their lifespan. If you’re interested in more effective tips and techniques, there is a lot more to discover to keep your sofa feeling fresh.

Key Takeaways

  • Unzip the cushion cover, remove old stuffing, and replace it with polyester fiberfill for improved support and firmness.
  • Flip and rotate cushions regularly to promote even wear and prevent additional sagging.
  • Incorporate quilt batting around foam inserts to enhance comfort and stability.
  • Vacuum cushions frequently to eliminate dust and debris, maintaining a clean seating area.
  • Regularly fluff cushions by lifting corners and shaking them to restore volume and prevent compression.

Understanding Sagging Cushions

causes of cushion sagging

Sagging sofa cushions can be a common problem that affects both comfort and the overall look of your furniture. Over time, daily use compresses the foam and stuffing inside your couch cushions, leading to noticeable indentations that can diminish your seating experience.

Typically, the average lifespan of couch cushions is around five years, after which wear and tear become evident. To maintain a healthier indoor environment, consider regular vacuuming to remove dust and allergens that can contribute to cushion deterioration, as highlighted in best vacuums for dust removal in 2024.

If you've got non-removable cushions, you might find it more challenging to clean and maintain them, allowing dirt and debris to build up and worsen the sagging. Regular inspection is essential, especially if you have pets or frequently use your sofa, as these factors can accelerate the sagging process.

To prolong the life of your cushions, consider high-quality materials during your next purchase. Techniques like flipping and rotating your cushions can help distribute wear evenly, preventing uneven sagging.

Additionally, investing in couch cushion covers can protect against stains and dirt, further extending their lifespan. By understanding the dynamics of saggy couch cushions, you can take proactive steps to maintain both comfort and aesthetics in your living space.

Advertisement

Common Causes of Sagging

skin elasticity loss factors

Over time, daily use takes a toll on your sofa cushions, leading to noticeable sagging. One of the primary culprits is the consistent weight distribution that compresses the foam cushion and stuffing materials. As you sit, the foam loses its firmness, creating visible indentations and sagging issues. If your cushions are made from poor-quality materials, this deterioration can happen even faster.

Additionally, certain factors, such as humidity and temperature changes, can also affect the longevity of your sofa cushions, similar to how cold medications can have varying effects on comfort and relief.

Regular maintenance is key; cushions that aren't flipped or fluffed can develop localized drooping, further exacerbating sagging. Additionally, attached cushions often experience uneven wear compared to removable ones, which you can adjust and maintain more easily.

If you have pets, they can greatly contribute to wear and tear on your sofa. Their weight and playful activities put extra pressure on the cushions, leading to faster sagging.

Understanding these common causes will help you address the problem effectively and prolong the life of your furniture. By recognizing how daily habits and external factors affect your sagging sofa, you can take proactive steps to keep your cushions looking and feeling like new.

Essential Tools and Materials

key supplies and equipment

To fix those sagging sofa cushions, you'll need some essential tools and materials. Start by gathering scissors, zippers or seam rippers, and consider optional items like plastic trash bags for easier handling. Once you have your tools ready, carefully open the cushion seams using either the zippers or the seam ripper. Insert additional padding, such as foam or polyester fiberfill, to give the cushions their firmness back. For a more detailed guide on how to repair a sinking sofa, you can explore adding plywood or replacing worn-out springs to bolster the seating structure. Once you’ve added the necessary padding and the cushions regain their shape, carefully sew the seams back together to ensure everything stays in place. Regular maintenance, such as rotating the cushions and tightening any loose fabric, can help prolong the life of your sofa. For more comprehensive steps on *how to repair a sagging sofa*, you may also want to explore reinforcing the frame or upgrading the support system for a long-lasting fix.

It's also important to guarantee your selected materials are safe and comfortable for use, much like how proper diet includes fresh fruits is vital for pet care.

Advertisement

For materials, think about polyester fiberfill, quilt batting, or high-density foam, all of which offer cost-effective solutions to bring your cushions back to life.

Required Tools Overview

When tackling the issue of sagging sofa cushions, having the right tools and materials at your disposal makes the process much easier. To enhance your living space's air quality while you work, consider using an air purifier for a cleaner environment air purifier maintenance dos and don'ts.

Here's a quick overview of what you'll need to get started:

  • Scissors for cutting materials
  • Zippers for accessing cushion stuffing
  • Vacuum for cleaning debris from under cushions
  • Quilt batting for added comfort
  • Plastic trash bag for easy cushion insertion

With these tools, you can effectively address the sagging problem. Use scissors to cut your quilt batting and foam pads to the appropriate size. Zippers will help you reach the stuffing within your cushions without hassle.

A vacuum is essential for removing any debris that may be hiding underneath, ensuring a clean workspace.

Don't forget to gather polyester fiberfill stuffing, which you can purchase in bulk, and consider incorporating high-density foam pads or even old bed pillows as additional stuffing materials.

Advertisement

A plastic trash bag can simplify the process of reinserting your cushions into their covers, making the task more efficient. With these items on hand, you're ready to restore your sofa cushions to their former glory!

Recommended Cushion Materials

Choosing the right materials is key to effectively restoring your sagging sofa cushions. Start with high-density foam, like 32D foam, which offers excellent stability and durability. This material is essential for long-term comfort, ensuring your cushions don't sag again soon after restoration.

Additionally, consider using essential oils for relaxation during the process, as they can create a calming environment while you work on your project.

Next, consider polyester fiberfill. It's an affordable option for cushion stuffing, typically available in 10lb boxes for around $19.97 at Walmart. Polyester fiberfill can help fluff up your cushions without breaking the bank.

To enhance support and comfort further, you can use quilt batting in conjunction with foam. Priced at about $7.97 per roll, quilt batting provides an additional layer that makes a noticeable difference in feel.

Advertisement

Don't forget about the tools you'll need, such as scissors for cutting your materials and zippers for accessing the cushion stuffing. A vacuum cleaner with upholstery attachments is also a must to clean existing cushions before you start, ensuring that dirt doesn't compromise your new stuffing.

With the right materials and tools, you'll be well on your way to reviving those sagging couch cushions!

Cost-Effective Solutions

Reviving your sagging sofa cushions doesn't have to break the bank. With a few cost-effective materials and tools, you can easily fix sagging couch cushions and give your couch a fresh look without splurging on a new couch.

Proper investment in home decor can also elevate your living space, similar to how budget planning can enhance financial health.

Here are some essential items you'll need:

Advertisement
  • Polyester fiberfill stuffing (10lb box for about $19.97)
  • Quilt batting (two rolls at approximately $7.97 each)
  • Scissors for cutting materials
  • Access to a zipper on your cushion covers
  • Old bed pillows for extra stuffing

Investing around $35.91 in these materials can greatly enhance your couch's comfort and appearance. The polyester fiberfill provides the necessary support, while quilt batting adds an extra layer of comfort.

Plus, using old bed pillows as stuffing can further cut costs.

Step-by-Step Repair Process

detailed repair instruction guide

To tackle sagging sofa cushions effectively, start by unzipping the cushion cover to access the stuffing. Removing the old stuffing and filling it with polyester fiberfill or other supportive materials until it's adequately full is crucial for restoring comfort.

Incorporating techniques from design thinking principles can help you approach this process creatively and effectively. Make certain to fill the corners to guarantee uniformity. If you're using foam, wrap it with quilt batting before reinserting it into the cover. This will enhance comfort and support, allowing the foam to maintain its shape over time.

Next, consider inserting a plywood board under the cushions for additional support. This provides a firmer base and helps prevent further sagging. Once you've added the new stuffing, zip the cover tightly. If you find it difficult to reinsert the cushions, use a plastic trash bag to make the process smoother.

Don't forget to regularly flip and rotate the cushions to distribute wear evenly. This simple step can help maintain their shape and greatly extend their lifespan.

Techniques for Cushion Restoration

cushion restoration techniques guide

Restoring your sofa cushions can breathe new life into your living space and enhance your comfort. Here are some effective techniques to fix sagging cushions and bring back their original shape:

  • Add polyester fiberfill or foam through zippers to restore firmness.
  • Flip and rotate your cushions regularly to distribute wear evenly.
  • Utilize quilt batting around foam inserts for added support and comfort.
  • Insert a piece of plywood under the cushions for a firmer base.
  • Regularly fluff and beat your cushions to rejuvenate the stuffing.

Maintaining Your Couch Cushions

couch cushion care tips

To keep your couch cushions in top shape, regularly fluff them to maintain their volume and prevent sagging.

Incorporating regular maintenance, similar to how preventive maintenance plans can extend appliance lifespans, can greatly enhance the longevity of your cushions.

Advertisement

Don't forget to check your cushion covers too; washing them can keep your seating area fresh and looking great.

Regular Fluffing Techniques

Although it might seem like a minor chore, regular fluffing of your couch cushions is crucial for keeping them in top shape. Fluffing not only helps redistribute stuffing but also prevents localized drooping, which can lead to a sagging sofa.

To guarantee comfort and longevity, you should fluff your cushions at least once a week, especially in areas that see a lot of use. Notably, much like the different brewing methods that can affect the quality of coffee, the way you care for your cushions can greatly influence their lifespan and comfort.

Understanding the mechanics of French press can enhance your overall experience, just as proper cushion maintenance can improve your seating comfort.

Here are some effective fluffing techniques:

Advertisement
  • Grasp the cushion corners and lift them upward.
  • Shake the cushions gently to loosen compressed stuffing.
  • Flip and rotate cushions to encourage even wear.
  • Use a vacuum cleaner with an upholstery attachment to remove debris before fluffing.
  • Make it a part of your cleaning routine for better maintenance.

Cushion Cover Maintenance

Maintaining your couch cushions requires attention to the covers that protect them. Regular cushion cover maintenance is essential for ensuring cleanliness and prolonging the life of your couch. Here's how you can effectively care for your cushion covers:

Maintenance Task Frequency Tips
Wash Removable Covers Every 1-3 months Use a gentle cycle and air-dry to avoid shrinkage.
Spot Clean Non-Removable As needed Use rubbing alcohol and always check care labels.
Vacuum Cushions Weekly Don't forget to vacuum under the cushions for allergens.
Inspect Under Cushions Monthly Remove debris that can cause odors and wear.
Apply Fabric Protectors After Cleaning Helps repel stains and spills for better appearance.

Community Tips and Insights

community advice and knowledge

The community has come together to share valuable tips and insights for fixing sagging sofa cushions, revealing a wealth of creative solutions.

Here are some standout suggestions that could help you restore your couch to its former glory:

  • Use old bed pillows or crib bumpers as unconventional stuffing materials. These items can provide added support and comfort, similar to well-draining soil essential for preventing root rot.
  • Flip and rotate cushions regularly to guarantee even wear and prolong their life.
  • Add extra stuffing, like polyester fiberfill, for improved firmness—many DIY enthusiasts recommend a 10lb box for around $20.
  • Check for zippers in cushion covers; they allow for easy stuffing adjustments, enhancing your DIY repairs.
  • Share before-and-after photos to inspire others and showcase your successful cushion restoration.

When to Seek Professional Help

recognizing when to seek help

Recognizing when to seek professional help can save you time and frustration in restoring your sagging sofa cushions. If your DIY attempts, like adding stuffing or using plywood support, haven't produced satisfactory results, it's a clear sign to consult a professional.

Consider professional reupholstery services, especially if your sofa is heavily used or older. These experts can provide high-quality materials and craftsmanship, guaranteeing a durable and comfortable restoration.

If you notice issues with the structural integrity of your sofa, such as broken frames or springs, it's essential to get professional help. Ignoring these problems can lead to further damage and costly repairs down the road.

For significant sagging or uneven wear impacting comfort and aesthetics, a professional evaluation can offer tailored solutions that go beyond basic fixes.

Additionally, if dirt and debris have accumulated under the cushions, consider hiring professional cleaning services. They can rejuvenate the upholstery and enhance your sofa's appearance, making it look fresh and inviting again.

Advertisement

Don't hesitate to reach out for expert assistance when your sofa needs it; it'll save you time and secure the best results.

Frequently Asked Questions

How Can I Make My Sofa Cushions Firm Again?

To make your sofa cushions firm again, try adding high-density foam or polyester fiberfill. Regularly fluff, flip, and rotate them to evenly distribute wear, and consider using a board underneath for extra support.

How to Fix a Couch That Sinks in the Middle?

To fix a couch that sinks in the middle, try placing plywood underneath for support. Regularly rotate your cushions and consider adding high-density foam or fiberfill to restore firmness and comfort effectively.

What to Do When Couch Cushions Go Flat?

When your couch cushions go flat, you can add polyester fiberfill or foam for support. Regularly fluffing and rotating them can help too, ensuring even wear and extending their life considerably.

How Do I Keep My Couch Cushions From Pushing Out?

Cushion care's essential! To keep your couch cushions from pushing out, regularly fluff and rotate them. Consider using support boards or high-density foam inserts for firmness, and check for debris underneath to maintain even pressure.

Advertisement

Conclusion

In the end, rejuvenating your sagging sofa cushions can breathe new life into your living space, like a fresh coat of paint on a weathered canvas. By understanding the causes and employing simple repair techniques, you'll turn a droopy disaster into a cozy haven. Remember, a well-maintained couch not only supports your body but cradles your soul. So, roll up your sleeves and give your furniture the love it deserves—after all, it's more than just a seat; it's your sanctuary.

Continue Reading

Interior Design

How to Bleach Wood Furniture

Start your journey to beautifully bleached wood furniture with essential tips and techniques that will transform your pieces into stunning decor. Discover the secrets inside!

Published

on

bleach wood furniture guide

In order to bleach wood furniture, begin by gathering the necessary supplies such as household bleach and protective gear. Start by cleaning the surface with Tri-Sodium Phosphate to get rid of dirt and oils. Create a mixture of equal parts bleach and hot water, then apply it using a sponge or brush in small sections. Allow the bleach to sit for approximately 15 minutes in sunlight for optimal results. Rinse the wood thoroughly with water afterwards. Keep an eye on any color changes and repeat the process if necessary for stubborn spots. Finally, lightly sand the wood and apply a non-yellowing topcoat for protection. Explore more tips for achieving the best outcomes. To bleach wood furniture safely, always make sure to work in a well-ventilated area and wear gloves and eye protection to prevent any potential harm from fumes or skin contact. After applying the bleach solution, exercise patience and monitor the wood until you reach the desired lightness, but avoid excessive processing as it can weaken the wood fibers. By taking proper protective measures and paying close attention, you can bleach wood furniture safely and achieve even, beautiful results.

Key Takeaways

  • Prepare the wood by cleaning it with Tri-Sodium Phosphate to remove dirt and oils before bleaching.
  • Mix household bleach with hot water at a 1:1 ratio and apply it evenly using a sponge or brush.
  • Always test a small, inconspicuous area first to gauge the wood's reaction to the bleach solution.
  • Allow the bleach to sit for about 15 minutes in sunlight for enhanced effectiveness, then rinse with water.
  • After bleaching, lightly sand the wood, rinse it again, and apply a protective topcoat for durability.

Methods of Wood Bleaching

When it comes to bleaching wood furniture, you have several effective methods to choose from. One popular option is household bleach, which contains sodium hypochlorite. It's inexpensive and works well for lightening wood, especially lighter woods with cooler undertones, particularly when combined with sunlight exposure.

However, keep in mind that effectiveness varies by wood type. For those looking to incorporate natural alternatives, essential oils such as eucalyptus oil can support overall wood maintenance and may enhance the aesthetic appeal of your furniture.

Another powerful option is oxalic acid, which comes in crystallized form. You'll need to dilute it with hot water. This method is excellent for removing rust stains while restoring the natural wood appearance without altering its color.

For more significant color changes, consider using a two-part A/B wood bleach that combines sodium hydroxide and hydrogen peroxide. This method allows you to keep the wood grain intact while achieving the desired results, although it usually requires multiple applications.

Regardless of the method, always follow safety precautions. Wear gloves and safety glasses, and remember to neutralize any residual bleach with a vinegar and water solution after the bleaching process to prevent unwanted reactions.

Advertisement

Essential Materials Needed

necessary supplies required here

Before you start bleaching your wood furniture, you'll need some essential materials for safety and effectiveness.

It's important to have a well-ventilated area to work in, as bleach fumes can be harmful. Make certain you've got protective gear like gloves and safety glasses, along with the right tools to prep and apply the bleach.

Additionally, consider using a vacuum with a high filtration system for dust removal during the process, as best vacuums for dust removal in 2024 can help keep your workspace clean.

Having these items ready guarantees a smoother process and better results.

Protective Gear Importance

Bleaching wood furniture can be a rewarding project, but it's crucial to prioritize your safety while doing so. To effectively protect yourself, you'll need to wear proper protective gear throughout the process.

Here's a quick guide on the essential gear you'll need:

Advertisement
Protective Gear Purpose Notes
Rubber Gloves Protects skin from irritation and burns Always wear during bleaching
Safety Glasses Shields eyes from splashes and fumes Essential for eye safety
Face Mask Prevents inhalation of harmful vapors Important in poorly ventilated areas
Long Sleeves/Pants Provides additional skin protection Helps avoid accidental contact
Well-Ventilated Area Minimizes exposure to fumes Open windows or use fans

Required Tools Overview

Once you're geared up and ready to start, gathering the right tools is the next step in your wood bleaching project. First and foremost, you'll need household bleach, like Clorox, to achieve that desired lightened effect on your wood furniture.

Before applying the bleach, it's crucial to remove any existing paint or finish with a paint stripper, such as Jasco or Citristip. Additionally, ensuring that the air quality in your workspace is ideal can enhance your overall experience, especially when dealing with strong chemicals; consider using an air purifier for better breathing.

To help with this process, a putty knife is invaluable for scraping off residue after using the paint stripper, ensuring the surface is clean and ready for bleaching. Don't forget to protect your hands with rubber gloves while working, as well as wearing safety goggles to shield your eyes from any splashes of bleach or paint stripper.

Additionally, using drop cloths to cover your work area will catch spills or drips, preventing any mess on your floors. Finally, for applying the bleach evenly, a sponge or brush is critical.

With these vital tools in hand, you're set to begin your wood bleaching project with confidence!

Advertisement

Cleaning Supplies Needed

Cleaning your wood furniture properly is vital for successful bleaching results. You'll need to gather a few important supplies to guarantee the process goes smoothly and safely. Here's a quick list of what you should have on hand:

  • Rubber gloves
  • Safety glasses
  • Paint stripper (like Jasco or Citristrip)
  • Tri-Sodium Phosphate (TSP) wood cleaner
  • Spray bottle

Start by wearing your rubber gloves and safety glasses to protect yourself from harsh chemicals. Use a good paint stripper to remove any existing finish, making sure your wood is clean and ready for bleaching. A putty knife will help you scrape off any stubborn paint residue, while stripping pads can make the process easier.

Before bleaching, pre-clean your furniture with a TSP wood cleaner to eliminate dirt and oils.

Once everything's prepped, mix your splashless household bleach with hot water in a spray bottle at a 1:1 ratio. This mixture will help you achieve an even application during the bleaching process.

Preparing the Furniture

arranging and organizing furnishings

Preparing your wood furniture for bleaching is vital to achieving the best results. First, make certain your furniture piece is solid wood, as engineered or laminated woods may not react well to the bleach.

Next, remove all hardware, such as knobs and hinges, to prevent any damage during the process and guarantee an even application of the bleach on all surfaces.

Once you've taken off the hardware, thoroughly clean the furniture using a wood cleaner like Tri-Sodium Phosphate. This step is essential to eliminate dirt, oils, and any existing finishes that could interfere with the bleaching effect.

Advertisement

After cleaning, it's wise to test the bleach on a small, inconspicuous area to see how the wood reacts and to determine the right dilution ratio for your desired results.

Step-by-Step Bleaching Process

detailed bleaching instructions guide

Now that you've prepared your furniture, it's time to gather the required materials and tools for the bleaching process.

You'll want to focus on the application techniques and tips to guarantee an even and effective result.

Following these steps closely will help you achieve the desired color change while protecting the wood's integrity.

Required Materials and Tools

To successfully bleach wood furniture, you'll need a few essential materials and tools to guarantee the process goes smoothly. Here's a quick list to help you gather everything you need:

  • Rubber gloves: Protect your hands from bleach and other chemicals.
  • Bleach: Use either household bleach or a two-part wood bleach for effective results.
  • Protective gear: Safety glasses and face masks will shield you from fumes and splashes.
  • Cleaning solution: Tri-Sodium Phosphate (TSP) helps clean the furniture before you start.
  • Tools: Putty knives and stripping pads assist in removing old finishes.

Before applying the bleach, make sure to clean the furniture thoroughly to eliminate dirt and oils.

Prepare your bleach solution by mixing splashless household bleach with hot water in a spray bottle at a 1:1 ratio. It's essential to test this bleach solution on a small, inconspicuous area of the wood first.

Advertisement

This way, you can gauge how the wood reacts before committing to the entire piece.

With these materials and tools on hand, you're ready to plunge into the bleaching process!

Application Techniques and Tips

With all the necessary materials and tools gathered, you're ready to start the bleaching process.

Begin by thoroughly cleaning the wood furniture with a Tri-Sodium Phosphate solution to remove any dirt and oils. This step is essential for best results when you apply bleach.

Next, use a sponge or brush to apply bleach evenly, working in small sections to prevent pooling and guarantee consistent coverage. Let the bleach sit for about 15 minutes under sunlight to enhance the lightening effect.

Advertisement

Afterward, rinse the surface with water to neutralize the bleach.

You may need to apply bleach multiple times, allowing it to dry between applications, especially on wood with stubborn stains or colors.

Once you reach your desired level of lightness, it's time to lightly sand the surface to smooth any raised grain.

Observing Color Changes

monitoring hue transformations

Observing color changes in wood furniture during the bleaching process can be both fascinating and crucial for achieving your desired look. As you bleach wood furniture, you'll notice immediate lightening, but it often takes several hours for the full effect to manifest.

Different wood types react uniquely; for instance, yellow pine may stubbornly retain yellow or orange tones that need extra applications for better lightening.

Here are some key points to keep in mind:

Advertisement
  • Monitor the wood closely for unexpected hues, like red or pink undertones.
  • Allow the bleach to sit for an extended period, especially in sunlight, to enhance its effectiveness.
  • Rinse the wood with water afterward to neutralize bleach and avoid chemical reactions.
  • Each wood type will respond differently, so patience is essential.
  • Document the changes as they happen to track progress.

Post-Bleaching Care

post bleach hair treatment

After bleaching your wood furniture, proper post-bleaching care is important to secure a beautiful and lasting finish.

Begin by lightly sanding the bleached wood using 120-grit sandpaper. This helps reduce any raised grain and gives you a smooth texture.

Next, it's essential to rinse the bleached wood with clean water. This step neutralizes the bleach and guarantees all chemical residues are removed before moving to the finishing stage.

Once rinsed, allow the bleached wood to dry completely. This drying process can take several hours to overnight, but it's critical for ideal adhesion of the protective topcoat.

When the wood is thoroughly dry, apply a protective topcoat or sealer, such as a non-yellowing polyurethane or natural wood wax. This not only enhances the durability of your furniture but also maintains its aesthetic appeal. Make sure to choose a product designed for the specific wood type and its intended use, as indoor and outdoor applications may require different finishes. For waterproofing outdoor wood furniture, it’s crucial to apply a sealer that provides strong protection against moisture, UV rays, and temperature fluctuations. Regular maintenance, such as reapplying the sealer or wax, will further extend the longevity and beauty of your furniture.

For ongoing maintenance, regularly dust your bleached wood furniture and avoid harsh chemicals that could damage the finish.

Advertisement

Safety Precautions

essential risk management practices

Properly caring for your bleached wood furniture is only part of the process; safety precautions are just as essential. Following the right safety instructions can help you avoid health risks while achieving beautiful results.

  • Always wear rubber gloves, safety goggles, and a mask.
  • Work in a well-ventilated area—preferably outdoors or near open windows.
  • Test bleach on a small, inconspicuous area of the wood first.
  • Protect your skin from caustic chemicals in bleach and other wood treatments.
  • Dispose of leftover bleach and contaminated materials according to local regulations.

Remember, when using two-part wood bleaches, handle each solution with care. Sodium hydroxide and hydrogen peroxide can cause chemical burns if they contact your skin.

By taking these precautions, you'll minimize the risk of injury and guarantee a safer bleaching experience.

Don't rush the process; verify that you've set up your workspace correctly before you begin.

Prioritizing your safety not only protects you but also helps you achieve the best results for your furniture. Always keep safety top of mind, and you'll enjoy your newly bleached wood for years to come!

Common Challenges and Solutions

overcoming obstacles effectively together

Bleaching wood furniture can come with its fair share of challenges, but knowing how to tackle them makes the process smoother.

One common issue is uneven bleaching, which can happen due to the varying types of wood. To combat this, apply the bleach evenly in sections and allow it to sit for the recommended time for consistent results.

If your furniture has old finishes, you'll need to use a paint stripper to remove them thoroughly, as shiny surfaces resist bleaching.

Advertisement

Stubborn stains may require multiple applications of bleach, so be patient and monitor the color change after each application. Avoid pooling or dripping bleach, as this can lead to discoloration; use a brush or sponge to apply it evenly and sparingly.

After bleaching, you'll likely notice the wood grain has raised due to the caustic nature of bleach. To fix this, perform light sanding to smooth the texture while preserving the desired color.

Frequently Asked Questions

Can I Bleach Wood Furniture?

Yes, you can bleach wood furniture to lighten its color or remove stains. Just make sure the wood is clean and solid, test a small area first, and always follow safety precautions during the process.

How Long Does It Take Bleach to Lighten Wood?

Bleach dances on wood like sunlight through leaves, transforming it gradually. It may take 15 minutes to several hours to see results, and sometimes you'll need multiple applications for that perfect, airy glow you desire.

Can You Bleach Wood Without Sanding?

Yes, you can bleach wood without sanding. Just use a stripper to remove existing finishes, then apply bleach directly. Monitor the process closely to avoid uneven results, and rinse afterward to neutralize the bleach.

Advertisement

Can You Bleach Wood to Make It Look Like Driftwood?

Yes, you can bleach wood to achieve a driftwood look. Apply a two-part bleach in sunlight, sand lightly for texture, and remember to neutralize with vinegar and water afterward for the best results.

Conclusion

Bleaching wood furniture can transform its appearance and breathe new life into your space. By following the right methods, using essential materials, and preparing carefully, you'll achieve stunning results. Embrace the process, observe the color changes, and guarantee proper post-bleaching care. Stay safe and tackle any challenges with confidence. With patience and practice, you'll enjoy beautifully bleached furniture that enhances your home's charm, showcases your style, and invites admiration from all who see it.

Continue Reading

Interior Design

Indonesian Christmas Decorations: Add a Unique Touch to Your Holiday Decor!

Your holiday decor can truly shine with Indonesian Christmas decorations—discover how these unique pieces can elevate your festive atmosphere!

Published

on

unique indonesian christmas decor

Indonesian Christmas decorations bring a lively element to your holiday setup, adding a truly distinctive touch. Handmade ornaments from Bali and Java showcase beautiful colors and intricate patterns. Consider using Batik textiles as table runners or hanging wall art for a festive focal point. Folk art pieces, such as wooden dolls and masks, offer cultural significance as well as artistic charm. These decorations not only elevate your holiday decor but also endorse fair trade practices and assist local artisans. If you’re interested in more creative ways to integrate these exquisite items, there’s a lot more to discover!

Key Takeaways

  • Indonesian Christmas decorations feature vibrant colors and intricate designs that enhance the festive atmosphere of your holiday decor.
  • Handcrafted ornaments from skilled artisans ensure unique pieces that reflect rich cultural heritage and support fair trade practices.
  • Incorporate traditional Batik textiles and Ikat fabrics as table runners or wall art for a warm and inviting holiday setting.
  • Rustic wooden trays and vintage Bali relief panels serve as elegant centerpieces, showcasing authentic Indonesian artistry in your decor.
  • Unique gifts like mini wooden dolls and ceramic pieces promote appreciation of Indonesian craftsmanship while enhancing holiday celebrations for recipients.

The Beauty of Indonesian Ornaments

indonesian ornament aesthetic exploration

What makes Indonesian ornaments so fascinating? Their unique craftsmanship and vibrant designs truly stand out, especially when it comes to Christmas ornaments. Many of these pieces are handmade by skilled artisans from Bali and Java, showcasing the region's rich cultural artistry.

You'll find miniature wooden carvings and ceramic hanging decorations that capture the essence of Indonesian heritage, making them perfect additions to your holiday decor. These ornaments often reflect the vibrant artistry of Indonesian culture, featuring traditional motifs and vibrant colors, bringing a festive atmosphere to your home.

As you browse through the range, you'll notice that prices can vary, with ceramic decorations starting around CZK 344.30 and intricate wooden sculptures reaching up to CZK 2,099.74, offering something for every budget.

When you choose these ornaments, you're not just enhancing your Christmas decor; you're also supporting fair trade practices. Each piece reflects the artisan's dedication and guarantees they receive fair compensation for their hard work.

Handcrafted Decorations From Bali

bali handcrafted decorative items

Handcrafted decorations from Bali offer a vibrant glimpse into the island's rich cultural heritage. These unique designs showcase the artistic expression and intricate craftsmanship that Bali is renowned for.

You'll find that many of these decorations are hand painted, featuring bold colors and detailed patterns that can truly enhance your holiday decor. Additionally, many pieces are inspired by traditional craftsmanship, such as the Face Indonesian Decor Mask, which represents the island's deep-rooted cultural stories.

Advertisement

From traditional motifs like angels to festive animals, each piece captures the spirit of Christmas while reflecting the island's culture. Using sustainable materials, these ornaments emphasize ethical craftsmanship and fair trade practices, so you can feel good about your purchase.

Prices for Bali handcrafted decorations typically range from CZK 370.75 to CZK 1,522.31, catering to various budgets and preferences. Whether you're looking to add a distinctive flair to your Christmas tree or want to create a warm, festive atmosphere in your home, these ornaments are perfect.

When you choose handcrafted decorations from Bali, you're not just enhancing your holiday decor; you're also supporting local artisans and preserving an incredible cultural tradition.

Immerse yourself in the world of Bali's handcrafted items this holiday season and transform your celebrations into something truly special.

Unique Folk Art and Sculptures

distinctive handmade folk creations

Indonesia's folk art and sculptures bring an enchanting charm to Christmas decorations, offering a unique blend of cultural significance and artistic beauty. Enhancing your holiday decor with hand-carved ornaments that showcase intricate designs and mythological motifs is a wonderful way to celebrate the season.

You can also explore the importance of Indonesian decor masks, which add depth and character to your festive arrangements cultural storytelling aspect. Imagine adding a stunning Nativity Scene crafted from wood, reflecting Indonesia's rich artistic heritage right under your Christmas tree.

Advertisement

Miniature wooden dolls and sculptures, often priced around CZK 2,099.74, make perfect gifts or festive additions. Each piece captures the essence of Indonesian culture, making your decor not just beautiful but meaningful.

Bali's rustic wooden ornaments are particularly popular, adding a touch of island artistry that blends seamlessly with traditional holiday themes, including representations of Santa Claus.

These unique folk art pieces are often ethically sourced and part of fair trade practices, allowing you to shop sustainably while celebrating Indonesia's artistry during the holiday season.

If you're looking to stand out this year, embrace these handcrafted treasures. Let's know how you incorporate these stunning sculptures into your celebrations, and watch as they transform your space into a vibrant holiday wonderland!

Traditional Textiles and Fabrics

heritage weaving and materials

When you think about Indonesian Christmas decorations, consider the vibrant Batik fabric ornaments that can brighten up your holiday setting.

Incorporating Indonesian decorative pillows and woven textiles also adds a unique touch to your decor, enhancing the festive atmosphere with their intricate designs.

Advertisement

Incorporating these traditional textiles not only showcases Indonesia's rich heritage but also elevates your celebration with style.

Batik Fabric Ornaments

Embracing the rich tradition of Indonesian craftsmanship, batik fabric ornaments offer a unique way to infuse your holiday decor with cultural significance. These ornaments are crafted using traditional dyeing techniques, where intricate patterns emerge through a wax-resist process, making each piece truly one of a kind. You'll find vibrant colors and motifs reflecting Indonesian culture, from floral designs to geometric shapes.

Incorporating batik fabric ornaments into your Christmas decorations not only enhances the aesthetic appeal but also supports local artisans and fair trade practices. These handmade treasures preserve traditional craftsmanship, ensuring that Indonesian artistry thrives.

Here's a quick look at some popular batik fabric ornament styles you might consider for your holiday decor:

Ornament Style Description Cultural Significance
Floral Patterns Features blooming flowers Symbolizes beauty and life
Geometric Shapes Bold, symmetrical designs Represents harmony and balance
Symbolic Motifs Includes animals or nature symbols Reflects cultural beliefs
Color Combinations Vibrant mixes of colors Represents joy and celebration

Woven Textiles for Decor

Woven textiles play a significant role in elevating holiday decorations, just like batik fabric ornaments. By incorporating traditional Indonesian textiles, you can add vibrant colors and intricate patterns that showcase the rich cultural heritage of the country.

Advertisement

Both Batik and Ikat textiles are perfect for creating a festive atmosphere during Christmas celebrations. Additionally, the natural materials and earthy tones found in Balinese design can complement these textiles beautifully, enhancing the overall aesthetic of your holiday decor.

Incorporating these elements fosters a warm, inviting environment that aligns with the principles of Balinese design characteristics.

Here are three ways to integrate these beautiful fabrics into your holiday decor:

  1. Table Runners: Use Ikat textiles as table runners for your holiday feasts. Their unique, blurred patterns will draw attention and spark conversations among your guests.
  2. Wall Hangings: Hang Batik wall art to create a stunning focal point in your living space. The intricate designs and colors will enhance the warmth of your home during the holidays.
  3. Ornaments: Craft ornaments from Batik scraps or Ikat pieces. These handmade decorations not only add a personal touch but also honor the artisans who create these unique textiles.

Creative Ways to Use Decorations

innovative decoration usage ideas

With the holiday season upon us, finding creative ways to use decorations can transform your home into a festive oasis. You can start by incorporating handmade Indonesian ornaments featuring vibrant Bali scenes on your Christmas tree. These intricate designs will not only enhance the visual appeal but also add a unique cultural flair.

Consider using vintage wooden Bali relief panels as wall decorations. They create a warm and inviting atmosphere while showcasing authentic Indonesian artistry. Pair these with customizable ornaments that reflect Indonesian culture, blending them with your traditional decorations for a cohesive theme.

Rustic wooden trays featuring Indonesian designs make elegant centerpieces for your holiday gatherings. Use them to hold seasonal treats or candles, adding a touch of sophistication. Finally, think about gifting Indonesian-themed decorations, like mini wooden dolls or ceramic hanging pieces, to friends and family. These unique keepsakes promote cultural appreciation and enhance their holiday decor.

Advertisement
Decoration Type Usage Idea Cultural Touch
Handmade Ornaments Christmas tree embellishments Bali scenes
Wooden Relief Panels Wall decorations Authentic artistry
Rustic Wooden Trays Centerpieces for gatherings Elegant Indonesian designs
Mini Wooden Dolls Unique gifts for friends/family Cultural keepsakes

Cultural Significance of Indonesian Decor

indonesian decor cultural importance

Indonesian Christmas decorations carry deep cultural significance that goes beyond mere aesthetics. When you incorporate these unique elements into your holiday decor, you're not just adding beauty; you're also celebrating Indonesia's rich heritage.

The vibrant colors and intricate designs symbolize joy and festivity, perfectly aligning with the celebratory spirit of Christmas. Additionally, many of these decorations embody the principles of sustainable craftsmanship, often seen in luxury tropical designs that emphasize the use of high-quality materials and local artistry.

Here are three key aspects of the cultural significance of Indonesian decor:

  1. Traditional Craftsmanship: Many ornaments are handcrafted, showcasing the skills of local artisans. This practice supports fair trade, benefiting communities and preserving traditional methods.
  2. Educational Value: Unique decorations, like Batik-printed items and wooden carvings, serve as conversation starters, educating you and your guests about Indonesian cultural traditions and artistry.
  3. Cultural Fusion: The blend of indigenous elements with Western symbols highlights Indonesia's multicultural influences. This adaptation reflects a harmonious coexistence of global festivities and local customs, enriching your holiday experience.

Frequently Asked Questions

Where Can I Buy Indonesian Christmas Decorations Online?

You can find Indonesian Christmas decorations online at various retailers. Check websites like Amazon, Etsy, or specialty decor shops. They usually have a wide selection that'll help you create a festive atmosphere for your holiday celebrations.

Are Indonesian Decorations Suitable for Indoor or Outdoor Use?

Indonesian decorations are versatile and can be suitable for both indoor and outdoor use. You'll find vibrant colors and unique designs that enhance any setting, making your holiday atmosphere truly special and memorable wherever you choose to display them. Whether you’re aiming for a minimalist aesthetic or something more eclectic, these pieces can easily complement various styles. For those interested in incorporating Indonesian elements into their space, some Indonesian home decor tips include using handcrafted items like batik or ikat textiles and teak wooden furniture to add an authentic touch. Additionally, combining natural elements such as bamboo or rattan can create a harmonious, earthy feel perfect for any home. Incorporating plants such as ferns and tropical greenery can further enhance the natural, serene ambiance that Indonesian home decor is known for. For more *Indonesian home decor inspirations*, consider integrating statement pieces like carved wooden masks or wayang puppets to infuse cultural richness into your space. These thoughtful touches can make your interior feel both globally inspired and deeply personal.

How Do I Care for and Maintain Indonesian Ornaments?

Did you know that 60% of people report their holiday decor affects their mood? To care for your Indonesian ornaments, clean them gently with a soft cloth, avoid harsh chemicals, and store them in a dry place.

Can I Incorporate Indonesian Decorations Into Non-Christmas Celebrations?

You can incorporate Indonesian decorations into any celebration. Their vibrant colors and intricate designs enhance your decor, creating a unique atmosphere. Just mix and match with your existing themes for a delightful, multicultural touch!

Advertisement

What Materials Are Commonly Used in Indonesian Christmas Decorations?

You'll find that Indonesian Christmas decorations often use natural materials like bamboo, woven rattan, and vibrant fabrics. These elements create a rich, festive atmosphere, blending traditional craftsmanship with holiday spirit you can appreciate in your celebrations.

Conclusion

By embracing Indonesian Christmas decorations, you're not just adding color to your holiday; you're weaving a tapestry of culture and tradition into your celebrations. Each handcrafted ornament and vibrant textile tells a story, inviting warmth and uniqueness into your home. As you hang these beautiful pieces, let them be the stars of your festive season, shining like lanterns in the night, illuminating the rich heritage that makes your holiday truly special. Celebrate with heart, and let your decor sing!

Continue Reading
Advertisement

Affiliate disclaimer

As an affiliate, we may earn a commission from qualifying purchases. We get commissions for purchases made through links on this website from Amazon and other third parties.

Advertisement

Vetted

chris bumstead s fitness secrets chris bumstead s fitness secrets
Vetted5 hours ago

Chris Bumstead: The Fitness Champ’s Secret Routine That’s Blowing Minds

Mastering the art of fitness, Chris Bumstead reveals his mind-blowing routine; discover the secrets that fuel his incredible success.

top pomades for men top pomades for men
Vetted7 hours ago

15 Best Hair Pomades for Men: Achieve the Perfect Style Every Time

Achieve the ultimate hairstyle with our guide to the 15 best hair pomades for men; discover the perfect option for...

hidden apple black friday discounts hidden apple black friday discounts
Vetted17 hours ago

Black Friday Apple Deals: The Hidden Discounts Apple Won’t Tell You About

Learn about the incredible Black Friday Apple deals that are often overlooked, and discover savings you won't find on Apple's...

stylish and functional men s caps stylish and functional men s caps
Vetted19 hours ago

15 Best Caps for Men: Style Meets Functionality in 2024

Outstanding caps for men await in 2024, blending style and functionality seamlessly—discover which ones will elevate your wardrobe!

genre defying musical surprises genre defying musical surprises
Vetted1 day ago

Sturgill Simpson: The Genre-Defying Artist Who Keeps Surprising Fans

The transformative sound of Sturgill Simpson defies genres and expectations, leaving fans eager to uncover the depths of his artistic...

top home workout rowers top home workout rowers
Vetted1 day ago

15 Best Rowers of 2024: Find Your Perfect Fit for Home Workouts

Your search for the perfect rowing machine ends here—discover the 15 best rowers of 2024 that will transform your home...

comfortable and stylish sleepwear comfortable and stylish sleepwear
Vetted1 day ago

15 Best Men’s Sleep Shorts for Ultimate Comfort and Style

Sleep soundly in style with our top 15 men's sleep shorts—discover the perfect blend of comfort and design for your...

stylish winter men s beanies stylish winter men s beanies
Vetted2 days ago

15 Best Men’s Beanies to Keep You Stylish and Warm This Winter

Stay stylish and warm this winter with our top 15 men's beanies; discover which ones are must-haves for your cold-weather...

men s haircuts for oval faces men s haircuts for oval faces
Vetted2 days ago

15 Best Haircuts for Men With Oval Faces – Find Your Perfect Style

Achieve the ideal look for your oval face with these 15 stylish haircuts that will enhance your features—discover your perfect...

moisturizers for fine lines moisturizers for fine lines
Vetted2 days ago

15 Best Moisturizers for Fine Lines That Will Transform Your Skin

Pamper your skin with these 15 best moisturizers for fine lines, but discover which one truly delivers transformative results.

top men s jewelry brands top men s jewelry brands
Vetted3 days ago

15 Best Jewelry Brands for Men: Elevate Your Style With These Top Picks

Find the perfect jewelry to elevate your style with our top 15 picks for men, but which brand will stand...

home abs workout equipment home abs workout equipment
Vetted3 days ago

15 Best Abs Workout Equipment to Sculpt Your Core at Home

Harness the power of the 15 best abs workout equipment to sculpt your core at home—discover the perfect tools for...

Trending

Copyright © 2024 StyleGuru.org Affiliate disclaimer As an affiliate, we may earn a commission from qualifying purchases. We get commissions for purchases made through links on this website from Amazon and other third parties.