
Taking apart a 3 seater recliner sofa is a simple task. Begin by preparing your work area and gathering necessary tools such as screwdrivers and pliers. Tilt the sofa forward to access any hidden locking mechanisms. Locate the levers, which are usually under fabric panels, and carefully release them to remove the seat backs. Then, unscrew the screws to detach the base bars. Make sure to organize all the components by labeling bags for easy reassembly later on. It is also helpful to take photos during the disassembly process to assist with correct reassembly. By following a systematic approach, you will quickly have your sofa disassembled. To complete the process, unscrew any remaining screws and gently lift off the armrests. Lastly, lift and remove the seat and back panels, being careful not to damage any parts. This step-by-step guide demonstrates how straightforward it is to dismantle a sofa when you know how. With a bit of patience and the right tools, you will have your sofa disassembled and ready for transport or storage in no time!
Key Takeaways
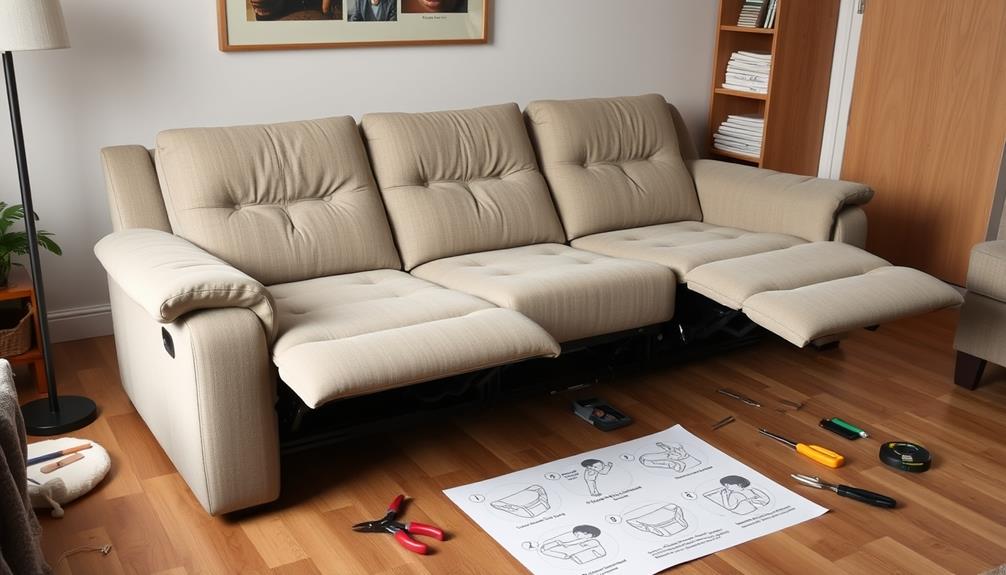
- Prepare your workspace by clearing the area around the sofa and gathering necessary tools like screwdrivers and pliers.
- Locate and access hidden locking mechanisms by tilting the sofa forward and inspecting seams for levers.
- Remove seat backs by unlocking levers, pulling them upward, and ensuring no cables are damaged in the process.
- Detach base bars by releasing locking levers and systematically removing screws or bolts while organizing hardware in labeled bags.
- Document the disassembly process with photos and labels to assist with reassembly and maintain component organization.

MCombo Large Dual Motor Power Lift Recliner Chair for Elderly 7896
- Power Lift Assistance: Helps seniors stand easily with stable support
- Dual Motor Infinite Position: Adjusts backrest and footrest independently
- Multiple Recline Angles: Reclines up to 165° for relaxation
As an affiliate, we earn on qualifying purchases.
Overview and Preparation

When you're ready to dismantle your recliner sofa, it's essential to prepare your workspace properly. Start by clearing the area around the sofa to guarantee you have enough space for safe movement during the process. An organized environment not only promotes efficiency but also helps prevent accidents.
Additionally, if you have pets or allergies, consider using a vacuum with a superior dust and allergen elimination feature to clean the area before starting, as this will help create a cleaner workspace.
In this overview of preparation, gather the necessary tools, like a flathead screwdriver and a drill with appropriate bits. Having a helper is also beneficial; they can stabilize the sofa while you work. Familiarize yourself with the sofa's design, locating any hidden locking mechanisms that might secure the seat backs. You'll often find these levers concealed under fabric panels, so inspect carefully to release them.
As you dismantle the sofa, use plastic bags to store hardware, guaranteeing you keep everything organized. Label each disassembled component to make reassembly easier later on. Additionally, consider taking photos throughout the process—these will serve as a handy reference when it's time to put everything back together.
With proper preparation, you'll find that dismantling your recliner sofa becomes a straightforward task.
Tools Needed for Dismantling
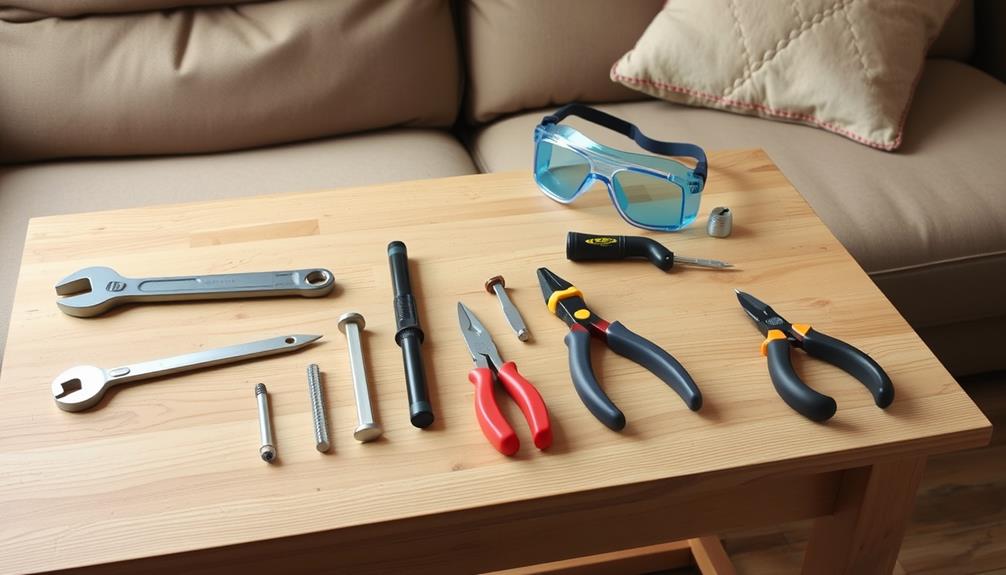
Dismantling your recliner sofa requires the right tools to make the process smooth and efficient. To get started, you'll need a flathead screwdriver, which is essential for prying apart clips and accessing locking levers. This tool will make it easier to get into those tight spots where components are secured together.
Additionally, considering energy-efficient appliances can improve overall home functionality, as highlighted in energy efficiency insights.
In addition to the flathead screwdriver, keep a Phillips screwdriver handy. You'll use it to remove screws that hold various parts of the sofa together, ensuring everything comes apart safely.
Pliers can also be beneficial for gripping and pulling out stubborn components, making disassembly quicker and less frustrating.
A utility knife is another useful tool, especially for cutting through any adhesive or fabric that might be in the way of hidden clips or screws.
Finally, don't forget to have a soft cloth or blanket on hand. Covering surfaces during disassembly helps protect your sofa and the surrounding area from scratches or damage.
With these tools needed, you'll be well-equipped to tackle the task ahead and successfully dismantle your 3 seater recliner sofa.
Accessing Locking Mechanisms

Accessing your recliner sofa's locking mechanisms is vital for a successful disassembly. Start by tilting the sofa forward, which exposes the rear upholstery strip. Look for the locking levers on both sides of the sofa. These levers are important for releasing the seat backs as you're taking apart the sofa.
Additionally, while you're focusing on the locking levers, consider how essential oils like eucalyptus oil can provide relief from any discomfort you may experience during this process.
Next, inspect the seams between the center console and the seats. You might find hidden locking levers that require lifting fabric panels to reveal. Use a flathead screwdriver or your fingertips to gently lift these locking levers, allowing you to free the seat backs for removal.
If your model has additional locking mechanisms, they may be secured by removable bolted bars. To access these, turn the sofa over and check for any screws or bolts that need to be removed.
Always verify you have a clear view of the locking mechanisms and any attached cables or wires. This way, you can prevent damage during the disassembly process. By carefully accessing these locking components, you'll be well on your way to dismantling your recliner sofa efficiently.
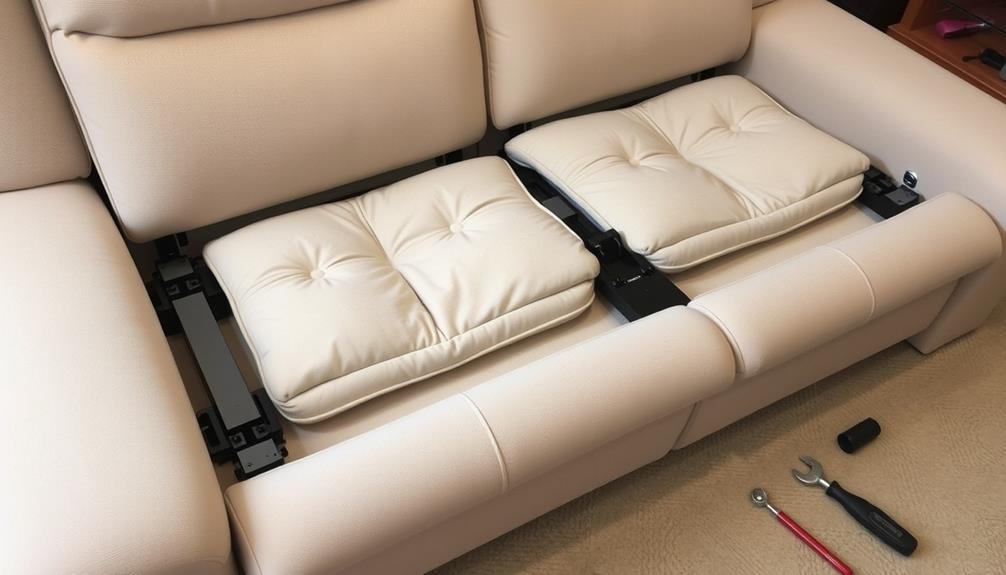
Removing Seat Backs

Removing the seat backs from your recliner sofa is a straightforward process once you've accessed the locking levers. Start by locating these levers, which are often hidden beneath fabric panels or at the seams between the seats. Engaging in this task can also inspire a sense of creativity, as igniting creativity in a digital world encourages hands-on problem-solving and innovation. Use a flathead screwdriver or your fingertips to carefully lift them.
Next, gently tilt the sofa forward to access the rear upholstery strip, making it easier to reach the locking mechanisms on both sides. Once you've released the levers, carefully pull the seat backs upward and away from the frame. Be mindful of any attached cables or wires, ensuring you don't damage them during removal.
It's a good idea to have a helper stabilize the sofa while you're removing the seat backs. This will prevent any tipping or potential damage to the structure.
After you successfully remove the seat backs, take a moment to label each component for easier identification when it's time to reassemble. Store any screws or hardware in clearly marked plastic bags to keep everything organized. Following these steps will make your dismantling process much smoother and more efficient.
Detaching Base Bars
Now that you've removed the seat backs, it's time to detach the base bars.
You'll need some basic tools and should keep safety in mind as you go through the step-by-step removal process.
Regular maintenance of your furniture, like ensuring the recliner mechanism is clean, can help prolong its life, similar to air purifier maintenance dos and don'ts.
Let's get started on ensuring your recliner sofa is ready for complete disassembly.
Tools Needed for Disassembly
When tackling the task of detaching base bars from your recliner sofa, having the right tools on hand makes a significant difference. Use the following tools to guarantee a smooth disassembly process:
| Tool | Purpose | Notes |
|---|---|---|
| Flathead screwdriver | Pry apart clips and access locking mechanisms | Essential for initial steps |
| Phillips screwdriver | Remove screws securing the base bars | Prevents damage while working |
| Pliers | Grip and remove stubborn components | Handy for tight spaces |
| Power drill | Unscrew bolts (T-30 bits recommended) | Speeds up the removal process |
| Soft cloth/blanket | Protect surfaces from scratches and damage | Use underneath the sofa |
Gather these tools to effectively remove screws and detach the base bars without causing any harm to your sofa. Each tool serves a specific purpose, making the disassembly easier and more efficient. By preparing in advance, you'll streamline the process and reduce the risk of frustration during your project.
Safety Precautions to Consider
Safety is paramount during the disassembly of your recliner sofa, especially when detaching base bars. Before you start, make certain the sofa is unplugged from the wall outlet to prevent any electrical hazards, particularly if it's a power reclining model.
Additionally, consider the importance of cold medications overview for your health, as physical exertion can sometimes lead to discomfort or cold symptoms. Wearing safety gloves is essential; they'll protect your hands from sharp edges and potential pinching while you handle tools and components.
When you're ready to detach the base bars, use a power drill with appropriate T-30 bits. Carefully remove the screws while maintaining a clockwise motion to avoid stripping them. This will make unscrewing much easier.
It's also wise to have a helper stabilize the sofa as you detach the last base bar. This prevents it from tipping over and causing injury during the process.
Before you engage in the disassembly, inspect the area for any loose wires or hidden components. This precaution helps prevent damage to electrical parts during the dismantling.
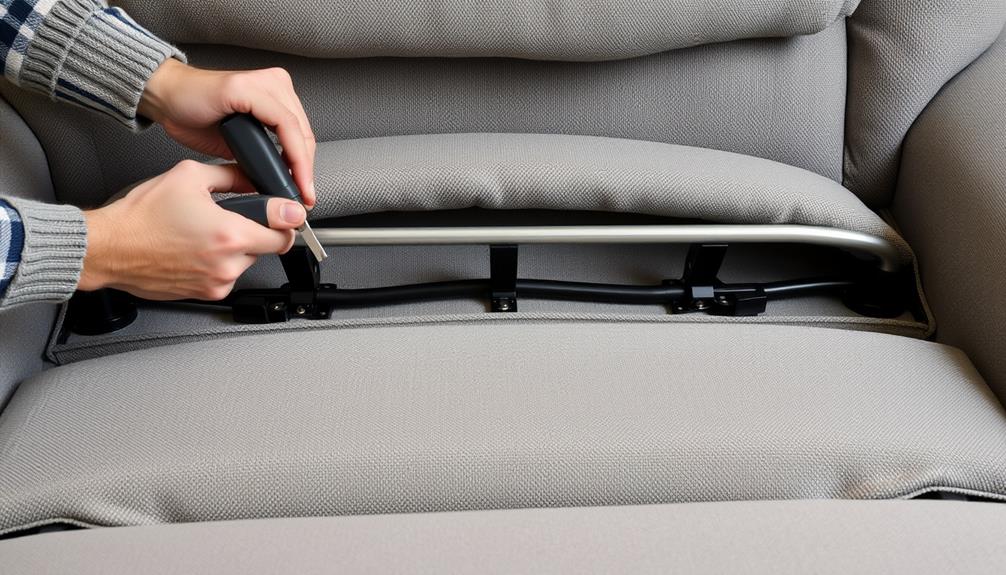
Step-by-Step Removal Process
How do you start the process of detaching the base bars from your recliner sofa? First, tilt the sofa forward to reveal the rear upholstery strip. This gives you access to the rear locking levers on both sides. You'll need to release these levers to detach the base bars. Next, inspect the base area for any screws or bolts securing the base bars to the frame. Use an appropriate drill to remove them systematically.
| Step | Action |
|---|---|
| 1 | Tilt the sofa forward |
| 2 | Release the rear locking levers |
| 3 | Remove screws/bolts from the base bars |
While you remove the last base bar, have a helper hold the sofa steady to avoid damage. It's also essential to organize and label all screws, bolts, and hardware into separate bags for easier reassembly. After detaching the base bars, make sure all components are accounted for and check for any hidden clips or brackets that might need attention before you fully take apart the sofa.
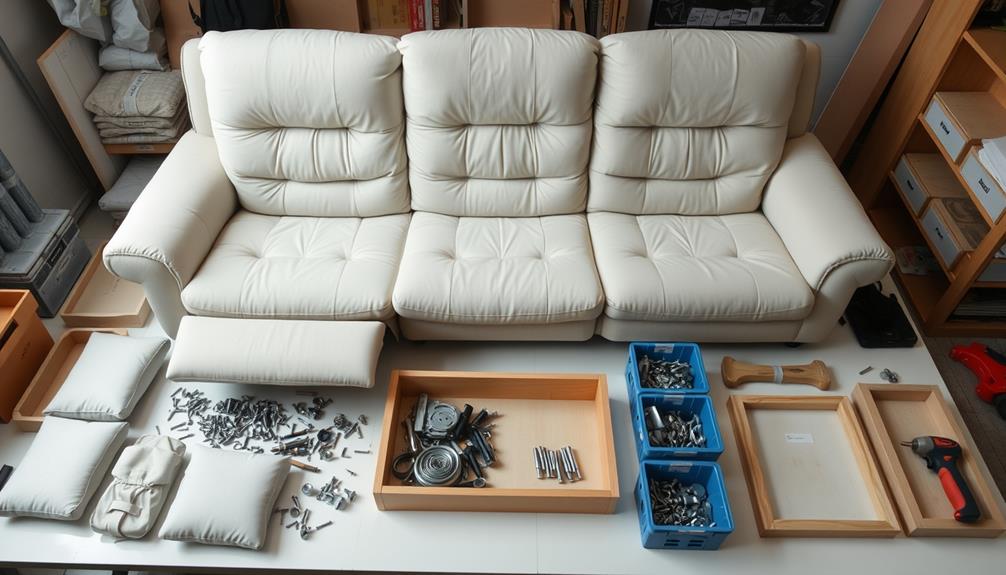
Organizing Components
As you take apart the recliner sofa, it's essential to keep everything organized for a smooth reassembly.
To guarantee you manage your time efficiently, consider setting a budget for the project, which can help you stay on track financially as you create a personal budget.
Start by labeling each component and storing hardware in clear bags to prevent any mix-ups.
Taking photos during the process can also help you remember where everything goes when it's time to put the sofa back together.
Labeling Disassembled Parts
When dismantling a recliner sofa, it's crucial to label each disassembled part right after you remove it. Use clear, descriptive tags to identify components like seat backs, base bars, and bags containing small hardware items. This practice not only helps you remember where everything goes but also streamlines the reassembly process. Proper organization can greatly enhance efficiency, similar to how mechanic shops for fuel injection cleaning guarantee ideal vehicle performance.
Consider implementing a color-coded system for labeling. This way, you can easily differentiate between parts from the left, right, and center sections of the sofa. It'll save you time and reduce confusion when you're putting it all back together.
For the small hardware items, such as screws and bolts, store them in labeled plastic bags. Make sure each bag corresponds to its respective component to keep everything organized.
Additionally, taking photos of each part and its location before you start dismantling can serve as a valuable visual reference.
Keep all labeled parts and hardware in a designated area, ideally within sight of your workspace. This approach will help prevent loss and maintain order throughout the disassembly process, making your task much easier.
Hardware Storage Solutions
Organizing hardware during the dismantling of a recliner sofa can save you a lot of headaches later on. Start by using clear plastic bags to store screws, bolts, and other components separately. Label each bag according to the corresponding part, so you won't mix them up when it's time to put it back together.
Keeping your workspace tidy is vital, much like maintaining your dog's healthy snacks for overall wellness.
Creating a checklist is also important. As you remove each piece of hardware, mark it off your list to guarantee nothing gets overlooked or lost. Designate a specific area or container for your hardware storage that's easy to access during both disassembly and reassembly stages.
A small toolbox or organizer with compartments can be a game-changer. It keeps various components sorted and prevents parts from different sections of the recliner from mixing.
If you're especially detail-oriented, consider taking a moment to photograph the hardware placements and configurations before you remove anything. These visual references can be helpful when you're ready to reassemble the sofa.
With these organization strategies in place, you'll have a smoother experience putting your recliner sofa back together.
Photo Documentation Tips
Capturing clear, high-resolution photos of your recliner sofa before you start taking it apart is essential for a smooth reassembly process. Consider using a well-organizing method, similar to how best room fans for summer cooling are selected, to guarantee that everything is documented efficiently.
Take pictures from various angles to create a thorough reference. When you begin disassembling the sofa, document each stage by photographing specific components and their connections. This will help you remember how everything fits together.
Use labels in your photos to note the location of screws, bolts, and locking levers. This will make identifying where each part belongs much easier when you're ready to reassemble the sofa.
Organizing your photos into a dedicated folder on your device or in cloud storage guarantees you can quickly access them during reassembly.
Don't forget to take close-up shots of any unique features or mechanisms that might require special attention. These photo documentation tips will serve as a valuable guide, preventing confusion and mistakes when putting your recliner sofa back together.
Reassembly Steps
Reassembling your 3-seater recliner sofa can be straightforward if you follow a few key steps.
Start by reinstalling the top bar first to guarantee the sofa's structural integrity. Align the predrilled holes with the corresponding holes on the frame for an accurate fit. Secure the top bar by fastening the center screws initially, then work your way outward to create an even and stable connection.
Next, put the seat backs back in place by sliding them into their respective slots. Lock the levers down to prevent any movement during use. If you took photos during disassembly, refer to them now to guide you through positioning the components correctly.
Once everything is reattached, it's essential to test the functionality of your recliner sofa. Make sure all mechanisms operate smoothly and check for any upholstery damage that might've occurred during the process.
This step guarantees that your sofa isn't only reassembled but also ready for comfortable use. By following these steps, you'll have your recliner sofa back in action in no time!
Additional Resources and Tips
After successfully reassembling your recliner sofa, enhancing the process with additional resources and tips can make future disassemblies even smoother. Here are some practical suggestions to keep in mind:
- Watch tutorial videos: Platforms like TikTok offer a treasure trove of disassembly techniques. Some videos have over 35,000 views for their detailed guidance.
- Gather essential tools: Use a flathead screwdriver, pliers, a Phillips screwdriver, and a utility knife. These tools will help you handle screws, clips, and any adhesive effectively.
- Document the process: Take photos at each stage of disassembly. This visual guide will be invaluable during reassembly, especially if your mechanical skills are limited.
- Label and organize parts: Keep a systematic approach by placing removed parts and hardware in separate bags. This organization simplifies the reassembly process and saves time on moving day.
When you're ready to disassemble, carefully slide your tools into place to avoid damaging the upholstery.
With these resources and tips, you'll guarantee that your next disassembly is as smooth as possible!
Frequently Asked Questions
How to Take Apart a 3 Seater Recliner Sofa?
To take apart a recliner sofa, start by clearing the area. Gather tools, locate hidden clips, and carefully remove the backrest and seat bases, keeping track of screws and parts for reassembly.
Can a Reclining Sofa Be Taken Apart?
Imagine you're moving into a new apartment. Yes, most reclining sofas can be taken apart. Just locate the locking levers and remove the screws; you'll make your move much easier and stress-free.
How Do You Remove the Back of a Recliner Sofa?
To remove the back of a recliner sofa, locate the hidden clips securing it. Use a flathead screwdriver to gently lift them, then detach the backrest carefully, ensuring no wires or cables get damaged.
How Do You Break up a 3 Seater Couch?
To break up a 3 seater couch, start by clearing the area. Gather tools, tilt the sofa to access hidden parts, and carefully unhook clips and screws for a smooth disassembly process without damage.
Conclusion
As you wrap up the dismantling of your 3-seater recliner sofa, remember this journey isn't just about furniture; it's a metaphor for life's changes. Each piece you've carefully removed mirrors the shedding of old layers, making way for new beginnings. By organizing components and mastering reassembly, you've not only refreshed your space but also honed your problem-solving skills. So, embrace the change, and let your creativity guide you in transforming your environment into something truly comfortable and inviting.