
To renovate your bathroom, the first step is to carefully plan your design and budget. Assess the current layout and think about any plumbing changes you might need. Then, proceed to safely remove old fixtures, making sure to handle plumbing and electrical work correctly. Install tiles that are resistant to moisture and apply waterproofing in wet areas. Once that is done, pay attention to the finishing touches such as lighting and decor that align with your vision. Remember to add personal touches with accessories that enhance both the functionality and style of the space. By following these steps, you will be well on your way to a beautiful bathroom makeover. You will be amazed at what can be accomplished!
Key Takeaways
- Begin with thorough planning, evaluating the current layout and setting a realistic budget for materials, labor, and unexpected costs.
- Proceed with the demolition process, ensuring to shut off electricity and water supply, and protect remaining fixtures from debris.
- Complete necessary plumbing and electrical work, adhering to local building codes and upgrading systems to support modern fixtures.
- Choose moisture-resistant tiles and apply waterproofing in wet areas, mastering grouting techniques for durability and aesthetics.
- Add finishing touches by selecting decor that complements the design, integrating energy-efficient lighting, and personalizing the space with unique accessories.
Top picks for "bathroom remodel"
As an affiliate, we earn on qualifying purchases.
Planning Your Bathroom Remodel
Kick off your bathroom remodel by thoroughly evaluating your current layout and pinpointing the changes you want to make. Think about relocating plumbing fixtures, as this can greatly impact both your budget and the overall design feasibility.
When planning, consider how the remodeling process can be influenced by unique camping experiences in your area, as this might inspire design choices that incorporate natural elements. Once you have a clear idea of what you want, create a detailed budget that covers all expected expenses, including materials, labor, and permits.
Don't forget to set aside funds for potential delays or unexpected costs. Consult with a general contractor early on to understand the structural requirements and gain insights on design possibilities. Their expertise can help you refine your vision and guarantee a smoother remodeling process.
Sketching an ideal bathroom design can also be beneficial; it allows you to visualize your ideas and communicate effectively with contractors. Lastly, do your homework on local suppliers for competitive pricing on materials and plumbing fixtures.
This research can greatly influence your overall budget and timeline for the remodel. By carefully planning and considering these elements, you'll set a solid foundation for a successful bathroom remodel.
Demolition Process
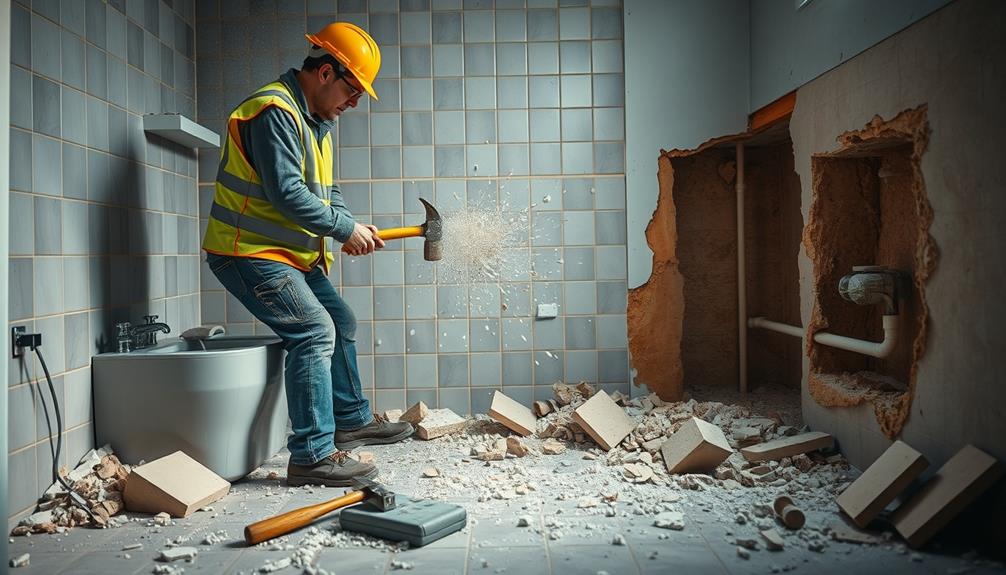
The demolition process marks the exciting start of your bathroom remodel, but it requires careful execution to prevent damage and guarantee safety.
Before diving in, turn off the electricity at the main breaker box and shut off the water supply to avoid leaks and accidents. Additionally, it may be beneficial to consult professionals for tasks like mechanic shops for fuel injection cleaning that require specialized skills to secure peak performance.
Here are three key steps to follow during the demolition:
- Clear the Space: Remove all non-fixed accessories, like towels and decorations, along with any removable fixtures such as mirrors and light fixtures. This secures a clean slate for your project.
- Careful Removal: Use a reciprocating saw to carefully take out tiles and fixtures, being cautious not to damage the underlying structures. Avoid using hammers on insulation to prevent complications and potential water damage.
- Assess and Protect: During the demolition, assess the condition of the subfloor and walls for any damage that may need repairs before moving forward. Store reusable materials safely and cover any fixtures that will remain in the bathroom to protect them from debris.
With the right DIY skills and careful planning, the demolition process sets the stage for your home improvement journey.
Plumbing and Electrical Work
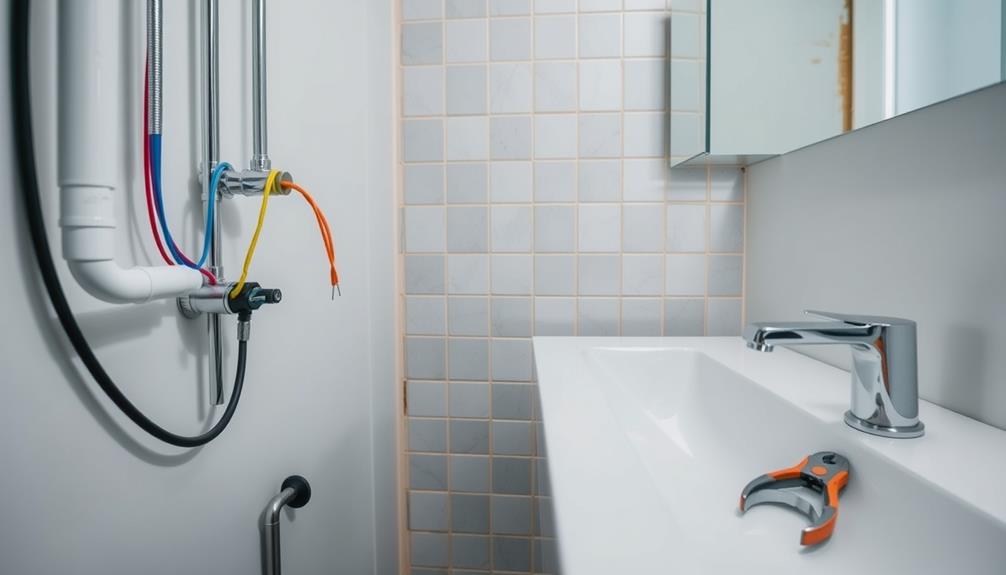
Steering plumbing and electrical work is vital for a successful bathroom remodel. Start with the plumbing rough-in phase by installing the new shower pan or tub to guarantee proper drainage and alignment with existing plumbing lines.
It's important to have a clear budget for this phase to avoid overspending, as proper planning can lead to better financial health. Replace shower controls and extend the water line for any additional fixtures, making sure everything's compatible with your new installations and the existing system.
Next, focus on electrical wiring. Upgrade your circuits by replacing 15-amp circuits with 20-amp circuits to support modern appliances and fixtures, especially in areas that need more power.
It's essential to install GFCI outlets near water sources for enhanced safety and to prevent electrical hazards in wet areas of the bathroom.
Don't forget about light switches! Relocate them and add new lighting hookups to improve functionality and accessibility.
Confirm that all your electrical work complies with local building codes to avoid any issues down the line. By carefully managing these aspects, you'll lay a solid foundation for your bathroom renovation, guaranteeing that your space is both safe and highly functional.
Tiling and Installation
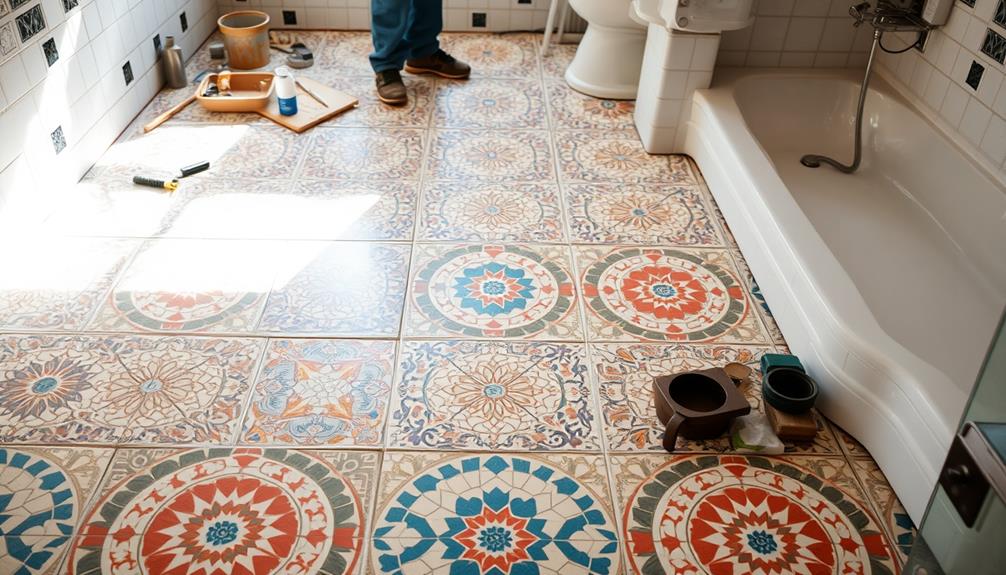
When choosing tiles for your bathroom, consider size and material to guarantee both functionality and style.
Selecting tiles that are resistant to moisture and easy to clean can greatly enhance your bathroom experience, making it more efficient and enjoyable.
Additionally, opting for energy-efficient appliances can complement your bathroom remodel by promoting sustainability in your home.
Once you've laid the tiles, mastering grouting techniques will enhance the overall look and durability of your installation.
Let's explore these key aspects to achieve a stunning finish.
Tile Selection Considerations
Selecting the right tiles for your bathroom remodel can greatly impact both functionality and design. When considering tile selection, keep these key points in mind:
1. Tile Size: Use small tiles for shower floors. They accommodate drainage gradients effectively, ensuring water flows smoothly.
Large format tiles can be a stunning choice for shower walls, but remember they require careful handling and may need two people during installation. Incorporating a well-thought-out design concept can enhance the overall experience of your remodel, as mood boards essential for visualizing design concepts can help you choose tile styles that resonate with your vision.
2. Waterproofing: Always apply a waterproofing membrane, like RedGard, to wall tiles in wet areas. This protects against moisture damage and prolongs the life of your tiles.
3. Grout Color and Trim: Choose your grout color and trim carefully. A well-chosen grout can enhance the overall aesthetic and contribute to a cohesive design, tying everything together beautifully.
In addition, consistently mixing and quickly applying thin-set mortar is vital for a strong bond between the tiles and substrates.
Grouting Techniques and Tips
Grouting tiles is an essential step in your bathroom remodel that can greatly affect both aesthetics and durability. Before you start grouting, make sure the thin-set mortar has fully cured, typically waiting 24 to 48 hours.
It's also important to take into account the flushing mechanisms of your new toilet, as modern options like the Dual-Flush Toilet System can complement your bathroom upgrade by promoting water efficiency.
For the actual grouting process, use a rubber float, holding it at a 45-degree angle to firmly press the grout into the joints while removing excess from the tile surface.
Choose the right type of grout based on joint width; sanded grout is ideal for joints wider than 1/8 inch, especially when working with natural stone.
After you've applied the grout, allow it to set for about 15 to 30 minutes before using a damp sponge to clean the tile surface and eliminate any grout haze.
Once the grout has fully cured, usually after 72 hours, it's vital to seal the grout lines with a grout sealer. This step protects against moisture and staining, ensuring your tile work remains beautiful and durable for your shower enclosure and beyond.
With these finishing touches, your bathroom won't only look great but also stand the test of time.
Finishing Touches
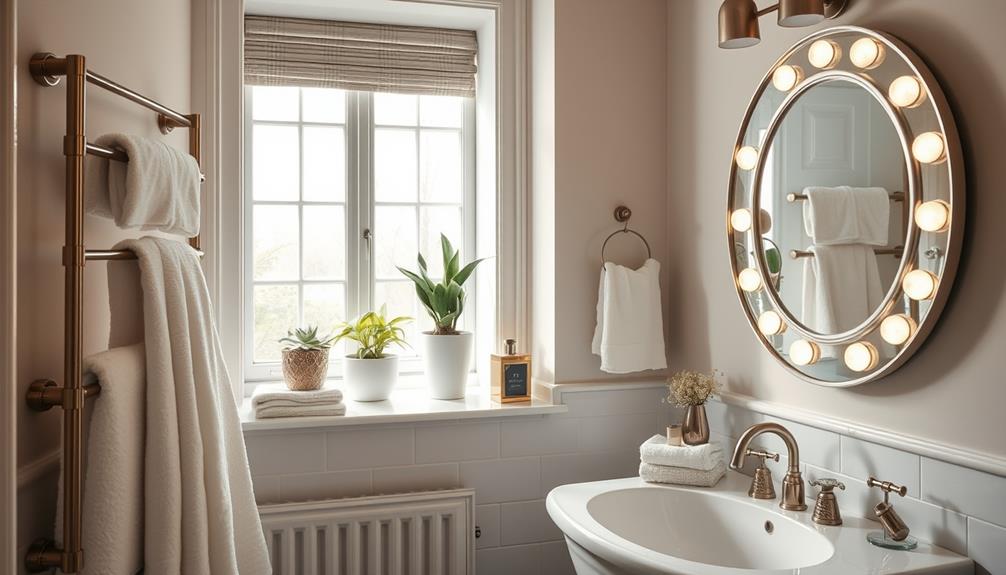
Now that you've tackled the major installations, it's time to focus on the finishing touches that make your bathroom shine.
Choose decor and accessories that enhance your design theme, such as selecting energy-efficient lighting options to reduce long-term costs.
Consider integrating smart devices for added convenience, like a programmable shower system for optimized water usage energy-efficient models.
These final details won't only elevate the space but also reflect your personal style.
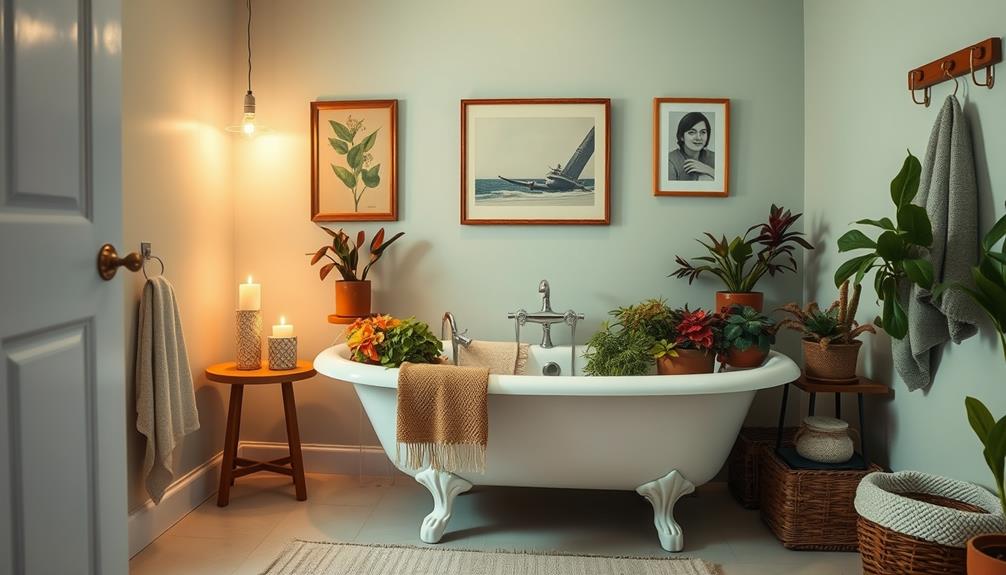
Decor and Accessories
As you put the finishing touches on your bathroom remodel, choosing the right decor and accessories can truly elevate the space.
Start by selecting items that complement your color scheme and enhance the overall aesthetic. Incorporating elements like farmhouse bathroom features can add charm and character to your design.
Here are three key elements to evaluate:
- Rugs and Towels: Choose stylish and comfortable bath rugs and towels that align with your design vision. Their colors and patterns should reflect the overall look you want to achieve.
- Functional Accessories: Incorporate practical items like towel bars, soap dishes, and trash cans. These accessories not only add utility but also maintain a cohesive design throughout your bathroom.
- Personal Touches: Add unique decorative accents or framed photos to create a warm atmosphere. These personal touches make the space feel inviting and truly yours.
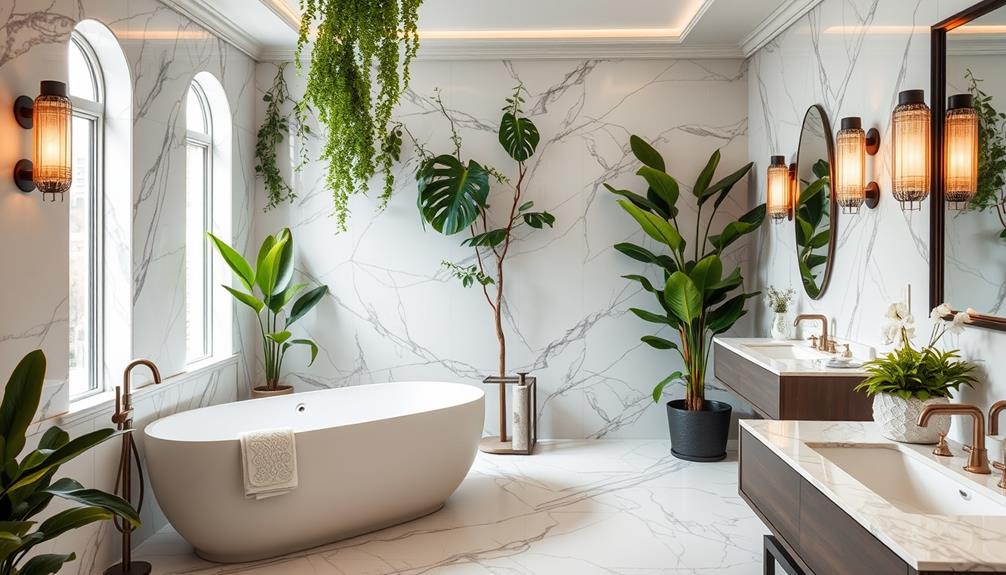
Don't forget to include living plants that thrive in low-light conditions. They enhance beauty while improving air quality, bringing a natural element into your bathroom.
Smart Device Integration
While you may have focused on the aesthetics of your bathroom remodel, integrating smart devices can greatly enhance its functionality and convenience.
Start with a smart shower system that allows you to control the temperature and schedule your showers through a mobile app, making each experience more comfortable. Additionally, consider exploring music production essentials for inspiration on how to optimize your space for creativity and relaxation.
Next, consider smart lighting solutions like voice-activated LED fixtures, which let you adjust brightness and color based on your mood or the time of day.
Don't forget about smart mirrors; these multifunctional devices can display news updates, weather forecasts, and even connect to your Bluetooth, transforming your bathroom into a tech-savvy space.
Installing smart faucets with touchless technology helps reduce water waste and promotes hygiene by minimizing contact with surfaces.
Lastly, explore smart ventilation fans that automatically adjust based on humidity levels. This feature not only improves air quality but also helps prevent mold and mildew growth, keeping your bathroom fresh and healthy.
Personalizing Your Space
Personalizing your bathroom can transform it into a space that truly reflects your style and meets your needs. When you focus on unique touches, like those found in DIY Fire Pit Ideas, you'll create an inviting atmosphere that feels like home.
Here are three ways to add that personal flair:
- Choose Decor Items: Select rugs, mirrors, and new fixtures that align with your color scheme. This cohesion enhances your home decor and creates a pleasant environment.
- Incorporate Living Plants: Adding greenery brings life to your bathroom. Research plants that thrive in low-light conditions to keep your space fresh and vibrant.
- Add Personal Touches: Custom artwork or unique shelving can showcase your personality. Consider integrating small vanities or decorative bath accessories like stylish soap dishes and towel holders to elevate the space.
Frequently Asked Questions
In What Order Should You Renovate a Bathroom?
You should start by removing fixtures, then tackle plumbing and electrical work. After that, install drywall and paint, lay down flooring, and finally, add fixtures and accessories to complete your renovation effectively.
How to Remodel a Bathroom Step by Step?
Picture a blank canvas; you'll start by evaluating your bathroom's layout and envisioning your design. Demolish old elements, install plumbing and flooring, then finish with fixtures and decor, ensuring everything meets your style and safety standards.
Can You Remodel a Bathroom Yourself?
Yes, you can remodel a bathroom yourself. With careful planning, essential skills, and the right tools, you’ll tackle the project successfully. Just be ready to invest time and effort for the best results. When planning your DIY bathroom remodel, there are a few key bathroom remodeling tips to keep in mind. Make sure you have a clear vision of what you want the finished product to look like and create a detailed plan for each step of the project. Additionally, be sure to familiarize yourself with basic plumbing and electrical skills, as these will likely come into play during the remodel.
What Are the Steps When Renovating a Bathroom?
Renovating requires revealing, redesigning, and refining. Start by sketching your dream layout, then prep for demolition. Focus on fixtures, finish with paint, and finalize with decor to create a delightful, dynamic bathroom space.
Conclusion
Now that you've transformed your bathroom from a dated space to a modern oasis, take a moment to appreciate the journey. From the chaos of demolition to the precision of tiling, each step contrasts with the serene escape you've created. The fresh paint and stylish fixtures stand in stark relief against the memories of the old. With every personal touch, your bathroom isn't just a functional room anymore; it's a reflection of you, a sanctuary amid life's hustle.