Interior Design
How to Get Bathroom Remodeled
Navigate the essentials of bathroom remodeling, from planning and budgeting to installation, and discover the key steps that can transform your space.
To get your bathroom remodeled, start by evaluating its current layout and identifying needed updates, like outdated fixtures or storage issues. Create a vision by gathering design inspiration and sketching out ideas. Next, plan a realistic budget, which typically ranges from $6,127 to $15,383, and set a clear timeline. Once you're ready, prepare for demolition by clearing the space and turning off utilities. After that, focus on proper plumbing and electrical installation. Finally, install your finishes and personalize the space to reflect your style. There's plenty more to contemplate for a successful remodel.
Key Takeaways
- Assess your current bathroom layout and identify specific needs and desired amenities for your remodel.
- Create a detailed budget, considering typical costs and adding a contingency fund for unexpected expenses.
- Consult with remodeling contractors to discuss design ideas, feasibility, and obtain quotes for the project.
- Prepare your space by clearing the bathroom and turning off electricity and water before demolition begins.
- Select durable finishes and fixtures that align with your aesthetic while ensuring compliance with local building codes.
Assessing Your Bathroom Needs
When evaluating your bathroom needs, what aspects of the space feel outdated or inefficient? Start by examining your current layout.
Look for specific issues, like outdated fixtures and inadequate storage, that hinder functionality. You might find that certain design options could vastly improve your experience. Understanding your unique style can also guide your remodeling choices, as exploration of personal tastes reveals what resonates with you.
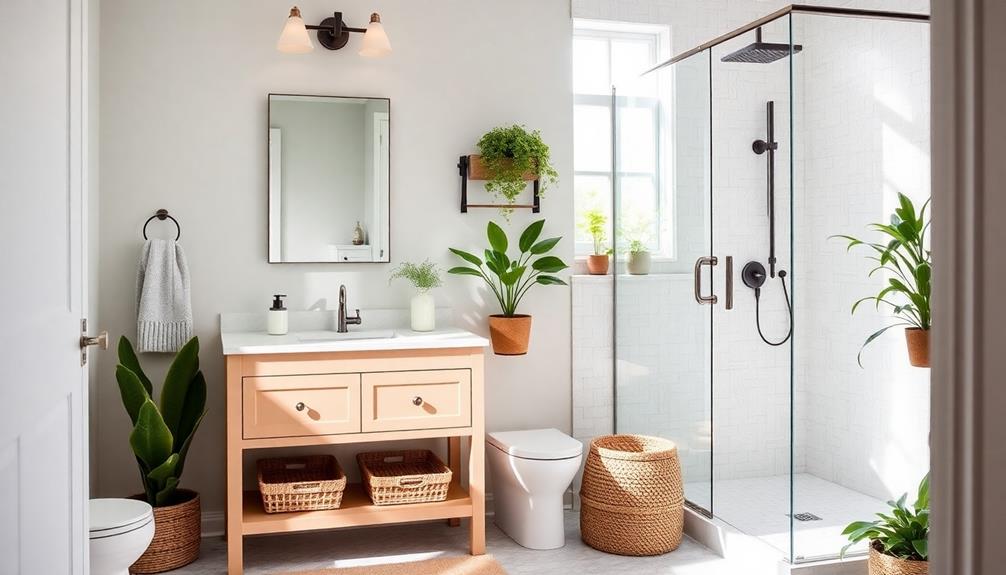
Consider the amenities you desire, such as a soaking tub or a walk-in shower. Are these features feasible within your existing layout? It's crucial to identify any structural requirements that heavy installations might demand.
This is where consulting with experienced remodeling contractors can be invaluable, as they can provide insight into what's possible.
Next, gather inspiration from platforms like Pinterest to visualize the changes you want in your bathroom renovation. Identify fixtures and materials that resonate with your vision.
As you compile your ideas, think about how these choices will enhance not just the look but also the usability of your space.
Creating a Vision and Design
Creating a vision and design for your bathroom remodel is an exciting opportunity to transform your space into a personal sanctuary. Start by evaluating your current bathroom layout and identifying any changes you want. It's wise to consult with a general contractor to understand plumbing and layout feasibility.
Consider exploring options like customizable shapes for fixtures to guarantee they fit your vision perfectly.
Sketch your ideal bathroom design, incorporating desired amenities like a soaking tub or walk-in shower. This visualization will help facilitate discussions with your contractor.
Don't forget to explore design inspirations on platforms like Pinterest or visit local home improvement stores to gather ideas that resonate with your vision.
As you refine your design, identify specific changes you'd like to make in the space. Consider relocating fixtures or addressing wasted areas while keeping existing positions for a more cost-effective solution.
Be mindful of potential material shortages, especially for items like glass shower enclosures, and have a backup plan ready.
Planning the Budget and Timeline
When you're planning your bathroom remodel, establishing a realistic budget is key to keeping your project on track.
You'll need to take into account not just the costs of materials and labor, but also potential unexpected expenses that can arise.
It's also important to set savings goals to guarantee you have adequate funds available for your project a clear budget plan.
Setting a clear timeline for project completion will help you manage these factors effectively and avoid unnecessary delays.
Establishing a Realistic Budget
Establishing a realistic budget for your bathroom remodel is essential to guarantee the project runs smoothly and stays within financial limits. Start by calculating all potential remodeling costs, including materials, tools, and contractor fees. Average bathroom remodel costs typically range from $6,127 to $15,383, but can exceed $30,000 for more extensive renovations.
Consider additional expenses such as design fees, permit requirements, and potential lost income if you need time off work. Unforeseen issues often arise, so it's wise to set aside a buffer for unexpected costs.
Here's a breakdown to help visualize your budget:
Expense Category | Estimated Cost |
---|---|
Materials | $2,000 – $5,000 |
Contractor Fees | $1,500 – $7,000 |
Plumbing Work | $500 – $2,000 |
Permit Requirements | $100 – $500 |
Buffer for Unexpected Costs | $1,000 – $3,000 |
Timeline for Project Completion
Typically, a bathroom remodel timeline can range from a few days for simple updates to several months for extensive renovations. When planning your project, consider the complexity of the remodeling tasks involved. If you're making significant changes, like moving plumbing or electrical work, you'll need to allocate more time.
Additionally, just as with IRA rollovers to gold, careful planning and timing can help avoid delays and guarantee a smoother process. Material lead times can also impact your timeline, so ordering materials weeks in advance is essential. This way, you can avoid delays that could push your project back.
As you work with your contractor, guarantee you schedule tasks in a logical sequence, accounting for inspections and compliance with local codes. Be mindful of your budget, as the average bathroom remodel costs around $10,753, with a range of $6,127 to $15,383.
A well-planned timeline should align with your financial constraints, helping you avoid unnecessary stress. Additionally, don't forget to build in buffer time for unforeseen issues, like hidden damages discovered during demolition, which can extend your project timeline.
Managing Unexpected Expenses
Unexpected expenses can quickly derail your bathroom remodel, so it's crucial to plan your budget carefully. Start by establishing a detailed budget that includes all potential costs like materials, labor, and permits.
Don't forget to add a contingency fund of 10-20% to cover unexpected expenses that may arise during the renovation project. Additionally, consider researching cold medications overview to understand how unexpected health issues could impact your remodeling process.
Remember, plumbing changes or hidden damages, such as water damage, can surface during demolition, leading to additional costs. Research average bathroom remodel costs to get a clearer picture; small updates typically range from $3,500 to $7,000, while extensive renovations can exceed $30,000.
As you work with your contractor, schedule regular check-ins to review the budget and timeline. This way, you can address any changes or unexpected costs promptly, preventing financial strain down the road.
Be prepared for potential delays in the timeline due to material shortages or unforeseen structural issues, which can extend the project duration and increase costs.
Preparing for Demolition
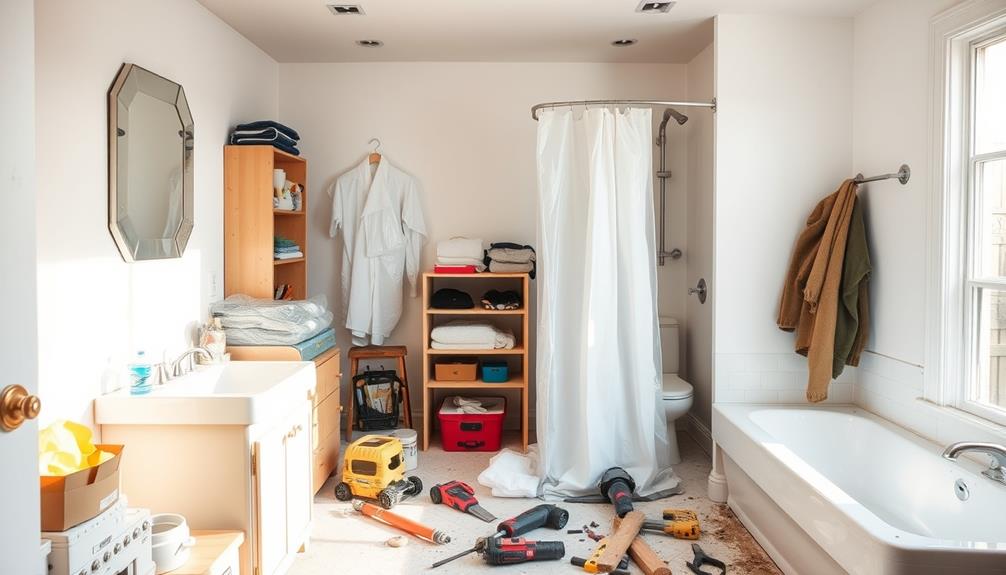
Preparing your bathroom for demolition requires careful planning and organization. Start by clearing the space of all accessories and non-fixed objects. This guarantees a clear workspace and protects items you want to keep.
Next, turn off the electricity at the main breaker box and shut off the water supply. This step is vital to avoid leaks and electrical hazards during the demolition process. Additionally, consider the energy efficiency of any new appliances or fixtures you plan to install, as energy-efficient appliances can greatly lower overall energy consumption in your home.
If you're replacing fixtures, store them securely and cover any items that will remain in the bathroom. Protecting these fixtures from dust and debris is essential.
If your remodel involves removing the toilet, identify load-bearing walls and plug waste pipes to maintain structural integrity and prevent plumbing issues.
Executing Plumbing and Electrical Work
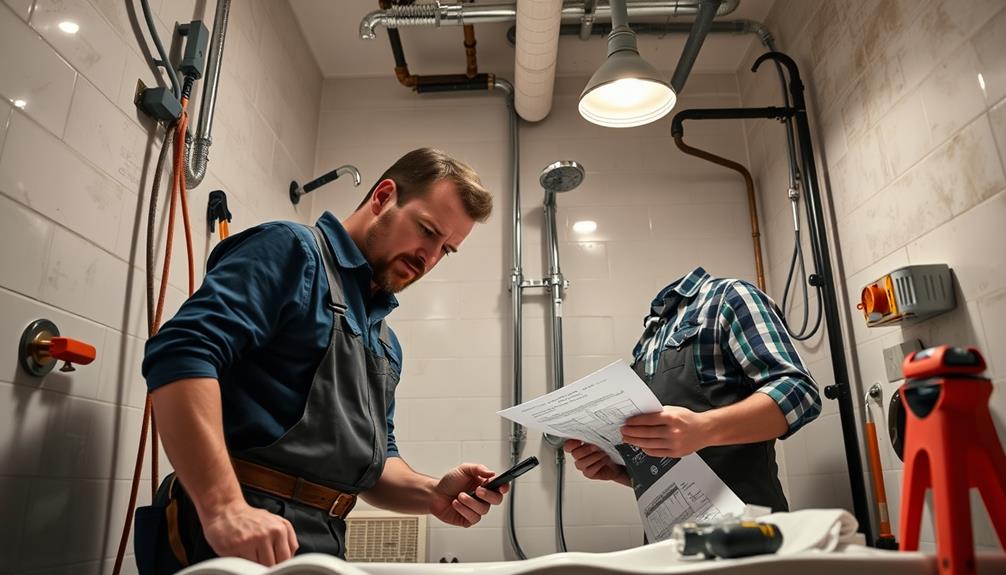
When executing plumbing and electrical work, you need to focus on the rough-in phase, ensuring your new shower pan or tub is properly installed and sealed.
The importance of safety during this phase can't be overstated, as improper installations can lead to costly damages and safety hazards.
Additionally, a functioning security system in your home, such as home security systems, can provide peace of mind while renovations are underway.
You'll also want to replace any outdated wiring with 20-amp circuits and install GFCI outlets near water sources for safety.
Plumbing Rough-In Phase
During the plumbing rough-in phase, you'll tackle the important tasks of executing plumbing and electrical work to lay a solid foundation for your bathroom remodel.
First, focus on the installation of new shower pans or tubs, making sure they align properly with existing plumbing lines for efficient water flow. If you're adding new plumbing fixtures, your water lines may need to be replaced or rerouted, which is essential for ideal performance.
Additionally, maintaining good air quality during the remodeling process is significant, so consider using an air purifier to help reduce dust and allergens in the space air purifier maintenance dos.
On the electrical side, replace any 15-amp wiring with 20-amp circuits to accommodate additional appliances. It's also crucial to install GFCI outlets near water sources to enhance safety.
Don't forget about vent fans; placing them correctly is key to reducing humidity levels. These fans should be installed according to local building codes for proper ventilation.
Before you proceed, remember that all plumbing and electrical installations require inspection and approval from local authorities.
Obtaining the right building permits is important, as they guarantee your project complies with local regulations. If you're unsure about the specifics, consider consulting a contractor who'd guide you through the necessary steps.
Electrical Circuit Requirements
One of the key aspects of your bathroom remodel is confirming the electrical circuit requirements are met for safety and functionality.
You'll need to replace any existing 15-amp wiring with 20-amp circuits to support modern appliances and fixtures. This upgrade is vital to prevent overloading and guarantee reliable power. Additionally, installing GFCI outlets near water sources like sinks and tubs is important for protection against electrical shock.
It's significant to take into account integrating energy-efficient solutions, such as a high-performance heat pump, which can greatly enhance your bathroom's comfort while keeping energy costs in check.
Proper electrical planning involves relocating light switches and enhancing lighting hookups to improve both safety and functionality in your bathroom space.
Make sure all electrical work complies with local building codes, as these regulations may require you to obtain permits and inspections for new circuits and outlets.
To certify that your electrical system is safe and meets all necessary safety standards, always hire a licensed electrician for any installations.
Their expertise not only helps you avoid costly mistakes but also guarantees your remodel adheres to all legal requirements.
GFCI Outlet Installation
To guarantee your bathroom is safe and up to code, installing GFCI outlets is an essential step in your remodel. GFCI outlets protect against electrical shock by cutting off power when they detect a ground fault, making them vital near any water source. The National Electrical Code mandates these outlets in bathrooms, securing compliance with safety regulations.
Additionally, implementing proper safety measures during installation, such as boosting card payment security, can enhance your overall project management.
To install a GFCI outlet, first, turn off the circuit breaker to avoid any risk. Remove the existing outlet and connect the black (hot) wire to the brass terminal, the white (neutral) wire to the silver terminal, and the ground wire to the green terminal. Position the GFCI outlet within 6 feet of the sink or any water source to minimize hazards.
Once you've installed the GFCI outlet, it's essential to test it. Use the "Test" and "Reset" buttons on the outlet to verify it's functioning properly. This step confirms that you've successfully created a safer environment in your bathroom, reducing the risk of electrical shock and complying with necessary safety standards.
With your GFCI outlet installed, you'll have peace of mind while enjoying your newly remodeled space.
Installing Finishes and Fixtures
Installing finishes and fixtures is a critical step in your bathroom remodeling project that can greatly enhance both functionality and aesthetics. To guarantee a successful installation, follow these key steps:
- Start with moisture-resistant paint on the walls to protect against humidity and achieve a clean look.
- Choose durable flooring materials like ceramic tile or luxury vinyl. These options resist moisture and provide slip resistance for safety.
- Install the bathroom vanity, sink, and toilet after laying the flooring. This approach guarantees a level fit, and don't forget to use a wax ring for a watertight seal under the toilet.
- Confirm proper placement of plumbing fixtures and secure connections during installation. This prevents leaks and ensures your fixtures and finishes function correctly.
When you're renovating a bathroom, taking the time to carefully install these elements won't only improve the overall look but also enhance the longevity of your space.
Prioritize durable materials for countertops, as they serve as a focal point and require meticulous placement. By following these steps, you'll create a stylish and functional bathroom for years to come.
Personalizing Your Space
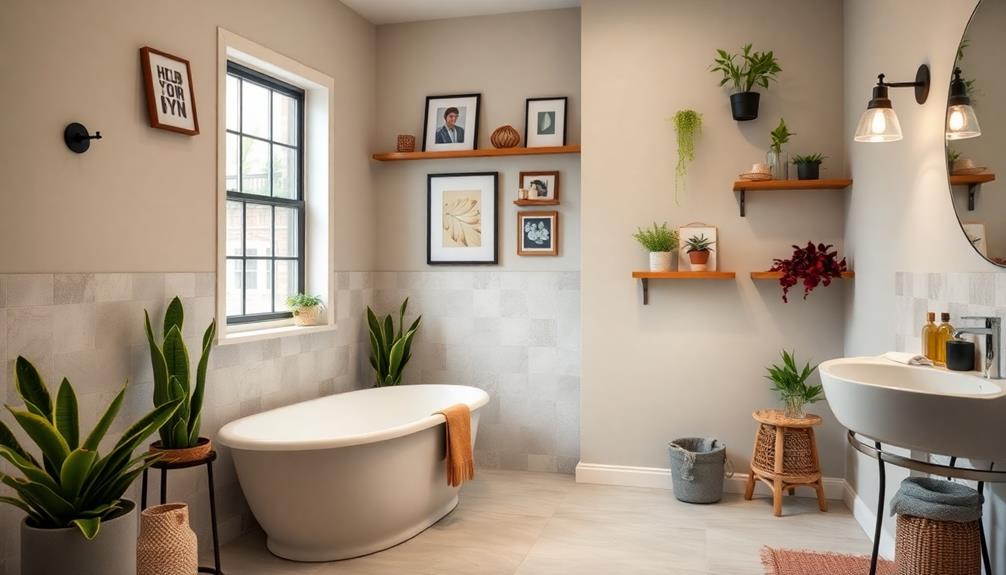
While remodeling your bathroom, personalizing your space is essential to create an environment that reflects your style and meets your needs. Start by selecting decor items like mirrors, rugs, and wall art that resonate with your aesthetic. These elements can transform your bathroom into a unique and inviting sanctuary.
Don't overlook the importance of colors. Choosing a color scheme that speaks to you—whether calming neutrals or vibrant accents—can dramatically change the room's ambiance.
Additionally, high-quality hardware and faucets not only enhance functionality but also tie your design together for a cohesive look.
Incorporating smart devices, such as automated lighting or temperature controls, can boost both comfort and convenience. Imagine adjusting the lighting for a relaxing soak or warming up the room on a chilly morning with just a touch.
Lastly, consider adding living plants. They improve air quality and bring a touch of nature indoors. Opt for low-light varieties that thrive in your bathroom's typically dim environment.
Frequently Asked Questions
How Much Should You Spend on a Bathroom Remodel?
You should budget between $6,000 to $25,000 for a bathroom remodel, depending on the scale and quality of updates you want. Consider your needs and preferences to find the right balance between cost and value.
What Is the Correct Order to Remodel a Bathroom?
Remodeling a bathroom's like building a rocket! First, plan your layout, then secure permits. Next, demolish the old space, install plumbing and electrical systems, and finish with tiling and fixtures. Quality checks are essential!
What Is the Most Expensive Part of a Bathroom Remodel?
The most expensive part of a bathroom remodel usually involves plumbing and electrical work. These costs can quickly add up, especially if you're opting for high-end finishes or making significant layout changes.
What Is the First Step in Renovating a Bathroom?
You've probably daydreamed about a fresh space. The first step in renovating is to assess your current layout. Identify necessary changes to enhance functionality and design, setting the stage for a successful transformation.
Conclusion
Remodeling your bathroom isn't just about aesthetics; it's a chance to enhance your daily life. By thoughtfully evaluating your needs and planning each step, you're creating a space that reflects you. Remember, the true value lies in how it improves your routine and comfort. So, as you personalize your space, recognize that each choice contributes to a sanctuary that revitalizes your spirit. Embrace the journey, and let your bathroom become a reflection of your unique style and needs.
Interior Design
Transform Your Space Into a Tranquil Spa Oasis
With simple enhancements and thoughtful design, you can create a serene spa oasis at home that invites relaxation and rejuvenation. Discover how to start!
You can transform your space into a tranquil spa oasis by selecting a secluded area that gets plenty of natural light. Create comfort with cozy seating and use calming colors like soft blues and neutrals. Incorporate durable natural materials like wood and stone to enhance the warmth. Adding water features, such as fountains or small ponds, will bring soothing sounds and visuals. Layer your lighting for peaceful ambiance, and consider including luxurious facilities like steam rooms. With a little creativity, you'll design a serene retreat, and there's so much more to discover about enhancing your spa experience.
Key Takeaways
- Choose a secluded area with lush greenery and natural light for a serene and inviting atmosphere.
- Incorporate calming colors like soft blues and neutral tones to promote relaxation.
- Add water features, such as fountains or ponds, to enhance tranquility with soothing sounds.
- Select durable, natural materials for furniture and decor to create warmth and comfort.
- Utilize versatile lighting options, including dimmable LEDs, to adjust ambiance for relaxation.
Choosing the Perfect Location
When you're transforming your space into a spa oasis, the location plays an essential role in setting the mood.
You'll want to choose a secluded area, shielded from public view, to enhance tranquility. Look for spots that let in natural light; it reduces your reliance on artificial lighting and creates a warm atmosphere.
Accessibility is vital—make sure your oasis is easy to reach while still feeling private. Incorporate pathways that guide guests seamlessly, perhaps through a garden or lush greenery.
If you're feeling adventurous, consider adding outdoor features like a gym or bar to promote wellness and social interactions.
Ultimately, a well-thought-out location will be the foundation of your serene retreat.
Designing for Privacy and Comfort
Creating a sense of sanctuary is essential for designing a spa oasis that prioritizes privacy and comfort. Start by selecting a secluded location, surrounded by lush greenery or privacy screens to shield your space from prying eyes.
Incorporate cozy seating arrangements that invite relaxation, like plush lounge chairs or hammocks, enhancing your comfort. A balanced diet rich in fruits and vegetables can also contribute to your wellness, allowing you to fully enjoy your tranquil space healthy lifestyle tips.
Use natural materials for furniture and décor to foster a sense of warmth and tranquility. Pathways lined with plants can guide you seamlessly to your spa area, creating a serene journey.
Additionally, consider sound features, like gentle water fountains, to drown out noise and promote peacefulness. By focusing on these elements, you'll create a nurturing environment that feels both intimate and rejuvenating.
Creating a Calming Color Palette
Establishing a calming color palette is essential for transforming your spa into a serene retreat. Start by choosing soft blues and tranquil greens, which evoke feelings of peace and relaxation.
Neutral tones like gentle greys and beiges can create a soothing backdrop, allowing other design elements to shine without overwhelming the senses.
Paint your walls in these calming hues, and consider matching tiles or accessories to maintain visual harmony. Use accent colors sparingly to enhance the ambiance without disrupting the tranquility.
Lighting also plays a significant role; warm, soft light complements your chosen colors beautifully. By thoughtfully selecting and coordinating your colors, you'll create a harmonious environment that encourages relaxation and rejuvenation.
Selecting Durable Materials
Selecting durable materials is key to ensuring your spa remains both beautiful and functional over time.
Focus on natural materials like stone, ceramic, or porcelain, as they withstand humidity and resist wear. Incorporate water-resistant elements to combat moisture, which is essential in a spa environment.
Consider integrating wood for its warmth and opulence, enhancing the overall aesthetic appeal. Remember, luxury doesn't have to sacrifice durability; choose materials that offer both beauty and resilience.
Opt for finishes that are easy to clean and maintain, ensuring your spa stays inviting and fresh.
Incorporating Water Features
Enhancing your spa oasis with water features can markedly elevate the atmosphere, adding both visual appeal and soothing sounds.
Consider installing a decorative fountain to create a focal point while drowning out background noise. The gentle trickle of water can help you relax and unwind.
You might also explore a small pond or a bubbling brook to bring nature closer to your space. Incorporating vibrant plantings around these features further enhances the sensory experience, making your oasis feel lush and inviting.
If space allows, a hot tub surrounded by water elements can provide a luxurious retreat.
Enhancing Ambiance With Lighting
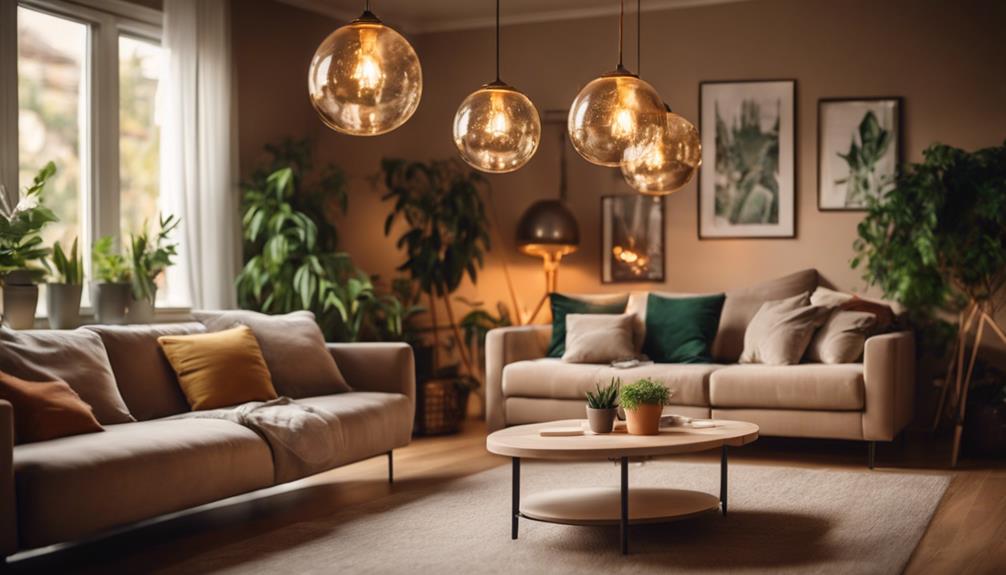
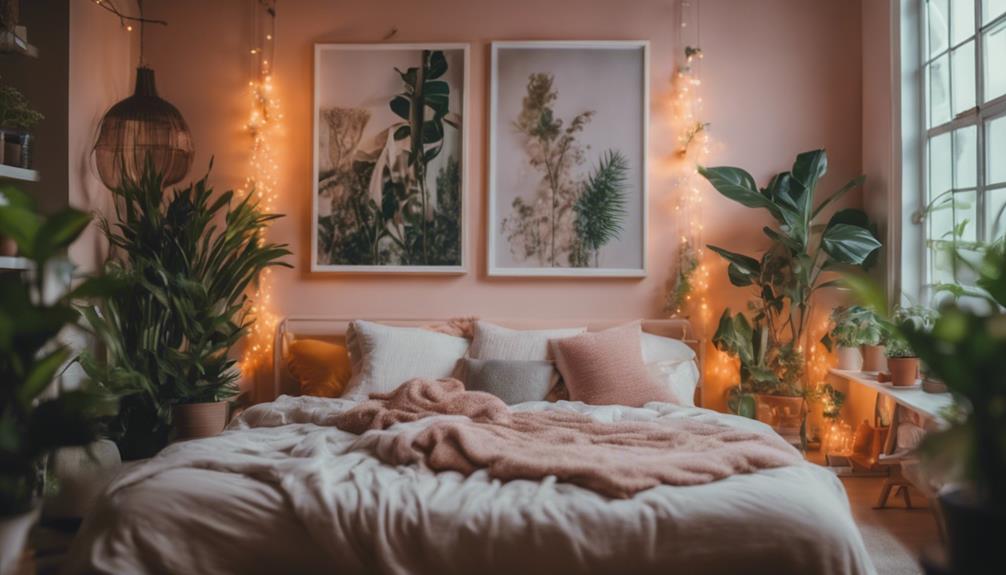
Creating the right ambiance with lighting can transform your spa oasis into a serene retreat. Consider investing in versatile lighting options that enhance relaxation. Dimmable LED lights let you adjust brightness, while natural light brings warmth during the day. Layered lighting, like sconces and floor lamps, adds depth to your space.
Lighting Type | Purpose |
---|---|
Dimmable Lights | Customizable ambiance |
String Lights | Soft, inviting glow |
Natural Light | rejuvenating and uplifting |
Incorporate cozy seating with ambient lighting to create inviting corners. By thoughtfully selecting your lighting, you'll cultivate a tranquil atmosphere that encourages relaxation and rejuvenation.
Installing Luxurious Spa Facilities
When you install luxurious spa facilities, you elevate the entire experience for your guests. Consider incorporating opulent interiors, where every detail enhances comfort and intimacy.
Think of adding steam rooms and saunas, providing relaxation and detoxification opportunities. A wellness center with yoga classes and personalized programs will cater to diverse needs, ensuring your guests feel valued and rejuvenated.
Don't forget about the treatment rooms; adorn them with unique amenities that create a personalized touch. Invest in plush furnishings and soothing color schemes to foster tranquility.
Embracing Sustainability and Culture
Sustainability and cultural appreciation are essential components in designing a spa that resonates with today's eco-conscious clientele. You can integrate eco-friendly materials like bamboo and reclaimed wood, ensuring your space reflects a commitment to the environment.
Embrace local artistry by showcasing handcrafted decor that tells a story, connecting guests to the region's heritage. Incorporating plants native to your area not only enhances aesthetics but also supports local biodiversity.
Consider energy-efficient lighting and water-saving fixtures to minimize your ecological footprint. By creating a tranquil oasis that honors both sustainability and culture, you'll provide an enriching experience where guests can unwind while feeling good about their choices.
This mindful approach will elevate your spa's appeal and foster a deeper connection with your clientele.
Frequently Asked Questions
How Can I Maintain My Spa's Tranquility in Busy Seasons?
To maintain your spa's tranquility during busy seasons, prioritize soundproofing, schedule quiet hours, and create serene spaces. Use calming scents and soft lighting to enhance relaxation, ensuring guests always feel at peace despite the hustle.
What Are the Best Plants for a Spa Environment?
For a spa environment, choose plants like lavender, peace lilies, and bamboo. They purify the air, add calming scents, and enhance relaxation. Make sure you care for them properly to maintain their beauty and benefits.
How Often Should I Refresh My Spa Decor?
You should refresh your spa decor every six to twelve months. This keeps the environment feeling fresh and inviting, allowing you to adapt to seasonal changes and maintain a calming atmosphere that promotes relaxation.
What Scents Promote Relaxation in a Spa Setting?
Imagine drifting on a gentle breeze, where lavender, chamomile, and eucalyptus dance in the air. You'll find these scents embrace you, calming your mind and inviting tranquility, perfect for creating a serene spa atmosphere.
How Can I Ensure Proper Ventilation in My Spa?
To guarantee proper ventilation in your spa, install exhaust fans, utilize windows for fresh air, and consider air purifiers. Regularly check filters and maintain systems to promote a healthy, comfortable atmosphere for relaxation.
Conclusion
So, go ahead, transform your space into a spa oasis—because who needs a vacation when you can just slap a few candles and a water feature in your living room? Forget the stress of travel; just indulge in your own personal paradise, complete with plush towels and a questionable number of potted plants. Remember, if you can't escape reality, you might as well decorate your way out of it. Now, let the relaxation (and imaginary vacation) begin!
Interior Design
Is Your Ceiling Fan a Falling Hazard
Not sure if your ceiling fan is safe? Discover crucial tips to ensure it remains securely installed and functional for your peace of mind.
Your ceiling fan can definitely be a falling hazard if it's not installed or maintained properly. Make certain you're following the manufacturer's installation guidelines and securing it to a sturdy ceiling joist. Regularly check for loose screws, unusual noises, or wobbling, as these can indicate instability. Confirm your fan is appropriate for the room size, and inspect it for wear at least twice a year. If you're unsure about its condition or installation, consider hiring a professional. Knowing how to spot potential issues can help you keep your fan safe and functional. Curious about more tips?
Key Takeaways
- Securely install the ceiling fan by following manufacturer guidelines to prevent it from becoming a falling hazard.
- Regularly inspect and maintain the fan for wear signs, such as wobbling or unusual noises that may indicate instability.
- Ensure the fan is mounted on a sturdy ceiling joist to provide adequate support and reduce the risk of falling.
- Use appropriate screws or bolts and consider a ceiling fan mounting kit for added stability during installation.
- Hire a professional for installation and maintenance if unsure, ensuring compliance with safety standards and local codes.
Installation Guidelines
When installing a ceiling fan, it's vital to follow the manufacturer's instructions closely to guarantee safety and functionality.
Start by selecting a sturdy ceiling joist, as this will provide the necessary support for your fan. Secure the mounting brackets tightly to the joist using appropriate screws or bolts to ensure stability. Consider using a ceiling fan mounting kit for added support.
Before connecting the electrical wiring, double-check all connections to make certain they're correct and secure. High-quality fans are designed to minimize wobbling, so choose one that's built for durability.
If you're unsure about any step, don't hesitate to hire a professional for installation. Proper installation is critical to avoid potential hazards down the line.
Maintenance Practices
Proper installation sets the stage for effective maintenance practices that keep your ceiling fan running safely and efficiently.
To prevent potential hazards, regularly check and clean the fan blades and motor to eliminate dust buildup, as this can enhance airflow and improve overall efficiency, leading to lower energy bills.
You should tighten screws and connections every few months to guarantee everything remains secure. Look out for any signs of instability, like unusual noises or wobbling, and address these issues promptly.
Aim to inspect your fan at least twice a year for any damage or wear.
Remember, lubricating moving parts and balancing the blades are vital tasks that enhance performance and longevity.
Factors Affecting Stability
Several factors influence the stability of your ceiling fan, directly impacting its safety and performance.
Understanding these elements can help you maintain a secure installation and prevent accidents.
Here are some key considerations:
- Installation quality: Verify your fan is correctly mounted to a sturdy ceiling joist.
- Age and wear: Regularly inspect your fan for signs of deterioration that could compromise stability.
- Vibration issues: Worn components can lead to excessive movement and instability during operation.
- Environmental conditions: High temperatures and humidity can stress motors and affect overall fan performance.
Identifying Failures
Identifying potential failures in your ceiling fan is essential for ensuring safety and preventing accidents. Common issues arise from improper installation or worn-out motor components.
If you notice unusual noises, it could signal loose parts or misalignment. Wobbling during operation is another red flag indicating potential instability. It's vital to address these issues early to mitigate risks.
Overloading the fan or exceeding weight limits can stress the unit, leading to malfunction. Also, keep an eye on fan speed settings; high speeds can increase instability.
Regularly monitoring your ceiling fan for these warning signs will help you maintain its functionality and safety, ensuring it remains a reliable fixture in your home.
Safety Precautions
Taking safety precautions with your ceiling fan is essential for preventing accidents and ensuring smooth operation. By implementing a few simple measures, you can enhance safety and prolong the fan's lifespan.
Here are some important precautions to contemplate:
- Follow manufacturer guidelines for installation and maintenance.
- Regularly inspect the fan for signs of wear, such as wobbling or unusual noises.
- Ensure proper clearance around the fan, especially in low-ceiling areas.
- Use fans appropriate for your room size to prevent instability.
User Awareness
User awareness plays an essential role in maintaining ceiling fan safety and performance. You should familiarize yourself with safe operation practices, including following the manufacturer's guidelines for installation and usage.
Always verify your ceiling fan's size is appropriate for the room to prevent instability. Regularly inspect the fan for signs of wear, such as unusual noises or wobbling, which could indicate loose components.
Be mindful of environmental factors like humidity, as they can impact the fan's performance. Additionally, understanding the potential hazards associated with ceiling fans, such as overloading or exceeding weight limits, is vital.
Professional Assistance
Hiring a professional for ceiling fan installation and maintenance can greatly enhance safety and performance. Their expertise guarantees that your fan is installed correctly and operates smoothly, reducing the risk of accidents.
Here are some key benefits of seeking professional help:
- Correct Installation: They follow manufacturer guidelines to guarantee your fan is securely mounted.
- Safety Compliance: Professionals adhere to local codes and safety standards.
- Regular Maintenance: They can perform routine checks to prevent wear and tear.
- Identifying Issues: Experts can spot potential problems early, such as wobbling or unusual noises.
Investing in professional assistance protects your home and enhances your ceiling fan's lifespan.
Don't compromise on safety—let the experts handle it!
Frequently Asked Questions
How Can I Tell if My Ceiling Fan Is Too Heavy for My Ceiling?
To determine if your ceiling fan's too heavy, check the manufacturer's weight recommendations, inspect your ceiling's joist strength, and guarantee secure mounting. If it wobbles or makes unusual noises, consider a lighter model.
What Types of Ceiling Fans Are Safest for Homes With Children?
Isn't safety your top priority? Choose ceiling fans with enclosed blades, lightweight materials, and secure mounting. Confirm they're installed correctly and regularly maintained, keeping your children safe while enjoying a cool breeze together.
Can Ceiling Fans Fall Due to Extreme Weather Conditions?
Yes, ceiling fans can fall during extreme weather, like high winds or heavy storms. To prevent this, guarantee your fan's securely installed and regularly maintained, paying attention to any signs of wear or instability.
What Should I Do if My Fan Falls?
If your fan falls, you'll want to act quickly—over 40% of household injuries come from falling objects. Check for injuries, turn off power, and consult a professional for repairs or replacement immediately. Safety first!
Are There Ceiling Fan Models Specifically Designed for High Ceilings?
Yes, there are ceiling fan models designed specifically for high ceilings. These models often feature longer downrods, ensuring ideal airflow. When selecting, consider the room size and fan specifications for the best performance.
Conclusion
In conclusion, staying savvy about your ceiling fan's safety is essential. By diligently dedicating time to proper installation, regular maintenance, and vigilant inspections, you can dodge dangerous dilemmas. Keep an eye out for signs of instability and don't hesitate to seek professional help when needed. With a little care and caution, you'll guarantee your fan continues to spin smoothly, providing a rejuvenating breeze without the worry of a falling hazard. Stay safe and enjoy your comfort!
Interior Design
Unleash Angular SPAs for Dynamic Web Experiences
You’ll discover how to harness Angular SPAs to create engaging web experiences that leave users craving more. Dive in to find out how!
You can elevate your web applications by releasing the power of Angular Single Page Applications (SPAs) for dynamic user experiences. With Angular's routing capabilities, you can create seamless navigation without traditional page reloads. Lazy loading further enhances performance by loading components on demand. Plus, you'll benefit from improved security and offline capabilities, making your app more robust. Implementing effective data management strategies using Angular services and NgRx guarantees a smooth developer experience while engaging users. As you explore the future trends in Angular SPAs, you'll uncover even more ways to enhance your applications.
Key Takeaways
- Angular SPAs offer seamless navigation by eliminating traditional page reloads, enhancing user experience.
- Employ lazy loading to improve performance by loading components only when needed, reducing initial load times.
- Utilize Angular services and RxJS observables for efficient data management and real-time updates across your application.
- Implement Angular Universal for server-side rendering, improving SEO and ensuring your application is easily indexed by search engines.
- Leverage reusable components with Angular Material to create a cohesive and responsive design across various devices.
Overview of Angular SPAs
When you think about modern web applications, Angular Single Page Applications (SPAs) stand out for their ability to deliver a smooth and efficient user experience. SPAs enhance this experience by eliminating traditional page reloads, allowing for seamless navigation between components.
With Angular's routing capabilities, you can easily manage multiple views within a single application context. Performance is boosted through techniques like lazy loading, which loads only necessary components as users interact with the app. Additionally, tree shaking minimizes the application bundle size by removing unused code, ensuring your interface remains fast and responsive.
However, mastering Angular routing is essential for effectively managing views and addressing challenges like client-side routing complexity and browser history.
Benefits of Using Angular SPAs
Angular SPAs offer a range of benefits that greatly enhance both performance and user experience.
You'll enjoy faster loading times since the application only needs to load once, allowing for smooth interactions as users navigate through different sections. This dynamic nature reduces server load by optimizing data retrieval, making your app more scalable and cost-effective.
Additionally, the offline capabilities of SPAs mean users can access certain features without an internet connection, further improving engagement.
Security is also a strong point; Angular SPAs provide better protection against common vulnerabilities.
Plus, they're optimized for mobile devices, ensuring a responsive design that looks great on any screen.
Essential Features of Angular SPAs
Single Page Applications (SPAs) built with Angular come equipped with essential features that greatly enhance usability and performance.
These features streamline your development process while providing users with a smooth experience. Here are some key highlights:
- Dynamic Routing: Navigate between views without reloading the entire page, maintaining context and improving speed.
- Lazy Loading: Load only the necessary components when needed, which reduces initial load time and improves performance.
- Component Reusability: Create reusable components that can be shared across different parts of your application, saving time and effort.
With these essential features, Angular SPAs not only enhance user engagement but also simplify the development process, allowing you to build more dynamic and responsive web applications.
Effective Data Management Strategies
Effective data management strategies are essential for building robust Angular SPAs that deliver a seamless user experience. You should leverage Angular services for centralized data access, guaranteeing components share data effectively.
Utilize RxJS observables to handle asynchronous data streams, allowing your app to respond dynamically to user interactions. Implementing NgRx Store can help you manage application state in a predictable manner, reducing complexity as your app scales.
Consider using Local Storage to persist user data across sessions, enhancing usability. Additionally, keep an eye on Angular's change detection mechanism, which confirms that your UI reflects the latest state changes.
Popular Tools for Angular Development
When diving into Angular development, you'll want to tap into a variety of popular tools that can streamline your workflow and enhance your projects.
These tools not only improve efficiency but also help you create visually appealing and responsive applications. Here are some must-have resources for your Angular toolkit:
- Angular Material: It offers a set of reusable UI components that adhere to Material Design principles, ensuring a consistent look and feel across your application.
- NgRx: This library helps you manage state predictably, making your application's data flow more manageable and maintainable.
- RxJS: It's essential for handling asynchronous data streams, allowing you to build reactive applications with ease.
SEO Techniques for SPAs
To boost your SEO strategy for Angular SPAs, you can't overlook the importance of proper indexing and visibility.
Start by implementing Angular Universal for server-side rendering (SSR), which generates static HTML for search engines to crawl effectively. Use dynamic rendering techniques to serve pre-rendered content to bots while delivering the SPA experience to users.
Make sure to manage your application's metadata accurately with Angular's built-in tools, ensuring search engines can index your pages correctly. Optimize your URLs by making them descriptive and user-friendly.
Future Trends in Angular SPAs
As you look to the future of Angular SPAs, several trends are set to shape the landscape.
First, the rise of micro-frontends will allow you to develop and deploy SPAs in a more modular fashion, enhancing team collaboration.
Next, server-side rendering (SSR) will become increasingly important for improving SEO and initial load times.
Finally, the integration of artificial intelligence will personalize user experiences, offering tailored content and recommendations.
- Enhanced micro-frontend architectures for better scalability
- Increased adoption of server-side rendering for improved performance
- AI-driven personalization to elevate user engagement
Staying ahead of these trends will empower you to build more dynamic and efficient Angular SPAs, ensuring you meet the evolving demands of users.
Frequently Asked Questions
What Are the Best Practices for Testing Angular SPAS?
When testing Angular SPAs, focus on unit tests for individual components, integration tests for service interactions, and end-to-end tests for user flows. Utilize tools like Jasmine, Karma, and Protractor to guarantee reliability and performance.
How Can I Improve Performance in Large Angular SPAS?
To make your large Angular SPAs lightning-fast, you'll want to harness lazy loading, tree shaking, and AOT compilation. Optimize routing, cache wisely, and minimize bundle sizes; your users will feel the speed surge instantly!
What Are Common Security Vulnerabilities in Angular SPAS?
You should be aware of common security vulnerabilities in Angular SPAs, such as cross-site scripting (XSS), cross-site request forgery (CSRF), and insecure direct object references. Implementing proper sanitization and authentication can mitigate these risks effectively.
How Do I Migrate an Existing Application to an Angular SPA?
"Rome wasn't built in a day." To migrate your existing application to an Angular SPA, start by restructuring components, implementing routing, optimizing performance with lazy loading, and ensuring state management aligns with your new architecture.
What Browser Compatibility Issues Should I Be Aware of With Angular SPAS?
When working with Angular SPAs, you should consider browser compatibility issues like outdated browsers not supporting ES6 features, differences in CSS rendering, and potential performance discrepancies. Always test across multiple browsers to guarantee functionality and appearance.
Conclusion
In summary, embracing Angular SPAs is like stepping into a vibrant garden of web development possibilities. You're not just planting seeds; you're cultivating an immersive experience that blossoms into seamless navigation and engaging interactions. As you navigate this landscape, remember that the right techniques and tools are your sunlight and water, nurturing your applications to flourish. So go ahead, release your creativity and watch your digital garden thrive, enchanting users and keeping them coming back for more.
-
Beauty and Grooming2 days ago
Embrace Natural Glow With Bronzer-Free Accelerators
-
Beauty and Grooming5 days ago
Discover Top Outdoor Tanning Lotions Today
-
Fashion Trends3 weeks ago
Fall 2025 Fashion Trends: Be Ahead of the Curve!
-
Vetted2 weeks ago
15 Best Affordable Sustainable Fashion Brands You Need to Know About in 2025
-
Beauty and Grooming2 days ago
Unlock Flawless Tanning With Skin Prep
-
Interior Design1 month ago
Mylar vs. Foil Balloons: The Ultimate Showdown
-
Vetted2 weeks ago
15 Best Women's Fashion Trends of 2025 You Need to Know About
-
Fashion Trends6 days ago
Fashion Nova Kids: Stylish Outfits for Your Little Ones!