Interior Design
How to Keep Outdoor Furniture Clean
Find out how to keep your outdoor furniture looking pristine and discover essential tips that will make maintenance a breeze!
To keep your outdoor furniture clean, start by removing loose debris with a soft brush. Use mild soap and water to scrub surfaces, adjusting techniques based on material—wood and metal need special care. Rinse thoroughly with a garden hose and allow furniture to dry naturally in a shaded area. Conduct regular checks for rust or loose screws and consider applying protective coatings to extend its life. Storing furniture during harsh weather also helps. For the best results, you might want to explore additional tips and tricks to maintain that fresh look year-round.
Key Takeaways
- Regularly remove debris and dust from surfaces to prevent buildup and staining on outdoor furniture.
- Use mild soap and water to clean different materials, avoiding harsh chemicals that can cause damage.
- Inspect furniture regularly for rust or loose screws and address any issues promptly to maintain integrity.
- Apply protective coatings like rust-resistant finishes for metal and sealants for wood to enhance durability.
- Store furniture in dry areas during off-seasons and use covers to protect against harsh weather conditions.
Preparation and Initial Cleaning
Keeping your outdoor furniture clean starts with proper preparation and initial cleaning. First, gather your supplies: a soft-bristled brush, mild soap or wood-specific cleaner, water, a microfiber cloth, and sandpaper if necessary. Next, remove any loose debris—brush off dirt, leaves, or dust from the surface. Before diving into cleaning, inspect your furniture for stains or areas needing special attention. Make sure your cleaning area is well-ventilated and free of obstacles.
Now, it's time for initial cleaning. Use your soft-bristled brush or a vacuum cleaner with a brush attachment to remove dirt and dust. Mix your cleaning solution according to product instructions and apply it gently with a soft cloth or brush. Be cautious—avoid harsh chemicals that can damage the finish. If you're trying a new cleaner, always test it on a small, inconspicuous area first. Regular cleaning prevents rust formation on metal furniture, which helps maintain its appearance and durability.
For intricate pieces, consider using a toothbrush for tight spaces. In summary, thorough preparation and careful initial cleaning lay the foundation for maintaining your outdoor furniture's beauty and longevity. Regular upkeep will make your cleaning efforts even easier down the line!
Cleaning Specific Materials

When it comes to cleaning outdoor furniture, understanding the material is key to maintaining its appearance and longevity. For wood furniture, start by using a broom or brush to sweep away dirt and debris. Then, mix mild dish soap with water and use a rag to wipe down the surfaces, avoiding harsh chemicals that can harm the wood. Consider applying a waterproofing wood sealant annually and using wood conditioner to prevent drying and cracking. Regular cleaning enhances furniture lifespan, maximizing your investment in outdoor seating.
For metal furniture, a solution of 1 part detergent to 3 parts water works wonders. Use a soft rag to spot-clean scuff marks, and rinse off any excess detergent with a garden hose. After cleaning, dry the surfaces with a cloth to avoid water spots. Regularly apply a rust-preventative coating, especially in humid conditions.
If your furniture is made from plastic or resin, stick with mild dish soap and water. You can sprinkle baking soda on a sponge for tougher stains. No matter the material, always store your furniture in a cool, dry place, and cover it to protect against dust and debris. Regular maintenance will keep your outdoor furniture looking great for years to come.
Scrubbing and Rinsing
To effectively clean your outdoor furniture, start by preparing the area and your cleaning supplies. Remove any cushions and fabric, along with visible debris. Use a vacuum with a dust-brush attachment or a dry paintbrush to get rid of dirt and dust. Fill a bucket with warm water and add a gentle soap or detergent, mixing according to the recommended ratio.
When scrubbing, begin at the top of the furniture and work your way down to avoid spreading dirt. Use a soft-bristled brush for gentle scrubbing, alternating strokes for wicker furniture. For metal surfaces, stick to mild detergents and avoid abrasive materials that could scratch. Make sure to scrub all surfaces thoroughly, changing the bucket water as needed. It's advisable to gather cleaning supplies such as dishwashing liquid, microfiber cloths, and a commercial cleaner before starting the process.
Once you've scrubbed everything, it's time to rinse. Use a garden hose with a high-pressure setting to wash away dirt and soapy water. For delicate surfaces, opt for a softer setting to prevent damage. Rinse thoroughly to remove any soap residue and ensure all areas are clean. This step will help maintain your outdoor furniture's appearance and longevity.
Drying and Maintenance

After rinsing your outdoor furniture, drying it properly is vital for maintaining its condition. For wood furniture, natural drying is your best bet. Place it in a clean, cool, dry, and shady area, stacking the wood on raised foundations to enhance air circulation. Keep in mind that this process may take time, depending on the weather. If you need quicker results, consider artificial drying using controlled kilns, which allows for better temperature and humidity management. Proper drying is essential for the durability and longevity of teak wood furniture.
When drying outdoor cushions, start by squeezing out as much water as possible. You can stand on them to press out water and then blot the remaining moisture with a towel. Hang them on a clothesline or over a railing to let them drain. Position cushions in sunny, yet not overly direct, sunlight to speed up drying while preventing fabric fading. Rotate and flip them periodically to ensure even drying on all sides.
For wood furniture maintenance, apply a sealant or stain annually and store it in a dry place during off-seasons. Regularly inspect for wear, and use covers when not in use to protect against the elements.
Using Commercial Cleaners
For a quick and efficient way to keep your outdoor furniture clean, using commercial cleaners can be a game-changer. Products like Hauser's Patio Furniture and Fabric Cleaner are safe for various materials, making them ideal for your furniture. CLR Outdoor Furniture Cleaner is specially formulated to tackle dirt and grime on surfaces like resin, wood, and vinyl, ensuring a thorough clean.
When you use these cleaners, the spray-and-wipe method is straightforward. Just spray the cleaner on the affected area, let it sit for a few minutes, and wipe it away with a clean cloth or sponge. If you want a deeper clean, some options are compatible with pressure washers. Plus, their non-abrasive formulas mean you won't damage your furniture while cleaning. Additionally, it's important to consider that seasonal cleaning is recommended to address the accumulation of dust, dirt, and grime after winter exposure.
Eco-friendliness is also a key feature; for example, Hauser's cleaner uses all-natural ingredients, while CLR won't harm your grass. Many of these cleaners effectively remove tough stains and leave no oily residue behind. With options like Nuvera® Patio Furniture Cleaner, you even get UV protection to help maintain your furniture's appearance. Using commercial cleaners makes caring for your outdoor furniture easy and effective.
Preventative Measures
Maintaining your outdoor furniture can save you time and effort in the long run, and implementing preventative measures is key. For wooden furniture, apply a coat of UV-blocker polyurethane, like Varathane Ultimate Spar Urethane, to shield it from sun and moisture. After cleaning and drying, use teak oil or wood polish to keep it looking fresh. Avoid abrasive cleaners or pressure washing, and regularly inspect your pieces to catch any damage early. Regular inspections are essential to ensure you address any issues before they worsen.
With metal and aluminum furniture, apply a coating of paste wax to combat corrosion and rust. If rust does appear, remove it, then use primer and paint before adding wax. Positioning metal items in shaded areas helps minimize sun exposure and prevents movement during high winds.
For plastic furniture, use an outdoor protector to prevent fading and cracking. Clean with a baking soda and water mixture, ensuring you rinse thoroughly. Lastly, for fabric and wicker furniture, spray on a sun and water shield, and store cushions indoors during the off-season. Use a vacuum with a soft-bristled attachment for wicker, and keep it out of direct sunlight to avoid damage.
Tips for Long-Term Care
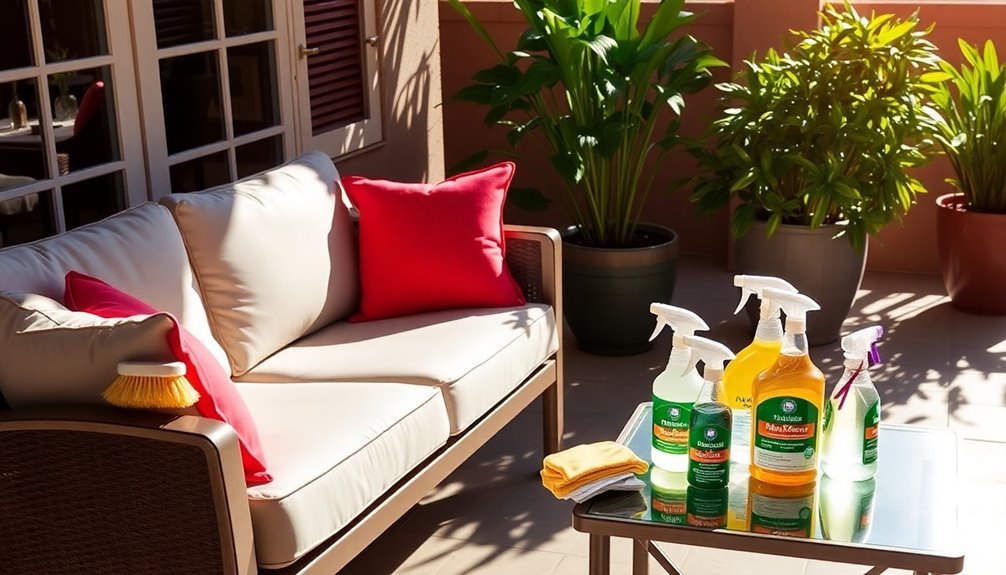
Keeping your outdoor furniture in top shape requires consistent care and attention. Start by cleaning your furniture regularly based on its material. For aluminum, use a damp cloth with mild soap, and polish painted surfaces to maintain their appearance. Woven or resin furniture benefits from a mild detergent wash and UV light stabilizers to resist fading. If you have composite furniture, hose it down and scrub with non-abrasive cleaners to prevent mold growth. Wood furniture needs dusting and an annual application of sealant to guard against weather damage. Additionally, aluminum furniture is particularly ideal for creating low-maintenance outdoor spaces.
Regular inspections are crucial. Check for loose screws or signs of rust, and address these issues promptly. Applying protective coatings, like rust-resistant finishes for metal and sealants for wood, enhances durability. During the off-season, store your furniture in a dry place, and use covers during harsh weather to protect against moisture.
Finally, clean spills immediately to prevent lasting damage. By following these tips, you'll not only preserve the look of your outdoor furniture but also extend its lifespan, ensuring you enjoy it for years to come.
Seasonal Cleaning Checklist
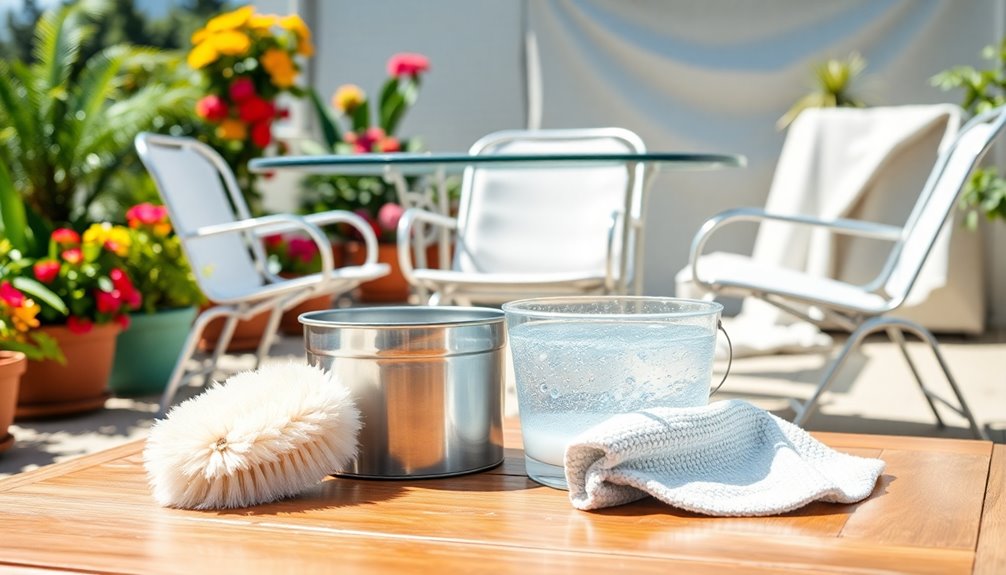
As the seasons change, it's essential to give your outdoor furniture a thorough cleaning to prepare it for use. Start by inspecting each piece for damage or wear from winter storage. Tighten any loose screws or bolts, and clear away debris or dirt that might have accumulated. Use a leaf blower to remove cobwebs, insects, and leaves from your outdoor area.
Next, deep clean your furniture. For metal pieces, wash them with soapy water and a soft brush, then rinse and dry to prevent rust. Clean wooden surfaces with a wood cleaner, and oil them to restore their sheen. If your cushions have removable covers, launder them; otherwise, use fabric cleaner for non-removable ones. Additionally, remember to sweep away debris from your patio area to create an inviting space for relaxation.
You'll want to spot clean wicker furniture and scrub off any light rust from wrought iron. For plastic, a dish soap solution works well, while tougher stains may need bleach. After cleaning, apply a UV protectant to synthetic materials and a water-repellent finish to wood. Finally, cover or store furniture in a dry, shaded place when not in use, and regularly wipe down surfaces to maintain cleanliness.
Frequently Asked Questions
How Often Should I Clean My Outdoor Furniture?
You should clean your outdoor furniture based on its usage and the climate. If you use it frequently or live in a coastal area, aim for every 1-2 weeks. For less frequent use, a quick wipe-down before guests arrive works well. Increase your cleaning during peak seasons like summer, but if you're in a mild climate, you can reduce the frequency. Always deep clean at least once a season to prevent buildup.
Can I Use Bleach to Clean Outdoor Furniture?
Yes, you can use bleach to clean certain outdoor furniture materials, but be cautious. For plastic and resin, mix 1/3 cup of bleach with a gallon of water and apply it. Wood needs to be sealed beforehand. Avoid bleach on metal, especially non-stainless options, and be careful with glass. Always wear protective gear and rinse thoroughly to avoid damage. Test on fabrics first to ensure color safety. Regular cleaning helps maintain your furniture.
What Should I Do for Rust on Metal Furniture?
If you notice rust on your metal furniture, start by scrubbing the affected area with aluminum foil dipped in saltwater to remove the rust. If it's more severe, sand the rusty spots lightly and apply rust-proof touch-up paint. You can also use a solution of equal parts white vinegar and water for aluminum surfaces. After cleaning, make sure to dry everything thoroughly to prevent further rust from forming. Regular maintenance is key!
Is It Safe to Use a Pressure Washer on Outdoor Furniture?
It's generally safe to use a pressure washer on outdoor furniture, but you need to be cautious. For hard-wearing plastic and metal furniture, a lower pressure setting works best. Start from a distance and test a small area first to ensure it's safe. Avoid using a pressure washer on rattan or wooden pieces, as it can cause damage. Always adjust your technique based on the material to prevent any harm.
How Can I Remove Stubborn Stains From Fabric Furniture?
To remove stubborn stains from fabric furniture, start by checking the care label for guidance. Act quickly on stains, gently scraping off dried residues first. For tough spots, dab with rubbing alcohol or use a mixture of water and vinegar. Blot food spills with a clean cloth and apply a mild detergent solution. Rinse thoroughly after cleaning, and let the fabric air dry to maintain its quality and appearance.
Conclusion
Keeping your outdoor furniture clean is essential for its longevity and appearance. By following the steps outlined, like regular cleaning, proper drying, and using the right materials, you can keep your furniture looking great season after season. Don't forget to implement preventative measures to minimize dirt buildup and protect your pieces from the elements. With a little effort, you'll enjoy a beautiful outdoor space that's ready for relaxation and entertaining. Happy cleaning!

Interior Design
How to Get Rid of Unwanted Furniture
Understand the best ways to declutter your home by getting rid of unwanted furniture, and discover various options that can benefit both you and your community.
Getting rid of unwanted furniture is easy and can benefit your community. Begin by assessing your items. If they are still in good condition, consider donating them to local charities like Goodwill or the Salvation Army. Another option is to sell them online through platforms such as Craigslist or Facebook Marketplace. For larger pieces, consider hiring a junk removal service that will take care of everything for you. Be sure to check local regulations for curbside pickup options and recycling programs. If you’re feeling up to it, hosting a yard sale can be a fun way to free up space. Keep exploring to discover more effective ways to part with your furniture! If you’re not quite ready to part with certain items, consider keeping furniture dust-free by covering it with drop cloths or storing it in a clean, dry area. Taking proper care of your furniture can help prolong its lifespan, giving you more time to decide its fate. Finally, don’t hesitate to ask friends or family if they might have a use for your pieces—there’s always someone in need out there!
Key Takeaways
- Evaluate furniture condition and consider donating usable items to local charities like Goodwill or the Salvation Army.
- Utilize online platforms like Craigslist or Facebook Marketplace to sell furniture for extra cash.
- Hire professional junk removal services for heavy or bulky items, ensuring efficient and safe removal.
- Research local regulations for curbside pickup options to dispose of smaller items properly.
- Explore recycling programs for eco-friendly disposal of furniture materials, preventing landfill waste.
Assessing Your Furniture Options
When you're ready to get rid of unwanted furniture, the first step is to evaluate your options carefully. Start by examining the condition of your furniture. Can it be reused or recycled? If it's still usable, consider donating it to a local charity. Many donation centers, like Goodwill or Salvation Army, offer free pickup for larger items, making it a hassle-free choice.
Additionally, you might want to explore mechanic shops for fuel injection cleaning to see if any of them have community programs for accepting furniture donations.
If your furniture isn't suitable for donation, check your local regulations regarding curbside pickup. You might be able to place smaller items out for collection on designated days, but larger pieces often require a scheduled pickup.
For heavy or bulky items, hiring junk removal companies can be a convenient solution. They'll manage both the labor and transport, ensuring your unwanted furniture is disposed of properly.
Alternatively, you can explore selling your unwanted furniture online through platforms like Craigslist or Facebook Marketplace. This not only helps you declutter but also gives you a chance to make some extra cash.
Donation Centers for Furniture
When you're ready to part with your unwanted furniture, local donation centers like Goodwill and Salvation Army can be a great option.
These organizations often provide essential resources for families in need, similar to how caregiver support networks offer assistance for those managing elderly care, including financial considerations for elderly care.
Not only do they help those in need, but donating can also lead to tax deductions for you.
Just remember to check their guidelines to guarantee your items meet their requirements.
Local Donation Locations
Looking to declutter your space? Donating your unwanted furniture is a fantastic way to give back while freeing up room in your home.
Additionally, you can enhance your well-being by exploring natural remedies, such as those found in essential oils for health, that can promote relaxation during the decluttering process.
There are several local donation locations that make it easy to part with your items and help those in need. Here are some great options:
- Goodwill Industries: Accepts a variety of furniture donations, promoting sustainability.
- The Salvation Army: Offers free pickup services for larger items, so you don't have to lift a finger.
- Habitat for Humanity ReStores: Welcomes gently used furniture to support affordable housing projects.
- Local charities like Furniture Bank: Provide donation options that help furnish homes for families in need.
When you choose these organizations for furniture removal, not only do you make space in your home, but you also contribute to your community.
Plus, many of them offer tax deduction receipts, giving you a financial benefit while you help others.
Benefits of Donating
Donating your unwanted furniture brings numerous benefits, both for you and the community. When you choose to donate, you help provide essential items to those in need while keeping usable goods out of landfills. Many donation centers, like Goodwill and Salvation Army, offer free pickup services. This makes furniture removal convenient, allowing you to part with large items without any disposal fees.
Additionally, donating aligns with eco-friendly practices that support sustainable living by reducing waste.
Moreover, donating your furniture promotes eco-friendly practices. Over 60% of donated items are reused or recycled, greatly reducing waste and supporting sustainable living. Organizations such as Habitat for Humanity utilize your donations to support local housing projects, directly benefiting the community.
While the immediate impact on others is crucial, don't forget about the advantages for yourself. Donating can also lead to potential tax deductions, as charitable contributions are often eligible for write-offs. This means you can declutter your space and possibly receive a financial benefit in return.
Tax Deduction Opportunities
If you're considering parting with your unwanted furniture, you might be pleased to know that doing so can lead to valuable tax deductions.
Donating furniture to qualified charitable organizations like Goodwill or the Salvation Army can reduce your taxable income based on the fair market value of the items. Additionally, similar to how Gold IRAs offer tax advantages through potential tax-deferred growth, your furniture donations can provide you with financial benefits.
To make the most of these tax deductions, keep detailed records of your donations, including receipts and photos.
Here are some key points to remember when donating furniture:
- Confirm your items are in good condition or better to qualify for deductions.
- Check the specific procedures of the organization you choose, as they may vary.
- Some organizations offer free pickup services, saving you on furniture removal costs.
- Donating helps support local charities and promotes environmental sustainability by preventing usable items from ending up in landfills.
Hiring Junk Removal Services
Hiring junk removal services is a smart solution for tackling unwanted furniture without the hassle. When you need to get rid of old furniture, a professional junk removal service can efficiently haul away your items, saving you time and effort.
Additionally, utilizing experts can help you navigate the emotional impact of decluttering, similar to how one might cope with the emotional impact of divorce. Typically, these services charge between $250 and $300 for the removal of a few pieces, with costs increasing based on the volume and type of furniture you need to dispose of.
One significant advantage of using local junk removal services is the labor assistance they provide. You won't have to worry about the physical strain of lifting heavy furniture, as the team will handle all aspects of the removal.
Many companies offer upfront quotes, guaranteeing you know the costs involved and avoiding any hidden fees.
Additionally, scheduling pickup services can be incredibly convenient, with options for same-day or next-day service. This means you can quickly clear out your space and make room for something new.
Recycling and Eco-Friendly Disposal
When you're ready to part with your unwanted furniture, consider donation centers that accept your items and support local charities. Many of these organizations not only help those in need but also offer tax deductions for your generosity.
Additionally, recycling programs can guide you in properly disposing of furniture materials, ensuring they're repurposed instead of ending up in landfills.
Donation Centers Availability
Finding a sustainable solution for unwanted furniture not only benefits the environment but also supports those in need. Donation centers like Goodwill and the Salvation Army accept usable furniture, ensuring your items serve a greater purpose.
Additionally, donating unwanted furniture can be seen as a way to diversify the resources available to local charities, similar to how one might evaluate diverse investment options for retirement savings. Habitat for Humanity ReStores take furniture donations to fund affordable housing projects, making a positive impact on your community.
Here are some reasons to evaluate donating your furniture:
- Free pickup services: Many organizations will come to your home to collect your items, making it hassle-free.
- Tax deductions: Donating can yield tax benefits, helping offset the cost of new purchases.
- Eco-friendly practices: By donating, over 60% of items can be reused or recycled, minimizing landfill waste.
- Support local families: Your donations help individuals and families find affordable housing and essentials.
Recycling Programs Support
Recycling programs play an essential role in managing unwanted furniture sustainably. By participating in these programs, you can guarantee that materials like wood, metal, and select plastics are diverted from landfills and repurposed effectively. Many recycling centers in Houston accept these materials, which helps improve recovery rates.
Additionally, utilizing the value of home security systems can enhance your safety during the disposal process, giving you peace of mind while you manage your unwanted items.
When you opt for eco-friendly junk removal services, you're contributing to a greener community. Services like Fire Dawgs recycle or donate over 60% of items removed, which promotes sustainable disposal practices.
While curbside recycling allows you to place small furniture items for pickup, larger items often require specialized recycling facilities.
It's also important to adopt proper disposal methods. This minimizes contamination in recycling streams, enhancing the efficiency of recycling programs.
Collaborating with local charities can further support responsible waste management; companies like LoadUp have donated over $26,732 to local charities, benefiting both the environment and community initiatives.
Selling Furniture Online
How can you effectively sell unwanted furniture online? Selling furniture online can be a quick and rewarding process if you use the right platforms like Craigslist, Facebook Marketplace, and OfferUp.
These sites facilitate local pickup, making transactions easier and more convenient for both you and the buyer.
To maximize your chances of a successful sale, consider these tips:
- Quality Photos: Use clear, well-lit images that showcase your furniture from multiple angles.
- Detailed Descriptions: Provide thorough information about the item's condition, dimensions, and any unique features.
- Competitive Pricing: Research similar listings to set a fair price that attracts buyers while reflecting the furniture's value.
- User Ratings: Take advantage of the platforms' review systems to build trust with potential buyers.
Hosting a Yard Sale
Hosting a yard sale can bring a sense of accomplishment as you declutter your home and turn unwanted furniture into extra cash. To get started, choose a weekend morning when foot traffic is higher. Advertise your yard sale in advance through local social media groups, community bulletin boards, and neighborhood apps like Nextdoor to attract buyers.
Consider incorporating some unique elements, such as engaging interactive games for guest engagement, to create an enjoyable atmosphere that could entice potential buyers.
When it comes to pricing items, keep it reasonable. A good rule of thumb is to price furniture at 20-30% of its original retail value to make it appealing to buyers. Make sure that all items are clean and presented well; staging furniture in an organized manner can greatly enhance their visual appeal and increase sales.
Consider creating a welcoming atmosphere by offering refreshments. This not only draws in potential buyers but also encourages them to linger and browse.
As you host your yard sale, engage with visitors, answer their questions, and be open to negotiations.
Local Regulations and Guidelines
Understanding local regulations and guidelines is essential when you're ready to get rid of unwanted furniture. Before you start the disposal process, make certain you're aware of specific rules regarding bulk item collection in your area. This will help you avoid fines and guarantee a smooth removal.
Additionally, research your local environment to find unique camping experiences that can inspire creative reuse or upcycling ideas for old furniture.
Here are some key points to take into account:
- Check for designated days for curbside furniture pickup; many cities have specific schedules.
- Confirm if you need to pre-schedule your large item pickups, as some municipalities require this.
- Follow the proper disposal methods for different materials like wood, metal, and plastics to promote environmentally friendly practices.
- Be mindful of recycling bins; only place acceptable items in them to prevent contamination, which can hamper recovery efforts.
Scheduling Removal Services
When you're ready to get rid of unwanted furniture, scheduling a removal service can simplify the process. Start by booking a free in-person estimate through platforms like Fire Dawgs, LoadUp, or TaskRabbit. This guarantees you get accurate pricing and service details tailored to your needs.
Many services offer multiple contact options, making scheduling appointments easy—whether you prefer phone calls, texts, or online forms.
If you're looking for quick removal, companies like LoadUp can provide same-day or next-day service if booked before 12 PM. You can even send pictures or videos of the items for a quick electronic estimate, further streamlining the process.
Don't hesitate to reach out to the customer support teams available through these services. They're there to assist with scheduling, answer any questions, and enhance your overall experience.
With their help, you can guarantee a smooth and efficient removal of your unwanted furniture. Remember, the right removal service can make this task hassle-free, giving you more space and peace of mind in no time!
Frequently Asked Questions
How Do I Get Rid of a Bunch of Furniture?
You've got several options to tackle that furniture. Consider hiring a junk removal service, renting a dumpster, donating usable items, or selling online. Each approach offers convenience and helps you declutter effectively.
How Do I Get Rid of a Couch Near Me?
You can get rid of your couch by checking curbside pickup options, donating to local charities, hiring a junk removal service, listing it on online marketplaces, or renting a dumpster for easy disposal.
How Much to Pick up a Sofa?
To pick up a sofa, you'll typically pay around $89, but prices can vary based on size, weight, and location. Expect to spend between $250 and $500 for full-service junk removal options.
Conclusion
No matter how overwhelming it feels, getting rid of unwanted furniture doesn't have to be a hassle. You might worry that your items aren't good enough to donate or sell, but remember, even a worn-out couch can bring joy to someone in need. By taking action, you're not just clearing space; you're giving your furniture a second chance at life. Embrace the change, and feel the weight lift off your shoulders as you create a more inviting home.
Interior Design
Essential LiftMaster Wiring Guide Unveiled
Learn the crucial steps to master your LiftMaster wiring; uncover tips that could save you time and trouble during installation. What will you discover next?
The essential LiftMaster wiring guide is your go-to resource for installing and troubleshooting your garage door opener. Begin by understanding the wiring diagrams; they show how to correctly connect color-coded wires. Red wires provide power, while white wires connect to the motor. Make sure you have the necessary tools such as screwdrivers and wire strippers for a smooth installation. Also, check for compatibility issues with your specific model. If you face any issues, examine connections and utilize the diagnostic LED indicators. Keep following for more tips to make your LiftMaster installation a breeze.
Key Takeaways
- LiftMaster models feature color-coded wiring: red for power, white for motor, green for safety sensors, ensuring correct connections during installation.
- Understanding wiring diagrams is crucial for successful installation, as they illustrate connections and identify terminals.
- Essential tools for installation include screwdrivers, wire strippers, pliers, and a level, ensuring a smooth setup process.
- Verify model compatibility before installation, as some models may have unique wiring configurations that could cause integration issues.
- Troubleshoot wiring problems by checking power supply, inspecting connections, and ensuring safety sensors are aligned for proper functionality.
Overview of LiftMaster Models
Exploring LiftMaster models reveals a range of options tailored to fit various needs, whether for residential or commercial use.
You'll find models like the LiftMaster 882LMW and 877LM, both packed with advanced features. The MyQ series stands out, offering smartphone control for added convenience.
All models come with Security+ 2.0 technology, ensuring encrypted communication for enhanced security against hacking. You can choose wall-mounted options for easy access, making operation seamless.
With energy-efficient designs, these openers not only save power but also operate quietly, minimizing noise. Plus, the multi-function wall control panels simplify your experience.
Understanding Wiring Diagrams
When it comes to installing your LiftMaster garage door opener, understanding wiring diagrams is key to guaranteeing a successful setup.
These diagrams illustrate how to connect various components, making it easier for you to visualize the installation process. You'll notice color-coded wires that signify specific functions: red for power supply, white for the motor, and green for safety sensors.
Most setups require at least two wires, but more complex installations may need additional connections for keypads or sensors. Identifying the correct terminals for these wires is vital to avoid mistakes.
Common Wiring Color Codes
Understanding common wiring color codes is critical for anyone working with LiftMaster garage door openers. These color codes help you connect components accurately.
Typically, you'll find red wires indicating the power supply, while white wires are used for the motor. Black wires serve as the ground, and green wires are designated for safety sensors. If you see blue wires, they're for the wall control panel.
Most installations require a minimum of two wires, but more complex setups might need additional connections for sensors or keypads. Always refer to the specific wiring diagram for your model to verify everything's hooked up correctly.
Installation Tips and Tools
To guarantee a smooth installation of your LiftMaster garage door opener, gather the right tools and follow a few essential tips. Start by confirming you have everything ready before you begin. Use the following table to help you prepare:
Tools | Purpose |
---|---|
Screwdrivers | For securing the opener in place |
Wire strippers | To prepare wires for connections |
Pliers | For gripping and twisting wires |
Level | To confirm the opener is installed straight |
Tape measure | For measuring distances accurately |
Always read the user manual thoroughly and double-check all connections against the wiring diagram. Taking your time will help you avoid mistakes and guarantee a successful installation.
Compatibility Issues With Models
Even with the right tools and installation tips, compatibility issues can arise with certain LiftMaster models.
For instance, models like Chamberlain HD220 and 45DCBR5 come with specific wiring configurations that mightn't work well with aftermarket accessories.
Similarly, LiftMaster 41D767 and 8075 models can present challenges when you're trying to integrate additional devices.
It's important to verify model compatibility before you start installation to avoid frustration down the line.
Always consult detailed wiring diagrams specific to your model, as these will guide you through the correct connections.
By being proactive about compatibility, you can facilitate a smoother installation process and peak functionality for your garage door opener system.
Don't overlook this step; it's vital for success.
Troubleshooting Wiring Problems
When dealing with wiring problems in your LiftMaster garage door opener, it's crucial to pinpoint the issue quickly. Start by checking the power supply; verify it's plugged in and the outlet is functioning.
Next, inspect all connections for any loose or damaged wires, particularly the red (power), white (motor), and green (safety sensors) wires.
If your remote isn't working, reprogram it and check the battery.
Diagnostic LED indicators on the opener can help identify issues; refer to your user manual for guidance.
If the door won't close, it might be a safety sensor misalignment.
Keep these steps in mind to troubleshoot effectively, verifying your LiftMaster operates smoothly and efficiently.
Future of Garage Wiring Systems
Identifying and fixing wiring problems in your LiftMaster garage door opener is just the beginning; the future of garage wiring systems looks promising with advancements in technology. New innovations, such as smart home integration and wireless controls, are transforming the way we manage these systems, making them more reliable and user-friendly. For example, the latest **Buick garage door opener setup** allows seamless connectivity between your vehicle and garage, enabling you to open and close the door with just the push of a button inside your car. As these technologies evolve, maintaining and upgrading your garage wiring will become an essential aspect of ensuring a smooth and efficient operation. Additionally, these advancements promise to reduce the need for frequent manual troubleshooting, as systems like the **Buick garage door opener setup** can now alert users of potential issues via mobile notifications or in-vehicle displays. This integration of smart diagnostics makes it easier for homeowners to address wiring problems before they become major concerns. As technologies like the **Buick garage door opener setup** continue to evolve, the future of garage management will become more streamlined and convenient, offering enhanced safety and efficiency.
You're likely to see a shift toward smart home integration, allowing seamless control of your garage door from your smartphone. As consumer demand for DIY installations rises, manufacturers will focus on user-friendly wiring solutions that simplify setup.
Enhanced security features will emerge to address safety concerns, using encrypted communication to prevent hacking. Additionally, energy-efficient designs will become standard, helping you save on power costs.
Frequently Asked Questions
What Safety Precautions Should I Take During Installation?
During installation, you should always unplug the opener to avoid electric shock, wear safety goggles, guarantee your workspace is clear, and follow the manufacturer's instructions closely for safe and effective setup. Safety first!
Can I Use a Rechargeable Battery With My Liftmaster Opener?
You can't use a rechargeable battery with your LiftMaster opener unless it's specifically designed for that model. Check your user manual for compatible power sources, ensuring you maintain peak performance and safety during operation.
How Do I Reset My Liftmaster Opener After a Power Outage?
After a power outage, you're not just resetting your LiftMaster opener; you're reviving a sleeping giant! Simply press and hold the "Learn" button until the light blinks, then reprogram your remotes. You're back in action!
Are There Any Specific Maintenance Tips for Wiring Connections?
To maintain wiring connections, regularly check for frayed wires and secure connections. Keep terminals clean and free from corrosion. Inspect the power supply and connections, ensuring everything's tight to prevent future issues with your LiftMaster opener.
Can I Extend the Wiring for My Liftmaster Garage Door Opener?
You might think extending the wiring's simple, but it's not. You'll need to match wire gauge and guarantee solid connections. If you're unsure, consider consulting a pro to avoid potential mishaps with your LiftMaster opener.
Conclusion
In wrapping up your LiftMaster installation journey, remember that "an ounce of prevention is worth a pound of cure." By understanding wiring diagrams, color codes, and potential compatibility issues, you're setting yourself up for success. Whether you're a DIYer or hiring a pro, thorough preparation guarantees your garage door opener runs smoothly. With the right knowledge, you'll enjoy the convenience and security your LiftMaster offers, making every entry and exit a breeze. Happy wiring!
Interior Design
How to Measure Furniture Dimensions
The ultimate guide to measuring furniture dimensions reveals essential tips for accuracy—discover the secrets to successful furniture fitting inside!
To measure furniture dimensions, grab a tape measure for the best results. First, measure the width from left to right, then the height from the floor to the highest point, and lastly, the depth from front to back. Don't forget to account for any protruding parts, like armrests. If you're dealing with irregular shapes, use the tick sticking method. It's also smart to check doorways and pathways to ensure easy delivery. Relying on consistent measurement standards will help maintain clarity. Stick around, and you'll discover more tips for achieving accurate and effective measurements.
Key Takeaways
- Use a tape measure to obtain width (W), height (H), and depth (D) of furniture for accurate fitting and placement.
- Measure diagonal dimensions to ensure furniture can maneuver through entry points and tight spaces.
- Record measurements consistently in the format of width, height, and depth to avoid confusion during delivery.
- Check room dimensions against furniture measurements to ensure compatibility and optimal layout.
- Consider obstacles like doorways and fixed objects when planning the delivery path for the furniture.
Essential Measuring Tools
When measuring furniture dimensions, having the right tools is essential for accuracy. Start with a tape measure, which helps you determine the width, depth, and height of your furniture. Look for one with clear markings and a strong locking mechanism. A 16-foot tape measure is usually enough, but consider a longer one for larger projects. A magnetic hook can be handy when working with metallic materials.
Next, use stainless steel rulers for short distances and to ensure straight edges. A non-slip backing will help it stay in place during use. Rulers are also great for checking if your furniture will fit through doorways and hallways.
Don't forget squares and combination squares. They'll help you check angles and ensure your cuts are accurate. A combination square can also serve multiple functions, like marking straight lines. Additionally, a combination square is perfect for marking 90° and 45° angles, enhancing your precision in joint setups.
Finally, consider digital tools for precision. Laser measuring devices offer quick measurements, while digital calipers can provide exact measurements down to fractions of a millimeter. Level tools are vital for confirming that your furniture sits correctly in your space. With these essential tools, you're ready to measure accurately.
Key Dimensions to Measure
To ensure your furniture fits perfectly in your space, it's crucial to measure key dimensions accurately. Start with the width (W), which you measure from left to right while facing the front of the furniture. Don't forget to include the widest parts, like armrests on sofas. This measurement is vital for determining if the furniture can fit through doorways and hallways.
Next, measure the height (H), from the floor to the highest point of the furniture. Make sure to account for permanent components like the back frame but exclude pillows unless specified. This helps you confirm the furniture fits in your room and can be moved through entry points. Using a metal tape measure ensures you get accurate height measurements.
Lastly, measure the depth (D) from the front to the back. Include the deepest part, such as the back of a sofa, as this is crucial for navigating through tight spaces and planning your room's layout.
For specific pieces, you might also consider diagonal measurements, which help evaluate whether the furniture can maneuver through entry points. Taking these key dimensions will help ensure a smooth delivery and perfect placement in your space.
Techniques for Complex Furniture
Measuring complex furniture requires some specific techniques to ensure a perfect fit in your space. Start by measuring diagonal dimensions, which are crucial for navigating through doorways and hallways. Use a straight edge ruler to measure from the highest back point of sofas or sectionals to the front of the arm. This helps assess any entry challenges and guarantees smooth delivery. Additionally, consider employing the tick sticking method for accurate measurements when dealing with irregularly shaped furniture pieces.
Next, consider using advanced measuring tools like laser devices. These tools provide quick and precise measurements, especially over larger distances or in tight spaces. They're invaluable for larger furniture items, and you can combine them with traditional tape measures for thoroughness. Just make sure the laser device is calibrated correctly.
Don't forget to account for obstacles and pathways. Measure the width and diagonal height of hallways and doorways that the furniture must pass through. Note any corners or fixed obstacles like light fixtures that could interfere with placement. Finally, visualize furniture placement by sketching the room's layout on graph paper or using a true-to-size footprint with paper, ensuring everything fits perfectly in the intended space.
Industry Measurement Standards
Furniture dimensions follow specific industry standards that help ensure consistency and clarity in communication. When you measure furniture, remember to follow the order of width, height, and depth. Start by measuring from left to right for width, from the floor to the top for height, and from front to back for depth. This standard makes it easier for everyone to understand the dimensions.
For common furniture, know the key dimensions: a dining table is typically 29 inches high, 40 inches wide, and 64 inches long. A dining chair usually measures 19 inches wide, 19 inches deep, with a seat height of 18 inches and an overall height of 36 inches. Dressers and chests generally follow a similar pattern, while mattresses are measured by width, length, and height. Additionally, for standard mattress dimensions, twin mattresses measure 38 inches by 75 inches.
Don't forget to measure entry points like doorways and hallways to ensure your furniture can fit through. Use a metal tape measure for precision and record your measurements in a height (H), width (W), and length (L) format. This preparation helps you avoid delivery issues and ensures your new furniture fits perfectly in your space.
Tools for Specific Tasks
When tackling furniture dimensions, having the right tools can make all the difference. For basic measurements, a tape measure is essential. Choose one that's flexible and durable, ideally with both imperial and metric markings. It's your go-to for measuring width, depth, and height.
When you need to tackle more complex measurements, a straight edge ruler becomes invaluable, especially for diagonal dimensions. This tool helps you assess if furniture can fit through entry points or tight spots accurately.
For larger items and tight spaces, laser measuring devices are a game changer. They provide quick, precise measurements, reducing manual effort and improving accuracy. Some smartphones even come equipped with built-in laser measuring features.
Don't forget to record your measurements accurately. A pencil and paper are crucial for jotting down dimensions for future reference. You might also want to use a level tool to ensure your furniture sits correctly in its designated space. For finer measurements, like thicknesses, digital calipers offer high precision, cutting down on human error. Lastly, smartphone apps can aid in measuring and converting units, making your task even easier.
Best Practices for Accuracy
Achieving accurate measurements is crucial to ensuring your furniture fits perfectly in your space. Start by measuring the furniture itself. For width, measure from arm to arm, focusing on the widest points. When measuring height, ignore removable pillows or cushions and capture the highest to lowest points. For depth, measure from the front of the seat to the back, and don't forget to check the diagonal depth for tight spaces.
Next, measure your entry points. Capture the width, height, and diagonal distance of doorways, hallways, and stairwells. Consider removing doors for extra space and take note of any obstacles like ceiling fans and banisters. Ensure you leave at least 4 inches of clearance for maneuverability. Accurate room dimensions are essential for selecting appropriate furniture size and placement.
Finally, compare the furniture dimensions with the measurements of your room and pathways. Visualize placement using sketches or life-size footprints on the floor. Be meticulous about accounting for obstacles, including light fixtures and wall art, that may impede placement. Always consider the total dimensions, including legs and bases, and plan the optimal pathway from delivery to placement. These best practices will help you navigate potential challenges seamlessly.
Recording and Verifying Measurements
Accurate recording and verification of your measurements are essential to ensure everything fits as intended. Start by measuring the height (H), width (W), and depth (D) of your furniture, including any extended features like arms or cushions. Don't forget to document diagonal measurements, especially for items like sofas and bookcases, as they're crucial for tight spaces.
Next, ensure you compare these measurements against your room's dimensions. Check doorways, hallways, and stairwells to confirm the furniture can pass through the narrowest entry points. Make sure to account for any immovable objects like light fixtures or railings that could impact the placement. Accurate measurements enhance the overall aesthetic and functionality of the space, ensuring a harmonious integration of new furniture.
As you record, keep everything organized. Write down your measurements in a safe, easily accessible spot, and consider using graph paper or scaled footprints to visualize the space. This helps you see how your furniture will fit within the room's layout. Finally, double-check each measurement to eliminate errors. A small mistake can lead to significant issues during delivery or setup, so take your time to verify and ensure accuracy.
Frequently Asked Questions
How Do I Measure Furniture for Small Spaces?
To measure furniture for small spaces, start by determining the dimensions of the area where you plan to place the furniture. Use a tape measure to check the width, depth, and height. Don't forget to account for doorways and narrow hallways. Consider diagonal measurements for tight corners, too. Visualize how the furniture will fit by sketching or using graph paper, ensuring you leave enough space for movement and accessibility.
Can I Use My Smartphone for Measuring Furniture Dimensions?
Yes, you can definitely use your smartphone for measuring furniture dimensions! With various AR apps available, you can easily get accurate measurements without traditional tools. Apps like MeasureKit and Quick Measure let you take quick measurements by simply pointing your camera at the object. They often allow you to switch between units and even save photos with measurements for later reference. It's an efficient and convenient way to measure your space!
What Should I Do if My Furniture Has an Irregular Shape?
If your furniture has an irregular shape, start by identifying its key dimensions like the longest side and height. Break it down into simpler shapes, measuring each part carefully. Use specialized tools like a bevel gauge for angles and a laser level for accuracy. Don't forget to account for any extended features and visualize how it'll fit in your space. Double-check everything to ensure it'll navigate through tight spots without issues.
How Do I Measure Furniture to Fit Around Obstacles?
To measure furniture to fit around obstacles, start by identifying any barriers in the path, like walls or furniture. Then, measure the distance from the obstacle to the intended placement area. Use a tape measure to check the width and height of both the furniture and the obstacles. Don't forget to account for any angles or turns your furniture will need to navigate. This'll help ensure a smooth fit without any surprises.
Are There Apps Available for Furniture Measurement?
Yes, there are several apps that can help you measure furniture accurately. Apps like AR Plan 3D and MeasureKit use augmented reality to provide virtual measurements right in your space. You can create floor plans, visualize in 3D, and even convert units easily. With features like automatic scans and manual adjustments, you'll find it easier to ensure your furniture fits perfectly. Just remember, some apps may have limitations with accuracy in certain situations.
Conclusion
Measuring furniture dimensions accurately is crucial for ensuring everything fits perfectly in your space. By using the right tools and techniques, you can avoid costly mistakes and make informed decisions. Remember to double-check your measurements and follow industry standards for best results. With these practices in mind, you're well-equipped to tackle any furniture project with confidence. Happy measuring, and enjoy creating a space that reflects your style and needs!
-
Beauty and Grooming1 month ago
Embrace Natural Glow With Bronzer-Free Accelerators
-
Beauty and Grooming1 month ago
Discover Top Outdoor Tanning Lotions Today
-
Fashion Trends2 months ago
Fall 2025 Fashion Trends: Be Ahead of the Curve!
-
Vetted1 month ago
15 Best Affordable Sustainable Fashion Brands You Need to Know About in 2025
-
Interior Design2 weeks ago
Mylar vs. Foil Balloons: The Ultimate Showdown
-
Beauty and Grooming1 month ago
Unlock Flawless Tanning With Skin Prep
-
Interior Design1 month ago
Create Your Dream Cottagecore Home Office Now!
-
Vetted1 month ago
15 Best Women's Fashion Trends of 2025 You Need to Know About