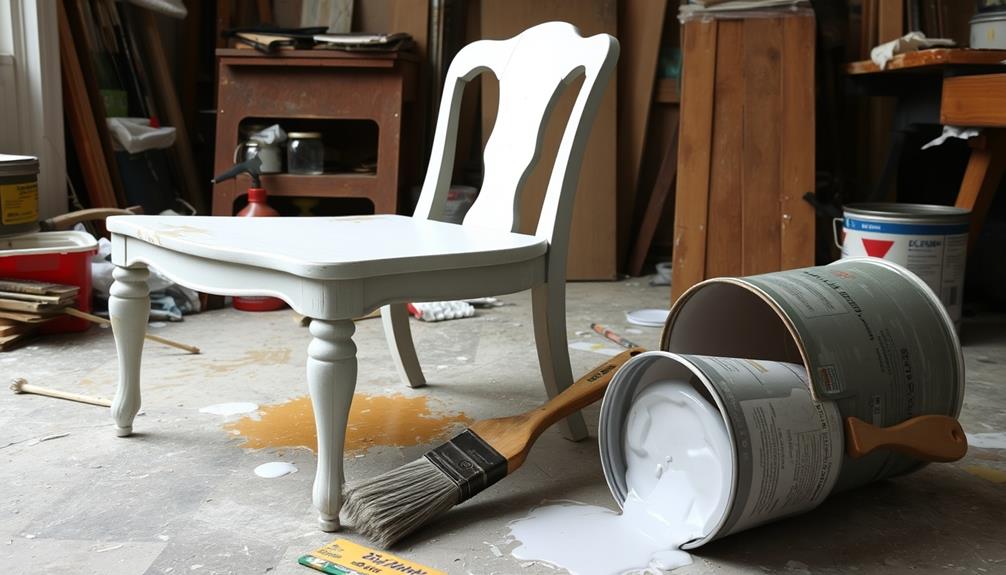
Connect with us

Interior Design

How to Paint Furniture

Start your furniture transformation journey with essential tips and tricks for a stunning finish that will leave you eager for more!

Published

on

furniture painting techniques guide

To paint furniture, start by cleaning it thoroughly to remove dirt. Next, sand the surface to guarantee paint sticks well. Use high-quality, furniture-specific paint and plan for 2-3 thin coats, sanding lightly between each for a smooth finish. Apply a primer first to enhance adhesion, then seal your work with a protective topcoat like polyurethane. Create a well-ventilated workspace, and don't forget to lay down a drop cloth. Avoid common pitfalls like skipping the primer or rushing the drying process. Stick around, and you'll discover more tips for a flawless furniture makeover! Looking to add a fresh look to your home beyond just furniture? Consider fresh front door styling ideas to spruce up your exterior. Paint your front door a bold color, add seasonal wreaths or planters, or upgrade your house numbers and hardware for a quick and easy way to boost curb appeal. Don’t be afraid to get creative and experiment with different styles to find what suits your home best. These simple changes can make a big impact on the overall look and feel of your home.

Key Takeaways

  • Thoroughly clean and sand furniture surfaces to ensure proper paint adhesion and a smooth finish.
  • Apply a suitable primer to enhance paint adhesion, choosing the right type based on your project needs.
  • Use high-quality, water-based furniture paint, applying 2-3 thin coats for durability while lightly sanding between layers.
  • Seal the painted surface with a clear topcoat after sufficient drying time for added protection and longevity.
  • Avoid common mistakes like skipping primer, overloading brushes, and rushing the drying process to achieve the best results.

Overview of the Process

When you decide to paint furniture, it's important to start with a solid overview of the process. First, you'll need to prep your piece thoroughly. This includes cleaning the furniture to remove any dirt and grime, followed by sanding the surface to create a better bond for the paint. Sanding helps achieve a smooth finish, so don't skip this step.

Additionally, if you're using appliances nearby while painting, be mindful of their energy consumption, as some may draw standby power even when not in use (energy-efficient appliances).

Once your piece is prepped, it's time to apply your paint. Opt for high-quality, furniture-specific paint and apply 2-3 thin coats for the best coverage and durability. Remember to sand lightly between each coat; this step enhances the overall finish and guarantees a professional look.

After the paint has dried completely, it's essential to seal the surface with a protective top coat. You can choose from options like polyurethane or water-based finishes, which will help safeguard your newly painted furniture from wear and tear.

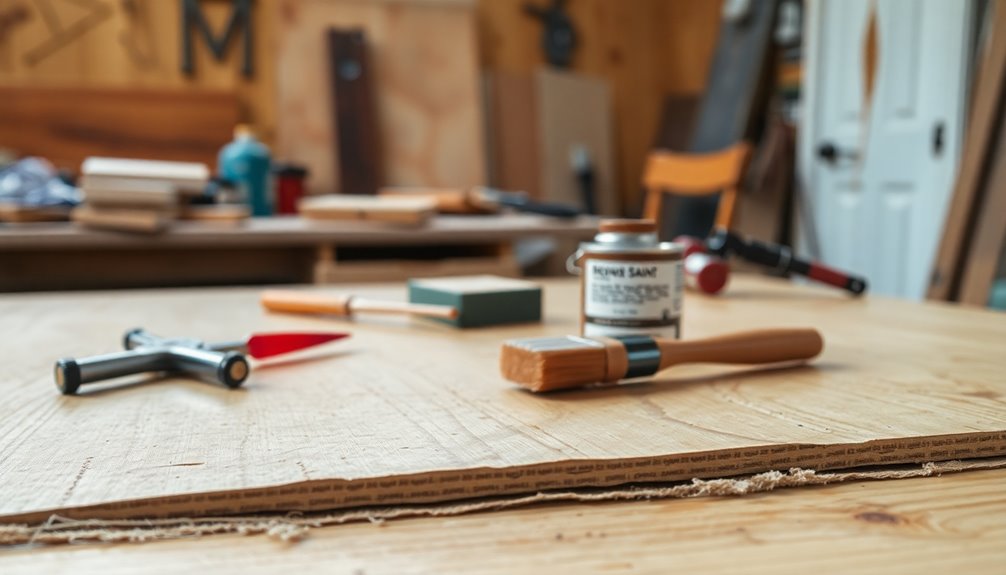
Essential Supplies Needed

critical items required now

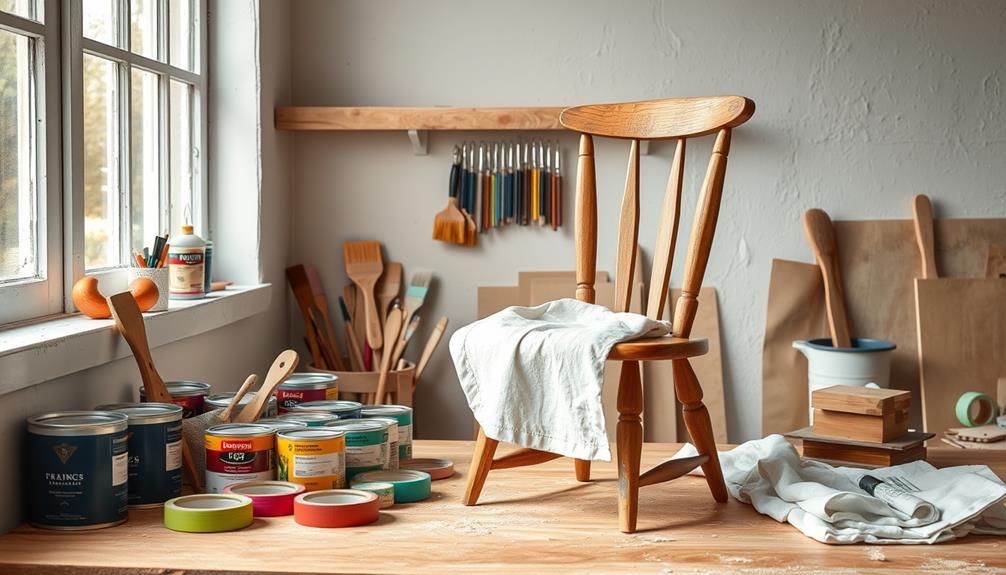
To successfully paint furniture, you'll need a specific set of essential supplies that guarantee a smooth and professional finish. Start with Murphy's Oil Soap for effective cleaning, making sure the surface is free from dirt and grease.

It's also helpful to verify your workspace is free of dust, much like how best vacuums for dust removal can enhance your cleaning routine. Next, grab medium and fine grit sandpaper to prepare the surface, making it smooth and ready for paint adhesion.

Advertisement

You'll also need a quality primer, which enhances the bond between the furniture paint and the surface. For the actual painting, choose a high-quality, water-based furniture paint for durability and easy cleanup.

A good paint brush is essential for applying the paint evenly, but you might also consider foam rollers or optional paint sprayers for larger areas.

Once your paint is dry, don't skip the topcoat! Using a product like Minwax Polycrylic or Finishing Wax protects your beautifully painted surface and extends its longevity.

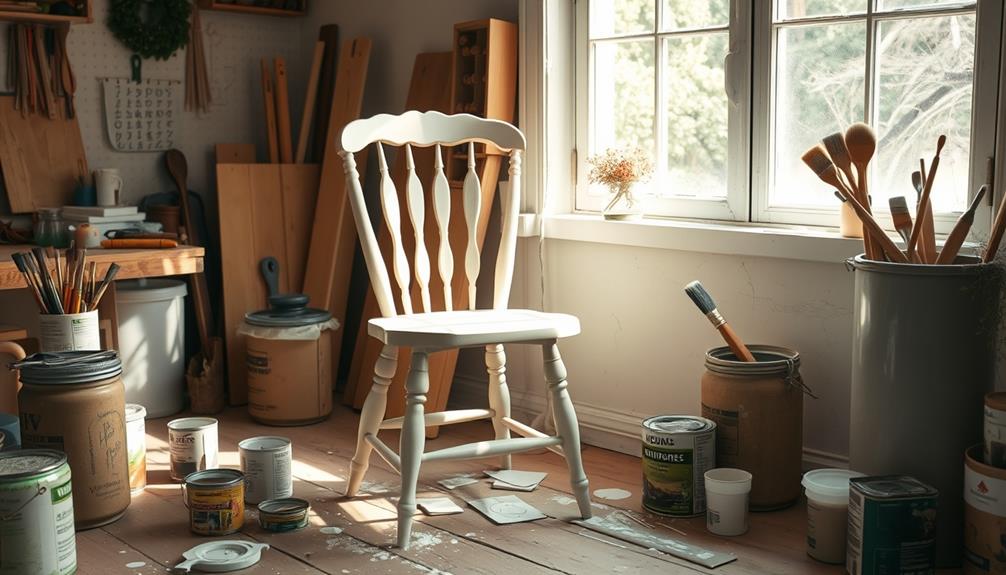
Preparing Your Workspace

organizing your work area

A well-prepared workspace is vital for achieving a flawless furniture painting project. Start by choosing a well-ventilated area to minimize exposure to paint fumes. This not only guarantees your safety but also helps the paint dry evenly.

Additionally, confirming proper airflow around your workspace can enhance the overall efficiency of your project, similar to how air purifier maintenance guarantees peak performance. Next, lay down a drop cloth to protect your floors and surrounding surfaces from spills and drips, making cleanup a breeze.

Before you plunge into painting, remove all hardware and drawers from the furniture using a screwdriver. This gives you easier access to all surfaces and prevents accidental splatters on areas you want to keep paint-free.

Advertisement

Then, use painter's tape to tape off any glass, metal, or mirrored surfaces. This step is vital for protecting these areas and achieving clean lines in your finished project.

Cleaning and Sanding Surfaces

surface preparation techniques explained

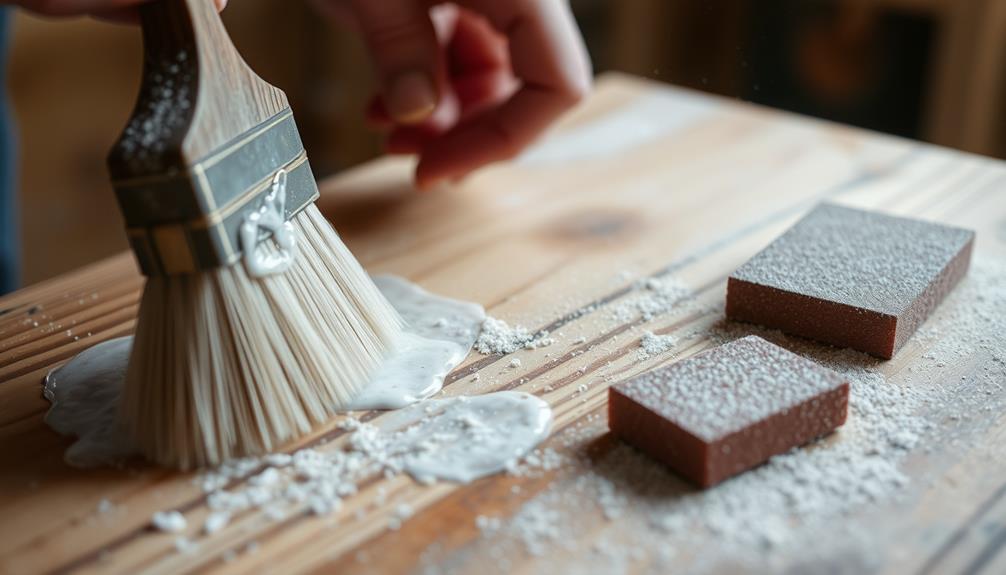
Once your workspace is set up, focus on cleaning and sanding the furniture to guarantee a smooth painting surface.

Begin by thoroughly cleaning the furniture with Murphy's Oil Soap or a TSP cleaner. This step removes dust, grease, and residues that can negatively affect paint adhesion.

After cleaning, grab your sandpaper. Start with a coarser grit, like 80 or 120, to remove any old paint or finishes. Gradually switch to finer grits, such as 220, to smooth the surface before painting.

Make sure to lightly sand the entire surface, creating a texture that enhances paint adhesion. If your furniture has a glossy finish, sanding it will dull the surface, helping the primer and paint stick better.

Don't forget to wipe away any dust with a tack cloth afterward.

Advertisement

Applying Primer Correctly

proper primer application techniques

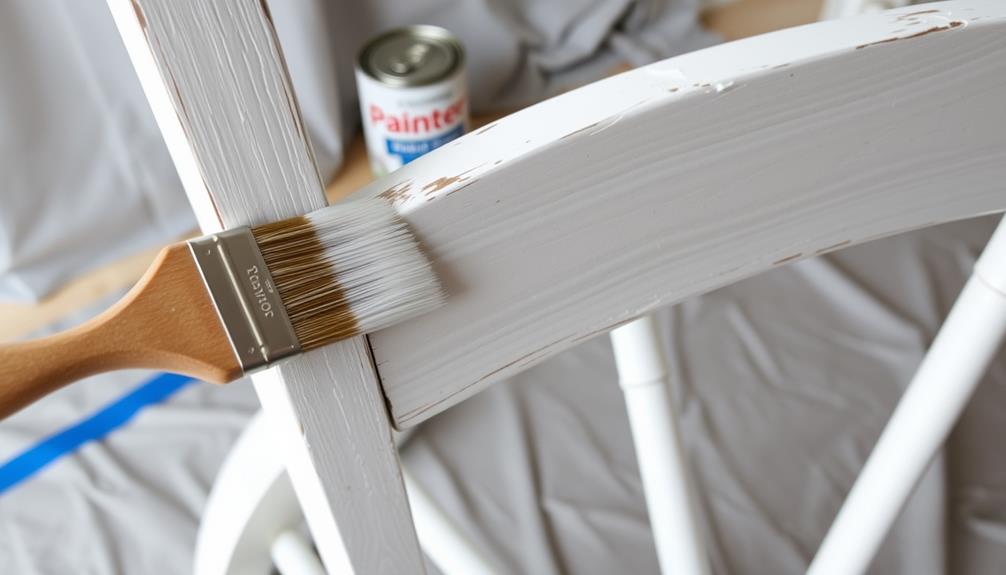
Priming your furniture is essential for achieving a smooth, durable finish.

You'll want to choose the right type of primer and apply it using the best techniques to guarantee ideal coverage.

Let's go over the importance of priming, the different types available, and how to apply them correctly.

Importance of Priming

Getting the primer right is essential for achieving a smooth and durable finish when painting furniture. Priming enhances paint adhesion, especially on raw or previously painted surfaces. By creating a suitable base for your topcoat, it helps guarantee that your paint adheres properly and lasts longer.

If you're working on an item with lingering smells, consider using Zinsser B-I-N, while a water-based primer is great for odor-free projects.

After applying your primer, don't skip sanding! Lightly sanding with 220 grit sandpaper once it's dry can smooth out any imperfections, making your surface ready for painting. Choosing the right primer color is also important; white primer works best for lighter colors, while gray or darker shades can complement rich hues, ultimately affecting the final appearance of your paint job.

Advertisement

Lastly, always allow the primer to dry according to the manufacturer's instructions. This step is essential for ideal results and durability.

Types of Primers

When it comes to choosing the right primer for your furniture project, understanding the different types available can make a considerable difference in your results. Here's a quick overview of some common types of primers you might consider:

Type of Primer Best For
Water-Based Primer Odor-free applications
Gray Primer Rich, deep colors
White Primer Lighter shades
Zinsser B-I-N Items with strong smells

Using a water-based primer is great for odor-free applications, while Zinsser B-I-N works well for items that have strong odors, just guarantee proper ventilation. Gray primer is ideal for enhancing deep color saturation, while white primer helps in achieving lighter shades, considerably affecting the paint's final appearance.

Remember to apply primer using a roller for larger flat surfaces and a brush for detailed areas. After priming, lightly sand the surface with 220 grit sandpaper to smooth out imperfections and enhance paint adhesion. Always inspect the primed surface for any stains or blemishes that might need additional priming before you continue with your paint application.

Application Techniques

After selecting the right primer for your furniture project, applying it correctly is crucial for achieving a smooth finish. Start by using a high-quality brush for detailed areas and a roller for larger flat surfaces. This'll help guarantee even coverage and minimize visible brush strokes.

Advertisement

Follow the manufacturer's drying time—usually around 1-2 hours—before moving on to the next step.

Once the primer is dry, take a sanding block with 220 grit sandpaper and lightly sand the surface. This process smooths out any imperfections and prepares the surface for your coat of paint.

If you're working with raw or previously painted surfaces, consider applying a second coat of primer for maximum adhesion and to cover any remaining flaws.

For projects that require an odor-free environment, go for a water-based primer. If you're dealing with strong odors or stains, Zinsser B-I-N is your best bet.

Mastering these application techniques will set the stage for a flawless finish in your furniture painting project.

Advertisement

Painting Techniques Explained

artistic methods unveiled thoroughly

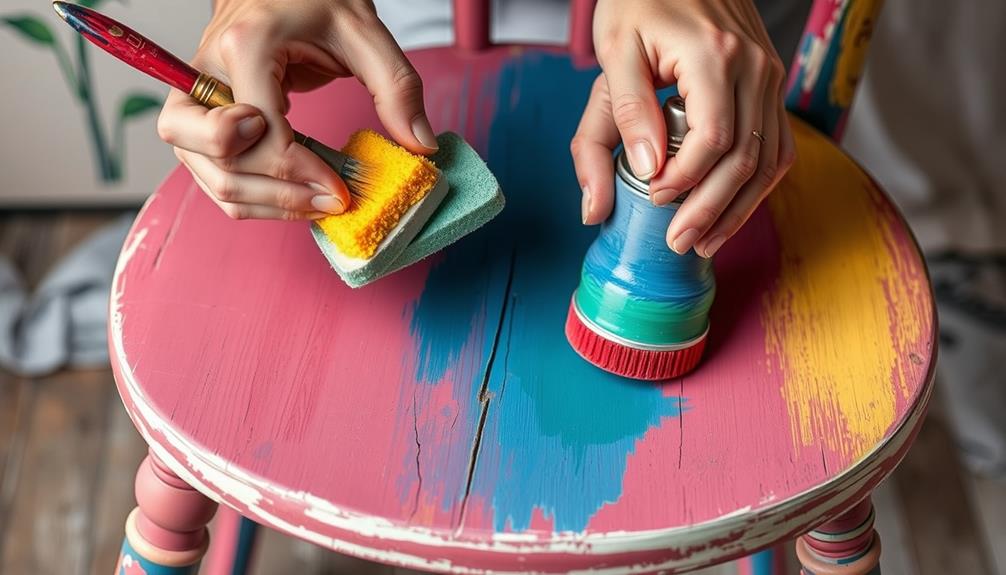
When it comes to painting furniture, choosing the right tools is essential for the best results.

You'll want to use a sponge roller for large areas and a high-quality brush for detailed spots to guarantee an even finish.

Understanding proper application methods can help you achieve a smooth, professional look that lasts.

Brush vs. Roller Techniques

How do you choose between a brush and a roller when painting furniture? The decision often boils down to the details of your project. A brush gives you greater precision and control, making it perfect for intricate designs and tight spaces. On the other hand, a roller excels at covering large flat surfaces quickly, providing a smooth finish with fewer visible brush strokes.

Here's a quick comparison to help you decide:

Technique Best For Finish Quality
Brush Detailed areas, edges, corners Moderate precision
Roller Large flat surfaces Smooth, even finish
Foam Roller Furniture applications Ultra-smooth finish

If you want the best of both worlds, consider combining techniques. Use a brush for edges and corners, followed by a roller for the main surfaces. This method enhances overall coverage and finish, ensuring your furniture looks stunning with minimal effort. Happy painting!

Advertisement

Proper Application Methods

Achieving a flawless finish on your furniture requires mastering proper application methods. Start by choosing a high-quality synthetic brush or foam roller to paint a piece. These tools provide better coverage and minimize brush marks, guaranteeing a professional look.

Before you begin, dilute your paint by about 10% with water. This adjustment enhances flow and helps attain a smoother finish, especially with thicker paints.

As you work, apply thin coats of paint, allowing each layer to dry for 2-4 hours before adding the next. This technique guarantees even coverage and prevents unsightly drips or runs.

To further enhance your results, lightly sand between coats using fine grit sandpaper (220 grit). This step creates a smooth surface and improves adhesion for subsequent layers, resulting in a more polished final product.

Remember to maintain a wet edge while painting to avoid lap marks. If sections dry before blending, you'll notice uneven areas.

Advertisement

Achieving a Smooth Finish

To achieve a smooth finish on your painted furniture, it's vital to use the right techniques and tools. Start by selecting a high-quality paintbrush for detailed areas to avoid shedding and streaking.

For larger surfaces, consider using a sponge roller to help spread the paint evenly. Diluting your paint by about 10% with water can enhance its flow, making application smoother and reducing brush marks.

Maintain a wet edge while painting to avoid lap marks, ensuring each section blends seamlessly. After your first coat, allow adequate drying time, typically 2 to 4 hours, before applying the next layer. This prevents pulling up the previous layer and contributes to a durable finish.

Don't skip sanding between coats! Use fine-grit sandpaper (220 grit) to smooth out imperfections and create a better surface for the next layer.

This step is essential in achieving that professional, smooth finish you desire. By following these techniques and giving each coat the proper drying time, you'll enhance the overall look of your furniture and enjoy a beautifully painted piece for years to come.

Advertisement

Adding Final Protection

enhanced security measures implemented

Once your painted furniture has dried for 24 hours, it's time to enhance its durability by adding a clear topcoat. You can choose a water-based option like Minwax Polycrylic or furniture wax to protect the finish effectively.

Water-based topcoats are ideal, as they prevent yellowing, especially on light-colored paints, ensuring a clear and long-lasting seal.

Before applying the topcoat, lightly sand the surface to improve adhesion and achieve a smoother finish. Be sure each layer is fully dry before moving on to the next application. Aim for at least two layers of the topcoat for optimal protection.

After you've applied the final layer, let the sealed furniture cure undisturbed for 1-2 days. This step is essential for the finish to set properly and enhance its longevity.

To keep your furniture looking great, maintain the protective finish by utilizing gently cleaning methods. Avoid harsh chemicals that could damage the surface.

Don't forget to perform touch-ups as needed to prolong the life of your paint job and keep your furniture looking fresh and vibrant.

Advertisement

Common Mistakes to Avoid

avoiding common mistakes

Even after applying a protective topcoat, mistakes can still undermine your furniture painting project. One common error is skipping the primer; without it, you'll likely face poor paint adhesion, leading to chipping and peeling.

When painting furniture, you also need to take care not to overload your brush or roller with paint. Doing so can create drips and uneven surfaces, ruining your final finish.

Another mistake is neglecting to sand between paint coats. This step is vital because it helps achieve a smooth, professional texture. Remember, you need to sand each layer lightly to avoid a rough finish.

Additionally, using low-quality paint can set you up for failure. Opt for good-quality paint to prevent quick chipping or fading that requires constant touch-ups.

Lastly, don't rush the drying process. Allowing each coat to dry fully is important; otherwise, you risk compromising the finish and may need to redo the entire project.

Benefits of Painting Furniture

transformative diy furniture upgrade

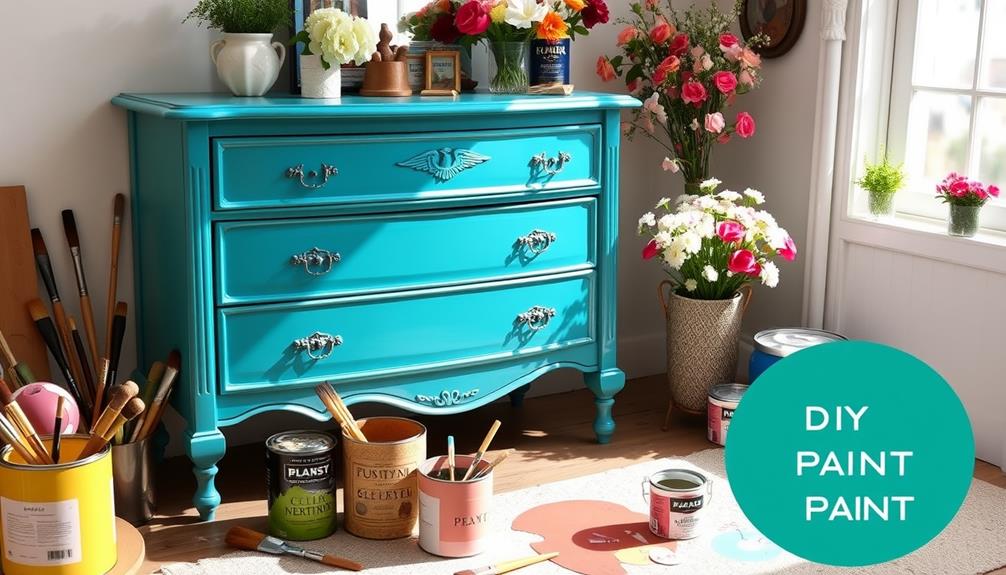
Painting furniture offers numerous benefits that can transform your home and enhance your lifestyle. Here are a few key advantages you'll enjoy:

  • Sustainability: Reusing old furniture helps reduce waste and promotes an eco-friendly lifestyle.
  • Cost-effective: Revamping worn pieces is often much cheaper than buying new high-quality furniture.
  • Customize: You can choose colors and styles that perfectly match your decor, giving your space a unique flair.

By painting your furniture, you not only breathe new life into outdated items but also strengthen your emotional connection with them.

Each piece you transform holds a story, making your home feel more personal and meaningful.

Advertisement

Plus, there's a real sense of personal satisfaction that comes from taking on such a project. You actively participate in shaping your living space, which can be incredibly fulfilling.

Frequently Asked Questions

What Kind of Paint Do You Use on Wood Furniture?

You'd think any paint works for wood, but it doesn't. Instead, choose high-quality furniture paint for durability. Water-based paints are easy, while oil-based ones require caution. Test samples to verify you get the right color.

What Is the Best Way to Paint Furniture for Beginners?

To start painting furniture as a beginner, clean the surface well, sand lightly, apply primer, and use quality paint. Work in thin layers, and don't forget to seal your masterpiece for lasting durability.

Do You Have to Sand Before Painting Furniture?

You can't build a house on sand. Yes, you have to sand before painting. It preps the surface for better adhesion, ensuring your finish won't chip or peel easily. Don't skip this essential step!

Do You Use a Roller or Brush to Paint Furniture?

You can use both a roller and a brush to achieve the best results. Rollers cover large areas quickly, while brushes excel in corners and detailed spots, ensuring a smooth, professional finish overall.

Advertisement

Conclusion

Now that you know how to transform old furniture into stunning statement pieces, don't let fear hold you back. While it may seem intimidating to take on a paint project, the satisfaction of seeing your vision come to life makes it worthwhile. Embrace the mess of creativity as you watch dull surfaces turn vibrant and fresh. With a little preparation and the right techniques, you'll turn your space from drab to fab, one brushstroke at a time!

Continue Reading
Advertisement

Interior Design

Unlocking the Secrets of Ceiling Fan Blades

Gain insight into ceiling fan blades and discover how their secrets can elevate your home’s comfort—find out what you’ve been missing!

Published

on

ceiling fan blade insights

Revealing the secrets of ceiling fan blades can transform your comfort at home. First, understand their primary function: circulating air for cooling. The size, shape, and pitch influence how effectively blades move air. Larger blades push more air, while a pitch between 10 to 15 degrees enhances efficiency. Material matters too; wood provides charm but can warp, whereas metal guarantees durability. Regular maintenance, like dusting and checking for damage, keeps your fan running smoothly. Finally, consider upgrading blades for better airflow. The more you know, the better choices you can make for your space and comfort.

Key Takeaways

  • Ceiling fan blade size, shape, and pitch significantly impact air circulation and cooling efficiency in a room.
  • Blade materials, such as wood, metal, and composites, affect durability, maintenance, and overall aesthetic appeal.
  • Curved blades with a steeper pitch enhance airflow better than flat blades, making them ideal for larger spaces.
  • Regular maintenance, including dusting and inspecting blades, ensures optimal performance and extends the lifespan of the fan.
  • Upgrading blades can improve airflow; choose compatible options with suitable materials and designs to match your room's style.

Functions of Ceiling Fan Blades

ceiling fan blade functions

Ceiling fan blades serve one primary function: to circulate air throughout a room, creating a rejuvenating cooling effect. When you turn on your ceiling fan, those blades start spinning, pushing air downwards and promoting a pleasant breeze.

The size, shape, and pitch of the blades play a crucial role in how effectively they move air. Larger blades can push more air, while the angle of the pitch determines how efficiently your fan operates.

To keep your ceiling fan performing at its best, regular maintenance is key. Cleaning dust off the blades and checking for any damage guarantees ideal airflow.

Understanding these elements not only enhances your comfort but also helps you choose the right fan for your space.

Impact of Blade Materials

effect of blade materials

When selecting ceiling fan blades, the material plays a significant role in performance and aesthetics. You've got several options: wood, metal, and composite.

Wood blades deliver a classic look but can warp over time, requiring care.

Advertisement

Metal blades, like aluminum and steel, offer durability and moisture resistance, making them ideal for humid areas.

Composite blades strike a balance, providing versatility and good performance without the maintenance demands of wood.

Think about your room's style and the airflow efficiency each material offers. The right choice can enhance both the fan's functionality and the overall ambiance of your space, so weigh the pros and cons carefully to find what suits your needs best.

Understanding Blade Design

mastering blade design principles

Blade design plays an essential role in a ceiling fan's performance, influencing both airflow efficiency and aesthetic appeal. When choosing a ceiling fan, consider the blade shape, length, and overall design.

Curved blades generally create better airflow than flat ones, while longer blades can move more air, making them ideal for larger spaces. Additionally, modern Energy Star certified fans can enhance airflow and potentially lower energy bills, contributing to energy savings and comfort.

The number of blades also matters; more blades can provide a different aesthetic and airflow experience. Remember, the materials used for the blades will impact both durability and maintenance.

Advertisement

A well-designed blade not only optimizes air circulation but also enhances the room's overall look. Understanding these design elements will help you make an informed decision for your ceiling fan needs.

Importance of Blade Pitch

blade pitch significance explained

The angle of the blades, known as pitch, is essential for maximizing airflow and cooling efficiency in your ceiling fan. A steeper pitch enhances air movement, which means better circulation and cooling for your space.

Here are four key points about blade pitch you should consider:

  1. Typical Range: Most residential fans feature a pitch between 10 and 15 degrees.
  2. Customizable Options: Some fans offer adjustable pitches, allowing you to tailor airflow to your needs.
  3. Impact on Airflow: A larger pitch can markedly increase the amount of air moved per rotation.
  4. Blade Shape Matters: Curved blades with steep pitches often outperform flat blades in airflow efficiency.

Understanding blade pitch helps you choose a fan that meets your cooling requirements effectively.

Noise Reduction Strategies

effective sound dampening techniques

Many homeowners overlook the importance of noise reduction strategies when selecting ceiling fans, yet it's an essential aspect that can enhance your overall comfort.

To minimize noise, consider choosing fan blades made from composite materials, as they effectively dampen sound. Aerodynamic blade designs also play a significant role; they reduce turbulence and the noise associated with it.

Additionally, always guarantee proper weight distribution across fan blades to prevent wobbling, which can create unwanted sounds. Regularly checking and adjusting blade pitch can optimize airflow and further reduce noise levels.

Maintenance Best Practices

effective maintenance strategies guide

To keep your ceiling fan running efficiently and quietly, regular maintenance is key.

By following these best practices, you'll guarantee peak performance and longevity:

Advertisement
  1. Dust Regularly: Wipe the blades with a damp cloth to prevent dust buildup that can hinder airflow.
  2. Inspect for Damage: Check for any cracks or warping in the blades. Replace damaged blades promptly to maintain balance.
  3. Lubricate the Motor: Periodically lubricate the fan motor to reduce friction and noise, guaranteeing smooth operation.
  4. Balance the Blades: Use a balancing kit if you notice wobbling. Properly balanced blades enhance airflow and reduce noise.

These simple steps can greatly improve your ceiling fan's performance and extend its lifespan.

Upgrading Ceiling Fan Blades

enhancing ceiling fan performance

Wondering how you can enhance your ceiling fan's performance? Upgrading your ceiling fan blades can make a significant difference.

Start by ensuring compatibility with your existing fan model; not all blades fit every fan. Consider selecting blades with a steeper pitch, as they improve airflow and cooling efficiency. Wider blades are perfect for larger rooms, generating more circulation.

Think about the materials too; metal blades offer durability, while wooden blades provide a classic look. Don't forget about aesthetics—choose colors and designs that complement your space.

Frequently Asked Questions

How Do Ceiling Fan Blades Affect Energy Efficiency?

Ceiling fan blades greatly impact energy efficiency by influencing airflow and cooling. By selecting blades with ideal pitch and size, you'll enhance air circulation, allowing you to maintain comfort while reducing reliance on air conditioning.

Can I Mix Different Blade Materials on One Fan?

Imagine a painter blending colors on a canvas. You can mix different blade materials on one fan, but make certain they're compatible. This can affect performance and aesthetics, so choose wisely for the best results.

What Are the Optimal Blade Sizes for Small Rooms?

For small rooms, you'll want blade sizes between 40 to 52 inches. These dimensions guarantee adequate air circulation without overwhelming the space, enhancing comfort while maintaining a balanced aesthetic that complements your room's design.

Advertisement

Do Blade Colors Influence Temperature Perception?

Yes, blade colors can influence temperature perception. Darker colors absorb heat, potentially making a room feel warmer, while lighter colors reflect light, helping to create a cooler ambiance. Choosing the right color can enhance your comfort.

How Often Should I Replace Ceiling Fan Blades?

Think of your ceiling fan blades as weary travelers. You should replace them every five to ten years, or sooner if you notice warping or significant wear. Keeping them fresh guarantees peak airflow and comfort in your space.

Conclusion

By mastering the secrets of ceiling fan blades, you're not just enhancing your home; you're transforming it into a breezy paradise! Picture yourself gliding through a whirlwind of cool air, as your perfectly designed blades create a symphony of comfort and style. With the right materials and pitch, your ceiling fan can become the crown jewel of your living space, whispering sweet nothings of tranquility while banishing stuffiness to the darkest corners of your home.

Continue Reading

Interior Design

How to Keep Cat From Scratching Furniture

Discover effective strategies to prevent your cat from scratching furniture and maintain peace in your home—your furry friend will thank you!

Published

on

prevent cat furniture scratching

To keep your cat from scratching furniture, you should first understand it's a natural instinct for them. Provide scratching posts and boards in various textures and positions to encourage their use. Keep your furniture less appealing by covering it with sheets or using double-sided tape on surfaces to create an unpleasant texture. Regularly trim your cat's nails to minimize damage potential. Engaging in interactive play can also reduce anxiety and boredom that leads to scratching. There are plenty of effective strategies to explore, ensuring a harmonious relationship with your furry friend.

Key Takeaways

  • Provide a variety of scratching alternatives, such as posts, boards, and mats, to redirect scratching behavior away from furniture.
  • Use positive reinforcement techniques to encourage your cat to use designated scratching areas.
  • Make furniture less attractive by applying double-sided tape or cat-safe sprays to deter scratching.
  • Regularly trim your cat's nails to minimize sharpness and reduce potential damage to furniture.
  • Address anxiety and boredom through interactive playtime and calming supplements to promote a peaceful environment.

Understanding Cat Scratching Behavior

When you watch your cat scratch, it's important to understand that this behavior is instinctual and serves multiple purposes. Cats scratch to maintain their claw health by shedding old claw covers, which exposes sharp new surfaces. This is essential for their overall well-being.

Additionally, scratching allows your feline to mark territory; their paws contain scent glands that leave both visual and chemical markers on surfaces. Understanding the key domains of development in animals can help pet owners grasp the significance of instinctual behaviors.

Scratching also fulfills a physical need for exercise and stretching, helping relieve muscle tension and anxiety. While many cats prefer vertical scratching surfaces, individual cat preference varies, so it's important to pay attention to your cat's specific habits.

If your cat frequently scratches furniture, it may be a sign of stress or boredom, indicating they need enrichment.

To prevent damage, consider providing a dedicated scratching post instead of just allowing them to scratch your furniture. Offering various scratching options that cater to your cat's preferences can help redirect their natural instincts.

Advertisement

Training and Management Strategies

effective training management techniques

To effectively manage your cat's scratching habits, start by providing a variety of scratching alternatives, like posts made from different materials.

Offering options such as cardboard, sisal, and carpet can appeal to your cat's natural instincts to scratch and play, ensuring they've a suitable outlet.

Use positive reinforcement techniques, such as treats or praise, to encourage your cat to use these designated areas.

This approach not only protects your furniture but also promotes healthy behaviors in your feline friend.

For additional tips on pet care, consider exploring hamster care costs.

Provide Scratching Alternatives

Providing your cat with suitable scratching alternatives is essential for preserving your furniture while keeping your feline friend happy. Start by offering a variety of scratching posts made from materials like sisal, wood, or fabric to cater to your cat's preferred scratching style. Position these posts in high-traffic areas and near favorite furniture to encourage your cat to scratch them instead.

Advertisement

Here are some effective scratching alternatives to take into account:

Scratching Alternative Description
Vertical Scratching Post Tall and sturdy for full-body stretching
Horizontal Scratching Board Flat surface that mimics flooring
Textured Mat Provides varied surfaces for scratching
DIY Scratching Options Create your own using cardboard or fabric

Experiment with different types to see which your cat enjoys the most. Regularly trim your cat's nails to minimize damage during their scratching sessions. By providing these options and encouraging your cat to scratch them, you'll help redirect their furniture scratching behavior and keep both your home and your cat content.

Positive Reinforcement Techniques

Using positive reinforcement techniques can effectively encourage your cat to choose scratching posts over furniture. Start by rewarding your cat with high-value treats and praise immediately after they use the scratching post. This reinforces the desired behavior and makes them associate the post with positive experiences.

Additionally, understanding your cat's behavior can be essential for successful training, much like recognizing the importance of selecting the right cold medication for effective relief in human health cold medications overview.

To maximize effectiveness, consider these strategies:

Advertisement
  • Redirect your cat's attention to the scratching post whenever they approach furniture.
  • Use consistent rewards like treats or affection each time they scratch the post.
  • Guarantee consistency among all household members in applying the same rules and rewards.
  • Introduce alternatives like textured mats or boards, rewarding your cat for exploring these new options.
  • Incorporate interactive play sessions to engage your cat's natural instincts, reducing boredom and the urge to scratch furniture.

Providing Alternative Scratching Surfaces

diverse scratching surface options

Cats naturally need to scratch, so offering alternative surfaces is crucial for preserving your furniture. Start by providing tall and sturdy scratching posts made from materials like sisal, fabric, or wood. Position these posts near your cat's favorite furniture or high-traffic areas to increase the chances they'll use them. This will help redirect their scratching behavior effectively.

Consider incorporating horizontal scratching boards that mimic your flooring material, as some cats prefer horizontal scratching. These boards can be a great alternative scratching surface that suits their natural instincts. Additionally, using textured floor mats can attract your cat for scratching and is an affordable option that protects your furniture while allowing their claws to engage effectively.

If you have multiple cats, make sure to provide several scratching options to reduce competition for resources. This will help promote healthy scratching habits among all your pets and guarantee everyone has a designated spot to scratch.

Making Furniture Less Attractive

reducing furniture visual appeal

After setting up alternative scratching surfaces, you'll want to make your furniture less appealing to your pets. You can do this through a few effective strategies that deter cats from scratching. Here are some tips to take into account:

  • Cover your furniture with sheets, plastic covers, or aluminum foil to create an undesirable texture.
  • Apply double-sided sticky tape to targeted areas; cats usually dislike the sticky feeling, making them think twice before scratching.
  • Use cat-safe citrus or vinegar sprays to create an aversive smell that keeps cats away from your furniture.
  • Regularly clean your furniture to remove scent marks, which can attract cats and encourage them to scratch.
  • Drape decorative blankets or throws over your furniture to protect surfaces and minimize visible claw marks, making the area less inviting.

Addressing Anxiety and Stress

managing anxiety and stress

To effectively address your cat's scratching, you need to recognize what triggers their anxiety.

Once you identify these stressors, consider calming supplements like pheromone diffusers to help ease their nerves.

Recognizing Anxiety Triggers

Recognizing anxiety triggers in your feline friend can be essential for preventing unwanted scratching and promoting a peaceful environment. By identifying what stresses your cat, you can tailor your approach to minimize anxiety and reduce destructive behaviors.

Common anxiety triggers include:

Advertisement
  • Loud noises, like thunderstorms or fireworks
  • Changes in routine, such as moving or new schedules
  • Introduction of new pets or people
  • Lack of environmental enrichment, leading to boredom
  • Illness or discomfort, which may manifest as anxiety

To address these triggers, you can provide environmental enrichment and regular interactive playtime, which helps to engage your cat mentally and physically.

Additionally, seeking behavioral support from a Certified Applied Animal Behaviorist can provide valuable insights into your cat's specific needs. They can recommend effective strategies to help your cat cope with anxiety, possibly including calming supplements to create a more comforting atmosphere.

Calming Supplements Options

When it comes to easing your cat's anxiety and stress, calming supplements can be a game-changer. These products, like L-theanine and valerian root, promote relaxation, which can help reduce anxiety in cats and minimize destructive scratching behavior.

You'll find calming supplements in various forms, such as treats, powders, and liquids, making it easy to fit them into your cat's daily routine.

Don't forget to consult your veterinarian for tailored recommendations, as each cat's needs may vary based on their temperament and any underlying issues.

Besides supplements, consider using calming sprays that contain pheromones. These mimic natural feline scents and can create a soothing environment, further deterring anxious scratching.

Advertisement

Combining regular use of calming supplements with environmental enrichment—like interactive toys, scratching posts, and cozy resting spots—can lead to a more balanced and less stressed cat.

This holistic approach not only helps in managing anxiety in cats but also considerably reduces the likelihood of them scratching your furniture.

Regular Nail Care Practices

consistent nail maintenance routine

Maintaining your cat's nails is a crucial step in protecting your furniture from scratches. Regularly trimming your cat's nails every 2-4 weeks minimizes sharpness and reduces potential damage.

Using a quality cat nail trimmer or grinder allows for the safe removal of the sharp tips without causing discomfort. Here are some essential practices to take into account:

  • Familiarize your cat with nail trimming from a young age, ideally starting at around 8 weeks.
  • Make certain the trimming process is calm and positive by using treats and praise.
  • Think about applying claw caps, like Soft Paws, to provide a protective barrier against scratches while allowing natural claw extension.
  • Regularly trimming won't only keep your furniture safe but also promote your cat's comfort and well-being.
  • If your cat resists nail trimming, try incorporating it into a routine, making it a part of your bonding time.

Effective Use of Deterrents

strategic application of deterrents

Deterring your cat from scratching furniture can be achieved through several effective methods. One of the simplest techniques is applying double-sided tape to the surfaces you want to protect. Cats generally dislike the sticky texture on their paws, making it a great deterrent.

You can also use cat-safe citrus or vinegar sprays on your furniture, as the aversive smell can discourage them from scratching those areas.

Consider investing in motion-activated air sprays. These devices release a burst of air when your cat approaches, effectively redirecting them away from the furniture.

Advertisement

Additionally, Feliway pheromone spray can help reduce anxiety and deter scratching on new items by mimicking natural feline facial pheromones, making the area feel less threatening.

Don't forget the importance of regularly cleaning furniture to eliminate any scent marks left by your cat. By removing these familiar territorial signals, you can greatly reduce their urge to scratch.

Combining these strategies will create an all-encompassing approach to deterring scratching and keeping your furniture intact.

Understanding Declawing Consequences

declawing risks and impact

Declawing, often misunderstood as a simple solution for managing scratching, has serious and painful consequences for cats. This surgical procedure involves amputating the last bone of each toe, leading to chronic pain and discomfort.

Many cities and countries have recognized the ethical implications of declawing and banned the practice due to its negative impact on a cat's physical and mental health.

Consider these consequences before opting for declawing:

Advertisement
  • Increased biting and aggression as a cat loses a primary means of defense.
  • Litter box avoidance due to discomfort or inability to scratch properly.
  • Mobility issues, making it difficult for your cat to climb or engage in normal activities.
  • Changes in cat behavior, causing stress and anxiety without their claws.
  • Ineffective long-term solution, as alternatives exist that respect your cat's well-being.

Instead of declawing, focus on providing your cat with scratching posts and using regular nail trimming or claw caps.

These alternatives allow your cat to use their natural behaviors without suffering harm. Remember, keeping your furniture safe shouldn't come at the cost of your cat's health.

Seeking Professional Help

pursuing expert guidance now

When dealing with your cat's scratching behavior, seeking professional help can make a significant difference. Consulting with a Certified Applied Animal Behaviorist can provide tailored strategies to address not just the scratching but any underlying anxiety issues your cat might have.

These professionals can assess your situation and recommend specific approaches that fit your cat's personality and environment.

If you notice your cat scratching excessively, it's crucial to take into account that anxiety could be a factor. Veterinary professionals can prescribe calming supplements or medications to help manage these anxiety symptoms, ensuring a safe and effective treatment plan.

Engaging in telehealth consultations can also be incredibly beneficial. This allows you to get immediate veterinary advice without the stress of a clinic visit.

Additionally, exploring pet care resources, including articles and community support groups, can offer you further insights and strategies tailored to your cat's needs.

Advertisement

Regular follow-ups with professionals can help monitor your cat's progress and adapt strategies as necessary, ensuring long-term success in managing scratching behavior.

Don't hesitate to reach out for help; your cat's well-being is worth it.

Frequently Asked Questions

What Deters Cats From Scratching Furniture?

To deter cats from scratching furniture, try using sticky tape on surfaces, applying cat-safe deterrent sprays, and providing scratching posts. Positive reinforcement and protective covers can also redirect their behavior effectively.

How Do I Stop My Cat From Scratching My Couch?

You don't want your precious couch to become a cat's personal playground. Instead, create a cozy scratching haven nearby, use deterrents, and reward your feline for choosing the right spot to stretch those claws.

How Do You Scratch Proof Furniture From Cats?

To scratch-proof your furniture, use clear shields, sticky tape, and sturdy scratching posts nearby. Apply pheromone sprays, and trim your cat's claws regularly. These steps will help protect surfaces while redirecting your cat's behavior.

Advertisement

What Can I Spray on My Sofa to Stop My Cat Scratching It?

Imagine a brave knight defending a castle. You can spray your sofa with deterrents like citrus or Bitter Apple. These repelling scents act as your shield, keeping your feline foe from scratching your cherished furniture.

Conclusion

To summarize, keeping your cat from scratching your furniture takes patience and understanding. Remember, "You can't teach an old dog new tricks," but cats can learn with the right approach. By providing alternative scratching surfaces, using effective deterrents, and addressing any anxiety, you'll create a happier environment for both of you. Regular nail care and training will make a significant difference, helping to preserve your furniture while ensuring your cat feels secure and fulfilled.

Continue Reading

Interior Design

How to Clean Your Sofa

Learn the essential steps to clean your sofa effectively and keep it looking fresh; discover surprising tips and tricks that could transform your cleaning routine.

Published

on

sofa cleaning step by step

Cleaning your sofa is key to keeping it fresh and allergy-free. Start by vacuuming with an upholstery attachment to remove hair and dust. Address spills immediately by blotting them up and using a suitable cleaning solution based on your sofa's fabric. For tougher stains, try a DIY mix of vinegar, water, and dish soap. Remember to rinse afterward to avoid residue. Schedule a deep clean every 12-18 months, and consider professional help for persistent issues. By following these steps, you'll maintain your sofa's beauty and longevity. There's more to discover about specific cleaning techniques for various fabrics.

Key Takeaways

  • Regularly vacuum your sofa every 3-4 weeks to remove dust, allergens, and pet hair for better indoor air quality.
  • Immediately blot spills with a clean cloth to prevent stains from setting, using appropriate cleaning solutions based on fabric type.
  • Deep clean your sofa at least once a year to maintain its appearance and longevity, using methods suitable for its specific fabric.
  • For persistent stains, utilize DIY cleaners like vinegar and dish soap, ensuring to rinse thoroughly to avoid residue.
  • Consider professional cleaning services for a thorough deep clean and improved indoor air quality, especially if your home has pets.

Importance of Regular Cleaning

consistent cleaning enhances hygiene

Regular cleaning of your sofa is essential for maintaining a healthy home. By keeping up with regular cleaning, you can prevent the buildup of dust, allergens, and germs that negatively impact your indoor air quality. This is especially important if you have pets or allergy sufferers in your household.

Additionally, maintaining clean air through practices such as using an air purifier can complement your sofa cleaning efforts, ensuring that your living environment is as healthy as possible air purifier maintenance dos and don'ts. Deep cleaning your upholstery once or twice a year, combined with surface cleaning every 3-4 weeks, greatly enhances both the longevity and appearance of your couch.

Neglecting to clean your sofa can lead to accumulated dirt and stains, making it harder to maintain in the long run. Regular maintenance like vacuuming and spot cleaning not only keeps your couch looking fresh but also helps avoid major health issues.

A clean sofa makes your living space more comfortable and inviting, while also preserving the integrity of the fabric. Ultimately, establishing a cleaning routine can save you time and effort down the line.

Immediate Cleaning Situations

urgent cleaning task scenarios

When it comes to your sofa, quick action during spills or accidents is essential for preventing stains and odors. Immediate cleaning not only helps maintain your sofa's appearance but also extends its lifespan.

In addition to acting fast, it's important to take into account the type of fabric your sofa is made from, as different materials may require specific cleaning methods. For instance, using appropriate cleaning solutions can prevent damage and guarantee effective stain removal, which can be found in cold medications overview.

Advertisement

Here are some key situations where you should act fast:

  1. Food and Beverage Spills: If you spill liquid, it can seep into the fabric. Blot the area immediately with a clean cloth and use an upholstery cleaner designed for your sofa's material.
  2. Pet Stains: For those unfortunate pet accidents, use an enzymatic cleaner right away. This helps neutralize odors and prevents your pet from returning to the same spot.
  3. Road Salt Residue: In winter, road salt can damage your upholstery. Wipe it off promptly to maintain your sofa's look and feel.

Step-by-Step Cleaning Process

detailed cleaning instructions guide

Begin your sofa cleaning journey by removing any hair and debris with an upholstery vacuum attachment. This step guarantees a thorough clean before applying any cleaning solutions.

For a deeper clean, consider steam cleaning your upholstered furniture to eliminate odors and allergens, similar to the benefits of professional cleaning over DIY methods in mechanic shops for fuel injection cleaning. Make sure to allow the cushions to dry completely to prevent moisture retention.

Next, if you plan to use a fabric-safe disinfectant spray or a homemade cleaning solution, always test it on a hidden area of the sofa first. This helps avoid potential damage to your upholstery.

For stubborn stains, act quickly: blot the area immediately, then apply a detergent solution with a clean sponge. Rinse with water to remove any residue afterward.

To maintain your sofa, vacuum it every 3-4 weeks and schedule a deep clean every 12-18 months. This regular maintenance not only keeps your sofa looking fresh but also prolongs its life.

Advertisement

Techniques for Different Fabrics

fabric specific sewing techniques

Different fabrics require unique cleaning techniques to maintain their appearance and longevity. Here's how to tackle various fabric upholstery:

Additionally, understanding the mechanics of fabric care can enhance the overall cleaning experience, much like various brewing methods affect coffee quality.

  1. Cloth Couch: Mix baking soda with a DIY cleaning solution of dish soap, vinegar, and water. Gently dab stains and let it dry for effective cleaning.
  2. Microfiber Couch: Spray rubbing alcohol on stained areas and scrub gently with a soft cloth. Once done, fluff the fabric with a dry brush for a refreshed look.
  3. Suede Couch: Use a soft brush to lift dirt. Apply a suede cleaner without water, blot any stains, and allow the fabric to dry naturally to preserve its texture.

For velvet couches, quickly absorb moisture with paper towels, lift solid stains with a butter knife, and steam clean to eliminate wrinkles while using a soft brush to maintain the fabric.

When dealing with couch cushions, vacuum thoroughly and use a solvent-based cleaning solution suited for the fabric type. Always perform a spot test in an inconspicuous area first to avoid any damage.

Evaluating Your Couch's Condition

assessing couch s wear status

How can you determine if your couch needs cleaning or replacement? Start by evaluating the overall appearance of your couch. Look for signs of thinning, staining, or tearing, as these can indicate that it's time to clean your couch or even consider a replacement.

Regular maintenance can extend the lifespan of your furniture, just as it does for appliances like energy-efficient appliances that help lower overall energy consumption.

Next, locate the fabric care tag; this will give you essential information about the Type of Fabric and the appropriate cleaning methods.

Evaluate the couch's comfort and structural integrity by testing the couch cushions. Make sure they feel firm and supportive.

Advertisement

Also, check that the frame is stable, without any creaking or wobbling. Persistent odors or allergens can signal a need for deep cleaning, especially if you have pets or allergy sufferers in your home.

Benefits of Professional Cleaning

enhanced hygiene and organization

When it comes to maintaining your sofa, professional cleaning offers a host of benefits that go beyond mere aesthetics. Engaging in upholstery cleaning not only enhances the look of your furniture but also contributes to a healthier home environment.

Regular cleaning can help protect seniors from financial scams by guaranteeing a safe and clean living space, especially for those who may be more susceptible to allergens and bacteria.

Here are three key benefits of opting for professional cleaning:

  1. Improved Indoor Air Quality: Professional cleaning effectively removes dust, allergens, and pollutants, greatly enhancing indoor air quality. This is especially essential for homes with pets or allergy sufferers.
  2. Extended Lifespan of Furniture: With specialized equipment and expertise, professional cleaners tackle tough stains and maintain the integrity of your upholstery. This guarantees your sofa lasts longer, saving you money in the long run.
  3. Comprehensive Hygiene: Regular professional cleaning eliminates harmful bacteria, allergens, and mold, promoting overall cleanliness and hygiene in your home.

Plus, with services backed by guarantees, you can have peace of mind knowing the job is done thoroughly and efficiently.

Addressing Stains Effectively

effective stain removal techniques

Stains are inevitable, but addressing them quickly can prevent lasting damage to your sofa. As soon as a spill occurs, blot it immediately with absorbent cloths. Avoid rubbing the area, as this can spread the stain further.

For fabric upholstery, you can create a DIY cleaner using a mixture of vinegar, water, and dish soap. Apply this solution with a clean sponge, and remember to rinse afterward. To guarantee your cleaning efforts are effective, consider using a vacuum with strong suction power, such as those reviewed in the best vacuums for dust removal in 2024.

Different fabrics require specific cleaning methods. For instance, use rubbing alcohol on microfiber couches, while a soft brush with suede cleaner works best for suede materials. If you encounter tough stains, consider applying a detergent solution and letting it sit for a few minutes before rinsing. This can help lift the stain effectively.

Advertisement

Before using any cleaning solution, always test it on a hidden area of the fabric first. This step guarantees you won't accidentally cause discoloration or damage.

Choosing High-Quality Upholstery

selecting premium upholstery materials

Selecting high-quality upholstery can markedly enhance the comfort and appearance of your sofa. To make the best choice, focus on these key factors:

  1. Durable Fabrics: Prioritize materials like washed linen and eco-friendly blends. These fabrics not only look great but also guarantee longevity and ease of maintenance, similar to the essential items in bug out bags that emphasize durability.
  2. Stain-Resistant Treatment: Look for upholstery treated with products like Scotchgard. This treatment creates a barrier against spills, helping to prevent stains from setting in.
  3. Fabric Codes: Always check the care tags for fabric codes. Codes like "W" indicate water-safe fabrics, while "S" means solvent cleaner only, guiding you on the appropriate cleaning methods.

Additionally, aim for upholstery with a high rub count (15,000 or more) for better wear resistance, especially in high-traffic areas.

Investing in upholstery that comes with a solid warranty offers peace of mind, guaranteeing coverage against defects and boosting the overall value of your purchase.

Frequently Asked Questions

What Is the Best Way to Clean a Fabric Sofa?

To clean a fabric sofa effectively, vacuum it first to remove dirt. Then, use a solution of vinegar and water, blot stains, and rinse with a damp cloth. Always check the care tag for specific instructions.

How Can I Deep Clean My Couch at Home?

Think of deep cleaning your couch as rejuvenating a tired canvas. Start by vacuuming, then scrub with a warm water solution. If possible, steam clean for an extra refresh. Don't forget to dry thoroughly!

How Do You Clean a Dirty Couch Without a Machine?

To clean a dirty couch without a machine, start by vacuuming thoroughly. Then, use a mixture of vinegar and water to scrub stains, blot spills immediately, and sprinkle baking soda to eliminate odors. Rotate cushions regularly.

Advertisement

How Do You Clean a Couch and Make It Smell Good?

Oh sure, just wave a magic wand and your couch will smell like roses! Seriously, vacuum it first, use a vinegar-water mix, sprinkle baking soda, and finish with a fabric-safe freshener for that delightful scent.

Conclusion

To summarize, cleaning your sofa isn't just about aesthetics; it's about maintaining a healthy home environment. Regular upkeep, immediate attention to spills, and knowing your fabric type can make all the difference. Have you considered how much time you spend on your couch and what it says about your living space? By investing in proper care and occasional professional cleaning, you can guarantee your sofa remains a cozy, inviting centerpiece for years to come.

Continue Reading
Advertisement

Affiliate disclaimer

As an affiliate, we may earn a commission from qualifying purchases. We get commissions for purchases made through links on this website from Amazon and other third parties.

Advertisement

Vetted

Vetted1 month ago

Book Review: “The Creative Spark: Unleashing Your Inner Artist”

Reawakening Creativity in the Digital Age Oxford Spiral Notebook 6 Pack, 1 Subject, College Ruled Paper, 8 x 10⁻¹/2 Inch,...

sustainable fashion brand recommendations sustainable fashion brand recommendations
Vetted2 months ago

15 Best Brands for Sustainable Fashion You Need to Know About in 2024

Discover 15 pioneering brands in sustainable fashion for 2024 that will transform your wardrobe while making a positive impact—find out...

sustainable fashion book recommendations sustainable fashion book recommendations
Vetted2 months ago

15 Best Books on Sustainable Fashion That Every Eco-Conscious Reader Should Explore

Join the journey through the 15 best books on sustainable fashion that will transform your wardrobe choices and open your...

sustainable fashion reading list sustainable fashion reading list
Vetted2 months ago

15 Must-Read Books About Sustainable Fashion to Inspire Your Eco-Friendly Journey

Here are 15 essential books on sustainable fashion that will transform your perspective and inspire your eco-friendly journey—discover the secrets...

affordable sustainable fashion brands affordable sustainable fashion brands
Vetted2 months ago

15 Best Affordable Sustainable Fashion Brands You Need to Know About in 2024

Join the journey to discover 15 affordable sustainable fashion brands for 2024 that will transform your wardrobe—find out which ones...

men s fashion essentials 2024 men s fashion essentials 2024
Vetted2 months ago

15 Best Men's Fashion Essentials to Elevate Your Style Game in 2024

Get ready to transform your wardrobe with the 15 best men's fashion essentials for 2024 that will elevate your style...

elevate wardrobe with amazon finds elevate wardrobe with amazon finds
Vetted2 months ago

15 Best Amazon Fashion Finds That Will Elevate Your Wardrobe in 2024

You won't believe the must-have fashion finds from Amazon that will transform your wardrobe in 2024—discover the top 15 styles...

stylish bow embellished fashion items stylish bow embellished fashion items
Vetted2 months ago

15 Best Fashion Pieces With Bows That Elevate Any Outfit

Knot your style with these 15 fashionable pieces featuring bows that promise to elevate any outfit—discover the perfect accessory for...

top men s sneakers 2024 top men s sneakers 2024
Vetted2 months ago

15 Best Men's Fashion Sneakers of 2024 – Style Meets Comfort

Looking for the perfect blend of style and comfort in men's fashion sneakers? Discover the top 15 picks for 2024...

stylish comfortable women s sneakers stylish comfortable women s sneakers
Vetted2 months ago

15 Best Women's Fashion Sneakers for Style and Comfort in 2024

Looking for stylish and comfortable women's sneakers in 2024? Discover the top 15 picks that will elevate your wardrobe and...

2024 women s fashion trends 2024 women s fashion trends
Vetted2 months ago

15 Best Women's Fashion Trends of 2024 You Need to Know About

Look ahead to 2024's must-have women's fashion trends that blend comfort and style—discover which pieces you can't afford to miss!

elevate your style game elevate your style game
Vetted2 months ago

13 Best Fashion and Beauty Products You Need to Elevate Your Style Game

Jumpstart your style with these 13 essential fashion and beauty products that promise to transform your routine—discover what you've been...

Advertisement

Trending

Copyright © 2024 StyleGuru.org Affiliate disclaimer As an affiliate, we may earn a commission from qualifying purchases. We get commissions for purchases made through links on this website from Amazon and other third parties.