Interior Design
How to Paint Leather Sofa
Keen to transform your leather sofa? Discover the essential steps for a stunning makeover and what to do if your sofa has weak seams.
To paint your leather sofa, start by cleaning it with a leather stripper or mild soap. Make sure it's completely dry before you apply paint. Choose specialized leather paint in the color you desire, and use a small brush for tight areas. Apply the paint in thin layers to maintain the leather's texture. Once painted, seal the surface with a leather-specific sealant to enhance durability. Remember to handle any weak seams or damages before you start. If you're curious about proper maintenance and advanced techniques, there's even more to explore.
Key Takeaways
- Clean the leather sofa thoroughly with a leather stripper or mild soap and water to prepare the surface for painting.
- Choose specialized leather paint, applying it in thin layers to maintain texture and flexibility.
- Use a small detail brush for precision around seams and intricate areas during the painting process.
- Allow the paint to dry completely before applying a leather-safe sealant for added durability and protection.
- Conduct a test on an inconspicuous area first to ensure desired results before painting the entire sofa.
Introduction
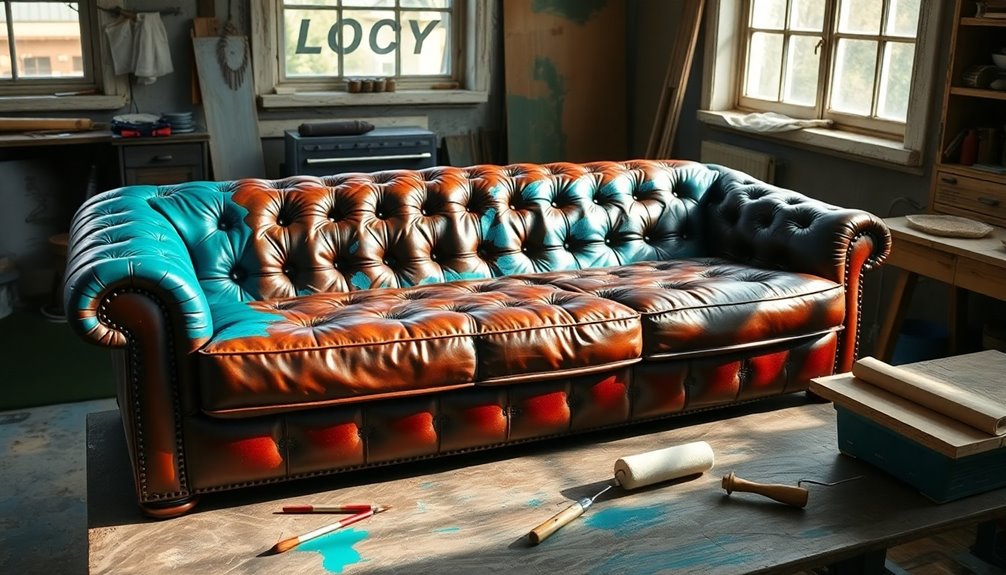
When you decide to paint your leather sofa, it's essential to start with proper care and maintenance. Routine dusting and conditioning keep the leather in good shape, while knowing fabric-specific cleaning techniques helps you tackle any ink or food stains. Taking these steps ensures a smooth painting process and a stunning final result.
Routine Dusting and Conditioning
Keeping your leather sofa looking its best requires regular maintenance, particularly through routine dusting and conditioning. Dusting is essential to maintain the appearance of your sofa, as it prevents dirt from accumulating and causing damage to the leather surface. Use a soft microfiber cloth for dusting; it effectively captures dust particles without scratching the leather.
In addition to dusting, conditioning your leather sofa every 3 to 6 months is crucial. This process helps keep the leather supple and prevents it from drying out and cracking over time. When choosing a leather conditioner, opt for a high-quality product that's free from harsh chemicals. This ensures it nourishes and protects the leather without causing discoloration or damage.
Before applying any conditioning product, always test it on a small, inconspicuous area of the sofa first. This step allows you to check for any adverse reactions, ensuring your leather remains in great shape. By committing to routine dusting and conditioning, you'll help prolong the life of your leather sofa and keep it looking fabulous for years to come.
Fabric-Specific Cleaning Techniques
Cleaning a leather sofa before painting is crucial for achieving a professional finish. Start by using a leather stripper or acetone on a rag to wipe down the surface. This step removes dirt, oils, and any previous finishes that could hinder paint adhesion. Make sure your workspace is well-ventilated, as the strong odors from cleaning agents can be overwhelming.
For edges or stubborn mold, vinegar works wonders as a natural cleaner and disinfectant, helping to prepare the leather for painting. After you've thoroughly cleaned the sofa, allow it to dry completely. This ensures a smooth and even application when you paint leather furniture.
Before you jump into painting, gather all your necessary materials, including leather paint, brushes, and protective gloves. This will streamline the process and help you stay organized. Remember, a clean surface is key to achieving that flawless look you desire, so don't skip this essential step. Taking the time to clean your leather sofa properly will set you up for success in your painting project.
Treating Ink and Food Stains
Leather furniture can be a stylish addition to your home, but it's also susceptible to ink and food stains that can mar its appearance. For ink stains, grab some rubbing alcohol and a cotton swab. Gently dab the stained area, but be careful not to use too much moisture, as it can damage the leather. When it comes to food stains, a mixture of mild soap and water applied with a soft cloth works wonders. Remember to blot the stain instead of rubbing, which can push it deeper into the leather.
Before you go all in with any cleaning solution, always test it on an inconspicuous spot first. This way, you can ensure it won't cause discoloration or further damage. If the stain lingers despite your efforts, consider using a leather cleaner specifically designed for your type of leather. Follow the manufacturer's instructions to achieve the best results. Once you've treated the stains, don't forget to apply a leather conditioner. This will help restore moisture and maintain the leather's suppleness, keeping your sofa looking its best for years to come.
Preventing Scratches and Scuffs
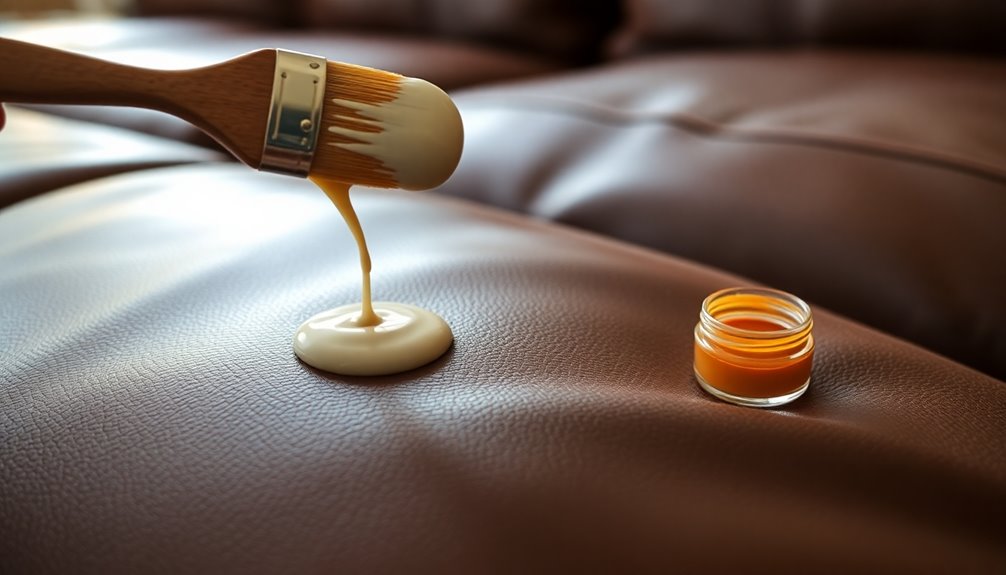
To keep your leather sofa looking pristine, consider using scratch-resistant fabrics or adding protective layers. Regular conditioning treatments can also help maintain the leather's integrity, making it less prone to damage. By taking these steps, you can significantly reduce the risk of scratches and scuffs over time.
Using Scratch-Resistant Fabrics
When selecting materials for your leather sofa, opting for scratch-resistant fabrics can significantly enhance its durability. Look for fabrics specifically labeled as scratch-resistant, such as certain synthetic blends or treated leathers. These materials are designed to withstand daily wear and tear, making them ideal for high-traffic areas in your home.
Pay attention to the rub count when choosing your fabric. Materials with a high rub count, particularly those with 15,000 double rubs or more, typically offer better resistance to scratches and scuffs. Additionally, consider applying protective coatings, such as Scotch Guard, to provide an extra layer of defense against potential damage.
Regular maintenance is crucial in preserving your leather sofa's finish. Use gentle, non-abrasive cleaners to keep your sofa clean and reduce the risk of scratches from dirt and debris. When your sofa isn't in use, incorporating furniture covers or throws can further shield it from scratches caused by pets or sharp objects. By choosing scratch-resistant fabrics and taking proactive measures, you'll ensure your leather sofa remains beautiful and durable for years to come.
Protective Fabric Layers
While maintaining the beauty of your painted leather sofa, incorporating protective fabric layers can be a game-changer in preventing scratches and scuffs. Start by applying a layer of acrylic leather finisher after painting. This creates a protective barrier that enhances durability and shields your sofa from daily wear.
Consider adding a soft, protective fabric cover over the areas you frequently use. This minimizes direct contact and helps reduce wear on your painted leather. Additionally, always clean your leather with a gentle, non-abrasive cleaner to keep its surface intact and lower the risk of scratches from dirt buildup.
Using coasters or placemats on the sofa can also protect against sharp objects and accidental scuffing from items placed on the surface. It's a simple yet effective way to maintain your sofa's pristine condition.
Finally, inspect the painted areas periodically for signs of damage. If you notice any wear, apply touch-up paint as needed. This way, you'll maintain both the protective layer and the overall aesthetic appeal of your beautiful painted leather sofa.
Regular Conditioning Treatments
Regular conditioning treatments are essential for keeping your leather sofa in top shape and preventing scratches and scuffs. By regularly applying a high-quality leather conditioner every 3-6 months, you maintain the moisture balance in the leather, preventing cracks and ensuring it stays supple.
To apply the conditioner effectively, use a microfiber cloth to ensure an even distribution across all areas, especially seams and crevices, which are often overlooked. This comprehensive treatment creates a protective barrier against dirt and oils, enhancing both the appearance and longevity of your sofa.
Consider choosing a conditioner that offers UV protection, as this can shield your leather from sun damage and fading, further reducing its susceptibility to wear. Regular conditioning not only restores the natural luster of the leather but also helps prevent scratches and scuffs, keeping your sofa looking new for years to come.
Incorporating these conditioning treatments into your maintenance routine is a simple yet effective way to protect your investment and enjoy a beautiful leather sofa for years ahead.
Upholstery Stitching and Seams
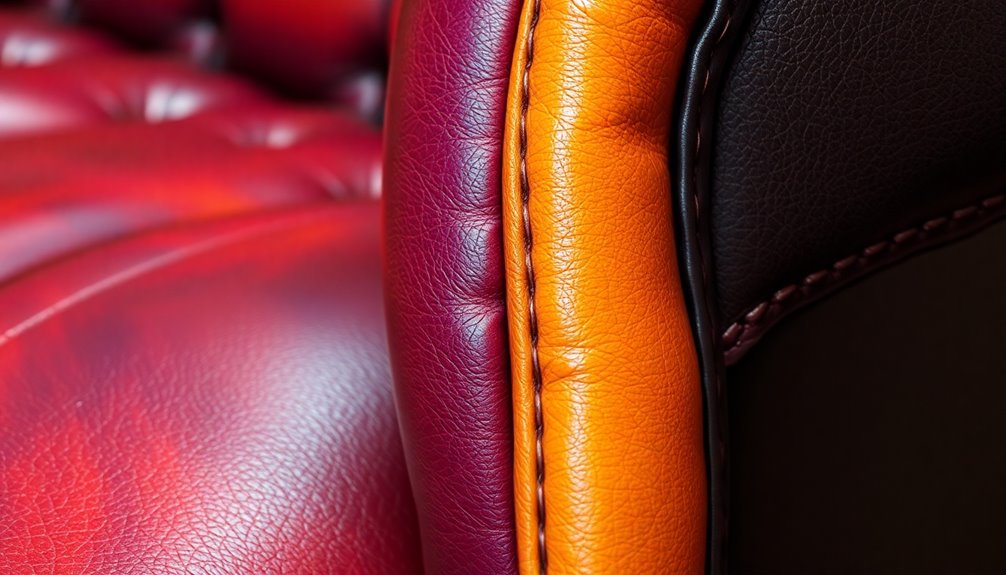
When you're painting your leather sofa, pay close attention to the upholstery stitching and seams, as weak spots can lead to bigger issues down the line. You'll want to consider leather repair techniques to strengthen these areas and maintain their integrity. Plus, reviving leather's natural luster can enhance the overall look once you've finished painting.
Weak Seams and Stitching
Weak seams and stitching can become a major concern for leather sofa owners, often leading to fraying and tearing over time. To avoid this, it's crucial to use high-quality thread and techniques during the upholstery process. Regularly inspect your sofa for signs of wear, especially around weak seams. Catching potential issues early allows for timely repairs, which can significantly prolong the life of your furniture.
When you decide to paint your leather chair, be cautious. Avoid applying paint directly over weak seams, as it may not adhere properly and could worsen existing issues. Instead, consider using a leather conditioner before painting. This helps maintain the flexibility of the seams, reducing the risk of cracking or splitting after the paint application.
If you find weak seams that need resewing, opt for a reinforced stitching technique. Double stitching can enhance durability and provide the support needed in high-stress areas. By taking these steps, you can preserve the integrity of your leather sofa and ensure it remains a comfortable and stylish centerpiece in your home. Additionally, understanding the emotional dysregulation associated with BPD can help in recognizing how stress and anxiety may influence your decision to maintain and care for your furniture.
Leather Repair Techniques
Inspecting your leather sofa for weak seams and stitching often reveals the need for effective repair techniques. Upholstery stitching is crucial for reinforcing the structure and preventing further damage. You'll want to use a heavy-duty needle paired with strong thread, like polyester or nylon, to ensure your repairs last.
When stitching, the saddle stitch technique is your best bet. This involves passing the needle through the same hole from opposite sides, creating a secure grip. For larger tears or damaged areas, consider using leather patches. Make sure they match the color and texture of your existing leather for a seamless look.
Regularly check your seams and stitching to catch any signs of wear early. This proactive approach allows for timely repairs before they worsen, saving you time and effort in the long run. After making your repairs, you can proceed to painting leather, revitalizing your sofa's appearance while maintaining its integrity. By employing these leather repair techniques, you'll not only extend the life of your sofa but also keep it looking fresh and stylish.
Reviving Leather's Natural Luster
Reviving your leather sofa's natural luster requires careful attention to upholstery stitching and seams, as these areas can significantly impact the overall appearance. When you paint your leather sofa, focus on these details to avoid paint clumping or obscuring the intricate stitching. Use a small detail brush to meticulously paint around the seams, ensuring you achieve even coverage without disrupting the stitching pattern. This approach helps maintain your sofa's original design integrity.
It's advisable to apply paint in thin layers, allowing each coat to dry completely before tackling the seams. This method preserves the texture and prevents oversaturation, which can dull the leather's natural shine. Once you've finished painting, consider applying a sealant specifically designed for leather. This extra step can enhance the durability of painted seams and stitching, protecting your hard work.
Don't forget that regular maintenance, including cleaning and conditioning, will keep your painted seams and stitching looking fresh. By following these tips, you'll ensure that the overall aesthetic of your leather sofa remains intact and vibrant, reviving its natural luster beautifully.
Personalized Color Choices

When it comes to painting your leather sofa, your color choices can truly transform the piece into a reflection of your personal style. Using specialized leather paint, like Angelus Leather Acrylic, gives you access to over 30 shades, allowing for personalized color choices that align with your decor.
If you want a vibrant finish, consider lighter colors, as they often provide better coverage than darker shades. Don't hesitate to mix paints to create unique hues that perfectly match your aesthetic; just remember to test small amounts first to ensure you achieve the desired tone before committing to a full application.
Popular color selections include earthy tones like tan and chestnut, which can enhance both rustic and contemporary spaces. Additionally, experimenting with finishes—such as matte or high gloss—can elevate the visual appeal of your painted leather. This way, you can create a stunning look that not only rejuvenates your sofa but also showcases your personal style. So, take your time exploring the options, and let your creativity shine through with every brushstroke!
Seasonal Leather Maintenance Tips
To keep your leather sofa looking its best throughout the year, regular maintenance is essential. Start by cleaning your sofa regularly with a damp microfiber cloth to remove dust and prevent buildup that can lead to stains or deterioration. Aim to apply a leather conditioner every 3-6 months to maintain its suppleness and prevent cracking, especially in dry or low-humidity environments.
During seasonal changes, pay attention to humidity levels in your home. Extreme dryness can drain moisture from the leather, making it brittle. Consider using a humidifier if you live in a dry climate. Additionally, protect your leather from direct sunlight by rearranging furniture or using window treatments. This helps avoid fading and drying out the material.
When entertaining during the holiday season, it's wise to apply a leather-safe protector spray to guard against spills and stains. This extra layer of protection will help keep your sofa looking pristine. By staying proactive with these maintenance tips, you'll ensure your leather sofa not only looks great but also lasts for years to come.
Conclusion
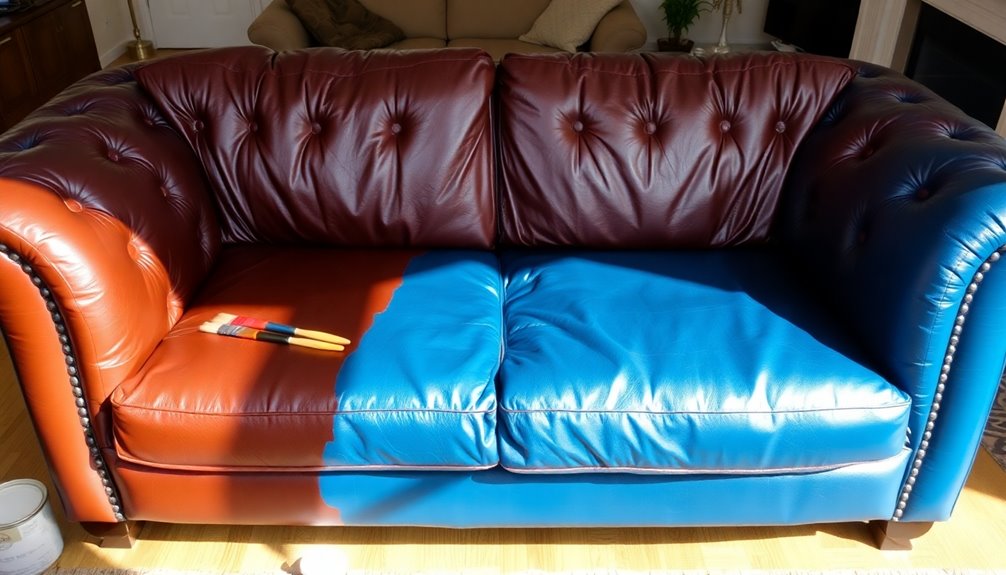
Maintaining your leather sofa is key to its longevity, and if you're looking for a fresh look, painting offers a fantastic solution. By using high-quality products like Angelus Brand Leather Paint, you can rejuvenate your sofa's appearance while making it uniquely yours. The painting process typically requires at least two coats, with a 24-hour drying time in between.
Start by thoroughly cleaning the leather with a deglazer or acetone to remove any dirt and oils, ensuring the paint adheres properly. Just as you'd take care of your leather shoes, regular maintenance checks are crucial for your sofa as well. After the final coat, applying a sealant like Angelus Acrylic Finisher will enhance durability and keep your new finish protected.
Allow a full day for the sealant to dry before using your sofa. Remember, touch-ups may be necessary over time to maintain its aesthetic appeal. With the right approach, you'll not only breathe new life into your leather sofa but also enjoy a personalized piece that complements your home decor beautifully. So get started and transform your sofa into a stunning focal point!
Frequently Asked Questions
Can a Leather Couch Be Painted?
Yes, you can paint a leather couch! To get started, you'll need specialized leather paints that adhere well, like Angelus Leather Acrylic Paint. First, clean your couch thoroughly with acetone or a leather stripper to remove oils and dirt. Apply two to three thin coats, letting each one dry for 24 hours. Don't forget to finish with a sealant to protect your newly painted surface. Regular maintenance will help keep it looking fresh!
What Paint Will Stick to Leather?
If you're looking for paint that sticks to leather, consider using Angelus Leather Acrylic Paint or Reluv Leather Renew. These paints are specially formulated for leather surfaces, ensuring excellent adhesion and flexibility. Make sure to clean the leather thoroughly with acetone or a degreaser to remove any oils before painting. For faux leather, applying a primer like Ultra Grip can enhance adhesion and prevent peeling. Your project will look great when using the right products!
What Paint Stays on Leather?
If you want a paint that stays on leather, consider using Angelus Leather Acrylic Paint. It's designed specifically for leather, ensuring excellent adhesion and flexibility. You'll find its runny consistency makes application easy, often needing just two coats for full coverage. Remember to prep the leather with a deglazer to enhance paint adherence. Always test the paint on a small, hidden area first to ensure you get the desired results before going all in.
How to Change the Color of a Leather Sofa?
To change the color of your leather sofa, start by cleaning it thoroughly with a leather stripper or acetone. This removes dirt and oils that interfere with paint adhesion. Next, apply a deglazer and let it dry. Once prepped, use high-quality leather acrylic paint in thin coats, allowing time to dry between applications. For added durability, finish with a sealant to protect your new color from wear and tear.
Interior Design
How to Fix Water Damaged Swollen Wood Furniture
Unlock the secrets to restoring your water-damaged wood furniture and discover essential techniques that will leave your pieces looking brand new.
To fix water-damaged, swollen wood furniture, start by assessing the damage. Dry the furniture in sunlight for a few hours, using fans and a dehumidifier for better circulation. Eliminate any water bubbles with a low-heat iron or hair dryer. Sand swollen areas with medium-grit sandpaper, then smooth with finer grit. Clean any mold with a mild solution and keep your space well-ventilated during this process. Finally, apply a sealant to prevent future damage. Each step is crucial for restoring your furniture's beauty and integrity, and there's more you can learn to enhance your restoration skills.
Key Takeaways
- Assess the damage by checking for discoloration, warping, and moisture content using a moisture meter to determine severity.
- Dry the furniture in a well-ventilated area, utilizing electric fans and dehumidifiers, and limit direct sunlight exposure to three hours.
- Eliminate water bubbles using a low-heat iron or hair dryer, ensuring to maintain a safe distance to avoid further damage.
- Sand swollen areas with medium-grit sandpaper, then finish with finer grit, ensuring to fill any cracks or gouges with wood filler.
- Apply waterproof sealants and maintain humidity levels between 30-50% to prevent future moisture-related issues.
Assessing Water Damage
When you notice signs of water damage on your wood furniture, it's crucial to assess the situation promptly. Start by identifying visible signs like discoloration, which can appear as cloudy or darker spots on the surface. Look for warping or swelling, as wood absorbs moisture, leading to uneven surfaces that may affect functionality. Inspect for bubbling or peeling paint, which often signals prolonged exposure to water.
Next, determine the severity of the damage. Minor issues might only involve slight swelling or small bubbles, while severe damage could include large discolored areas and extensive warping. Check joints and connections for any signs of separation due to water-induced expansion. Using a moisture meter can help quantify the moisture content in the wood, giving you a clearer picture of the damage.
Additionally, be aware that different types of wood react variably to water exposure, which can affect the restoration process. Don't forget to evaluate the wood type and finish, as these factors will influence your restoration approach. Finally, feel for soft spots, which indicate moisture saturation, and inspect for structural integrity by looking for splits, cupping, or gaps. This thorough assessment will guide you in deciding the best steps to take next.
Drying the Furniture
Drying water-damaged wood furniture is essential to restore its integrity and appearance. Start by placing the furniture in direct sunlight for a quick drying process. Rotate the pieces periodically to ensure even drying and prevent warping, but limit exposure to no more than three hours at a time to avoid cracking. Be mindful of the weather; avoid extreme cold or heat.
If sunlight isn't an option, position the furniture in a well-ventilated area. Use electric fans to enhance air circulation, blowing air directly onto the furniture for at least 24 hours while keeping the fans at a moderate distance. Open windows to promote airflow. Additionally, employing a dehumidifier can significantly aid in reducing moisture levels in the air, further supporting the drying process.
For an alternative approach, you can employ heating appliances. Use an iron on the lowest heat setting, covering the wood with a clean cloth. Alternatively, use a hair dryer, moving it constantly to prevent overheating. Apply heat gradually, repeating the process until the wood is fully dry.
Lastly, consider using a dehumidifier to lower humidity levels in the room and place the furniture in a warm, dry environment. This helps prevent further swelling and promotes effective drying.
Removing Water Bubbles
After ensuring your water-damaged wood furniture is thoroughly dried, the next step involves tackling any unsightly water bubbles that may have formed. One effective method is using an iron. Set it to the lowest heat setting, then cover the swollen area with a wet rag to protect the wood. Hold the iron on the rag for a few seconds, lift, and repeat until the bubbles disappear. Remember to keep the iron moving to prevent scorching.
Alternatively, you can use a needle or a printer. Poke it through the water bubble to let the air and water escape, a quick and heat-free solution that won't damage the wood. Repeat until all bubbles are gone.
Another option is a hair dryer. Set it to the lowest heat and hold it about six inches away, moving it constantly. This method also helps evaporate the trapped water. Keep in mind that humidity in the air can contribute to the formation of new bubbles if the furniture is not kept in a controlled environment.
Regardless of your chosen method, allow the furniture to air dry for a few hours afterward. Ensure the wood is completely dry before proceeding to any other steps. Keep your workspace well-ventilated to help speed up the drying process.
Cleaning the Furniture
Cleaning your water-damaged wood furniture is essential to restore its appearance and prevent further issues. Start by identifying any areas with mold, mildew, or black spots, as these often appear after water exposure. When you find them, wear protective gear like gloves, eyewear, and a face mask. Use a diluted bleach solution, cleaning vinegar, or dish soap to gently scrub the affected areas with a soft-bristled brush. Rinse thoroughly with clean water, then let the furniture dry completely.
Next, wipe off any residue or debris from the wood's surface using a clean microfiber cloth. A vacuum can help remove standing water and debris from the furniture and surrounding area. Make sure the furniture is in a well-ventilated space to prevent further moisture buildup; electric fans can aid in the drying process, but avoid using heat to prevent cracking or warping. Additionally, it's important to remove excess water to prevent further absorption, which can lead to swelling and long-term structural issues.
Finally, keep the area well-ventilated after cleaning. Wipe down the furniture surface to eliminate excess moisture. With these steps, you'll set the stage for effective restoration and protect your wood furniture from future damage.
Sanding the Wood
Once you've cleaned your water-damaged wood furniture, it's time to address any swelling or rough spots through sanding. Start with medium to coarse-grit sandpaper, around 80-120 grit, to tackle the swollen areas. Sand in the direction of the wood grain to avoid scratches, using a hand-sanding tool or sanding by hand for even results. Apply gentle to moderate pressure depending on how much swelling there is.
Once the surface is more level, switch to finer-grit sandpaper (180-220 grit) to smooth out any filled areas. Finish with a final sanding using fine-grit sandpaper (220-320 grit) for a smooth finish. Remember, using very fine grit initially can clog your sandpaper, so progress from coarser to finer grits.
Before you start, don safety glasses, rubber gloves, and a dust mask, and make sure your workspace is well-ventilated to avoid inhaling dust. After the initial sanding, inspect for cracks or gouges. If you find any, apply wood filler, let it dry, and lightly sand those areas to blend them into the surrounding wood. It's essential to recognize early signs of water damage to prevent further issues. Check for any imperfections, ensuring everything is smooth and even.
Applying Finishes
Applying a new finish to your water-damaged wood furniture is essential for restoring its beauty and protecting it from future damage. Start by selecting a finish that matches the original type used on your furniture. Consider the wood type and its initial finish; compatibility is crucial for a successful application. If you're using a high-performance finish like catalyzed varnish, ensure you follow any special care requirements. Remember that smart home device integration can also enhance your home environment, making it easier to monitor conditions that could affect your furniture.
Before applying the finish, prepare the surface. Clean it thoroughly to remove dust, residue, or old finish. Use fine sandpaper (#320 grit or finer) to scuff the surface for better bonding, and remove any loose finish. If needed, wipe it with mineral spirits and ensure it's completely dry. Remember that applying waterproof sealants can enhance the durability of your finish against future moisture damage.
When applying the finish, do so in thin, even coats to prevent blistering. If you're using lacquer, a spray gun is best; consider a retarder to avoid blushing. For shellac, lightly wipe the surface with a cloth dampened in denatured alcohol. Allow each coat to dry fully before applying more. Once done, inspect the finish regularly to maintain its protective qualities and extend the life of your furniture.
Preventing Future Damage
To keep your wood furniture looking its best and prevent future damage, maintaining a controlled environment is crucial. Aim for humidity levels between 30 and 50 percent to stop the wood from swelling or drying out excessively. If you live in a dry climate, consider using a humidifier to stabilize those levels. Avoid placing your furniture in high-moisture areas like basements or near bathrooms, and ensure the room temperature remains steady and moderate. Additionally, regularly applying sealants can provide an added layer of protection against moisture. Using an air purifier can also help maintain optimal indoor air quality, further protecting your furniture.
Daily care is equally important. Always use coasters under drinks to prevent spills from penetrating the wood. Wipe up any spills immediately to avoid absorption. For plants, place mats or rugs underneath to catch drips. Regularly dust your furniture to prevent buildup, and clean surfaces with a damp microfiber cloth and white distilled vinegar if needed.
Protect your furniture from direct elements by keeping it out of strong sunlight and away from heating vents or air conditioning units. Use curtains or blinds to filter sunlight, and ensure your furniture stays dry by avoiding exposure to rain or snow. Regularly inspect your pieces for damage, and apply wood moisturizer or sealants as recommended to maintain their integrity.
Tools and Materials Needed
When tackling water-damaged wood furniture, having the right tools and materials on hand is essential for effective restoration. First, ensure your safety by wearing goggles, gloves, and a dust mask. You'll need buckets and towels to collect any excess water and moisture. For drying, gather fans and a dehumidifier, and consider a moisture meter to check the wood's dryness. It's important to remember that early detection of water damage can significantly reduce the extent of repairs needed. Additionally, maintaining a clean and safe environment around your workspace will help prevent accidents while restoring furniture.
You'll also want cleaning tools like a lint-free rag, a scrubbing brush, detergent, and bleach to tackle any mold or mildew. Make sure all electrical sources are unplugged before you start. When it comes to smoothing the wood, have sandpaper of various grits ready, along with a power sander and hand-sanding tool.
For filling gaps, get wood putty or filler, and have paintbrushes and sealant on hand for refinishing. Furniture oil, wood stain, and clamps or weights will help you achieve a protective finish. Finally, a wet rag and iron can assist with swollen areas, while a soft brush helps clear away dust. With these tools and materials, you'll be prepared to restore your furniture effectively.
Tips for Effective Restoration
Restoring water-damaged wood furniture requires a careful approach to ensure the best results. Start by drying the furniture. Place it in the sun, rotating it regularly to prevent uneven drying and cracking. Use electric fans and a dehumidifier to speed up the process while avoiding high heat, which can warp the wood. Wipe down surfaces with a clean microfiber cloth to remove excess moisture.
Next, tackle any water bubbles. Use an iron set to its lowest heat with a cloth to absorb bubbles, or apply a hairdryer on low, moving it constantly to prevent overheating. Clean any mold or black spots to avoid further damage.
Once the surface is dry, sand down swollen areas using medium to coarse-grit sandpaper, working with the grain. After sanding, brush off the dust and follow up with fine-grit sandpaper for a smooth finish.
Finally, protect the wood by applying furniture oil to the sanded areas. Fill any cracks or holes with wood filler, sand it once dry, and finish with a coat of oil or varnish to enhance and protect the wood's appearance.
When to Seek Professional Help
Recognizing the limits of your DIY skills can be crucial in restoring water-damaged wood furniture. If you notice severe swelling, warping, or large discolored areas, it's time to call in a professional. When multiple components, like drawers and doors, are affected and hard to open, expert intervention is recommended. Complex restoration tasks, such as sanding and refinishing, often require specialized tools and techniques that you might not have.
If you're facing risks of further damage while attempting to fix the furniture, it's safer to seek help. Professional help has the experience to handle advanced techniques properly, including drying methods that could otherwise damage the wood. Additionally, if mold or mildew is present, professionals can remove it safely.
Consider the value of your piece; if it has significant sentimental or monetary worth, a professional restoration can justify the cost. Restoration can also be time-consuming, so if you lack the patience or space to manage the process, let someone else handle it. Finally, if insurance covers the damage, professionals can help navigate the claims process effectively, ensuring your furniture is restored and protected.
Frequently Asked Questions
How Can I Tell if Wood Is Still Wet Inside?
To tell if wood is still wet inside, check for signs like a soft, soggy texture or visible cracks and gaps. Use a moisture meter for precise readings. If the wood feels cooler when you touch it or reacts to heat, that's a clue it might still be wet. Also, pay attention to any musty odors or prolonged drying times. These indicators can help you assess the wood's moisture content effectively.
What Are the Best Types of Wood Fillers for Water Damage?
When dealing with water damage, you'll want wood fillers that can handle moisture effectively. For this, consider using Elmer's ProBond Wood Filler for its strong bond and durability. Gork's Goodfilla Wood & Grain Filler is another great option due to its resistance to shrinking and cracking. If you're looking for versatility, Gorilla High Performance Wood Filler works well outdoors and can withstand the elements, ensuring a long-lasting repair.
Can I Use Vinegar Instead of Turpentine for Cleaning?
Yes, you can use vinegar instead of turpentine for cleaning. It's less toxic and gentler on wood surfaces. Mix equal parts of vinegar and water, then apply it with a soft cloth, wiping in the direction of the grain. This solution effectively removes water spots and helps restore wood color. Just remember to test a small area first to ensure there's no damage, and avoid using it on sensitive or old finishes.
How Long Should I Wait Before Applying Finishes?
You should wait until the wood is completely dry before applying finishes. This can take several days to weeks, depending on the environment and how wet the wood was. Check for any moisture by touching the surface; it should feel dry to the touch. If you've used wood fillers, ensure they're fully cured as well. Rushing this step can lead to trapping moisture, which can damage your finish and the wood itself.
Is It Safe to Use Heat Tools on Antique Furniture?
Using heat tools on antique furniture isn't safe. Heat can soften finishes and damage the underlying glue, especially in older pieces. You risk burning the wood or causing uneven fading and cracking. Instead of heat, consider letting the furniture dry naturally or using safer methods like sanding and applying furniture oil. Always keep your antique pieces away from direct heat sources to preserve their value and integrity.
Conclusion
By following these steps, you can effectively restore your water-damaged, swollen wood furniture and bring it back to life. Remember, patience is key during the drying and sanding processes. Always keep an eye out for signs of future damage and take preventive measures. If the damage is too extensive or you're unsure about tackling it yourself, don't hesitate to reach out to a professional. Your furniture deserves the best care, so give it the attention it needs!
Interior Design
Unraveling Germany’s Ceiling Fan Dilemma
Mapping Germany’s ceiling fan dilemma reveals surprising insights about climate, design trends, and energy costs—what solutions could emerge in this unique market?
Germany faces a **ceiling fan dilemma** due to its **mild weather**, leading to reduced reliance on fans for cooling. Instead, air conditioning is becoming more popular despite strict rules promoting **energy efficiency**. Modern home designs lean towards **minimalism**, making traditional ceiling fans less attractive. Older houses with low ceilings present installation hurdles, prompting homeowners to opt for **portable options**. However, with increasing energy prices and climate change concerns, attitudes may change as new fan designs merge seamlessly with contemporary interiors. Delving into the reasons behind this dilemma provides insights into cooling choices in this distinctive market. Discover more about this intriguing situation and uncover valuable tips for navigating the cooling landscape in Germany.
Key Takeaways
- Germany's temperate climate reduces the demand for ceiling fans, with natural ventilation preferred during warmer months.
- Stringent energy regulations and a focus on efficiency lead to a preference for alternative cooling solutions over traditional ceiling fans.
- The minimalist design trend favors sleek, unobtrusive cooling options, making bulky ceiling fans less appealing to homeowners.
- Architectural limitations in older homes, such as low ceilings, complicate ceiling fan installation and reduce their practicality.
- Climate change and rising energy costs may shift perceptions, increasing interest in ceiling fans as energy-efficient alternatives in the future.
Climate Influence on Cooling Needs
Germany's temperate climate greatly shapes your cooling needs. With mild summers and cool winters, you find less necessity for ceiling fans. Instead, you often rely on air conditioning, which has become more common in homes due to the climate, reducing the demand for ceiling fans.
You likely prefer natural ventilation by opening windows during warmer months, as extreme temperatures are rare. Although climate change could spark interest in energy-efficient cooling solutions, ceiling fans aren't a priority for you right now.
However, using ceiling fans during summer can still help decrease your reliance on energy-intensive air conditioning. In winter, operating them in reverse aids warm air circulation, enhancing your heating efficiency and comfort throughout your home.
Regulations Shaping Energy Choices
The choices you make regarding cooling solutions in your home are heavily influenced by Germany's strict energy efficiency regulations.
These rules shape your options and often discourage the use of ceiling fans. Here are some key factors to take into account:
- The Energy Efficiency Directive promotes reduced energy consumption.
- Ceiling fans are often seen as energy-hungry appliances.
- The Energy Conservation Act encourages sustainable measures in buildings.
- The Eco-Design Directive sets efficiency standards for appliances, including fans.
Due to these regulations, you'll likely opt for more efficient cooling systems that align with energy-saving practices.
This shift not only meets regulatory demands but also reflects a growing commitment to sustainability in your household.
Design Preferences in Interiors
In contemporary German interiors, a strong preference for minimalist design often clashes with the bulky appearance of ceiling fans. You'll find that many homeowners prioritize clean lines and simplicity, making ceiling fans seem disruptive. Instead, they lean toward energy-efficient systems that align better with their aesthetic values.
Preference | Popular Alternatives |
---|---|
Minimalist aesthetics | Portable air conditioners |
Clean lines and simplicity | Window fans |
Energy-efficient solutions | Innovative cooling tech |
Dislike for bulky designs | Natural ventilation methods |
This cultural emphasis shapes how you choose cooling solutions, as sleek, unobtrusive options become more desirable than traditional ceiling fans. Ultimately, your interior design choices reflect a commitment to both aesthetics and sustainability.
Architectural Limitations and History
Many homeowners face challenges when considering ceiling fans due to architectural limitations in older buildings. These constraints often discourage the installation of fans, making them less practical.
Here are some common issues you might encounter:
- Many older homes have low ceilings, making fan installation difficult.
- Decorative architectural features complicate wiring and mounting.
- Building codes prioritize historical preservation, limiting modern additions like fans.
- Retrofitting can be cumbersome and costly, often deterring homeowners.
As a result, the historical focus on efficient heating further reduces the necessity for ceiling fans, pushing many to explore alternative cooling methods.
This blend of architectural and historical factors creates a unique dilemma for those looking to embrace ceiling fans in their homes. Many older homes feature intricate ceiling designs or period-specific aesthetics that can clash with the visual presence of modern ceiling fans. Incorporating reverse fan design insights allows homeowners to explore innovative solutions, such as fans that complement vintage interiors or serve dual-purpose functionality. These insights are particularly valuable when trying to balance preserving a home’s character with ensuring modern comfort and energy efficiency.
Popular Cooling Alternatives
Considering the various limitations with ceiling fans, homeowners often turn to popular cooling alternatives that better suit their needs.
Portable air conditioners offer targeted cooling, making them a favorite for those seeking flexibility. You can easily move them from room to room, ensuring comfort wherever you are.
In addition, innovative technologies in energy distribution, such as AI-driven smart grids, are improving the efficiency of cooling solutions, making them even more appealing.
Window fans are another great option, as they draw in fresh air and enhance ventilation, keeping spaces cool without high energy costs.
Additionally, innovative cooling technologies, like evaporative coolers, are gaining traction, providing efficient solutions tailored for specific climates.
With these alternatives, you can create a comfortable environment while embracing practicality, aligning with both your lifestyle and the architectural nuances of your home.
Sustainability and Energy Efficiency
Exploring alternative cooling solutions not only addresses immediate comfort needs but also aligns with the growing emphasis on sustainability and energy efficiency.
You can take several steps to guarantee your cooling methods are both effective and eco-friendly:
- Choose energy-efficient appliances that consume less electricity.
- Utilize natural ventilation, like open windows, to cool your space without energy use.
- Consider portable cooling options that allow for targeted use, minimizing energy waste.
- Embrace innovative technologies that offer sustainable alternatives to traditional cooling methods.
Future of Ceiling Fans in Germany
As climate change pushes for more energy-efficient solutions, the future of ceiling fans in Germany may see a shift in perception.
While traditional views favor air conditioning and natural ventilation, you might notice a growing interest in ceiling fans as people seek sustainable alternatives. Their ability to circulate air efficiently could appeal to those wanting to lower energy bills and reduce reliance on high-demand cooling systems.
Additionally, advancements in design technology could allow ceiling fans to blend seamlessly into minimalist interiors, addressing aesthetic concerns.
As awareness of energy conservation grows, you may find that ceiling fans regain popularity, especially if they align with Germany's commitment to sustainability and efficiency in home design.
Frequently Asked Questions
What Are the Health Benefits of Using Ceiling Fans?
Using ceiling fans can help you maintain comfortable temperatures, improving sleep quality and reducing heat-related illnesses. They circulate air, enhancing ventilation and providing relief during warmer months, ultimately promoting better overall health and well-being.
How Do Ceiling Fans Compare to Air Conditioning in Energy Costs?
When comparing ceiling fans to air conditioning, you'll find ceiling fans generally use less energy, resulting in lower costs. However, air conditioning provides more powerful cooling, which might justify its higher energy consumption in extreme heat.
Can Ceiling Fans Improve Indoor Air Quality?
Did you know that ceiling fans can improve indoor air quality by circulating air and reducing humidity? By using them, you're not just staying cool; you're also promoting a healthier living environment in your home.
What Are the Best Ceiling Fan Brands Available in Germany?
If you're looking for the best ceiling fan brands in Germany, consider brands like Westinghouse, Hunter, and Faro. They offer stylish designs and energy-efficient models that suit various preferences and home aesthetics perfectly.
Are There Ceiling Fans Designed Specifically for Low Ceilings?
If your ceiling feels like a cozy hug, you'll find low-profile ceiling fans designed just for snug spaces. They circulate air efficiently without overwhelming your room, blending functionality and aesthetics seamlessly. You'll love the comfort!
Conclusion
As you navigate the landscape of cooling solutions in Germany, think of ceiling fans as ships lost at sea, their sails unfurled but never catching the wind. The temperate climate, strict regulations, and a love for minimalist design keep them anchored in the harbor of tradition. Yet, as sustainability becomes the lighthouse guiding energy choices, there's a chance these ships might one day set sail, finding their place in German homes amidst the whirl of change.
Interior Design
Unlock Your Creativity With Simple Mehndi Designs
Bring your imagination to life with simple mehndi designs and discover techniques that will transform your creativity into stunning artistry. What’s the first step?
You can easily unleash your creativity with simple mehndi designs by starting with basic techniques. Focus on mastering fundamental strokes like lines and curves, which can lead to beautiful patterns. Utilize essential tools like a henna cone for precision and practice paper to refine your skills. Try simple flower patterns and leafy vines to bring life to your designs. As you gain confidence, explore elegant peacock feathers and inspiring mandalas. Consistent practice is key; setting aside time each week will help you flourish. Keep going, and you’ll discover even more ways to express yourself through mehndi artistry!
Key Takeaways
- Start with mastering basic strokes like lines and curves to build a solid foundation for creativity in mehndi designs.
- Experiment with simple flower patterns using basic shapes like circles and teardrops to unlock unique design ideas.
- Incorporate leafy vine designs to add flowing elements that enhance creativity and complexity in your mehndi art.
- Utilize mandala patterns to combine geometric shapes and floral elements, allowing for exploration of intricate designs.
- Practice regularly and document your progress to inspire new ideas and develop a personal style in mehndi artistry.
Basic Techniques for Beginners
When you first pick up a henna cone, mastering basic techniques is essential for creating beautiful designs. Start by practicing with a pen to get comfortable with strokes like lines, curves, dots, hearts, and leaf shapes.
Focus on maintaining continuous strokes in one direction, which helps your designs flow smoothly. Experiment with drawing simple alphabets and leafy structures to broaden your skills.
As you develop confidence, shift to a henna cone for more precise application. Don't forget to practice on paper first to refine your control.
Consistent practice is key, so try different shapes and simple flower designs. With dedication, you'll build a strong foundation that sets you up for more intricate patterns in the future.
Essential Mehndi Tools
To create stunning mehndi designs, having the right tools at your fingertips is essential. Here's a quick rundown of the must-have mehndi tools that can elevate your artistry:
Tool | Purpose |
---|---|
Henna Cone | For precise application of designs |
Practice Paper | To perfect your strokes before applying |
Toothpick/Needle | For fine detailing and correcting mistakes |
Stencil | For beginners to create consistent patterns |
With these tools, you'll find it easier to craft intricate designs and build confidence in your skills. Start practicing today, and you'll see how essential these tools are for your mehndi journey!
Simple Flower Patterns
Simple flower patterns are a great starting point for anyone looking to master mehndi designs. These designs allow you to explore your creativity while keeping things manageable.
Begin with basic shapes like circles and teardrops to form petals. You can arrange these petals in a circular pattern or layer them for a more intricate look. Adding small dots or lines in the center of the flowers enhances their beauty.
Experiment with various sizes and placements to create visual interest. Remember, practice makes perfect, so don't hesitate to draw these patterns on paper before applying them on your skin.
With consistent practice, you'll gain confidence and develop your own unique style in mehndi artistry. Enjoy the process!
Creative Leafy Vine Designs
Creative leafy vine designs add an elegant touch to your mehndi artistry, making them a favorite for both beginners and experienced artists. These designs often incorporate flowing vines adorned with leaves and small flowers, creating a natural and sophisticated look. You can use them as fillers or borders in larger patterns, enhancing the overall design. Start with simple leaf shapes and gradually experiment with intricate vines for a personalized touch.
Here's a quick reference table to inspire your leafy vine creations:
Leaf Shape | Design Element |
---|---|
Simple Leaf | Curved Vines |
Double Leaf | Small Flowers |
Twisting Vine | Buds Along the Vine |
Elegant Peacock Feather Styles
Peacock feather styles in mehndi offer a stunning blend of elegance and intricacy, making them a popular choice for various occasions, especially weddings.
To create your peacock feather design, start with a central spine that represents the feather's backbone. From there, draw delicate curved lines to form the feather's graceful shape. Incorporate eye shapes, dots, and swirling patterns to add depth and complexity.
You can experiment with different sizes and styles, allowing your creativity to shine. These designs not only enhance your mehndi but also symbolize beauty and grace, making them perfect for brides.
With practice, you'll master this enchanting style and impress everyone with your artistic flair. Enjoy the process and let your creativity flow!
Inspiring Mandala Patterns
Mandala patterns in mehndi offer a unique opportunity to combine geometric precision with floral elegance, much like the intricate designs found in peacock feathers.
These enthralling patterns draw you in with their symmetry and depth, making them perfect for any occasion.
Begin by sketching simple elements like dots and circles, then gradually expand to more complex shapes and petals.
Focus on maintaining even spacing and balance to create a harmonious design.
As you practice, let your creativity flow—experiment with different sizes and styles.
Mandalas not only enhance your mehndi art but also inspire mindfulness and focus during the application process.
Embrace the journey, and you'll find joy in each stroke as you reveal your artistic potential.
Cultural Significance of Mehndi
Mehndi holds deep cultural significance across various traditions, serving as a symbol of joy, celebration, and artistry. You'll find it prominently featured in weddings, festivals, and other special occasions, where it represents beauty and good fortune. Mehndi designs vary globally, reflecting the distinct cultural identities and artistic expressions of different regions. Just as the intricate patterns of mehndi tell a unique story, the Christopher Radko ornament collection captures the spirit of celebration and festivity through its meticulously crafted, heirloom-quality decorations. Both serve as enduring symbols of tradition and shared joy, connecting people across generations.
In many cultures, applying mehndi is a cherished ritual that brings communities together, often accompanied by music and dance. The designs you choose can carry personal meanings, reflecting your heritage and individuality.
Whether it's intricate floral patterns or bold geometric shapes, each design tells a story. Embracing mehndi allows you to connect with these rich traditions, celebrating heritage while expressing your creativity.
Tips for Consistent Practice
To develop your mehndi skills consistently, it's essential to set aside dedicated practice time each week. This routine helps you build muscle memory and enhances your confidence in design creation.
Here are some tips to keep your practice consistent:
- Choose specific days and times for practice to create a habit.
- Start with basic strokes and gradually incorporate more complex designs.
- Use online tutorials to explore new styles and techniques.
- Keep a practice journal to track your progress and note improvements.
Frequently Asked Questions
What Are the Best Practices for Storing Henna Paste?
To store henna paste, keep it in an airtight container in the fridge. It'll stay fresh for about two weeks. For longer storage, freeze small portions, then thaw when needed. Always check for quality before use.
How Long Does Henna Remain on the Skin?
Henna can stay on your skin for about one to three weeks, depending on skin type and aftercare. Notably, darker stains typically last longer, often indicating a stronger dye release from the henna paste.
Can I Mix Different Henna Colors for Unique Designs?
Yes, you can mix different henna colors to create unique designs. Experimenting with shades adds depth and dimension to your artwork, allowing for personalized patterns that reflect your style and creativity. Enjoy the process!
What Skin Types Are Best for Henna Application?
What skin types are best for henna application? Generally, smooth, clean skin absorbs henna better, giving vibrant results. Oily skin can repel henna, while dry skin might not hold designs well. Experiment to find what works for you!
How Can I Remove Henna Stains From Skin Safely?
To remove henna stains safely, apply lemon juice or a mixture of baking soda and water to the area. Gently scrub with a washcloth, then rinse off. Moisturize afterward to soothe the skin.
Conclusion
To sum up, diving into the world of mehndi is like hitting the creative jackpot. By mastering basic techniques and exploring simple designs, you'll not only develop your skills but also discover your unique artistic voice. Remember, practice makes perfect, so don't be afraid to experiment and let your imagination run wild. As you create beautiful patterns, you'll find joy in every stroke. So grab that henna cone and get started—you're on the brink of something beautiful!
-
Beauty and Grooming1 month ago
Embrace Natural Glow With Bronzer-Free Accelerators
-
Beauty and Grooming1 month ago
Discover Top Outdoor Tanning Lotions Today
-
Vetted2 months ago
15 Best Affordable Sustainable Fashion Brands You Need to Know About in 2025
-
Fashion Trends2 months ago
Fall 2025 Fashion Trends: Be Ahead of the Curve!
-
Interior Design3 weeks ago
Mylar vs. Foil Balloons: The Ultimate Showdown
-
Beauty and Grooming1 month ago
Unlock Flawless Tanning With Skin Prep
-
Interior Design1 month ago
Create Your Dream Cottagecore Home Office Now!
-
Vetted2 months ago
15 Best Women's Fashion Trends of 2025 You Need to Know About