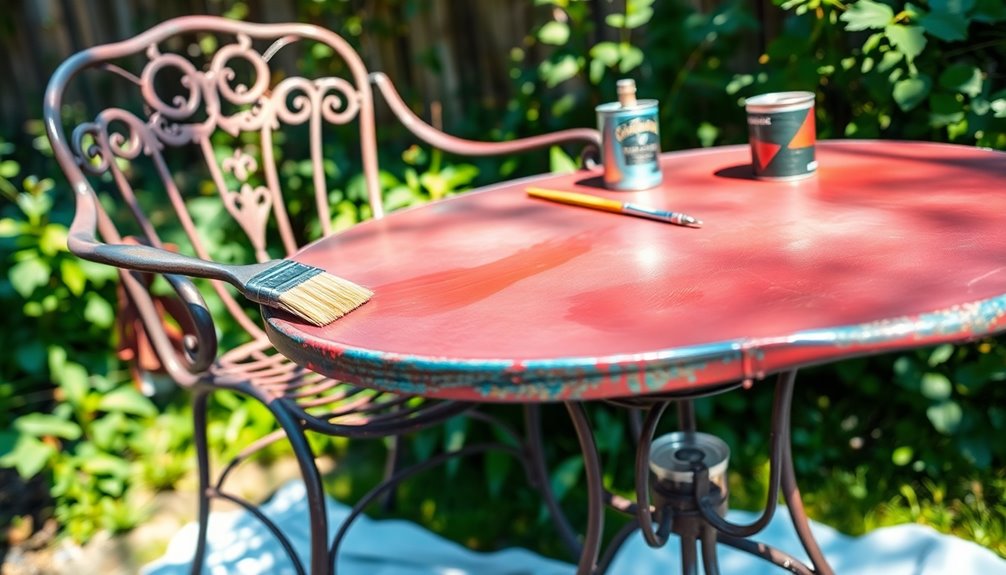
You can easily paint metal furniture without spray paint by starting with thorough surface preparation. Clean the metal with soapy water, and dry it completely. Sand the surface lightly to promote paint adhesion. Next, apply a quality metal primer in thin, even coats and let it dry as per the manufacturer's instructions. Choose a suitable oil-based or latex paint and use high-quality brushes or foam rollers for a smooth finish. Apply multiple thin coats, mixing in touch-ups as needed. Finally, consider protective coatings for added durability. There's so much more to explore, so keep going to enhance your project!
Key Takeaways
- Thoroughly clean and sand the metal surface to ensure proper paint adhesion and a smooth finish.
- Apply a quality metal primer in thin, even coats for corrosion protection and enhanced paint adhesion.
- Choose the right paint type based on the metal and its intended use, using brushes or foam rollers for application.
- Use long, consistent strokes and apply multiple thin coats of paint, allowing proper drying time between each coat.
- Finish with a clear protective coating if desired, and regularly inspect for wear to maintain the furniture's appearance.
Preparing the Metal Surface
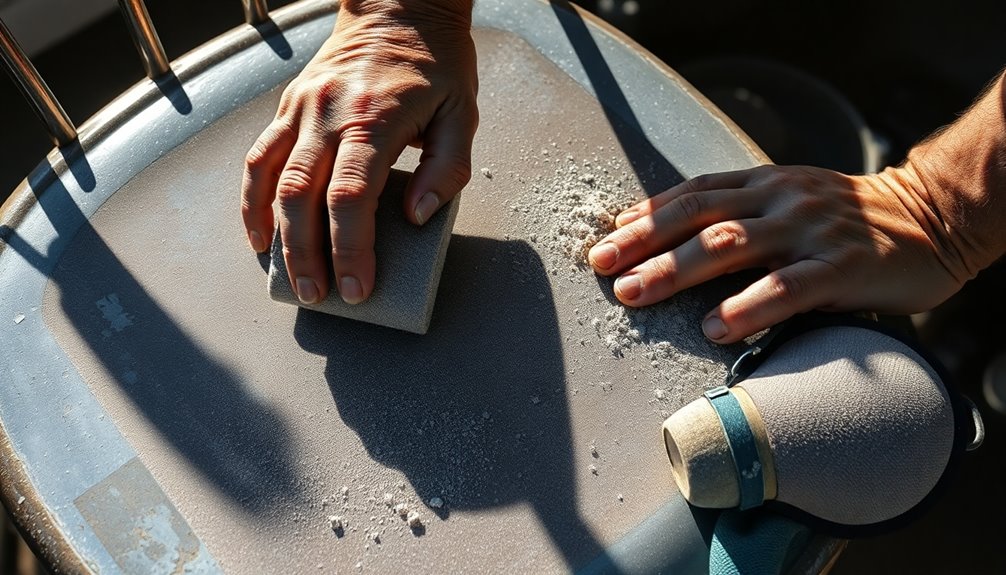
Preparing the metal surface is crucial for a successful paint job. Start by removing any loose dust or dirt using a soft-bristle brush or a wire brush for rusty areas. Next, mix warm water with a bit of washing-up liquid or mild soap. Apply this cleaning solution with a sponge, then dry the surface thoroughly with a towel. If you're dealing with oily or greasy spots, grab a cloth soaked in turpentine or vinegar to tackle those issues.
For rust and corrosion, use an electric sander with coarse grit paper or steel wool to remove rust and achieve a smooth finish. For stubborn rust, a specialist rust remover gel works wonders. In tricky spots, a wire brush can help. After you've dealt with any rust, refine the surface with sandpaper. It's also important to ensure that the furniture is completely dry before sanding to prevent further damage to the metal surface.
If you want to ensure a clean finish, use acetone on a clean rag—it dries quickly! Avoid touching the surface afterward to prevent adding grease. Finally, wipe down the metal with a clean, dry cloth to eliminate any leftover dust. Make sure everything is dry before moving on to the next steps.
Sanding and Deglossing Techniques
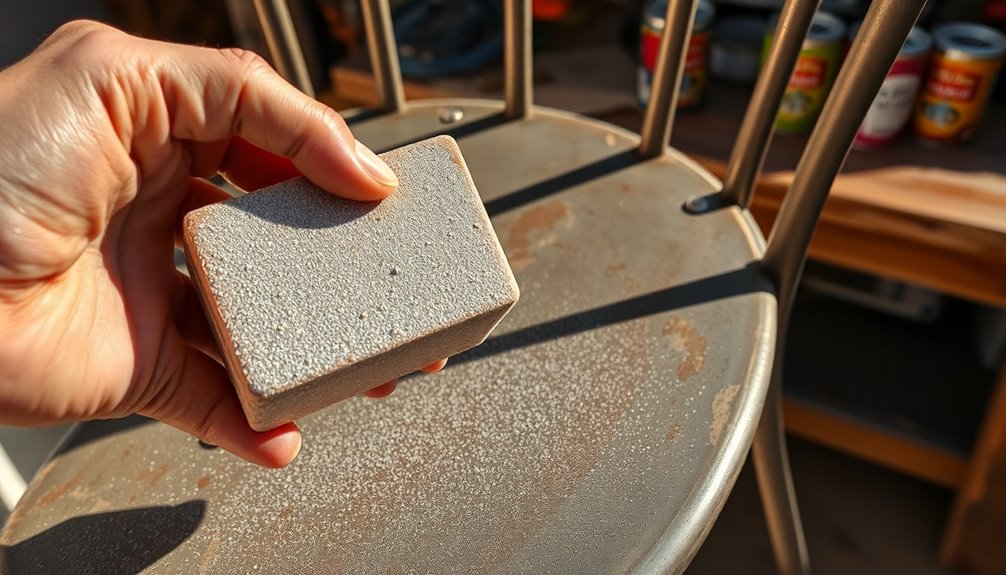
Sanding and deglossing are essential techniques to ensure your paint adheres properly to metal furniture. Start with sanding; use medium to fine grit sandpaper to roughen the surface. For painted metal in good condition, opt for 240 grit sandpaper. If you're dealing with damaged paint or bare metal, use 120 grit sandpaper to smooth things out. Don't forget to remove any rust with a wire brush or sandpaper, ensuring the surface is level. Sand in small circular motions for effective rust removal.
Next, apply a deglosser using a rag to dull the shiny finish, enhancing paint adhesion. Liquid sandpaper works well for intricate details, but make sure your workspace is well-ventilated due to its strong smell. If your metal will be frequently handled, deglossing is particularly beneficial. Combining sanding with deglossing offers the best results; lightly sand after deglossing for a textured surface that promotes adhesion. Always ensure the deglosser is fully dried before painting. This combination not only enhances durability but also ensures a strong bond between the metal and the paint, providing a long-lasting finish for your furniture. Proper preparation, including thorough cleaning, is crucial to achieving a successful paint application.
Importance of Priming

After you've effectively sanded and deglossed your metal furniture, priming becomes a key step in achieving a long-lasting finish. Priming enhances paint adhesion, ensuring that the paint sticks to the metal surface effectively. This prevents peeling, chipping, or flaking, creating a stronger bond that reduces the risk of paint detachment over time.
Moreover, primers improve durability by protecting the metal from corrosion, oxidation, and moisture. They extend the lifespan of your paint job by acting as a protective barrier against environmental factors. This helps maintain the integrity of the metal and keeps your paint looking vibrant longer. Additionally, using a rust inhibiting primer can provide extra protection against rust formation.
Additionally, applying a primer increases surface smoothness. It fills small gaps or imperfections in the metal, allowing for a more even application of paint. This leads to a professional finish that reduces the visibility of any surface flaws.
Lastly, priming prevents surface rust by creating a barrier that keeps moisture from reaching the metal. This is especially crucial for ferrous metals like iron and steel, ensuring your furniture remains free from corrosion and maintains its structural integrity.
Choosing the Right Paint
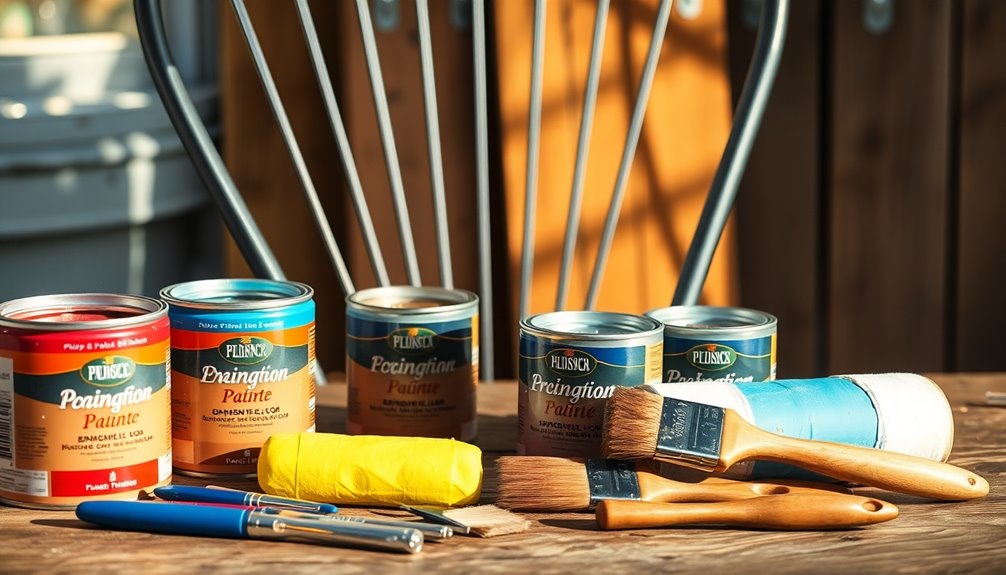
When it comes to choosing the right paint for your metal furniture, understanding the various types and their specific applications is crucial. You'll find several options available, each suited for different needs. For a glossy finish that resists discoloration, consider oil-based metal paints like Hammerite Garage Door Paint. If you're looking for versatility, water-based metal paints, such as Bird Brand Outdoor Paint, work well on metal and other surfaces.
For direct applications, choose direct-to-metal paints like Benjamin Moore Ultra Spec DTM Acrylic Enamel, which contain rust inhibitors. It's important to note that energy-efficient appliances often use materials that can be painted easily without compromising their function. If you prefer a latex option, use a bonding primer like KILZ Adhesion for a semi-gloss finish. Urethane enamel paint provides a durable finish, ideal for professional settings. Cleaning metal surfaces is an essential step before painting to ensure proper adhesion and durability.
Compatibility is also vital; ensure you match the paint to the metal type—non-ferrous metals need specific formulations like Benjamin Moore Ultra Spec, while ferrous metals require products like Benjamin Moore Super Spec. Lastly, consider the environment—opt for outdoor-compatible paints like Zinsser AllCoat for exterior use. By selecting the right paint, you'll ensure a long-lasting and beautiful finish for your metal furniture.
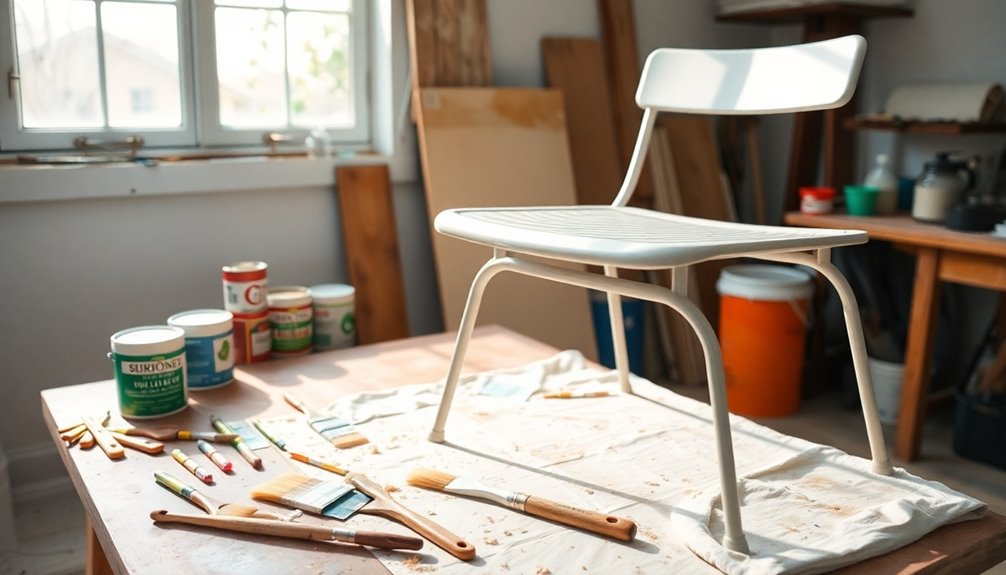
Applying Paint Effectively

To achieve a beautiful finish on your metal furniture, effective paint application is essential. Start by selecting the right primer, specifically formulated for your type of metal. Apply it using a foam roller for larger areas and a small brush for intricate details. Aim for one to two light coats, and allow the primer to dry completely. Remember that selecting the correct primer can significantly enhance paint adhesion and durability.
When it's time to paint, choose a high-quality small, flat paintbrush or foam roller. Apply thin, even coats to avoid drips and brush marks—multiple thin coats are better than one thick one. Use long, consistent strokes in the same direction for a smooth finish. Remember to wait for each coat to dry fully according to the manufacturer's instructions before applying the next one.
Always ensure you're working in a well-ventilated area and wear protective gear like a dust mask and goggles. Avoid painting in direct sunlight or on overheated metal, as this can compromise adhesion. Clean up any drips immediately to prevent them from turning into bigger messes. Following these steps will help you achieve a durable and visually appealing finish on your metal furniture.
Exploring Additional Techniques

In exploring additional techniques for painting metal furniture, you’ll discover various methods that can enhance your results. Start by preparing the metal surface properly. Clean it thoroughly to remove rust, dirt, or old paint using a degreasing cleaner and a steel wool scrubber. Sand the surface to ensure smoothness and better paint adhesion. If the metal has a shiny finish, apply a deglosser, then rinse and let it dry completely. When you’re ready to apply the paint, it’s crucial to understand how to choose paint for furniture. Opt for high-quality, rust-resistant paint specifically formulated for metal surfaces, which will provide durability and a smooth finish. Additionally, consider whether you prefer a spray paint for an even coat or a brush-on option for more control, depending on the intricacies of the furniture design. Finally, allow ample drying time between coats to achieve the best results.
Next, consider using primers and converters. A metal primer improves adhesion and durability, especially if you use a rusty metal primer for areas with significant rust. Always allow the primer to dry fully according to the instructions. For rusted areas, a rust converter can be effective, too. Additionally, it's crucial to ensure proper ventilation while painting to promote optimal drying and safety.
When it comes to your paint choice, opt for oil-based or high-performance enamel paint for outdoor furniture to protect it from water and UV rays. If you're working indoors, latex paint can suffice. Finally, for application, use a high-quality paintbrush or roller, applying thin, even coats. This approach ensures better coverage and reduces drips, resulting in a professional-looking finish.
Finishing Touches and Protection

Completing your metal furniture project involves careful finishing touches and protective measures that ensure longevity and a polished appearance. First, inspect your work for any spots needing touch-ups. Use a brush to apply additional paint where necessary, ensuring even coverage. Allow the paint to dry completely before making these adjustments and check it under various lighting conditions to identify imperfections.
Once the paint is dry, remove any painter's tape or drop cloths. Clean up spills immediately to protect surrounding surfaces and dispose of materials responsibly. For final cleaning, gently wash the painted surface with mild soap and water, avoiding solvent-based cleaners or abrasives that can damage the paint. Use a soft cloth to wipe away dust and ensure the surface dries thoroughly.
To enhance durability, consider applying a clear protective coating after the paint has fully cured. Recommended for high-touch areas, this additional layer can help safeguard your furniture against wear and tear. Test this on a small area first. Remember to protect your furniture from environmental factors by placing it in shaded areas and covering it during harsh weather. Regularly inspect for wear and perform touch-ups as needed to maintain its pristine appearance.
Tips for Best Results
Achieving the best results when painting metal furniture starts with thorough preparation. First, clean the surface using a degreasing cleaner and a steel wool scrubber to remove dust, paint, and grime. Make sure to tackle any rust or dirt, ensuring a smooth surface for the paint to adhere. Once cleaned, dry the metal completely, and if the surface is glossy, use a deglosser or medium fine grit sandpaper to create a rough texture that promotes adhesion.
Next, lightly sand the metal to enhance paint grip before applying a quality metal primer, like Kilz. Applying a specific primer is crucial as it helps prevent rust and ensures better paint adhesion. Apply the primer in thin, even coats, letting it dry fully according to the manufacturer's instructions. When it's time to paint, opt for an oil-based paint for durability. Apply the paint in multiple thin coats, allowing each layer to dry before adding the next.
Use a combination of high-quality brushes and foam rollers, maintaining even pressure for a smooth finish. Focus on details with smaller brushes and avoid thick coats, as they can lead to drips. Finally, always work in a well-ventilated area to keep the air fresh and reduce fume buildup.
Frequently Asked Questions
Can I Use Acrylic Paint on Metal Furniture?
Yes, you can use acrylic paint on metal furniture. Just make sure to prepare the surface properly by cleaning, sanding, and priming it first. This ensures good paint adhesion. Apply the acrylic paint in thin coats, allowing each layer to dry before adding the next. For added protection, consider sealing your work with a clear varnish or sealant after the paint cures. This'll help maintain the finish and extend its longevity.
How Long Does Paint Take to Dry on Metal?
When you're painting metal, drying time varies based on the paint type. Polyurethane and epoxy paints dry to the touch in about 5 minutes, while enamel and latex can take up to 8 hours. Environmental factors like temperature and humidity also play a crucial role. To speed up drying, ensure you prepare the surface well and apply thin coats. Remember, even if it feels dry, full curing might take weeks.
Is It Necessary to Use a Primer?
Is it necessary to use a primer? Yes, it's crucial for ensuring better paint adhesion and creating a uniform base on metal surfaces. It reduces the chances of peeling or flaking, improving the paint job's durability and appearance. However, if you're using a high-quality paint with a built-in primer, you might skip this step. Always consider the condition of your metal surface to make the best choice for your project.
What Tools Are Best for Painting Metal Furniture?
When painting metal furniture, you'll need several essential tools. Start with a degreasing cleaner to prep the surface, followed by steel wool and sandpaper for thorough cleaning. Use a metal primer for improved adhesion, then choose a high-quality paintbrush or foam roller for application. Safety goggles and gloves are a must, along with a drop cloth to protect your surroundings. Don't forget a non-yellowing polyurethane for sealing, if necessary.
How Can I Remove Paint From Metal Surfaces?
To remove paint from metal surfaces, you can use several methods. Apply a chemical stripper, following the instructions carefully. If you prefer heat, use a heat gun or boiling water to loosen the paint. Mechanical methods like a handheld scraper or angle grinder can help, too. For a natural approach, try a baking soda solution or vinegar. Always wear protective gear and work in a well-ventilated area to stay safe.
Conclusion
By following these steps, you can transform your metal furniture without the need for spray paint. Preparing the surface, choosing the right paint, and applying it effectively are key to achieving a beautiful finish. Don't forget to add protective layers to ensure your work lasts. With a little patience and creativity, you'll have stunning, refreshed furniture that enhances your space. So grab your supplies and enjoy the process of revitalizing your metal pieces!