Interior Design
How to Plan a Master Bathroom Remodel
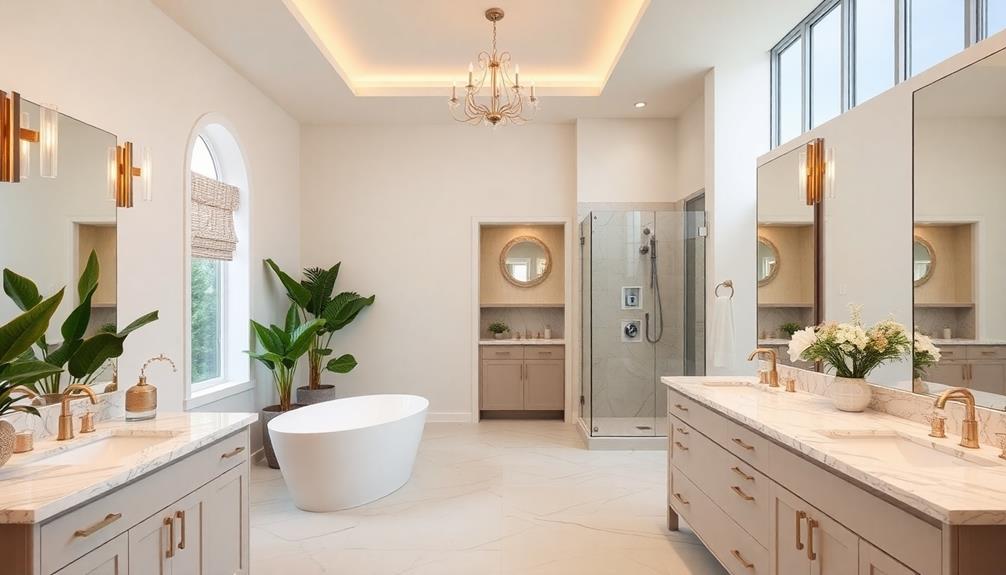
Begin your master bathroom remodel journey by assessing your needs and envisioning your dream space, but don’t forget the crucial steps that follow.
To start planning your master bathroom remodel, begin by assessing your needs and evaluating the current layout. Take into consideration your lifestyle and storage requirements as you define a cohesive design concept that represents your personal style. It is important to establish a realistic budget that accounts for unexpected expenses and to choose high-quality materials wisely. Plan the layout to optimize space and ensure comfort, and remember to obtain any necessary permits. Depending on your skill level, you can choose to handle some tasks yourself or hire a contractor. By carefully organizing your project, you can achieve the bathroom of your dreams, with more details to explore in the process. When selecting fixtures and finishes, prioritize durability and ease of maintenance. Integrate energy-efficient lighting and water-saving fixtures to lower your environmental impact and utility costs. Additionally, consider investing in top-notch cabinetry and countertops for a classic and sophisticated appearance. These master bathroom remodel design tips will guide you in creating a practical, stunning space that elevates your daily routine.
Key Takeaways
- Assess your needs by evaluating the current layout, user preferences, and storage solutions to identify pain points in the existing bathroom.
- Define a cohesive design concept that reflects your style while incorporating functional elements like spacious showers and ample storage.
- Establish a budget that covers all costs, including materials, labor, and permits, while allowing for unexpected expenses of 10-20%.
- Choose durable, waterproof materials and high-quality fixtures to ensure long-term satisfaction and minimize maintenance issues.
- Decide whether to DIY or hire a contractor based on your skill level, project complexity, and available time while considering the associated costs.
Assessing Your Needs
When planning a bathroom remodel, start by evaluating your needs to create a space that truly works for you.
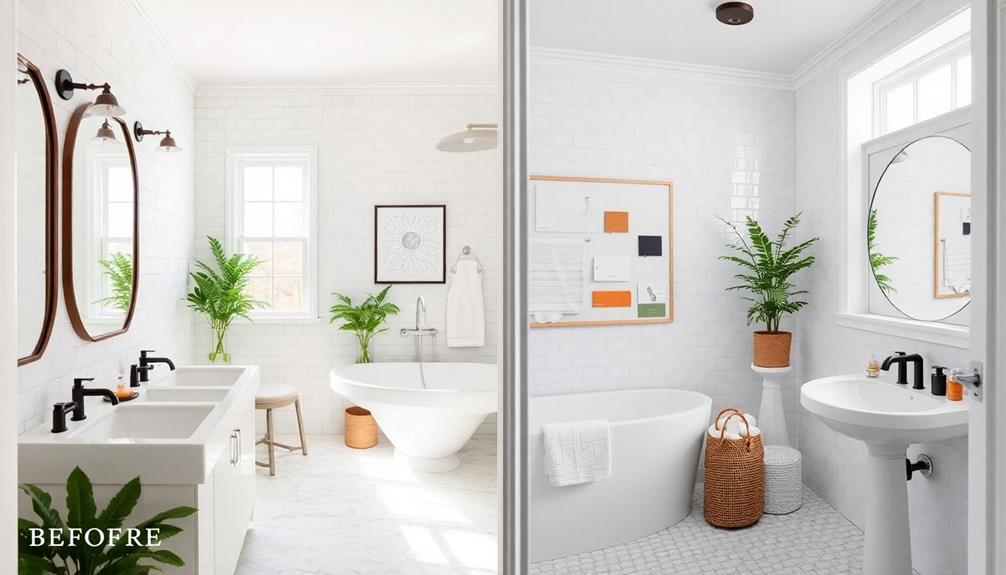
Begin by examining your current bathroom layout and pinpointing specific pain points. Is there enough storage? Are fixtures inconveniently placed? Identifying these issues will guide your bathroom design. Incorporating mood boards essential can help visualize how different elements will come together in your new space.
Next, consider how many people will use the space and their preferences. Do you want a soaking tub, a walk-in shower, or maybe a new vanity? These choices will enhance both functionality and comfort.
Don't forget about storage; think about adding built-in cabinets, shelving, or vanity drawers to keep your toiletries and linens organized.
While evaluating your needs, assess your existing plumbing and electrical systems. Determine what can be reused and what might need updates to guarantee your remodel meets your long-term usability needs.
Defining Design Concepts
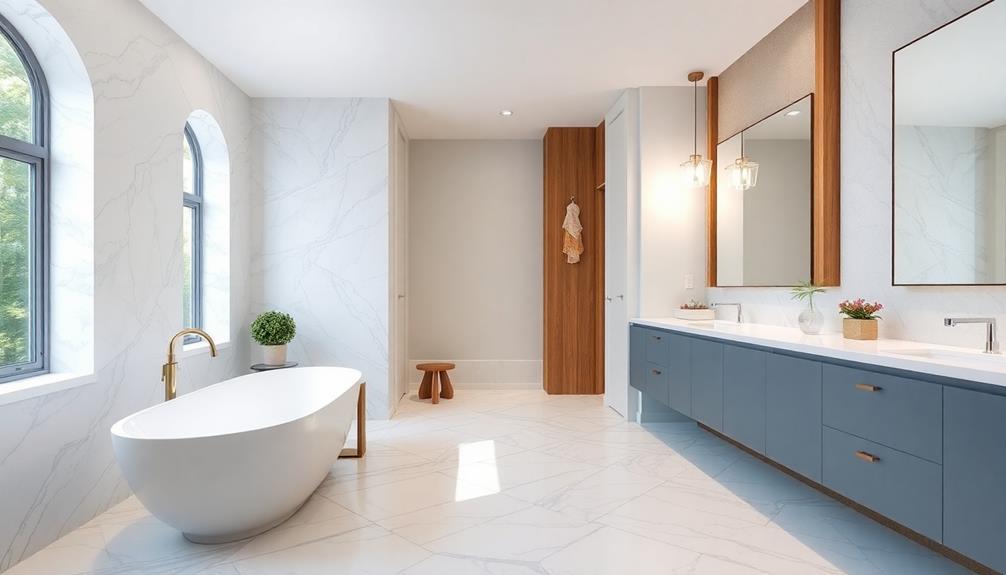
As you immerse yourself in defining design concepts for your bathroom remodel, focus on creating a cohesive vision that reflects your style and enhances functionality. Consider integrating luxurious elements typical of master baths, like freestanding tubs and spacious walk-in showers, which cater to relaxation and comfort. This adds an inviting atmosphere to your space.
Incorporating natural materials like wood and stone can further enhance the rustic charm and tranquility of your bathroom. Explore spa-inspired designs that create a tranquil environment. Using natural materials and soothing color palettes can help foster a sense of peace, making your bathroom a perfect retreat.
Don't forget that adequate storage is essential in high-traffic master bathrooms; built-in cabinets and shelving can keep your space organized and clutter-free.
Current design trends emphasize a minimalist aesthetic, which combines simplicity with high-quality finishes. This approach not only promotes style but also practical solutions for your bathroom remodeling project.
Establishing a Budget
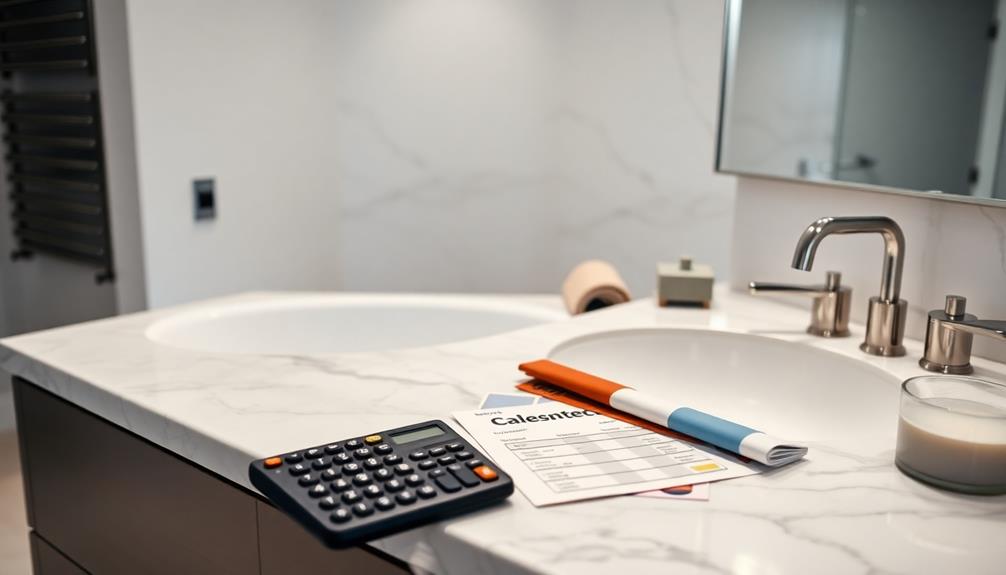
When you're establishing a budget for your bathroom remodel, it's vital to break down costs clearly.
Consider tracking your income and expenses to guarantee you stay within your means. Think about where you want to splurge on high-end fixtures and where you can save with budget-friendly options.
Creating a personal budget is essential for managing your finances effectively. By planning for unexpected expenses and understanding your total financial commitment, you'll set yourself up for a successful renovation.
Cost Breakdown Essentials
Creating a budget for your bathroom remodel is essential to guarantee you don't overspend or encounter financial surprises. Start by identifying the cost breakdown essentials for your project. A typical master bathroom renovation can range from $15,000 to over $30,000, depending on what you choose.
Consider the benefits of diversifying your financial investments, similar to how you'd with a retirement portfolio, as you plan your remodel budget; investing wisely can provide long-term returns, much like potential for higher returns with gold. Break down your budget into categories like plumbing fixtures, materials, labor, and permits to make sure you've covered all bases.
Allocate about 10-20% of your total budget for unexpected expenses that may pop up during the renovation. This cushion can save you from stress later on. Keep in mind that high-end materials and custom features can greatly increase costs, so decide where you want to splurge and where it's okay to save.
Research local market rates for contractors and materials to get a sense of realistic pricing in your area. This step is fundamental for establishing a budget that truly reflects your needs and resources.
Splurge vs. Save Strategies
Determining where to splurge and where to save in your bathroom remodel can make a significant difference in your overall budget. Aim to allocate about 20% of your total budget for splurging on high-impact items like fixtures, finishes, and a stylish bathroom vanity. These elements enhance aesthetic appeal and can elevate your space dramatically.
Additionally, just as many homeowners find that investing in a home security system can greatly increase their sense of safety, investing in key bathroom components can provide long-lasting satisfaction and comfort increased safety and peace of mind.
On the other hand, consider saving on less visible aspects, such as plumbing work or electrical upgrades. While you should invest in durable materials, like quartz countertops or high-quality tiles, don't hesitate to seek budget-friendly options for cabinetry or accessories.
You can also explore cost-saving strategies, like purchasing floor models or gently used fixtures, which can cut expenses by 30-50% without sacrificing quality.
Additionally, prioritize investing in waterproofing and ventilation systems, as this can prevent future repair costs.
Choosing Materials Wisely
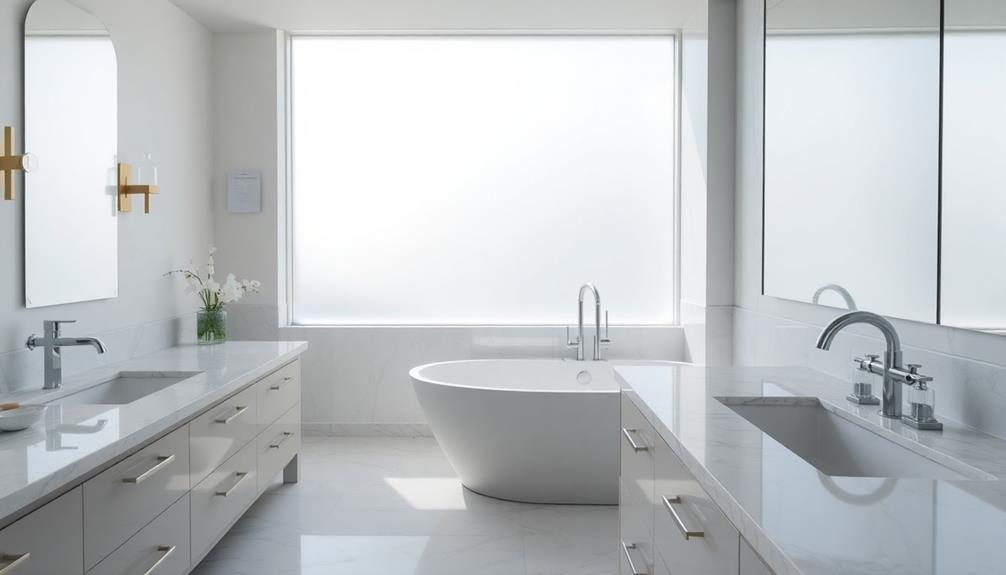
Selecting the right materials for your bathroom remodel can make all the difference in both functionality and aesthetics. Start by prioritizing waterproof options for your flooring materials, such as ceramic tile, porcelain tile, or luxury vinyl.
These choices will help prevent moisture damage, ensuring your bathroom remains beautiful and functional for years to come. Additionally, consider incorporating air purifiers to maintain a healthy indoor environment, as they can help reduce allergens and improve air quality in your newly remodeled space air purifier maintenance tips.
For countertops, consider durable materials like quartz or natural stone. They not only provide a premium look but also resist staining and scratching, which is vital in a high-use area like the bathroom.
When it comes to the walls, opt for mildew-resistant paint with a satin or semi-gloss finish. This enhances moisture protection and guarantees longevity in humid environments.
Don't forget your fixtures! Choose high-quality faucets and a shower head that focus on water efficiency. This will reduce your long-term water costs and lessen your environmental impact.
Planning the Layout
When planning the layout of your bathroom, it's crucial to assess the existing plumbing and electrical setups first. This will help you determine the feasibility of your desired changes in the new bathroom.
Once you've evaluated these systems, consider features that enhance both functionality and luxury, like a freestanding tub or a spacious walk-in shower. Additionally, incorporating smart storage solutions can maximize space efficiency and keep the area clutter-free, guaranteeing a serene atmosphere best vacuums for dust removal.
Next, evaluate the dimensions of your space. Aim for a minimum of 30 inches between fixtures to promote comfortable movement. This won't only make your master bath more functional but also more enjoyable to use.
Don't forget to prioritize natural light and ventilation; think about window placements and exhaust fan locations to create a bright and inviting environment.
DIY or Hire a Contractor

Before you start your bathroom remodel, take a moment to assess your skill level and the complexity of the tasks ahead.
Understanding the potential challenges, such as plumbing or electrical work, can help you determine whether to tackle the project yourself or hire a professional.
If you're comfortable with simple projects but unsure about plumbing or electrical work, it might be wise to hire a contractor.
Balancing your budget with your capabilities will help you make the best decision for your renovation.
Consider consulting resources on cold medications overview for insights that could inform your approach to managing any potential discomfort during your remodel.
Assess Your Skill Level
Evaluating your skill level is essential to deciding whether to tackle your bathroom remodel as a DIY project or hire a contractor. Start by honestly reviewing your past DIY experiences. If you've successfully completed smaller projects, you might feel confident.
However, complex tasks like plumbing or electrical work usually require professional expertise to guarantee safety and compliance with local codes. Additionally, consider if you have the tools and resources available, as some projects may necessitate specialized equipment. For example, a DIY fire pit can be a great project if you're comfortable with outdoor renovations.
Next, consider the specific requirements of your master bathroom remodel. Projects involving tile installation, fixture replacement, or structural changes often necessitate advanced skills. If you're unsure, hiring a licensed general contractor can provide peace of mind. They possess the necessary insurance and familiarity with local permits, which can help mitigate the risks of costly mistakes during renovation.
If you choose to DIY, focus on surface alterations like painting or installing new fixtures, which are generally manageable. Just remember to be cautious of hidden problems that may arise during the process.
Complexity of Tasks
Steering through the complexity of tasks in a bathroom remodel often involves weighing your DIY skills against the need for professional help. Simple tasks like painting or installing fixtures may be within your reach, but you should recognize when a project requires a licensed contractor.
Plumbing and electrical work, for instance, typically demand professional expertise to guarantee safety and compliance with local building codes, especially considering the potential risks associated with power consumption insights in such installations.
When deciding between DIY and hiring a contractor, consider the time commitment involved and the potential for mistakes. While DIY projects can add personal touches to your remodel, they can also lead to costly errors if not executed correctly.
Complex installations, like tiled showers or major layout changes, are best left to professionals who can maintain the structural integrity and value of your home.
Before making a decision, obtain multiple quotes from contractors to compare costs and services. Ascertain they've experience with bathroom remodels and can provide references.
Balancing DIY projects with professional installation will help you navigate the complexity of tasks effectively, making your bathroom remodel a successful and enjoyable endeavor.
Budget Considerations
Budgeting for a bathroom remodel requires careful consideration of whether you'll tackle the project yourself or hire professionals. Your budget will typically range from $15,000 to over $30,000, depending on your choices and the project's complexity.
If you decide to DIY, you can save on labor costs, but keep in mind that tasks like plumbing and electrical work often need a contractor's expertise for safety and compliance.
Conducting a cost-benefit analysis is essential in this decision-making process. While hiring professionals may lead to higher upfront costs, their experience can provide better quality and long-term satisfaction. It's worth weighing these factors against your own skills and the potential savings.
Additionally, don't forget to factor in unexpected costs. Renovations can quickly exceed initial estimates due to unforeseen issues such as structural repairs or material shortages.
To manage your budget effectively, consider exploring financing options, like home equity loans or grants, especially if you're leaning toward hiring contractors for more extensive work.
Ultimately, a well-structured budget will help you navigate your remodel with confidence.
Securing Permits and Codes

Before diving into your bathroom remodel, it's essential to check if you need permits, as many projects—especially those involving plumbing or electrical work—require them. Start by reviewing your local building codes to determine the specific requirements for your remodel. Most municipalities will ask for a site plan and detailed documentation, including before and after plans.
Here's a quick overview of what you might need:
Permit Type | Common Requirements | Approval Time |
---|---|---|
Plumbing Permit | Detailed plumbing plans | Minutes to weeks |
Electrical Permit | Electrical layout and safety plans | Minutes to weeks |
General Building Permit | Site plan, project description | Days to weeks |
Renovation Permit | Before and after plans, compliance docs | Minutes to weeks |
It's essential to include accurate contact information and a clear project description in your permit application to expedite the approval process. Failing to secure the necessary permits can lead to costly fines and complications when selling your home, so make sure you adhere to all legal requirements during your remodel.
Executing the Remodel
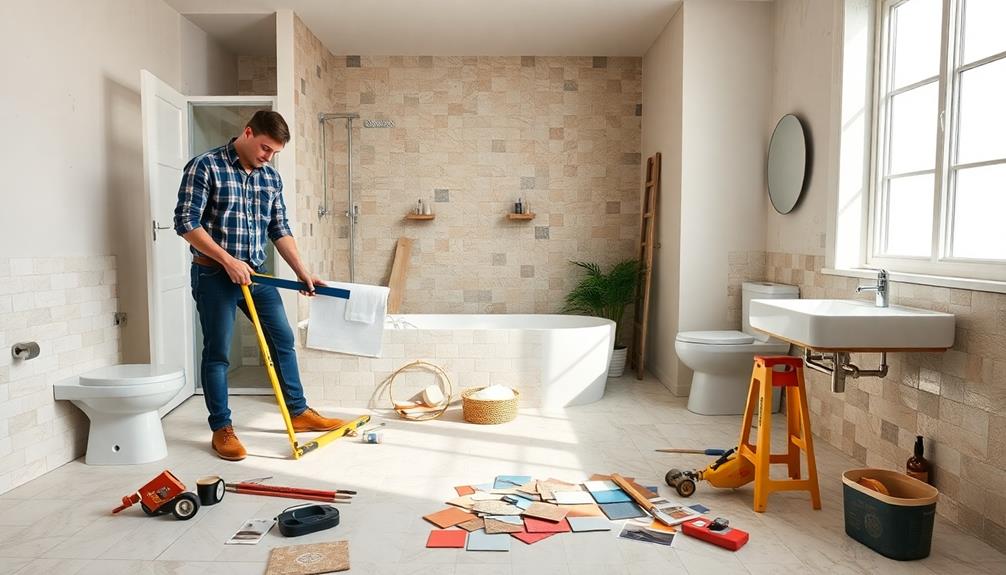
To execute your bathroom remodel effectively, start by creating a detailed project timeline that outlines each phase, from demolition to final inspections.
You'll also want to coordinate closely with your contractors to guarantee material delivery aligns with your schedule.
Clear communication is key, so keep everyone in the loop to tackle any unexpected issues as they arise.
Project Timeline Establishment
Establishing a clear project timeline is essential for executing your bathroom remodel smoothly. To achieve this, break down the remodel into distinct phases, ensuring you stay organized and focused.
Here's a suggested timeline to help you plan:
- Demolition (1-2 weeks): Start by tearing down the current layout. This phase allows for inspections and approvals before moving forward.
- Plumbing and Electrical Work (4-6 weeks): Plan for this important phase, as it involves installing major fixtures. Coordination may be necessary, so be prepared.
- Installation (2-3 weeks): Focus on cabinets, countertops, and other significant components during this time, ensuring they're in line with your design vision.
- Finishing Touches (2-3 weeks): Allocate time for painting, trim work, and decor to complete your space. This step is essential for making it functional and visually appealing.
As your project progresses, regularly update your timeline to adapt to any changes or delays.
Keeping communication open with everyone involved will help avoid unexpected costs and time extensions, ensuring a successful remodel.
Coordination With Contractors
Successfully coordinating with contractors during your bathroom remodel is vital for turning your vision into reality. Start by verifying all your contractors are properly licensed and insured to avoid any legal issues.
Schedule a pre-construction meeting to discuss the project timeline, set expectations, and address necessary permits. This initial meeting will help streamline the execution process.
Maintain open lines of communication with your contractors throughout the remodel. Share your design plans and any changes that arise promptly, as this can prevent misunderstandings and keep the project on track.
It's also important to create a detailed project timeline that outlines each phase of the remodel. Make sure contractors understand the sequence of tasks to avoid delays.
Regularly inspect the work being done to confirm it aligns with your vision and meets building codes. If you notice any issues, address them with your contractors immediately to prevent costly rework.
By staying engaged and proactive, you'll foster a cooperative environment that supports your goals and leads to a successful bathroom remodel.
Installation Essentials
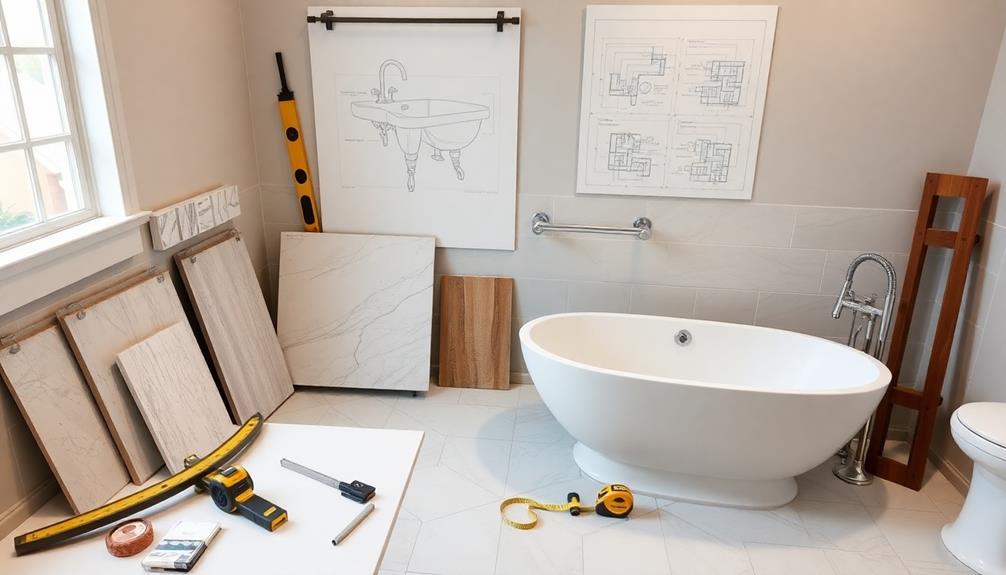
Installation essentials play an important role in ensuring your bathroom remodel is both functional and visually appealing. To achieve a successful installation, keep these key factors in mind:
- Flooring: Choose moisture-resistant materials like ceramic tile, porcelain tile, or luxury vinyl. These options offer durability and slip resistance, significant for a bathroom.
- Toilet Installation: Install the toilet after laying the flooring. Use a wax ring for a watertight seal, and make sure the toilet is level to prevent leaks.
- Ventilation: Adequate ventilation is essential. Install a high-quality exhaust fan to reduce humidity and prevent mold growth, keeping your bathroom fresh and safe.
- Countertops: Select premium materials like quartz or natural stone for your countertops. Proper installation is important for functionality and to enhance the overall aesthetic of your master bathroom.
Final Touches and Maintenance
Once you've completed the installation essentials, it's time to focus on the final touches that can truly elevate your bathroom's look and functionality.
Start by adding moulding and window treatments that not only enhance the aesthetic but also improve privacy and light control. Select moisture-resistant rugs and mats to guarantee durability in your humid environment; this helps prevent mold growth and keeps your space clean.
Next, incorporate personal touches in your decor, like artwork or plants, to create a unique and inviting atmosphere that reflects your style.
Evaluate the overall functionality of the space, confirming that all fixtures and design elements align with your initial vision and meet your daily needs.
Regular maintenance is key to preserving your bathroom's beauty and functionality. Establish a routine that includes washing bath mats and guaranteeing proper ventilation.
These small steps can considerably extend the life of your fixtures and materials. By focusing on these final touches and committing to maintenance, you'll enjoy a master bathroom that's not only visually appealing but also practical for everyday use.
Frequently Asked Questions
How Much Should You Spend on a Master Bathroom Remodel?
You should spend about 5-10% of your home's value on a master bathroom remodel. Typically, mid-range projects average around $18,000, but high-end renovations can exceed $30,000, so budget wisely for unexpected costs.
What Is the Correct Order to Remodel a Bathroom?
To remodel a bathroom, start with demolition, then tackle plumbing and electrical work. Schedule inspections, followed by drywall and flooring installation. Finally, install fixtures and cabinetry, adding finishing touches for a polished look.
Where Do I Start When Planning a Bathroom Renovation?
Imagine stepping into a serene oasis. Start your bathroom renovation by evaluating your current layout, identifying pain points, and sketching your dream design. Consulting a contractor will help refine your vision and feasibility.
What Is the Most Expensive Part of a Bathroom Remodel?
The most expensive part of a bathroom remodel is typically labor costs. Skilled trades like plumbing and electrical work can consume 20% to 35% of your budget, greatly impacting your overall renovation expenses.
Conclusion
Now that you've mapped out your master bathroom remodel, remember: it's not just about the space, but how it makes you feel. With thoughtful planning and attention to detail, your dream oasis is within reach. Don't rush the process—take your time to choose what truly resonates with you. After all, a well-designed bathroom can transform the mundane into a daily retreat. So, roll up your sleeves and get ready to create a sanctuary that reflects your style!
Interior Design
How to Protect Furniture From Cats
Learn effective strategies to safeguard your furniture from cats and discover the best tips to maintain harmony in your home.
In order to protect your furniture from cats, consider starting with the use of durable sofa covers and transparent vinyl guards to cover areas that are susceptible to scratching. It is also helpful to incorporate scratching posts in common areas to redirect their natural instincts, placing them near furniture you want to safeguard. Regular nail trimming can also help minimize damage. Additionally, using double-sided sticky tape or citrus sprays can be effective deterrents. Nail caps are another option for temporary protection. By implementing these strategies, your furniture will be better equipped to resist scratches. There are even more steps you can take to create a harmonious living space for both you and your cat. Providing plenty of toys and interactive activities can help keep your cat mentally and physically engaged, reducing their inclination to scratch furniture out of boredom. Training your cat with positive reinforcement when they use their scratching posts is another effective method for keeping them away from furniture. With patience and consistency, you can establish a cat-friendly environment while protecting your home’s furnishings.
Key Takeaways
- Use durable sofa covers and transparent vinyl guards to protect furniture from cat scratches while maintaining aesthetics.
- Provide scratching posts in common areas to redirect cats from scratching furniture.
- Regularly trim your cat's nails every two to three weeks to minimize potential damage.
- Apply double-sided sticky tape or citrus sprays on furniture surfaces to deter scratching behavior.
- Invest in products like Clawguard Furniture Shields and Soft Claws nail caps for effective protection solutions.
Furniture Protection Strategies
When you want to protect your furniture from your cat's claws, employing effective strategies can make a significant difference. Start by using furniture protectors like durable sofa covers designed to withstand cat claws. These covers come in various colors and patterns, so you won't have to compromise on your home's aesthetic.
You can also apply transparent furniture guards made of vinyl to shield specific areas prone to scratching without disrupting your décor. Additionally, guarantee proper airflow around your furniture to maintain a pleasant environment, similar to how air purifier maintenance helps enhance performance in your home.
Utilizing double-sided sticky tape on furniture surfaces can deter your cat from scratching, as the unpleasant sensation encourages them to seek alternative options.
Additionally, consider incorporating citrus or essential oil sprays as natural deterrents; cats usually dislike these strong smells. Just be sure to test them on inconspicuous areas first.
Providing Alternatives for Scratching
To keep your furniture safe, start by placing scratching posts in areas where your cat loves to hang out.
Offering a mix of vertical and horizontal surfaces can cater to their scratching preferences and help redirect their energy.
Additionally, consider using natural ingredients in homemade cat treats as a reward for using the scratching posts, promoting overall health and wellness for your pet natural ingredients promote health.
Scratching Post Placement
Strategically placing scratching posts can considerably reduce your cat's urge to scratch furniture. Start by positioning scratching posts in common areas where your cat spends the most time. This encourages use and helps redirect scratching behavior away from your beloved furniture.
If your cat tends to scratch a specific piece of furniture, place a scratching post nearby to increase the likelihood of them choosing it over the furniture. Additionally, consider incorporating natural remedies for calming your cat, as consideration of natural remedies can further reduce unwanted scratching behaviors.
Make sure the scratching posts are tall enough—at least 32 inches—to satisfy your cat's natural instinct for vertical scratching. Many cats prefer this type of surface, and a tall post provides them with an enticing option.
Using a variety of scratching post materials, like sisal, cardboard, or carpet, caters to different preferences and keeps them engaged in their scratching activities.
To maintain your cat's interest and prevent boredom, regularly rotate the locations and types of scratching posts. This helps keep their scratching behavior directed towards the designated posts, ultimately protecting your furniture from unwanted damage.
Variety of Scratching Surfaces
Cats love to scratch, and providing a variety of scratching surfaces can help redirect that instinct away from your furniture. To effectively satisfy their scratching needs, consider investing in multiple scratching posts made from appealing materials like sisal rope or cardboard. Offering both vertical posts and horizontal scratching surfaces caters to different preferences, increasing the likelihood that your cat will use them.
Position these scratching posts near your cat's favorite resting spots or areas where they typically scratch. This encourages frequent use and helps them associate these designated areas with positive experiences. Additionally, incorporating scratching mats can enhance the options available. You can place these mats on the floor, drape them over furniture, or attach them to walls, providing versatile scratching opportunities.
To keep your cat engaged, regularly rotate scratching surfaces and introduce new textures. This prevents boredom and maintains their interest in designated scratching areas.
Maintenance and Care Techniques
To keep your furniture safe, regular nail trimming is key; aim for every two to three weeks.
Plus, using positive reinforcement when your cat scratches in the right places can make a big difference in their behavior.
Regular Nail Trimming
Every two to three weeks, you should make nail trimming a part of your cat care routine. Regularly trimming your cat's nails greatly reduces the damage caused by scratching furniture and other surfaces.
Using nail clippers specifically designed for cats guarantees a safe and effective trim. You might also want to use cat nail files or emery boards to keep those nails smooth and prevent snagging.
Maintaining this routine not only protects your furniture but also promotes your cat's overall health. Overgrown nails can lead to discomfort or even injury, making regular trimming essential.
If you have multiple cats, this practice becomes even more important. It helps manage scratching behaviors and reduces the likelihood of territorial disputes over your furniture.
Creating a positive experience around nail trimming can make the process smoother. Consider using positive reinforcement, like treats or praise, to help your cat associate nail trimming with something enjoyable.
Positive Reinforcement Training
Integrating positive reinforcement training into your routine can greatly enhance your efforts to protect furniture from scratching. By rewarding your cat with treats, praise, or affection immediately when they use scratching posts instead of your furniture, you encourage desirable behavior.
Consistency is key—offer rewards every time your cat engages with the appropriate scratching surface.
To attract your cat to scratching posts, consider utilizing catnip or placing treats at the base. These techniques can help redirect their natural instincts away from your furniture.
Regularly monitoring your cat's responsiveness to these training techniques is crucial. Adjust your approach to guarantee that rewards remain meaningful and timely.
Engaging your cat in interactive play sessions can also reduce boredom, decreasing the likelihood of unwanted scratching. Incorporate toys that mimic prey to stimulate their hunting instincts, providing an alternative outlet for their energy.
Over time, this combination of positive reinforcement and engaging activities will help establish new habits, making your home a cat-friendly environment that protects your furniture from scratching.
Engagement and Stimulation
Engaging your cat with interactive toys like feather wands or laser pointers keeps them mentally and physically stimulated, reducing their urge to scratch your furniture.
Regular play sessions not only provide fun but also reinforce proper scratching behavior, steering your cat away from your beloved couch.
To enhance your cat's engagement, consider these strategies:
- Rotate toys every few days to maintain interest and prevent boredom.
- Incorporate cat trees or climbing shelves to satisfy their natural climbing instincts, diverting attention from your furniture.
- Provide various scratching surfaces, including vertical posts and horizontal mats, catering to different preferences and encouraging them to scratch where you want.
- Schedule regular play sessions that integrate scratching alternatives, keeping your cat entertained and less likely to seek out your furniture for stimulation.
Best Products for Furniture Protection
Protecting your furniture from cat scratches can be achieved with the right products designed specifically for this purpose. One effective option is the Clawguard Furniture Shields, which provide durable, transparent protection for your furniture.
They're easy to install using upholstery twist pins and can be trimmed to fit the dimensions of your furniture that your cat is likely to scratch.
For a non-invasive solution, consider Pioneer Pet Sticky Paws. This double-sided tape deters cats from scratching by sticking to surfaces, although you'll need to replace it regularly due to debris.
Another innovative choice is the Sofa Scratcher, which doubles as a scratching post and furniture guard, fitting snugly against your furniture without needing tape or pins.
You might also want to try Soft Claws nail caps for your cat, which allow natural claw extension while protecting your furniture.
Finally, the Our Pets Double-Wide Floor Scratcher caters to both vertical and horizontal scratching preferences, encouraging your cat to use designated areas instead of your furniture.
With these products, you can keep your furniture safe and stylish!
Advantages and Disadvantages of Nail Caps
While nail caps like Soft Claws can be a practical solution for safeguarding your furniture from cat scratches, they come with both benefits and drawbacks. Understanding these can help you decide if they're right for your furry friend.
Advantages:
- Non-destructive solution: Nail caps cover sharp claws, preventing furniture damage without altering your cat's behavior.
- Safe for cats: Made from soft, durable vinyl and applied with non-toxic adhesive, they're generally safe for your pet.
- Natural claw extension: Nail caps allow for natural claw extension, so your cat can still stretch and flex.
- Effective temporary solution: They last about 4 to 6 weeks, making them ideal during training or changing phases.
Disadvantages:
However, there are a few downsides. Some cats may resist wearing them or have difficulty adjusting to the feel.
Additionally, their effectiveness can vary based on individual temperament, and they require consistent monitoring to guarantee they stay in place.
Occasionally, nail caps may fall off prematurely, necessitating careful application and consideration of your cat's activity level.
Ultimately, weigh these pros and cons to find the best solution for your cat and your furniture.
User Experience and Effectiveness
When it comes to protecting your furniture from feline mischief, user experiences highlight the effectiveness of various products designed for this purpose. Many cat owners have found that items like Clawguard Furniture Shields and sofa scratchers greatly reduce scratching damage, with positive results often seen within weeks.
Alternatives such as scratching posts and mats are particularly effective in encouraging your cat to redirect their scratching behavior, leading to less wear and tear on your furniture.
One of the most appreciated features is how easy to apply these products are. Users frequently mention the simplicity of installing double-sided tape or furniture guards without causing damage.
Long-term use of these protective measures typically requires minimal upkeep, making them lasting solutions for safeguarding your belongings.
Another key factor in success is the variety of colors and styles available. This customization allows you to choose products that match your home decor while catering to your cat's preferences, increasing the likelihood of preventing furniture damage.
Considerations and Limitations
Numerous factors come into play when considering furniture protection from cats, and it's important to weigh the pros and cons before committing to a solution.
Here are some considerations and limitations to keep in mind:
- Cost: Some protection products, like guards or tape, can be pricier than traditional methods, which might strain your budget.
- Installation: Certain items, such as scratching posts or furniture shields, may require time and effort to set up, which can be inconvenient for busy pet owners.
- Aesthetic Appeal: The visibility of guards or tape could impact your furniture's look. Transparent options may not blend seamlessly with every decor style.
- Effectiveness: The success of different methods varies with individual cat behavior. You might need to experiment to find what truly works for your feline friend.
Additionally, regular maintenance is essential.
Products like nail caps or scratching surfaces need replacement every few weeks to continue protecting your sofa effectively.
Product Information and Resources
To keep your furniture safe from feline claws, exploring effective products is key. One excellent option is the 12 PCS Anti Cat Scratch Furniture Protector by Fomers.
These protectors come in XXL and XL sizes, measuring 14.65 x 12.01 x 0.59 inches, and are made from non-toxic, durable materials that resist cat claws while blending seamlessly with your furniture's aesthetic.
Installation is easy; simply apply professional sofa glue for strong adhesion on fabric without leaving residue. Plus, the product includes 40 twist pins for added security.
Customer reviews rate it 4.3 out of 5 stars, praising its effectiveness and ease of application. Some users suggest using additional spiral pins over time for enhanced durability.
For a temporary solution while training your cat, consider Soft Paws nail caps. Available in various sizes and colors, these caps can last 4-6 weeks, helping you protect your furniture without hindering your cat's natural behavior.
Additionally, using scratch tape on vulnerable areas can deter scratching. With these products, you can safeguard your furniture effectively while keeping your feline friend happy.
Frequently Asked Questions
How Do I Make My Furniture Cat Proof?
To make your furniture cat-proof, consider using protective covers, applying double-sided tape on vulnerable areas, and providing appealing scratching posts nearby. You'll create a comfortable environment for both you and your feline friend.
How Can I Keep My Cat off My Furniture?
Ever wondered why your cat loves your furniture so much? To keep them off, create enticing alternatives like scratching posts, use deterrents like citrus sprays, and reward them when they choose their designated spots.
How Do I Stop My Cat From Attacking My Furniture?
To stop your cat from attacking furniture, provide scratching posts, use double-sided tape on surfaces, apply citrus sprays, trim their nails regularly, and reward them for choosing the right spots to scratch instead.
What Smell Will Keep Cats off Furniture?
Cats generally dislike citrus, vinegar, and strong essential oils like lavender and peppermint. You can use these scents effectively by spraying diluted solutions on surfaces, ensuring to test them first to avoid any damage.
Conclusion
By combining protective strategies with engaging alternatives, you can create a harmonious home for both you and your cat. Imagine this: as you settle onto your scratch-resistant sofa, your feline friend happily claws at their designated scratching post nearby. It's a win-win—your furniture stays safe, and your cat gets the stimulation they need. With the right products and a little effort, you'll find that protecting your furniture from cats can be both effective and rewarding.
Interior Design
Unveil Your Unique Design Style Today
Begin your journey to uncover a design style that truly reflects you, and discover how to make your space uniquely yours.
You can reveal your unique design style today by exploring what truly resonates with you. Start by identifying your aesthetic preferences, whether it's Midcentury Modern or Modern Farmhouse. Use mood boards to visualize color schemes, furniture styles, and textures that speak to you. Embrace trendy elements like bold patterns or sustainable materials that match your values. Don't forget to reflect on how smart furniture can enhance both functionality and style. Personalizing your space with meaningful decor makes it truly yours. Keep going, and you'll discover even more ways to create a living environment that reflects who you are. As you refine your vision, consider studying the work of **mustknow German interior designers** to gain further inspiration and discover innovative design techniques. Their unique approaches can offer fresh perspectives, helping you to blend international ideas with your personal aesthetic. Ultimately, it’s about crafting a space that not only reflects your individuality but also welcomes comfort and creativity into your everyday life.
Key Takeaways
- Take an immersive quiz to discover your preferred design vibe and unique aesthetic.
- Explore different color schemes and furniture styles that resonate with your personal taste.
- Create mood boards to visualize and curate your design ideas effectively.
- Embrace design trends like bold patterns and sustainable materials to enhance your space.
- Personalize your home by incorporating meaningful decor and family heirlooms that reflect your identity.
Discover Your Design Identity
Your living space is a canvas waiting for your unique touch, and discovering your design identity is the first step to transforming it.
Begin by taking an immersive quiz that reveals your preferred design vibes, whether it's the free-spirited Bohemian Glam or the sleek Midcentury Modern. Each question acts as a brushstroke, disclosing your distinctive style and helping you understand how personal tastes shape your space.
As you explore your options, consider creating mood boards essential to visualize your ideas effectively. You'll complete the quiz in under two minutes, gaining quick insights that empower you to curate a home that reflects your true self.
With 65% of participants leaning towards Midcentury Modern, recognizing your design identity becomes vital for creating a masterpiece tailored to your sensibilities.
Embrace this journey and let your space come alive!
Uncovering Personal Aesthetics
Revealing personal aesthetics is like starting on a creative adventure that transforms your living space into a true reflection of who you are.
Begin by exploring your preferences in color schemes, furniture styles, and decor accessories. For instance, if you lean towards the Modern Farmhouse aesthetic, consider incorporating natural materials and vintage furnishings that enhance authenticity.
Ask yourself what vibes resonate with you—are you drawn to the free-spirited Bohemian or the luxurious Glam? Taking an immersive quiz can help uncover your unique design identity, providing quick insights into your tastes.
Each choice you make serves as a brushstroke in your design masterpiece. Embrace these insights to craft a space that not only looks good but also enhances your emotional well-being.
Embracing Design Trends
Embracing design trends can invigorate your living space and reflect your evolving tastes. By incorporating bold geometric patterns, you can add visual interest and create a striking focal point.
Using sustainable materials not only enhances your home's aesthetic but also promotes eco-friendly living, aligning your design choices with your values.
Don't shy away from natural textures; they bring warmth and comfort, making your space inviting.
Blend modern designs with your personal style to create a unique environment that feels distinctly yours.
Remember, trends can serve as inspiration—feel free to adapt them to suit your preferences, crafting a space that's both functional and visually appealing.
Your home should tell your story, so let these trends guide your creativity!
The Role of Color and Texture
Color and texture play pivotal roles in defining the atmosphere of your living space. They can evoke emotions and set the tone for your home. For example, warm colors like reds and oranges create energy, while cool colors like blues and greens promote calmness. Textures, from smooth surfaces to rough fabrics, add depth and interest.
Here's a quick reference table to help you understand the effects of different colors and textures:
Color | Emotional Impact |
---|---|
Red | Passion and energy |
Blue | Calmness and serenity |
Soft Fabrics | Comfort and coziness |
Rough Textures | Warmth and richness |
Integrating Smart Furniture
Smart furniture is revolutionizing how you experience and interact with your living space. These innovative pieces enhance functionality while seamlessly blending with your design preferences.
By incorporating smart furniture, you can transform your home into a more efficient and enjoyable environment. Additionally, having a secure home environment can be supported by the value of home security systems, which contribute to overall peace of mind.
- Enjoy adjustable desks that promote better posture and comfort.
- Utilize multifunctional tables to maximize space and utility.
- Embrace wireless charging stations to keep your devices powered without the clutter.
- Experience voice command systems that simplify your daily routines.
Integrating smart furniture not only makes your life easier but also allows your aesthetic to shine through modern design.
Creating Connected Spaces
Creating connected spaces elevates your home experience by integrating technology seamlessly into your daily life.
Imagine controlling your lights, temperature, and even your entertainment systems from one device. With the rise of smart home integration, energy efficiency becomes a key benefit, allowing you to manage power consumption more effectively.
Smart furniture, like adjustable desks and multifunctional tables, not only enhances functionality but also promotes wellness.
You'll appreciate the convenience of voice command systems that simplify your routines, making daily tasks feel effortless.
Personalizing Your Home Experience
Personalizing your home experience transforms a house into a sanctuary that reflects your unique tastes and lifestyle.
By infusing your personality into every corner, you create a space that feels truly yours.
Here are some ways to personalize your home:
- Showcase your travels: Display souvenirs and art from your adventures to spark joy and memories.
- Curate a cozy reading nook: Fill it with your favorite books and comfy seating for relaxation.
- Incorporate family heirlooms: Blend the past with the present by showcasing meaningful items that tell your story.
- Choose colors that inspire you: Use paint, textiles, or decor to create a mood that resonates with your personality.
Embrace these ideas, and watch your space evolve into a reflection of who you truly are.
Frequently Asked Questions
How Do I Maintain My Unique Style Over Time?
To maintain your unique style over time, regularly reassess your preferences, stay updated on trends, and incorporate new elements that resonate with you. Remember, your space should evolve alongside your personal growth and experiences.
Can I Combine Multiple Design Styles in One Space?
Absolutely, you can combine multiple design styles in one space! Just blend elements that resonate with you, like pairing modern furniture with vintage decor, creating a unique atmosphere reflecting your personal taste and lifestyle.
What Budget Should I Consider for a Design Overhaul?
Think of your budget as a canvas; it shapes your design masterpiece. Consider costs for materials, labor, and decor. Prioritize what resonates with you, ensuring your space reflects your unique style without financial strain.
How Can I Incorporate Cultural Influences Into My Design?
Incorporate cultural influences by selecting textiles, colors, and patterns that resonate with your heritage. Display art and decor from your culture, and blend these elements seamlessly to create a harmonious, personalized space that reflects your identity.
What Resources Are Best for Finding Design Inspiration?
So you're clueless about design inspiration, huh? Check out Pinterest, Instagram, and design blogs. They'll shower you with ideas, making you feel like a design genius—just don't forget to credit your newfound brilliance!
Conclusion
Now that you've commenced this exciting journey to reveal your unique design style, your living space is bound to transform into a breathtaking masterpiece! Embrace your newfound insights and let your personal aesthetics shine through every corner of your home. Remember, design isn't just about decoration—it's about creating a sanctuary that reflects who you are. So immerse yourself, explore, and watch as your space becomes the envy of everyone who walks through your door!
Interior Design
How to Decorate Sofa With Pillows
Navigate the art of pillow decorating for your sofa and uncover the secrets to creating a stunning focal point in your living room.
When it comes to styling your sofa with pillows, the first step is to establish a cohesive color scheme consisting of 3-5 hues. Opt for odd numbers of pillows, such as 3 or 5, for a visually appealing look. Mix various shapes and textures, like square, lumbar, and round pillows, to add depth to the arrangement. Place larger pillows towards the back for support and smaller ones in the front for added style. Balance patterns against neutral backgrounds to prevent the space from feeling cluttered. Limit the total number of pillows to maintain a comfortable yet chic look. By arranging them properly, your sofa will truly stand out.
There is always more to explore when it comes to perfecting your space, so keep experimenting! When selecting pillows, consider using a mix of high-quality fabrics like velvet, linen, and cotton to elevate the overall aesthetic. Don’t be afraid to try new things, as trial and error is part of the process, just like building furniture step by step—each layer brings something unique to the final design. Keep refining until you find the perfect balance between comfort and style. Whether you are arranging pillows or considering building your own furniture, personalization is key to creating a space that truly reflects your personality. Coordinate the pillows with other custom pieces in the room for a cohesive and harmonious look. Similar to the process of building furniture, intentionally layering different elements helps create a functional yet stylish living area tailored to your taste. Join us as we learn more and share surprises about creating furniture step-by-step.
Key Takeaways
- Establish a cohesive color palette of 3-5 colors to create a harmonious look for your sofa pillows.
- Use odd numbers of pillows (3 or 5) for visual interest and balance in your arrangement.
- Mix various shapes and sizes, incorporating square, lumbar, and round pillows for added texture and comfort.
- Layer larger pillows at the back and smaller ones in front to create depth and support.
- Limit the number of pillows to 3-5 to maintain comfort and avoid overcrowding on the sofa.
Fundamental Styling Principles
When decorating your sofa with pillows, understanding the fundamental styling principles is essential to achieving a balanced and inviting look. Start by establishing a cohesive color scheme consisting of 3-5 colors. This guarantees your pillows and throws mix and match effectively, preventing any clustering of hues that might disrupt the visual flow.
Additionally, incorporating personal influences into your pillow selection can enhance the overall design, making it uniquely yours—exploration of personal tastes reveals unique design preferences.
Next, incorporate pillows in various sizes—round, lumbar, and square—to create visual interest. Aim for odd numbers in your arrangement, as they tend to be more aesthetically pleasing.
Don't forget to balance small and large-scale patterns; larger designs work best against neutral backgrounds, enhancing the overall appeal.
Textures play a vital role, too. Mixing solids and neutrals with varied textures like velvet, linen, and cotton adds depth without overwhelming the space.
You can choose a minimalist approach with a few well-placed pillows or layer multiple pillows for a dynamic look that suits your room's style.
Sofa Types and Considerations
When it comes to styling your sofa, understanding the type you have is key.
Traditional sofas thrive on a simple color scheme and texture, while sectionals offer more freedom to mix and match pillows for both comfort and aesthetics.
To spark your creativity while decorating, consider incorporating elements that encourage a balance between technology use and creative expression, such as a nurturing imaginative mindset.
Let's explore how to enhance the look of each style with thoughtful pillow arrangements.
Traditional Sofa Styling Tips
Decorating a traditional sofa with pillows can transform your living space into a cozy haven. To create a balanced and inviting look, follow these simple tips:
- Choose a Color Palette: Stick to three colors. This keeps your design cohesive while allowing you to layer in patterns and textures for warmth and interest. Incorporating rich colors can also evoke a sense of comfort and relaxation, similar to the benefits of antioxidants in cranberry juice.
- Mix Pillow Sizes: Use medium-scale pillows, like 22-inch and 20-inch square pillows, alongside smaller lumbar pillows. This combination enhances comfort and aesthetics without overwhelming your sofa.
- Group in Odd Numbers: Aim for arrangements of three or five pillows. Odd numbers create visual appeal and a cozy atmosphere that complements traditional sofas.
When selecting pillow sizes and shapes, consider the overall scale of your sofa. Confirm your decorative pillows enhance the sofa's elegance without making it feel cluttered.
Sectional Pillow Arrangement Ideas
Arranging pillows on a sectional sofa can elevate your space while enhancing comfort and style. To achieve the best look, focus on pillow styling that incorporates an odd number of pillows, like three or five. This not only creates visual interest but also maintains balance across your sectional sofa.
Here's a quick guide to help you with your arrangement:
Pillow Size | Placement |
---|---|
Large (22"+) | Outer corners |
Lumbar (small) | Middle sections |
Textured pillows | Mix with solid colors |
Patterned pillows | Pair with stripes/solids |
Odd-number group | Aim for 3 or 5 total pillows |
When decorating a couch, mix textures and patterns for depth. For instance, pair a floral lumbar pillow with a solid color larger pillow. This combination adds personality to your living rooms while ensuring comfort. Also, consider the sectional's configuration by defining each section with your pillows. This strategy allows for easy lounging and relaxation, creating a cohesive and inviting layout.
Balancing Comfort and Aesthetics
While you want your sofa to look stylish, comfort should never take a backseat. When decorating with pillows, it's crucial to strike that perfect balance. Here are three tips to help you achieve both comfort and style:
1. Choose Supportive Inserts: Opt for medium to firm pillows that provide adequate support while still enhancing the sofa's design. This guarantees you can lounge comfortably without compromising on aesthetics.
Additionally, consider the textures and materials of your pillows, as they can greatly impact both comfort and visual appeal, similar to how wall decor inspiration adds character to a space.
2. Limit the Number of Pillows: Stick to three to five pillows to prevent overcrowding. This quantity allows you to create a visually appealing arrangement while maintaining a cozy atmosphere.
3. Mix Textures and Shapes: Combine square, lumbar, and round pillows to add visual interest. Different textures can evoke different feelings, making your space feel inviting and comfortable.
When you arrange your pillows, layer larger ones at the back for support, placing smaller decorative pillows in front for style.
Remember to select colors that complement your sofa and evoke the desired mood. Balancing comfort and aesthetics will create a welcoming seating area that invites relaxation and enjoyment.
Integrating Colors and Patterns
Integrating colors and patterns into your sofa's pillow arrangement can transform the entire look of your living space. Start by selecting a cohesive color palette of 3-5 colors to guarantee your pillows mix and match effectively without overwhelming the space. Use a color wheel to identify complementary shades that enhance visual harmony.
Next, incorporate a mix of bold and subtle patterns. Consider florals, stripes, and geometrics, distributing them evenly across the sofa to avoid clustering. Pair larger pillows (20 inches and up) with smaller textured pillows for added depth and interest in your arrangement. This combination not only provides comfort but also elevates the design.
Here's a quick reference table to help you visualize:
Pattern Type | Color Suggestion |
---|---|
Floral | Soft pastels |
Stripes | Bold primary colors |
Geometric | Neutral tones |
Choosing the Right Pillow Shapes
When it comes to choosing the right pillow shapes, you'll want to contemplate how different styles can enhance your sofa's look.
Incorporating natural materials and textures, such as those found in modern farmhouse decor trends, can elevate the overall aesthetic.
Mixing classic shapes, like square and lumbar pillows, not only adds visual interest but also caters to various seating preferences.
Keep in mind the size of your pillows and how they interact with your sofa to create a balanced and inviting arrangement.
Classic Shapes Overview
Choosing the right pillow shapes can transform your sofa into a stylish focal point in your living space. When deciding on classic shapes, consider how each one can enhance your decor. Incorporating a balanced mix of these shapes can create visual interest while ensuring comfort.
Here are three popular options:
- Square Pillows: These versatile pillows are typically available in sizes ranging from 16 to 24 inches. They work beautifully in both traditional and contemporary spaces, adding structure and a clean look.
- Lumbar Pillows: Rectangular lumbar pillows, often sized at 12×20 or 14×20, provide comfort and support for your lower back. They're perfect for creating a cozy, inviting atmosphere on your sofa, especially when paired with classic textiles that enhance overall decor.
- Round Pillows: If you're aiming for a softer, more bohemian vibe, round pillows can introduce a unique flair to your arrangement. Their different textures complement various styles, making them ideal for eclectic or casual settings.
Size Matters
Pillow size plays an essential role in creating a well-balanced and inviting sofa arrangement. For standard sofas, start with 20-inch square pillows, and consider incorporating larger options like 22-inch or 24-inch pillows for added variety and visual interest. Using an odd number of pillows enhances aesthetic appeal; three pillows work well for loveseats, while five to seven pillows suit a standard six-foot sofa.
Additionally, consider the size matters when selecting pillows to guarantee they harmonize with your overall decor theme.
When you arrange pillows, place the largest on the outside and the smallest on the inside to create a balanced look that complements your couch. To break up monotony, mix standard square shapes with lumbar pillows, such as 12×20 or 12×24 sizes. This combination adds dimension and keeps the arrangement engaging.
It's vital to confirm that your selected pillow sizes complement the couch dimensions without overwhelming the space. By choosing the right amount of pillows in different sizes and shapes, you'll maintain a cohesive and inviting appearance that enhances your living room's decor.
Mixing Shapes Effectively
Often, mixing different pillow shapes can elevate your sofa's style and create a more inviting atmosphere, much like how Blue Skies and Lemonade by Rhythm Failure evokes feelings of joy and warmth.
By incorporating a variety of shapes, you not only add visual interest but also maintain balance in your arrangement.
Here are three effective ways to mix shapes with your throw pillows:
- Start with Square Pillows: Use larger square pillows (22 inches or more) as anchors on each end of your sofa. Their size provides a strong base for your arrangement.
- Add Lumbar Pillows: Place smaller lumbar pillows (12×20 inches) in the center. Their rectangular shape contrasts beautifully with the square pillows, creating a layered effect that draws the eye.
- Include Round Pillows: For a playful touch, mix in a few round pillows. Their curves break the monotony of the square and lumbar shapes, adding dynamic flair to your sofa's look.
Sourcing Quality Pillow Inserts
When it comes to sourcing quality pillow inserts, selecting the right materials and sizes can make all the difference in achieving that inviting look for your sofa. High-quality inserts enhance the appearance of your throw pillows, regardless of the cost of the covers.
For that plush and full look, remember the general rule of insert sizing: choose an insert that's one size larger than your pillow cover. This simple tip will help create a visually appealing arrangement. Additionally, it's important to take into account how well these inserts perform over time; for example, investing in options that maintain their shape and fluffiness can prolong the life of your decorative pillows.
You might also explore the best mini vacuums for easy cleanup of any dust or debris that settles on your sofa and pillows.
You'll want to take into account the materials, too. Feather inserts provide a luxurious feel and maintain their shape well, but if you're concerned about allergies, opt for hypoallergenic polyester options instead. Retailers like Pottery Barn and Crate and Barrel offer a reliable selection of well-filled inserts that can suit various styles.
Additionally, Tonic Living lets you purchase inserts with the pillow covers for perfect sizing.
Investing in fewer, high-quality pillow inserts not only enhances your decor but also makes swapping out seasonal covers easier, minimizing your storage needs while keeping your sofa looking inviting year-round.
Mixing and Matching Techniques
With quality pillow inserts in place, you can now focus on mixing and matching techniques to elevate your sofa's aesthetic.
Start by establishing a cohesive color palette of 3-5 colors. This will guide your selections and guarantee even distribution across the sofa for visual balance. Incorporating elements that enhance emotional well-being, such as music therapy integration, can further enrich your space.
Here are three key techniques to take into account:
- Mix Various Textures: Combine different materials like velvet, linen, and cotton. Introduce contrasting elements such as leather or knitted textures to add depth and warmth.
- Utilize Different Pillow Shapes: Incorporate both square pillows and lumbar pillows in varying sizes. Group them in odd numbers for an aesthetically pleasing arrangement that feels dynamic.
- Experiment with Arrangements: Try asymmetrical arrangements for a relaxed vibe or go for symmetrical setups for a more polished look. This flexibility allows you to adapt your styling based on your desired aesthetic.
Shopping for Throw Pillows
Shopping for throw pillows can be an exciting adventure that transforms your sofa into a stylish focal point. Start by establishing a cohesive color palette of 3-5 colors that complements your couch and overall room decor. Aim for a mix that includes neutral colors, as they can create a harmonious backdrop.
When you choose your throw pillows, consider the shapes of pillows to add depth and visual interest. Opt for various textures and patterns—think velvet, linen, and faux fur—to enhance your decorative style. You'll want to select pillow inserts that are one size larger than the covers for that plush, inviting look.
For quality inserts, check out retailers like Pottery Barn, and explore customizable pillow covers at Tonic Living to fit your unique style.
Don't forget to explore budget-friendly options too; thrift stores and online platforms like Etsy often offer one-of-a-kind pillow covers that add character to your space.
With a bit of creativity and effort, you can curate a collection of throw pillows that not only beautifies your couch but also reflects your personal taste.
Engaging Community and Inspiration
Exploring the world of throw pillows doesn't have to be a solo journey. Engaging with design communities can spark inspiration and elevate your home decor game.
Here are three ways to connect and gain insights:
- Social Media Platforms: Immerse yourself in Instagram and Pinterest to discover unique pillow arrangements and color combinations. Follow influential interior designers who share innovative styling ideas that can transform your space.
- Online Forums: Join groups dedicated to home decor where you can exchange ideas and receive feedback on your pillow styling choices. You'll find a supportive community enthusiastic to help you refine your designs.
- Local Workshops: Attend events hosted by home decor stores to gain hands-on experience. These workshops often provide professional tips on pillow placement and styling techniques, making your decorating journey more engaging and effective.
Frequently Asked Questions
How to Decorate a Couch With a Pillow?
To decorate a couch with a pillow, start by choosing a cohesive color palette. Mix sizes and textures, using odd numbers for visual appeal. Layer patterns while keeping harmony for an inviting and stylish arrangement.
How Many Decorative Pillows Should Be on a Couch?
You should consider the size of your sofa when choosing decorative pillows. For smaller sofas, aim for 2-3 pillows. Larger ones can handle 5-7, ensuring a balanced look while maintaining comfort and functionality.
How Do You Arrange Pillows and Blankets on a Couch?
Did you know that 75% of people prefer a cozy, layered look? You can arrange pillows and blankets by stacking larger pillows at the back, adding medium ones in front, and draping a blanket for warmth.
Should You Put Pillows on a Sofa?
Absolutely, you should put pillows on a sofa! They add comfort and style, making your space inviting. Choose colors and textures that reflect your personality, and don't hesitate to experiment with different arrangements for visual interest.
Conclusion
Decorating your sofa with pillows can transform your living space into a cozy and stylish haven. Imagine a bright, sunny living room where you've layered soft, textured pillows in shades of blue and yellow, perfectly complementing your neutral sofa. You've mixed geometric patterns with floral designs, creating a vibrant yet harmonious look. By following these tips, you'll not only enhance your sofa's aesthetic but also make it an inviting spot for relaxation and conversation.
-
Beauty and Grooming3 weeks ago
Embrace Natural Glow With Bronzer-Free Accelerators
-
Beauty and Grooming4 weeks ago
Discover Top Outdoor Tanning Lotions Today
-
Fashion Trends1 month ago
Fall 2025 Fashion Trends: Be Ahead of the Curve!
-
Vetted1 month ago
15 Best Affordable Sustainable Fashion Brands You Need to Know About in 2025
-
Interior Design3 days ago
Mylar vs. Foil Balloons: The Ultimate Showdown
-
Beauty and Grooming3 weeks ago
Unlock Flawless Tanning With Skin Prep
-
Interior Design3 weeks ago
Create Your Dream Cottagecore Home Office Now!
-
Vetted1 month ago
15 Best Women's Fashion Trends of 2025 You Need to Know About