Interior Design
How to Refurbish Furniture
Master the art of furniture refurbishment and discover essential techniques that will transform your old pieces into stunning treasures. What comes next is crucial!
To refurbish furniture, start by evaluating its condition. Check for structural damage and surface imperfections, and verify the hardware is in good shape. Next, strip old finishes using chemical strippers or heat guns, always wearing protective gear. Once the surface is clean, sand it down with coarse then fine grit sandpaper, making sure it's dust-free before moving on. Choose your finish—oil-based for warmth or water-based for quicker drying—apply it using a brush or rag, and seal with polyurethane for durability. Each step builds on the last, revealing new possibilities for your piece while you explore further techniques and tips.
Key Takeaways
- Inspect furniture for structural damage and surface imperfections before starting the refurbishing process.
- Use effective stripping methods, such as chemical strippers or heat guns, to remove old finishes safely.
- Sand the surface using coarse grit sandpaper for removal, then fine grit for smoothing, ensuring a clean and dry surface.
- Apply chosen finishes, like oil-based or water-based products, using a brush or rag, and seal with polyurethane for durability.
- Document repairs and enhancements to maintain the furniture's emotional connection and legacy while increasing its aesthetic appeal.
Importance of Furniture Refinishing
When you consider the importance of furniture refinishing, think about how it helps preserve not just the piece itself but also the stories and memories tied to it. Each refinished item can become a canvas of emotional connections, representing cherished moments and family legacies.
Quality refinishing not only enhances the aesthetic appeal of vintage pieces but also greatly increases their value over time. Incorporating techniques that celebrate modern farmhouse decor trends allows for a seamless blend of old and new, creating a timeless look that's both inviting and stylish.
Using proper refinishing techniques guarantees that the furniture remains in excellent condition, preventing damage and prolonging its life. This commitment to sustainability aligns with a growing appreciation for environmentally friendly practices, promoting a culture of reuse instead of waste.
As you engage in furniture refinishing, you also foster community engagement, connecting with fellow enthusiasts who share knowledge and skills. This collaboration sparks creativity and encourages the development of new techniques.
Tools and Materials Needed
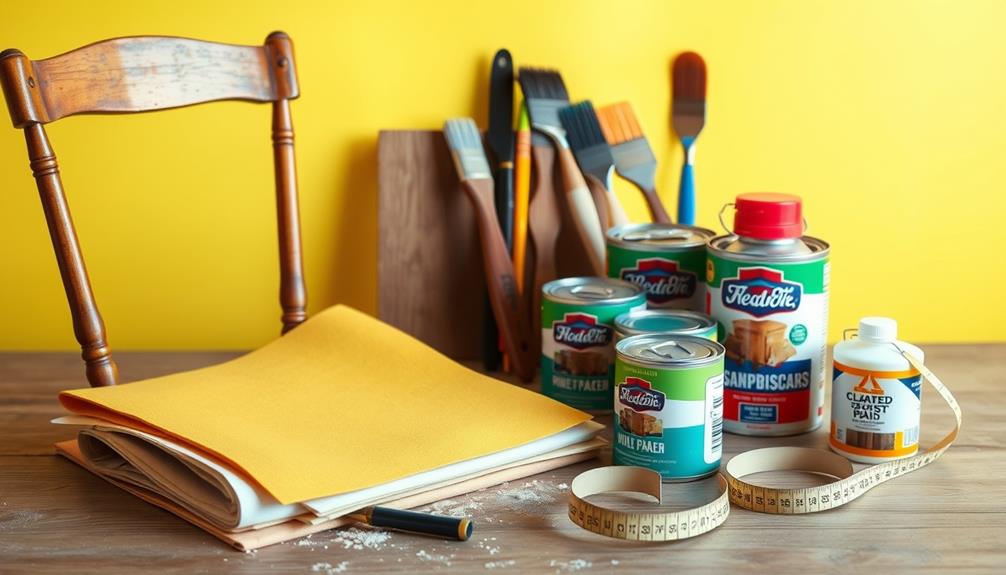
Refurbishing furniture successfully relies on having the right tools and materials at your fingertips. First, you'll need sandpaper or a power sander to smooth out surfaces before applying finishes. A set of quality paintbrushes is vital for achieving an even coat on your refinishing project. Don't forget a putty knife to fill in any gaps and cracks that may need attention.
Additionally, if you're working in a home with pets or allergens, consider using a vacuum with superior dust removal to keep your workspace clean and safe.
Protective gear, like gloves, masks, and goggles, is essential to keep you safe from dust and harmful chemicals during the process. To prepare your furniture for refinishing, gather cleaning materials such as dish soap, warm water, and microfiber cloths to remove dirt and old finishes effectively.
For structural repairs, wood glue is a must-have, while epoxy putty is perfect for filling larger flaws you may encounter. This combination will help you achieve a polished final result.
Assessing Your Furniture Condition
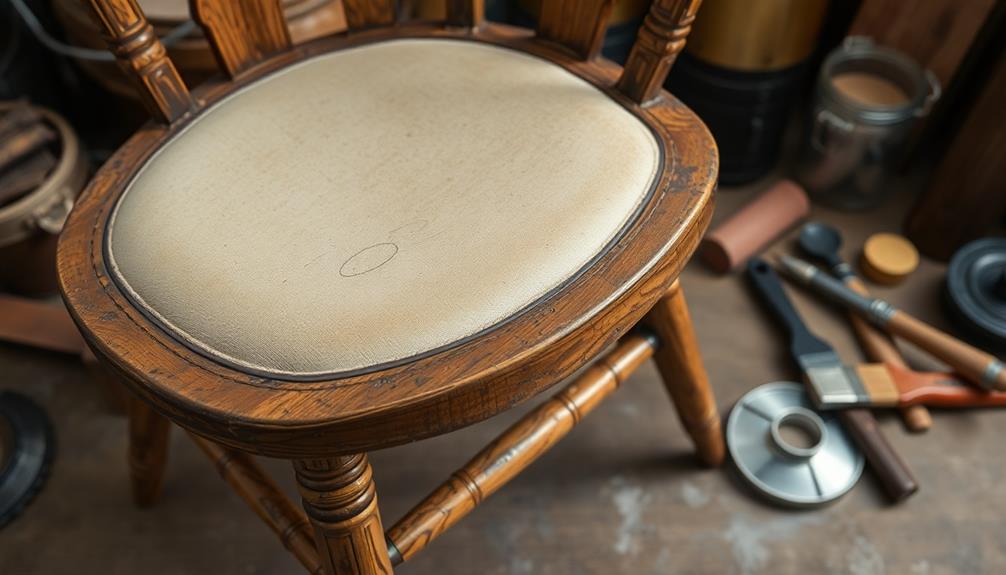
Start by inspecting your furniture for any structural damage, like cracks or loose joints, as these issues can impact your refurbishing efforts.
It's also crucial to reflect on how the condition of the furniture can affect its overall value, especially if you plan to sell it later.
Next, take a close look at the surface for imperfections that might need attention, such as dents or scratches. For instance, if you notice any significant wear, you might want to explore effective natural ingredients for grout cleaning to enhance the overall appearance.
Inspect for Structural Damage
A thorough inspection for structural damage is essential before diving into the refurbishing process.
Start by examining all joints and connections to guarantee they're intact and not loose. This is vital for maintaining structural integrity and the longevity of your furniture.
Next, check for any signs of wood rot, especially in areas where moisture might've accumulated. Wood rot can greatly compromise the piece's stability.
Inspect the legs and support structures for cracks or breaks. If you find any, you might need to perform repairs using wood glue or consider replacing parts to restore strength.
Also, look for signs of pest damage, such as small holes or sawdust, indicating an infestation that needs to be addressed before you proceed with refurbishing.
Identify Surface Imperfections
Once you've guaranteed the structural integrity of your furniture, the next step is to identify surface imperfections that could affect the final look. Carefully inspect all surfaces for visible imperfections like scratches, dents, and stains. These blemishes can greatly impact the overall appearance and finish of your piece.
Use a bright light to reveal small flaws that might be hidden in shadows, ensuring a thorough evaluation. As you inspect, document any major damages or areas requiring repair. This record will help you determine the necessary supplies and techniques needed for refinishing and refurbishing.
Don't forget to reflect on the age of your furniture, as historical significance may influence your approach to repairs. Keeping the furniture's value and integrity in mind can guide your decisions on how far to go with the refinishing process.
If you find deep stains or notable imperfections, prioritize these areas during your refurbishing efforts. By carefully identifying and documenting these surface imperfections, you'll set yourself up for success in restoring your furniture to its former glory.
Evaluate Hardware Condition
When evaluating the condition of your furniture, don't overlook the hardware, as it plays an essential role in both functionality and design.
Start by inspecting each piece of hardware, like hinges, knobs, and pulls, for signs of rust, corrosion, or wear that could affect their functionality and aesthetics. Loose screws or fittings may need tightening or replacement to guarantee your furniture remains sturdy and safe for use.
Next, assess the finish of the hardware. If it looks tarnished or discolored, consider cleaning it with suitable solutions or replacing it if necessary. This can enhance the overall appearance and longevity of your piece.
Also, evaluate the style and material of the hardware to determine if it complements the intended design of your refurbished furniture. The right hardware can elevate your piece and align with your vision.
Stripping Old Finishes
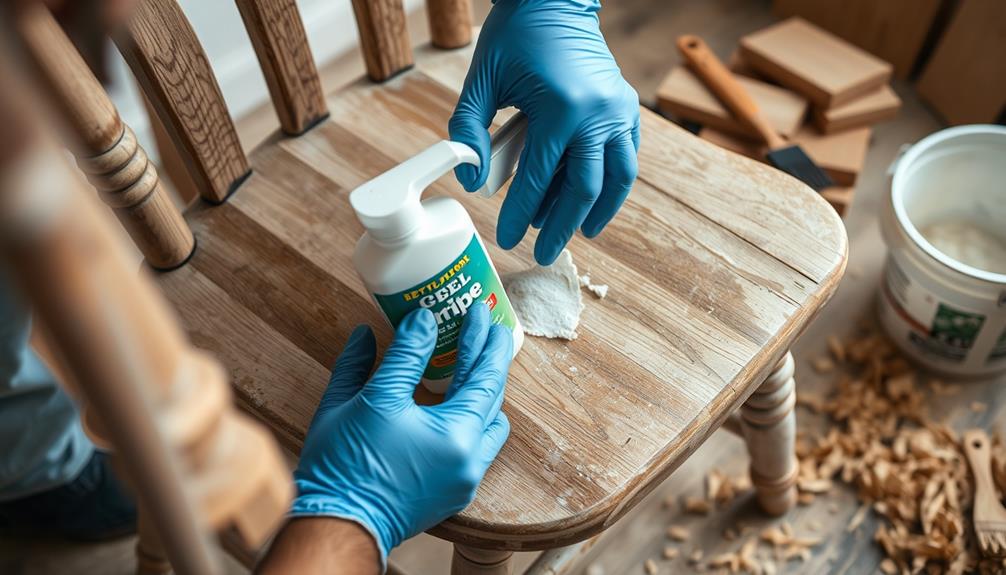
When it comes to stripping old finishes, you've got a couple of effective methods: chemical strippers or heat guns.
Always remember to prioritize safety by working in a well-ventilated area and wearing gloves and protective eyewear.
Once you've removed the old finish, make sure to rinse the surface thoroughly before moving on to sanding or refinishing.
Effective Stripping Methods
Stripping old finishes from furniture can seem intimidating, but with the right methods, you can make the process efficient and effective. Here are three effective stripping methods you can try:
1. Chemical Strippers: Use products like Citristrip. Apply the stripper generously and cover it with plastic wrap to enhance efficacy. Let it sit for at least 30 minutes, or up to 24 hours for tougher finishes.
Always test the stripper on a small, inconspicuous area first to gauge its efficacy.
2. Heat Guns: If you prefer a chemical-free option, heat guns can soften finishes, making it easier to remove the old finish.
Be cautious with temperature control to avoid burning the wood.
3. Final Cleanup: After using chemical strippers, make sure to remove the residue thoroughly with mineral spirits and a Scotch-Brite pad.
This guarantees a clean surface before moving on to sanding.
Remember to wear protective gloves and work in a well-ventilated area while using chemical strippers.
Following these steps will help you successfully strip old finishes and prepare your furniture for its new life.
Safety Precautions Required
Taking safety precautions is essential when removing old finishes from furniture.
Begin by working in a well-ventilated area to minimize exposure to harmful fumes from chemical strippers. Open windows and doors, or use fans to guarantee proper airflow. Always wear chemical-resistant gloves to protect your hands from potential burns and irritation that can occur from paint strippers.
Don't forget your protective eyewear; it's vital to shield your eyes from splashes and debris while you apply a coat of chemical stripper.
Additionally, a mask or respirator is recommended to prevent inhaling toxic vapors released during the stripping process, especially with solvent-based products.
Make certain to carefully follow the manufacturer's instructions for the specific stripper you're using, including the recommended application methods and necessary safety precautions.
This ensures not only your safety but also the effectiveness of the stripping process. By taking these precautions seriously, you can confidently strip old finishes from your furniture while minimizing risks to your health.
Sanding and Prepping the Surface

Sanding and prepping the surface is an essential step in refurbishing furniture that sets the stage for a flawless finish. Start by using coarse grit sandpaper (around 60-80 grit) to remove old paint and imperfections. Always sand with the grain of the wood to prevent scratches. For larger flat surfaces, a random orbital sander can save you time, while a sanding block or hand sanding is perfect for intricate areas.
Here's how to guarantee your surface is ready for the next step:
- Remove Old Finishes: Use coarse grit sandpaper to remove the entire surface's old paint and imperfections.
- Smooth the Surface: Progress to fine-grit sandpaper (120-220 grit) for a smooth finish.
- Clean Off Dust: After sanding, use a tack cloth to clean off the remaining dust and debris.
Make sure the wood is completely dry before you proceed to staining or sealing. This preparation is essential for achieving the best adhesion and quality of your wood finishes.
Taking the time to sand and prep properly will make a significant difference in your final result.
Applying Finishes and Sealants
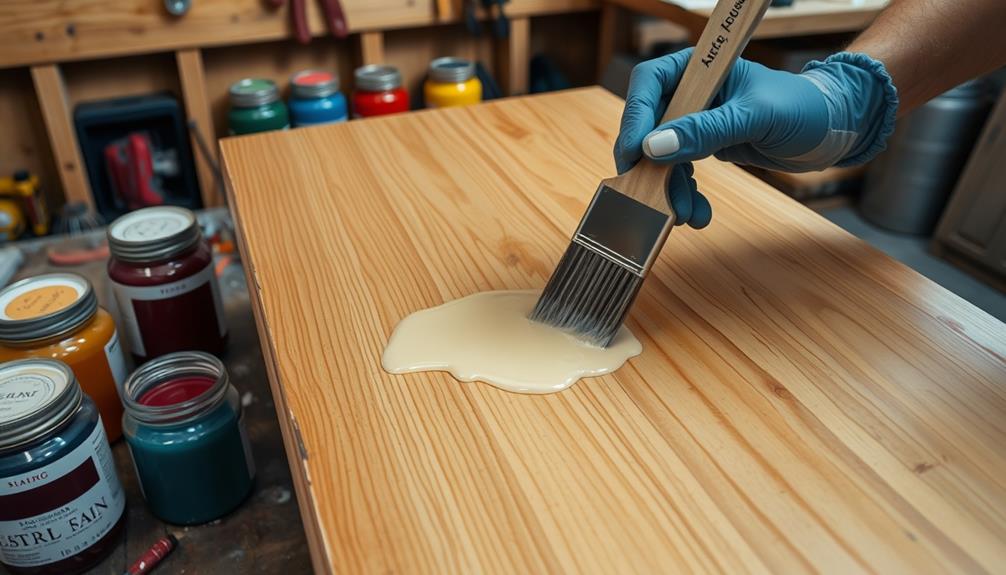
After you've thoroughly prepared the surface, it's time to apply finishes and sealants that will enhance the beauty and durability of your refurbished furniture.
Start by choosing between oil-based finishes, which provide a warm, rich look, or water-based options that offer quicker drying times and lower odors.
Before applying any stain or paint, don't forget to use a sanding sealant after sanding. This step prevents excess stain absorption and avoids unwanted color shifts, so make certain it dries completely.
When you're ready to stain, use a clean, lint-free rag or a paintbrush, wiping off excess within a few minutes to achieve a consistent color.
For sealing, apply polyurethane in multiple thin coats—typically 2-3—allowing 1-2 hours of drying time between each. Lightly sand between coats for a smooth finish.
Once the stain or paint has dried completely, consider using a topcoat varnish for additional protection against scratches and wear. This final touch will enhance the longevity of your finish, making sure your refurbished furniture stays beautiful for years to come.
Frequently Asked Questions
What Is the Best Way to Restore Old Furniture?
To restore old furniture, assess its condition, clean thoroughly, and repair any damages. Strip old finishes, sand the surface, then apply a quality sealant to protect and enhance the piece's natural beauty. You'll love the results!
How to Start Refurbishing Furniture for Beginners?
To start refurbishing furniture, choose a simple piece. Assess its condition, gather necessary tools, and follow a step-by-step process. Take your time, and don't rush; patience guarantees a better quality finish. If you’re new to this craft, it’s best to practice on projects that require minimal repairs before advancing to more detailed ones. As you gain confidence with refurbishing real-life pieces, you can also explore furniture placement in virtual spaces, such as learning **how to rotate furniture in Stardew** Valley to experiment with different layouts. Soon enough, both your hands-on and in-game design skills will improve significantly.
Is It Worth Restoring Old Furniture?
Absolutely, restoring old furniture's worth it! You'll enhance its value, preserve family history, and enjoy unique craftsmanship. Plus, it's often cheaper than buying new pieces, while promoting sustainability and reducing waste in your home.
Is It Cheaper to Refinish Furniture or Buy New?
Refinishing furniture typically costs between $50 to $300 per piece, making it often cheaper than buying new items that can exceed $2,000. You'll save money while personalizing your space and reducing waste.
Conclusion
Refurbishing furniture not only breathes new life into your pieces but also contributes to sustainability. Did you know that refinishing can save up to 90% of the resources needed to create new furniture? By taking the time to restore your old items, you're not just enhancing your space, but also making an eco-friendly choice. So grab your tools, get creative, and enjoy the rewarding process of transforming your furniture into something beautiful and unique! In addition to helping the environment, refurbishing furniture can significantly reduce the costs of updating your home. For instance, by repurposing an old vanity or cabinet, you can **save money on bathroom remodel** projects while still achieving a stylish, custom look. Not only will you be cutting expenses, but you’ll also have the satisfaction of knowing you’ve created a one-of-a-kind space.
Interior Design
Unlocking the Secrets of Ceiling Fan Wattage
Prolong the lifespan of your ceiling fan while slashing energy bills—discover the essential wattage secrets that could transform your home’s comfort.
Revealing the secrets of ceiling fan wattage helps you maximize efficiency and comfort in your home. You should know that wattage impacts energy bills and fan performance. Factors like fan size, motor efficiency, and speed settings all influence how much wattage a fan requires. By choosing fans with lower wattage ratings but effective airflow, you can save energy. Additionally, proper maintenance, such as cleaning blades and checking electrical connections, guarantees peak performance. Understanding these elements is key to enhancing your living environment. Stick around to explore how these insights can lead to better cooling and energy savings.
Key Takeaways
- Ceiling fan wattage indicates energy consumption, affecting electricity bills and ensuring compatibility with electrical systems.
- Larger fans require more wattage, while high-efficiency motors and blade design can reduce overall energy needs.
- Selecting the right wattage based on room size and ceiling height maximizes airflow and energy efficiency.
- Regular maintenance, such as cleaning and inspecting connections, improves fan performance and longevity.
- Overwattage poses safety risks like overheating, electrical failures, and potential injury hazards; always follow manufacturer guidelines.
Importance of Ceiling Fan Wattage
Understanding ceiling fan wattage is essential for making informed decisions about energy consumption and efficiency. The wattage rating indicates how much electrical power a ceiling fan uses, directly influencing your energy bills.
By knowing the wattage, you can ascertain compatibility with your electrical systems, preventing potential hazards like overheating or blown fuses. Additionally, being aware of different wattage levels helps you select the right fan for specific needs—whether it's for general air circulation, cooling, or lighting.
This awareness not only supports energy-saving choices but also enhances the overall performance of your fan in any environment. Ultimately, understanding wattage empowers you to create a comfortable atmosphere while managing your energy consumption effectively.
Factors Affecting Wattage Consumption
Several factors influence the wattage consumption of ceiling fans, impacting their overall performance and efficiency. Understanding these factors helps you choose the right fan for your space.
- Fan Size: Larger fans typically require more wattage to operate effectively. If you need good airflow, consider a fan size that matches your room dimensions.
- Motor Efficiency: Quality motors consume less energy. Investing in a high-efficiency motor will reduce wattage needs while maximizing performance.
- Speed Settings: Higher speeds demand more energy. If you often use the highest setting, be prepared for increased wattage consumption.
Energy Efficiency Considerations
When selecting a ceiling fan, energy efficiency plays a significant role in determining both your energy bills and environmental impact.
You'll want to look for models with lower wattage ratings that still provide effective airflow. Fans with high-efficiency motors and adjustable speed settings can help you save on electricity costs.
Consider opting for LED light kits instead of incandescent bulbs, as they consume less energy and last longer.
Regular maintenance, like cleaning the blades and ensuring the fan runs smoothly, can enhance efficiency.
Finally, using your ceiling fan in conjunction with your HVAC system can optimize your energy use, allowing you to enjoy comfort without skyrocketing utility bills.
Make energy efficiency a priority for both your wallet and the planet.
Safety Risks of Overwattage
Exceeding the recommended wattage for your ceiling fan can lead to serious safety hazards. When you push your fan beyond its wattage limits, you risk overheating and potential fires.
Here are three key risks to keep in mind:
- Overheating: Higher wattage bulbs can cause the fan's motor to overheat, damaging internal components and creating fire risks.
- Electrical Failures: Overloading the fan can lead to blown fuses or tripped circuit breakers, disrupting your electrical system.
- Injury Risks: High wattage bulbs may shatter, posing risks of injury from glass shards.
Always follow manufacturer guidelines to guarantee safety and maintain your fan's performance.
Keeping within the recommended wattage helps keep your home safe and your ceiling fan running smoothly.
Selecting the Right Wattage
Choosing the right wattage for your ceiling fan is essential for maximum performance and energy efficiency.
First, consider the size of your fan. Smaller fans, like 36-inch models, typically require 10-30 watts, while larger fans, such as those measuring 72 inches, might need 120-150 watts.
Next, think about the room's size and ceiling height. A fan that's too low on wattage may struggle to circulate air effectively.
Also, remember that features like built-in lights increase overall wattage consumption.
Check the product manual, look for labels on the fan, or visit the manufacturer's website to find the exact wattage rating.
Understanding Fan Size Impact
The size of your ceiling fan considerably impacts its wattage and overall performance.
Larger fans generally use more energy due to their greater surface area and the need for a more powerful motor.
Here's how fan size affects wattage:
- Blade Length: Longer blades can move more air, but they also require higher wattage to operate effectively.
- Room Size: A larger fan is necessary for bigger rooms to guarantee adequate airflow, leading to increased wattage needs.
- Motor Efficiency: Bigger fans often come with more robust motors, which can consume more power.
Choosing the right size fan for your space not only enhances comfort but also helps you manage energy consumption effectively.
Maintenance for Optimal Performance
Regular maintenance is essential for guaranteeing your ceiling fan operates at peak performance.
Start by dusting the blades regularly to prevent dirt buildup, which can hinder airflow. Check the motor housing and verify it's clean to maintain efficiency.
You should also tighten screws and bolts to avoid any vibrations during operation. Inspect the electrical connections for wear or damage, and replace any frayed wires immediately.
Lubricate the motor according to the manufacturer's guidelines to keep it running smoothly. Additionally, confirm your fan is installed at least 8 feet above the floor for ideal airflow.
Frequently Asked Questions
How Do I Calculate the Wattage Needed for Multiple Ceiling Fans?
To calculate wattage for multiple ceiling fans, add the wattage ratings of each fan together. Consider room size and desired air circulation, ensuring you're within safe limits for your electrical system to avoid hazards.
Can Ceiling Fan Wattage Impact My Electricity Bill Significantly?
Sure, if you think ceiling fan wattage won't affect your electricity bill, you might as well leave your fridge door open! Higher wattage fans can definitely inflate your bill, so choose wisely and save cash.
Are There Ceiling Fans With Variable Wattage Features?
Yes, some ceiling fans offer variable wattage features, allowing you to adjust energy consumption based on your needs. By selecting different speed settings or using integrated lighting, you can optimize efficiency while enjoying customized comfort.
What Is the Lifespan of a Ceiling Fan Motor Based on Wattage?
You might wonder how long a ceiling fan motor lasts, right? Generally, it ranges from 10 to 20 years, influenced by wattage and usage. Higher wattage may lead to more wear, reducing lifespan.
How Does Ceiling Fan Wattage Relate to Environmental Impact?
Ceiling fan wattage directly impacts energy consumption, influencing your carbon footprint. By choosing energy-efficient models with lower wattage, you can reduce environmental harm while enjoying comfort, ultimately contributing to a more sustainable lifestyle.
Conclusion
In conclusion, understanding ceiling fan wattage is essential for maximizing comfort and efficiency in your home. Did you know that a typical ceiling fan uses about 70-80 watts on high speed, but energy-efficient models can use as little as 15 watts? By choosing the right wattage, you not only save on energy bills but also guarantee peak performance. So, keep these insights in mind, and you'll find the perfect ceiling fan that fits both your needs and your budget.
Interior Design
Feng Shui Bedroom Products for Better Sleep
Get ready to transform your sleep with essential Feng Shui bedroom products that create a serene sanctuary, but what are the must-haves for your space?
To enhance your sleep using Feng Shui, focus on key products that create a calm atmosphere. Start with luxury bedding and a high-quality mattress for ideal support and comfort. Soft, natural fabrics like cotton or linen minimize overstimulation while promoting tranquility. Incorporate soothing colors, such as earthy tones or soft pastels, to foster relaxation. Don't forget about air quality—adding plants like jade or peace lilies can help. Finally, consider soft lighting to set a peaceful ambiance. For additional tips and tricks to optimize your bedroom, you might want to explore more guidelines that can transform your space.
Key Takeaways
- Invest in luxury bedding and natural fabrics to enhance comfort and promote relaxation during sleep.
- Choose a high-quality mattress that supports deep relaxation and aligns with Feng Shui principles.
- Incorporate soft lighting options to create a calming atmosphere conducive to restful sleep.
- Use essential oils or indoor plants to improve air quality and induce tranquility in the bedroom.
- Select decorative items with soft, rounded shapes to reduce sharp energy and enhance serenity.
Understanding Feng Shui Principles
At its core, Feng Shui is all about creating harmony between your living space and the natural world. Understanding the principles of Feng Shui helps you enhance the energy flow or chi energy in your bedroom, promoting a restful sleep environment.
Start with bed placement; ideally, your bed should be positioned against a solid wall and away from the door, allowing for balance within your room. This positioning encourages a positive flow of energy while providing a sense of security.
Incorporating natural elements, such as plants or soothing colors, can further enhance harmony and balance. The furniture placement also plays a critical role; you want to avoid clutter and guarantee that pathways are clear. This not only promotes good energy flow but also creates a calm atmosphere.
Pay attention to the orientation of your room and the construction date, as these factors can influence the unique energy of your space.
Essential Bedroom Layout Tips
Creating your ideal bedroom layout is fundamental for maximizing comfort and promoting restful sleep. In bedroom Feng Shui, the position of your bed is significant. Place the bed in a commanding position, allowing you to see the door while avoiding direct alignment with it. This setup enhances energy flow and fosters a sense of security.
To create a balanced environment, verify symmetry in your layout. Use equal-sized nightstands and lamps on both sides of the bed, which encourages relaxation and harmony.
Maintaining clear pathways around the bed and furniture is critical for smooth energy movement. Avoid any feelings of confinement or chaos by confirming there's enough space to walk freely.
Additionally, steer clear of placing the bed under low beams or sloped ceilings, as these can create oppressive energy that hinders restful sleep.
Finally, keep the space under the bed free of clutter. A clutter-free area promotes positive energy flow, enhancing tranquility in your bedroom.
Color Choices for Serenity
Choosing the right colors for your bedroom can greatly impact your mood and sleep quality. By carefully selecting calming hues, you can create a restful atmosphere that promotes tranquility and relaxation. In Feng Shui, color choices play a significant role in establishing a serene environment.
Here's a quick guide to color options that can enhance your bedroom:
Color Type | Benefits |
---|---|
Earthy Tones | Promote grounding and stability |
Muted Colors | Enhance relaxation without overwhelm |
Neutral Tones | Create a soothing backdrop |
Soft Pastels | Foster a light, airy feel |
Avoid Brights | Prevent disruptions in energy flow |
Soft earthy tones like greens, blues, grays, and browns are particularly effective for establishing a calming space. Muted colors such as taupe and pale pink further enhance relaxation. On the other hand, avoid bright primary colors like reds and yellows, as they can lead to increased restlessness.
Natural Elements for Balance
To further enhance the tranquility of your bedroom, incorporating natural elements can greatly contribute to a balanced and harmonious atmosphere. Start by adding plants like the jade plant or peace lily. These not only improve air quality but also promote relaxation, creating a calming atmosphere conducive to restful sleep.
Additionally, maintaining a calm and dark sleep environment is crucial for promoting better sleep, especially for newborns who thrive in such settings newborn sleep patterns.
Choose natural materials for your furniture and decor, such as wood and stone. These elements foster a connection with nature, helping you feel grounded and serene.
When selecting decorative items, opt for soft, rounded shapes to reduce sharp energy and enhance the soothing ambiance necessary for a tranquil sleeping space.
Bedding made from natural fabrics like cotton or linen enhances comfort while maintaining a serene aesthetic, allowing you to unwind more easily.
Additionally, make sure your room benefits from regular exposure to natural light during the day. Using sheer window treatments helps regulate your circadian rhythms, improving your sleep quality and encouraging a natural sleep-wake cycle.
Products to Enhance Sleep Quality
Enhancing your sleep quality often starts with the right products that align with Feng Shui principles. By choosing items that foster a peaceful energy, you can considerably improve the quality of your sleep and enjoy restful nights.
Product | Benefits | Feng Shui Element |
---|---|---|
Luxury Bedding | Enhances comfort and supports relaxation | Softness and warmth |
High-Quality Mattress | Provides support for deep relaxation | Balance with furniture |
Soft Lighting | Creates a calming atmosphere | Natural light energy |
Natural Fabrics | Minimizes overstimulation | Earth element |
Essential Oils/Plants | Improves air quality, induces tranquility | Natural connection |
Invest in luxury bedding from Sobel Westex to complement your Feng Shui setup. A high-quality mattress will support a restful environment, ideally giving you that weightless feeling. Incorporate natural fabrics for bedding and curtains to maintain serenity. Additionally, using soft, adjustable lighting with dimmer switches helps establish a calming atmosphere. Finally, consider adding essential oils or natural elements like plants to enhance tranquility and air quality. Embrace these products to transform your bedroom into a sanctuary for better sleep!
Avoiding Common Feng Shui Mistakes
When it comes to creating a harmonious bedroom, you can't overlook common Feng Shui mistakes.
For instance, placing mirrors directly facing the bed can disrupt your sleep, while clutter and disorganization block positive energy flow.
Mirror Placement Issues
Placing mirrors in your bedroom can make or break the overall energy of the space. In Feng Shui, mirror placement is essential for promoting a restful environment.
Avoid positioning mirrors directly facing the bed, as this can stimulate energy that disrupts your sleep and creates a feeling of being watched, leading to unnecessary disturbances. Instead, position mirrors away from the sleeping area to cultivate tranquility.
If you must have mirrors in your bedroom, opt for smaller, decorative pieces that don't dominate the space or reflect the bed. This approach helps maintain a calm atmosphere, allowing for a more peaceful night's rest.
Another helpful tip is to cover mirrors at night; this minimizes their potential to reflect energy back into the room, enhancing your ability to unwind.
Clutter and Disorganization
A cluttered bedroom can suffocate the positive energy and serenity that Feng Shui aims to create. To cultivate a clutter-free environment, it's essential to address clutter and disorganization.
Implementing multi-functional furniture can maximize space while maintaining a serene atmosphere. Here are some tips to enhance your space:
- Regularly declutter unnecessary items
- Avoid storing things under the bed
- Keep drawers and cupboards closed
- Tidy up before bedtime
When you maintain a clutter-free environment, you encourage better energy flow, allowing chi to circulate freely. This helps eliminate stagnant energy that can lead to increased stress and anxiety.
Frequently Asked Questions
How Can I Decorate My Bedroom for Better Sleep?
To decorate your bedroom for better sleep, use soft, earthy colors, position your bed for visibility, add natural elements, optimize lighting with dimmers, and keep the space clutter-free for a calming, restful environment.
What Is the Best Material for a Bed Feng Shui?
For fabulous Feng Shui, you'll want to select soft, soothing materials like organic cotton or wool. These natural fabrics foster a friendly, calming environment, ensuring your bed promotes peaceful sleep and positive energy flow.
Does Feng Shui Help You Sleep Better?
Yes, incorporating Feng Shui principles can help you sleep better. By optimizing your bedroom's energy flow, minimizing clutter, and using calming colors, you create a serene environment that promotes relaxation and enhances your overall sleep quality.
What Not to Put Under Bed Feng Shui?
You might think it's harmless, but storing clutter under your bed disrupts energy flow. Keep that space clear; avoid work-related items, sharp objects, or anything negative. Instead, create a serene, restful atmosphere for better sleep.
Conclusion
By embracing the principles of Feng Shui, you're not just rearranging your bedroom; you're inviting peace, promoting harmony, and fostering restful sleep. Choose calming colors to soothe your mind, incorporate natural elements to ground your spirit, and select products that cradle you in comfort. Avoid common pitfalls that disrupt energy flow, and create a sanctuary where tranquility reigns, dreams flourish, and you wake up refreshed. Transform your space, transform your sleep, and transform your life.
Interior Design
Transform Your Event With Elegant Buffet Decor
Get inspired to elevate your event with stunning buffet decor that captivates guests—discover essential tips for a memorable experience!
Transform your event with elegant buffet decor that wows your guests. Start with high-quality tablecloths and layered runners to create depth and sophistication. Add eye-catching centerpieces like fresh flowers or rustic wooden crates filled with seasonal fruits. Use stylish tableware, opting for ceramics or glass instead of plastic, to elevate presentation. Incorporate height variations with risers and pedestal bowls for visual interest. Don't forget soft, warm lighting to enhance the atmosphere. Thoughtful arrangements and cohesive color palettes can greatly enrich your buffet experience. Keep exploring these ideas to create a truly memorable event that your guests will cherish.
Key Takeaways
- Use high-quality tablecloths and layered fabrics to enhance the visual appeal of your buffet setup.
- Create eye-catching centerpieces with fresh flowers, seasonal fruits, or rustic elements to draw attention.
- Incorporate stylish tableware, such as ceramic plates and cloth-like napkins, to elevate the overall presentation.
- Utilize soft, warm lighting to create an inviting atmosphere and highlight decorative elements.
- Plan a practical buffet layout with clear food labels to ensure easy navigation for your guests.
Elegant Buffet Table Essentials
When planning an elegant buffet, the essentials of your table decor play an essential role in setting the tone for the event.
Start with high-quality tablecloths that enhance the overall aesthetic; layering sheer or lace cloths can add depth.
Choose creative centerpieces—fresh flowers in tall vases, cascading greenery, or rustic wooden crates filled with seasonal fruits evoke charm and warmth.
Opt for stylish tableware; real dishes and flatware elevate the presentation while quality napkins add refinement.
Confirm your serving dishes are cohesive to create a visually appealing display.
Avoid plastic utensils to maintain sophistication.
These essential elements combined contribute to a beautiful buffet setup that impresses your guests and elevates the occasion.
Enhancing Visual Appeal
Elevating your buffet's visual appeal can transform the dining experience for your guests. Start by incorporating height variations using pedestal bowls and risers to add dimension.
Mix small and large serving platters to create interest, and don't forget cake stands to showcase featured dishes.
Thoughtful lighting also plays an essential role; use soft, warm lights to highlight your decor elements and set an inviting atmosphere.
Choosing a cohesive color palette can harmonize with your event theme, enhancing the overall ambiance. Complementary colors elevate sophistication, while bold hues can grab attention.
Functional Buffet Setup
How can you guarantee a functional buffet setup that flows smoothly for your guests? A well-organized layout can make all the difference.
Here are four key elements to take into account:
- Labeling Food Displays: Use elegant labels to help guests navigate the buffet and accommodate dietary needs.
- Practical Layout: Plan the arrangement for ideal flow, ensuring easy access to all dishes.
- Height Variation: Incorporate risers and tiered displays to create visual interest and facilitate better serving.
- Spacious Arrangement: Leave adequate space between food items to prevent crowding and maintain a pleasant experience.
Seasonal Decor Ideas
Seasonal decor ideas can transform your buffet table, making it resonate with the time of year and the event's theme.
In spring, consider using pastel colors and fresh blooms for centerpieces, while summer calls for vibrant fruits and tropical elements.
For autumn, incorporate rich oranges, deep reds, and rustic touches like mini pumpkins or hay bales.
Winter decor can feature evergreen branches, pinecones, and metallic accents to create a cozy atmosphere.
You can also enhance the seasonal vibe with themed tableware and linens that reflect the colors and textures of each season.
Thematic Decor Integration
When planning your buffet decor, integrating a specific theme can transform the overall experience and captivate your guests.
By carefully selecting decor elements that align with your chosen theme, you'll create a cohesive and engaging atmosphere. Here are four ideas to ponder:
- Color Coordination: Choose a color palette that reflects your theme, using it in tablecloths, centerpieces, and serving dishes.
- Themed Centerpieces: Incorporate unique centerpieces that resonate with your theme, whether it's floral arrangements or seasonal elements.
- Specialty Tableware: Use themed plates and utensils that enhance the decor while providing functionality.
- Signage and Labels: Create custom signage that aligns with your theme, making it easy for guests to navigate the buffet.
Embrace these ideas to create an unforgettable buffet experience!
Eco-Friendly Buffet Solutions
As you create a cohesive and engaging atmosphere for your buffet, considering eco-friendly solutions can further enhance the experience while being mindful of the environment.
Start by choosing table decor made from recyclable materials, such as paper or fabric, to minimize waste. Incorporate potted plants instead of cut flowers for centerpieces; they add beauty and can be reused later.
Opt for sustainable serving items like bamboo plates or compostable utensils, which offer elegant yet eco-friendly alternatives.
When selecting decor elements, aim for items that can be reused or repurposed after the event.
Stylish Tableware Choices
Choosing stylish tableware can transform your buffet into a visually stunning display.
It's not just about functionality; it's about creating an inviting atmosphere.
Here are four essential tableware choices to elevate your event:
- Real Dishes: Opt for ceramic or glass plates to enhance elegance.
- Quality Napkins: Use cloth-like paper or fabric napkins for a refined touch.
- Heavy Tumblers: Choose sturdy disposable tumblers for beverage service, ensuring they look upscale.
- Cohesive Serving Dishes: Select matching serving platters and bowls to maintain a unified aesthetic.
These choices not only improve the presentation but also contribute to the overall sophistication of your buffet, making a lasting impression on your guests.
Creating a Memorable Experience
Creating a memorable experience at your event hinges on thoughtful details that resonate with your guests long after the occasion has ended.
Start by focusing on elegant buffet decor that captures attention. Choose high-quality tablecloths in complementary colors to set the mood, and layer with stylish runners for added depth. Incorporate creative centerpieces, like fresh flowers or rustic elements, to draw the eye.
Thoughtful lighting enhances the atmosphere, creating a warm and inviting space. Don't forget to label your food displays elegantly, ensuring guests can navigate the buffet with ease.
Frequently Asked Questions
How Do I Choose the Right Color Palette for My Buffet?
Choosing the right color palette for your buffet involves considering your event's theme, season, and mood. Pair complementary colors for harmony, or use bold shades to create a striking visual impact that captivates your guests.
What Are Some Budget-Friendly Decor Ideas for a Buffet Table?
Think of your buffet table as a canvas waiting for splashes of creativity. Use simple centerpieces like mason jars filled with wildflowers, table runners from fabric remnants, and DIY signage to add charm without breaking the bank.
Can I Mix Different Tableware Styles for an Elegant Look?
Yes, you can mix different tableware styles for an elegant look. Just make certain they complement each other and maintain a cohesive color palette. This adds visual interest while keeping the overall aesthetic refined and sophisticated.
How Do I Ensure My Buffet Setup Flows Smoothly for Guests?
A flawlessly flowing buffet setup is like a perfectly choreographed dance! To guarantee smoothness, plan your layout carefully, maintain clear pathways, and space food items adequately. Your guests will appreciate the seamless experience you create!
What Are Some Unique Centerpiece Ideas for a Buffet Table?
For unique buffet table centerpieces, consider tall vases filled with fresh flowers, rustic crates of seasonal fruits, or elegant floating candles in glass bowls. Layering these elements adds charm and visual interest to your setup.
Conclusion
Incorporating elegant buffet decor is like painting a masterpiece; each element contributes to the overall beauty of your event. By thoughtfully selecting table settings, lighting, and seasonal touches, you create an inviting atmosphere that resonates with your guests. Remember, the details matter—they're the brushstrokes that elevate your gathering from ordinary to extraordinary. So, as you plan your buffet, let your creativity shine and transform your event into a memorable celebration everyone will cherish.
-
Beauty and Grooming4 months ago
Discover Top Outdoor Tanning Lotions Today
-
Beauty and Grooming4 months ago
Embrace Natural Glow With Bronzer-Free Accelerators
-
Fashion Trends6 days ago
Fall 2024 Fashion Trends: Be Ahead of the Curve!
-
Vetted21 hours ago
15 Best Affordable Sustainable Fashion Brands You Need to Know About in 2024
-
Beauty and Grooming4 months ago
Unlock Flawless Tanning With Skin Prep
-
Interior Design1 month ago
Mylar vs. Foil Balloons: The Ultimate Showdown
-
Vetted22 hours ago
15 Best Women's Fashion Trends of 2024 You Need to Know About
-
Fashion Trends4 months ago
Fashion Nova Kids: Stylish Outfits for Your Little Ones!