To fix significant scratches in wooden furniture, begin by thoroughly cleaning the affected area with mineral spirits to eliminate any dirt or grease. Then, select a wood filler that matches the color of the furniture and apply it using a putty knife to completely cover the scratch. Smooth out any excess filler and allow it to dry for approximately 30 minutes. Once dry, sand the patched area with 180-grit sandpaper, followed by 240-grit for a smoother finish, making sure to sand in the direction of the wood grain. Finally, apply a sealant such as polyurethane to safeguard your repair. Need advice on preventing future scratches or other repair methods?
Key Takeaways
- Clean the scratched area with mineral spirits and a damp cloth to remove dirt and ensure proper adhesion for repairs.
- Use a color-matching wood filler to fill deep scratches, applying it with a putty knife to avoid air bubbles.
- Sand the filled area smoothly following the wood grain, starting with 180-grit sandpaper and finishing with 240-grit.
- Apply multiple thin coats of sealant, like polyurethane, allowing 24 hours of drying time between each coat for durability.
- Regularly maintain furniture with pads and coasters to prevent future scratches and damage.
Understanding Deep Scratches
Deep scratches in wood furniture often go beyond just the surface, making them a frequent headache for homeowners. These scratches can be caused by various factors, such as moving furniture, pet claws, or heavy impacts.
Because they penetrate through the finish and into the wood itself, they're more challenging to repair than surface scratches. Regular maintenance, like fuel injection cleaning, can help prevent damage to your furniture by ensuring a clean environment.
To tackle deep scratches effectively, you'll need to start by cleaning the scratched area thoroughly. Use mineral spirits to remove any old finish and grime, ensuring the surface is ready for treatment. This step is essential for proper adhesion of the wood filler, which should match the furniture's color for a seamless look.
Once the area is clean and dry, apply the wood filler, pressing it into the scratch. After the filler has dried completely, you'll need to sand it flush with the surrounding wood. This step helps blend the repaired area with the rest of the furniture.
Tools and Materials Needed
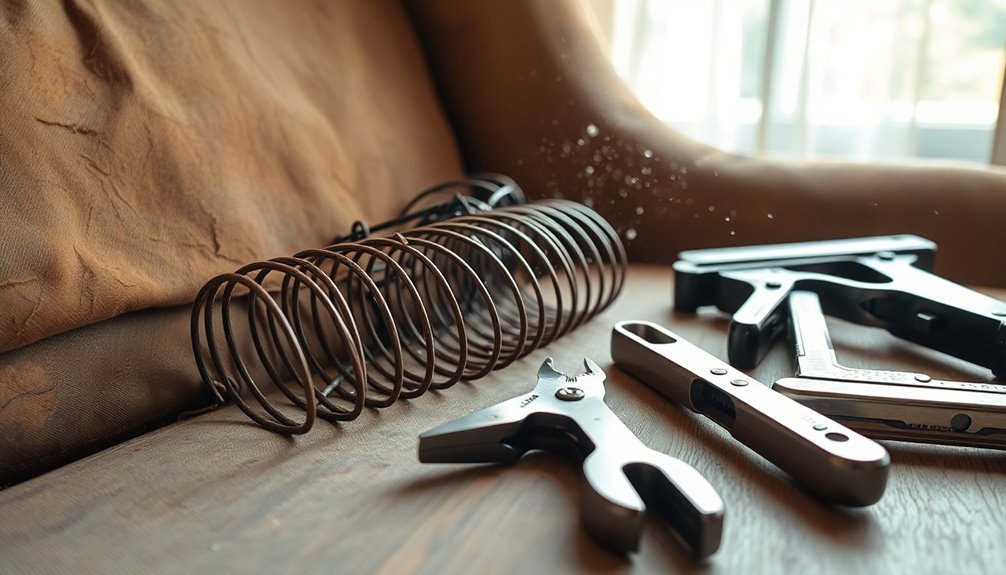
To effectively repair deep scratches in your wood furniture, you'll need a few essential tools and materials.
Gathering a putty knife, fine sandpaper, and a specialized wood filler that matches your furniture's color is vital for a successful repair.
Additionally, consider creating a mood board to visualize the desired finish and guarantee color consistency.
Don't forget to prepare the area properly before you start, as this will guarantee a smooth and lasting repair.
Essential Repair Tools
When tackling deep scratches in wood furniture, having the right tools on hand is vital for achieving a smooth and professional finish. You'll want to gather a few key items to guarantee the repair process goes smoothly.
Understanding the importance of a budget can also help you allocate funds for quality materials without overspending financial planning.
- Putty knife: This tool is perfect for applying wood filler evenly without damaging the surrounding area.
- Wood filler: Select a wax wood filler stick or putty that closely matches the wood's finish for a seamless blend.
- Fine sandpaper: Use 180-grit or higher sandpaper to smooth the filled area, making sure it aligns with the wood grain.
Before you start, clean the area with mineral spirits. This step is vital, especially if there's a polyurethane coating that needs to be removed for the filler to adhere properly.
After applying the wood filler with your putty knife, use clean, dry rags to wipe away any excess and dust. This preparation will set the stage for a successful repair, leaving your furniture looking as good as new.
With these vital repair tools, you're well on your way to restoring your wood furniture's beauty.
Recommended Materials Overview
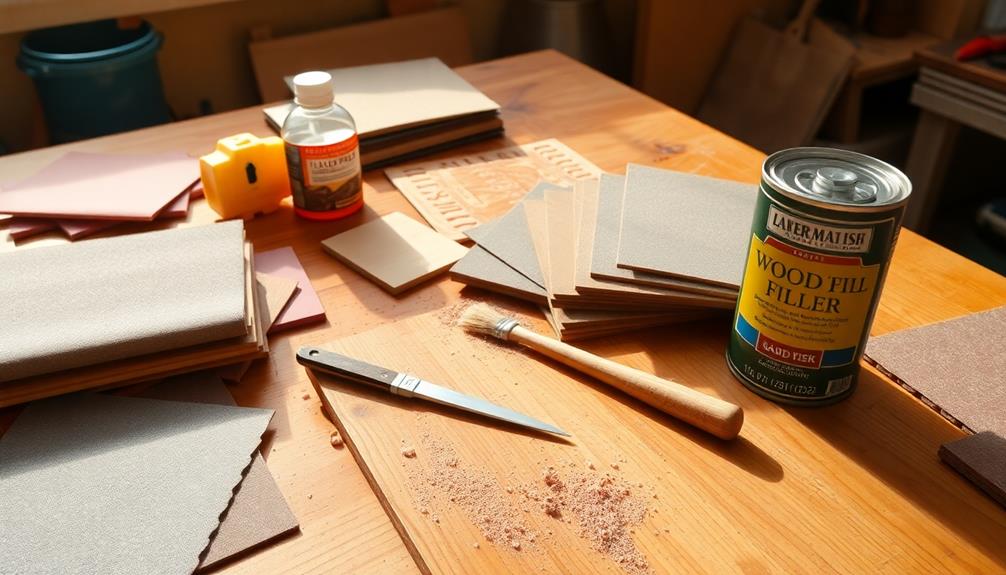
Having gathered your tools, it's time to focus on the materials you'll need for repairing deep scratches in wood furniture.
First, you'll require specialized wood filler that matches your furniture's color. This filler is vital for effectively filling in the scratch and making it less noticeable.
Next, make sure you have fine sandpaper, specifically 240 grit, which will smooth the area after applying the filler. A putty knife or an old credit card will help you apply the filler evenly, ensuring a smooth finish.
Before you begin, grab a clean damp cloth to wipe down the scratched area. This step is important as it removes dust and debris that could interfere with the adhesion of the filler.
If there's an existing finish, consider using mineral spirits to strip it away for better penetration of the filler.
Lastly, once the filler has dried, protect your repair with a quality sealant, like polyurethane or clear lacquer. This not only safeguards the repair but helps blend it seamlessly with the surrounding wood surface.
With these materials on hand, you're set to tackle those deep scratches effectively!
Preparation Before Repair
Before diving into your repair project, it's crucial to gather the right tools and materials for a successful outcome. Having everything ready will make the repair process smoother and more efficient.
Here's what you'll need:
- Specialised wood filler: Choose a product that closely matches your furniture's color for a seamless finish.
- Cleaning solution: Mix one tablespoon of dishwashing detergent with a gallon of warm water to remove oil and grease.
- Fine sandpaper: Get 180-grit or higher to smooth out the repaired area after applying wood putty.
Start by using a lint-free cloth dampened with your cleaning solution to wipe the scratched area. This will help eliminate any excess moisture and promote better adhesion for the wood filler.
Next, clean the surface using mineral spirits to remove any existing finish. As you prepare, make sure your workspace is well-ventilated and free of dust.
With these tools and materials in hand, you're set for a successful furniture repair. Proper preparation is key to achieving a durable and visually appealing result.
Cleaning the Affected Area
Before you start the repair, gather your cleaning supplies, including a specialized hardwood cleaner and a clean rag.
Clean the scratched surface thoroughly to remove any dirt or grease, ensuring a smooth area for the repair process.
Gather Cleaning Supplies
To effectively clean the affected area of your wood furniture, start by gathering essential cleaning supplies. Having the right tools on hand will make the process smoother and guarantee you don't damage the wood finish. Here's what you'll need:
- A specialized hardwood cleaner
- A damp rag (or damprag)
- Mineral spirits for removing old finishes
Begin by preparing a gentle cleaning solution, mixing 1 tablespoon of dishwashing detergent with 1 gallon of warm water. This mixture will help you effectively remove any oil or grease from the scratched area.
Before you start cleaning, use a lint-free cloth to wipe down the surface, confirming it's free from dust and debris.
While you're working, consider wearing gloves to protect your hands from any cleaning products. It's essential to avoid harsh chemicals that might harm the wood finish.
Once you've cleaned the area thoroughly, let it dry completely for a few minutes. This step is critical for best adhesion when you move on to repairing those deep scratches.
With your cleaning supplies ready, you're one step closer to restoring your furniture.
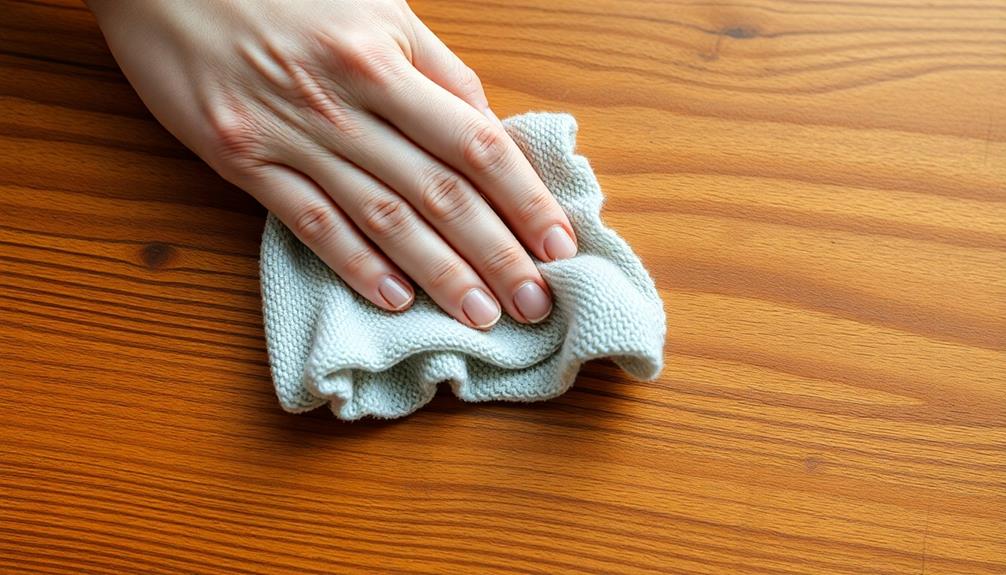
Clean Surface Thoroughly
Cleaning the scratched area thoroughly is vital for a successful repair. Begin by using a specialized hardwood cleaner and a damp rag to remove dust, dirt, or grease that could interfere with the repair process. Make certain to use a lint-free cloth dampened with a mixture of warm water and dishwashing detergent. This gentle approach guarantees you eliminate all contaminants without introducing excess moisture, which can further damage the wood or cause swelling.
After cleaning, inspect the surface closely to verify it's free from any residual substances. This step is important, as any leftover debris can affect the filling and finishing processes down the line.
Here's a quick reference table for your cleaning process:
| Step | Action | Notes |
|---|---|---|
| 1. Gather Supplies | Hardwood cleaner, damp rag | Confirm lint-free cloth |
| 2. Clean Surface | Wipe area gently | Remove dust and dirt |
| 3. Inspect Area | Check for contaminants | Verify no residue remains |
| 4. Prepare for Repair | Confirm area is clean and dry | Vital for adhesion |
Dry the Area
After verifying the scratched area is thoroughly cleaned, it's time to focus on drying it properly. A well-dried surface is essential for a successful repair, as moisture can hinder the effectiveness of wood fillers or sealants.
Start by blotting any excess moisture with a clean, dry cloth. This step helps eliminate any lingering dampness from the cleaned area.
Next, allow the cleaned area to sit for a few minutes, confirming it's completely dry before moving on to the repair process. Don't forget to check the surrounding wood; it should also be dry and free from debris.
Consider the following points to guarantee a successful drying process:
- Use a specialized hardwood cleaner for best results.
- Blot any excess moisture thoroughly before proceeding.
- Inspect the scratched area for any remaining imperfections.
Applying Wood Filler
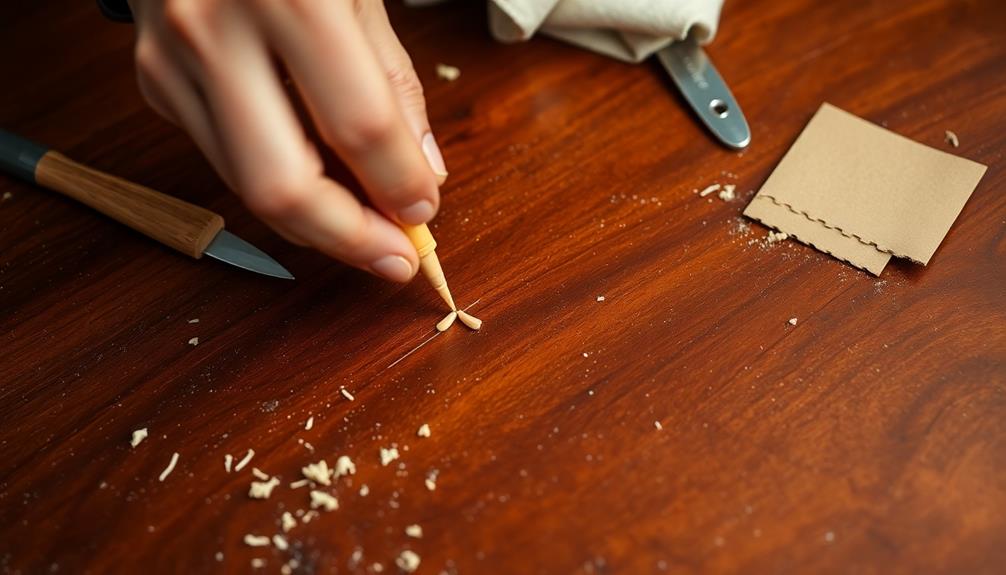
Applying wood filler is an important step in restoring deep scratches on your furniture. First, clean the area around the scratch with a specialized hardwood cleaner to remove any debris. This guarantees the wood filler adheres properly.
Next, choose a color that closely matches your furniture. Once you've selected the right shade, it's time to apply wood filler. Using a putty knife, fill the scratch completely, taking care to avoid air bubbles.
After you've applied the filler, smooth the excess with the putty knife held at a 45-degree angle. This technique helps create an even surface that blends seamlessly with the surrounding wood. Allow the wood filler to dry according to the manufacturer's instructions, which usually takes around 30 minutes.
Once it's dry, you'll want to lightly sand the area with fine-grit sandpaper, preferably at least 180-grit, to achieve a flawless finish. This step is vital for guaranteeing that your repair isn't noticeable.
Be patient and follow these steps carefully, and you'll have your furniture looking as good as new in no time.
Sanding the Repaired Area
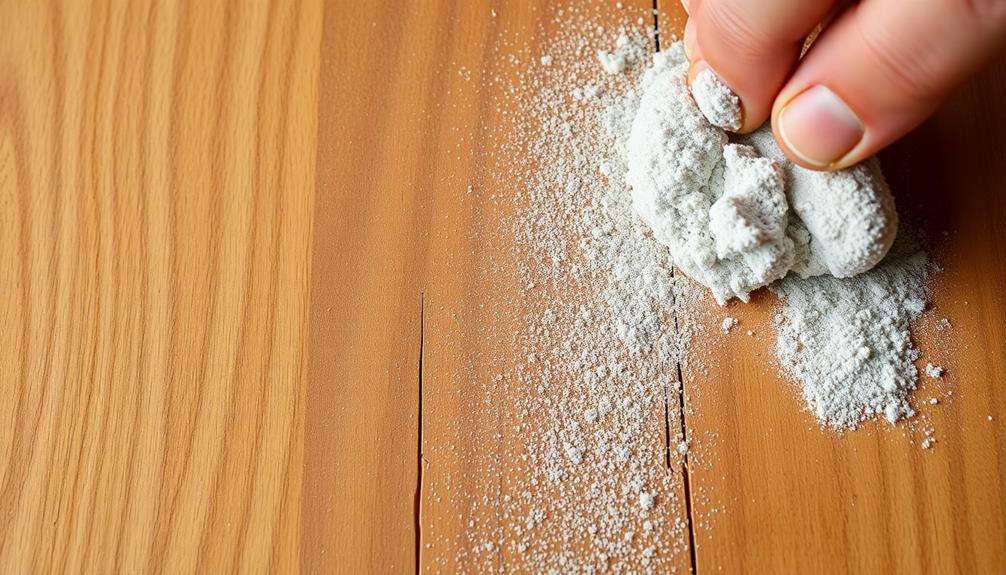
Sanding the repaired area is vital to achieving a seamless finish. Begin by using fine sandpaper, starting with 180-grit to smooth out the filled scratch. This initial sanding helps level the repair with the surrounding wood.
Next, switch to 240-grit sandpaper for a finer finish, guaranteeing you create a surface that blends well with the existing wood grain.
When sanding, remember to always follow the direction of the wood grain. This technique prevents visible marks that can detract from your repair efforts.
Here's a quick checklist for your sanding process:
- Start with 180-grit sandpaper for initial smoothing.
- Switch to 240-grit for a polished, finer finish.
- Clean the area thoroughly to remove dust and debris.
After sanding, it's essential to clean the area thoroughly to eliminate any dust particles that could interfere with the next steps.
Lightly buff the sanded area with a clean cloth to restore shine and create a smooth shift between the repaired patch and the original wood surfaces.
Allow the area to dry completely before applying any finish to guarantee proper adhesion and appearance.
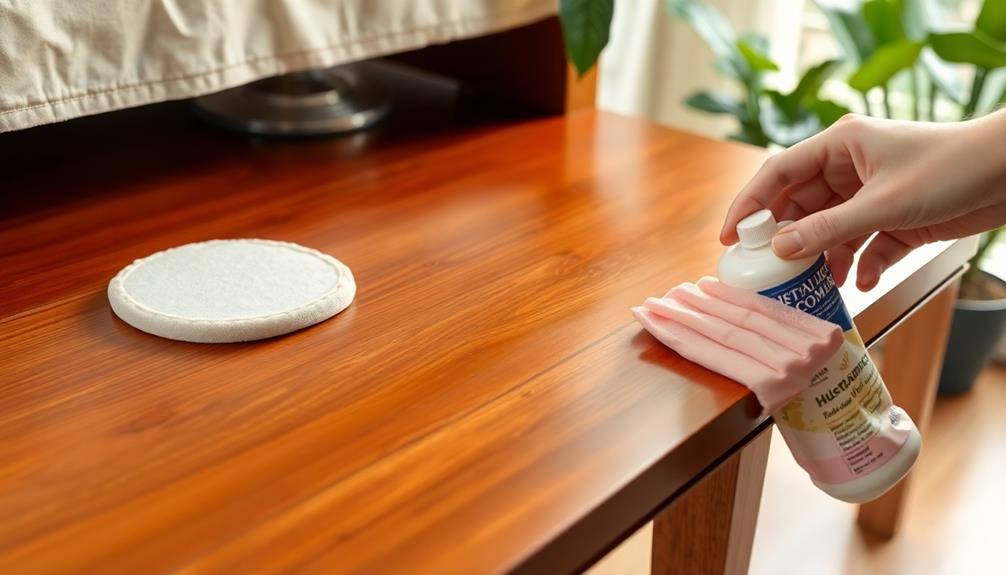
Finishing Touches
Achieving a flawless finish is the final step in restoring your wood furniture. After the wood fillers have dried, smooth any excess with a putty knife or an old credit card. This helps create an even surface that blends seamlessly with the surrounding wood.
Once you've confirmed it's dry—typically after about 30 minutes—grab some fine sandpaper (180 grit or higher) to sand the area. This step enhances the repair's appearance and prepares it for sealing.
Before applying a sealant, use a damp cloth to clean the filled area, removing any dust or debris for peak adhesion.
When choosing a sealant, products like polyurethane or clear lacquer spray work well. Apply multiple thin coats, allowing at least 24 hours of drying time between each application for a durable finish.
Preventing Future Scratches
To keep your wood furniture looking pristine, it's vital to take proactive steps in preventing scratches. Implementing a few simple strategies can dramatically extend the life of your furniture.
Start by using furniture pads under heavy items and when moving furniture to prevent scratches from contact with the surface. It's also important to protect your wood from temperature-related damage; avoid placing hot or cold items directly on the wood. Instead, use coasters and placemats.
Set up a consistent cleaning routine that includes soft, non-abrasive cloths and gentle cleaning solutions. This helps maintain the wood finish while avoiding wear and tear.
Regularly inspect high-traffic areas for signs of damage, allowing you to make quick repairs before they require extensive refinishing.
Lastly, consider enforcing a no-shoes policy in your home. This reduces the dirt and debris that can scratch wooden surfaces during daily use.
By following these tips, you'll be well on your way to preventing future scratches and keeping your wood furniture in excellent condition.
- Use furniture pads under heavy items
- Implement a regular cleaning routine
- Enforce a no-shoes policy in your home
Additional Repair Techniques

Even with the best preventive measures, deep scratches can still occur on your wood furniture. To tackle these, start by cleaning the scratched area with a specialized hardwood cleaner to remove dust and debris.
Once the surface is clean, use wood filler that matches your furniture's color. Apply the filler with a putty knife, ensuring there are no air bubbles trapped beneath the surface. Allow the wood filler to dry completely according to the manufacturer’s instructions, then sand the area smoothly until it blends seamlessly with the rest of the surface. If desired, you can repeat the dyeing process for furniture to restore or enhance the color consistency of the entire piece. Afterward, apply a protective finish, such as varnish or wax, to ensure the repairs and color are preserved over time. For best results, make sure to carefully choose a finish that complements the natural texture and hue of the wood. If you’re unsure about color restoration techniques, there are many guides available to help you learn **how to dye furniture easily**, providing step-by-step instructions for beginners. With patience and the right tools, your furniture can look as good as new, with repairs and color blending seamlessly together.
After the filler dries according to the product's instructions, lightly sand the area with fine sandpaper (240 grit). This step helps you blend the repair seamlessly with the surrounding wood grain.
If the color of the filler doesn't quite match, consider using a stain marker or a wood fill blending pencil to achieve a more precise match.
When to Seek Professional Help
Recognizing when a scratch goes beyond your DIY repair capabilities is vital for preserving your wood furniture's integrity. If you encounter deep scratches that require extensive sanding, refinishing, or involve structural integrity issues, it's time to seek professional help.
Here are some signs that indicate you should enlist an expert:
- The scratch affects the stability of the furniture, posing a safety risk.
- You're struggling with color matching and achieving a seamless finish.
- You're dealing with large-scale damage across multiple pieces of furniture.
Professionals possess the tools and expertise necessary to address these challenges effectively.
If a scratch is accompanied by additional issues, like water damage or mold, it's important to consult a professional for safe restoration. They can guarantee your furniture maintains its structural integrity while delivering high-quality results.
By opting for professional help in these situations, you not only save time but also achieve consistent, lasting repairs that stand the test of time.
Frequently Asked Questions
Can You Fix Deep Scratches on Wood?
Yes, you can fix deep scratches on wood. Start by cleaning the area, then apply wood filler that matches your furniture's color. Smooth it out, sand it down, and let it dry for a perfect finish.
How Do You Repair Gouges in Wood Furniture?
When gouges mar your wood's beauty, you'll want to clean the area first. Then, fill it with a matching wood filler, sand it smooth, and finish with a protective coat for a seamless repair.
How to Fix Deep Cat Scratches on Wood?
To fix deep cat scratches on wood, start by cleaning the area. Then, apply mineral spirits, use wood filler that matches, sand gently, and finish with a protective sealant to restore your furniture's beauty.
Does Vinegar and Olive Oil Fix Wood Scratches?
Vinegar and olive oil can help minimize minor scratches on wood, but they won't fix deep ones. Test a small area first, then apply the mixture in circular motions for the best appearance.
Conclusion
To sum up, repairing deep scratches in your wood furniture can restore its beauty and extend its life. Did you know that 70% of homeowners have faced furniture damage at some point? By using the right tools and techniques, you can tackle scratches with confidence. Remember to keep your furniture clean and use coasters to prevent future damage. With a little effort, you can maintain the elegance of your pieces for years to come!