Connect with us

Interior Design

How to Repair Leather Sofa at Home

You can easily restore your leather sofa’s beauty at home, but wait until you discover these essential tips for lasting results!

Published

on

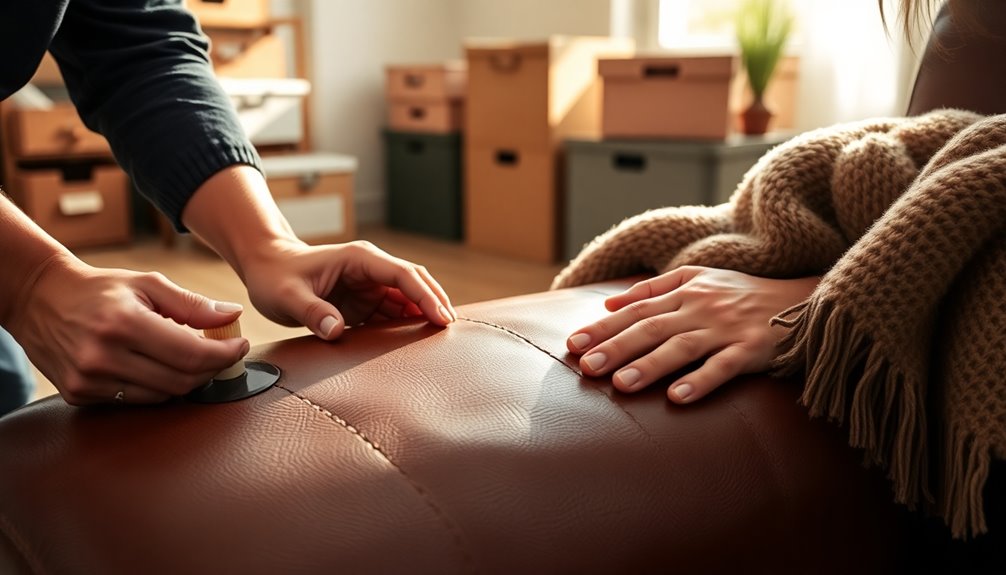
repairing leather sofa yourself

You can easily repair your leather sofa at home using some simple techniques. Start by inspecting it for scratches or tears. Use a color-matching leather dye to fix minor imperfections—just test it on a hidden spot first. Clean the surface with a leather-safe solution, and remember to condition it regularly to prevent drying. Avoid direct sunlight exposure to maintain its look and feel. Rotate cushions to reduce wear, and store it correctly during off-seasons. With these steps, you'll enhance your sofa's appearance and longevity. Keep going, and you'll discover even more tips and tricks for your leather care!

Key Takeaways

  • Conduct routine inspections for scratches or tears, noting areas needing repair.
  • Use color-matching leather dye for minor damages, testing on inconspicuous areas first.
  • Apply multiple thin layers of dye for a uniform finish, allowing drying between applications.
  • Regularly condition the leather with high-quality conditioner to maintain moisture and texture.
  • Protect repaired areas from sunlight and use breathable covers to prevent future damage.

Introduction
introduction to the topic

Taking care of your leather sofa is essential for its longevity and appearance. You'll want to focus on routine conditioning, use leather-safe cleaning solutions, and tackle any unwanted odors, like pet urine smells. By addressing these points, you can keep your sofa looking great and feeling comfortable for years to come.

Routine Leather Conditioning

Leather furniture can transform a living space with its elegance and comfort, but maintaining that beauty requires regular care. One of the most important aspects of this care is routine leather conditioning. Ideally, you should condition your leather every 6-12 months to prevent dryness and cracking. A high-quality leather conditioner is essential, as it helps restore moisture, enhancing the texture and shine of your leather furniture.

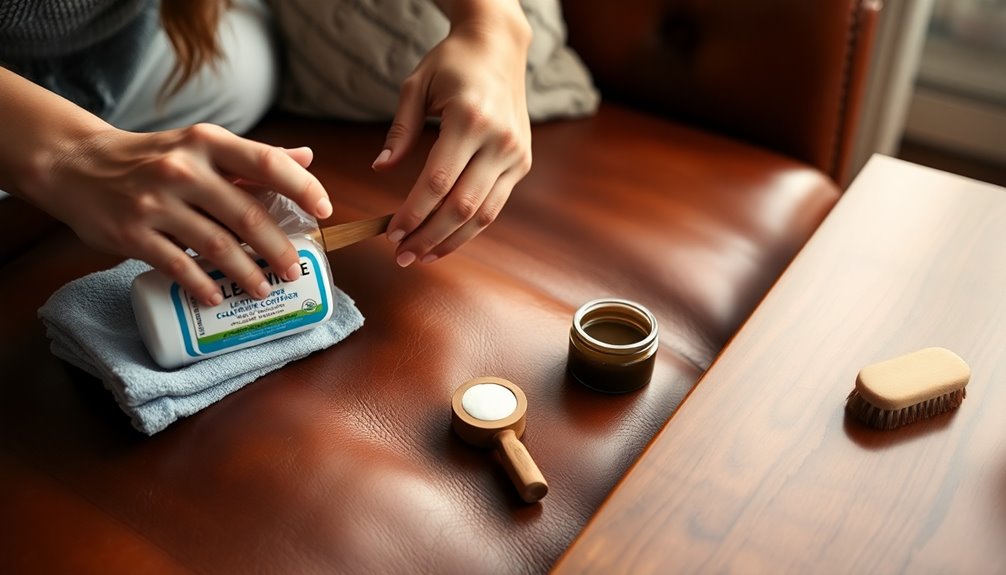
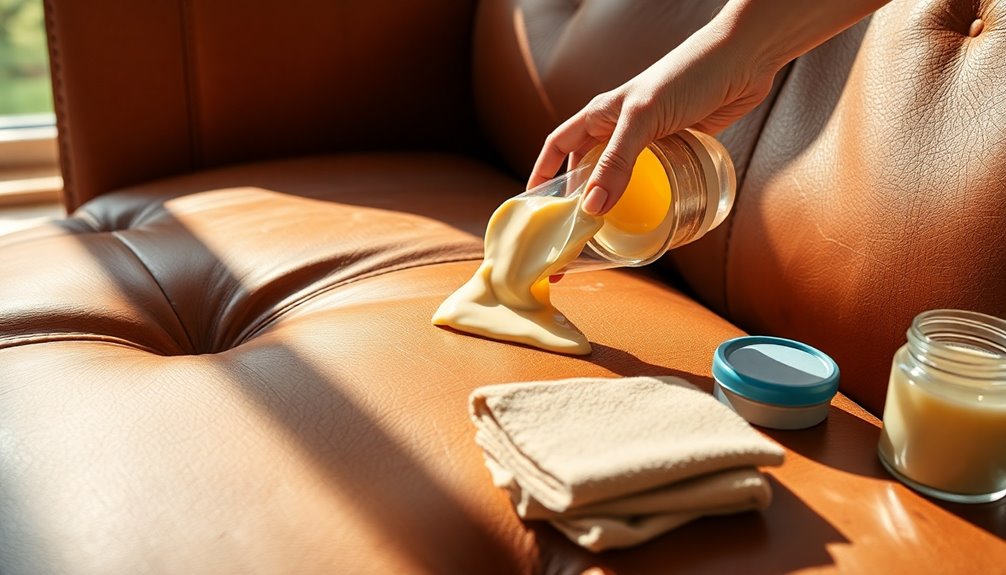
Before applying the conditioner, make sure to clean the leather thoroughly using a leather-safe cleaning solution. This step is crucial, as it removes dirt and oils, allowing the conditioner to penetrate properly. Always choose conditioning products specifically designed for leather to ensure compatibility and effectiveness without causing damage.

Leather-Safe Cleaning Solutions

Maintaining the beauty of your leather sofa starts with proper cleaning, and using the right leather-safe cleaning solutions is key to achieving that. A DIY leather cleaner can be easily made by mixing 1 quart of warm water with 1 tablespoon of Castile soap and a splash of vinegar. This effective solution allows you to clean a couch without damaging the leather.

Before applying any homemade cleaner, always test it on a small, inconspicuous area to ensure it won't cause discoloration or damage. For routine maintenance, take a soft, lint-free cloth dampened with your cleaning solution to gently remove dirt and oils. This method helps keep the surface scratch-free while preserving the leather's natural oils.

Advertisement

Avoid harsh chemicals and abrasive cleaners, as they can strip these oils, leading to drying and cracking over time. By regularly using a gentle, leather-safe solution, you not only enhance the appearance of your sofa but also prolong its lifespan. Incorporating these practices into your cleaning routine will help you effectively repair leather and maintain your sofa's luxurious look for years to come. Additionally, using natural materials in your cleaning solutions can further enhance the leather's condition and longevity.

Eliminating Pet Urine Smell

Dealing with pet urine smell on your leather sofa can be a daunting task, but prompt action can make a significant difference. Start by blotting up as much of the urine as possible with a clean, dry cloth. This prevents further absorption into the leather. Next, mix a solution of equal parts water and white vinegar or use a specialized leather cleaner. This mixture will help neutralize odors and clean the affected area safely.

Gently apply the vinegar solution to the stain with a soft cloth, taking care not to saturate the leather. Allow it to air dry completely. After cleaning, it's essential to use a leather conditioner to restore moisture and suppleness to the leather, which can help reduce any residual smells.

If the odor lingers, sprinkle baking soda on the affected area. Let it sit for several hours or even overnight to absorb the odor, then vacuum it up. By following these steps, you'll effectively eliminate pet urine smell and keep your leather sofa looking and smelling fresh.

Avoiding Direct Sunlight Exposure

stay out of sunlight

To keep your leather sofa looking great, you'll want to protect it from direct sunlight. Using scratch-resistant fabrics and decorative throws can help shield it while adding a stylish touch. Don't forget to regularly rotate your cushions to ensure even exposure and prevent fading.

Using Scratch-Resistant Fabrics

Protecting your leather sofa from scratches and fading is essential for its longevity. One effective way to do this is by using scratch-resistant fabrics as protective covers. These durable materials can shield your leather from everyday wear and tear, especially if you have pets or children. Consider investing in slipcovers made from scratch-resistant fabrics that not only fit snugly but also offer a layer of defense against potential scratches.

Advertisement

In addition, regularly placing protective covers on high-use areas can keep your leather looking pristine. This proactive approach helps minimize direct contact with elements that could cause damage. Remember, the more you protect your sofa, the longer it will last.

Avoiding direct sunlight exposure is also crucial. By positioning your leather sofa away from windows or using UV-filtering curtains, you reduce the risk of fading and drying out. Maintaining a consistent environment with controlled temperature and humidity levels further protects your leather from developing cracks. Additionally, employing scratch-resistant fabrics in your home can help reduce overall wear on furnishings and extend their lifespan.

Incorporating these strategies ensures that your leather sofa remains a beautiful focal point in your home for years to come.

Protect With Decorative Throws

In addition to using scratch-resistant fabrics, incorporating decorative throws offers a stylish and functional way to shield your leather sofa from direct sunlight. These throws effectively protect your sofa from harmful UV rays, reducing the risk of fading and wear and tear over time. By draping a throw across your sofa, you not only preserve its rich color but also add an aesthetic layer that enhances your room's decor.

When choosing decorative throws, opt for breathable materials to prevent moisture buildup, which can lead to mold or mildew on the leather. Regularly rotating or cleaning these throws helps maintain their appearance and ensures they continue to provide optimal protection.

Advertisement

Additionally, throws can minimize the impact of daily wear and tear, such as scratches from pets or kids, prolonging the life and appearance of your leather sofa. With a variety of colors and patterns available, you can easily change the look of your space while keeping your furniture safe. So, make decorative throws a part of your leather sofa care routine, and enjoy both style and protection in your home.

Regularly Rotate Cushions

Rotating your sofa cushions regularly is a simple yet effective way to maintain their appearance and comfort while preventing uneven wear. By making it a habit to rotate your leather couch cushions every few months, you'll help distribute the pressure and wear evenly. This practice minimizes fading and damage that can occur when specific areas bear the brunt of daily use.

In addition to rotating your cushions, it's crucial to avoid direct sunlight exposure. UV rays can significantly fade and dry out leather, leading to cracks and deterioration over time. Position your couch away from windows, or consider using sheer curtains to filter the light. This can dramatically reduce sunlight exposure, preserving the leather's color and texture.

Combining these two strategies—regularly rotating your cushions and protecting them from sunlight—will extend their lifespan and maintain both the aesthetic appeal and comfort of your leather sofa. By taking these simple steps, you ensure your couch remains a beautiful and inviting centerpiece in your home for years to come.

Routine Inspection and Upkeep
regular maintenance and checks

To keep your leather sofa in top shape, you should regularly inspect its frame for any integrity concerns. Moreover, knowing some leather color touch-up techniques can help maintain its appearance, while fluffing the cushions will enhance comfort. Staying proactive with these simple upkeep tasks can significantly extend the life of your sofa.

Frame Integrity Concerns

How often do you think about the integrity of your leather sofa's frame? Regular inspections are crucial to maintaining both its stability and your comfort. Look for signs of wear, like cracks, squeaks, or any instability. These can indicate underlying issues that need fixing before they escalate. Check for loose screws or joints in the frame; a simple tightening can enhance frame integrity and prevent sagging.

Advertisement

Don't forget to inspect the legs and supports. Damage here can disrupt weight distribution, potentially leading to further issues. It's also essential to place your sofa on a level surface. Uneven footing can cause misalignment and deteriorate the frame over time.

Schedule routine inspections every six months to a year. Proactive maintenance not only helps you catch problems early but can also extend the lifespan of your leather sofa, saving you from costly repairs. If you find any damaged leather during your inspection, having a repair kit on hand can help you address minor issues effectively. By being diligent with your sofa's frame upkeep, you can enjoy its comfort and style for years to come.

Leather Color Touch-Up Techniques

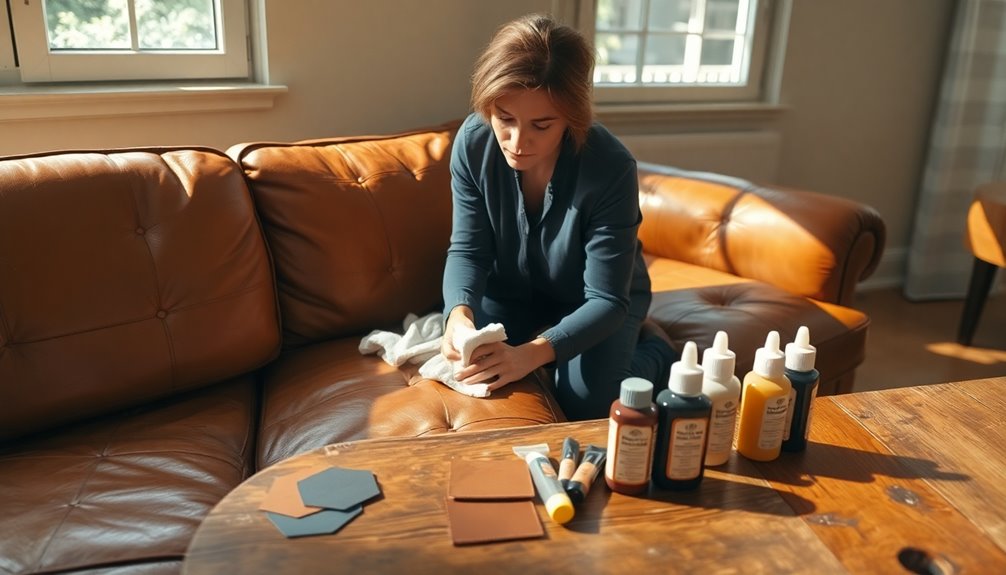
After ensuring the frame of your leather sofa is in good condition, it's time to focus on the surface. Conduct routine inspections every few months to spot any fading or discoloration early. This proactive approach helps prevent more extensive damage down the line. If you notice minor scratches and tears, use color-matching leather dye to touch them up. Make sure the repairs blend seamlessly with the original leather color for a polished look.

Before applying any dye, test it on a small, inconspicuous area to ensure color compatibility. This will help you avoid visible mismatches that could detract from your sofa's appearance.

Additionally, regularly condition your leather sofa with a quality leather conditioner. This maintains moisture levels and enhances the richness of the color, preventing it from fading over time. Be mindful of environmental factors like sunlight exposure, which can accelerate color fading. Consider using protective covers or repositioning your furniture away from direct sunlight to preserve your sofa's vibrant hue. By staying on top of these care techniques, you'll keep your leather sofa looking its best for years to come.

Advertisement

Cushion Fluffing Techniques

Regular inspections of your sofa cushions can prevent sagging and maintain their comfort and appearance. Look for signs of flattening, which often indicates that it's time for a little fluffing. Start by using a vacuum cleaner with an upholstery attachment to remove dust and debris from your leather sofa cushions. A clean surface makes the fluffing process more effective.

To fluff your cushions, gently beat them with your hands, redistributing the filling and restoring their original shape. This simple technique can significantly extend their lifespan. Don't forget to rotate and flip your cushions periodically to promote even wear and avoid permanent indentations from regular use.

If you notice that your cushions have lost their firmness, consider adding extra filling material, like polyester fiber or foam. This addition can enhance support and comfort, making your leather sofa feel like new again. By following these cushion fluffing techniques, you'll not only keep your sofa looking great but also ensure it's a cozy spot for years to come. Regular maintenance can prevent major repairs down the line, saving you time and money.

Color Matching Leather Dyes
leather dye color matching

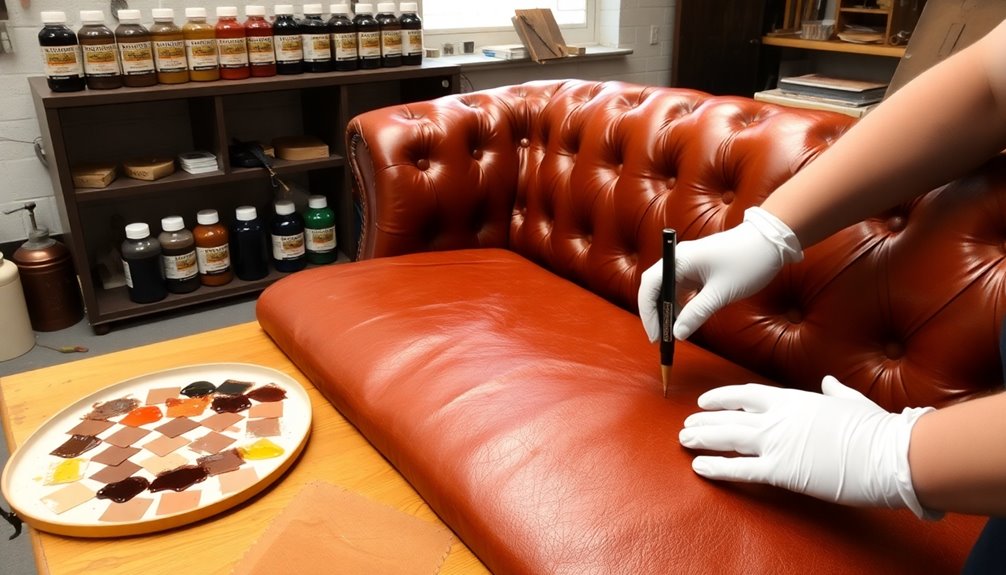
Achieving a seamless appearance in leather repairs hinges on the skillful use of color matching leather dyes. These dyes are essential for blending the repaired areas with the original leather, ensuring you won't notice any differences. Many leather repair kits include color charts or mixing instructions to help you achieve the desired shade that closely resembles your existing leather color.

Before applying the dye, always test it on a small, inconspicuous area first. This step ensures compatibility and helps you confirm the right color match before committing to a full application. Opting for water-based dyes is a good choice, as they're easier to work with and less likely to damage your leather.

When you're ready to apply the dye, use multiple thin layers rather than one thick coat. Allow each layer to dry completely before adding the next. This technique helps you achieve a uniform finish that looks professional and polished. By mastering the use of color matching leather dyes, you can effectively restore your leather sofa and maintain its aesthetic appeal.

Advertisement

Seasonal Leather Storage Tips

proper care for leather

When it comes to storing your leather sofa during seasonal changes, choosing the right environment is crucial for maintaining its quality. Always store leather furniture in a climate-controlled area to prevent damage from extreme temperatures and humidity fluctuations. This helps keep your leather couch in great shape and avoids any potential damaged areas.

Before storing, condition your leather items to restore moisture and suppleness. This step ensures they remain in good condition during off-seasons. Use breathable covers made of cotton or linen to protect your leather couch from dust and dirt while allowing air circulation, which helps prevent mold growth.

Be mindful of placement; avoid putting your leather furniture near heat sources like radiators or fireplaces. The heat can cause the leather to dry out and crack over time. Additionally, elevate your leather furniture off the floor to prevent potential water damage. This also enhances air circulation underneath, promoting a healthier storage environment. By following these tips, you can effectively store leather furniture and keep it looking its best for years to come.

Conclusion
final thoughts and reflections

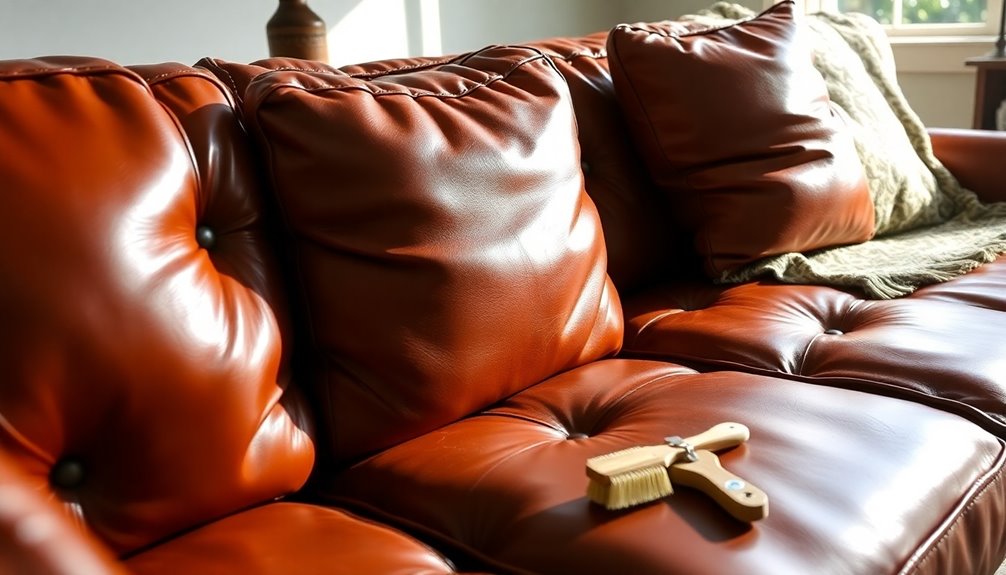
Repairing a leather sofa can seem daunting, but with the right approach, you can restore its beauty and extend its life. DIY leather sofa repairs effectively address common issues like scratches, cracks, and even small tears in leather. Utilizing appropriate products such as leather glue, color-matching dye, and filler materials allows you to tackle minor damages at home, saving you money in the long run.

Regular maintenance is crucial. Conditioning your leather every 6-12 months keeps it supple and prevents drying and cracking. By being proactive, you can avoid larger problems that require professional help. While many repairs can be done yourself, remember that significant tears in leather may necessitate a certified technician for optimal results.

Promptly addressing minor issues not only enhances the appearance of your sofa but also prolongs its lifespan. So, don't shy away from taking on these repairs—embracing the process can lead to impressive results. With a bit of patience and the right techniques, your leather sofa can remain a stunning centerpiece in your home for years to come.

Frequently Asked Questions

Can a Damaged Leather Sofa Be Repaired?

Yes, you can often repair a damaged leather sofa, depending on the type of damage. Common issues like cracks, scratches, and small tears can typically be handled with DIY methods. You'll need some leather repair glue, color-matching dyes, and a conditioner to restore its look. Regular maintenance can also help prevent further damage, making future repairs easier. However, for extensive damage, you might want to consult a professional for the best results.

Advertisement

What Home Remedies Can You Use to Repair Leather?

You can use several home remedies to repair leather. For minor scratches, apply a small amount of olive or coconut oil to moisturize and reduce visibility. A mixture of equal parts vinegar and water can clean and condition the leather, restoring its shine. Rubbing a banana peel on scratches helps conceal damage, while using clear nail polish can temporarily seal peeling edges. These methods keep your leather looking good without needing professional help.

Is It Worth It to Reupholster a Leather Sofa?

Deciding whether it's worth it to reupholster a leather sofa depends on several factors. If your sofa has sentimental value and the frame is still in good shape, reupholstering might be a great choice. However, if the leather's extensively damaged or the frame's compromised, it could be more cost-effective to buy a new one. Always assess the overall condition and weigh the costs against the emotional attachment before making your decision.

Do Home Leather Repair Kits Work?

Home leather repair kits can work really well for minor damages like scratches, holes, or tears. You'll find that they often include everything you need, including color-matching dyes and repair glues. Many users with little experience have had success using these kits, saving money compared to professional repairs. Just remember, for larger issues or significant tears, it's best to consult a professional to ensure a lasting fix.

Interior Design

How to Clean Wooden Furniture

How to effectively clean wooden furniture and maintain its beauty? Discover essential tips and tricks that will transform your cleaning routine!

Published

on

cleaning wooden furniture effectively

To clean your wooden furniture, start by removing any decor and vacuuming nearby areas to eliminate dust. Use a microfiber cloth for initial dusting, focusing on corners and crevices. For a gentle clean, mix mild dish soap with warm water or equal parts white vinegar and water. Apply with a damp cloth, wringing it out to avoid excess moisture. For extra shine, use a lemon juice and olive oil paste. Remember to polish regularly and control humidity levels to prevent damage. By following these tips, you can ensure your furniture stays beautiful and lasts longer—there's plenty more helpful advice ahead!

Key Takeaways

  • Start by removing decor and vacuuming to eliminate dust before cleaning wooden furniture.
  • Use a mild soap and water solution or equal parts vinegar and water for effective cleaning.
  • Test cleaning solutions on hidden areas to prevent damage to the wood finish.
  • Dry surfaces thoroughly and maintain optimal humidity levels to protect wood integrity.
  • Regularly dust and polish with a soft cloth to maintain shine and prevent surface damage.

Preparation and Initial Cleaning

cleaning and preparation process

Before you begin cleaning your wooden furniture, it's crucial to prepare the area properly. Start by removing all decor, cushions, and rugs to clear your working space and prevent scratches. Take off any objects like lamps and pillows, then pull the furniture away from the wall to access all sides. If there's any non-essential hardware, unscrew and remove it to make cleaning easier. Next, vacuum the area around the furniture to reduce dust and debris.

Once your area's prepped, it's time for initial cleaning. Use a microfiber cloth, feather duster, or vacuum with a brush nozzle to remove dust and loose dirt. If you don't have a vacuum handy, lightly moisten a cloth to wipe down the wood. Be sure to focus on crevices and corners where dust tends to gather, using a soft brush for intricate details and carvings. Teak wood, known for its durability outdoors, may require special attention if used in exterior settings. Ensure all surfaces are free from debris before you apply any cleaning solution. This preparation sets the stage for a successful cleaning session, ensuring your wooden furniture looks its best while remaining protected during the process.

Effective Cleaning Solutions

efficient and practical cleaning methods

There are several effective cleaning solutions you can use to maintain your wooden furniture. For a gentle cleanse, mix mild dish soap with warm water. This solution is safe for most sealed finishes. If you need to tackle dirt and grime, combine equal parts white vinegar and water; it's perfect for removing water spots and sticky residues.

For a nourishing and disinfecting option, try mixing equal parts lemon juice and olive oil to create a paste that adds a natural shine. For stubborn stains, a paste of baking soda and water works wonders—apply it, let it sit, and then wipe off with a damp cloth.

If you prefer commercial products, consider Weiman Wood Furniture Cleaner & Polish, which cleans and protects without leaving a messy buildup. It is formulated with four nourishing oils that beautify and protect your furniture while enhancing its natural luster. TriNova Wood Cleaner & Conditioner is another option that effectively deals with fingerprints and food residue.

Remember to avoid harsh chemicals, as they can damage your furniture's finish. Using these effective solutions will help keep your wooden furniture looking its best while preserving its integrity.

Advertisement

Application Techniques

effective methods for application

To effectively clean your wooden furniture, start by preparing the surface properly. Use a microfiber cloth to dust off any loose debris, and for furniture with carvings or grooves, grab a soft-bristle brush to reach those tight spaces. Before you begin, remove any decor, cushions, and rugs to avoid scratches and ensure a clear working area. Always test your cleaning solution on a small, hidden area to prevent damage to the finish.

Next, mix a mild dish soap or white vinegar with warm water to create a cleaning solution. Dip a soft cloth into the solution, wring it out until it's barely damp, and gently wipe the furniture. Cover all surfaces, paying special attention to crevices. For stubborn stains, consider using mineral spirits. Regular care preserves the appearance and structural integrity of wood furniture.

If you encounter specific stains, dab non-gel toothpaste on water stains, or create a paste with baking soda and water for heat stains. For ink, use rubbing alcohol on a cotton ball. For sticky residue, mix equal parts white vinegar and water, and gently rub with a damp cloth. This thorough approach ensures your wooden furniture remains clean and well-maintained.

Drying and Moisture Control

moisture management and drying

Proper drying and moisture control are essential for maintaining the beauty and integrity of your wooden furniture. To start, aim for a moisture content of 6% to 12% for optimal results. Harvest your logs in late fall or winter when sap levels are lower, and remove the bark to prevent moisture trapping. Sealing the ends with a commercial wood sealer or a wax and paint mixture helps minimize excessive moisture loss.

When stacking the logs, ensure they're in a well-ventilated area with spacers between them to promote air circulation. Elevate the bottom layer to avoid moisture contact with the ground. It's crucial to monitor humidity levels, keeping them between 40% and 60% for preservation. Proper seasoning is critical as it prevents warping, cracking, and shrinking in your wooden furniture.

Use a hygrometer to track indoor humidity, and consider humidifiers in dry climates or winter months to maintain necessary moisture. Conversely, employ dehumidifiers during humid seasons to remove excess moisture. Remember, avoiding extreme humidity fluctuations is vital to prevent wood from swelling, shrinking, or cracking. By following these steps, you can effectively manage drying and moisture control, ensuring your wooden furniture remains in excellent condition.

Polishing and Protection

shine and safeguard surfaces

Maintaining your wooden furniture's appearance goes beyond just managing moisture levels; polishing and protection play a vital role too. Start by applying wood polish with a small amount on a soft, lint-free cloth made of cotton or microfiber. Always apply the polish in the direction of the wood grain to prevent scratches and ensure even coverage. Work in small sections for better control, and avoid overapplying to prevent a sticky residue.

When applying, use long, straight strokes with light to moderate pressure, following the natural pattern of the wood's growth rings. This technique enhances the wood's beauty and prevents swirl marks. After applying the polish, buff the surface with a clean cloth, using circular motions and moderate pressure. Focus on one area at a time, and check for streaks or unevenness as you go.

Advertisement

Consider using protective finishes like furniture polish or wax for added protection and luster. Regularly apply wood oil or conditioner for unsealed furniture to maintain its shine. Aim to polish every few months to guard against scratches and daily wear, keeping your wooden furniture looking its best. Additionally, regular dusting (at least once a week) helps remove debris and enhances the overall cleanliness of your furniture.

Special Cases for Stains

stain treatment special guidelines

When it comes to tackling stains on wooden furniture, knowing the right approach can make all the difference. For water stains, try soaking paper towels in white vinegar and placing them on the stain for about 30-45 minutes. Alternatively, mix baking soda with distilled vinegar to create a paste and apply it directly. If you're dealing with oil and grease stains, mayonnaise works wonders; just apply it, let it sit for a few hours, and wipe it off. Petroleum jelly is another effective option.

Ink and dye stains require a more delicate touch. Lightly dampen a cloth with hydrogen peroxide and apply it to the stain, letting it sit overnight. You can also mix baking soda with non-gel toothpaste for another paste solution. For dark and old stains, consider using CitriStrip gel; cover it with plastic wrap, wait up to an hour, then scrub it off. If the stain persists, gently sand the area once it's dry. Always remember to follow up with a protective finish like Polycrylic to keep your wood looking its best. Additionally, after using CitriStrip gel, make sure to clean the surface thoroughly with soap and water to remove any residue before applying a protective finish.

Tips for Maintaining Wood

care for wooden surfaces

After addressing stains effectively, keeping your wooden furniture in top shape requires regular maintenance. Start by dusting your furniture regularly with a soft, lint-free cloth, always moving in the direction of the wood grain to avoid scratches. For deeper cleaning, dampen the cloth with a mild dish soap solution, rinse with soap-free water, and dry the surface immediately. Steer clear of harsh cleaners that can strip the wood's natural oils.

To protect your furniture from environmental factors, keep it out of direct sunlight and use curtains to filter UV rays. Maintaining stable temperature and humidity levels in your home is crucial; consider using a humidifier or dehumidifier as needed. Additionally, solid wood furniture is known for its durability against wear and tear, making it a practical choice for any home. Regularly checking and adjusting temperature and humidity levels can further enhance the longevity of your wooden pieces.

Prevent surface damage by using coasters and placemats for hot or wet items, and place felt pads under decorative objects to avoid scratches. When moving furniture, lift it instead of dragging to prevent dents. Lastly, apply furniture polish sparingly and choose one low in alcohol to maintain the finish. By following these tips, you can ensure your wooden furniture remains beautiful and durable for years to come.

Final Thoughts on Care

compassion support healing connection

Caring for your wooden furniture not only preserves its beauty but also extends its lifespan. Regular cleaning is essential; dust daily with a soft microfiber cloth and use a damp cloth weekly to tackle smudges and light dirt. Monthly polishing with high-quality wood polish enhances the wood's natural charm and offers protection. For deeper cleaning, dilute mild dish soap or white vinegar, but steer clear of harsh chemicals that could harm the finish.

Protect your furniture by using coasters and trivets to prevent water marks and heat damage. Place protective pads under heavy items and keep furniture away from direct sunlight and heat sources. Maintaining humidity levels between 35% and 45% also helps prevent warping, as control humidity levels is essential for preventing damage.

Advertisement

Inspect your furniture periodically for wear and tear. Tighten loose screws and address scratches promptly. When tackling repairs, test methods on inconspicuous areas first.

Finally, adapt your care routine to seasonal changes and the type of wood finish you have. By following these strategies, you'll ensure that your wooden furniture not only looks great but lasts for generations to come.

Frequently Asked Questions

Can I Use Essential Oils on Wooden Furniture?

Yes, you can use essential oils on wooden furniture! They offer natural benefits like antibacterial properties and a lovely scent. Just make sure to dilute them with a carrier oil to avoid damaging the wood. Conduct a patch test on a small area first, and use a soft cloth for application. Regularly applying essential oils can enhance the wood's appearance and protect it from environmental damage. Enjoy a refreshed, aromatic space!

How Often Should I Clean My Wooden Furniture?

You should clean your wooden furniture every couple of weeks to keep it looking its best. If you've got pets or a busy household, consider doing it once a month instead. Regular dusting's important too; aim for at least once a week to prevent dirt buildup. This simple routine helps maintain the furniture's appearance and durability, ensuring it stays beautiful and functional for years to come. Don't forget to check for any necessary repairs!

Is It Safe to Use a Vacuum on Wood Surfaces?

It's not always safe to use a vacuum on wood surfaces. Regular vacuums can scratch or dent your floors due to rigid brush rollers and plastic wheels. To protect your wood, opt for a vacuum designed for hard surfaces, preferably a canister model with gentle suction. Always check that the vacuum is suitable for your specific wood type, and consider using a brush attachment to minimize damage while keeping your spaces dust-free.

Advertisement

What Types of Wood Furniture Require Special Care?

When it comes to wood furniture requiring special care, you'll want to pay attention to exotic woods like teak, rosewood, and ebony. These types need regular oiling and gentle cleaning to maintain their natural beauty. Hardwoods like oak and cherry also need careful treatment, but they're generally more durable. Avoid harsh chemicals and direct heat, as they can damage finishes and the wood itself. Being proactive will help preserve the furniture's integrity.

Can I Use Furniture Polish on Antique Wood?

You can use furniture polish on antique wood, but be cautious. Always choose a natural polish to avoid harsh chemicals that might damage the finish. Test it on a small, hidden area first to ensure it doesn't react negatively. Apply it sparingly and buff in the direction of the grain. Regular maintenance is key, so keep your antique pieces clean and protected from direct sunlight and heat to preserve their beauty.

Conclusion

Taking care of your wooden furniture doesn't have to be complicated. By preparing properly, using the right cleaning solutions, and applying them with care, you can keep your pieces looking their best. Don't forget to dry them thoroughly and apply polish for added protection. For any stubborn stains, address them promptly. With a little regular maintenance, your wooden furniture will remain beautiful and last for years. Enjoy the warmth and character it brings to your home!

Continue Reading

Interior Design

Clash of Styles: Traditional vs. Modern Homes

Learn how the clash between traditional and modern homes reveals deeper values and lifestyle choices that could transform your living experience.

Published

on

traditional versus modern architecture

When comparing traditional homes with modern homes, you will encounter an interesting clash of design styles. Traditional homes are known for their intricate details and segmented spaces, which reflect historical significance. On the other hand, modern designs prioritize open-concept layouts, sleek lines, and the use of innovative materials such as steel and concrete. This shift emphasizes evolving lifestyles, emphasizing flexibility and communal living. Modern spaces are flooded with natural light through large windows, while traditional designs typically have smaller windows, leading to distinct room divisions. Ultimately, your choice of home style reveals your values and connection to culture. Discover how these contrasting styles can influence your living experience and impact the ambiance and functionality of your home.

Key Takeaways

  • Traditional homes emphasize intricate details and compartmentalized rooms, reflecting historical influences and cultural significance.
  • Modern homes prioritize open-concept layouts, promoting spatial flow and adaptability for contemporary lifestyles.
  • Furniture and decor styles differ, with traditional emphasizing ornate craftsmanship and modern focusing on sleek, minimalist designs.
  • Window and lighting choices contrast, as modern designs favor large windows for natural light, while traditional homes often rely on smaller, artificial sources.
  • Both styles express evolving cultural values; traditional homes evoke nostalgia, while modern architecture represents innovation and sustainability.

Architecture Styles Overview

diverse architectural design styles

When you immerse yourself in the world of architecture, you'll quickly notice the stark contrast between traditional and modern homes. Traditional homes often reflect historical influences, showcasing intricate details and craftsmanship that tell stories of the past. Styles like Victorian and Colonial evoke a sense of nostalgia, emphasizing cultural significance.

In contrast, modern designs embrace innovation, using industrial materials like steel and concrete to create sleek, functional spaces. You'll find clean lines and minimalist aesthetics that prioritize simplicity and efficiency.

Both styles highlight how architecture evolves, reflecting changing societal values and lifestyles. As you explore these differences, you'll appreciate how each style contributes uniquely to the built environment, shaping the way we experience and interact with our surroundings.

Variations in Floor Plans

diverse architectural layout designs

While exploring the variations in floor plans, you'll notice that traditional homes often feature compartmentalized rooms designed for specific functions. Each space, whether it's a formal dining room or a cozy study, offers a clear purpose and promotes a sense of separation.

In contrast, modern homes embrace open-concept layouts that enhance spatial flow and connectivity. You'll find multi-functional areas that allow you to adapt your living space to various activities, encouraging interaction among family members.

This shift reflects changing lifestyles, as many people now prioritize versatility and communal living. Ultimately, these differing floor plans illustrate how architectural choices can greatly impact your everyday experience and how you engage with your home.

Advertisement

Room Layout Comparisons

comparative room design analysis

In comparing room layouts, you'll quickly notice that traditional designs create distinct separations between spaces, often featuring foyers and halls that guide you from one room to another.

Each room typically serves a single purpose, like dining or relaxing, providing a structured flow. This compartmentalization can enhance privacy but limits flexibility in how you use your space.

In contrast, modern layouts prioritize open spaces, allowing for seamless exchanges between areas.

With fewer walls, you can easily adapt rooms for various activities, fostering a more interactive environment.

The optimized floor plans in modern homes maximize usability and encourage a sense of togetherness, reflecting contemporary lifestyles that value connectivity and dynamic living experiences.

The Open Concept Trend

open concept living spaces

Embracing the open concept trend transforms how you experience and interact with your living space. This design approach eliminates barriers, creating a seamless flow between areas.

You'll find that:

Advertisement
  1. Enhanced Connectivity: Family interactions increase as living, dining, and kitchen spaces blend together.
  2. Flexibility in Function: Spaces can easily adapt for various activities, from hosting to relaxing.
  3. Spacious Living: Removing interior walls can make even smaller homes feel larger and airier.
  4. Modern Aesthetic: Open layouts often embody a minimalist feel, showcasing clean lines and simplicity.

Window and Lighting Choices

designing optimal ambiance aesthetics

When it comes to window and lighting choices, most people find that the right design can dramatically influence the ambiance of their homes. In modern homes, large windows are common, allowing in ample natural light and creating a sense of openness. You'll notice that strategically placed windows enhance brightness, reducing the need for artificial lighting. On the other hand, traditional homes often rely on more artificial sources, using smaller windows that offer less illumination.

Style Window Design Lighting Approach
Modern Large, expansive windows Natural light emphasis
Traditional Smaller, detailed windows Reliance on artificial
Energy-Efficient Focus on sustainability LED and smart lighting

Choosing the right style can transform your living space!

Furniture and Decor Styles

diverse interior design trends

Window and lighting choices play a significant role in setting the mood of a home, but furniture and decor styles further define the character of your space.

When you choose between traditional and modern styles, consider these key elements:

  1. Material: Traditional furniture often features dark woods and ornate details, while modern pieces focus on sleek lines and industrial materials.
  2. Color Palette: Traditional decor tends to use rich, muted colors, whereas modern decor embraces bold hues and minimalist aesthetics.
  3. Functionality: Modern furniture prioritizes usability and versatility, while traditional designs emphasize craftsmanship and form.
  4. Ambiance: The overall feel of your space can shift dramatically based on your furniture choices, influencing comfort and style.

Cultural Significance of Designs

designs reflect cultural identity

Architecture often tells a story, and the cultural significance of designs is no exception. When you step into a traditional home, you're entering a space rich with history and heritage. These designs reflect the values and lifestyles of the past, evoking nostalgia and a sense of belonging.

On the other hand, modern architecture embodies current societal changes and innovative thinking. It prioritizes functionality and simplicity, showcasing contemporary values like sustainability and minimalism. This movement has led to the emergence of the **neoeclectic architectural revolution**, where designers blend elements from various styles to create unique, adaptable spaces. This approach, while rooted in modernism, allows for greater creativity and personalization, aligning with the diverse needs of today’s communities. As a result, architecture has become a reflection not only of function but also of the varied cultural and aesthetic preferences that define the present era.

Both styles reveal how culture evolves over time, expressing identity and community. By choosing one style over the other, you're not just selecting a home; you're making a statement about your values and how you connect with your surroundings.

Each design carries its own narrative worth exploring.

Advertisement

Frequently Asked Questions

What Are the Costs Associated With Building Traditional Versus Modern Homes?

When building a home, consider that traditional styles often incur higher costs due to intricate details and materials. In contrast, modern designs typically focus on efficiency, potentially lowering overall expenses while maximizing functionality and space.

How Do Traditional and Modern Homes Affect Resale Value?

Did you know homes with open-concept designs can sell for up to 20% more? Resale value often hinges on current market trends, with traditional homes attracting buyers seeking nostalgia and modern ones appealing to those favoring innovation.

What Are the Environmental Impacts of Traditional vs. Modern Building Materials?

When considering building materials, you'll find traditional ones often use more natural resources, while modern materials can be eco-friendly yet energy-intensive. Your choice impacts sustainability, energy efficiency, and the overall environmental footprint of your home.

Which Home Style Requires More Maintenance Over Time?

Imagine nurturing a vintage car; it demands more upkeep than a sleek electric model. Similarly, traditional homes typically require more maintenance due to their intricate details, while modern designs often prioritize low-maintenance materials and simplicity.

How Do Climate and Location Influence Design Choices in Traditional and Modern Homes?

Climate and location shape your design choices substantially. You'll consider insulation, materials, and orientation to optimize energy efficiency. A home in a hot area needs shading, while colder climates require robust heating solutions and durable construction.

Advertisement

Conclusion

In the end, whether you lean towards traditional charm or modern sleekness, it's clear that each style offers its own unique flair. Embracing the best of both worlds can create a home that reflects your personality and lifestyle. Remember, you can have your cake and eat it too! By mixing elements from both styles, you not only enhance your living space but also celebrate the rich tapestry of architectural history that shapes our communities today.

Continue Reading

Interior Design

How to Remove Mold From Wood Furniture

Safeguard your wood furniture from mold with these effective cleaning tips, but discover the crucial steps to prevent future infestations.

Published

on

mold removal from furniture

To eliminate mold from wooden furniture, start by putting on protective gear such as gloves and a mask. For mild infestations, combine equal parts distilled white vinegar and water in a spray bottle, then spray it onto the affected areas and let it sit for an hour. For more stubborn mold, use a bleach solution (1 cup bleach in 1 gallon of water) and gently scrub with a stiff brush. Once the cleaning is done, ensure the furniture is completely dry in a well-ventilated area to prevent future mold growth. Additionally, maintain humidity levels below 50% to discourage mold. Further tips on keeping your furniture safe can be found below. It is crucial to regularly inspect and clean the furniture after removing the mold to prevent any recurrence. If you have other cleaning issues, like removing stains from sofa cushions, consider using a mild upholstery cleaner or a mixture of baking soda and water for targeted treatment. Consistent upkeep and proper storage are essential for preserving the durability of your wooden furniture. To provide extra protection for your wooden furniture, consider applying a protective finish like wax or oil after cleaning to help seal the surface against moisture and future mold growth. It is also important to monitor nearby upholstery; if you need to remove stains from sofa cushions, acting promptly can prevent permanent discoloration. Regular maintenance of your living space, including wooden furniture and upholstered items, will ensure a clean and healthy environment for years to come.

Key Takeaways

  • Identify mold by looking for discoloration, a fuzzy texture, and a musty smell on wood furniture.
  • Use a mixture of equal parts distilled white vinegar and water for light mold infestations.
  • For stubborn mold, apply a bleach solution (1 cup bleach in 1 gallon water) with a stiff-bristled brush.
  • After cleaning, ensure the furniture dries completely in a well-ventilated area to prevent future growth.
  • Maintain indoor humidity levels below 50% and conduct regular inspections to prevent mold resurgence.

Understanding Mold and Its Risks

Mold is a common problem that can silently invade your home, especially if you have wood furniture. Mold spores are everywhere, thriving in damp and humid environments. When these spores settle on your wooden furniture, they can quickly multiply, posing significant risks to both your health and your furniture's integrity.

In fact, about 50% of homes in the U.S. face mold issues, which can severely impact indoor air quality. Understanding how to protect seniors from financial scams can also be beneficial, as mold removal services can sometimes be a target for unethical practices.

Exposure to mold can lead to various health problems, particularly respiratory issues like asthma and allergies, skin rashes, and headaches. Sensitive individuals, such as children or those with preexisting conditions, are particularly vulnerable.

Certain molds, like Stachybotrys chartarum, or black mold, are associated with even more severe health risks and require specialized cleaning solutions for removal.

To protect your wooden furniture and your health, it's crucial to keep humidity levels in check and take proactive measures to prevent mold. Regularly inspect your furniture for signs of mold and act quickly to remove mold if you notice any.

Advertisement

Identifying Mold on Wood

detecting mold on wood

Identifying Mold on Wood

When inspecting your wood furniture, look for signs of mold, which often manifests as patches of green, black, or brown discoloration. Mold on wood may have a fuzzy or velvety texture, making it distinct from simple dirt or water stains. If you notice a musty smell, that's another strong indicator of mold presence, especially in areas with high humidity, like basements or bathrooms.

Regular cleaning and maintenance, such as preventing cross-contact in kitchens, can also help mitigate the conditions that promote mold growth.

Identifying mold isn't just about visible signs; it's crucial to differentiate between mold growth and water stains. Water stains typically don't have a fuzzy texture and are confined to specific areas, while mold can spread over time.

Regular inspections in high humidity areas can help catch mold early.

Keep in mind that the size of the mold infestation matters. If you identify mold covering an area larger than 10 square feet, it's wise to seek professional assistance for safe removal.

Advertisement

Always take precautions when dealing with mold, and avoid using random cleaning products that may not effectively address the issue. By knowing how to identify mold, you can take the necessary steps to protect your furniture and your health.

Essential Products for Removal

necessary items for cleanup

What products should you reach for when tackling mold on wood furniture? It's essential to use effective cleaning solutions to clean and remove mold safely. Here's a handy table to guide you on the best options:

Product Use Case
Distilled White Vinegar Natural solution for light mold infestations
Hydrogen Peroxide Effective for deeper stains
Borax Mixed with Warm Water Powerful for thorough cleaning
Dishwashing Detergent Gentle cleaning for mild cases
Commercial Products (e.g., Mold Armor) For severe infestations

These solutions not only assist in mold removal but also help to prevent future mold growth by disinfecting your wood surfaces. For light mold infestations, vodka can serve as a non-toxic alternative, effectively eliminating odors and killing mold spores. Remember to guarantee proper ventilation when using these products to minimize exposure to harmful fumes. Taking these steps will help you maintain a clean environment and keep your furniture safe from mold.

Steps for Removing Mold

mold removal process steps

Taking swift action is essential for effectively removing mold from your wood furniture. Start by gathering protective gear like rubber gloves, safety goggles, and an N95 mask to shield yourself from mold spores and cleaning agents.

For light mold, mix equal parts distilled white vinegar and water. This natural remedy can be quite effective, as many people have found success using natural remedies alongside conventional methods. Apply this solution to the affected area, letting it sit for an hour before wiping it off with a cloth.

If you encounter stubborn mold, use a bleach solution—mix 1 cup of bleach in 1 gallon of water. Apply it with a stiff-bristled brush, scrubbing gently to avoid damaging the wood.

After cleaning, make sure your furniture dries completely in a well-ventilated area. This step is vital to prevent future mold growth.

Advertisement

To keep mold at bay, conduct regular inspections and maintain indoor humidity levels below 50%. By following these steps, you can successfully remove mold from wood and protect your furniture from further contamination. Remember, the key is to act quickly and stay vigilant in your maintenance efforts.

Safety Precautions During Cleanup

cleanup safety precautions guidelines

Cleaning mold from wood furniture can be hazardous, so prioritizing safety is essential. Always wear protective gear, including rubber gloves, safety goggles, and an N95 mask, to minimize your exposure to harmful mold spores and cleaning agents.

Confirm the cleaning area is well-ventilated by opening windows and using fans. This helps disperse airborne mold spores and prevents you from inhaling harmful fumes from the cleaning solutions.

To further contain the cleanup, seal off the area with plastic sheeting, which will help stop mold spores from spreading to other parts of your home.

When disposing of contaminated materials, like rags and vacuum bags, use sealed plastic bags to prevent the spread of mold beyond the cleanup zone.

Additionally, be cautious when using strong chemicals, such as bleach. Always follow the manufacturer's instructions to avoid harmful reactions and confirm effective mold removal.

Advertisement

Advanced Removal Techniques

specialized extraction methods

When tackling mold on wood furniture, a variety of advanced removal techniques can effectively restore your pieces.

Start with vinegar treatment; apply distilled white vinegar directly to the affected areas and let it sit for an hour. Its natural mold-killing properties will help eliminate the mold.

For deeper infestations, sanding is vital. Use 100-grit sandpaper and sand along the grain to minimize damage. After sanding, consider refinishing your furniture by applying a protective wood finish to restore its appearance and guard against future mold growth.

If the mold persists, you can turn to bleaching. Mix one cup of bleach with one gallon of water, then apply it using a stiff-bristled brush, remembering to scrub gently to avoid harming the wood.

Once you've tackled the mold, allow the cleaned areas to air dry completely. This step is essential in preventing any residual moisture from fostering new mold growth.

Make sure that the environment is well-ventilated during this process to aid in drying and further reduce mold risk.

Advertisement

Preventing Future Mold Growth

mold growth prevention strategies

To keep mold from returning, you need to maintain indoor humidity levels between 30%-50%.

Make certain your spaces are well-ventilated, especially in kitchens and bathrooms, to prevent moisture buildup.

Regularly check for leaks in plumbing or roofing, and fix them promptly to eliminate sources of dampness.

Maintain Low Humidity

Keeping indoor humidity levels between 30-50% is essential in preventing mold growth on wood furniture. Mold thrives in high humidity environments, so maintaining ideal humidity levels is key.

You can effectively manage moisture accumulation by using dehumidifiers in damp areas like basements and bathrooms. Regularly inspect and promptly repair leaks from plumbing or roofs to prevent excess moisture from fostering mold growth. Cleaning and drying water-damaged areas within 24-48 hours is critical to avoid mold establishment on wood surfaces.

Here's a quick reference table to help you maintain low humidity:

Advertisement
Action Purpose
Use dehumidifiers Reduce indoor humidity levels
Repair leaks Prevent moisture accumulation
Clean water-damaged areas Deter mold growth

Ensure Proper Ventilation

Ensuring proper ventilation is essential for preventing mold growth on wood furniture. Maintaining humidity levels between 30-50% is critical, and effective ventilation plays a key role in achieving this.

Install exhaust fans in areas prone to moisture, like kitchens and bathrooms, and make it a habit to open windows whenever possible. This will help reduce moisture accumulation and minimize the likelihood of mold establishment on wooden surfaces.

In damp areas, like basements, consider using dehumidifiers to lower humidity and create an environment less conducive to mold spores.

Regularly inspect and clean your vents and air circulation systems to enhance airflow. Stagnant air promotes mold growth, so it's important to keep your home's ventilation system in good shape.

Additionally, spacing your furniture apart allows for better air circulation, preventing moisture build-up and reducing the risk of mold colonization on wooden surfaces.

Advertisement

Regularly Inspect for Leaks

Maintaining proper ventilation helps minimize moisture, but even the smallest leaks can spell trouble for wood furniture. To prevent mold growth, you need to regularly inspect for leaks, particularly in plumbing systems and roofing.

Monthly checks in high-humidity areas like kitchens, bathrooms, and basements can help you identify potential water sources before they lead to moisture accumulation.

Use moisture meters to assess humidity levels in your home; if you find readings above 50%, consider repairing leaks or implementing additional moisture control measures.

Focus on caulking and seals around sinks, bathtubs, and windows. Any cracks or deterioration in these areas can allow water to seep into wood surfaces, creating ideal conditions for mold.

Additionally, establish a routine for checking gutters and downspouts to guarantee proper drainage away from your home. Poor drainage can lead to water infiltration, increasing the risk of mold on your wooden furniture.

Advertisement

When to Seek Professional Help

knowing when to consult

If you notice signs of severe mold infestation, like extensive growth or a musty odor, it's time to contemplate calling in the pros.

Additionally, if you have health concerns, such as asthma or a weakened immune system, tackling mold removal on your own mightn't be safe.

Seeking professional help guarantees thorough remediation and protects your health.

Signs of Severe Infestation

Mold infestations can escalate quickly, and recognizing the signs of a severe problem is crucial for your health and safety. If you notice any of the following indicators, it's time to seek professional help:

  1. Visible Structural Damage: If you see warping or weakening of the wood furniture, it's a clear sign that the mold infestation has gone beyond a manageable level.
  2. Persistent Mold Growth: If mold keeps returning despite your DIY cleaning efforts, this suggests deeper issues that need experts.
  3. Location of Mold: If you find mold inside walls, ceilings, or even in your HVAC system, professional remediation services are necessary to prevent further spread and contamination.

Ignoring these signs can lead to significant health risks, especially for individuals with health concerns like asthma or weakened immune systems.

Don't compromise your safety; tackling a severe mold infestation requires expertise that only professionals can provide. Act promptly to guarantee thorough removal and protect your home and health.

Health Risks Consideration

Dealing with a mold problem can be overwhelming, especially when health risks are involved. If you or anyone in your household has pre-existing health conditions like asthma or allergies, it's vital to seek professional mold removal.

Advertisement

Cleaning mold can exacerbate respiratory problems and trigger severe reactions. If the mold covers an area larger than 10 square feet, don't hesitate to contact specialists; larger infestations often require advanced mold remediation techniques that go beyond DIY capabilities.

Persistent health problems—such as ongoing respiratory issues or skin irritation—warrant a visit to your healthcare provider and consideration of professional mold remediation services.

Additionally, if you discover mold hidden inside walls, ceilings, or HVAC systems, hiring professionals is essential. These areas can harbor toxic mold and pose significant health risks if not properly addressed.

Professionals not only provide effective treatment but also identify and tackle underlying moisture issues that contribute to mold growth, ensuring thorough prevention of future infestations.

Prioritize your health and safety by understanding when it's time to call in the experts.

Advertisement

Frequently Asked Questions

Can Moldy Wood Furniture Be Saved?

Yes, you can save moldy wood furniture if you catch the infestation early. With proper cleaning techniques and maintenance, you'll restore its appearance and prevent future mold growth, ensuring your furniture lasts longer.

What Kills Mold Spores on Wood Furniture?

To kill mold spores on wood furniture, you can use white vinegar, hydrogen peroxide, or a bleach solution. Alternatively, commercial mold removers are effective. Always test a small area first to prevent damage.

Does Vinegar Remove Mold From Wood Furniture?

Yes, vinegar effectively removes mold from wood furniture. Just apply it directly to the moldy area, let it sit for an hour, then wipe it clean. It'll also help eliminate any musty odors.

Is Bleach or Vinegar Better to Kill Mold on Wood?

You might think bleach's strong smell means it's more effective, but vinegar's actually better for killing mold on wood. It penetrates deeper, is non-toxic, and prevents future growth without damaging the wood's integrity.

Conclusion

To sum up, tackling mold on your wood furniture isn't just a chore; it's an epic battle against a tiny, green menace! With the right tools and a dash of determination, you can reclaim your furniture and banish mold like a superhero. Just remember to follow the steps, don your protective gear, and keep that mold at bay! After all, your furniture deserves to shine without a sinister, fuzzy intruder lurking around! So, go forth and conquer!

Advertisement
Continue Reading
Advertisement

Affiliate disclaimer

As an affiliate, we may earn a commission from qualifying purchases. We get commissions for purchases made through links on this website from Amazon and other third parties.

Advertisement

Vetted

timeless men s denim jackets timeless men s denim jackets
Vetted47 minutes ago

15 Best Men’s Denim Jackets for Timeless Style and Comfort

Master the art of timeless style with the 15 best men's denim jackets that blend comfort and versatility; find the...

top mustache trimmers 2024 top mustache trimmers 2024
Vetted9 hours ago

15 Best Mustache Trimmers of 2024 – Grooming Tools You Can Trust

Find the perfect mustache trimmer with our top 15 picks of 2024, but which one will elevate your grooming routine...

dwayne johnson presidential rumors 2024 dwayne johnson presidential rumors 2024
Vetted11 hours ago

Dwayne Johnson 2024: The Rumor That’s Shaking Hollywood to Its Core

Shattering conventions in Hollywood, Dwayne Johnson's bold moves in 2024 will leave you questioning everything you thought you knew about...

flattering haircuts for diamonds flattering haircuts for diamonds
Vetted13 hours ago

12 Best Haircuts for Men With Diamond-Shaped Faces: Flattering Styles to Try

Keep your diamond-shaped face looking its best with these 12 flattering haircuts—discover which styles will enhance your features and why...

fashion tips for all occasions fashion tips for all occasions
Vetted13 hours ago

15 Best Fits for Every Occasion: Style Guide for All Seasons

Join us as we explore the 15 best fits for every occasion, ensuring you never compromise on style or comfort—discover...

stylish and durable cowboy boots stylish and durable cowboy boots
Vetted17 hours ago

15 Best Cowboy Boots for Men: Style Meets Durability in 2024

Just when you thought you knew cowboy boots, discover the 15 best styles for men in 2024 that blend durability...

men s refreshing shower gels men s refreshing shower gels
Vetted21 hours ago

15 Best Men’s Shower Gels for a Refreshing and Invigorating Cleanse

Wondering which men's shower gels offer the ultimate refreshing cleanse? Discover our top 15 picks that will elevate your shower...

superhero physique training regimen superhero physique training regimen
Vetted21 hours ago

Alan Ritchson’s Workout: The Secret Regimen Behind His Superhero Physique

Uncover the secrets behind Alan Ritchson's impressive workout regimen, but what unique techniques set him apart from other superheroes?

linen shirts for summer linen shirts for summer
Vetted1 day ago

15 Best Linen Shirts for Men: Stay Cool and Stylish This Summer

Find the perfect linen shirts to keep you cool and stylish this summer, and discover which top picks will elevate...

swim trunks for comfort swim trunks for comfort
Vetted1 day ago

15 Best Swim Trunks of 2024 for Ultimate Comfort and Style

Here are the 15 best swim trunks of 2024 that offer ultimate comfort and style, but there's more to discover...

men s skincare for radiance men s skincare for radiance
Vetted1 day ago

15 Best Men’s Skincare Products for a Fresh and Radiant Look in 2024

Make your skincare routine shine with the 15 best men's products for 2024, but wait until you see the top...

comfortable and stylish sweatshirts comfortable and stylish sweatshirts
Vetted1 day ago

13 Best Sweatshirt Brands That Combine Comfort and Style

Hunt for the ultimate sweatshirt brands that marry comfort and style—discover which names made our top 13 list and elevate...

Trending

Copyright © 2024 StyleGuru.org Affiliate disclaimer As an affiliate, we may earn a commission from qualifying purchases. We get commissions for purchases made through links on this website from Amazon and other third parties.