Interior Design
How to Reupholster Furniture
Keep your furniture looking fresh and stylish by learning the essential steps to reupholster it yourself; discover the secrets to a professional finish!
To reupholster furniture, start by evaluating its condition and making necessary repairs. Check for structural integrity and reinforce any weak spots. Next, choose a durable fabric that fits your style and the piece's purpose. Measure and cut the fabric accurately, using the old fabric as a pattern. When applying the new fabric, use a staple gun to ensure it's tight and wrinkle-free. Secure corners neatly and consider adding decorative touches like trim or buttons for flair. Finally, inspect your work to ensure everything's tight and tidy. There's plenty more to explore to perfect your skills!
Key Takeaways
- Assess the furniture's emotional and practical value before starting the reupholstering process, ensuring you want to invest time and resources.
- Choose durable fabric suitable for the intended use, considering factors like traffic, comfort, and color to complement your space.
- Carefully measure and cut the fabric, ensuring it is square and labeled, using original fabric pieces as patterns for accuracy.
- Securely attach the new fabric using a staple gun, ensuring it is taut, and replace any worn padding before finishing the upholstery.
- Finish with decorative elements and protective undersides, ensuring a polished look while preserving the furniture's longevity and durability.
Evaluation and Disassembly
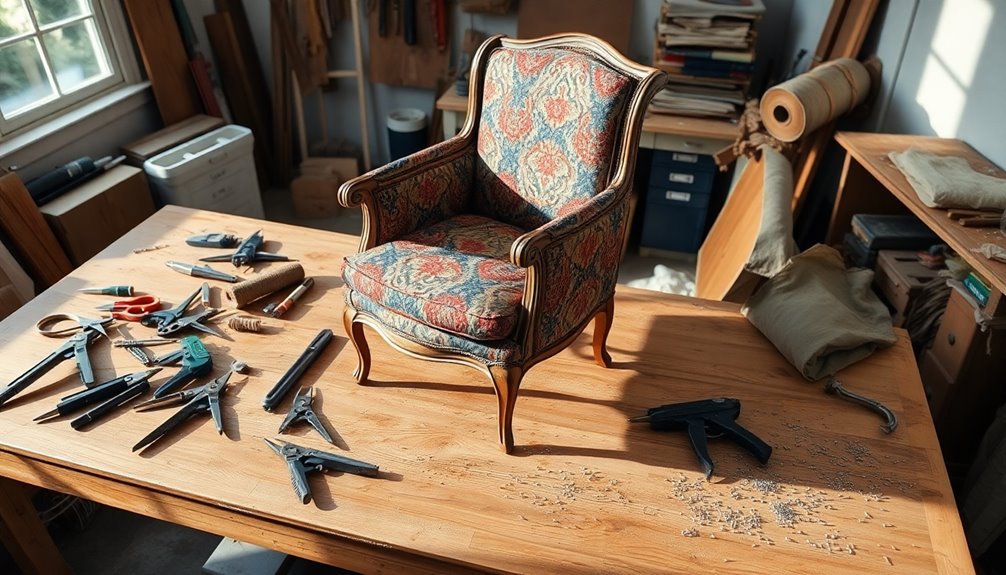
When you're preparing to reupholster furniture, your first step is to evaluate its condition and disassemble it carefully. Start by assessing the emotional and practical value of the piece. Consider factors like comfort, size, and any sentimental attachments you may have. Check the structural integrity by grasping opposing parts to identify any movement or looseness. Inspect exposed wood or metal for necessary cleaning or refinishing. It's crucial to determine if the furniture has solid 'bones'—a sturdy frame—while keeping an eye out for composite-wood substitutes like particle board, which may not be worth restoring. Additionally, it's important to evaluate potential worth to ensure the investment aligns with your expectations.
Next, move on to disassembly. Remove cushions and slipcovers to access the underlying structure. Detach legs and arms by unscrewing them, and use tools like staple removers and pliers to carefully take off old fabric. As you disassemble, label and store each component securely to avoid damage. Document the process with photos and notes to aid reassembly later. Remember to protect delicate surfaces with bubble wrap or thick padding during this stage, ensuring you handle everything with care.
Repairs and Preparation
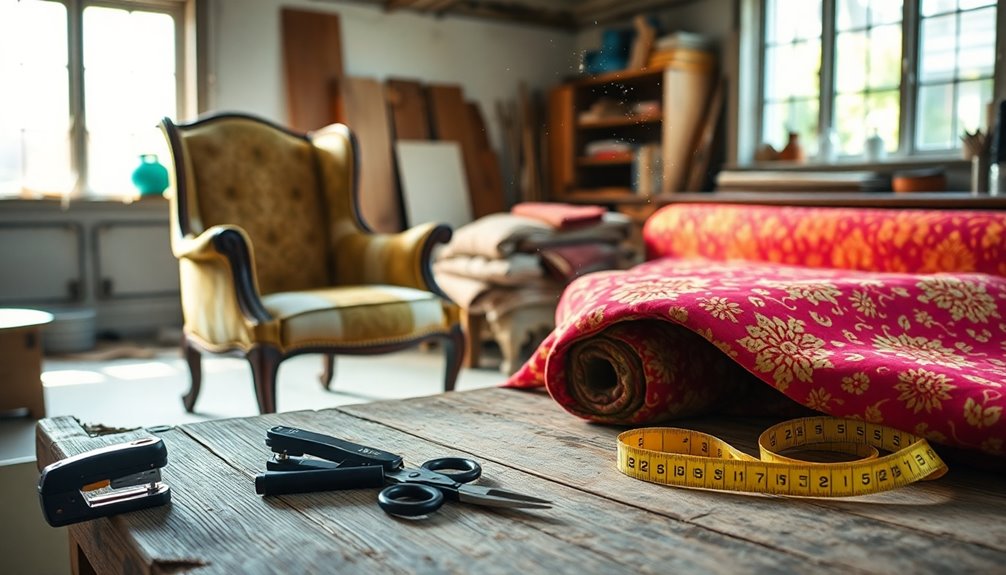
Repairing and preparing your furniture is essential for a successful reupholstering project. Start by inspecting the frame for any damages, like loose joints or broken pieces. If you find weak springs or sagging cushions, reinforce those areas. For wooden frames, use wood filler for any dents or scratches, then sand them smooth, transitioning from medium-grit to fine-grit sandpaper. A clear topcoat will protect your repairs and help them blend seamlessly.
Next, examine the springs and cushions. Replace any springs that are worn out and consider re-padding the cushions with new foam or polyurethane if needed. Make sure to re-tie or replace broken springs for proper support and use high-temp adhesive to secure the new padding. Additionally, choosing high-quality materials for reupholstering ensures enhanced longevity of the furniture.
Check the webbing or strapping for wear and replace it if necessary, ensuring it's tight and evenly spaced. A rawhide mallet can help secure it firmly to the frame.
Finally, clean the entire frame and apply any stain or paint to match the original finish. Allow it to dry completely, and prepare the frame with a tack strip for the new upholstery fabric. With these repairs made, you're ready to reupholster!
Choosing the Fabric
With the frame in solid shape, the next step is choosing the right fabric for your reupholstering project. Consider durability first; fabrics with a higher double rub count are more densely woven and will hold up better over time. Think about the lighting and environment where the furniture will be used—fabrics like cotton and acrylic are easy to maintain and clean, making them great choices for high-traffic areas. Additionally, selecting fabrics that complement your decor style can enhance your overall unique atmosphere in the space.
When you select the fabric, consider its intended use. For example, wool offers durability and insulation, while linen is breathable but may wrinkle. If you're after a luxurious look, velvet can elevate your furniture, but it might require blending with other fibers for added durability. Additionally, understanding fabric characteristics is essential to ensure satisfaction with your final choice.
Don't forget about color and pattern. Choose shades that complement your space and ensure that patterns are straight and correctly oriented. Texture plays a significant role too; plush fabrics can add warmth to a room. Lastly, think about dual-purpose options like those from Liberty's collection, which offer versatility for different styles. Make your fabric choice wisely to ensure both aesthetics and functionality.
Cutting the Fabric
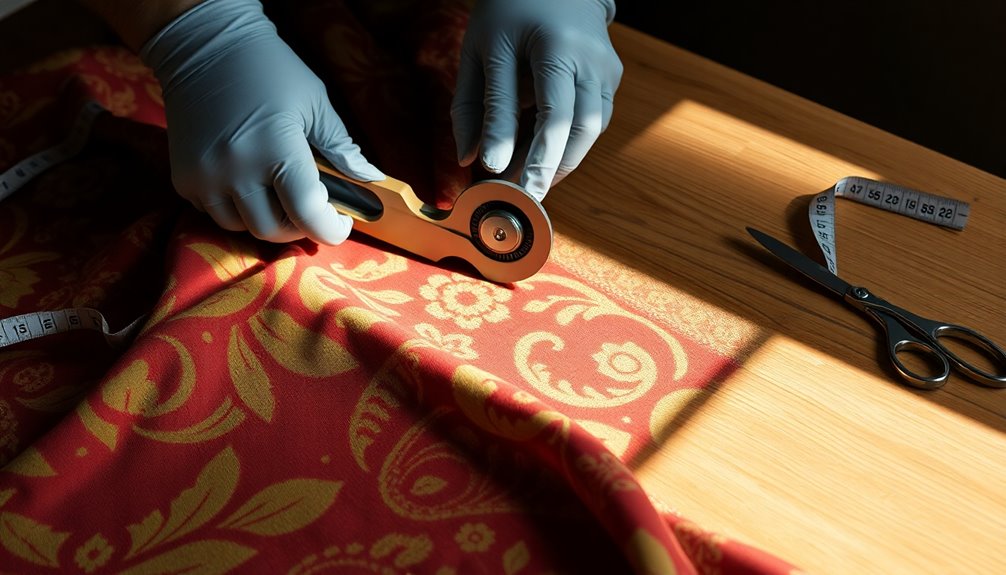
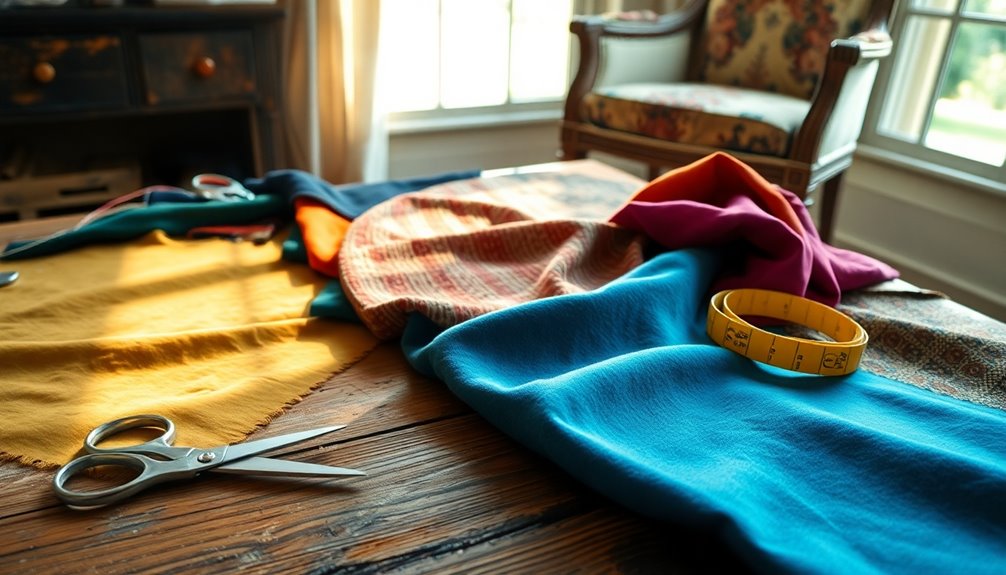
Cutting the fabric is a crucial step in your reupholstering project, as precision determines the final look and fit of your furniture. Begin by ensuring your fabric is square and free from creases. Lay it out on a large, flat surface, like a table or the floor. Use a metal square or straight edge to mark a straight line along the selvage edge. Before cutting, wash or dry clean the fabric according to the manufacturer's instructions to avoid shrinkage.
Next, create a layout chart and cutting list to ensure you have all necessary pieces. Remember to measure twice and cut once. Use original fabric pieces as patterns, tracing them onto the new fabric with chalk. When marking, add a ½ inch margin for easier stapling. Pattern matching is essential to ensure that your fabric aligns correctly across different sections of the furniture.
As you cut, label each piece with sticky notes to avoid confusion later. Avoid flipping pieces to maintain color consistency, and be mindful of patterns—match them carefully for a seamless look. If using bias strips for welt cord, cut those on the diagonal for better flexibility. Take extra care with delicate fabrics, ensuring you cut in the right direction for texture consistency.
Upholstering the Furniture
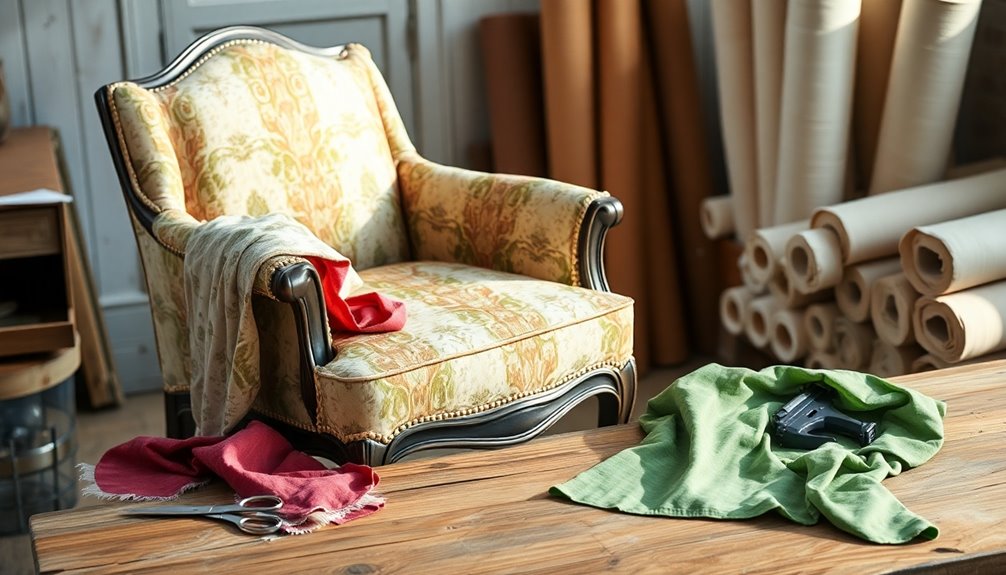
After you've meticulously cut the fabric, it's time to move on to upholstering the furniture. First, assess the frame to ensure it's sturdy. If you notice any weak spots, repair or replace them before attaching the new upholstery. This will give your furniture a solid foundation. Upholstery craftsmanship requires skill and attention to detail, which will greatly enhance the final outcome.
Using a staple gun, start attaching the fabric to one edge of the frame and work across. Pull the fabric taut as you staple to prevent wrinkles and sagging. Trim any excess fabric but leave enough for a clean finish. Make sure the staples are hidden for a polished look.
Next, inspect the old padding. If it's worn out, replace it with foam or polyurethane padding, cutting it to match the original shape. Align the new padding on the frame and secure it with staples or adhesive. For added support, consider adding webbing or springs.
Finally, enhance the appearance by adding decorative elements like welt cord or buttons. Secure any complex designs with high-temp adhesive and ensure all seams and edges are neat. With these steps, you're well on your way to giving your furniture a fresh, new look!
Securing Edges and Corners
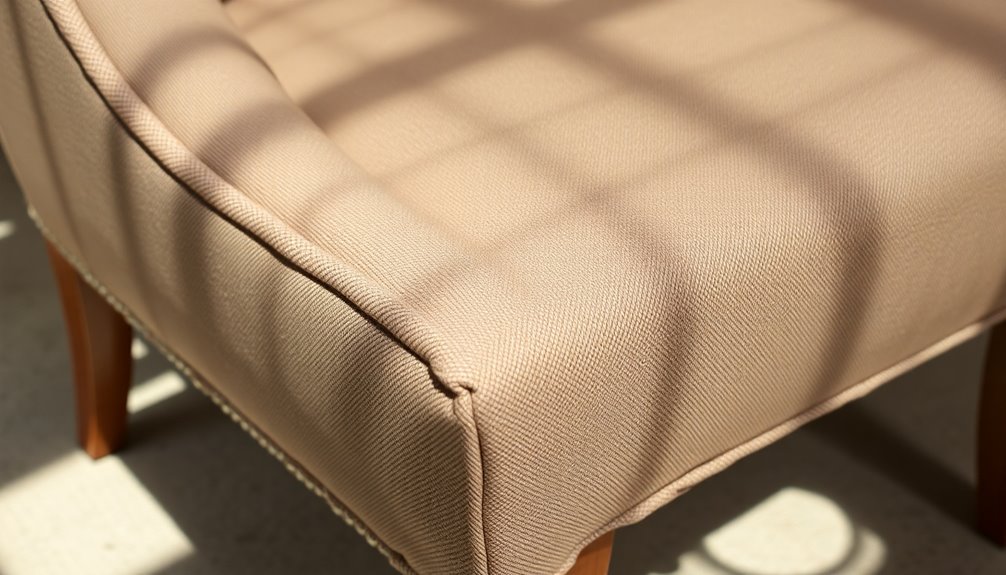
Securing edges and corners is crucial for achieving a polished look in your upholstery project. Start by measuring the straight edge you'll be upholstering and cut a piece of cardboard tack strip to size. Lay your fabric, reverse-side up, over the edge, leaving an inch or two of excess underneath. Push the tack strip into the seam's edge and attach it with tack pins or staples. Fold back the fabric to create a clean, fray-free edge, ensuring everything is tight and even.
For corners, staple around the material, stopping about two inches from each corner. Fold the fabric like you're wrapping a present for neat, symmetrical corners. Alternatively, pinch the excess fabric upwards to create a 45-degree "sail" at the corner and staple it down. Bring the fabric together in the corner and staple along both sides at a 45-degree angle. Leave an inch without staples near the outer edge. Trim the fabric close to the staples, then pull the flap tight and staple it down. Finally, check that all corners are tidy and the fabric is evenly pulled for a professional finish. Using thicker fabrics and leathers can enhance the overall success of your upholstery project.
Finishing Touches
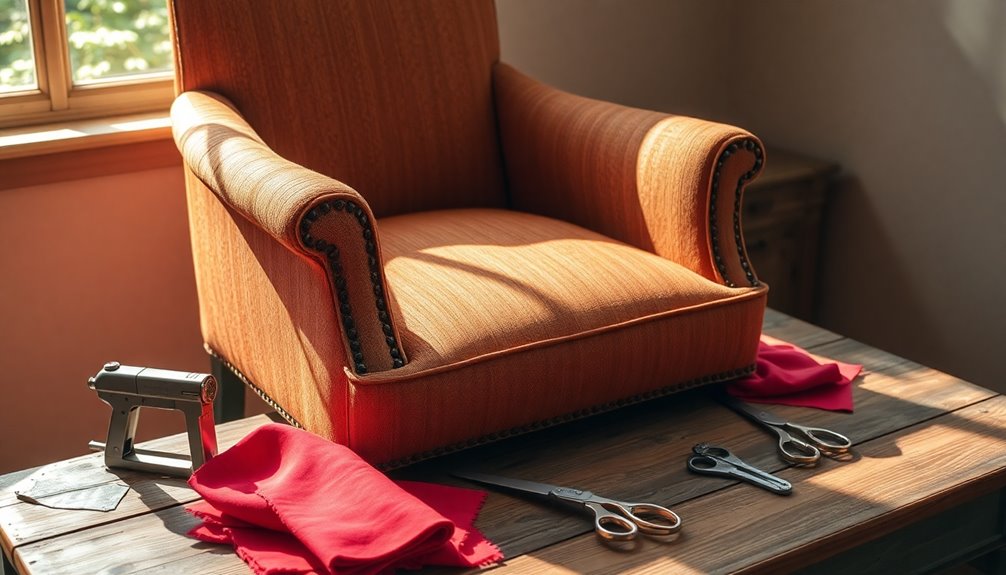
With the edges and corners of your upholstery looking sharp, it's time to enhance the overall appearance with finishing touches. Consider adding trims like gimp braids, nail heads, or tufting to give your piece unique flair. Choose trims that harmonize in color with your upholstery to maintain a cohesive look. Use tacks, nails, or a hot glue gun to attach your trims, starting in inconspicuous areas to ensure a neat finish.
Incorporate decorative details such as fabric-covered buttons or decorative tacks with unique finishes like gemstones for added personality. Expert advice on incorporating these details can help you achieve the best results. Edge roll can also provide comfort while enhancing the furniture's aesthetic. Be sure to keep decorative details aligned symmetrically for a professional appearance.
Don't forget to protect the underside of your furniture. Attach black fabric to shield it from dust and give it a polished look. Cut the new fabric using the old piece as a guide, folding over the edges before stapling securely in place.
Lastly, choose fabrics that reflect your personal style and consider the piece's functionality. Ensure that patterns align at seams to keep everything looking professional. These finishing touches will elevate your reupholstered furniture beautifully.
Final Inspection
Before you finalize your reupholstered furniture, a thorough inspection is essential to ensure quality and safety. Start by checking the materials and construction. Look at the type of wood for knots, warping, and any damage. Assess the upholstery for fabric quality, stitching, and finish. Inspect metal components for rust or sharp edges, and make sure the frame and joints are sturdy and secure.
Next, perform structural stability tests. Ensure your furniture doesn't tip over on a 10-degree incline and can support the intended weight. Apply 75 lbs. of force to each leg and perform a drop impact test for durability. Additionally, it's crucial to perform a stability test to confirm that your furniture can withstand real-life usage scenarios.
Don't forget about safety and compliance. Verify that safety mechanisms work, and check edges and corners for protection against injury. Conduct a static loading test with 300 lbs. for one hour to ensure no deformation occurs.
Lastly, perform quality control by randomly sampling products, testing functionality, and checking surface quality. Conduct carton drop tests to confirm packaging integrity. By completing this final inspection, you'll ensure your reupholstered furniture is both safe and ready for use.
Frequently Asked Questions
How Much Does It Typically Cost to Reupholster Furniture?
When you're considering reupholstering furniture, you'll typically find costs around $650, but they can range from $300 to $2,000, depending on the piece. Sofas usually cost between $1,000 and $4,600, while dining chairs might only be $200 to $400. Factors like size, fabric type, and labor can influence the final price. Keep in mind that luxury pieces can exceed $10,000, so it's wise to budget accordingly.
Can I Reupholster Furniture Without Prior Experience?
You can definitely tackle reupholstering furniture without prior experience. Start with simpler projects like chairs or ottomans to build your confidence. Gather the right tools and materials, and follow step-by-step guides. Patience is key; take your time measuring and cutting fabric. Don't hesitate to seek help or watch tutorials online. You'll learn as you go, and soon enough, you'll have stunning pieces that reflect your personal style!
What Tools Do I Need for Reupholstering Furniture?
To tackle your project, you'll need essential tools like needle-nose pliers for removing staples and a staple remover for old fabric. A heavy-duty stapler or staple gun will help you attach new materials securely. Don't forget cutting tools like sewing scissors and a utility knife for precision. A rubber mallet can protect your furniture while you work. Lastly, protective gear like gloves and a dust mask will keep you safe during the process.
How Long Does the Reupholstering Process Take?
The time it takes to complete a project can vary significantly based on the size and condition of the piece. For instance, removing old fabric from a chair might take you around 8-10 hours, while a sofa could require 16-22 hours. Once you start, you'll also need to factor in the time for repairs, preparation, and reassembly, which can add several more hours to your timeline. So, patience is key!
Where Can I Find Suitable Upholstery Fabric?
You can find suitable upholstery fabric at local fabric stores, home improvement centers, or specialty upholstery shops. Online retailers like Etsy, Amazon, or dedicated fabric websites offer a vast selection too. If you're looking for something unique, check out thrift stores or antique shops. Don't forget to consider your project's specific needs, like durability and style, to ensure you choose the right fabric that fits your vision perfectly.
Conclusion
You've successfully transformed your furniture! By evaluating, disassembling, and repairing it, you laid a solid foundation. Choosing the right fabric and cutting it precisely ensured a perfect fit. As you upholstered and secured edges, you brought your vision to life. With those finishing touches, your piece is now ready to shine in your space. Take a moment to admire your hard work—you've not only revived a piece of furniture but also added a personal touch to your home!
Interior Design
How to Clean Wood Furniture Naturally
Clean your wood furniture naturally with simple ingredients and techniques that will leave it shining—discover the secrets to maintaining its beauty!
To clean your wood furniture naturally, start by dusting it with a soft microfiber cloth, moving from top to bottom. Mix equal parts vinegar and water in a spray bottle for an effective cleaner. Lightly mist the surface and wipe in the direction of the grain using a damp cloth. For stubborn stains, try a baking soda paste or use a bit of mayonnaise for water marks. Don't forget to apply a little olive oil monthly to enhance shine and protect the wood. There's plenty more to discover about keeping your furniture looking its best.
Key Takeaways
- Dust wood furniture regularly with a soft microfiber cloth to remove debris without scratching the surface.
- Create a natural cleaning solution using equal parts vinegar and water, and apply it with a lightly damp cloth.
- For conditioning, mix vinegar and olive oil to enhance shine and protect the wood.
- Address stubborn stains with a baking soda paste or a vinegar solution, gently rubbing and wiping off.
- Use coasters and hot pads to prevent scratches and spills, promoting longevity and maintaining the furniture's appearance.
Understanding Wood Furniture Needs
Understanding wood furniture needs is essential for keeping your pieces looking their best. Different types of wood respond uniquely to cleaning methods, so identifying whether you have hardwoods like oak and maple or softwoods such as pine and cedar is crucial. This knowledge helps you choose the right cleaning solutions and techniques to avoid damage. Additionally, wood furniture often features finishes like varnish, lacquer, or oil, which protect and enhance its appearance. Each finish has specific cleaning requirements, so testing with mineral spirits can help determine how to clean it properly.
You should also consider the condition of your furniture. Heavily soiled pieces may need more intensive cleaning than lightly soiled ones, and you must check for cracks or flaking finishes before you start. If the finish is damaged, it's better to hold off on cleaning to prevent further harm. Regular maintenance is important as it enhances the visual appeal of your wood furniture and preserves its integrity over time.
Lastly, remember to avoid harsh chemicals and abrasive cleaners. Opt for natural and mild cleaning solutions like mild dish soap or white vinegar to protect the wood and its finish. Prioritizing these factors ensures your furniture stays beautiful and well-maintained.
Importance of Regular Dusting
Why is regular dusting crucial for your wood furniture? Dusting is essential because it removes layers of dust and debris, keeping your furniture looking clean and inviting. When you dust, you eliminate unwanted particles like dirt, pollen, skin cells, and even insect waste that can accumulate over time. This not only enhances the appearance of your furniture but also prevents dust from scratching the surface, which can cause damage.
Moreover, regular dusting contributes to better air quality in your home. It minimizes the circulation of airborne particles that could affect respiratory health, especially if you or someone in your household suffers from allergies or asthma. By keeping surfaces clean, you also reduce the amount of dust that becomes airborne when disturbed. Additionally, reducing airborne particles through regular dusting can significantly benefit those with respiratory sensitivities.
Finally, consistent dusting helps preserve the wood finish. Dust mixed with moisture can lead to stains, warping, or even mildew growth. By maintaining a dust-free environment, you protect the natural beauty of your wood furniture and extend its lifespan. So, make regular dusting a part of your cleaning routine to keep your wood furniture in top shape!
Natural Cleaning Solutions Overview
To keep your wood furniture looking its best, using natural cleaning solutions is a smart choice. Not only are these solutions eco-friendly and safe for kids and pets, but they also effectively clean without harsh chemicals. Vinegar serves as a natural disinfectant and deodorizer, perfect for cutting through grime and restoring shine. Combine it with olive oil, a natural conditioner, to hydrate and polish your furniture. Lemon juice can act as a stain remover, adding a refreshing scent to your cleaning routine. Essential oils like lemon, lavender, and tea tree oil enhance your cleaners with pleasant fragrances and antibacterial properties. Regular maintenance practices, including avoiding direct sunlight, are crucial for prolonging the lifespan of your wood furniture.
You can easily create your own cleaners at home. For a versatile cleaner, mix 1 ½ cups of water with ¼ cup of white vinegar, 2 tablespoons of olive oil, and 20 drops of lemon essential oil. For a polishing solution, try 1 tablespoon of white vinegar mixed with 3 tablespoons of olive oil. Remember to test any solution on a small, inconspicuous area first to ensure it's safe for your specific wood finish. By using these natural options, you'll maintain your furniture's health and appearance effectively.
Effective Application Techniques
When cleaning wood furniture, using effective application techniques is key to achieving a polished finish without damaging the surface. Start by dusting with a soft microfiber cloth or feather duster. Always begin at the top and work your way down to prevent dust from settling on already cleaned areas. For intricate carvings, a soft-bristle brush or vacuum with a brush attachment works wonders.
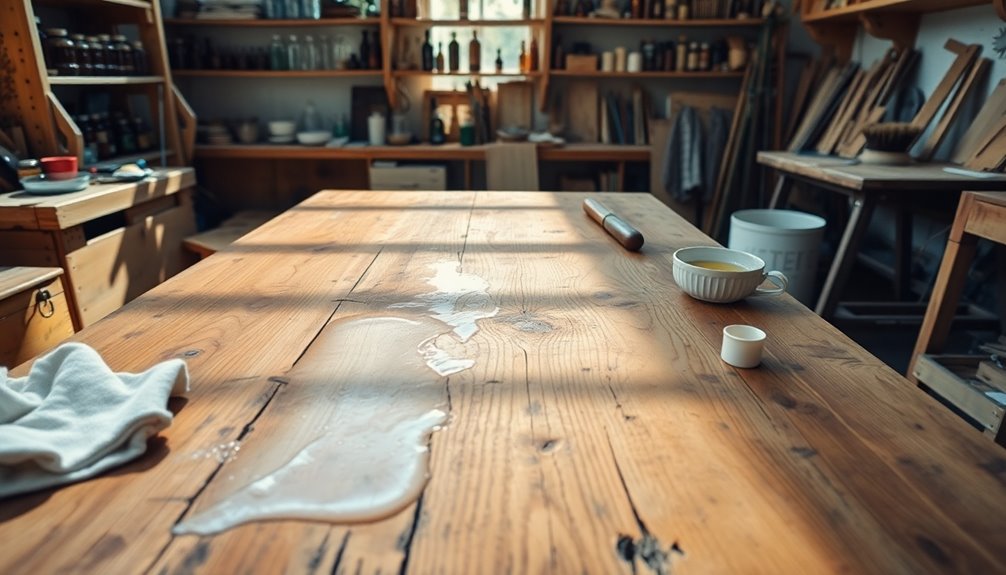
Next, prepare your natural cleaning solution, mixing equal parts white vinegar and water in a spray bottle. Shake it well to blend. Dip a soft cloth into the solution, wring it out until it's barely damp, and gently wipe the furniture, always following the wood grain. Avoid using excessive moisture, as this can damage the finish, so it's important to remember that excess water can lead to warping and discoloration of wood.
After wiping, use a clean, dry cloth to immediately remove any remaining moisture and prevent watermarks. Make sure to dry thoroughly, especially in corners where solution might collect. Finally, consider applying a wood polish or oil once a month using circular motions to enhance shine and protect the wood. Always test new solutions on a hidden spot first to ensure safety for your furniture.
Tackling Stubborn Stains
Stubborn stains on wood furniture can be frustrating, but with the right natural solutions, you can restore its beauty. Start with a vinegar solution by mixing equal parts water and white vinegar in a spray bottle. Lightly mist the stained area and wipe it with a soft cloth. This method effectively removes water spots and sticky residue.
For tougher stains, create a baking soda paste by mixing baking soda with water. Apply it to the stain and gently rub with a soft cloth or sponge. Let it sit for a few minutes before wiping off with a damp cloth. If needed, repeat this process.
You can also use mineral oil or a mixture of olive oil and vinegar. Douse a clean rag with mineral oil and scrub the stain, allowing it to penetrate for a while. Alternatively, smear mayonnaise on water stains and let it sit for 3-4 hours. Additionally, if the stain remains stubborn, consider using a stripping gel to effectively remove it before applying natural solutions.
If stains persist, consider lightly sanding the area with fine sandpaper, always sanding in the direction of the grain. This helps prepare the surface for further treatment, ensuring your wood furniture looks its best.
Polishing for Added Shine
Polishing wood furniture not only enhances its natural beauty but also protects it from wear and tear. To start, choose a wood polish—either commercial or homemade. For commercial polish, apply a small amount to a soft, lint-free cloth. Gently rub the cloth in long, straight strokes, always following the grain. Avoid circular motions to prevent swirl marks.
If you prefer a natural option, mix 1 cup of olive oil, ½ cup of lemon juice, and 1 teaspoon of white vinegar. Alternatively, combine ⅔ cup of beeswax with 3 cups of jojoba oil for a beeswax-based polish. Always test a small area first to ensure the polish won't damage the wood. Regular dusting is essential to start with a clean surface for effective polish adhesion.
When applying, fold your cloth for a firm grip, and use moderate pressure. Buff the surface in small sections, checking for streaks or unevenness along the way. For the final touch, use a separate clean cloth to remove any residue. This not only enhances shine but also keeps moisture at bay. Regular polishing keeps your furniture looking vibrant and helps maintain its longevity.
Maintaining Wood Furniture
Maintaining wood furniture is essential for preserving its beauty and durability. Start with daily dusting; use a soft microfiber cloth or feather duster to remove dust and debris. Always dust from the top down, ensuring you don't reintroduce dust to cleaned areas. Gently rub in the direction of the wood grain to avoid scratches, and use a soft-bristle brush for intricate carvings and crevices.
For deeper cleaning, prepare natural solutions by mixing equal parts water and white vinegar in a spray bottle. You can also combine 250ml water, 250ml vinegar, and 1 tbsp olive oil for a gentle cleaner. When cleaning, dip a soft cloth into your solution, wring it out until barely damp, and wipe the furniture, always following the wood grain. Regular maintenance is crucial to ensure the longevity of your furniture.
If you encounter stubborn stains, non-gel toothpaste can help with water stains, while a baking soda paste works for heat stains. For ink, use a cotton ball soaked in rubbing alcohol. Always remember to dry the surface immediately with a clean cloth to avoid moisture damage. Regular maintenance makes deep cleaning easier and keeps your furniture looking its best.
Protecting Against Environmental Damage
Protecting your wood furniture from environmental damage is crucial to maintaining its integrity and appearance. Start by shielding your outdoor pieces from moisture. Use waterproof covers or tarps to guard against rain and high humidity. Ensure proper drainage around your furniture to prevent water pooling, and always clean and dry your items before covering them to avoid mold and mildew. Secure covers with ties to withstand strong winds.
Next, be mindful of sun and heat exposure. Avoid placing your furniture in direct sunlight or near uncovered windows and vents. Rotate your furniture locations regularly to give them exposure to shaded areas. Consider using UV-resistant covers or protective finishes to prevent fading, and apply paint or sealants to enhance durability. Additionally, choosing naturally resistant woods can significantly enhance your furniture's ability to withstand the elements.
When it comes to wind and extreme weather, use durable, waterproof covers designed for outdoor use. Secure your furniture to prevent it from being moved by strong winds, and bring it indoors during severe weather conditions.
Lastly, maintain structural integrity by applying clear sealants like polyurethane to protect against moisture and UV rays. Regularly inspect your furniture for signs of damage, addressing any issues promptly to ensure longevity.
Choosing Safe Cleaning Products
Keeping your wood furniture in great shape goes beyond just protecting it from environmental damage; it also involves using the right cleaning products. When choosing cleaners, look for biodegradable formulations that are water-based or soy-based. These options avoid harsh chemicals, making them safer for both you and your furniture. Ensure the products are free from solvents, caustic substances, and flammable materials.
Opt for non-damaging formulas that work on all types of wood surfaces, whether modern or antique. You want a cleaner that doesn't leave a film or residue and won't dry out or damage the wood. Effective cleaning action is key, so select products that can tackle dust, dirt, grease, and stubborn stains without harshness. Additionally, consider using products that are suitable for daily or deep cleaning to ensure thorough maintenance of your wood surfaces.
Finally, consider user and eco-friendly practices. Look for products recognized by environmental programs like the US EPA's Safer Choice or USDA's BioPreferred Program. These options are safe for greywater and septic systems and eliminate hazmat shipping concerns. Always remember to use masks and gloves when needed, ensuring a safe cleaning experience while caring for your wood furniture.
Tips for Long-lasting Care
To ensure your wood furniture stands the test of time, it's essential to adopt a few long-lasting care practices. Start by protecting your furniture from environmental factors. Keep it away from heating and cooling vents to prevent warping. Use curtains or blinds to shield it from direct sunlight, which can cause fading. Maintaining a humidity level of 40 to 45 percent is crucial—consider using a humidifier in dry air and a dehumidifier or air conditioner in humid conditions. Consistent humidity control can significantly enhance the longevity of your wood pieces.
Regular cleaning is key, too. Dust your furniture with a soft, lint-free cloth or feather duster to avoid scratches. Wipe it down weekly with a damp microfiber cloth, and clean deeper with a mild dish soap solution. Always dry the wood immediately after cleaning to prevent moisture damage.
To protect surfaces, use coasters, hot pads, and placemats to prevent scratches and spills. Tighten loose screws periodically and inspect for signs of wear. Lastly, use a soft-bristle brush for intricate details and avoid harsh cleaners. By implementing these practices, you'll help your wood furniture maintain its beauty and integrity for years to come.
Frequently Asked Questions
Can I Use Furniture Polish Instead of Natural Cleaners?
You can definitely use furniture polish instead of natural cleaners, but it depends on your preference and the wood type. Furniture polish often provides a quick shine and protective layer, making it convenient. However, natural cleaners are eco-friendly and safer for homes with kids and pets. If you choose polish, ensure it's suitable for your specific wood finish to avoid damage. Ultimately, it's about what works best for you and your furniture.
How Often Should I Clean My Wood Furniture?
You should clean your wood furniture regularly to keep it looking its best. Dust it at least once a week, and if it's in a high-traffic area, consider doing it every few days. For deep cleaning, aim for every couple of weeks, especially for frequently used pieces. Remember to inspect for signs of wear and treat any issues promptly to maintain its beauty and integrity over time.
Is It Safe to Use Essential Oils on Wood Furniture?
Yes, it's safe to use essential oils on wood furniture, but you should always take precautions. Dilute the oils with a carrier oil to prevent any damage and conduct a patch test first. Oils like lemon, orange, and cedarwood not only clean but also protect your furniture. Just remember to apply them using a soft cloth, following the wood grain, and avoid soaking the surface to keep it in great condition.
What Should I Do if My Wood Furniture Has Scratches?
If your wood furniture has scratches, you've got some effective options. For minor scratches, try applying vegetable oil or peanut butter; let it sit, then buff it out. For deeper scratches, sand the area smooth and use wood filler. You can also mix white vinegar and olive oil, applying it to the scratch and buffing afterward. Always test any solution on an inconspicuous area first to avoid discoloration.
Can I Use Water to Clean Antique Wood Furniture?
You shouldn't use water to clean antique wood furniture, as it can damage the finish and lead to swelling or buckling. If you do choose to use a damp cloth, make sure it's barely wet. Always test any cleaning solution on an inconspicuous area first to ensure it won't harm the wood. Instead, consider safer alternatives like oil soap or vinegar mixed with water for effective cleaning without the risk.
Conclusion
In conclusion, keeping your wood furniture clean and well-maintained doesn't have to be complicated. By dusting regularly and using natural cleaning solutions, you can preserve its beauty and integrity. Remember to tackle any stubborn stains promptly and protect your pieces from environmental damage. With a few simple tips and safe products, you'll ensure your furniture looks great for years to come. Embrace these practices, and enjoy the timeless elegance of your wood furnishings!
Interior Design
How to Protect Sofa From Cat
You can safeguard your sofa from cat damage with simple strategies, but what innovative tips will truly keep your furniture intact?
To protect your sofa from your cat, start by using durable, washable covers and placing scratching posts nearby. Regularly trim your cat's nails to reduce damage. Choose tightly woven fabrics like microfiber that resist scratching, and avoid delicate materials like silk. You can also apply protective films and use Sticky Paws tape on vulnerable areas. Lastly, inspect your sofa frequently for wear and keep it clean to discourage scratching. By employing these methods, you can keep your sofa safe while creating a cozy space for your cat. There's so much more you can discover to enhance your efforts!
Key Takeaways
- Use durable, washable sofa covers to shield against cat claws and reduce damage.
- Install transparent Clawguard Furniture Shields on vulnerable areas to prevent scratching.
- Place scratching posts nearby to redirect your cat's scratching behavior away from the sofa.
- Regularly trim your cat's nails every two to three weeks to minimize potential damage.
- Apply Sticky Paws double-sided tape on furniture surfaces to deter scratching effectively.
Introduction
Taking care of your sofa goes beyond just protecting it from scratches; it also involves regular inspections and proper cleaning techniques. By understanding fabric-specific care and knowing how to treat cat urine stains, you can keep your furniture looking fresh and new. Let's explore some practical steps to ensure your sofa remains safe from your feline friend.
Routine Upholstery Inspections
To keep your sofa in top shape and protect it from your cat's antics, regular upholstery inspections are essential. Schedule routine inspections every few weeks to catch any signs of wear and tear, like frayed threads or loose seams, before they worsen. Pay special attention to scratching marks or areas where your cat frequently scratches; these spots might need additional protective measures to prevent damage.
Assess the fabric type of your sofa, as tightly woven materials tend to resist scratching better than delicate fabrics. If you notice any scratches or signs of wear, consider installing furniture guards or using slipcovers to shield your upholstery. Also, keep an eye out for debris or hair buildup on your furniture. This can attract your cat and encourage scratching behavior, so it's crucial to maintain a clean environment.
Fabric-Specific Cleaning Techniques
When it comes to preserving your sofa's appearance and longevity, understanding fabric-specific cleaning techniques is crucial. For microfiber sofas, a simple mixture of water and vinegar in a 1:1 ratio works wonders for removing stains. This fabric is moisture-resistant, making maintenance easy. Velvet fabric, on the other hand, requires a gentler touch; use a soft brush to lift dirt and a damp cloth to dab at stains, being careful not to over-saturate, which can ruin its texture.
If you have tightly woven fabrics, a vacuum with an upholstery attachment is your best bet for removing cat hair without causing damage. For stains, spot cleaning with a mild detergent should do the trick. When dealing with leather upholstery, wipe it down with a damp cloth and condition it regularly to prevent drying and cracking. Remember that while leather is less prone to scratching, it can still suffer from excessive moisture.
Finally, with delicate fabrics like silk or linen, always test any cleaning solution on a hidden area first. These materials are sensitive to harsh chemicals, and you want to avoid any discoloration or damage.
Treating Cat Urine Stains
Even with the best cleaning techniques, accidents can happen, especially when you have a cat. Cat urine stains can quickly become a nightmare if not treated promptly, leading to lasting odors and damage to your upholstery. The first step is to act fast. Blot the affected area with paper towels to absorb as much cat urine as possible before applying any cleaning solution.
For effective removal, use enzymatic cleaners. These specialized products break down urine proteins and eliminate odors rather than just masking them. Follow the instructions on the cleaner for the best results. If you encounter stubborn stains, a natural alternative is a mixture of vinegar and water. Just remember to rinse the area thoroughly afterward to prevent any residue from forming.
Before applying any cleaning solution, always test it on a small, inconspicuous area of your upholstery to ensure it won't cause discoloration or damage. By addressing the stains quickly and effectively, you can protect your sofa and maintain a fresh-smelling home, keeping your feline friend and your furniture happy.
Sofa Guarding Techniques
To keep your sofa safe from your cat's claws, you'll want to explore effective furniture scratch resistance techniques. Consider using decorative fabric protection solutions that not only guard against scratches but also enhance your living space. Additionally, opting for durable fabrics can provide long-lasting protection while maintaining the look you love.
Furniture Scratch Resistance Techniques
Protecting your sofa from cat scratches can be achieved through several effective techniques. Start by using durable, washable sofa covers that can withstand cat claws, acting as reliable furniture protectors from cats. You can also install transparent Clawguard Furniture Shields on your sofa's corners and sides for an effective barrier against scratching, all while keeping your furniture's aesthetic intact.
To redirect your cat's natural scratching behavior, place scratching posts near the sofa. This encourages them to use these designated areas instead of your furniture. Additionally, applying Sticky Paws double-sided tape on your sofa creates a deterrent that discourages scratching due to its sticky sensation. It's easy to remove without leaving any residue.
Regularly trimming your cat's nails every two to three weeks can significantly reduce the potential for furniture damage. Consider using nail caps as a temporary, non-invasive solution to further protect your sofa. These simple yet effective furniture scratch resistance techniques will ensure your sofa remains in pristine condition while keeping your feline friend happy.
Decorative Fabric Protection Solutions
Incorporating decorative fabric protection solutions can significantly enhance your sofa's resilience against cat scratches while adding style to your living space. One effective method is utilizing sofa covers made from durable, tightly woven fabrics. These covers not only shield your furniture from scratching but also come in various colors and patterns, allowing you to maintain an appealing aesthetic.
Another option is applying transparent protective films, like the FTSTC Anti Cat Scratch Furniture Protector, to vulnerable areas of your sofa. These films create an invisible barrier against claw damage without compromising the overall look of your furniture. Additionally, consider using cat scratch guards or placing scratching posts nearby to redirect your cat's scratching behavior, minimizing wear and tear.
Regularly trimming your cat's nails can also play a crucial role in protecting your sofa. Shorter nails are less likely to puncture or snag decorative fabric. By combining these protective measures with the right choice of materials, you can create a stylish yet resilient environment that keeps both your furniture and feline friends happy.
Using Durable Fabrics
Choosing durable fabrics is essential for safeguarding your sofa from cat damage. Opt for tightly woven materials like microfiber or canvas; these are more resistant to claw penetration than delicate fabrics such as silk or velvet. When selecting your upholstery, consider darker colors or patterns that can better camouflage wear and tear caused by scratching and daily use.
Durable synthetic materials, like polyester blends, are another great option. They're designed to withstand scratching and are easier to clean than traditional fabrics. Additionally, you should look for upholstery treated with stain or scratch-resistant coatings that enhance durability and protect against claw damage.
It's also crucial to check the fabric's rub count—aim for at least 30,000 rubs. This number indicates the durability and resistance to wear from both pets and regular use, ensuring your sofa remains in great shape despite your cat's playful antics. By focusing on these durable fabrics, you'll create a more pet-friendly environment while keeping your furniture looking its best.
Upholstery Seam Reinforcement
When reinforcing upholstery seams, you should also consider frame stability, as a sturdy base helps maintain the integrity of your sofa. Leather conditioning treatments can protect the surface while cushioning with eco-friendly materials provides comfort without compromising durability. These elements work together to ensure your sofa withstands your cat's antics while looking great.
Frame Stability Concerns
A strong upholstery seam is crucial for maintaining your sofa's frame stability, especially when you have a curious cat around. Cats love to scratch, and if your upholstery seams aren't reinforced, they can quickly become a weak point in your furniture. To enhance the durability of your sofa, use heavy-duty thread and double stitching for your seams. This extra reinforcement will help withstand potential claw damage.
Consider adding a layer of fabric or canvas underneath the upholstery to provide additional strength and support. This layer can act as a buffer, further preventing your cat's claws from reaching the frame. Don't forget to use upholstery adhesive to secure any loose seams—this ensures there are no gaps where claws can penetrate and cause damage.
Regularly inspect your sofa's seams for any signs of wear and tear. Catching these issues early allows for timely repairs, preventing further damage and preserving your sofa's integrity. When reupholstering, choose tightly woven fabrics that resist snagging and tearing. By prioritizing seam stability, you can protect your furniture and keep your sofa looking great for years to come.
Leather Conditioning Treatments
Maintaining your leather sofa involves more than just regular cleaning; conditioning treatments play a vital role in keeping it looking its best. Leather conditioning treatments help maintain the flexibility and suppleness of your leather upholstery, preventing unsightly cracks and wear that can result from your cat's scratching. By regularly applying a high-quality leather conditioner, you create a protective barrier that makes it harder for cat claws to penetrate the surface, ultimately protecting your furniture.
You should condition your leather every 6 to 12 months, depending on usage and exposure to elements, for optimal protection against wear and tear. Additionally, consider reinforcing the upholstery seams with durable thread and adhesives. This not only enhances the strength of your leather furniture but also makes it more resistant to tearing and damage.
Utilizing a protective leather spray can provide an extra layer of defense against scratches and stains, prolonging the life of your upholstery. By investing in these leather conditioning treatments and seam reinforcements, you can ensure your sofa remains a beautiful centerpiece in your home, despite the antics of your feline friend.
Cushioning With Eco-Friendly Materials
Durability and sustainability come together when you choose eco-friendly materials for your sofa upholstery. By opting for fabrics like organic cotton or hemp, you create a durable surface that can withstand your cat's scratching. These materials not only reduce your environmental impact but also provide comfort and resilience.
To further enhance the durability of your upholstery, reinforce seams with extra stitching or use heavy-duty thread. This extra support can prevent fraying and tearing caused by feline claws, ensuring your sofa lasts longer. Additionally, consider upholstery treated with stain-resistant coatings. This will protect your sofa from spills and pet-related messes while maintaining an eco-conscious approach.
Incorporating recycled polyester into your upholstery can offer a resilient option that stands up to daily wear and tear, blending comfort with sustainability. Choosing tightly woven fabrics, like canvas or microfiber, minimizes the risk of claws snagging, providing a softer surface that both you and your pets will enjoy. With these eco-friendly strategies, you can create a stylish, pet-friendly space that doesn't compromise on durability. Moreover, selecting woods like oak for your furniture frame can further ensure longevity and strength against wear from pets.
Custom Fabric Choices
Choosing the right fabric for your sofa can make a significant difference in protecting it from your cat's claws. Opt for tightly woven fabrics like microfiber or canvas; they're more resistant to claw penetration and can withstand regular scratching. These durable upholstery choices hold up better against feline antics, ensuring your sofa remains intact.
Consider velvet as well. Its looped threads don't just provide a luxurious feel; they also make it less appealing for cats to scratch compared to delicate materials. Avoid fabrics like silk or thin cotton, which can easily snag and tear under a cat's claws. You want something that looks good but can also handle wear and tear.
Darker colored fabrics or those with patterns are smart choices too, as they can camouflage any minor damage caused by scratching, making it less noticeable. When selecting fabric, prioritize options that balance durability and aesthetic appeal. Investing in the right upholstery will not only protect your sofa but also provide a comfortable, stylish space for you and your furry friend. With the right fabric choices, you can enjoy your sofa while minimizing the impact of your cat's playful behavior.
Ongoing Fabric Maintenance Tips
To keep your sofa looking its best and protect it from your cat's antics, regular maintenance is key. Start by vacuuming your sofa regularly to remove cat hair and debris. This simple step helps maintain its appearance and prolongs its lifespan. If your cat leaves a mark, don't wait—spot clean any stains immediately with a mild detergent and a soft cloth. This prevents stains from setting in and becoming tougher to remove later on.
Consider applying a fabric protector spray designed for upholstery. This creates a barrier against spills and stains, enhancing the fabric's resistance to damage. It's a proactive measure that can save you a lot of trouble down the line. Additionally, schedule routine professional cleaning every 6 to 12 months. This deep clean removes embedded dirt and allergens, keeping your sofa fresh and inviting.
Finally, make it a habit to inspect the fabric regularly for signs of wear or damage. By addressing any issues promptly, you can ensure timely repairs or treatments that extend the life of your upholstery. Consistent care will keep your sofa in top shape, even with a playful feline around!
Conclusion
Protecting your sofa from your cat's playful tendencies requires a combination of proactive measures and regular maintenance. Start by investing in scratch guards for furniture, which can effectively redirect your cat's scratching behavior to designated surfaces. Placing scratching posts near your cat's favorite lounging areas will help satisfy their natural scratching instincts while keeping your sofa safe.
Regular nail trimming also plays a crucial role. Aim to trim your cat's nails every two to three weeks to significantly reduce potential damage. Additionally, consider applying double-sided tape or adhesive protectors on your sofa. The sticky sensation is unappealing to cats, acting as a deterrent against scratching.
When choosing your sofa, opt for durable fabrics like tightly woven materials or microfiber. These fabrics can withstand claw damage much better than delicate materials, which are more prone to tearing. By combining these strategies—using scratching posts, applying double-sided tape, and selecting durable fabrics—you'll create a harmonious living environment for both you and your feline friend. With consistent effort, you'll successfully protect your sofa while allowing your cat to express their playful nature.
Frequently Asked Questions
How Do I Protect My Sofa From My Cat?
To protect your sofa, start by using durable, washable furniture covers that can handle scratches and spills. Place scratching posts nearby to redirect your cat's natural instincts and keep them from targeting the sofa. Applying double-sided tape can make the fabric less appealing for scratching. Regularly trim your cat's nails every couple of weeks to reduce damage. With these steps, you'll maintain your sofa's appearance while keeping your cat entertained.
How to Make Your Sofa Cat Proof?
To make your sofa cat-proof, start by choosing durable fabrics like microfiber or tightly woven materials that resist claw damage. Add scratching posts nearby to redirect your cat's natural behavior. Use double-sided tape on the sofa to create an unappealing surface for scratching. You might also invest in furniture shields or protective covers. Regularly trim your cat's nails to minimize damage and keep your furniture looking great.
How Do I Keep Cats off My Couch?
To keep cats off your couch, start by placing scratching posts nearby to redirect their energy. Use double-sided tape or sticky paw protectors on the couch to deter them from scratching. Consider protective furniture shields that won't alter your couch's look. Regularly trim your cat's nails to minimize damage, and try natural deterrents like citrus-scented sprays to keep them at bay. These strategies can help maintain your couch's integrity while satisfying your cat's instincts.
How Do I Protect My Fabric Couch From Pets?
To protect your fabric couch from pets, you can use durable, washable sofa covers that fit snugly and look great. Consider installing transparent furniture guards on vulnerable areas to shield against scratches. You might want to apply double-sided tape, as the sticky sensation can deter pets from scratching. Regularly trimming your pet's nails and providing designated scratching posts nearby can also help redirect their natural behavior away from your couch.
Interior Design
Master Mehndi: Your Creative Journey Begins
Get ready to embark on a vibrant journey into Mehndi artistry, where each stroke leads to endless creativity and inspiration awaits at every turn.
Your journey into the world of Mehndi begins with exploring its rich cultural heritage. You will require essential tools such as a quality henna cone and fine-tipped applicators to create intricate designs. Master the basic strokes of lines, dots, and curves as they form the basis of your artistry. Experiment with a range of patterns, from traditional paisleys to floral motifs, and let your creativity shine. Establish clear practice goals and track your progress for motivation. By sharing your creations with a community of fellow enthusiasts, you will celebrate your development. Keep pushing forward, and you will uncover new and exciting ways to improve your Mehndi skills.
Key Takeaways
- Start your Mehndi journey with quality tools, including fine-tipped henna cones and essential henna powder for precision and smooth application.
- Master basic strokes like lines, dots, and curves to build a solid foundation for intricate designs.
- Explore various design patterns, such as florals and geometric shapes, to enhance creativity and artistic expression.
- Utilize online tutorials and workshops for structured learning and practice regularly on paper to refine your skills.
- Share your progress on social media and connect with fellow enthusiasts to gain inspiration and foster a supportive community.
Understanding Mehndi Basics
When you immerse yourself in the world of Mehndi, you'll quickly discover it's more than just body art; it's a vibrant expression of culture and tradition. This ancient practice, rooted in South Asia, often shines during weddings and festivals, symbolizing joy and celebration.
Each design carries deep meanings, reflecting the rich heritage of various communities. You'll encounter different types of henna, with natural henna being the preferred choice for authentic designs.
As you explore the intricacies of Mehndi, you'll appreciate its role in rituals and social gatherings, connecting you to generations past. This art form invites you to express your creativity while honoring cultural identity, making every stroke a personal and meaningful journey.
Essential Tools for Application
To achieve beautiful Mehndi designs, having the right tools is essential. Start with a quality henna cone, as it's vital for precise application. Opt for fine-tipped cones to create intricate patterns and detailed lines.
A henna cone holder will enhance your control, giving you the confidence to experiment. Don't forget quality henna powder mixed with essential oils for a smooth paste that flows easily. Keep an old cloth handy to wipe excess henna and prevent smudging.
Consider incorporating tools like Jewelry Shape Templates and Mehndi Frames to boost your creativity. Finally, investing in a Mandala Dotting Tools Set can help you achieve accuracy and elevate your designs to the next level.
Happy creating!
Mastering Basic Strokes
Mastering basic strokes is the foundation of creating stunning Mehndi designs. You'll want to start with a pen to get comfortable with the movements before using a henna cone. Focus on essential strokes like lines, dots, and curves, as they form the basis of your designs. Here's a quick reference to inspire your practice:
Stroke Type | Emotion Evoked |
---|---|
Dots | Playfulness |
Curves | Elegance |
Lines | Strength |
Experimenting with strokes and shapes like circles and triangles will enhance your repertoire. As you practice and refine these basic elements, you'll find your creativity blossoming, allowing you to craft unique Mehndi masterpieces that reflect your personal style.
Creative Learning Resources
Exploring creative learning resources can greatly enhance your Mehndi skills and inspire your artistry. Start by utilizing online tutorials and video workshops that offer step-by-step guidance tailored for beginners. These resources provide valuable tips and techniques to refine your skills.
Additionally, consider joining virtual workshops led by experienced artists; they often provide structured lessons and essential supplies. You can also invest in beginner kits that include design templates and quality henna.
Don't forget to practice regularly using blank paper or handkerchiefs to master your strokes. Sharing your progress on social media can help you connect with fellow enthusiasts, receive feedback, and gather inspiration for your next design.
Exploring Design Patterns
Design patterns in Mehndi can transform your artistry, offering limitless possibilities for creativity. By exploring various designs, you'll discover the intricate beauty of floral motifs, geometric shapes, and traditional patterns.
Start by experimenting with classic paisleys and mandalas, then mix in modern twists to make your work unique. Don't hesitate to draw inspiration from nature, architecture, and cultural symbols; each can spark new ideas.
As you develop your style, focus on balancing complex designs with open spaces, creating a visually appealing flow. Remember, combining different patterns can lead to stunning results, so let your imagination run wild.
The more you experiment, the more confident you'll become in your Mehndi artistry, paving the way for your creative journey ahead.
Practicing With Purpose
Practicing with intention is key to elevating your Mehndi skills. Set clear goals for each practice session—whether it's mastering a specific stroke or creating a complete design.
Focus on the fundamentals first; practice lines, dots, and curves until they feel effortless. Use reference images to inspire your work and challenge yourself with new patterns.
Keep a practice journal to track your progress and note areas for improvement. Aim for consistency; regular practice, even in short bursts, yields better results than infrequent, lengthy sessions.
Don't shy away from making mistakes; they're part of the learning process. Remember, every stroke you perfect brings you closer to your Mehndi mastery, so stay committed and enjoy the journey!
Sharing Your Mehndi Journey
As you progress on your Mehndi journey, sharing your experiences can be just as rewarding as the practice itself. By documenting your growth through photos and stories, you not only track your development but also inspire others.
Social media platforms are perfect for showcasing your designs, connecting with fellow enthusiasts, and receiving constructive feedback. Consider joining online groups or local workshops where you can exchange tips and tricks.
Sharing your journey fosters a sense of community and encourages you to keep honing your skills. Don't hesitate to ask questions or seek advice; everyone started as a beginner.
Celebrate your successes, learn from challenges, and remember that each design tells a unique story of your artistic evolution. Embrace the process, knowing that every experiment, whether it leads to triumph or setback, contributes to your growth as an artist. By pushing boundaries and embracing new perspectives, you unlock your creativity in ways that elevate your work to new heights. Stay curious, seek inspiration, and remember that each moment is an opportunity to nurture your vision. As you continue to unlock your creativity, you’ll discover that the journey itself is a reflection of your commitment to growth and self-expression. Each brushstroke, sketch, or concept is a testament to the evolution of your craft, pushing you ever closer to your fullest potential. Never underestimate the power of perseverance and curiosity, as they are the keys that will continue to unlock your creativity in ways you never imagined.
Frequently Asked Questions
What Are the Best Occasions to Wear Mehndi Designs?
You can wear Mehndi designs at weddings, festivals, and cultural celebrations. Engaging in rituals like Eid, Diwali, or personal milestones enhances your experience, showcasing your creativity and connecting you with your heritage and community.
How Long Does Mehndi Typically Last on the Skin?
Mehndi typically lasts about one to three weeks on your skin, depending on factors like skin type, aftercare, and how often you wash your hands. Enjoy its beauty while it fades gradually over time!
Can Mehndi Be Applied on Sensitive Skin?
Yes, you can apply mehndi on sensitive skin, but it's essential to do a patch test first. Look for natural henna products without additives, and consider consulting a professional if you have concerns.
What Should I Do if My Mehndi Color Is Too Light?
If your Mehndi color's too light, don't panic! You can enhance it by applying lemon juice or sugar to darken the stain. Remember, patience is key; let it develop for a richer hue over time.
Are There Any Aftercare Tips for Maintaining Mehndi Designs?
To maintain your Mehndi designs, keep the area dry and avoid scrubbing. Apply a light oil or balm to nourish the henna. Avoid water exposure for the first 24 hours for ideal color retention.
Conclusion
As you wrap up your Mehndi journey, remember that each design you create is a blend of tradition and personal expression. While the delicate curves of your patterns echo ancient rituals, the colors and styles reflect your unique voice. Embrace the challenges and celebrate the victories, for every stroke brings you closer to mastery. So, whether you're adorning a friend's hand or your own, let your creativity flow. Your Mehndi adventure is just beginning, and the possibilities are endless!
-
Beauty and Grooming1 month ago
Embrace Natural Glow With Bronzer-Free Accelerators
-
Beauty and Grooming1 month ago
Discover Top Outdoor Tanning Lotions Today
-
Vetted2 months ago
15 Best Affordable Sustainable Fashion Brands You Need to Know About in 2025
-
Fashion Trends2 months ago
Fall 2025 Fashion Trends: Be Ahead of the Curve!
-
Interior Design2 weeks ago
Mylar vs. Foil Balloons: The Ultimate Showdown
-
Beauty and Grooming1 month ago
Unlock Flawless Tanning With Skin Prep
-
Interior Design1 month ago
Create Your Dream Cottagecore Home Office Now!
-
Vetted2 months ago
15 Best Women's Fashion Trends of 2025 You Need to Know About