Connect with us

Interior Design

How to Secure Furniture to Wall

You can easily prevent tipping hazards by learning how to secure furniture to the wall—discover the essential steps to ensure your home’s safety.

Published

on

secure furniture to wall

To secure furniture to the wall, start by moving the furniture close to the wall. Use a stud finder to locate wall studs, as these are crucial for stability. Mark the stud locations and then drill pilot holes. Attach L-brackets or specialized anchors to both the wall and furniture, using screws at least two inches long for a strong hold. After installation, gently pull or push the furniture to test its stability. Don't forget to check your anchors regularly for signs of wear. There's plenty more to learn about ensuring your home is safe and secure.

Key Takeaways

  • Use a stud finder to locate wall studs for secure anchoring of furniture to prevent tip-overs.
  • Mark the desired positions on the wall and furniture with a pencil for accurate alignment.
  • Drill pilot holes in both the wall and furniture, using appropriate anchors to ensure stability.
  • Employ strong anchoring devices like L-brackets or specialized kits to maximize safety and prevent accidents.
  • Regularly inspect and tighten anchors to maintain stability and ensure long-term safety.

Importance of Securing Furniture

securing furniture prevents accidents

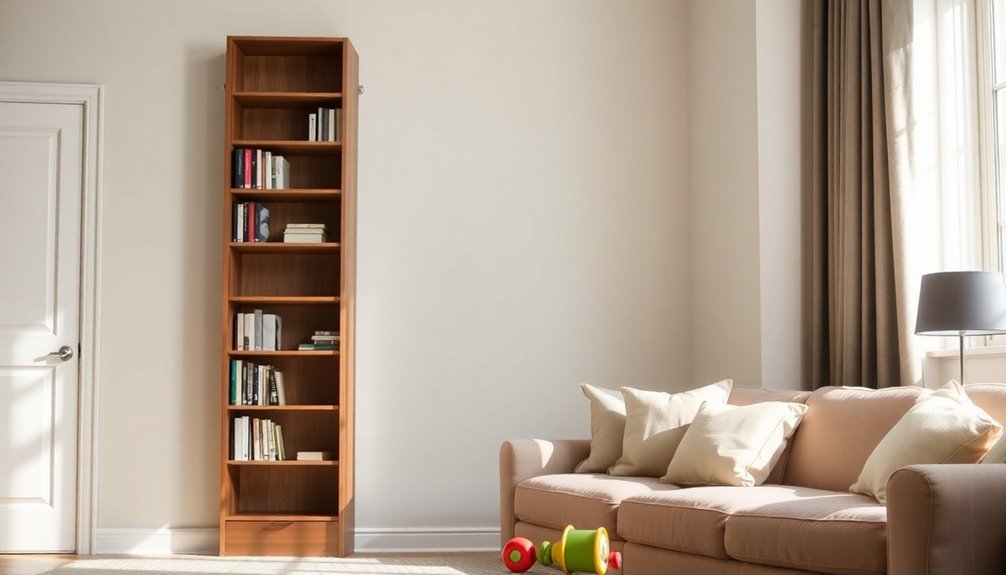
When it comes to keeping your home safe, securing furniture to the wall is essential. Furniture tip-overs can seriously injure or kill both children and adults, with someone rushing to the ER every hour due to these incidents. These accidents can happen with any type of furniture, regardless of its height, weight, or cost, making it crucial to take preventive measures. Small children are particularly at risk as they may climb on furniture, while older adults may not move quickly enough to avoid a falling piece.

The recent STURDY Act highlights the importance of stability by requiring certain dressers and furniture to pass safety tests and come with anchors. While this law applies to specific items, it doesn't cover all furniture types or protect older children and adults. Therefore, it's vital to secure all furniture, including TVs and appliances, to prevent tip-over accidents. Annually, there are over 11,000 injuries reported in the U.S. due to furniture tip-overs, emphasizing the need for vigilance in home safety. Regularly checking the anchors for security and ensuring all furniture is anchored can provide peace of mind. By taking these steps, you can significantly reduce the risk of serious injuries or fatalities in your home, creating a safer environment for everyone.

Tools Needed for Installation
installation requires specific tools

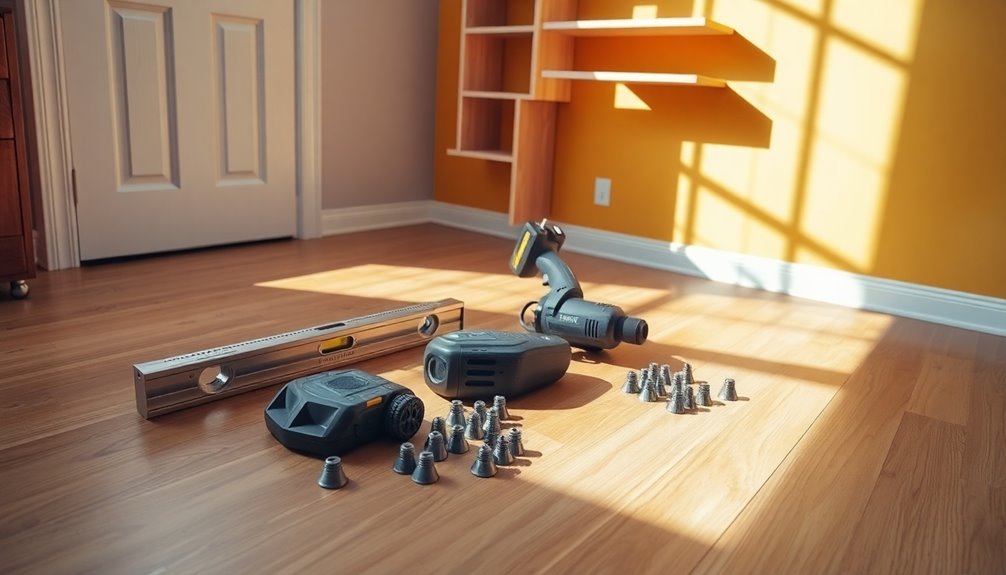
Securing furniture to the wall requires the right tools to ensure a safe and effective installation. First, you'll need a stud finder to locate the wall studs, as this is crucial for a secure attachment. A pencil is handy for marking both the wall and the furniture, while a tape measure ensures precision in your measurements. A drill with an appropriate drill bit is essential to create pilot holes, and a hammer may be necessary for tapping in nails or wall anchors.

For drilling and screwing, a power drill is vital, along with various drill bits to accommodate different wall types like drywall or masonry. Choose wood screws or drywall screws based on your wall material, and have a screwdriver or screwdriver bit ready for tightening. Additionally, using furniture anchors is essential for preventing tip-over incidents and ensuring the safety of your home.

You'll also need furniture straps, L-brackets, or wall anchors designed specifically for this purpose. Don't forget safety gear like safety glasses and a dust mask to protect yourself. Finally, a level helps ensure your furniture is straight, while spackling can patch any holes if needed. With these tools, you'll be well-equipped for a secure installation.

Locating Wall Studs Effectively
finding wall studs accurately

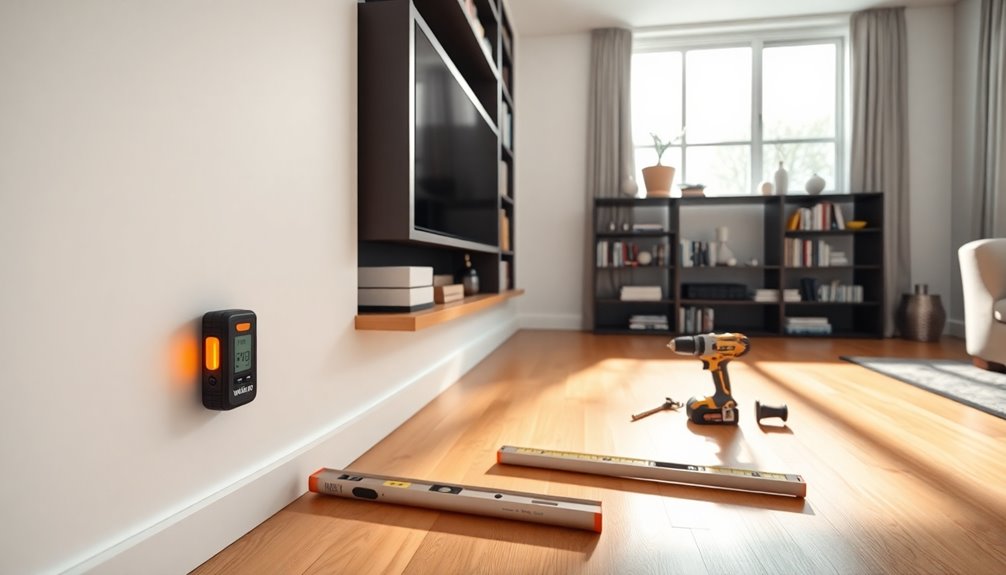
Locating wall studs effectively is crucial for securely anchoring your furniture. One reliable method is to use electrical outlets and switches as indicators. Most outlets are mounted to the side of a stud, so removing the switch plate can reveal the nail securing the box. From there, measure about 16 inches to find the next stud.

Another approach involves utilizing magnets. You can use a strong magnet to locate metal screws or nails holding the drywall to the studs. Simply attach the magnet to tape or dental floss and drag it across the wall. When it sticks, you've found a stud. Many stud finders also provide visual or audible signals when a stud is found, which can enhance your detection accuracy.

Advertisement

You can also measure from corners and trim. Generally, studs are spaced 16 inches apart, starting from the corner of the room. Check the baseboard for nail depressions to confirm stud locations.

Lastly, tapping the wall can help, too. Gently knock on the surface; a muffled sound indicates a stud, while a hollow sound means there's none. Drilling small holes near the baseboard can further verify stud presence. Using these methods, you'll effectively locate your studs for secure furniture anchoring.

Installing Wall Brackets
mounting wall support brackets

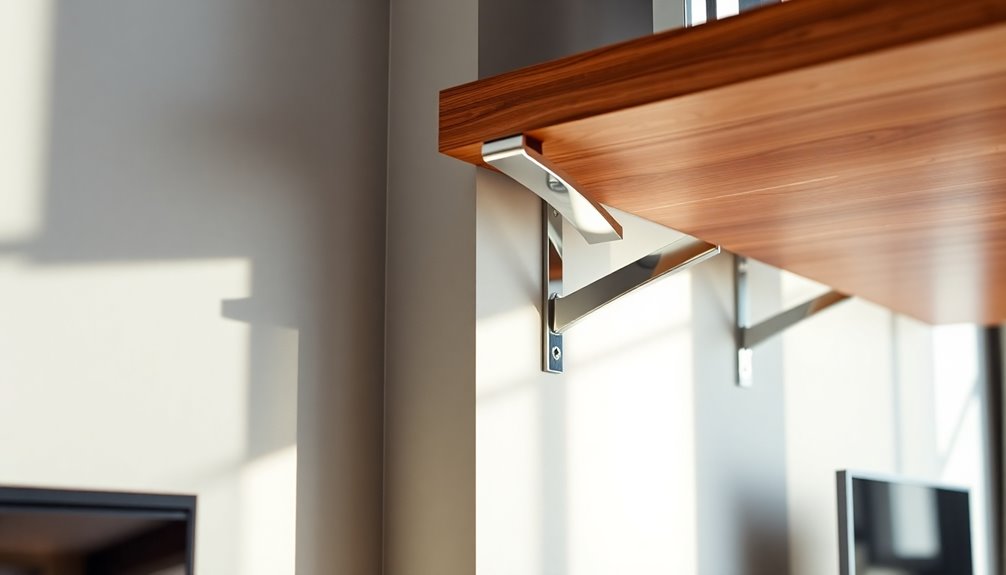
Installing wall brackets is a straightforward process that can significantly enhance the safety of your furniture. First, choose the right bracket based on your furniture type and wall material. Make sure it can support the weight of your furniture and consider moisture-resistant options like galvanized steel if needed. You might opt for L-brackets, adjustable spacer fixings, or anti-tip straps, depending on your specific requirements. Galvanized Steel Brackets are particularly useful in areas with high humidity, like bathrooms or kitchens, as they prevent rust and ensure durability.

Next, position the wall bracket just below the top of the furniture. Use a pencil to mark the wall along the stud for accurate placement. Align the bracket vertically or horizontally based on the furniture design, leaving a small gap for maneuvering.

When it's time to secure the bracket, use a 3/32 inch drill bit to create pilot holes in the studs. Attach the brackets with two long screws each, ensuring they're tightly secured into the studs for maximum stability. If you're not screwing into a stud, remember to use wall plugs or anchors. After installing, double-check that each screw is tight by testing them with a screwdriver, ensuring everything is securely in place before moving on.

Securing Brackets to Furniture
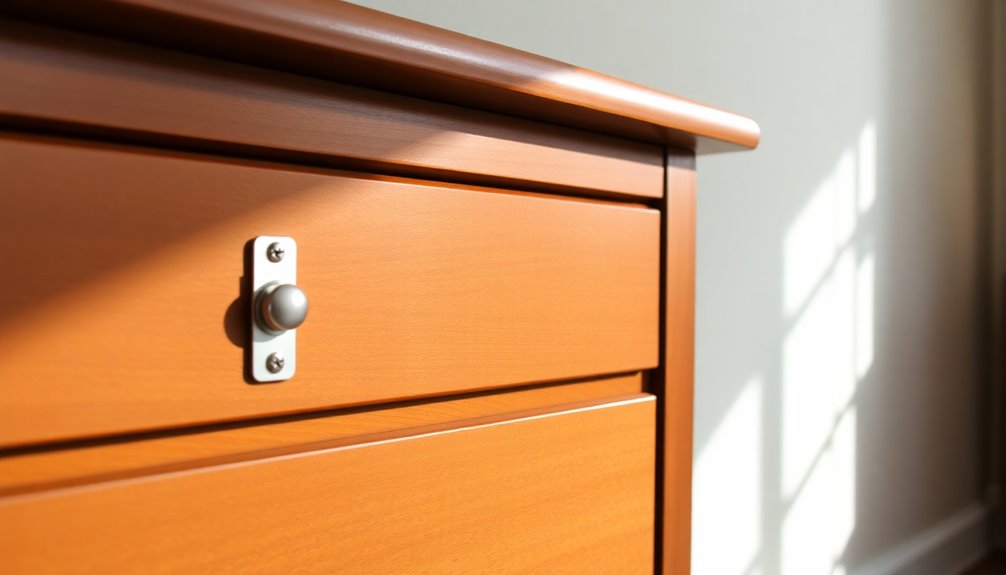
securing brackets to furniture

When attaching brackets to your furniture, it's crucial to find the right location for maximum stability and support. Always aim to fasten brackets to solid wood rather than the thin back panel. Install the brackets as high as possible on the furniture, and remember, they don't need to be centered; securing them to a thick piece of wood is more important. Before you start, mark where the bracket will go using the holes in the bracket as a guide.

Next, prepare your furniture by pre-drilling holes to prevent splitting. Use a drill with the right bit to create these precise holes, ensuring they align with the bracket's holes. If your furniture is larger, consider using multiple brackets for added stability. Before securing everything, confirm that the furniture is level.

Advertisement

Now, it's time to secure the brackets. Use wood screws that fit the material and thickness of your furniture. Tighten each screw by hand with a screwdriver to ensure they're secure. Lastly, double-check that the brackets are firmly attached, and test the furniture's stability to ensure it won't tip over. This way, you'll achieve a safe, stable setup. Additionally, securing furniture with brackets can significantly reduce the risk of furniture tip-overs, which is especially important for households with children.

Types of Furniture Anchors
furniture anchoring solutions available

After securing the brackets to your furniture, it's important to choose the right type of anchor to ensure maximum stability. One popular option is furniture straps, which connect a wall bracket to your furniture using adjustable straps or cables. They're easy to install and can be adjusted after installation. Straps like the Simple Mount Furniture Anti-Tip Kit have been tested for strength, ensuring your furniture stays put. Additionally, many of these furniture stabilizer kits are designed with child safety features to protect your little ones from potential hazards.

L-brackets are another choice, fastening to both the wall and the top of the furniture. However, they can be trickier to install and need to be secured to a wall stud for stability. Be cautious if your wall has baseboards, as they may affect how closely the furniture sits against the wall.

If you're anchoring specific items like TVs, consider mounts designed for that purpose. These typically come with the necessary hardware and are essential for preventing heavy items from tipping over. Lastly, specialized anchor kits, like the Booda Brand Furniture Anchors, offer general use options that can withstand significant force, ensuring your furniture remains secure in any situation.

Step-by-Step Installation Process
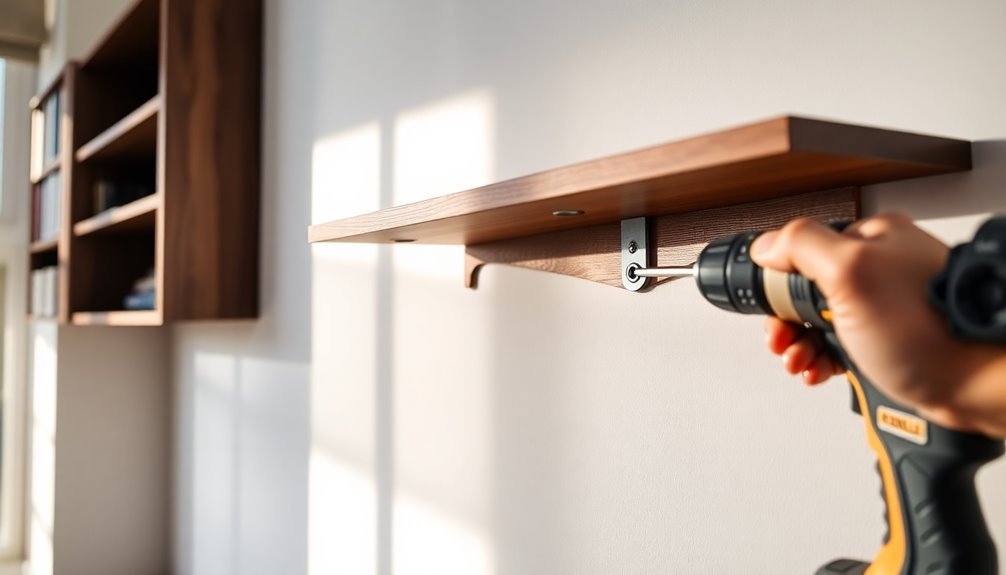
installation process explained clearly

Securing your furniture to the wall might seem daunting, but breaking the process into manageable steps makes it straightforward. Start by moving the furniture against the wall and marking its top with a pencil. Ensure your marks on the wall align with the furniture and follow any manufacturer's instructions for bracket placement. Use a stud finder to locate wall studs and mark their outlines. Then, measure and mark where the anchors will go.

Next, drill pilot holes at your marked locations with a drill bit slightly smaller than the screws in your anchor kit. Insert the wall anchors securely, especially if using toggle bolts. If you're drilling into studs, use wood screws at least 2 inches long for a strong hold. For drywall, choose appropriate anchors. Make sure to use a stud finder to enhance the support of your installation.

Now, drill pilot holes in the solid wood at the top of your furniture and attach brackets or straps using screws. Make sure they're aligned and level. Finally, align your furniture with the wall-mounted brackets, securing it with the provided screws. Tighten everything down and test the stability by gently pulling or pushing the furniture. Regularly inspect the anchors to ensure they're still tight.

Advertisement

Safety Precautions to Consider

safety measures to follow

Taking safety precautions is essential to prevent furniture tip-overs, which can lead to serious injuries or even fatalities, especially among children and the elderly. Every hour, someone ends up in the ER due to injuries from tipped-over furniture, TVs, or appliances. That's why it's crucial to anchor all your furniture, regardless of its weight or height.

When choosing anchors, steer clear of plastic cable ties or zip ties, as they can break down over time. Opt for L brackets, angle braces, or products designed for earthquake safety, ensuring they're suited for your specific furniture and wall material. It's important to install anchors into solid wood rather than MDF or particle board to avoid pulling out screws. Additionally, remember to use two restraints for each furniture piece to maximize safety.

Use a stud finder to locate wall studs for the strongest attachment points, and if you're working with drywall without studs, employ toggle bolts. Regularly check your furniture restraints for any slack, and remove heavy items before anchoring. Always follow the manufacturer's instructions for anchor placement, and be vigilant about recalls, replacing any unsafe anchors immediately. Your diligence in these precautions can significantly enhance your home's safety.

Best Practices for Stability
stability best practices outlined

Implementing the right anchoring techniques can significantly enhance the stability of your furniture and prevent it from tipping over. Start by choosing anchoring devices specifically designed for the task. Avoid unreliable options like plastic cable ties or drywall anchors. Instead, opt for L brackets, steel cable style anchors, or heavy-duty furniture straps with metal attachments, ensuring they contain no plastic parts. When installing anchors, always secure them into solid wood on the back or top of the furniture. Use a stud finder to locate wall studs and attach the anchor directly to one. Never use plastic drywall anchors or toggles. Drill pilot holes in both the furniture and wall for a secure fit, using screws that are at least 2 inches long. Additionally, ensure that you pre-drill a hole in the furniture for the L bracket to achieve a more stable connection. For optimal stability, use at least two restraints per piece of furniture, especially for wider or stacked items. Secure the top piece to the base and then to the wall. Tighten the restraints at the end of the installation process to eliminate any slack. Regularly check that the restraints remain tight, and test each screw by hand to confirm a secure connection.

When to Hire a Professional
when to hire professionals

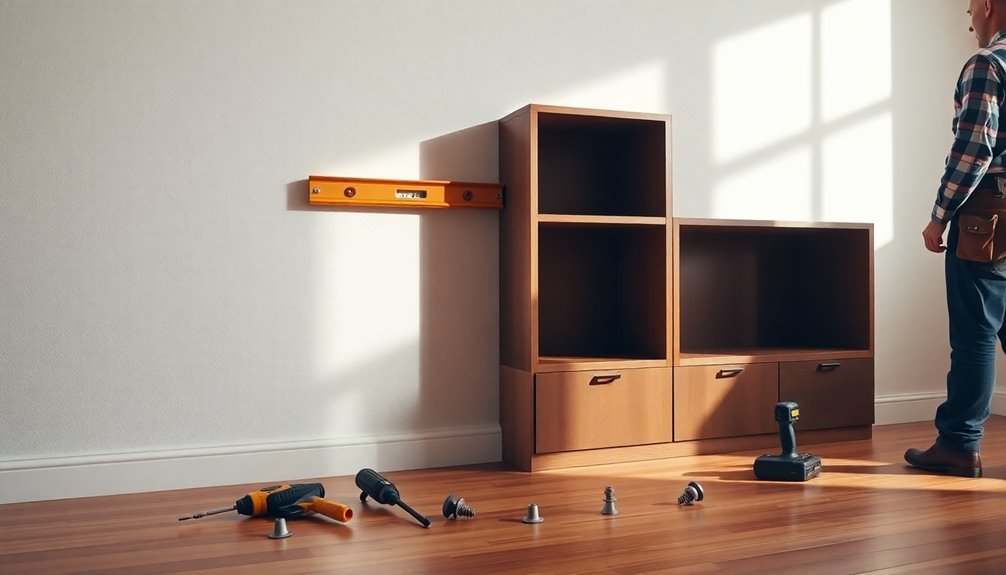
When it comes to anchoring furniture, knowing when to hire a professional can make all the difference in ensuring safety and stability. If you're dealing with complex tasks like anchoring to masonry or plaster walls, it's wise to seek expert help. These tasks often require specialized tools and skills that most DIY enthusiasts don't possess. Additionally, professionals possess extensive knowledge of various furniture assembly techniques, ensuring each piece is securely anchored.

If you lack the necessary tools, hiring a professional is a smart choice. They come equipped with everything needed, from power tools to specialized screws, saving you the hassle and expense of purchasing equipment you might only use once. Proper tool selection minimizes the risk of damaging both your furniture and walls.

Safety is another significant concern. If you're uncomfortable with climbing ladders or handling heavy items, it's best to let professionals take over. They're trained in safety procedures, reducing the risk of injuries like strains or accidents from improperly anchored furniture.

Lastly, consider the time and effort involved. Professionals can complete the job quickly and efficiently, allowing you to focus on other important tasks. If you want peace of mind and a job well done, hiring a professional is the way to go.

Advertisement

Frequently Asked Questions

What Types of Furniture Should I Secure to the Wall?

You should secure tall and heavy furniture like dressers, bookshelves, and armoires to the wall, as they're prone to tipping. TV stands and entertainment centers, especially when loaded with electronics, also need anchoring. If you have small children or pets, any freestanding cabinets or furniture near play areas are high-risk and should be secured. Remember, furniture with narrow bases is more likely to tip, so take extra precautions with those pieces.

How Can I Hide the Mounting Hardware After Installation?

To hide mounting hardware after installation, you can choose discreet locations for your brackets and straps. Use shorter straps to minimize visibility and adjust them tightly. Install L brackets flush against the wall for a cleaner look. Consider using wall putty to fill any holes and paint over them for a seamless finish. Finally, ensure everything is level, so the hardware blends in with your decor, maintaining an aesthetically pleasing environment.

Can I Use Adhesive Strips Instead of Brackets?

You can use adhesive strips instead of brackets for lighter items, but keep in mind their limitations. They're great for quick applications without drilling, but they generally can't support heavy furniture. Make sure the surface is clean and dry for optimal adhesion. If you have tall or heavy pieces, it's safer to combine adhesive strips with brackets for added security. Always check weight limits to ensure your furniture stays secure.

How Often Should I Check the Stability of Secured Furniture?

You should check the stability of secured furniture at least once a year, ideally between October and February before the wet season. After significant events like heavy rain or earthquakes, it's essential to inspect the anchors to ensure they're still secure. Regularly look for loose screws or signs of wear, and if you notice any issues, tighten the anchors or consult a professional to maintain safety and stability.

Are There Specific Brands Recommended for Furniture Anchoring Kits?

When choosing furniture anchoring kits, consider brands like Simple Mount, Booda, and QuakeHOLD. Simple Mount's anti-tip kit is strong and easy to install, while Booda offers a budget-friendly option that works well on both wooden and metal studs. QuakeHOLD is top-rated for its resistance against significant forces. Avoid Lomily and Qdos, as they failed in tests. Prioritize safety with reliable brands to ensure your furniture stays secure.

Advertisement

Conclusion

Securing your furniture to the wall is a simple yet vital step to ensure safety in your home. By following the steps outlined, you can prevent accidents and protect your loved ones. Remember to use the right tools, locate wall studs, and double-check your installations for maximum stability. If you ever feel unsure, don't hesitate to reach out to a professional for help. Your peace of mind is worth it! Stay safe and enjoy your well-secured space.

Advertisement

Interior Design

How to Clean Mold off Furniture

You can effectively remove mold from furniture using simple techniques, but do you know the crucial steps to prevent its return?

Published

on

remove mold from furniture

Cleaning mold off furniture is straightforward if you follow a few essential steps. Start by identifying the mold type and gathering safety gear like gloves and goggles. For wood, mix equal parts vinegar and water, and gently scrub the affected area. Allow the solution to sit for about 30 minutes before drying thoroughly. For upholstery, remove visible mold with a brush or HEPA vacuum, then clean with a bleach solution or vinegar mix. Always ensure good ventilation during the process, and address moisture sources to prevent recurrence. There's plenty more you can learn to keep your furniture mold-free.

Key Takeaways

  • Identify and assess the extent of mold growth on furniture before starting the cleaning process.
  • Wear safety gear, including gloves, goggles, and a mask, to protect against mold spores.
  • Use a mixture of equal parts vinegar and water or mild detergent to clean affected surfaces.
  • Scrub gently with a soft brush, allowing the solution to sit for 30 minutes before drying thoroughly.
  • Maintain low humidity levels and ensure good airflow to prevent future mold growth on furniture.

Identifying Mold and Preparing

mold identification and preparation

Identifying mold on your furniture and preparing for its removal is crucial for maintaining a healthy living environment. You'll want to recognize the different types of mold that can appear. Black mold, with its slimy, greenish-black appearance, often lurks on damp upholstery and poses serious health threats. Aspergillus can be gray, white, green, or black, thriving in high humidity. Penicillium usually appears bluish-green or white and grows rapidly in water-damaged areas. Alternaria has a dark green or brown velvety texture, while Cladosporium shows dark green or black spots.

Understanding the factors contributing to mold growth is essential. Excessive moisture from water damage or high humidity can create a perfect breeding ground, especially with poor air circulation and insufficient sunlight. Remember, organic materials like wood and fabric can absorb moisture, providing a feast for mold spores, which thrive in temperatures between 60 and 80 degrees Fahrenheit. Additionally, even if mold is not visible, hidden mold can still be present and may require testing to ensure complete removal.

Before tackling mold removal, assess the severity of the infestation. Collect samples for testing to identify the type and risk level. Isolate the affected furniture to prevent spores from spreading, and ensure your environment is less favorable for mold growth. Taking these steps will prepare you for effective mold removal.

Essential Tools and Materials

necessary equipment and supplies

When tackling mold removal from furniture, having the right tools and materials is essential for effective cleaning and safety. Start by gathering safety gear: wear safety goggles to shield your eyes from mold spores, rubber gloves to protect your hands, and a face mask with a HEPA filter to prevent inhalation. Don't forget protective clothing to keep your skin safe. Mold can cause health issues, so it's crucial to take these precautions seriously.

Next, prepare your cleaning solutions. A mild dish detergent mixed with water works well for gentle cleaning. Alternatively, use a commercial fungicide or mold-killing cleaner according to the instructions. For tougher jobs, a bleach solution (1 cup of bleach per gallon of water) or undiluted white vinegar can be effective.

For cleaning tools, keep microfiber cloths handy for wiping away mold residue, and use a scrub brush or sponge to apply your cleaning solutions. A vacuum with a HEPA filter is crucial for capturing loose spores. Lastly, you might need sandpaper or a power sander for stubborn mold and stains.

Advertisement

Don't forget miscellaneous supplies like a bucket for mixing solutions, a spray bottle for application, and sealed plastic bags for disposing of vacuumed materials.

Cleaning Wood Furniture

maintain and care for furniture

Often, mold can invade wood furniture, leaving unsightly patches and potentially damaging the finish. To tackle this issue effectively, start by ensuring your workspace is well-ventilated. Open windows and doors, and wear protective gear like gloves, a mask, and safety goggles to shield yourself from mold spores and cleaning solutions.

If possible, move the affected furniture outdoors or to a well-ventilated area. Inspect the furniture to gauge how deep the mold has penetrated. For surface mold, mix equal parts of water and white vinegar in a spray bottle for a natural cleaning solution. For stubborn patches, you can use 3% hydrogen peroxide directly on the mold or a mild detergent solution. Timely action is crucial to prevent extensive damage to mold-affected items.

Apply your chosen cleaning solution with a soft-bristled brush or sponge, being careful not to oversaturate the wood. Let the solution sit for about 30 minutes, then gently scrub the moldy areas. Wipe away the residue with a damp cloth and dry the furniture thoroughly. If mold persists, repeat the process. Finally, ensure the wood is completely dry and consider applying a mold inhibitor to prevent future growth.

Removing Mold From Upholstery

mold removal from upholstery

Mold on upholstery can be a frustrating problem, but you can tackle it effectively with the right approach. First, inspect the extent of the mold growth to decide if you need professional help. Protect yourself by wearing gloves, a mask, and safety goggles, and ensure the area is well-ventilated by opening windows and doors. Identify and fix any moisture sources to prevent further growth.

Start removing visible mold by using a brush or small broom to loosen patches, then vacuum the area thoroughly with a HEPA filter. Remember to discard the vacuum bag or clean the canister afterward to avoid spreading spores. For cleaning, mix a solution of 8 oz bleach, 2 oz laundry detergent, and 1 gallon of water, or use equal parts water and white vinegar as a natural antifungal. Lightly spray the solution onto the affected area without soaking it. Mold thrives on dirt and moisture, so keeping your upholstery clean and dry is essential to prevention.

After cleaning, allow the fabric to air dry in a well-ventilated space or direct sunlight. Rinse the area with a clean, damp cloth to remove any residue, and regularly check your upholstery to prevent future mold growth.

Advertisement

Alternative Cleaning Techniques

eco friendly cleaning methods

There are several effective alternative cleaning techniques you can use to tackle mold on furniture. One of the simplest methods involves using white vinegar. Fill a spray bottle with undiluted vinegar or a mix of equal parts vinegar and water, spray it on the moldy area, let it sit for at least an hour, then wipe with a damp cloth and allow it to air dry.

Baking soda also works wonders. Mix a teaspoon with water to create a paste, apply it to the area with a soft brush, let it sit for 15-20 minutes, and rinse with a damp cloth. If you have carbonated water, spray it on the affected area, scrub with a clean cloth, and wipe it away.

For a stronger solution, mix hydrogen peroxide with water in a spray bottle, spray it on the mold, let it sit for about 10 minutes, then wipe it clean. Rubbing alcohol can be used similarly—mix equal parts with water, apply, and wipe after a few minutes. It is important to note that mold thrives in areas with high humidity, so ensure you address any underlying moisture issues in addition to cleaning.

Lastly, consider eco-friendly options like MOLD*OFF or a clove oil and salt paste, applying them according to their instructions for effective results.

Ensuring Safety During Cleaning

cleaning safety measures implemented

When tackling mold on furniture, ensuring your safety should be a top priority. Start by isolating the cleanup area to keep unprotected individuals away. Close off the space to prevent mold spores from spreading to other rooms, using plastic sheets or tarps if necessary. Make sure the area is well-ventilated, but avoid running fans that could disperse spores.

Next, equip yourself properly. Wear a NIOSH-approved N95 respirator or a full-face respirator for extensive work. Use non-latex, vinyl, or nitrile gloves to protect your skin, and wear safety goggles to shield your eyes from spores. Protective footwear and clothing, like Tyvek® or Tychem® garments, are essential depending on the severity of the mold. Proper protective apparel is crucial to minimize exposure during cleanup activities.

Avoid direct contact with mold by not touching it with bare hands. Be careful when inspecting behind wall coverings to minimize spore release. Use a HEPA vacuum to remove loose spores before cleaning, ensuring that your methods don't disperse spores into the air. Lastly, dispose of any damaged materials in sealed plastic bags to prevent further contamination.

Advertisement

Preventing Future Mold Growth

mold growth prevention strategies

Preventing future mold growth is essential for maintaining a healthy living environment. Start by keeping humidity levels between 30% and 50%. You can use dehumidifiers and regularly monitor humidity, especially in damp areas like bathrooms and kitchens. Avoid placing furniture in basements or other high-humidity zones.

Air circulation plays a crucial role too. Move furniture away from walls to promote airflow, and consider using fans to increase circulation around pieces. Open windows and doors to let fresh air in, and ensure good ventilation in closets and basements.

Address water damage promptly by wiping up spills immediately and repairing any leaks. Regularly inspect your furniture for signs of moisture and use waterproof coatings on wooden pieces to protect against dampness. This is particularly important as poor air circulation can trap moisture, fostering mold growth.

Regular cleaning and maintenance are key. Wipe down wooden furniture with a dry cloth to remove dust and potential mold spores. Inspect surfaces for mold and apply varnish or sealant to create a moisture barrier. Lastly, expose furniture to direct sunlight when possible to help dry out any moisture and inhibit mold growth.

Maintaining a Healthy Environment

sustaining a clean ecosystem

Maintaining a healthy environment is crucial for both your well-being and the longevity of your furniture. Start by isolating the cleanup area when you detect mold. Close off the space to prevent mold spores from spreading, using plastic sheets or tarps if necessary. Ensure good ventilation in this area to minimize spore dispersion, and keep it free of debris to avoid further contamination.

Protect yourself by wearing appropriate gear. Use a respirator or face mask to avoid inhaling spores, along with gloves to prevent skin contact. Safety glasses will shield your eyes, and long-sleeved clothing will cover your skin. Also, consider protective footwear to keep spores from sticking to your shoes. Additionally, using dehumidifiers to lower humidity levels can significantly help in the prevention of mold growth.

Be cautious during the cleanup. Avoid direct contact with mold and refrain from breathing in spores. When checking behind wallpaper or other coverings, do so gently to prevent releasing more spores. Use a HEPA vacuum for cleaning surfaces, as it helps contain the spores instead of scattering them.

Advertisement

Finally, dispose of any damaged materials properly and never paint over mold. Instead, clean surfaces thoroughly and allow them to air dry completely. This approach helps maintain a healthier living environment.

Frequently Asked Questions

Can I Use Essential Oils to Clean Mold?

Yes, you can use essential oils to clean mold. Oils like tea tree, clove bud, and eucalyptus are effective due to their antimicrobial properties. You can mix them with vinegar or water in a spray bottle for easy application. Just apply a few drops directly to the moldy area or create a scrubbing paste with baking soda. Remember to wear protective gear and ensure the area is dry afterward to prevent mold from returning.

How Do I Know if Mold Is Toxic?

To know if mold is toxic, look for dark spots, a fuzzy texture, and water stains, which may indicate growth. Pay attention to strong musty odors in damp areas; they often signal mold presence. Monitor your health for symptoms like coughing, sneezing, or fatigue, as these can result from exposure. If you suspect mold, it's best to consult a professional for proper identification and advice on handling it safely.

Is It Safe to Clean Mold While Pregnant?

It's not safe to clean mold while you're pregnant. Increased exposure to mold spores can lead to respiratory issues and heightened allergic reactions, which can be more severe during pregnancy. Your immune system is compromised, making you more susceptible to infections. Additionally, mold exposure might pose risks to fetal development. It's best to avoid direct contact and hire professionals for mold remediation to ensure your safety and that of your baby.

Can I Wash Moldy Furniture in a Washing Machine?

You can't wash moldy furniture in a washing machine. Furniture is typically too large and made of materials that don't withstand the machine's cycles. Instead, use gentle cleaning products and soft cloths to wipe surfaces. For upholstery, vacuum and spot clean stains. Always check the manufacturer's instructions and ensure proper ventilation while cleaning. Taking these precautions helps prevent damage and keeps your furniture looking its best.

Advertisement

What Should I Do if Mold Returns After Cleaning?

If mold returns after cleaning, you need to take immediate action. First, identify the source of moisture and fix any leaks or spills. Increase air circulation by using fans and moving furniture. Keep humidity levels between 30% and 50% with dehumidifiers. Regularly inspect for dampness and clean surfaces to remove dust. Finally, consider applying moisture-resistant coatings to protect your furniture from future mold growth. Stay vigilant to prevent recurrence!

Conclusion

In conclusion, tackling mold on your furniture doesn't have to be overwhelming. By identifying the mold, gathering the right tools, and following the proper cleaning techniques, you can restore your pieces effectively. Remember to prioritize safety and take preventive measures to keep mold from returning. With a little effort, you can maintain a healthy environment in your home. Don't let mold take over—take action and enjoy your clean, fresh living space!

Continue Reading

Interior Design

How to Get Ink Out of Sofa

Act quickly to remove ink from your sofa with these essential tips and techniques that can save your furniture from permanent stains.

Published

on

remove ink from upholstery

To get ink out of your sofa, act quickly. First, gently blot the stain with a clean cloth to absorb excess ink—don't rub, as that spreads it further. For water-based inks, mix dish soap and water; for permanent ink, use rubbing alcohol on a cloth and dab the area. Always test solutions on an inconspicuous spot first. After treatment, rinse the area with clean water, and dry it gently to avoid damage. Regular maintenance can help prevent future stains. Keep going to discover more effective cleaning methods and tips tailored to your sofa's fabric!

Key Takeaways

  • Blot the ink stain immediately with a clean cloth to absorb excess ink and prevent spreading.
  • Identify the fabric cleaning code; use water-based solutions for "W" code fabrics or solvent-based cleaners for "S" code fabrics.
  • Apply rubbing alcohol or a dish soap and water mixture gently to the stain using a dabbing motion, avoiding scrubbing.
  • Rinse the area with clean water after treatment to remove any residue, and dry with a towel to prevent water damage.
  • Consider using a stain-resistant treatment on upholstery to protect against future stains and simplify cleaning.

Introduction

introduction to upcoming content

When ink stains hit your sofa, knowing how to tackle them can save your furniture. You'll want to consider routine spot cleaning, use material-specific techniques, and address those pesky ink and wine stains quickly. Let's explore the best methods to keep your sofa looking fresh and clean.

Routine Spot Cleaning

Ink stains on your sofa can be a real eyesore, but routine spot cleaning can help you tackle them effectively. The key to successful ink stain removal is acting quickly. The sooner you address the stain, the better your chances of getting rid of it without damaging your sofa fabric. Always check the cleaning code on your sofa before diving in; it'll guide you on which cleaning solutions are safe to use.

Gather your cleaning supplies, including rubbing alcohol, white vinegar, dish soap, and clean cloths. Begin by gently blotting the ink stain with a clean cloth to absorb as much ink as possible. Avoid rubbing, as this can push the ink deeper into the fabric. Instead, apply a small amount of your chosen cleaning solution to a clean cloth and continue to blot the area until the stain lifts. Remember, it's essential to test any cleaning solution on an inconspicuous area first to ensure it won't damage or discolor your sofa fabric. By incorporating these routine cleaning practices, you can keep your sofa looking fresh and free of unsightly ink stains.

Material-Specific Cleaning Techniques

Choosing the right cleaning technique for your sofa's fabric is crucial for effectively removing ink stains without causing damage. Different fabrics require distinct methods. If your sofa has a "W" code fabric, you can safely use water-based solutions. For these, a mixture of dish soap and vinegar works well to lift water-based ink stains, ensuring you don't harm the delicate material.

However, if your sofa has an "S" code fabric, you'll need to turn to solvent-based cleaners like rubbing alcohol. This powerful solution penetrates deep into the fabric to dissolve ink stains from pens or markers. Always test any cleaning solution on an inconspicuous area first, as this will help you confirm that it won't cause discoloration or damage.

Advertisement

For leather sofas, be cautious. Traditional cleaning methods can harm the leather's surface, so it's best to use specialized products designed for leather cleaning. By being mindful of your specific sofa fabric and using the right techniques, you can effectively remove ink stains while preserving the integrity of your furniture.

Treating Ink and Wine Stains

Stains can be a homeowner's worst nightmare, especially when they come from ink or wine. Quick action is crucial to prevent ink and wine stains from setting into your sofa. For dry ink stains, you can use the rubbing alcohol method. Start by testing any cleaning solution on an inconspicuous area to ensure it won't damage the fabric. If it's safe, apply a small amount of rubbing alcohol to a clean cloth or paper towel and gently blot the stain. Continue blotting until the stain starts to lift.

For wine stains, a vinegar solution can work wonders. Mix equal parts of dish soap, white vinegar, and water. Apply this mixture onto the stain using a clean cloth, and again, blot until the stain is removed. Regardless of the stain type, remember that patience is key. Blotting gently is essential to avoid spreading the stain further. With these methods, you can effectively tackle ink and wine stains, keeping your sofa looking fresh and prolonging its life. Regular maintenance and prompt treatment will save you from the stress of stubborn stains in the future.

Stain-Resistant Fabric Treatments

stain resistant fabric solutions available

When it comes to keeping your sofa looking great, stain-resistant fabric treatments are essential. These treatments not only protect against spills but also minimize friction, helping to prevent scratches and prolong the life of your upholstery. By investing in a sofa with these features, you'll make maintenance much simpler and enhance the overall durability of your furniture.

Scratch-Resistant Materials

Often, homeowners find themselves dealing with unexpected spills on their sofas, making the choice of scratch-resistant materials crucial. When selecting upholstery fabrics, you should consider options that incorporate advanced fiber technologies. These materials create a protective barrier against stains and damage while ensuring comfort and aesthetics.

Stain-resistant fabric treatments, such as those featuring Teflon or Scotchgard, can significantly reduce the absorption of liquids and ink. This makes cleaning up ink stains easier, allowing you to act quickly before they set in. Choosing upholstery made from synthetic fibers like polyester or nylon often results in greater durability and scratch resistance compared to natural fabrics.

Advertisement

Regular maintenance and the application of fabric protectors can further prolong the life of your scratch-resistant materials. By doing so, you'll enable easy wipe-downs and prevent deeper stains from forming. Investing in these materials not only enhances the longevity of your sofa but also simplifies your cleaning routine. With the right choices, you can enjoy a stylish and resilient sofa that stands up to everyday wear and tear while making ink stain cleanup a breeze. Additionally, utilizing energy-efficient technology can also contribute to creating a more sustainable home environment.

Protective Fabric for Spills

Regularly investing in stain-resistant fabric treatments can make a significant difference in how well your sofa withstands spills. These treatments create a protective barrier that helps repel both water-based and oil-based stains, making it easier to wipe away potential messes before they penetrate the fabric. Whether it's ink from a pen or a splash of sauce, having this protection reduces the likelihood of permanent damage.

To maintain the effectiveness of these stain-resistant treatments, you should consider regular application, especially after professional cleaning. This ensures that your sofa continues to look great and resist dirt and grime buildup. Many of these treatments are non-toxic, making them safe for various fabric types, including cotton and polyester blends.

Incorporating stain-resistant fabric treatments into your furniture care routine will help extend the life of your upholstery, giving you peace of mind when it comes to spills. By taking these proactive steps, you'll significantly reduce the stress and hassle of dealing with unexpected messes, allowing you to enjoy your sofa without worry.

Minimize Friction on Fabric

To effectively minimize friction on fabric while tackling ink stains, it's crucial to use gentle blotting techniques instead of rubbing. Rubbing can spread the ink and damage the fabric fibers, making the situation worse. Instead, you should blot the ink stain with a clean cloth or paper towel, applying light pressure to absorb as much ink as possible.

Advertisement

Employing stain-resistant fabric treatments is another great way to create a protective barrier against spills. When you regularly apply protective sprays containing silicone or fluoropolymer, you help repel liquids, preventing ink from absorbing into the fabric. However, always remember to test any stain-resistant treatment on an inconspicuous area first to ensure it's compatible and won't cause discoloration.

Maintaining the integrity of stain-resistant fabrics is essential. Regularly clean them with appropriate cleaning solutions to ensure the protective barrier remains effective. By taking these steps, you'll not only tackle current ink stains more effectively but also prevent future stains from becoming a problem. With the right techniques and treatments, your sofa can stay looking its best, no matter what spills come your way.

Upholstery Fabric Care Tips

upholstery fabric maintenance guidelines

Taking care of your upholstery is essential to keep it looking great and lasting longer. You'll want to pay attention to fabric integrity, use proper leather conditioning techniques, and follow cozy fabric maintenance tips. By staying proactive, you can enjoy your furniture for years to come. Additionally, incorporating natural materials like wood can enhance the overall aesthetic of your space while providing durability.

Fabric Integrity Concerns

Maintaining your sofa's fabric integrity is crucial for keeping it looking fresh and inviting. Before you attempt any stain removal, always check the cleaning code of your upholstery. This ensures the methods you choose won't damage the fabric. When tackling stains, use gentle soap and a stain remover that's safe for your fabric type. Remember to blot the area instead of rubbing it; this prevents fraying and pilling.

Regularly vacuuming your sofa and performing maintenance cleaning can significantly reduce the chances of stains setting in. If you're trying a new cleaning solution, test it on a hidden area first to check for any potential discoloration or damage. This precaution helps protect your upholstery from unexpected results. Additionally, keeping an eye out for signs of bed bug infestations can help you maintain your sofa's overall condition.

After cleaning, consider applying fabric protectants. They create a barrier against future stains while preserving the fabric's original texture and appearance. By following these tips, you can keep your sofa looking its best and extend its lifespan. Prioritizing fabric integrity means your sofa will remain a welcoming centerpiece in your living space for years to come.

Advertisement

Leather Conditioning Techniques

Caring for your upholstery goes beyond just fabric; leather also requires attention to stay in top shape. Regular maintenance is key, so aim to apply a high-quality leather conditioner every 6-12 months. This helps maintain the softness of the leather and prevents cracking, which can lead to irreversible damage.

Before applying the conditioner, take a soft, damp cloth and wipe down the leather surfaces. This cleaning step is crucial as it removes dust and dirt that can hinder the absorption of the conditioner. When trying a new leather care product, always test it on an inconspicuous area first. This ensures compatibility with your specific leather type and prevents any adverse reactions.

Avoid using harsh chemicals or abrasive materials during cleaning, as they can cause permanent damage to the leather's finish. Lastly, be mindful of where you store your leather furniture. Keep it away from direct sunlight and heat sources to prevent fading and drying out, which can compromise its integrity. By following these leather conditioning techniques, you'll keep your upholstery looking great for years to come. Additionally, regular cleaning with water-based solutions can help maintain the leather's appearance without damaging its surface.

Cozy Fabric Maintenance Tips

To keep your upholstery looking its best, regular maintenance is essential. Start by regularly checking the cleaning codes on your sofa. This helps you determine the appropriate cleaning methods to avoid fabric damage. Use a vacuum cleaner with an upholstery attachment to remove dust and debris, maintaining a clean and fresh appearance.

For spills or stains, it's crucial to act quickly. Blot the stain with a clean white cloth to absorb the liquid and prevent it from setting into the fabric. When it comes to removing ink stains, ensure you don't rub, as this can spread the ink further. Instead, gently blot until the stain lifts.

Advertisement

Consider using fabric protectants to create a barrier against future stains and spills, enhancing the longevity of your upholstery. Additionally, periodically rotate cushions and pillows to ensure even wear and maintain the shape and comfort of your sofa. Lastly, avoid letting any stain dry; the sooner you treat it, the better your chances of complete removal. By following these maintenance tips, you'll keep your upholstery looking cozy and inviting for years to come. Regularly checking and cleaning upholstery can also improve indoor air quality, similar to how air purifiers maintain efficiency.

Fabric Treatment Enhancements

improving fabric treatment methods

Enhancing the treatment of your fabric sofa can significantly boost its longevity and appearance. Start by always checking the manufacturer's care instructions before applying any cleaning solutions. This ensures you use the right methods and products suited for your specific fabric. When tackling stains, like ink, consider using rubbing alcohol on a clean cloth, but test it on an inconspicuous area first to avoid discoloration.

After you've removed the stain, it's essential to clean before drying. Use a gentle soap mixed with water to wipe the area, then blot with a dry cloth. Incorporating a gentle, pH-balanced upholstery cleaner into your routine can help maintain the fabric's resilience and enhance its overall look over time.

Once your sofa looks great, consider applying fabric protectors. These create a barrier against future stains and spills, making clean-up much easier. Regular maintenance, including vacuuming and prompt attention to stains, will also contribute to the sofa's longevity. By taking these simple steps, you'll keep your fabric sofa looking fresh and inviting for years to come.

Routine Maintenance for Upholstery

upholstery care and upkeep

Maintaining your upholstery goes hand in hand with the treatments you've applied to protect it. To keep your furniture looking its best, you should regularly vacuum to remove dust and debris. This simple step helps prevent dirt buildup that can contribute to stains and discoloration. Aim to use fabric-safe upholstery cleaners at least once every six months to maintain appearance and ensure the integrity of the fabric.

When it comes to cushions and pillows, don't forget to rotate them periodically. This practice ensures even wear and prolongs the life of your upholstery. If you encounter spills and stains, act quickly! Blotting with a clean cloth can prevent them from setting into the fabric, making it easier to clean later.

Finally, be mindful of sun exposure. Keeping upholstery away from direct sunlight minimizes fading and deterioration over time. By implementing these routine maintenance tips, you can keep your upholstery looking fresh and inviting, ensuring it remains a beautiful centerpiece in your home. With a little effort, you'll enhance its longevity and maintain its appearance for years to come.

Advertisement

Conclusion

final thoughts and summary

Successfully removing ink from your sofa can feel daunting, but with the right approach, you can tackle the stain effectively. The key is to act quickly; the sooner you address the ink stain, the better your chances of complete removal. Start by determining the type of ink involved—solvent-based inks respond well to rubbing alcohol, while water-based inks can be treated with a cleaning solution of dish soap and vinegar.

Before applying any cleaning solution, always test it on an inconspicuous area of the fabric to avoid discoloration or damage. When you're ready to treat the stain, use a dry cloth to gently blot the stain rather than rubbing it, which can spread the ink and push it deeper into the fabric.

If your home remedies don't yield results, don't hesitate to seek professional cleaning. Experts have access to specialized techniques and solutions that can tackle even the most stubborn ink stains. With these steps in mind, you're well-equipped to restore your sofa and keep it looking pristine. Remember, quick action and the right methods are your best allies in this cleaning challenge.

Frequently Asked Questions

How Do You Get Ink Out of a Fabric Sofa?

To tackle an ink stain, start by blotting it with a clean, dry cloth to absorb as much ink as possible. For water-based inks, mix one tablespoon of dish soap and vinegar with two cups of warm water. Apply this solution and blot until the stain lifts. For pen inks, use rubbing alcohol on a cloth, blotting from the edge inward. Always rinse the area with water, then let it air dry completely.

How Do You Remove Ballpoint Pen Ink From Furniture?

To remove ballpoint pen ink from furniture, start by blotting the stain with a clean cloth to soak up as much ink as possible. Next, apply a small amount of rubbing alcohol to another clean cloth and gently dab the stained area, moving from the outside in. If the stain's still there, try a mix of dish soap and white vinegar. Always test solutions on a hidden spot first to avoid damage.

What Removes Ink From Fabric?

To remove ink from fabric, you've got a few effective options. Rubbing alcohol works wonders on solvent-based inks, while a mix of liquid dish soap and white vinegar tackles water-based stains. For tougher marks, try non-acetone nail polish remover, but be sure to test it first on a hidden spot. Quick action is crucial; the sooner you treat the stain, the better your chances of getting it out completely.

Advertisement

How to Get a Ballpoint Pen Out of Fabric?

To get a ballpoint pen out of fabric, start by blotting the stain with a paper towel to absorb as much ink as you can. Don't rub, as that can spread the stain. Next, apply rubbing alcohol to a clean cloth and dab the ink, working from the edges inward. If the stain lingers, mix dish soap and white vinegar, then blot until the ink lifts. Always test solutions first to avoid damage.

Continue Reading

Interior Design

How to Clean Cloth Sofa at Home

Uncover the secrets to effortlessly cleaning your cloth sofa at home and maintain its fresh appearance—discover essential tips to get started!

Published

on

diy cloth sofa cleaning

To maintain the cleanliness of your fabric sofa at home, it is important to first determine the type of fabric by checking the care tag. Gather cleaning essentials such as a vacuum with an upholstery attachment, microfiber cloths, and a DIY cleaning solution consisting of water, dish soap, and vinegar. Thoroughly vacuum the sofa to eliminate dust and debris, paying special attention to crevices and beneath cushions. In case of stains, promptly blot them with a damp cloth using the cleaning solution, ensuring to test it on a hidden spot beforehand. Regularly vacuum, fluff up the cushions, and use fabric protector for upkeep. For more helpful cleaning tips, there is a wealth of information to discover! Moreover, understanding how to clean sofa fabric based on its material, whether linen or polyester, can prevent harm and extend its longevity. Always avoid saturating fabrics excessively with liquid to prevent water stains or mold growth. If your sofa has intricate designs or delicate upholstery, consider hiring a professional cleaning service for a deeper cleanse.

Key Takeaways

  • Identify the fabric type using the care tag to choose the correct cleaning method and avoid damage.
  • Thoroughly vacuum the sofa with an upholstery attachment to remove dirt and pet hair before cleaning.
  • Prepare a DIY cleaning solution using 2 cups distilled water, 2 tbsp clear Dawn dish soap, and 2 tbsp distilled white vinegar.
  • Spot clean stains immediately by blotting with a damp microfiber cloth and the cleaning solution; always test on a hidden area first.
  • Maintain your sofa by vacuuming weekly, fluffing cushions regularly, and using a lint brush to remove pet hair as needed.

Identify Fabric Type

determine material composition

When you're ready to clean your cloth sofa, the first step is to identify its fabric type. Locate the care tag, which usually provides essential cleaning codes like "W" for water-safe options, "S" for solvent-based cleaners only, "WS" for both, and "X" for vacuuming only.

Understanding these codes is vital, as they guide you in choosing the right cleaning methods for your specific upholstery. Additionally, it's important to take into account the potential risks associated with using incorrect cleaning products, as improper usage can lead to potential side effects and interactions that may damage your sofa.

Common fabric types include cotton, linen, and polyester, each demanding particular care to prevent issues like color fading or fabric shrinkage. For instance, using a water-based cleaner on a fabric marked "S" can damage your sofa.

Many modern fabrics, such as microfiber, are crafted to be stain-resistant, making them ideal for homes with children or pets.

Always refer to the manufacturer's instructions found on the care tag before applying any cleaning solutions. This guarantees compatibility with your sofa's fabric type and helps you avoid costly mistakes that could lead to structural damage or discoloration.

Advertisement

Gather Cleaning Supplies

collect necessary cleaning tools

To effectively clean your cloth sofa, you need to gather the right supplies beforehand. Having everything ready will streamline the process and guarantee excellent results.

Here's a quick list of essential cleaning supplies:

  1. Vacuum Cleaner with Upholstery Attachment: This helps remove loose dirt, dust, and debris from your sofa's surface. For the best results, consider using a vacuum that excels in dust removal, as noted in best vacuums for dust removal in 2024.
  2. DIY Cleaning Solution: Mix 2 cups of distilled water, 2 tablespoons of clear Dawn dish soap, and 2 tablespoons of distilled white vinegar in a spray bottle for an effective cleaner.
  3. Microfiber Cloths: These are perfect for blotting stains and applying your cleaning solution without damaging the fabric.

Additionally, keep baking soda handy to absorb odors and loosen stains by simply sprinkling it on the fabric.

If you have pets, a lint brush or fabric shaver can help quickly remove pet hair and fuzz from the upholstery.

Vacuum and Pre-Clean

vacuuming and pre cleaning tasks

A thorough vacuuming session is essential for prepping your cloth sofa before any deep cleaning. Start by using an upholstery attachment to vacuum the entire couch, ensuring you remove loose dirt, dust, and pet hair.

Regular maintenance, such as vacuuming, is important for prolonging the life of your upholstery and preventing odors, similar to how proper diet and care are critical for pets. Pay special attention to the crevices and under the cushions where debris often hides.

Don't forget to remove and vacuum both sides of any loose cushions to maximize your cleaning efforts. For surface debris, a hand vacuum or brush attachment can effectively tackle the mess, helping to prevent dirt buildup and prolonging the life of your upholstery.

Incorporating vacuuming into your routine maintenance schedule is key. Aim to vacuum at least once a week, especially if your sofa sees heavy use or if you have pets.

Advertisement

Before moving on to deeper cleaning, make sure to spot test any cleaning solution on a hidden area of the fabric. This precaution helps avoid potential damage, ensuring your cleaning process is safe and effective.

A good pre-clean sets the stage for a successful cleaning session, allowing you to achieve a fresh, clean look for your sofa.

Spot Clean Stains

targeted stain removal technique

After vacuuming and pre-cleaning your cloth sofa, it's time to tackle any stains that may have marred its appearance. Quick action is important, so always blot spills immediately with an absorbent cloth using a gentle dabbing motion—rubbing might set the stain. For tougher stains, you can use a fabric-safe cleaner or create a mild soap solution with water to gently clean the affected area. Always test any cleaning solution on a hidden part of the sofa first to ensure it won’t cause discoloration. If you’re looking to remove stain from leather sofa, a different approach is required, often using specially formulated leather cleaners and conditioners to avoid damaging the material.

To maintain a clean living environment, consider using an air purifier to reduce allergens and dust in the room, which can help prevent future stains from settling in your upholstery air purifier maintenance dos and don'ts.

Here's a simple method to spot clean stains effectively:

  1. DIY Cleaning Solution: Combine 2 cups of distilled water, 2 tablespoons of clear Dawn dish soap, and 2 tablespoons of distilled white vinegar. This solution effectively targets stains without damaging fabric.
  2. Spot Test: Before using the cleaning solution, always spot test it on an inconspicuous area to check for colorfastness. You want to avoid any discoloration.
  3. Blot the Stain: Dampen a clean microfiber cloth with the solution. Gently blot the stained area, ensuring not to oversaturate, as excessive moisture can damage the fabric.

Regular Maintenance Tips

consistent care recommendations

Keeping your cloth sofa looking fresh requires consistent care and attention. To maintain its appearance and longevity, incorporate these regular maintenance tips into your routine.

Task Frequency Benefits
Vacuuming At least once a week Dust removal and allergen reduction
Fluffing Cushions Every few weeks Prevents uneven wear and maintains shape
Lint Brush Usage As needed Removes pet hair and surface debris
Spot Clean Immediately after spills Prevents stains and maintains hygiene

Regular cleaning is essential for upholstery maintenance. Always vacuum your sofa to keep dust and dirt at bay. Fluffing cushions keeps them comfortable and extends their life, while using a lint brush helps maintain a clean surface. Spot clean spills quickly to prevent stains from setting in.

Advertisement

Consider applying a fabric protector like Scotchgard periodically. This creates a barrier that helps prevent stains and spills, making deep cleaning easier in the long run. By following these simple steps, you'll guarantee your cloth sofa remains inviting and fresh for years to come.

Frequently Asked Questions

What Is the Best Way to Clean a Fabric Sofa?

To clean a fabric sofa effectively, start by checking the care tag for cleaning codes. Regularly vacuum, blot spills immediately, and use a gentle DIY solution for stains to keep it looking fresh and clean.

How Do You Clean a Fabric Couch Without a Machine?

Cleaning a fabric couch without a machine's like painting a masterpiece with delicate strokes. Start by vacuuming thoroughly, then gently blot stains with a homemade solution, and finish by sprinkling baking soda to refresh the fabric.

What Is the Best Homemade Upholstery Cleaner?

The best homemade upholstery cleaner combines 2 cups distilled water, 2 tablespoons clear Dawn dish soap, and 2 tablespoons distilled white vinegar in a spray bottle. It effectively lifts stains without damaging your fabric. Always spot test first!

How to Deep Clean a Sofa at Home?

"Cleanliness is next to godliness." To deep clean your sofa, vacuum thoroughly, apply a DIY solution, test it, blot stains gently, and let it air dry. For tougher spots, consider a portable upholstery cleaner.

Advertisement

Conclusion

Cleaning your cloth sofa at home can feel intimidating, but it doesn't have to be. Many believe that professional cleaning is the only way to go, yet you can achieve great results yourself with just a few simple steps. By identifying your fabric type, using the right supplies, and committing to regular maintenance, you'll keep your sofa looking fresh and inviting. So, why spend money when you can easily refresh your sofa with a little effort?

Continue Reading
Advertisement

Affiliate disclaimer

As an affiliate, we may earn a commission from qualifying purchases. We get commissions for purchases made through links on this website from Amazon and other third parties.

Advertisement

Vetted

top men s underwear choices top men s underwear choices
Vetted3 hours ago

15 Best Men’s Underwear of 2024 – Comfort and Style Combined

How can you elevate your comfort and style with the best men's underwear of 2024? Discover the top picks that...

transform your bedroom life transform your bedroom life
Vetted5 hours ago

Quality Sex Toys That Will Transform Your Bedroom Life—Expert-Approved

Unlock the secrets to an exhilarating bedroom experience with expert-approved sex toys that promise to enhance intimacy and pleasure—discover what...

unadvertised airpods discount event unadvertised airpods discount event
Vetted6 hours ago

AirPods Black Friday Deal: The Insane Discount Apple Won’t Advertise

Amazing AirPods Black Friday deals await, but hurry—these shocking discounts won't last long and you won't believe the savings!

men s bomber jackets 2024 men s bomber jackets 2024
Vetted7 hours ago

15 Best Men’s Bomber Jackets to Elevate Your Style Game in 2024

Check out the 15 best men's bomber jackets to elevate your style game in 2024 and discover which one will...

top running brands 2024 top running brands 2024
Vetted7 hours ago

14 Best Running Brands That Every Runner Should Know About in 2024

Learn about the 14 best running brands of 2024 that every runner should know, and discover what makes each one...

top men s aftershaves 2024 top men s aftershaves 2024
Vetted7 hours ago

9 Best Men’s Aftershaves of 2024 for a Smooth and Refined Finish

Optimize your grooming routine with the 9 best men's aftershaves of 2024 that promise a smooth and refined finish—discover which...

underground bdsm lifestyle exploration underground bdsm lifestyle exploration
Vetted11 hours ago

BDSM: The Underground Lifestyle That’s Shocking Mainstream Curiosity

How does the underground world of BDSM challenge societal norms and ignite curiosity? Discover the intriguing dynamics that lie beneath...

kendrick vs drake showdown kendrick vs drake showdown
Vetted11 hours ago

Kendrick Lamar vs. Drake: The Rap Battle That Could Change Everything

Just when you thought the rap game was settled, Kendrick Lamar and Drake reignite a rivalry that could redefine hip-hop's...

stylish comfortable men s dress shoes stylish comfortable men s dress shoes
Vetted11 hours ago

15 Best Men’s Dress Shoes for Every Occasion in 2024 – Stylish and Comfortable Choices

I've curated the ultimate list of stylish and comfortable men's dress shoes for 2024, but which pair will elevate your...

men s sleep shorts guide men s sleep shorts guide
Vetted15 hours ago

15 Best Men’s Sleep Shorts for Ultimate Comfort and Style

The ultimate guide to the 15 best men's sleep shorts awaits you, showcasing comfort and style that will elevate your...

top vodkas for shots top vodkas for shots
Vetted19 hours ago

9 Best Vodkas for Shots That Will Elevate Your Party Experience

Just when you think you've tried them all, discover the 9 best vodkas for shots that will transform your party...

stylish comfortable dress shoes stylish comfortable dress shoes
Vetted19 hours ago

15 Best Dress Shoe Brands That Combine Style and Comfort for Every Occasion

Join us as we unveil the 15 best dress shoe brands that perfectly blend style and comfort, leaving you eager...

Trending

Copyright © 2024 StyleGuru.org Affiliate disclaimer As an affiliate, we may earn a commission from qualifying purchases. We get commissions for purchases made through links on this website from Amazon and other third parties.