Interior Design
How to Ship Furniture to Another State
Get ready to discover essential tips for shipping furniture across state lines—your items deserve the best care and protection during transit.
To ship furniture to another state, start by understanding the costs, which can range from $300 to over $4,000 depending on distance and item size. Prepare your furniture by cleaning it, inspecting for damages, and disassembling larger pieces if needed. Use protective wrapping and sturdy packing materials to avoid damage. Choose a shipping method like Less-Than-Truckload (LTL) for smaller loads or freight shipping for larger ones. Don't forget to compare quotes to save money. With the right preparation and method, your furniture will arrive safely. There's more to consider, so keep exploring your options.
Key Takeaways
- Determine shipping costs based on distance, size, and weight to budget accordingly for interstate furniture transport.
- Disassemble large items and securely wrap fragile parts to minimize damage during shipping.
- Choose the right shipping method, such as LTL or consolidated shipping, for cost-effectiveness based on your load size.
- Research and compare quotes from various carriers to find the best rates and services for long-distance shipping.
- Use tracking tools and maintain communication with the carrier to stay updated on your shipment's status.
Understanding Shipping Costs
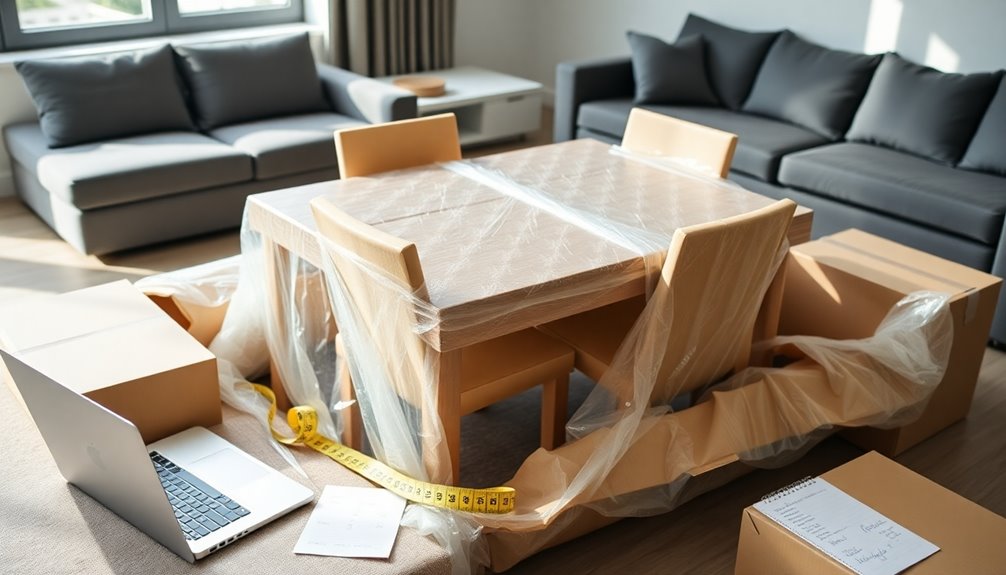
When it comes to shipping furniture, understanding shipping costs is essential for budgeting your move. The distance you're shipping significantly impacts the overall price. Local deliveries typically range from $75 to $250, while long-distance shipping can set you back anywhere from $300 to $600 or more. If you're moving cross-country, be prepared for costs that can soar to $4,000 for multiple pieces.
Freight class also plays a crucial role in determining your shipping costs. This classification depends on the density and contents of your packages. Using Less Than Truckload (LTL) freight can help you save money, especially if you have an existing carrier account, as it often offers lower rates. Additionally, it's important to note that distance significantly impacts shipping quotes, as larger distances typically incur higher costs.
You should also consider additional fees for oversized or fragile items, which might require special handling and packaging. Extra services like expedited shipping or white glove services will add to your expenses. Remember, comparing quotes from different carriers can reveal hidden savings, so don't hesitate to shop around. Understanding these factors will empower you to make informed decisions and manage your budget effectively for your furniture shipping needs.
Factors Influencing Costs

Considering various factors can significantly influence your furniture shipping costs. First, the shipping distance plays a crucial role; longer routes mean increased fuel consumption and labor expenses. If you're shipping across the country, expect costs to soar up to $4,000, with large items ranging from $300 to $800 each. Additionally, remote areas can hike your costs due to challenging logistics.
The size, weight, and fragility of your furniture also impact expenses. Larger and heavier items require more space and effort to handle, often necessitating special insurance. Fragile pieces need extra care, resulting in additional packaging costs. Accurate measurements are essential to avoid surprises.
Pickup and delivery locations matter too. Urban areas usually offer competitive rates, while rural spots incur higher charges due to logistical challenges. Traffic and parking restrictions can further affect delivery costs. Moreover, understanding market dynamics, including peak seasons and demand fluctuations, can also drive prices up.
Lastly, consider any additional services you might need. Expedited shipping or white glove services will increase your total costs. If you can, consolidate shipments for potential savings.
Preparing Your Furniture

Preparing your furniture for shipping requires careful attention to detail to ensure it arrives safely at its destination. Start by cleaning your furniture to remove any dust and dirt. Inspect each piece for existing damages, noting any scratches or dents. Remove loose or fragile items from within the furniture and dust surfaces to prevent scratches from trapped debris. Taking photos or notes of the furniture’s condition before shipping can be helpful. When disassembling furniture for shipping, keep all hardware and small parts in a labeled bag to avoid losing them during transit. Protect delicate surfaces by wrapping them in bubble wrap or furniture blankets, and consider using corner protectors to prevent damage to edges and corners. If you have a fabric sofa, be sure to research fabric sofa cleaning tips to properly maintain and clean the upholstery before shipping. This will help ensure that your furniture arrives in the best possible condition at its destination.
If you have large furniture, disassemble it if possible. This makes movement easier and minimizes damage. Keep screws, nuts, and bolts in labeled bags. If you're packing dressers or cabinets, consider removing drawers and packing them separately, or keep their contents in place if necessary. Wrap fragile parts like glass tabletops in bubble wrap or packing paper for protection.
When wrapping larger items, use moving blankets, bubble wrap, or furniture pads, securing everything with packing tape. An "X" pattern with your tape helps ensure stability. Finally, wrap each piece individually, using stretch wrap to keep drawers closed and secure any loose components. This thorough preparation will help your furniture arrive in excellent condition. Proper wrapping significantly reduces the risk of damage during transportation.
Shipping Methods Overview
Choosing the right shipping method for your furniture is crucial to ensure it arrives safely and cost-effectively. There are several options available, depending on your shipment size and budget.
Less-Than-Truckload (LTL) shipping is ideal for smaller loads that don't fill an entire truck. You'll only pay for the space your furniture occupies, making it often the cheapest choice. However, keep in mind that LTL may involve transfers between trucks, which could increase transit time.
Freight shipping includes both full truckload (FTL) and LTL services. FTL suits larger shipments, while LTL is more economical for smaller loads. Freight carriers specialize in handling heavy shipments and can offer expedited options if you need faster delivery. Understanding service differences helps in cost savings.
Consolidated shipping combines multiple shipments going to similar destinations, optimizing routes and reducing costs. It's a great option for smaller loads, as you'll share expenses with other shippers.
Lastly, self-moving gives you complete control but requires more effort. Alternatively, independent transporters can provide discounted rates if you connect with them through platforms like uShip. Each method has its benefits, so choose the one that aligns best with your needs.
Additional Costs to Consider

Shipping furniture involves various additional costs that can significantly impact your overall budget. First, consider the shipping distance. Longer moves often mean higher fuel consumption, which can drive up costs. Labor expenses also increase with longer travel times, leading to more days worked by your moving crew. If you're shipping internationally, be prepared for even steeper costs due to customs and robust packaging requirements.
Next, think about the size and fragility of your items. Oversized or delicate furniture requires extra handling and materials, which can add to your expenses. Antique pieces may need additional protection, and disassembly or reassembly of modular furniture could incur further fees. Additionally, consider that heavier and bulkier items incur higher shipping costs, which can further strain your budget.
Location plays a big role too. Urban areas usually offer competitive rates, while rural locations can lead to increased charges due to longer distances and accessibility challenges.
Lastly, consider timing and additional services. Expedited shipping or guaranteed delivery windows can come with higher fees, and opting for extra services like white glove assistance will raise your costs. By being aware of these factors, you can better manage your shipping budget.
Tracking Your Shipment

Once you've accounted for the additional costs, tracking your shipment becomes a vital part of the process. You'll want to use the tracking number provided by your shipping carrier to monitor your furniture's journey. Most carriers offer online tracking through their websites or dedicated tracking pages, making it easy to stay updated. For long-haul shipments, consider utilizing GPS devices for real-time location data, which can provide peace of mind.
Real-time updates are essential, as they notify you of any changes or issues during transit. If you're shipping sensitive goods, IoT sensors can help you monitor conditions like temperature and humidity. This way, you can address potential delays or problems promptly. Additionally, using advanced algorithms can help optimize delivery routes, ensuring your furniture arrives on time and in perfect condition.
To enhance your tracking experience, explore mobile apps from logistics companies that offer direct communication with the carrier and allow you to track shipments independently. Tools like ShipperHQ and uShip can simplify the process, while advanced logistics software like Locate2u streamlines tracking and dispatch.
Finally, proactive customer communication is key. Keeping your customers informed with automated notifications boosts satisfaction and ensures transparency about the current status and location of their furniture.
Frequently Asked Questions
What Documentation Is Needed for Shipping Furniture to Another State?
When you're preparing to ship furniture, you'll need several key documents. Start by taking clear photos to document the furniture's condition. Create an inventory list detailing all items being shipped. Clearly label each piece with its contents and any special handling instructions. Keep records of how to disassemble the furniture and note any existing damage. This documentation will help protect you and simplify the shipping process.
Can I Ship Assembled Furniture, or Should It Be Disassembled?
You can ship assembled furniture, but disassembling it is often a smarter choice. Assembled pieces are bulkier and more prone to damage during transit, making them harder to maneuver. By taking apart your furniture, you reduce the risk of scratches and breakage, simplify transport, and potentially save on costs. Plus, smaller parts are easier to wrap and protect. Consider disassembling for a smoother, safer shipping experience.
How Do I Choose a Reliable Furniture Shipping Company?
To choose a reliable furniture shipping company, start by researching various options online. Compare prices and services offered by different companies, and read customer reviews for insights. Verify their experience in the industry and check for necessary licenses and insurance. Evaluate their customer service reputation and look for additional services like packing or white-glove delivery. Finally, ensure they keep you updated on your shipment's status throughout the process.
Are There Restrictions on Shipping Certain Types of Furniture?
Yes, there are restrictions on shipping certain types of furniture. Weight and size limitations vary by carrier, with FedEx and UPS having specific maximums. Fragile items need extra protective measures like bubble wrap and foam padding. You should disassemble large pieces to prevent damage, keeping hardware organized. Also, check for any legal requirements before shipping. It's crucial to communicate with your carrier to ensure a smooth pickup and delivery process.
What Should I Do if My Furniture Gets Damaged During Shipping?
If your furniture gets damaged during shipping, act quickly. Document the damage on the delivery receipt and take photos for evidence. Notify the carrier or broker as soon as you can. Keep the damaged items until your claim's resolved, and don't discard anything. Gather necessary documents like the bill of lading and proof of delivery. Submit a claim detailing the loss, including repair estimates, within the required timeframes for a smoother process.
Conclusion
Shipping furniture to another state doesn't have to be stressful. By understanding the costs involved, preparing your items properly, and choosing the right shipping method, you can ensure a smooth process. Don't forget to factor in any additional expenses and keep track of your shipment for peace of mind. With a little planning, you can get your furniture to its new home safely and efficiently. Happy moving!
Interior Design
How to Paint Wooden Furniture
Keen to transform your wooden furniture? Discover essential steps and tips that ensure a stunning finish and lasting results!
To paint wooden furniture, start with thorough preparation. Sand the surface with fine-grit sandpaper to improve paint adherence. Inspect for damage and fill cracks with wood filler before applying a quality primer. Once dry, clean the surface to remove dust and ensure it's well-ventilated. Choose the right paint for your project, applying thin coats in the direction of the grain. Lightly sand between coats for a smooth finish. Finally, seal your work to protect it. By following these steps, you'll achieve a beautiful result that lasts. Stick around to uncover tips for maintaining your newly painted furniture!
Key Takeaways
- Sand the wooden surface with fine-grit sandpaper after initial coarse sanding to ensure better paint adherence.
- Clean the furniture thoroughly, removing dust and grease before applying primer or paint.
- Apply a quality wood primer to enhance paint adherence and ensure an even finish.
- Use thin, even coats of paint, allowing ample drying time between layers for a smooth finish.
- Seal the painted surface with a water-based sealer after drying to preserve durability and appearance.
Preparation Steps
When you're ready to paint wooden furniture, the preparation steps are crucial for achieving a smooth and long-lasting finish. Start by sanding the surface with fine-grit sandpaper (180-220 grit) to de-gloss the existing finish and enhance paint adherence. If you encounter thicker finishes, begin with lower grit sandpaper (80-100 grit) and work your way up for a smooth result. Use an orbital sander for large areas and a sanding block for tight corners, then wipe away any dust.
Next, inspect the wood for cracks or damage. Fill any gaps with wood filler, smoothing it out to match the surrounding surface. Ensure it dries completely before lightly sanding again. If needed, relocate hardware holes during this stage.
After repairs, apply a quality wood primer to help the paint adhere better and cover any stains. Choose a reputable brand, and allow the primer to dry fully before proceeding. Additionally, using quality primer will significantly improve the durability of your paint job. Finally, check that the surface is dust-free using a shop vac and a tack cloth. Remove any hardware and ensure good ventilation as you prepare to paint. Taking these steps will lay the foundation for a beautiful finish.
Cleaning the Furniture
Thoroughly cleaning your wooden furniture is essential before painting to ensure a smooth finish. Start by using a soft microfiber cloth or feather duster to remove dust and debris from the surfaces. For deeper cleaning, dampen a cloth with minimal water—too much can damage the wood. Don't forget to vacuum crevices and drawers to eliminate cobwebs and crumbs.
If you encounter greasy spots, grab a degreasing spray like Zep Heavy-Duty Citrus Degreaser or mix mild dish soap with warm water. Scrub the affected areas gently with a sponge. White vinegar mixed with water can also cut through grease effectively. Always read product labels to ensure they're safe for varnished surfaces. Proper cleaning helps to ensure better adhesion of paint or finish.
Once cleaned, wipe the furniture down with a dry rag to prevent watermarks. If there are stubborn stains, you can use non-gel toothpaste for water stains or baking soda paste for heat stains. After cleaning, let the furniture dry completely. This step is vital for the paint to adhere properly. Finally, consider applying a wood polish or oil to restore shine and add a protective layer before moving on to the next steps in your painting project.
Sanding the Surface
Before you start painting, sanding the surface of your wooden furniture is crucial for achieving a flawless finish. Begin by inspecting the wood for any cracks, holes, or remnants of old paint and varnish. Use wood filler to address imperfections, ensuring a smooth surface. For initial sanding, grab coarser grit sandpaper (100-150 grit) to remove old paint or smooth rough areas. As you progress, switch to finer grits (220-320 grit) for a polished look. Remember to sand in the direction of the grain to avoid scratches.
When sanding, use handheld sandpaper, sanding blocks, or electric sanders depending on your project size. A backing block helps prevent uneven pressure. Change your sandpaper often to avoid clogging. For intricate designs, opt for smaller tools or hand sand carefully. After sanding, thoroughly remove the dust with a tack cloth or damp cloth. For woods like oak, ensure you eliminate any metal filings that could lead to staining. Wipe the surface with denatured alcohol for a clean finish. Finally, make sure the surface is completely dry before moving on to the next steps in your painting project. Quick sanding is recommended even for unfinished wood to enhance paint adhesion.
Importance of Priming
Once you've sanded your wooden furniture to a smooth finish, priming is the next step that can't be overlooked. Priming serves several crucial purposes that enhance your painting project. First, it seals the original wood, preventing the paint from soaking in and ensuring even coverage. It also prevents bleed-through from knots and natural blemishes, so any imperfections don't mar your final finish.
By applying primer, you create a smoother surface that helps hide joints or seams, making everything look more polished. Most importantly, primer enhances paint adhesion by bonding physically and chemically to both the wood and the paint, increasing the durability of your finish. This means your furniture will resist peeling, cracking, and fading over time. Additionally, using the right primer can significantly reduce the number of paint coats needed, allowing for a more efficient painting process.
Choose the right type of primer for your project—latex for quick-drying convenience, shellac for dark woods, or oil-based for oil paints. Remember to lightly sand the surface again after priming and clean up any dust before applying your topcoat. With these steps, you'll ensure a flawless and long-lasting finish for your wooden furniture.
Choosing the Right Paint
When it comes to choosing the right paint for your wooden furniture, you'll want to weigh your options carefully to achieve the desired look and durability. If you're aiming for a velvety matte finish with a distressed vibe, chalk paint is your go-to. It's perfect for a farmhouse or country chic aesthetic and requires minimal prep work. Just remember to seal it with a protective wax for added durability.
For a more vibrant and durable finish, consider mineral or acrylic paints. Fusion Mineral Paint is particularly resilient and doesn't need a top coat, while acrylic paints offer a wide range of vivid colors and are also easy to apply. Both types are non-toxic and work well on wood and laminate. Additionally, light sanding before applying your paint can enhance adhesion and improve the final finish.
If you're on a budget and your furniture won't see heavy use, latex paint is an affordable option. It comes in various sheens, but you'll need to prep the surface thoroughly for the best results.
Lastly, oil-based or alkyd paints provide a strong finish suitable for high-traffic areas, though they come with higher VOCs and longer drying times. Choose wisely based on your needs and your furniture's intended use!
Application Techniques
Achieving a smooth finish on your wooden furniture hinges on the application techniques you choose. Start by considering paint additives like Floetrol, which can minimize brush strokes and extend drying time. Just be careful not to overdo it; too much can make your paint runny and affect its coverage.
If you prefer a flawless finish, using a paint sprayer is an excellent option. Although cleanup is more involved, sprayers like the Wagner Flexio 3000 deliver impressive results. Always work in a well-ventilated area and use a spray shelter to manage overspray.
When using brushes, pick the right type based on your paint; synthetic bristles work well with water-based options. Initially, use a round brush, then switch to smaller ones for detailed areas. Load your brush carefully to avoid drips, and always paint in the direction of the wood grain. Lightly sanding the surface before painting can also significantly enhance paint adhesion and lead to a more professional-looking finish.
For an even smoother application, lightly mist the wood with water before painting. This helps the paint glide seamlessly over the surface, especially with porous paints, allowing for quicker drying and easy reactivation if needed.
Sanding Between Coats
After you've applied your paint using the right techniques, the next step is sanding between coats to ensure a smooth and flawless finish. First, make sure the previous coat is completely dry. Inspect the surface for any imperfections and thoroughly clean it to remove dust or debris. Use fine-grit sandpaper, typically 220-grit or higher, to gently scuff the surface, sanding in a circular motion. Apply light to moderate pressure; too much can create scratches. Sand the entire surface evenly, being careful around the edges to avoid creating a worn look.
Once you've finished sanding, it's crucial to clean the surface again. Use a vacuum with a bristled attachment to remove dust particles, and follow up with a tack cloth to catch any remaining debris. Check the surface once more to ensure it's dust-free. If needed, you can use a damp cloth to wipe down the surface, but make sure it's completely dry before applying the next coat. This sanding process significantly improves the adhesion of subsequent layers, leading to a more durable and professional-looking finish. Additionally, this step enhances adhesion and durability of the paint job, ensuring long-lasting results.
Finishing Touches
To achieve a polished look for your wooden furniture, focus on the finishing touches that can elevate your project. Start by applying thin, even coats of paint to prevent drips and ensure a smooth finish. Always paint in the direction of the wood grain for a consistent appearance. Work in small sections to avoid the paint drying too quickly, and use a high-quality brush for corners and intricate details. Many DIY enthusiasts find that using affordable airless paint sprayers can significantly streamline the painting process.
Consider using a mini roller for even coverage, followed by a dry brush technique if you want a subtle antique look. Be gentle; too much pressure can disturb your carefully applied paint. To maintain a professional appearance, use top-notch brushes and rollers to avoid bristles or lint in your finish. Quality materials significantly improve the finishing process and enhance durability, making it essential to choose the right wood type for your project.
Paint in a well-ventilated area, allowing ample drying time between coats. For easier cleaning and a more resilient surface, opt for a semi-gloss finish. Lastly, clean the furniture thoroughly before painting to remove any dust, grease, or old polish. This attention to detail in the finishing touches will ensure your furniture looks both beautiful and durable.
Sealing the Paint Job
Sealing your painted furniture is crucial for protecting your hard work and ensuring a lasting finish. Start by choosing the right sealer; water-based sealers are ideal as they won't alter your paint's color or cause yellowing. If you've used chalk paint, consider wax or polycrylic sealants. For acrylic or latex paints, a clear polyurethane finish works best. It's generally recommended to wait 24 hours for the paint to dry before sealing to allow for better adhesion.
Before you apply the sealer, make sure the paint is completely dry, which can take from a few hours to a couple of days. Lightly sand the surface with fine-grit sandpaper for a smoother finish, then wipe away dust with a damp cloth. Always test the sealer on a small area first to check compatibility.
When applying, use a high-quality synthetic brush for polyurethane, working in thin, even coats along the wood grain. For wax sealants, apply in a circular motion with a soft cloth, then buff after 20 minutes. Aim for 3-5 thin coats, allowing each to dry completely before adding the next. Finally, avoid heavy objects on the furniture for a few days while the finish cures, and clean gently to maintain its beauty.
Frequently Asked Questions
Can I Paint Over Previously Painted Furniture Without Sanding?
Yes, you can paint over previously painted furniture without sanding. Start by cleaning the surface thoroughly to remove dust and grease. Use a deglosser to prepare the finish, following the product's instructions. Opt for chalk paint or other no-prep options that adhere well. Make sure to apply a top coat for protection. Just remember to ensure good ventilation while working, as some chemicals can produce strong odors. Happy painting!
How Do I Choose the Right Color for My Furniture?
Choosing the right color for your furniture depends on several factors. First, consider the wood type and its undertones; they can guide your color selection. Next, think about the ambiance you want to create—warm colors energize, while cool colors soothe. Also, evaluate the room's style and decor to ensure harmony. Lastly, remember color psychology; certain shades can influence mood and interactions, so pick a color that resonates with your desired atmosphere.
What Type of Paint Is Best for Outdoor Wooden Furniture?
When choosing paint for outdoor wooden furniture, consider oil-based, latex, or acrylic options. Oil-based paints offer durability against harsh weather but take longer to dry. Latex paints are quicker and environmentally friendly, making them easier to work with. Acrylic paints provide excellent coverage and fade resistance. Ultimately, select a paint that matches your climate needs and desired finish, ensuring your furniture stays protected and beautiful for years to come.
How Can I Fix Paint Drips or Runs?
To fix paint drips or runs, act quickly while the paint's still wet. Use a brush to smooth the area, blending it with the surrounding paint. If the drips are dried, grab a utility knife to carefully scrape them away, then sand the surface smooth. After that, repaint the area, feathering outwards to ensure a seamless blend. Always let each coat dry before inspecting for any additional touch-ups you might need.
Is It Necessary to Seal Chalk Paint for Durability?
Yes, it's necessary to seal chalk paint for durability, especially if you want to protect it from wear and tear. Sealing helps prevent chipping, scratching, and marks from daily use, ensuring your paint job lasts longer. You can choose between wax sealants for a classic look or lacquer and varnish for more robust protection in high-traffic areas. Ultimately, it depends on how you plan to use the painted item.
Conclusion
Now that you've prepped, painted, and sealed your wooden furniture, you can enjoy your refreshed piece for years to come. Remember, taking the time to clean, sand, and prime makes all the difference in achieving a smooth, durable finish. Don't hesitate to experiment with colors and techniques to truly make the furniture your own. With a little patience and creativity, you've transformed your furniture into something special. Happy painting!
Interior Design
Transform Your Home Decor Instagram Today
Harness your unique style and captivating visuals to elevate your home decor Instagram—discover essential tips that will transform your feed today!
To enhance your home decor on Instagram today, begin by identifying your unique style – whether it’s bohemian or minimalist. Utilize natural light to capture captivating visuals and try out different angles for engaging shots. Interact with your followers by responding to comments and utilizing Instagram Stories for exclusive behind-the-scenes peeks. Remember to utilize hashtags effectively to expand your audience, and craft intriguing captions that narrate a story. Develop a content calendar to maintain consistency, and explore innovative decor trends to keep your feed up-to-date. Stay tuned for more tips to enhance your Instagram presence even more!
Key Takeaways
- Define a unique style by exploring aesthetics and selecting a cohesive color palette that reflects your personality and creativity.
- Capture stunning visuals using natural light and experimenting with angles, ensuring your photos tell a compelling story.
- Boost follower engagement by interacting promptly and using Instagram Stories, Reels, and polls to create a dynamic community experience.
- Master hashtags and captions by researching trends, crafting captivating narratives, and analyzing performance to enhance reach and engagement.
- Plan content strategically with a calendar, mixing various content types and incorporating seasonal themes to maintain consistency and interest.
Define Your Unique Style
When you start decorating your home, it's essential to identify your unique style so you can create a space that truly reflects who you are.
Begin by exploring different aesthetics, like bohemian, minimalist, or industrial, and see which resonates most with you. Once you have a vision, select a color scheme that complements your decor pieces—whether you prefer bold and vibrant or calm and neutral tones.
Curate unique decor items that showcase your personality and enhance originality. Consistency is key; maintain a cohesive palette to make your space feel harmonious.
Don't hesitate to incorporate DIY projects that express your creativity. By defining your style, you'll not only create a beautiful space but also establish a theme for your Home Decor Instagram that draws in followers.
Capture Stunning Visuals
With your unique style defined, it's time to focus on capturing stunning visuals that showcase your home decor. Start by using natural light to illuminate your space, making colors pop and details shine.
Consider incorporating elements from modern farmhouse decor trends to create a warm and inviting atmosphere. Apply the rule of thirds for balanced compositions, ensuring each shot feels intentional.
Experiment with various angles to add depth and intrigue; sometimes a low shot or a bird's-eye view can make all the difference. Incorporate props to enhance your narrative, whether it's a cozy throw or a vibrant plant.
Don't forget to edit your photos for consistency, maintaining a cohesive color palette and aesthetic. Finally, showcase transformations with before-and-after shots to highlight your design journey and creativity.
Boost Your Follower Engagement
Regularly engaging with your followers can greatly enhance your Instagram presence and foster a loyal community. Start by responding promptly to comments and direct messages; it shows you value their input.
Use Instagram Stories and Reels to share behind-the-scenes content, making your followers feel more connected to your process. Host giveaways or contests to excite your audience and attract new followers.
Create engaging polls and quizzes in your stories to encourage interaction and gather insights. Collaborate with other influencers and brands to broaden your reach and establish credibility.
Master Hashtags and Captions
Engaging your audience goes hand in hand with mastering hashtags and captions. Start by researching trending hashtags like #interiordesign and #homedecor to expand your reach.
Don't forget to include niche hashtags to connect with specific followers who share your interests. Create a branded hashtag to foster community around your unique content and keep it updated based on current trends.
When it comes to captions, be enthralling! Tell a story that resonates with your audience, and always include a call-to-action that encourages engagement. Ask questions or invite followers to share their thoughts.
Regularly analyze your hashtag performance to refine your strategy. By combining effective hashtags and engaging captions, you'll elevate your home decor Instagram and build a loyal following.
Protect Your Creative Work
Protecting your creative work is essential in the competitive world of home decor on Instagram. To keep your content safe, consider these strategies:
Action | Purpose |
---|---|
Watermark your images | Deter unauthorized use |
Use strong passwords | Secure your account from hackers |
Educate yourself on copyright laws | Understand your rights as a creator |
Monitor for infringement | Quickly address content theft |
Report violations | Maintain the integrity of your work |
Plan Your Content Strategically
After guaranteeing your creative work is safeguarded, it's time to focus on how to effectively plan your content. Start by defining your target audience and understanding their interests.
Create a content calendar to maintain consistency; this helps you stay organized and guarantees regular posting. Set specific goals, like increasing engagement or followers, to measure your progress.
Mix up your content types—photos, videos, and stories—to keep your feed dynamic and engaging. Don't forget to incorporate seasonal themes or trending decor styles to stay relevant.
Explore Innovative Decor Trends
How can you stay ahead in the ever-evolving world of home decor? Embrace innovative trends that blend functionality with style. Incorporate natural materials like bamboo, rattan, and teak to add warmth and authenticity to your living space. Additionally, consider Indonesian home decor tips, such as using intricate batik patterns or hand-carved wooden accents, to introduce a unique, artisanal touch that exudes both elegance and cultural richness. Ultimately, staying ahead means continually exploring global influences while balancing comfort and sustainability.
Consider tech-integrated furniture that enhances your space while offering convenience, as this approach aligns with the effective networking essential for business growth. Multifunctional designs allow you to maximize smaller areas without sacrificing aesthetics. Eco-friendly materials not only elevate your decor but also support sustainability, appealing to conscious consumers.
Keep an eye on bold colors, like deep greens and warm terracottas, that create inviting atmospheres.
Don't shy away from mixing textures, such as wood with metal, to add depth and interest. Finally, explore vintage finds that tell a story, giving your space a unique touch.
Frequently Asked Questions
How Often Should I Post on My Home Decor Instagram Account?
You should aim to post 3 to 5 times a week on your home decor Instagram account. This frequency keeps your content fresh and engaging, helping you maintain visibility and grow your follower base effectively.
What Are the Best Times to Post for Maximum Engagement?
Studies show that posting between 9 AM and 11 AM on weekdays can boost engagement by up to 30%. You should experiment within this window to find your audience's peak activity times for maximum interaction.
Should I Focus More on Videos or Photos for My Content?
You should focus on a mix of both videos and photos. Videos showcase dynamic transformations and engage viewers, while high-quality photos highlight details. Experiment to see what resonates best with your audience and adjust accordingly.
How Can I Find Local Home Decor Influencers to Collaborate With?
You'll stumble upon local home decor influencers at community events, markets, or online platforms. Try searching Instagram hashtags, joining local Facebook groups, or attending workshops—collaborations often spark unexpectedly, so keep your eyes open!
What Tools Are Recommended for Scheduling Instagram Posts Effectively?
To schedule Instagram posts effectively, you can use tools like Later, Buffer, or Hootsuite. They let you plan content in advance, analyze performance, and guarantee consistent posting, saving you time and enhancing engagement.
Conclusion
By embracing these strategies, you're not just showcasing your home decor; you're inviting others into your personal sanctuary. Imagine the joy of connecting with a community that shares your passion, where each post sparks inspiration and creativity. As you transform your feed, remember that every detail of your space tells a story—your story. So go ahead, let your unique style shine and watch as your Instagram evolves into a vibrant tapestry of home decor magic!
Interior Design
How to Move a Sofa by Yourself
Keep your back safe and your sofa secure with these essential tips, but there’s more to discover for a hassle-free move!
To move a sofa by yourself, start by removing any cushions and loose items. Measure doorways and stairwells to ensure a proper fit. Use furniture sliders under the legs to glide the sofa smoothly across the floor. If it's heavy, try the "lift and tilt" technique, tilting the sofa vertically to navigate tight spaces. Keep your back straight and lift with your legs to avoid injury. Secure the sofa in a moving vehicle with straps. Following these steps will make your move easier, and you'll find even more useful tips to simplify the process as you continue.
Key Takeaways
- Measure doorways and hallways to ensure the sofa fits through without damage during the move.
- Clear a path by removing obstacles to avoid tripping and ensure smooth navigation.
- Reinforce loose joints and tighten screws before transport to prevent damage while moving.
- Use furniture sliders or a dolly to easily lift and maneuver the sofa without straining your back.
- Employ a friend for assistance, especially when lifting heavy or bulky sections of the sofa.
Introduction
When you're moving a sofa, it's not just about the heavy lifting; taking care of the fabric is important too. Regular vacuuming and dusting keep it looking fresh, while knowing the right cleaning techniques can help maintain its condition. If you have pets, treating any stains promptly will ensure your sofa stays in top shape during and after the move.
Routine Vacuuming and Dusting
Maintaining the cleanliness of your sofa is essential for a healthy living space. Regular vacuuming helps remove dust, allergens, and debris that can accumulate in the upholstery. This not only contributes to a healthier environment but also keeps your sofa looking fresh. Aim to vacuum your upholstery at least once a week, especially if you have pets or suffer from allergies.
When vacuuming, use the appropriate attachments, like a brush or upholstery tool, to effectively reach crevices and protect delicate fabrics from damage. Don't forget to dust your sofa with a microfiber cloth to prevent dirt and grime buildup. This simple step helps maintain the fabric's appearance and prolongs its lifespan. Additionally, consider using specialized pet hair removal tools to efficiently tackle any fur that may cling to your sofa.
Following the manufacturer's cleaning instructions after routine dusting and vacuuming ensures the fabric remains in optimal condition. By incorporating these practices into your cleaning routine, you'll keep your sofa looking clean and inviting while minimizing wear over time. A clean sofa not only enhances your living space but also contributes to your overall well-being. So, make vacuuming and dusting a regular part of your home maintenance routine!
Fabric-Specific Cleaning Techniques
Understanding the specific cleaning techniques for different upholstery fabrics is crucial to preserving your sofa's appearance and longevity. When dealing with natural fibers like cotton or linen, opt for a solvent-based cleaner or a gentle mixture of mild soap and water. This prevents water stains and shrinkage. For synthetic fabrics such as polyester or nylon, use a water-based cleaner, but remember to blot rather than scrub to avoid damaging the fibers.
Leather care requires a different approach; use a leather conditioner or a mixture of equal parts vinegar and water. Apply this with a soft cloth, ensuring you avoid excess moisture to prevent cracking. If your sofa is microfiber, a rubbing alcohol solution can work wonders for stain removal—just make sure to test a small area first for colorfastness.
Regardless of the fabric type, always tackle stains promptly. Blot with a clean, dry cloth and use the appropriate cleaner based on the fabric to maximize your chances of complete removal without damage. By following these fabric-specific cleaning techniques, you'll maintain the beauty and durability of your upholstery for years to come. Additionally, regular skin treatments can help enhance the overall appearance of your home environment, making it feel more inviting.
Treating Pet Urine Stains
Even with careful cleaning, accidents happen, especially if you have pets. When treating pet urine stains on your sofa, acting quickly is essential. Start by blotting the stain with paper towels or a clean cloth to absorb as much liquid as possible. Avoid rubbing, as this can spread the stain deeper into the upholstery fibers.
After blotting, reach for an enzymatic cleaner specifically designed for pet stains. These cleaning solutions break down the compounds in urine that cause lingering odors, making them your best bet for effective treatment. Before applying the cleaner, test it on an inconspicuous area of the fabric to ensure it won't cause discoloration or damage.
Once you've treated the stain with the enzymatic cleaner, rinse the area with clean water to remove any residue. Blot the area dry again, and then let the fabric air dry completely. This step is crucial to prevent mold growth, which can occur if the fabric remains damp. By following these steps, you'll keep your sofa looking fresh and odor-free, ensuring a comfortable space for both you and your furry friends.
Regularly Rotate Cushions
To keep your sofa looking great and feeling comfortable, regularly rotating the cushions is key. This simple act not only helps to prevent sagging but also encourages better maintenance habits overall. As you think about cushion care, consider choosing durable, stain-resistant fabrics and using protective covers to enhance your sofa's longevity.
Choose Durable, Stain-Resistant Fabric
Choosing the right fabric for your sofa is crucial for ensuring its longevity and ease of maintenance. Opt for durable materials like polyester or microfiber, which resist wear and tear, making them ideal for active households. Additionally, look for stain-resistant treatments such as Teflon or Crypton to protect your sofa from spills. This can make maintenance easier and keep your sofa looking fresh.
When selecting your fabric, pay attention to the rub count. A high rub count, like 15,000 or more, indicates better durability, especially in high-traffic areas. Fabrics with a tight weave enhance resistance to fraying and snagging, ensuring a longer lifespan for your sofa.
Regularly rotating cushions complements your choice of fabric, helping to prevent uneven wear and maintain the overall shape and comfort of your sofa. By investing in durable, stain-resistant fabric and following these maintenance tips, you'll keep your sofa in great condition for years to come. Remember, the right fabric not only elevates your living space's aesthetics but also contributes significantly to its practicality.
Utilize Decorative Fabric Layers
Utilizing decorative fabric layers can significantly enhance your sofa's look and longevity. By adding throws or slipcovers, you can protect the original upholstery from stains and fading while easily updating your sofa's appearance. This is especially beneficial when you're relocating, as lightweight decorative fabrics can be quickly removed and washed, simplifying maintenance.
Regularly rotating cushions is another essential practice. This helps distribute wear evenly across the sofa, prolonging its lifespan and maintaining its aesthetic appeal. When you layer decorative fabrics, you also gain extra cushioning, making the sofa more comfortable for you and your guests. Plus, these layers offer protection against scratches during the moving process.
Incorporating decorative fabric layers not only boosts your sofa's comfort but also contributes to a more inviting living space. Even after a move, well-placed fabrics can keep your decor fresh and visually pleasing. Additionally, using high-quality materials, such as oak and maple, can further enhance the durability of your fabric layers. So, as you prepare to relocate your sofa, remember that these simple additions can significantly impact both the protection of your upholstery and the overall maintenance of your furniture.
Use Protective Furniture Covers
Protective furniture covers are essential for keeping your sofa in top shape, especially during a move. They shield your sofa from dust, spills, and pet hair, significantly reducing the need for deep cleaning and maintaining its overall appearance. To maximize their effectiveness, invest in high-quality, custom-fit covers that adequately protect all edges and corners.
While you're at it, don't forget about regular cushion rotation. By rotating your cushions, you help distribute wear evenly, which prevents sagging in specific areas and extends your sofa's lifespan. This simple maintenance task ensures that your sofa maintains its shape and comfort over time.
For added protection, choose covers made from breathable materials. This prevents moisture buildup, which can lead to mold or mildew growth, especially in humid environments. Remember, regular maintenance is key: clean your protective covers periodically to keep them effective and prolong both their life and that of your sofa underneath.
Using protective furniture covers and rotating your cushions are two crucial steps in safeguarding your investment, ensuring your sofa stays beautiful and functional for years to come.
Couch Frame Reinforcement Techniques
When moving your sofa, it's crucial to address any frame stability concerns. You might want to check for loose joints or weak areas that could compromise its integrity during transport. Reinforcing the frame not only ensures it holds up but also enhances its overall durability and comfort.
Frame Stability Concerns
Stability is crucial when moving a sofa, as a sturdy frame can prevent unwanted damage during transport. To enhance frame stability, you should consider reinforcing the corners and joints with L-brackets. This simple addition can significantly increase the structural stability of your couch, ensuring it doesn't wobble during the move.
Next, install wood dowels or screws at strategic points to further enhance the frame's integrity. This step ensures that your sofa can withstand the stress of moving. Additionally, placing plywood or particle board under the seat cushions helps distribute weight evenly, preventing sagging over time.
Before you start moving, tighten all existing screws and bolts to make sure the frame is secure. This precaution minimizes the risk of damage during transport. For extra strength, you might apply wood glue to the joints, but remember to allow it to cure fully before moving. Moreover, proper installation practices can prevent operational problems during the moving process.
Leather Conditioning and Repair
To keep your leather sofa looking great and lasting longer, regular conditioning and repair are essential. Start by applying a high-quality leather conditioner every 6-12 months. This helps maintain suppleness and prevents cracking. Before conditioning, ensure your sofa is cleaned with a pH-balanced cleaner to effectively remove dirt and oils without damaging the finish.
If your leather shows signs of wear, a leather repair kit can be your best friend. These kits usually contain color-matched repair compounds, making it easy to fix scuffs, scratches, or tears yourself. Just follow the instructions for a seamless repair.
As you focus on the leather, don't forget the couch frame. If it's developed any creaks or wobbles, it's time to reinforce the couch frame. Adding corner braces or wooden dowels will enhance stability. For sagging cushions, consider using high-density foam inserts to restore their shape and comfort.
Cushion Foam Replacement
Replacing cushion foam can breathe new life into your sofa, making it more comfortable and supportive. Start by measuring the old foam accurately to avoid mismatched sizes that can lead to discomfort. Choose high-density foam (at least 1.8 lbs per cubic foot) for durability and support. You might also want to consider using a foam replacement calculator to determine the exact amount needed.
Before you begin, protect yourself from injury by employing furniture sliders to move your couch with ease and remove the legs for a more manageable load. While you're at it, reinforce your couch frame by adding corner brackets or using wood glue to strengthen the joints. This will prevent sagging and extend the life of your old couch.
For added comfort, opt for a combination of foam and batting in your cushions. This balance enhances your seating experience and ensures it withstands regular use without flattening quickly. With these steps, you'll not only enhance your couch's comfort but also prolong its lifespan, ensuring it remains a cherished piece in your home for years to come.
Personalized Cushion Firmness Adjustments
Personalized cushion firmness adjustments can transform your sofa experience, making it feel tailor-made just for you. By customizing the firmness of your cushions, you can significantly enhance your comfort, potentially improving your satisfaction by up to 30%. Many sofas offer removable or adjustable cushioning layers, allowing you to fine-tune the density of the foam or filling based on your unique body type and preferred seating posture.
Studies indicate that a medium-firm cushion usually strikes the perfect balance between support and comfort, accommodating various body weights and sitting styles effectively. If you have a more advanced sofa design, you might even find features like air chambers or gel-infused foam that let you inflate or deflate cushions to hit that ideal firmness level. Additionally, investing in a power reclining sofa can enhance your overall comfort experience with customizable adjustments at the push of a button.
Regular maintenance and adjustments are crucial, as they can extend the lifespan of your sofa. Well-maintained cushions resist sagging and retain their shape longer, providing a durable and comfortable seating solution. So, take the time to personalize your cushion firmness and enjoy a sofa experience that truly caters to your needs!
Seasonal Fabric Care Tips
Caring for your sofa throughout the year can significantly extend its life and keep it looking fresh. Start with winter; apply a fabric protector spray to guard against moisture and stains from snow and wet clothing. This simple step can save your sofa from lasting damage.
As spring rolls in, it's time to vacuum your couch thoroughly. Use a damp cloth to wipe down surfaces, removing any pollen and dust that accumulated during the winter months.
Summer brings the risk of fading, so avoid direct sunlight exposure. Consider installing UV-blocking window treatments to protect your upholstery.
Fall is perfect for a deep clean of your upholstery. If the fabric allows, use a steam cleaner, or hire a professional service for a thorough refresh and sanitization. Don't forget to follow the manufacturer's care instructions; they may specify dry cleaning or particular cleaning solutions to maintain your sofa's longevity.
Conclusion
Moving a sofa by yourself can seem daunting, but with the right planning and techniques, you can accomplish it successfully. Start by measuring doorways and hallways to ensure you can move your couch without damage. If you encounter tight spaces, having a plan B can save you time and effort.
Utilize furniture sliders to help you glide your heavy sofa across different floor types while protecting your flooring from scratches. When lifting, remember to use proper techniques: bend at your knees, keep the weight close to your body, and take breaks to avoid fatigue. If the sofa feels too heavy or awkward, don't hesitate to break it down by removing cushions and legs, making it more manageable.
Frequently Asked Questions
How Do You Move a Heavy Sofa Alone?
Moving a heavy sofa alone can be challenging, but it's doable. Start by using furniture sliders under each leg to glide it easily across the floor. Tilt the sofa at an angle to fit through tight spaces. If you have a dolly, lift one end and secure it with straps. Clear your path of obstacles and measure doorways beforehand. Remember to lift properly—bend your knees and keep the sofa close to avoid injury.
Can You Move a Sofa by Yourself?
Yes, you can move a sofa by yourself, but it takes some preparation. Start by measuring doorways and hallways to ensure it fits through. Use furniture sliders under the legs for easier movement across the floor. If it's heavy, a dolly can help lift and transport it. Don't forget to remove cushions and legs to lighten the load. Remember to take breaks to avoid fatigue and reassess your technique to stay safe.
How Do You Move a Couch Through a Door by Yourself?
To move a couch through a door by yourself, first measure both the couch and the doorframe to ensure it fits. Clear any obstacles around the door for a smooth path. Angle the couch diagonally as you push it through, which often helps it squeeze past tighter spots. If it's still too wide, consider removing the door from its hinges. Using furniture sliders can also make lifting and pivoting easier and safer.
How to Move a Couch on a Dolly?
To move a couch on a dolly, start by placing it securely on the dolly, using moving straps to keep it from slipping. Tilt the dolly back, lifting the couch off the ground with your legs for balance. Navigate through doorways by angling the dolly, and don't hesitate to remove doors if needed. When going down stairs, ask for help to guide the dolly. Always lock the wheels when you're not in motion.
-
Beauty and Grooming3 weeks ago
Embrace Natural Glow With Bronzer-Free Accelerators
-
Beauty and Grooming3 weeks ago
Discover Top Outdoor Tanning Lotions Today
-
Fashion Trends1 month ago
Fall 2025 Fashion Trends: Be Ahead of the Curve!
-
Vetted1 month ago
15 Best Affordable Sustainable Fashion Brands You Need to Know About in 2025
-
Interior Design6 hours ago
Mylar vs. Foil Balloons: The Ultimate Showdown
-
Beauty and Grooming3 weeks ago
Unlock Flawless Tanning With Skin Prep
-
Interior Design3 weeks ago
Create Your Dream Cottagecore Home Office Now!
-
Vetted1 month ago
15 Best Women's Fashion Trends of 2025 You Need to Know About