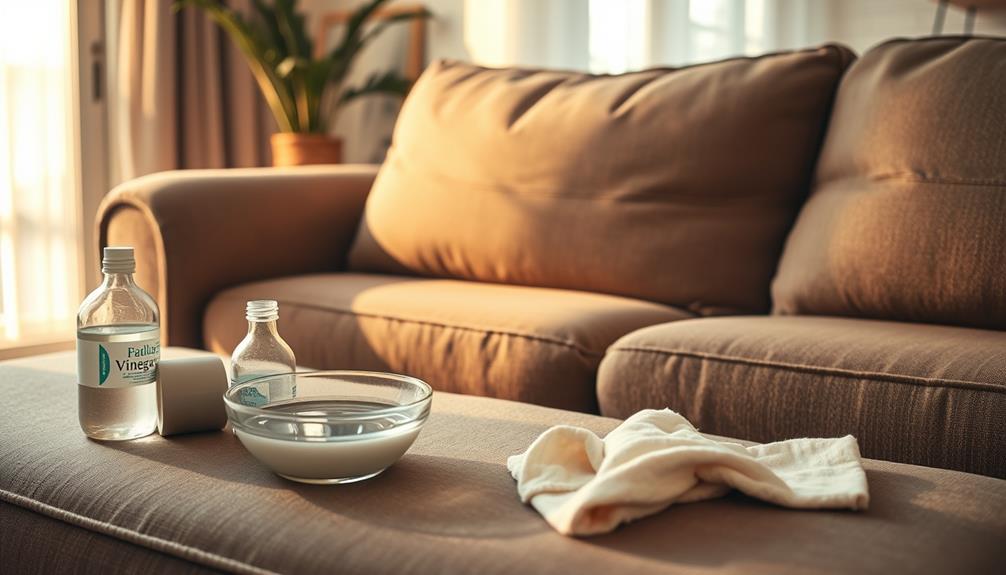

In order to stain wooden furniture, begin by taking it apart for easier access. Use 80-grit and then 220-grit sandpaper to sand the surface for a smooth finish. Wipe down the wood with a damp cloth, then apply a pre-stain conditioner to prevent any blotches. Choose your stain, test it on a piece of scrap wood, and apply it in the direction of the grain, wiping off any excess after 5-10 minutes. After it dries, check the stain and apply a second coat if needed. Finish with a protective topcoat and make sure to upkeep the furniture. There’s always more to learn about perfecting your staining technique! If you also need help with removing cigarette odor from furniture, it’s crucial to thoroughly clean the piece to get rid of any lingering smells. Begin by cleaning the surface with a mixture of white vinegar and water, then sprinkle baking soda over the upholstery and let it sit for a few hours before vacuuming it up. Additionally, consider using an odor-eliminating spray made specifically for furniture to help neutralize any remaining odors. By properly maintaining your wood furniture, not only will it look great, but it will also smell fresh. To keep your wooden furniture in pristine condition, it’s essential to implement some regular maintenance routines. Utilize cleaning tips for wood furniture, such as dusting with a microfiber cloth regularly to prevent dirt buildup and using a gentle wood cleaner for deeper cleans. Additionally, avoid placing your furniture in direct sunlight, as this can cause fading and damage over time. With consistent care and attention, your wooden pieces can remain beautiful and enjoyable for years to come.
Key Takeaways
- Disassemble furniture and sand the wood surface with 80-grit and then 220-grit sandpaper for a smooth finish before staining.
- Apply a pre-stain wood conditioner to prevent blotching, especially on softwoods and certain hardwoods.
- Test the stain on a scrap piece or an inconspicuous area to ensure desired color before full application.
- Apply stain in the direction of the wood grain, then wipe off excess after 5-10 minutes for an even finish.
- Finish with a protective topcoat, such as oil-based polyurethane, and reapply every few years for durability.

SERNIAL Womens White Tennis Shoes PU Leather Sneakers Casual Walking Shoes for Women(White,US8.5)
【Water-Resistant Upper】:Womens white tennis shoes use PU leather upper,PU upper is water-resistant and easy to clean.
As an affiliate, we earn on qualifying purchases.
Preparation Steps
Before you plunge into staining your wood furniture, it's essential to prepare properly. Start by disassembling the furniture to access all surfaces. This step allows for thorough sanding and guarantees every part is ready for stain application. After disassembly, proceed to sand down the wood with medium-grit sandpaper to remove any existing finish or imperfections. This creates a smooth surface for the stain to adhere to. Once sanded, you can choose to apply a wood conditioner to prevent the stain from blotching or use chalk paint techniques to create a distressed or antique look. Finally, be sure to wipe down the furniture with a tack cloth to remove any dust or debris before starting the staining process.
To maintain a clean environment during your project, consider using an air purifier to minimize dust particles that can settle on your work.
Begin sanding the wood down to bare wood using 80-grit sandpaper, followed by 220-grit for a smooth finish. This process removes any previous coatings, enhancing stain absorption.
Once you've sanded, clean the wood surface thoroughly with a damp cloth or tack cloth. Removing dust and debris is vital for even stain application.
If you're working with softwoods or specific hardwoods, don't skip applying a pre-stain wood conditioner. This helps prevent blotching and promotes uniform color absorption.
Additionally, consider dampening the wood lightly before sanding to raise the grain. This technique helps achieve that desired smooth finish after staining.
Using a sanding sponge can make this process easier, guaranteeing even pressure across all areas.

Adidas Women's X_PLR Path, White/White/Black, 10
Women's lightweight running-inspired sneakers for everyday wear
As an affiliate, we earn on qualifying purchases.
Safety Considerations

Staining wood furniture can be a rewarding project, but safety should always be your top priority. To start, make sure you're working in a well-ventilated area. This helps minimize inhalation of fumes from stains and finishes, preventing potential respiratory issues.
Additionally, it's wise to take into account the potential side effects and interactions of any chemicals involved, much like when selecting cold medications. Always wear safety goggles to protect your eyes from splashes and fine particles, which can cause irritation or injury.
Using latex gloves is equally important, as they shield your skin from direct contact with stains, reducing the risk of skin irritation or allergic reactions.
Before you begin, clear your workspace of non-essential items and cover surfaces to avoid workspace contamination and minimize fire hazards. Keep a fire extinguisher nearby and dispose of any oil-soaked rags in a flameproof container to prevent spontaneous combustion.

Betsy Furniture 3PC Faux Leather Reclining Couch Set, Living Room Furniture Set, Sofa, Loveseat, Glider, 8018 Multiple Colors (Gray, Sofa+Loveseat+Chair)
Dimensions: 3 pieces set, sofa 85"W x 40"D x 39"H, loveseat 75"W x 40"D x 39"H, glider recliner...
As an affiliate, we earn on qualifying purchases.
Staining Techniques
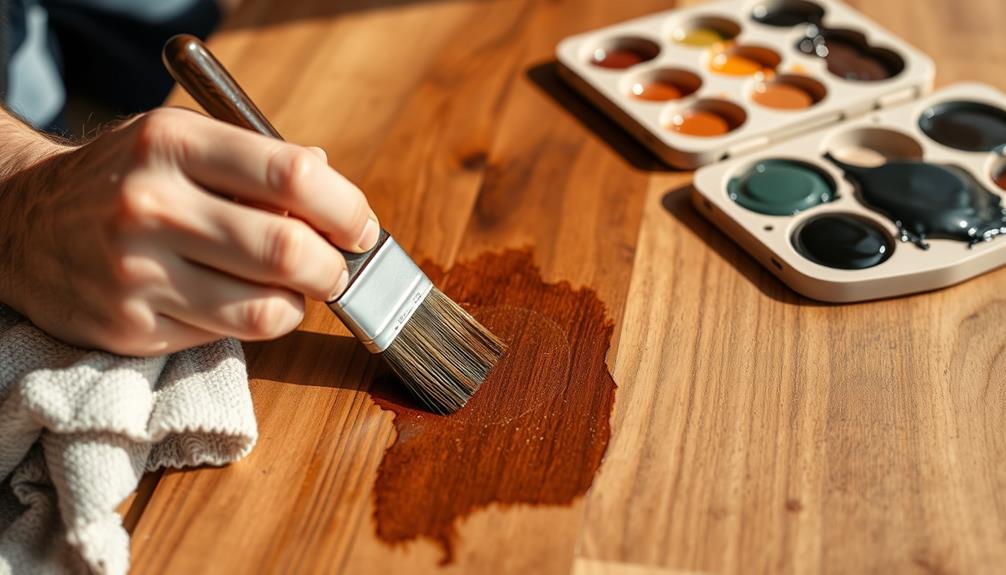
Achieving a beautiful finish on your wood furniture hinges on mastering effective staining techniques. Start by testing the stain on a scrap piece or an inconspicuous area of the furniture. This guarantees you get the desired color and finish before applying it to the entire piece.
For those who frequently encounter dust and allergens in their homes, consider using best vacuums for dust removal in 2024 to keep your workspace clean and free of debris that may affect your staining process.
When you're ready to apply the stain, use a clean cloth, brush, or staining pad and work in the direction of the wood grain. It's essential to maintain a wet edge to avoid lap marks. Work in small sections and remember to wipe off excess stain after 5-10 minutes to achieve a consistent finish without blotches.
For a smoother surface, lightly sand with fine-grit sandpaper between coats. Generally, two to three coats are recommended for the best results. Allow sufficient drying time between coats—4-6 hours for oil-based stains and 2-4 hours for water-based ones, following the manufacturer's guidelines.
Here are some tips to keep in mind:
- Always test the stain.
- Apply in the direction of the grain.
- Wipe off excess stain.
- Lightly sand between coats.
- Use wood conditioner before staining.

Portaforta 4 PCS Living Room Furniture Set, 3 Seat Couch & Loveseat & Armchair with Storage Ottoman, Modern Couch Set with Side Pockets, Couches for Living Room (3+2+1 Seat/Beige)
3 Piece Sofa Set Combination: You will get a 3-seat sofa, 1-seater accent chair and a loveseat
As an affiliate, we earn on qualifying purchases.
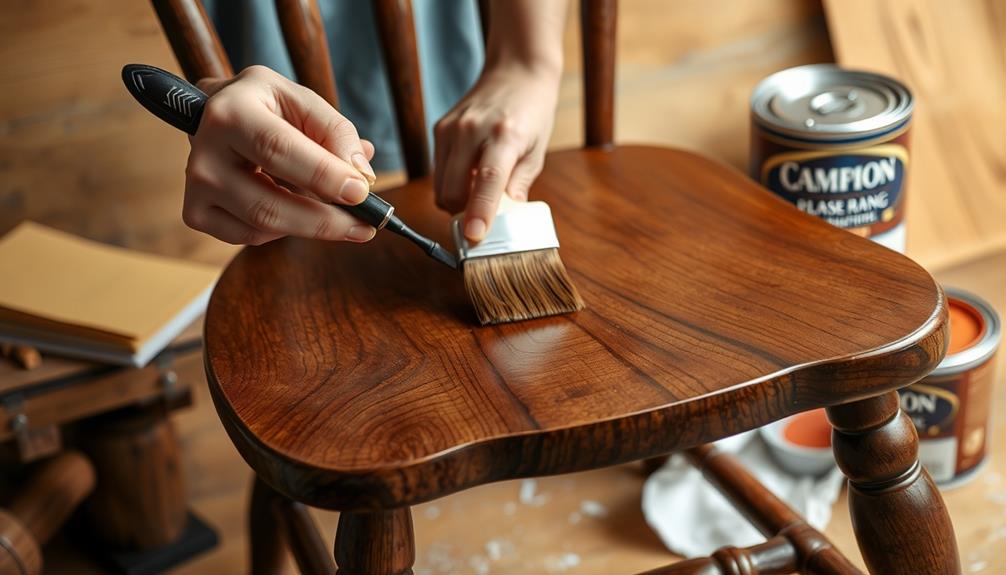
Finishing Touches
Once the stain is applied and dried, it's time to focus on the finishing touches that will enhance the beauty and durability of your wood furniture.
Start by inspecting the stained wood for consistency. If you notice uneven areas, don't hesitate to apply a second coat of stain, guaranteeing to lightly sand the surface with 220-grit sandpaper between each coat. This step provides a smoother finish and deepens the stain color.
After the final coat of stain has cured fully, clean the stained surface with a soft cloth to remove dust and debris. This guarantees a flawless application of your protective topcoat.
You can choose between a water-based stain for a clear finish or oil-based polyurethane for added durability. Whichever you pick, follow the manufacturer's instructions for drying and curing times, which can vary.
Once the protective topcoat is applied, it'll shield your wood furniture from wear and tear.
For maintenance, remember to reapply the topcoat every few years as needed. These finishing touches will keep your stained wood looking stunning for years to come.
Maintenance and Care

To keep your stained wood furniture looking its best, regular maintenance is essential. Maintaining your furniture not only enhances its appearance but also extends its lifespan.
Start by dusting stained wood frequently with a soft, dry cloth to prevent dirt and grime buildup that can dull the finish. Use coasters and placemats to protect surfaces from water rings, heat, and scratches that can compromise the integrity of the stain.
Remember these key maintenance tips:
- Reapply a protective topcoat, like polyurethane or wax, every few years.
- Avoid using harsh chemicals or abrasive cleaners on your stained surfaces.
- Keep your furniture out of direct sunlight to prevent fading.
- Regularly check for any signs of wear or damage to the wood stain.
- Choose the right cleaning products suitable for your specific wood species.
Frequently Asked Questions
What Is the Best Way to Apply Stain to Wood Furniture?
To apply stain effectively, use a natural bristle brush or lint-free cloth for even coverage. Stir the stain well, apply in small sections, and wipe off excess after a few minutes for ideal results.
Can You Stain Over Wood Without Sanding?
Imagine painting a canvas without priming it first; you can stain over wood without sanding if it's clean and in good condition. Just remember to test a small area for the best results!
Do I Need to Sand Wood Before I Stain?
Yes, you need to sand wood before staining. It removes imperfections and prepares the surface, ensuring better stain absorption. Skipping this step can lead to blotchy, uneven results that won't look professional.
What Is the Best Way to Stain a Wooden Table?
To stain a wooden table effectively, sand it thoroughly, clean the surface, apply a wood conditioner if needed, choose your stain type, and wipe off excess after applying. Let it dry completely before additional coats.
Conclusion
Now that you've mastered the art of staining wood furniture, you're ready to transform your pieces into stunning masterpieces. With a little patience and the right techniques, you can breathe new life into your beloved items, turning the ordinary into the extraordinary. Remember, it's not just about the color; it's about the stories your furniture will tell. So go ahead, embrace the process, and let your creativity shine through every brushstroke. Happy staining!