Connect with us

Styling Tips

Interior Styling Vs Interior Design – Which Career Path Should You Choose?

The choice between interior styling and design can shape your career—discover which path aligns with your passions and potential!

Published

on

styling or designing careers

When you're choosing between interior styling and interior design, think about what excites you most. Interior design involves creating functional spaces and typically requires a degree and licensing. You'll tackle structural changes and manage larger projects. In contrast, interior styling focuses on aesthetics through color and furnishings, often without formal education or certification. It's more about enhancing existing spaces with creative decorations. Your decision should reflect your skills and interests. If you want to explore the challenges, financial aspects, and market trends of each path, you'll find valuable insights that can guide your choice.

Key Takeaways

  • Interior design requires formal education and certification, while interior styling can be pursued with little to no formal training.
  • Designers focus on functional layouts and structural changes, whereas stylists enhance visual appeal without altering existing structures.
  • The earning potential in interior design can be inconsistent, while home staging offers quicker financial returns with substantial income potential.
  • Designers must adhere to building codes and use CAD software, whereas stylists emphasize aesthetics and creativity without technical software requirements.

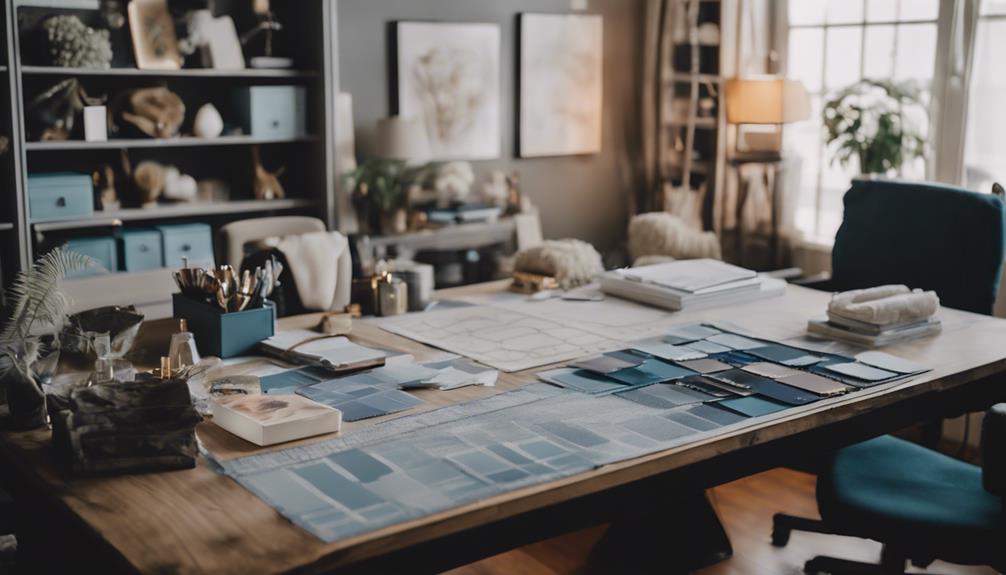
Understanding Interior Design

Interior design is all about creating functional and visually appealing spaces that meet specific needs and preferences. As you explore the world of interior design, you'll find that interior designers play an essential role in transforming environments. They utilize their skills to plan layouts, select materials, and guarantee compliance with building codes and regulations.

To become an effective designer, you'll likely need to complete an Interior Design program, which provides fundamental knowledge and training. In this program, you'll learn to use computer-aided design (CAD) software for creating schematic drawings and renderings. This skill is important for communicating your ideas clearly to clients and contractors.

It's also important to note that many states require interior designers to obtain licensure, underscoring the significance of formal education in the field. Interior designers typically tackle larger projects involving structural changes, collaborating closely with architects and other professionals.

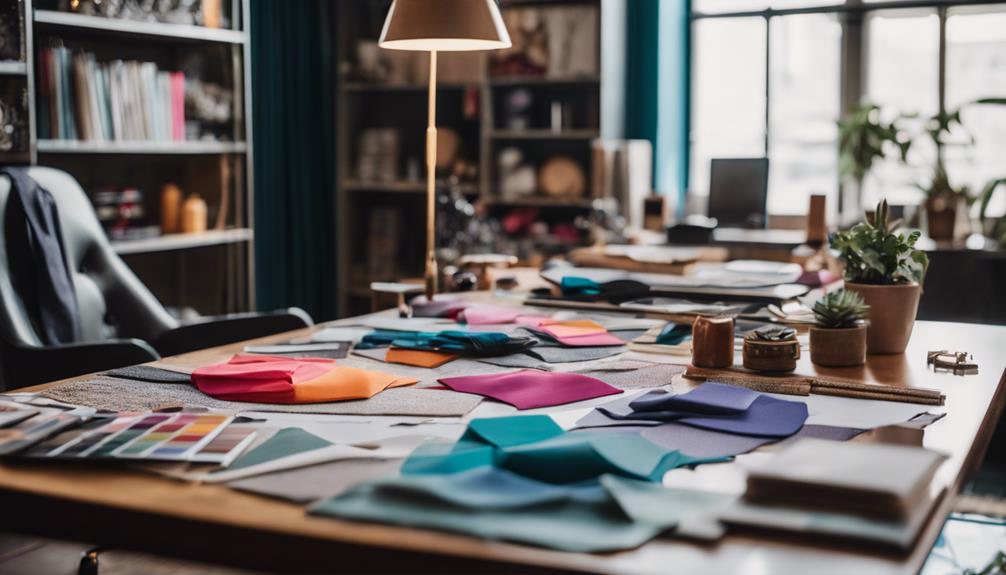
Exploring Interior Styling

interior design inspiration journey

Styling a space is all about enhancing its visual appeal, using carefully chosen colors, furniture, and decorative elements to create a cohesive and inviting atmosphere. Unlike interior designers, who often focus on structural changes and larger projects, interior styling emphasizes the aesthetic without the need for formal education or certification. This accessibility makes it an appealing option for many aspiring creatives.

As an interior stylist, you typically work on smaller projects, honing in on the visual aspects of a space. Your role involves selecting the right pieces to transform a room and create a specific mood. Networking and building a strong portfolio are essential for success; many stylists grow their clientele through referrals and showcasing their work online.

The demand for home staging services has also increased, making interior styling a lucrative career path. By preparing homes for sale or enhancing existing spaces, you can earn significant income while helping clients realize their vision. If you're passionate about aesthetics and enjoy working with colors and decor, exploring interior styling could be the perfect fit for you.

Advertisement

Key Differences Explained

distinctive features clarified thoroughly

Understanding the distinctions between interior design and interior styling can help you choose the right path for your creative aspirations.

An interior designer focuses on creating functional and aesthetically pleasing spaces through structural modifications. This role typically requires formal education, often a bachelor's degree, and licensing in many states.

In contrast, an interior decorator, or stylist, emphasizes the visual appeal of spaces without making structural changes, relying on experience and a keen eye for aesthetics.

When considering the interior designer vs decorator dynamic, note that designers often tackle larger projects, such as residential, commercial, or healthcare spaces, while decorators handle smaller, more cosmetic updates.

Designers utilize tools like CAD software for detailed plans and must adhere to building codes. Decorators, on the other hand, concentrate on selecting color schemes, furniture, and decorative elements without the same regulatory constraints.

Both design career paths enhance living environments but differ greatly in their educational and regulatory frameworks.

Advertisement

If you're drawn to the technical aspects and enjoy structural creativity, interior design might be your calling. If you prefer the aesthetic touch and a more flexible approach, interior styling could be the right fit.

Career Paths Comparison

exploring career options together

When you're considering a career in interior design or decorating, it's important to look at the educational requirements and job responsibilities for each path.

Interior designers typically need formal education and licensing, while decorators can often enter the field without such credentials.

Understanding these differences can help you choose the right direction for your career.

Educational Requirements and Licensure

What sets apart the educational requirements and licensure for interior designers compared to interior decorators?

As an aspiring interior designer, you typically need a bachelor's degree in interior design or architecture. This formal education provides you with both theoretical knowledge and practical skills, including business training.

Advertisement

In contrast, interior decorators can often enter the field without any formal education, relying instead on their experience and understanding of design principles.

When it comes to licensure, many states require interior designers to obtain certification, usually by passing the National Council for Interior Design Qualification (NCIDQ) exam. This licensure guarantees that you meet industry standards and stay informed about current trends.

On the other hand, interior decorators don't need such certification, which allows for a more accessible entry into the field.

While continuing education is vital for interior designers to maintain licensure and stay updated, decorators can enhance their skills through workshops or self-directed learning.

If you're considering specialization within interior design, be aware that additional certifications may be necessary, whereas decorators typically don't face specialized licensing requirements.

Advertisement

Job Responsibilities and Focus

Interior designers and decorators take on distinct job responsibilities, with designers focusing on functional layouts and structural changes, while decorators enhance existing spaces' aesthetics. If you're considering an interior design career path, it's crucial to understand these differences.

Here's a quick comparison of their job responsibilities:

  1. Interior Designers: They create functional layouts, making structural alterations, and must adhere to building codes and safety standards.
  2. Interior Decorators: They select colors, furnishings, and decorative elements to improve visual appeal without structural changes.
  3. Project Management: Designers often oversee larger projects, coordinating with contractors and managing timelines; decorators usually handle smaller, cosmetic updates.
  4. Technical Skills: Designers use CAD software for detailed planning, while decorators focus on aesthetics without needing technical design software skills.

Education and Training Requirements

educational and training standards

A solid foundation in education and training is essential for anyone aiming to excel in interior styling or design. For aspiring interior designers, obtaining a bachelor's degree in interior design or architecture is important. Look for programs accredited by the Council for Interior Design Accreditation (CIDA) to guarantee credibility in your education.

Many states also require licensure for interior designers, which involves passing the National Council for Interior Design Qualification (NCIDQ) exam.

On the other hand, interior decorators may not need formal education, but taking courses on design principles can greatly enhance your skills and marketability. Regardless of your chosen path, continuing education is critical. It helps you stay updated on industry trends and maintain any necessary licensure or certifications.

Additionally, pursuing specialized training in areas like sustainable design, lighting, or home staging can provide you with extra career opportunities and broaden your skill set.

Advertisement

Skills for Success

essential abilities for achievement

To succeed in interior styling or design, you need a strong set of essential design skills, including an eye for aesthetics and proficiency in design software.

Networking and collaboration with industry professionals can open doors and enhance your knowledge.

Essential Design Skills

Mastering essential design skills is key to succeeding in the competitive fields of interior styling and design. If you're pursuing a career as an interior professional, focus on honing these critical abilities:

  1. Understanding Design Principles: Grasp color theory, spatial awareness, and materials selection to create functional and visually appealing spaces.
  2. Practical Decoration Skills: Develop hands-on experience in decoration and staging, allowing you to merge aesthetics with client preferences and project goals effectively.
  3. Attention to Detail: Cultivate a keen eye for detail and good taste, which helps you curate harmonious environments that resonate with your clients.
  4. Ongoing Education: Stay updated on design trends and techniques through workshops and online courses. This commitment enhances your professional credibility and keeps your skills sharp.

Networking and Collaboration

Building strong connections within the interior design and styling community is essential for accessing new opportunities and advancing your career. Networking with industry professionals, such as real estate agents and contractors, can lead to valuable referrals and potential collaborations that boost your prospects. By participating in local design groups and community forums, you gain insights and support, plus access to job postings shared within trusted networks.

Collaboration is another key aspect of success in this field. Working with photographers and artists can elevate your project presentations and diversify your portfolio, showcasing your unique skills and styles. Attending workshops and industry events is a fantastic way to meet mentors and peers, facilitating the exchange of ideas and best practices that can enhance your career growth.

Additionally, building a robust online presence through social media and professional platforms enhances your visibility and attracts clients. It also serves as a powerful tool for networking with other design professionals.

Market Trends and Opportunities

emerging market insights analysis

In today's evolving market, the demand for home staging services is surging as more interior designers recognize its profitability and quick turnaround times. This trend aligns with broader market trends in interior design, making it a lucrative path for your career.

As home staging becomes more prevalent, you can capitalize on opportunities that cater to the real estate sector. Here are four key trends to examine:

Advertisement
  1. Sustainable Design: There's a growing interest in eco-friendly practices. You can attract clients by incorporating sustainable materials and designs.
  2. Technology Integration: Use tools like virtual reality and 3D modeling to enhance your presentations. Clients appreciate innovative visualization methods.
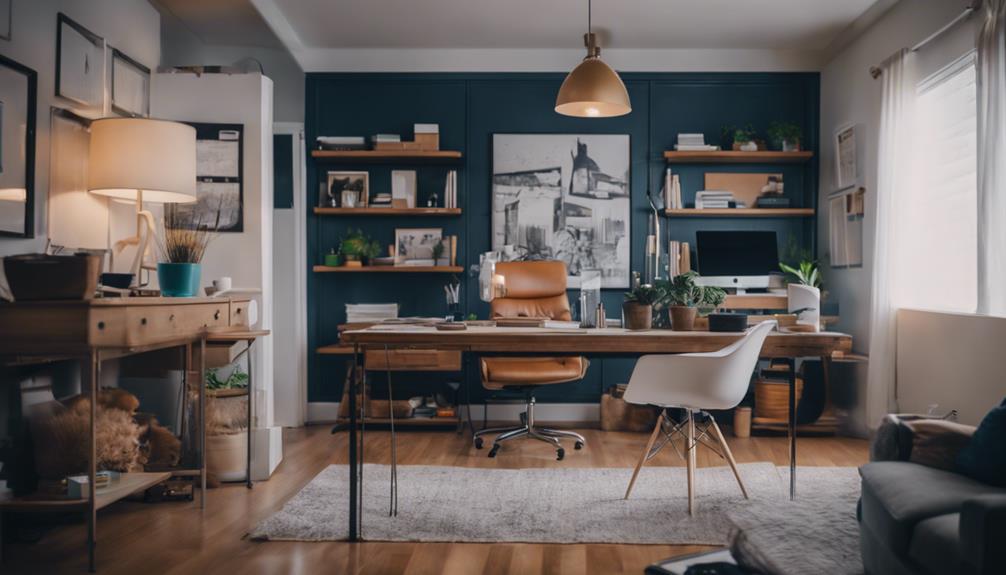
  3. Multifunctional Spaces: With remote work on the rise, homes are evolving. Focus on designing spaces that serve multiple purposes for work and leisure.
  4. Faster Sales: Staged homes sell quicker and at higher prices. This trend emphasizes the effectiveness of your services in the real estate market.

Challenges in Each Field

field specific challenges identified

When exploring the challenges in interior styling and design, you'll quickly notice that time commitment can be a major hurdle.

Interior designers often struggle with creative freedom due to client demands, while home stagers enjoy more flexibility but face their own set of pressures.

Additionally, income stability can vary greatly between the two fields, impacting your career choices and financial growth.

Time Commitment Challenges

Time commitment challenges vary greatly between interior design and home staging, as the former often demands years of study and extensive project timelines, while the latter allows for quicker turnarounds and flexibility for those juggling other responsibilities.

If you're considering these paths, here are some key points to keep in mind:

  1. Study Interior Design: You'll typically need 2 to 4 years of full-time education, which can be tough if you have family or work obligations.
  2. Project Timelines: Interior design projects often involve lengthy decision-making processes and client revisions, extending timelines considerably.
  3. Cost of Education: High tuition costs and potential income loss during your studies can deter many from pursuing interior design.
  4. Entry into Home Staging: Experienced home stagers often rely on practical experience, allowing them to enter the field without the long-term time commitment of formal education.

Ultimately, if you're looking for a career that offers flexibility and quicker results, home staging might be the better fit.

On the other hand, if you're ready to invest time and effort into a more in-depth career, interior design could be the path for you.

Advertisement

Creative Freedom Limitations

Steering creative freedom can be a significant challenge in both interior design and home staging, as each field presents unique constraints that influence how professionals express their vision.

As an interior designer, you might encounter creative freedom limitations due to client expectations and strict building codes. These regulations can stifle your innovative design choices, leading to frustration when clients alter your carefully crafted spaces after completion. This not only impacts your original vision but can also create conflicts over design integrity.

In contrast, home stagers often enjoy greater creative control. You focus on aesthetics for immediate appeal, primarily working with existing furnishings, which can lead to varied and dynamic projects. However, even in staging, you might still face some constraints based on client preferences and budget restrictions.

Additionally, the competitive nature of the interior design field can limit your opportunities for individual expression. You may find yourself competing on price rather than creativity, particularly in retail settings. While interior decorators often work on smaller projects with less structural involvement, they still grapple with client expectations and budget constraints, which can also hinder their creative expression.

Balancing these challenges is essential for success in either path.

Advertisement

Income Stability Concerns

Income stability is a significant concern for both interior designers and home stagers, as each field presents unique financial challenges. As you consider your career path, it's crucial to understand how each profession can impact your financial well-being.

Project-Based Work: Interior designers often face inconsistent income due to project-based work, with starting salaries averaging around $43,000, which can fluctuate based on market demand.

Real Estate Dependency: Home stagers rely heavily on the real estate market, and while successful stagers can earn up to $10,000/month during peak seasons, income can dwindle during slower periods.

Job Availability: Many interior designers find themselves in sales roles instead of design, leading to lower income stability and potential dissatisfaction in their careers.

Education Costs: The high cost of education and licensing for interior designers can create financial burdens, making it harder to achieve consistent income, especially early on.

Advertisement

Financial Considerations

monetary factors and implications

When comparing interior design and home staging, financial considerations play a crucial role in determining the best career path for you.

Interior design typically requires a formal education that spans four years, leading to considerable tuition costs and potential lost income during that time. This investment can add up quickly, especially when you consider the high competition in the field. Many designers and interior decorators end up in retail positions, which can limit your earning potential.

In contrast, home staging can be pursued without a degree, which allows for a lower initial financial investment. You can enter the workforce much faster, reducing your financial risk. Successful home stagers can earn substantial income, even up to $10,000 per month, making this path financially viable. Additionally, many home stagers work with existing furnishings, appealing to budget-conscious clients and minimizing expenses related to new purchases.

Ultimately, when weighing your options, consider how much you're willing to invest upfront and your long-term financial goals. Both career paths have unique financial implications that could greatly impact your future.

Making Your Decision

choosing wisely and confidently

Making a decision between interior design and home staging hinges on your personal goals and circumstances. To help you evaluate your options, consider the following factors:

  1. Career Goals: Interior designers usually need formal education and licensing, while home staging has a lower barrier to entry, focusing on aesthetics.
  2. Financial Situation: Interior design programs can take 2 to 4 years and can be expensive. In contrast, home staging training is often quicker and more affordable.
  3. Creative Preferences: If you enjoy managing large projects with structural changes, interior design might be your path. However, if you prefer shorter timelines and more creative freedom, home staging could be the better fit.
  4. Job Market Trends: The demand for home staging services is increasing, especially in real estate, offering lucrative opportunities. Meanwhile, the interior design field can be more competitive.

Frequently Asked Questions

Which Career Is Best Interior Designing or Fashion Designing?

Choosing between interior designing and fashion designing depends on your passion. If you love creating spaces, go for interior design. If you're drawn to clothing and trends, fashion design might be your best fit.

Should I Be an Interior Designer or Interior Decorator?

You should consider your passion for structure versus aesthetics. If you enjoy creating functional spaces and working with regulations, interior design's for you. If you prefer enhancing existing decor, then interior decorating might be your path.

What Is the Difference Between Interior Design and Interior Styling?

Interior design focuses on creating functional spaces through structural changes, while interior styling enhances existing spaces with decor. Designers require formal education, whereas stylists can succeed with an eye for aesthetics and minimal training.

Advertisement

Should I Study Interior Design or Fashion Design?

“Follow your heart.” If you're drawn to creating spaces and understanding functionality, study interior design. If fashion and trends excite you, then fashion design's your path. Choose what resonates with your passion and creativity.

Conclusion

Ultimately, choosing between interior styling and interior design depends on your personal passion and career goals. If you have a keen eye for aesthetics and enjoy creating visually appealing spaces, interior styling might be the perfect fit for you. On the other hand, if you are more interested in the technical and functional aspects of designing a space, then a career in interior design might be more suitable. It’s also important to consider the industry trends, such as the debate between inline style vs styled components, and decide which path aligns better with your interests and future aspirations. Ultimately, following your passion and staying up-to-date with industry developments will lead to a successful and fulfilling career in either field.

You might think styling is less impactful, but remember, it's about creating a mood and atmosphere that resonates with people.

Both fields offer unique opportunities and challenges, so weigh your options carefully.

Trust your instincts, and immerse yourself in what excites you the most.

Advertisement

Whether you're crafting spaces or curating styles, you can make a meaningful difference in people's lives.

Continue Reading
Advertisement

Styling Tips

Styling Ideas for Your Lantern Roof Extension – Maximize Light!

Prepare to transform your lantern roof extension into a luminous haven with these clever styling ideas that will leave you inspired!

Published

on

lantern roof extension styling tips

To maximize light in your lantern roof extension, focus on key styling elements. Choose light, reflective colors for walls and furniture to amplify brightness. Arrange furniture away from windows to allow sunlight to flow freely, and use mirrors strategically to bounce light around the space. Incorporate sheer curtains for privacy without sacrificing natural illumination and consider adding indoor plants to bring vibrancy. Don't forget to use multi-functional furniture to save space while enhancing the airy feel. Each choice enhances your environment, turning it into a cheerful, well-lit oasis that'll make you want to explore more inspiration for your space.

Key Takeaways

  • Choose lighter color palettes for walls and furniture to enhance brightness and create a cheerful atmosphere in your lantern roof extension.
  • Position mirrors strategically across from windows and roof lanterns to reflect and amplify natural light throughout the space.
  • Utilize sheer curtains to maintain privacy while allowing natural light to diffuse softly into the room, creating an airy feel.
  • Incorporate indoor greenery to improve air quality and add visual interest without obstructing light; opt for light-colored pots to enhance brightness.

Benefits of Natural Light

Natural light can instantly uplift your mood and make your space feel more inviting. When you're surrounded by light-filled environments, you'll likely notice a significant boost in your overall well-being. This is especially important if you work from home; natural light enhances productivity and focus, enabling you to tackle tasks with greater efficiency.

Incorporating roof lanterns into your design is an excellent way to maximize the amount of natural light entering your home. These architectural features not only brighten up a room but also create an illusion of a larger, more open space. Imagine sitting in your home office, basking in the warm glow of sunlight filtering through your roof lanterns. You'll feel more energized and motivated to get things done.

Moreover, utilizing natural light reduces your reliance on artificial lighting, leading to energy savings and lower utility bills. By embracing the numerous benefits of natural light, you can transform your living and working environments into bright, cheerful spaces that promote happiness and productivity.

Choosing the Right Colors

selecting ideal color palettes

Selecting the right colors for your lantern roof extension can dramatically enhance the brightness and overall atmosphere of the space. When you're choosing the right colors, consider lighter palettes for your walls and furnishings. Soft neutral tones, like pale greys or off-whites, work wonders with the natural light pouring in from the roof lanterns. These colors create a harmonious backdrop, making your extension feel more open and inviting.

To take it a step further, incorporate reflective surfaces into your design. Gloss finishes or strategically placed mirrors can amplify the light effect, making your space feel even larger. They bounce light around, enhancing the overall brightness.

Don't shy away from adding pops of color through accessories or artwork. Bright cushions, vibrant wall art, or colorful plants can inject personality and visual interest into your extension without overshadowing the natural light. By utilizing color theory, you can evoke specific feelings; warm hues can create a cozy environment, while cool tones can offer a calming effect.

Advertisement

Ultimately, choosing the right colors won't only brighten your space but also enhance its charm and warmth.

Furniture Arrangement Tips

effective space layout strategies

When arranging furniture in your lantern roof extension, think about how to make the most of your space while maximizing natural light.

You'll want to choose light-reflective materials that enhance brightness and create an airy feel.

Optimal Space Utilization

To make the most of your lantern roof extension, arrange furniture to encourage light flow and maintain an open atmosphere. By focusing on ideal space utilization, you can enhance the natural daylight that pours in through the roof lights, creating a bright and inviting environment.

Here are some tips to take into account:

  1. Keep larger furniture pieces away from windows and lanterns to allow sunlight to illuminate every corner of the room.
  2. Incorporate multi-functional furniture like storage ottomans or nesting tables to maximize floor space while keeping the area airy.
  3. Use lighter color palettes for your furniture and decor, reflecting sunlight and enhancing the brightness in your extension.
  4. Position seating to encourage interaction and views towards the lantern, fostering a cozy atmosphere while maximizing light exposure.

Light-Reflective Materials

Incorporating light-reflective materials in your furniture arrangement can dramatically brighten your lantern roof extension, making the most of the natural light streaming in. Start by choosing furniture with high-gloss finishes. These surfaces bounce light around the room, enhancing brightness. You might also consider mirrors—mirrored coffee tables or decorative accents can create an illusion of depth and amplify the amount of light in your space.

Opt for lighter-colored upholstery and fabrics, such as whites or pastels. These colors reflect sunlight instead of absorbing it, contributing to a bright atmosphere. When arranging your furniture, be mindful of the pathways for light. Position larger pieces away from windows to avoid blocking any natural illumination.

Advertisement

Additionally, incorporating transparent or translucent furniture like acrylic chairs or glass tables can maintain an open feel while allowing light to flow freely. By combining these strategies with your furniture arrangement, you'll guarantee your lantern roof extension feels as bright as possible, making every moment in the space a cheerful one.

Incorporating Mirrors for Brightness

enhancing light with mirrors

Incorporating mirrors in your lantern roof extension can work wonders for brightness.

By strategically placing large mirrors, you can bounce natural light around the space, creating a more inviting atmosphere.

Plus, reflective surfaces can make your room feel larger, enhancing the overall design and functionality.

Reflective Surfaces Impact Light

How can you use mirrors to amplify the natural light in your lantern roof extension?

By incorporating reflective surfaces, you can create a vibrant and airy atmosphere that enhances the light and ventilation in your space. Here are some effective ways to use mirrors:

Advertisement
  1. Large Wall Mirrors: Position a large mirror opposite your roof lantern to bounce light around the room, considerably brightening the area.
  2. Splashbacks: Use mirrors as splashbacks in your kitchen or dining areas to reflect light, maximizing the illumination from your roof lantern.
  3. Light-Colored Surfaces: Opt for light-colored walls and furnishings that work harmoniously with mirrors to create a sense of openness and brightness.
  4. Decorative Elements: Choose stylish mirrors that not only reflect light but also add a modern touch, enhancing the overall design of your extension.

Incorporating mirrors in these ways can improve the perception of space while providing energy savings by reducing your reliance on artificial lighting during the day.

Embrace reflective surfaces to transform your lantern roof extension into a luminous haven!

Strategic Placement for Effectiveness

Positioning mirrors thoughtfully can greatly enhance the brightness in your lantern roof extension by effectively redirecting and amplifying natural light. By incorporating large wall mirrors directly across from windows or glass panels, you can maximize the reflection of sunlight, creating a more open and airy atmosphere.

Consider using mirrors as splashbacks or decorative accents in key areas. This not only serves a practical purpose but also adds a stylish focal point to your space. When you position mirrors at angles that capture and redirect light from the roof lantern, you'll optimize illumination throughout the extension, enhancing the overall ambiance.

Don't forget about the impact of light-colored and reflective surfaces for cabinetry and flooring. These elements can work in tandem with mirrors to further increase brightness, especially in areas that receive limited natural light.

Utilizing Sheer Curtains

enhancing light with transparency

Sheer curtains transform your lantern roof extension by allowing natural light to flood the space while maintaining your privacy. They create a bright, airy atmosphere that enhances your home's aesthetic. With sheer curtains, you can enjoy the best of both worlds—ample light control and a stylish look.

Consider these benefits of incorporating sheer curtains into your design:

Advertisement
  1. Privacy: They provide a barrier from the outside while still letting in natural light.
  2. Visual Appeal: Available in various fabrics and colors, sheer curtains can complement your decor and elevate the overall ambiance.
  3. Glare Reduction: By diffusing sunlight, they help reduce glare and protect your furniture from fading over time.
  4. Versatility: Layer them with blackout curtains for adjustable light control, giving you complete flexibility depending on the time of day.

Lightweight and easy to install, sheer curtains are a practical choice for enhancing your lantern roof extension. Embrace the beauty and functionality they offer, creating a space that feels both inviting and serene.

Adding Indoor Greenery

enhancing spaces with plants

Incorporating indoor greenery into your lantern roof extension not only improves air quality but also maximizes the benefits of abundant natural light. Indoor plants thrive in bright environments, so placing larger plants near the edges of your space guarantees they soak up all that lovely light without blocking your views from the glazing options.

Consider utilizing hanging planters or wall-mounted greenery for a stunning vertical garden effect. This approach allows you to make the most of available light while keeping your floor space open, perfect for a home office setting. Choosing light-colored pots can help bounce light around the room, enhancing the overall brightness and ambiance of your extension.

Incorporating a variety of plant heights and types creates a dynamic and inviting indoor landscape, making certain each plant gets adequate light. This diversity not only adds visual interest but also contributes to a serene atmosphere that boosts creativity and productivity in your home office.

Maximizing Vertical Space

utilizing vertical storage solutions

Maximizing vertical space in your lantern roof extension can transform the area, making it feel more open and airy. To achieve this, consider the following design elements:

  1. Install a roof lantern: A slim-framed glass roof lantern enhances natural light and makes the ceiling appear higher, amplifying the sense of vertical space.
  2. Strategically place furniture: Position key functional areas, like your dining or living space, directly beneath the roof lantern to draw the eye upward, further enhancing the feeling of height.
  3. Incorporate vertical design elements: Use tall bookshelves or hanging plants to create visual interest and complement the increased vertical space, making the room feel more cohesive.
  4. Choose light colors: Opt for light, reflective color palettes for your walls and ceilings. This choice can amplify brightness and enhance the overall spaciousness of the room.

Personalizing Your Decor

customizing your home aesthetics

Personalizing your decor in a lantern roof extension allows you to create a unique space that reflects your style while enhancing the natural light and ambiance. Start by selecting a light color palette for your walls and furnishings. This choice will reflect and amplify the sunlight streaming through the roof lantern, making your space feel more open and airy.

Next, contemplate incorporating mirrors into your decor. Placing large wall mirrors or opting for mirrored furniture can help bounce light around the room, enhancing overall brightness. Pair this with light, sheer window treatments that let sunlight filter in without sacrificing privacy.

To further maximize the light, choose light-reflective surfaces, like glossy finishes on cabinets or countertops. These surfaces will complement the influx of natural light, creating a luminous environment. Finally, introduce indoor plants that thrive in bright conditions. They not only purify the air but also add a vibrant touch to your decor.

Here's a quick overview of key elements to ponder:

Advertisement
Element Purpose
Light Color Palette Reflects and amplifies natural light
Mirrors Bounces light for enhanced brightness
Indoor Plants Adds vibrancy and improves air quality

Frequently Asked Questions

Does a Roof Lantern Let in More Light?

Yes, a roof lantern does let in more light. Its design and larger glass area enhance vertical light penetration, brightening deeper spaces and creating an airy atmosphere. You'll definitely notice the difference in brightness!

How Do You Light an Extension?

To light your extension, incorporate multiple light sources, use dimmable LEDs for flexibility, install skylights for natural brightness, and place task lighting strategically. Reflective surfaces also enhance light, making your space feel brighter and more inviting.

Can You Hang a Light From a Roof Lantern?

Yes, you can hang a light from a roof lantern, as long as it can support the weight. Choose fixtures that match the style, and guarantee proper electrical connections for safe, effective illumination.

Does a Roof Lantern Need an Upstand?

Yes, a roof lantern needs an upstand. It prevents water pooling, guarantees effective drainage, and complies with building regulations. Proper installation also helps insulate the structure, enhancing energy efficiency and prolonging its lifespan.

Conclusion

By embracing these styling ideas, you can truly transform your lantern roof extension into a bright, inviting space.

Advertisement

Imagine how much more enjoyable your home will be with an abundance of natural light streaming in!

Remember to choose light colors, arrange your furniture wisely, and incorporate greenery to enhance that airy feel.

Are you ready to create a haven that maximizes light and reflects your personal style?

Immerse yourself in these tips and let your creativity shine!

Advertisement
Continue Reading

Styling Tips

Pomade Vs Putty Vs Styling Cream – the Ultimate Guide to Choosing the Best Product!

Find out which styling product—pomade, putty, or cream—will elevate your hairstyle and unleash your true potential!

Published

on

choosing best hair product

When it comes to choosing between pomade, putty, and styling cream, it all depends on your hairstyle goals. Pomade offers a strong hold with a shiny finish, perfect for structured styles like pompadours. If you're after a more casual, tousled look, putty provides medium hold and a matte finish, allowing for easy moldability. On the other hand, styling cream is lightweight, enhances natural texture, and gives low to medium hold, ideal for a relaxed, effortless appearance. Each product has its unique qualities, so figuring out what suits you best is key. Discover more insights to make the perfect choice! If you’re unsure about which product to choose, experimenting with different options can help you determine what works best for your hair type and desired look. Additionally, consider seeking recommendations from hairstylists or friends who have similar hair textures and styles. Just as you might weigh your options between rich chocolate cake and soft dessert options, take the time to explore your styling product choices to find the perfect match for your hair.

Key Takeaways

  • Hold Strength: Pomade offers strong hold for structured styles, while putty provides medium hold for textured looks, and cream delivers low to medium hold.
  • Finish Types: Choose pomade for a high-shine finish, putty for a matte finish, and styling cream for a low to medium shine.
  • Application Techniques: Use pomade on dry or damp hair, putty on clean, damp hair, and apply styling cream to enhance natural shine and smoothness.
  • Hair Type Suitability: Select pomade for polished hairstyles, putty for casual textures, and cream for relaxed, natural finishes based on your hair type.

Understanding Hair Styling Products

When it comes to hair styling products, knowing the right type for your hair and desired style can make all the difference. Each product—pomade, putty, and styling cream—offers unique benefits tailored to specific hair types and hairstyles.

Pomade's greasy or creamy texture provides a strong hold with a high-shine finish, making it perfect for structured looks like pompadours or slicked-back styles. If you're aiming for a polished, sleek appearance, pomade's hold strength is your best ally.

On the other hand, hair putty offers a thick, moldable consistency that delivers a flexible hold with a matte finish. This makes it ideal for creating textured and tousled hairstyles, giving you that effortless, natural look.

For those with medium to long hair types, styling cream is a versatile product that enhances natural shine and moisture. It provides a lightweight option with low to medium hold, making it suitable for a more relaxed finish.

Understanding these differences in hold strength, finish, and texture will help you confidently choose the best styling aid for your specific hair needs and desired styles.

Advertisement

Comparing Pomade, Putty, and Cream

pomade vs putty vs cream

How do pomade, putty, and cream stack up against each other regarding hold, finish, and suitability for different hairstyles?

Pomade offers a strong hold strength, making it ideal for structured hairstyles. Its high-shine finish gives a polished look, perfect for classic styles.

On the other hand, putty provides a medium hold, suitable for more casual, tousled looks, and boasts a matte finish that enhances a natural vibe. Its thick, moldable texture allows you to shape your hair freely.

Styling cream, with its smooth and lightweight texture, offers a low to medium hold that enhances natural texture and movement. It works across all hair types, making it particularly beneficial for fine or thinning hair. The finish is typically low to medium shine, giving you a soft appearance that doesn't weigh hair down.

Application Techniques for Each Product

product specific application techniques

Mastering the application techniques for hair putty, pomade, and styling cream can greatly enhance your styling results and overall hair health.

For Hair Putty, start with clean, damp hair. Warm a dime-sized amount between your palms and distribute it evenly from roots to tips to achieve that desired texture. Remember, small amounts are key to avoiding clumping.

When it comes to Pomade, you can use it on either dry or damp hair. Take a pea-sized dollop, warm it in your hands, and apply it primarily where you want hold. A comb can help you achieve a polished finish, ensuring a structured look.

Advertisement

For Styling Cream, apply it to damp hair for a lightweight feel. This product will enhance your hair's natural shine and provide a smooth, manageable texture without weighing it down.

Always start with small amounts and gradually add more if needed, particularly with pomade and putty. Experimenting with different application techniques can help you find the perfect balance for your hairstyle while maintaining hair health.

Whether you seek texture or hold, mastering these techniques is essential for great results.

Key Ingredients and Ethical Choices

sustainable practices and ingredients

Choosing the right hair products means paying attention to key ingredients and making ethical choices that benefit both your hair and the environment.

Prioritizing natural ingredients is vital for promoting hair health while steering clear of harmful substances like sulfates, parabens, and phthalates. These ingredients not only harm your hair but may also pose reproductive health risks. Ingredient transparency is essential; knowing what's in your products empowers you to make informed decisions.

When shopping for styling products, look for those that feature moisturizing agents like coconut oil and beneficial plant extracts. Coconut oil helps repair damaged hair and provides deep hydration, while plant extracts, such as artichoke, can enhance scalp health and combat dandruff.

Advertisement

Additionally, consider cruelty-free options that haven't been tested on animals. Supporting brands that prioritize ethical choices not only aligns with your values but also fosters a more compassionate beauty industry.

Tips for Selecting the Right Product

choosing the best product

Understanding your hair type and styling goals is key to selecting the right product for your needs. Start by considering the type of look you want. If you're after a sleek, polished style, pomade is your best bet for high shine and strong hold. For textured, versatile hairstyles, hair putty offers medium hold with a matte finish, while styling cream provides moisture for a more natural look.

Next, evaluate the hold and shine levels required for your desired style. Test the products by using small amounts, starting with pea-sized portions to avoid overloading your hair. This will help you find the right balance without weighing it down.

Don't forget to assess weather conditions, too. Hair putty works well in humid environments because of its flexible hold, while pomade excels in dry conditions to maintain shine and structure.

Frequently Asked Questions

Is Putty Better Than Pomade?

It depends on your style and hair type. If you want a flexible, matte finish for textured looks, putty's your best bet. For a strong hold and shiny finish, pomade's better suited. Choose accordingly!

Should I Use Pomade or Styling Cream?

Imagine a polished car versus a breezy convertible. If you're seeking sleek, shiny styles, go for pomade. But if you prefer a relaxed, natural vibe, styling cream's your best bet for flexibility and moisture.

Advertisement

What Type of Hair Is Putty Good For?

Hair putty's great for short to medium lengths, especially if you have thicker hair. It gives you a flexible hold, enhances texture, and works well for tousled or structured styles without weighing your hair down.

What Is the Best Product to Style Men's Hair?

What's your ideal hairstyle? Choosing the best product depends on your hair type and style. If you need strong hold, opt for pomade; for a flexible look, consider putty; or try styling cream for a natural finish.

Conclusion

Choosing the right hair product is like finding the perfect brush for a canvas; each one offers a unique way to express your style.

Whether you opt for the sleek finish of pomade, the textured hold of putty, or the soft flexibility of styling cream, remember that your hair's a reflection of you.

Embrace the artistry of hair styling, and let your choice be the stroke that brings your personal masterpiece to life.

Advertisement
Continue Reading

Styling Tips

Kallax Styling Ideas for a Modern Look!

Open the door to endless Kallax styling ideas that will transform your space into a modern masterpiece—discover the possibilities!

Published

on

modern kallax styling tips

Kallax units are perfect for achieving a modern look while being super functional. You can use them as stylish room dividers, add colorful baskets for a pop of personality, or transform them into cozy reading nooks with cushions. If you're feeling creative, paint them vibrant colors or add wood accents for a chic touch. They also work great as home bars, allowing for a sleek display of glassware. Integrating natural elements like plants adds warmth to your space. You'll find even more creative ways to style your Kallax units for that modern aesthetic waiting for you! For a truly unique twist, consider incorporating Japanese kimono styling tips into your Kallax units. Hang beautiful kimonos as art pieces on the unit’s back panels, or use them as decorative drapes to add an elegant and serene atmosphere to your space. The beautiful patterns and colors of kimonos can truly elevate the modern look of your Kallax units and create a one-of-a-kind design statement.

Key Takeaways

  • Opt for a monochromatic color scheme with neutral tones to create a sleek, modern aesthetic that complements various decor styles.
  • Incorporate decorative baskets and boxes in earth tones for stylish organization while maintaining a contemporary look.
  • Use Kallax units as room dividers, combining open shelving with decorative elements like plants to enhance space definition and visual interest.
  • Add wooden countertops or wallpaper panels for texture and warmth, elevating the Kallax unit's design appeal in modern interiors.

Multifunctional Furniture Solutions

Kallax units offer a variety of multifunctional furniture solutions that adapt effortlessly to your space and needs. These versatile storage units can be transformed into stylish storage options like nightstands, bar carts, or bookshelves with just a few modifications. By adding custom wood tops or rearranging the configurations, you can create a DIY Kallax that perfectly suits your lifestyle.

The modular design of Kallax allows you to stack or arrange multiple units, maximizing your storage while serving different functions in small spaces. With features like caster wheels, your Kallax shelving unit can even become a mobile kitchen island, making cooking and entertaining more convenient.

Additionally, the grid-style compartments provide organized storage for everything from office supplies to toys, keeping your space clutter-free and visually appealing. You can further personalize your Kallax with decorative elements like doors, legs, or paint, ensuring it seamlessly integrates into your home decor.

Whether you need practical storage solutions or a stylish centerpiece, Kallax offers the versatility and functionality you desire for a modern look.

Cozy Reading Nooks

comfortable reading spaces

Creating a cozy reading nook can transform a corner of your home into a personal oasis, perfect for diving into your favorite books.

Start by using IKEA Kallax units, either stacked or placed side by side, to maximize storage space for your literary collection. Fill these units with colorful storage baskets or Drona boxes to keep everything organized and easily accessible.

Advertisement

Next, add a comfortable chair or a plush cushion right in front of your Kallax setup. This dedicated seating area will invite you to relax and immerse yourself in your reading material.

To enhance the inviting atmosphere, style the Kallax with decorative elements like plants, art pieces, or personal mementos. These touches add character and warmth to your nook.

Artistic Customization Ideas

creative design personalization concepts

Transform your Kallax units into a canvas for artistic expression with unique customization ideas that reflect your personal style. You can easily turn your stylish IKEA Kallax into a centerpiece of your room using vibrant paint colors or geometric patterns. Consider utilizing DIY projects, like applying wallpaper or fabric panels to the Kallax doors, adding texture and visual interest while keeping functionality intact.

Here are some artistic customization ideas to inspire you:

Customization Idea Description
Stencils and Decals Use designs that match your decor theme.
Vibrant Paint Colors Brighten up your Kallax with bold hues.
Decorative Knobs or Handles Add unique hardware for extra flair.
Open Shelving Displays Combine art pieces and plants with storage.

Stylish Room Dividers

chic space separation solutions

Using Kallax units as stylish room dividers not only boosts your space's functionality but also adds a unique decorative element that can beautifully define different areas in your home. You can stack Kallax units vertically or place them horizontally to create distinct spaces in open floor plans. These room dividers provide ample storage while maintaining an aesthetic appeal.

The grid-style design of Kallax allows for both visible and concealed storage, helping you minimize clutter effectively. To customize your Kallax units, consider adding decorative baskets or plants that not only improve organization but also showcase your personality. You can even incorporate unique door styles or paint finishes to create a visually striking focal point that serves as a functional space separator.

For added stability, it's wise to anchor the Kallax units to the wall, especially in high-traffic areas. This guarantees safety while still allowing you to get creative with your styling. With Kallax units, you can achieve a stylish and functional room divider that enhances your home's overall design while providing practical storage solutions.

Advertisement

Home Bar Setup

diy home bar essentials

A stylish home bar setup can easily be achieved with Kallax units, bringing both functionality and flair to your entertaining space. You can transform your Kallax into a chic home bar by adding casters for mobility, making it easy to move around during gatherings. Customizing your Kallax with open shelving allows you to display liquor bottles and cocktail essentials, while the compartments offer ample storage space for glassware and mixers.

To elevate the aesthetic, consider combining Kallax with BESTA units for a cohesive Art Deco-inspired design that enhances your space. Incorporating decorative elements like vibrant glassware and trendy bar tools creates an inviting display that your guests will love.

Don't forget the power of LED lighting; adding it to your Kallax shelves can beautifully highlight your spirits and set an ambient mood for parties. Stacking Kallax units vertically maximizes your storage space while providing a modern focal point for your home bar area.

This setup allows you to personalize the look according to your style, making your entertaining space truly unique and functional.

Versatile Storage Solutions

flexible storage options available

Kallax units aren't just for books; they can transform into multi-functional pieces tailored to your needs.

You can customize them with colorful boxes and baskets to create a stylish and organized space.

With a little creativity, your Kallax can serve various purposes, from a room divider to a chic media center.

Advertisement

Multi-functional Kallax Uses

Transforming your space with Kallax units offers versatile storage solutions that adapt seamlessly to your needs. The IKEA Kallax unit is a fantastic choice for organizing various items while maintaining a stylish look. You can stack Kallax shelving units to create a built-in feel, maximizing storage without compromising aesthetics.

For a craft room, consider incorporating colorful storage boxes and additional shelving to keep your supplies organized and easily accessible. If you have kids, Kallax is perfect for storing kids' toys, making clean-up a breeze with its grid-style design that accommodates bins and baskets.

Want to create a mobile kitchen island? Simply add casters to your Kallax unit, turning it into a multi-functional bar cart or workspace. This flexibility allows you to adapt your setup based on your needs, whether for cooking or entertaining.

Whatever your requirements, the Kallax system provides endless possibilities for organization and style, ensuring your space remains functional and inviting. Embrace the versatility of Kallax to enhance your home and keep everything in its place!

Creative Customization Options

When it comes to customizing your Kallax unit, endless options let you showcase your personal style while enhancing its functionality. You can choose from a variety of colors, stencils, and drawer options to create the perfect look. To elevate your IKEA Kallax shelves into a true furniture piece, consider adding wooden countertops or decorative knobs that make a statement.

Advertisement

Incorporating woven baskets or fabric cubes into your Kallax compartments not only introduces textured storage but also keeps your items organized and visually appealing. For a more modern aesthetic, you might attach furniture legs or casters, improving mobility while adding a fresh touch.

Don't forget about the creative customization options that DIY projects can offer. A simple coat of paint or applying contact paper can transform your Kallax into a unique piece that complements your contemporary decor theme.

With these ideas, you'll not only enhance the visual appeal of your space but also maximize its functionality. Embrace your creativity and make your Kallax unit a reflection of your personal style!

Kids' Playroom Organization

playroom decluttering and arrangement

Creating an organized playroom for your kids can be a breeze with versatile storage solutions like Kallax units. These units can be customized with colorful Drona boxes, making it fun for your children to help in organizing toys and books.

The open shelving design allows for easy visibility and access, encouraging kids to take responsibility for their belongings and promoting independent play.

Positioning Kallax at a low height keeps it accessible for young children, fostering a sense of ownership in their play areas. You'll find that when they can reach their toys easily, they're more likely to put things back where they belong.

Advertisement

Incorporating decorative elements, like themed baskets or labels, can enhance the aesthetic of the playroom while providing functional storage tailored to your children's needs.

The versatility of Kallax units allows for creative configurations, whether you choose stacked arrangements or corner units, maximizing space—even in smaller playrooms.

With Kallax, organizing toys becomes not just practical, but also a delightful experience for your little ones, making playtime more enjoyable and tidy!

Modern Boho Aesthetics

contemporary bohemian style

To create a modern boho vibe with your Kallax, think about integrating natural elements like woven baskets and wooden accents.

You'll want to focus on earthy tones and varied textures that bring warmth and character to your space.

Natural Elements Integration

Integrating natural elements into your Kallax setup instantly elevates the modern boho vibe, making your space feel warm and inviting. To achieve this look, incorporate woven baskets and wooden accents throughout your Kallax styling. Woven baskets add texture while providing practical storage solutions, and wooden accents create a cozy atmosphere.

Advertisement

Consider placing potted plants on open shelving to bring a revitalizing burst of greenery into your design. These living elements not only improve air quality but also enhance the overall aesthetic. You can also mix in decorative items like terracotta pots or unique driftwood accents to further connect with nature.

Using open shelving allows you to display these natural elements effectively, creating a dynamic and lively atmosphere while maintaining functionality. You might even customize your Kallax unit with hooks for hanging plants or additional shelves to showcase your favorite natural decor.

Earthy Tones and Textures

Incorporating earthy tones like terracotta and olive green into your Kallax design enhances the inviting nature of the modern boho aesthetic. These muted hues create a warm atmosphere, allowing your space to resonate with the tranquility of nature.

Textures are key in achieving this look. Use woven baskets to store items while adding visual interest and a rustic charm. Pair these with natural wood accents to bring warmth and a touch of organic beauty to your Kallax unit. Layering materials, such as soft macrame or linen textiles, can also create a cozy feel.

Don't forget to integrate potted plants and artwork into your Kallax design. The greenery from plants breathes life into the space, while carefully selected artwork reflects your personality and taste.

Advertisement

Customization is another great way to make your Kallax truly yours. Consider using stencils or earthy-colored paint to add unique touches that align with your modern bohemian style. By combining earthy tones and textures, you'll craft a Kallax setup that's not only functional but also stylishly inviting.

Scandinavian Design Inspirations

nordic aesthetic design influences

Embracing Scandinavian design inspirations can transform your Kallax unit into a stunning centerpiece that reflects simplicity and functionality. Kallax units align perfectly with these principles, showcasing a minimalist aesthetic that's both elegant and inviting. To achieve this look, consider using light wood tones that enhance the airy feel typical of Scandinavian interiors.

Incorporating neutral colors into your Kallax unit won't only maintain the understated elegance of Scandinavian decor but also enhance its functionality. Custom woven baskets can add texture while providing practical storage solutions, keeping your space organized and stylish.

Thanks to Kallax's modularity, you can easily adapt your unit to fit various Scandinavian styles, from the warm and cozy vibes of hygge to the sleek lines of modernism. Don't forget to integrate natural elements like plants and art within your Kallax displays. These additions complement the design ethos of blending nature with interior spaces, creating a harmonious atmosphere.

Frequently Asked Questions

How to Make KALLAX Stylish?

To make your KALLAX stylish, try bold paint colors, add decorative baskets, or elevate it with stylish legs. Mix orientations and use it as a backdrop for art and plants to showcase your personal aesthetic. You can also utilize the KALLAX as a room divider to create a functional and stylish space. Consider adding a pop of color to the back of the shelves to add visual interest and make a statement. To enhance the overall look, you can also accessorize the shelves with stylish kimono outfit ideas, unique knick-knacks, and personal mementos that reflect your individual style and personality.

How to Spruce up Kallax?

Did you know 70% of homeowners seek stylish storage solutions? To spruce up your Kallax, add decorative doors, vibrant Drona boxes, and personal decor. These touches create a fresh, organized, and visually appealing space you'll love.

Advertisement

How to Make Ikea Kallax Look Vintage?

To make your Kallax look vintage, try distressing it with chalk paint, adding ornate hardware, and attaching reclaimed wood. Use vintage-patterned wallpaper in the cubbies and pair it with retro decor for a cohesive aesthetic.

What Is the New Name for Kallax?

You won't believe it, but Kallax was once known as Expedit! This name change in 2014 highlighted its amazing modular design, while keeping all the fabulous features you love. Isn't that just incredible?

Conclusion

So, if you're ready to turn your Kallax into a multifunctional masterpiece, why not just throw a pile of mismatched cushions and call it a cozy reading nook?

Who needs cohesive design when you can create chaos with flair?

And remember, nothing says 'modern living' quite like a home bar that doubles as a stylish room divider—because, after all, why should your guests see the clutter?

Advertisement

Embrace the beautiful mess that's life!

Continue Reading
Advertisement

Affiliate disclaimer

As an affiliate, we may earn a commission from qualifying purchases. We get commissions for purchases made through links on this website from Amazon and other third parties.

Advertisement

Vetted

Vetted1 month ago

Book Review: “The Creative Spark: Unleashing Your Inner Artist”

Reawakening Creativity in the Digital Age The Book Thief Amazon The Pumpkin Spice Café: TikTok Made Me Buy It (Dream...

sustainable fashion brand recommendations sustainable fashion brand recommendations
Vetted2 months ago

15 Best Brands for Sustainable Fashion You Need to Know About in 2024

Discover 15 pioneering brands in sustainable fashion for 2024 that will transform your wardrobe while making a positive impact—find out...

sustainable fashion book recommendations sustainable fashion book recommendations
Vetted2 months ago

15 Best Books on Sustainable Fashion That Every Eco-Conscious Reader Should Explore

Join the journey through the 15 best books on sustainable fashion that will transform your wardrobe choices and open your...

sustainable fashion reading list sustainable fashion reading list
Vetted2 months ago

15 Must-Read Books About Sustainable Fashion to Inspire Your Eco-Friendly Journey

Here are 15 essential books on sustainable fashion that will transform your perspective and inspire your eco-friendly journey—discover the secrets...

affordable sustainable fashion brands affordable sustainable fashion brands
Vetted2 months ago

15 Best Affordable Sustainable Fashion Brands You Need to Know About in 2024

Join the journey to discover 15 affordable sustainable fashion brands for 2024 that will transform your wardrobe—find out which ones...

men s fashion essentials 2024 men s fashion essentials 2024
Vetted2 months ago

15 Best Men's Fashion Essentials to Elevate Your Style Game in 2024

Get ready to transform your wardrobe with the 15 best men's fashion essentials for 2024 that will elevate your style...

elevate wardrobe with amazon finds elevate wardrobe with amazon finds
Vetted2 months ago

15 Best Amazon Fashion Finds That Will Elevate Your Wardrobe in 2024

You won't believe the must-have fashion finds from Amazon that will transform your wardrobe in 2024—discover the top 15 styles...

stylish bow embellished fashion items stylish bow embellished fashion items
Vetted2 months ago

15 Best Fashion Pieces With Bows That Elevate Any Outfit

Knot your style with these 15 fashionable pieces featuring bows that promise to elevate any outfit—discover the perfect accessory for...

top men s sneakers 2024 top men s sneakers 2024
Vetted2 months ago

15 Best Men's Fashion Sneakers of 2024 – Style Meets Comfort

Looking for the perfect blend of style and comfort in men's fashion sneakers? Discover the top 15 picks for 2024...

stylish comfortable women s sneakers stylish comfortable women s sneakers
Vetted2 months ago

15 Best Women's Fashion Sneakers for Style and Comfort in 2024

Looking for stylish and comfortable women's sneakers in 2024? Discover the top 15 picks that will elevate your wardrobe and...

2024 women s fashion trends 2024 women s fashion trends
Vetted2 months ago

15 Best Women's Fashion Trends of 2024 You Need to Know About

Look ahead to 2024's must-have women's fashion trends that blend comfort and style—discover which pieces you can't afford to miss!

elevate your style game elevate your style game
Vetted2 months ago

13 Best Fashion and Beauty Products You Need to Elevate Your Style Game

Jumpstart your style with these 13 essential fashion and beauty products that promise to transform your routine—discover what you've been...

Advertisement

Trending

Copyright © 2024 StyleGuru.org Affiliate disclaimer As an affiliate, we may earn a commission from qualifying purchases. We get commissions for purchases made through links on this website from Amazon and other third parties.