Interior Design
Master Your Buick Garage Door Opener Today
Discover the simple steps to master your Buick garage door opener and unlock a new level of convenience—are you ready to enhance your experience?
You can master your Buick garage door opener today by starting with compatibility checks and preparation. First, verify your opener supports the HomeLink system and gather both your Buick owner's manual and the garage door opener manual. Next, reset the HomeLink by holding the outer buttons for 10 seconds. Then, program it by pressing the desired HomeLink button and your garage door remote button together until the indicator light flashes slowly. Troubleshoot any issues by checking compatibility or signal interference. With these steps, you'll easily sync your opener, making your life simpler—stick around for more tips on optimizing your setup!
Key Takeaways
- Ensure your Buick Envision's HomeLink system is compatible with your garage door opener by consulting both manuals before starting programming.
- Reset the HomeLink system by holding the outer buttons for 10 seconds to clear any previous settings.
- Program your garage door opener by pressing and holding the desired HomeLink button and the garage remote button until the indicator light flashes slowly.
- Test the programming by pressing the HomeLink button; if it doesn't work, repeat the process or check for compatibility issues.
- Manage your programmed buttons easily by erasing them with a long press until the indicator light changes from slow to rapid flash.
Compatibility and Preparation
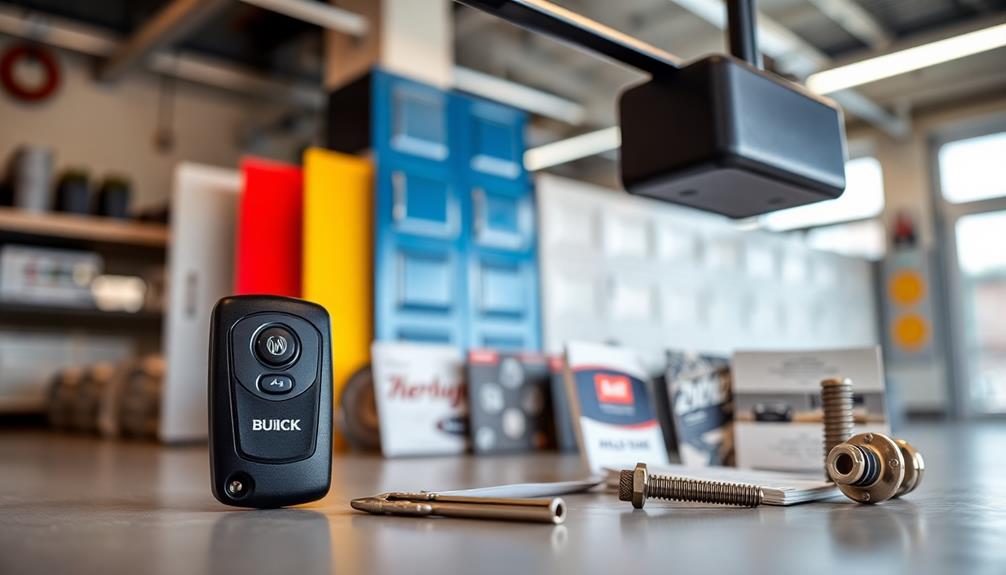
Before you plunge into programming your Buick garage door opener, it's crucial to check compatibility.
Start by consulting the manufacturer's manual to verify that your garage door opener supports the HomeLink system. Most modern openers do, but double-checking will save you frustration later.
Gather your Buick Envision owner's manual and the garage door opener's user manual for specific instructions. Having a screwdriver handy can help with any necessary adjustments.
Prepare the garage door remote for potential programming needs, ensuring everything's in place for an efficient process.
HomeLink System Reset

To guarantee a smooth programming experience, you may want to reset your HomeLink system before starting. This guarantees that any previous configurations are cleared, giving you a fresh slate.
Here's how to do it:
- Press and hold the outer HomeLink buttons for 10 seconds.
- Wait for the indicator light to flash, signaling the reset is complete.
- Confirm that all previously registered devices are cleared.
- It's a good idea to perform this reset if you're selling or returning your vehicle.
- Always refer to your owner's manual for specific instructions tailored to your Buick model.
Programming HomeLink

Once you're ready to program your HomeLink system, make sure your vehicle's ignition is in the ON/RUN position without starting the engine.
Next, press and hold the desired HomeLink button and the garage door opener button simultaneously. You'll notice the HomeLink indicator light starts to flash slowly after about 20 seconds—this means it's working!
Release both buttons and test the programming by pressing the HomeLink button. If successful, the garage door should respond.
If it doesn't, you may need to repeat the process or check compatibility with your garage door opener.
Always refer to your owner's manual for specific instructions tailored to your Buick model to guarantee a smooth setup.
Troubleshooting Tips
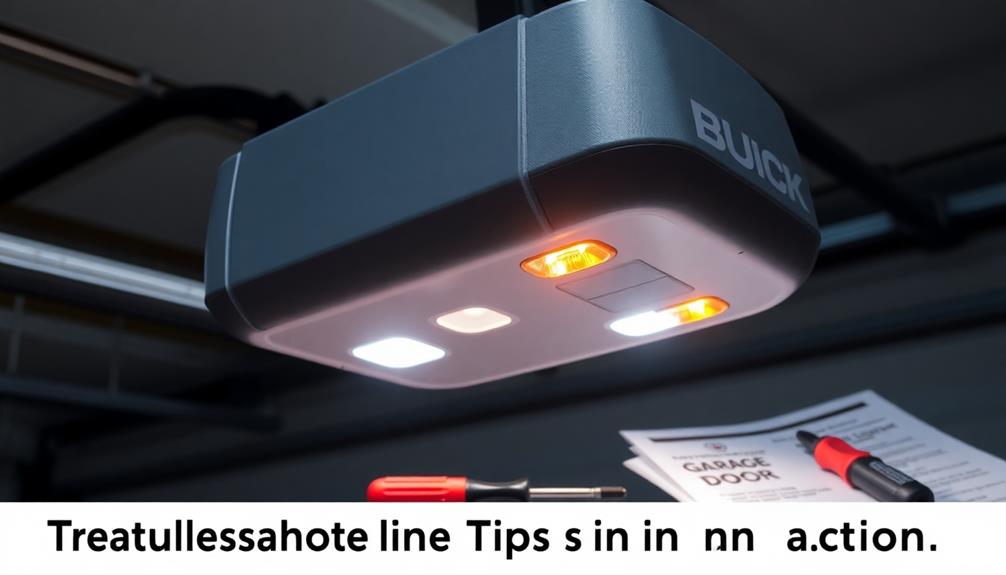
Troubleshooting programming issues with your HomeLink system can save you time and frustration.
If you're having trouble, try these tips to get things back on track:
- Check the indicator light; rapid blinking means there's a problem.
- Confirm your garage door opener is compatible with HomeLink.
- Keep the garage door remote within range during programming.
- Press and hold the HomeLink button longer if it doesn't program initially.
- Verify that there's no signal interference from nearby devices.
Managing Programmed Buttons

If you've resolved any programming issues with your HomeLink system, it's important to manage your programmed buttons effectively.
To erase a single programmed button, locate the HomeLink buttons in your vehicle. Press and hold the specific button until the indicator light flashes. Keep holding it until the light changes from a slow to a rapid flash, then release to confirm successful erasure.
For clearing the programmed remote, find the designated button on the Buick Garage Door Opener. Press and hold it for about 20 seconds. When the indicator light flashes rapidly, you've successfully erased the remote.
This allows you to manage and update your programmed remotes as needed, ensuring your HomeLink system stays current and functional.
Specific Buick Model Programming

Programming specific Buick models like the 2018 Buick Enclave and the 2008 Buick Lucerne can be straightforward when you follow the right steps.
Here's what you need to do:
- Clear old programming by holding the HomeLink buttons for 10 seconds.
- Ensure your vehicle's ignition is ON/RUN without starting the engine.
- Press and hold the desired HomeLink button and the garage door remote button simultaneously.
- Wait for the indicator light to flash slowly, then release both buttons.
- Test the HomeLink button to confirm successful programming.
Syncing HomeLink Functionality
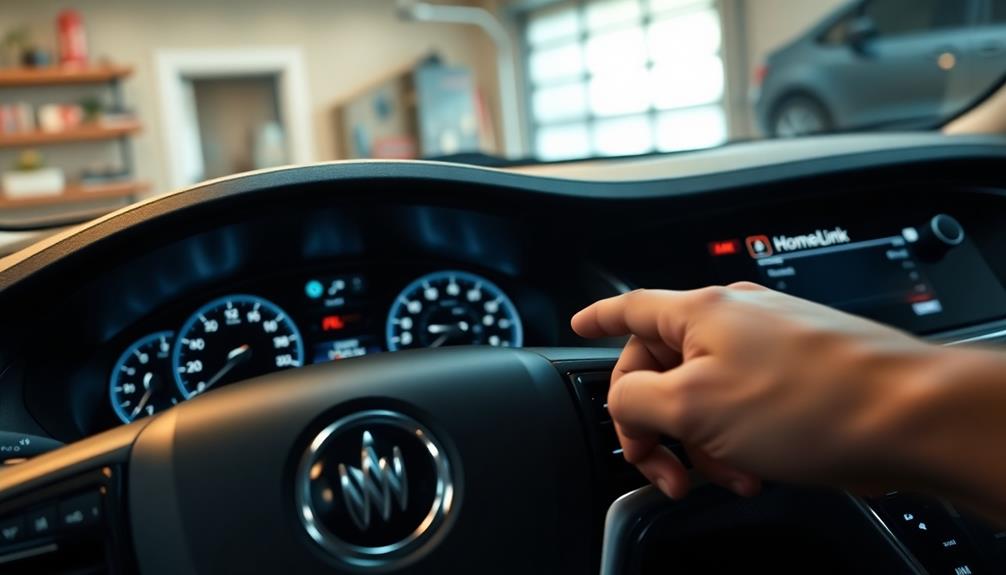
Syncing HomeLink functionality offers the convenience of operating multiple garage doors or gates from your vehicle with ease. You'll need to clear any existing programming first. Press and hold the HomeLink and garage door opener buttons simultaneously, and check for a response to guarantee successful programming.
Here's a quick reference table to visualize your syncing process:
Step | Action | Result |
---|---|---|
Clear Existing Codes | Hold HomeLink buttons for 10 seconds | System reset |
Program New Opener | Hold HomeLink & remote buttons together | Light flashes slowly |
Test Functionality | Press HomeLink button | Door should respond |
Sync Additional Devices | Repeat above steps | Control multiple doors/gates |
Enjoy Convenience | Operate from your vehicle | Hassle-free access |
Additional Resources
To get the most out of your Buick garage door opener, it's helpful to explore additional resources that can enhance your experience.
These tools and guides can streamline your usage and keep you informed:
- Manufacturer's Manual: Always refer to your Buick owner's manual for specific instructions and compatibility.
- Smart Garage Door Openers: Check out models like the Genie 7155-TKV for advanced features.
- Home Automation Guides: Learn how to integrate your opener with smart home systems.
- DIY Projects: Explore home automation projects to enhance functionality.
- Online Forums: Join communities for tips and troubleshooting advice from fellow Buick owners.
Utilizing these resources can guarantee you maximize the benefits of your Buick garage door opener.
Frequently Asked Questions
Can I Program Multiple Garage Door Openers to One Homelink Button?
You can't program multiple garage door openers to one HomeLink button. Each button can only control one opener. To manage multiple openers, use separate HomeLink buttons for each garage door or gate.
What Should I Do if My Garage Door Opener Is Not Responding?
If your garage door opener isn't responding, check the batteries in your remote, confirm compatibility with HomeLink, and verify there's no signal interference. Reset the HomeLink system if needed, then try programming again.
How Do I Know if My Garage Door Opener Is Homelink Compatible?
Did you know that over 90% of modern garage door openers support HomeLink? To check compatibility, consult your manufacturer's manual and guarantee your opener integrates seamlessly, avoiding potential connectivity issues during programming.
Can Homelink Control Other Devices Besides Garage Doors?
Yes, HomeLink can control various devices beyond garage doors, like gates and home automation systems. Just guarantee each device is compatible and follow the specific programming instructions for seamless integration with your vehicle.
Is There a Limit to the Number of Devices I Can Program?
Yes, there's typically a limit to how many devices you can program into the HomeLink system, usually around three. Check your vehicle's owner's manual for the exact number and specific instructions on programming.
Conclusion
So, you've mastered your Buick's garage door opener, but let's be honest—who wouldn't want the thrill of getting out of the car in the rain just to fumble with a remote? Embracing technology means you can effortlessly glide into your garage while staying dry and cozy inside. But hey, if you ever miss that old-school charm of manual opening, you can always leave the remote somewhere just to keep things interesting! Enjoy your newfound convenience!

Interior Design
How to Move Furniture
Learn essential tips for moving furniture safely and efficiently, ensuring you avoid common pitfalls and protect your belongings during the process.
To move furniture safely and efficiently, start by planning your route and measuring your items. Clear pathways by removing obstacles and gather supplies like moving blankets and dollies. If necessary, disassemble large pieces to make them easier to transport. Utilize proper lifting techniques—bend at your knees and keep your back straight—to prevent injury. Always communicate with your helpers and use equipment like furniture sliders for heavy items. Once you've moved everything, inspect for damage and arrange your furniture according to your planned layout. There's more you can learn to guarantee a smooth moving experience ahead.
Key Takeaways
- Plan your route and measure furniture to ensure safe passage through doorways and stairs.
- Disassemble heavy items to reduce weight and enhance safety during transport.
- Use proper lifting techniques and communicate clearly with your helpers for efficient teamwork.
- Protect furniture with moving blankets and secure them with stretch film to prevent damage.
- Utilize equipment like dollies and furniture sliders to ease the movement of heavy items.
Preparation Steps for Moving
When you're preparing to move furniture, the first step is to plan your route carefully. Map out pathways, noting any narrow doorways or stairs that could pose challenges when you're trying to move heavy items. For instance, if you have a vehicle, remember that fuel injection cleaning can improve its performance, making your moving experience smoother.
Measure both your furniture and these access points to see if disassembly is necessary; this can greatly ease the moving process.
Next, clear your pathways of obstacles like rugs or other furniture. Creating a safe, unobstructed route is essential for transporting heavy items without accidents.
Gather essential moving supplies, such as moving blankets to protect your belongings, dollies for easier transport, and furniture sliders to help glide heavy pieces across floors.
Don't forget to enlist the help of at least two additional people. Lifting and maneuvering heavy furniture is much easier and safer with extra hands. Make sure everyone knows their roles to boost efficiency during the move.
With careful planning and the right tools, you can navigate your space confidently and guarantee that your furniture arrives at its new location without damage.
Disassembly Techniques
Disassembling furniture can make your move smoother and safer, especially for larger pieces that can be cumbersome to navigate. Start by using appropriate tools like screwdrivers, hex wrenches, or pliers to carefully take apart items. For tables and chairs, remove legs to considerably reduce weight, making them easier to handle.
Additionally, ensuring that your heat pump is functioning well can help maintain a comfortable environment while you work on your move; features of the ultimate heat pump can enhance temperature regulation during this hectic time.
When dealing with box springs, remove the fabric covering and cut along the middle crosspiece to allow for folding. This technique simplifies transport and handling, making it easier to fit through tight spaces. Remember to keep small parts like screws and brackets organized in ziplock bags to prevent loss during the move.
For heavy items like armoires or entertainment centers, disassembling them can be essential. Not only does it help you navigate tight spaces and doorways more effectively, but it also enhances safety during the move.
Safe Lifting Methods
How can you lift heavy furniture safely without risking injury? First, use proper lifting techniques to protect your back and guarantee a smooth move. Always bend at the knees and keep your back straight while engaging your core muscles. This way, you'll have better stability and support when lifting.
Additionally, consider the benefits of multi-functional gear that can aid in your moving process, allowing for easier handling of heavy items.
When you're ready to lift, hold the item close to your body. This helps maintain balance and reduces strain on your back and arms. Avoid twisting your torso; instead, pivot your feet to change direction.
If the furniture is particularly cumbersome, consider using moving straps or furniture sliders to distribute weight evenly.
It's vital to communicate with your moving partner throughout the process. Make sure you both coordinate your movements to lift and carry heavy items safely.
Moving on Stairs
When you're moving furniture up or down stairs, teamwork is essential for safety.
Always protect surfaces by covering banisters and corners, and make sure to use proper lifting techniques to avoid injury.
Teamwork for Safety
Moving heavy furniture down a flight of stairs can feel like maneuvering through an obstacle course, but teamwork makes the process safer and more efficient. To guarantee stability and control, always have one person positioned at the bottom and another at the top of the stairs. Clear communication with your moving partner is essential, especially when maneuvering tight turns or uneven steps.
Using a hand truck or dolly can make moving heavy items easier. Center the load and secure it with tie-down straps to maintain balance while moving up or down stairs. When you lift the item, the person at the top should guide it while the person at the bottom bears most of the weight, allowing for a smoother shift.
Here's a quick reference table to enhance your teamwork:
Task | Top Person Responsibilities | Bottom Person Responsibilities |
---|---|---|
Lifting | Guide the item | Bear most of the weight |
Communication | Signal movements | Confirm readiness |
Breaks | Initiate breaks | Suggest route adjustments |
Taking breaks as needed helps prevent fatigue and keeps both movers comfortable with the load and stairs ahead. Prioritize safety and teamwork for a successful move!
Protect Surfaces During Transport
To guarantee your surfaces stay protected during transport on stairs, it's important to take a few simple precautions. Start by covering banisters and corners with moving blankets. This prevents scratches and dents from shifting furniture.
As you lift and maneuver items, use padded furniture straps to secure them, minimizing contact with stair surfaces and reducing the risk of damage.
When traversing stairs, always keep the heavy end of the furniture facing upward. This tactic helps maintain balance and control, which is essential for avoiding scrapes against walls or railings.
Additionally, consider installing corner guards on walls and banisters. These provide extra protection against impacts while moving large or bulky items.
During the move, regularly check your protective coverings for any signs of wear or damage. Ensuring they remain effective throughout the process is important for safeguarding your surfaces.
Use Proper Lifting Techniques
Using proper lifting techniques is vital for safely traversing stairs with furniture. When you carry heavy items up or down stairs, always have one person at each end. This guarantees weight distribution and helps maintain stability. Position the lighter end of the furniture facing down the stairs and the heavier end facing up. This setup makes it easier to navigate and reduces the risk of tipping.
Make certain to use proper lifting techniques by bending at the knees and keeping your back straight. This approach helps avoid injury while moving.
As you ascend or descend, it's essential to communicate with your partner. Clear communication allows you to coordinate movements, especially in tight spaces where mishaps can easily occur.
Consider using moving straps or furniture sliders designed for stairs to help transport heavy items more safely and efficiently. These tools can greatly improve your grip and control over the furniture, making the process smoother.
Protecting Your Furniture
When you're moving furniture, protecting your items is essential.
Wrap your furniture in moving blankets to cushion against impacts and prevent scratches.
Then, use stretch film to secure those blankets in place, keeping everything safe during transport.
Use Moving Blankets
Moving blankets are a essential investment for protecting your furniture during transport. These thick, quilted moving blankets provide necessary cushioning that helps prevent scratches, dents, and other damage to your furniture. When you wrap delicate items, the blankets absorb impacts, ensuring everything remains intact throughout the moving process.
To maximize their effectiveness, cover all surfaces of your furniture, including corners and edges, as these areas are particularly vulnerable. Once you've covered your furniture with moving blankets, be sure to secure them tightly with stretch wrap or packing tape. This step is critical to prevent the blankets from shifting or falling off during transport.
Investing in high-quality moving blankets can save you money in the long run by greatly reducing the likelihood of costly repairs or replacements due to moving damage.
Apply Stretch Film
Protection is key when it comes to safeguarding your furniture during a move, and applying stretch film is an effective way to achieve that. Stretch film is a versatile protective material that helps you securely wrap furniture, preventing scratches, dents, and damage during transit. To guarantee maximum protection, cover all surfaces and edges completely.
Using a hand-held dispenser makes the efficient wrapping process much easier and helps reduce the risk of tearing the film while applying it. As you wrap, remember to overlap the layers by 50% to enhance stability and keep your furniture tightly secured during transport. This method prevents any shifting that could lead to damage.
Stretch film isn't just for large items; it's also great for bundling smaller items together. This makes them easier to transport and greatly reduces the risk of losing pieces during the moving process.
Utilizing Moving Equipment
Transporting heavy furniture can be an intimidating task, but utilizing the right moving equipment makes all the difference.
Start with moving dollies, which are essential for carrying heavy furniture. They can support up to 1,000 pounds and greatly reduce the physical strain on you.
For sliding heavy items across floors, furniture sliders are your best bet. Choose hard plastic sliders for carpets and soft ones for hard surfaces to effectively reduce friction.
Don't overlook lifting straps, like the Forearm Forklift, which help distribute weight evenly. This allows you to lift heavy furniture using your legs instead of your back, minimizing the risk of injury.
Hand trucks are invaluable for stacking and moving multiple items at once. They usually support a weight capacity of 600 to 800 pounds, making them perfect for transporting appliances or several boxes.
Lastly, invest in heavy-duty moving blankets to protect your furniture from scratches and dents during the moving process. These blankets can also cover floors and walls, preventing damage in your home.
With the right equipment, you'll make transporting heavy furniture a smoother and safer experience.
Getting Help From Others
Enlisting help from friends or family can make the challenging task of moving heavy furniture much easier and safer. To tackle carrying heavy items, recruit at least two helpers to distribute the weight effectively.
Before moving day, communicate your moving plan clearly with your team, so everyone knows their roles and can coordinate movements. This is especially important when maneuvering tight spaces or stairs, where accidents can happen easily.
If you have exceptionally heavy or complex items, consider hiring professional movers. They've the experience and equipment to guarantee safe transportation, alleviating some of the stress from your shoulders.
Regardless of who you enlist to help, make certain to provide refreshments and breaks to maintain energy levels and prevent fatigue during the moving process.
Scheduling your moving day well in advance is essential. This guarantees your friends or hired help are available, reducing stress on the actual day of the move.
With the right people by your side and a solid plan in place, you'll find moving can be a smoother, more enjoyable experience.
Planning Your Route
Moving furniture requires careful planning, especially when it comes to mapping out your route. You need to identify potential obstacles, like narrow doorways, staircases, and tight corners, before you start. Here's how to effectively plan your route:
- Measure: Measure the dimensions of both your furniture and the access points. This guarantees everything will fit through without damage and helps you decide if disassembly is necessary.
- Clear the Pathway: Remove any tripping hazards from your route. Loose rugs, stray furniture, or debris can create obstacles that complicate the moving process.
- Protect with Padding: Use padding on edges of doorways and corners to prevent damage to both your furniture and your home as you move.
Additionally, consider employing the L Method when maneuvering large items. This technique involves turning the furniture at an angle, allowing for easier navigation through tight spaces.
If you have furniture sliders, use them to glide heavy pieces smoothly, reducing strain on your back. By planning your route carefully, you'll make the moving process much more manageable.
Final Arrangements and Setup
After settling into your new space, it's important to focus on the final arrangements and setup of your furniture.
Start by inspecting furniture for any damages that may have occurred during transport. If you find any issues, make the necessary repairs promptly to guarantee everything looks and functions well.
Next, carefully reassemble any disassembled pieces, making sure all parts are securely attached for stability.
Now, it's time to arrange furniture according to your pre-planned layout. This will optimize flow and enhance usability in your new space.
To protect your flooring, utilize furniture coasters under heavy items. This not only prevents damage but also facilitates easier rearrangements later on.
As you position your furniture, keep an eye out for areas that may become cluttered. Dispose of packing materials responsibly to maintain a tidy environment and reduce clutter post-move.
Once everything's in place, take a step back and assess the overall layout. Adjust as necessary until you've achieved a comfortable and functional setup that meets your needs.
Enjoy your new space!
Frequently Asked Questions
How Can I Move Furniture by Myself?
To tackle moving furniture by yourself, start by gathering necessary tools like sliders and a dolly. Planning your route, disassembling larger pieces, and using proper lifting techniques will help you avoid injury and make the process smoother.
What Is the Most Cost Effective Way to Move Furniture?
To save money, utilize friends for help, rent moving equipment, disassemble large items, and schedule your move during off-peak times. If possible, use your vehicle to transport smaller pieces, cutting rental costs considerably.
How to Move a Heavy Couch?
Moving a heavy couch is like steering a ship through a narrow canal. Start by clearing obstacles, measuring spaces, and employing furniture sliders. Lift with your legs, keeping it close, and always maintain a steady, balanced partnership.
How to Move Heavy Furniture With Sliders?
To move heavy furniture with sliders, place them under corners with the smooth side down. Push from the lower section for control, and lift slightly to insert sliders. This reduces friction and protects your floors.
Conclusion
As you settle into your new space, remember that moving isn't just about furniture; it's about creating a home filled with memories. Like the journey of Odysseus, each step you took brought you closer to your destination. Embrace the challenges and triumphs, knowing you've crafted a fresh start. So, take a moment to breathe, appreciate your hard work, and let your new surroundings inspire the next chapter of your life. Your adventure has only just begun!
Interior Design
How to Keep Sofa Covers in Place on Leather
Practical tips for securing sofa covers on leather will transform your seating experience—discover the secrets to a flawless fit and lasting style.
To keep sofa covers in place on leather, consider several effective methods. First, choose high-stretch covers that fit snugly. You can use foam sticks or rolled magazines to fill gaps, increasing grip. Upholstery pins discreetly placed under armrests help reduce slippage, while industrial-strength Velcro keeps covers anchored in high-movement areas. Make sure to check your covers regularly and adjust them as needed for a perfect fit. Quality covers and smart securing techniques enhance both stability and the appearance of your leather sofa. There's more to explore about these methods and tips to keep your sofa looking great.
Key Takeaways
- Use high-stretch jacquard sofa covers for better elasticity and grip on leather surfaces.
- Insert foam sticks or rolled magazines in gaps to enhance friction and prevent slipping.
- Secure covers with upholstery pins under armrests and along the back for a snug fit.
- Apply industrial-strength Velcro in high-movement areas to keep covers in place effectively.
- Regularly check and readjust covers to maintain their position and appearance over time.
Importance of Quality Covers
When it comes to protecting your leather sofa, the significance of quality covers can't be overstated. Low-quality sofa covers can lead to a poor fit, requiring constant readjustments that compromise your sofa's sleek appearance. You want covers that fit snugly and look great, and that's where high-quality materials come into play.
Fabrics like Nolan Interior's high-stretch jacquard blend combine 95% polyester and 5% spandex to provide enhanced elasticity and grip, minimizing slippage on smooth leather surfaces. Additionally, investing in covers designed with advanced features, similar to how top-rated cordless vacuums enhance cleaning efficiency, can further improve the functionality of your sofa covers.
Proper sizing is essential; oversized covers create excess fabric that detracts from your furniture's elegant look. Look for covers with non-slip features, such as innovative backing and elastic edges, to help maintain stability and guarantee they stay in place.
Additionally, consider options that utilize high-quality velcro for a more secure fit. If you find that your cover isn't quite right, a seamless return policy allows you to exchange it for the perfect size.
Investing in quality sofa covers won't only protect your leather sofa but also enhance its aesthetic appeal, ensuring it remains a stunning centerpiece in your home.
Methods for Securing Covers
To keep your sofa covers securely in place, you can use a few effective methods. The Foam Sticks Method, upholstery pins, and Velcro attachments can all help minimize slippage and maintain a neat appearance.
Additionally, ensuring that the environment around the sofa is clean and free of excessive dust can contribute to the longevity of the covers, similar to how regular maintenance enhances air quality in purifiers air purifier maintenance.
Let's explore how each of these techniques can enhance your sofa's look and functionality.
Foam Sticks Method
The Foam Sticks Method offers a practical solution for keeping your sofa covers securely in place. By inserting foam sticks, like cut pool noodles, into the creases between the back and seat of your sofa, as well as along the arms, you can effectively anchor the cover. This cost-effective approach enhances the friction between the leather surface and the couch cover, considerably reducing slippage.
Additionally, this method can be easily adapted to fit various couch styles, making it versatile for different home aesthetics. For those interested in pet care, maintaining a tidy sofa is essential, especially when considering ultimate hamster care.
For a seamless look, consider using color-matching foam sticks, which help maintain the aesthetic integrity of your sofa while providing a reversible solution. This method allows for easy washing of your covers without any hassle.
Implementing the Foam Sticks Method is simple and doesn't require any permanent alterations to your leather furniture, preserving its original condition.
Foam sticks can be easily purchased online or even DIYed using rolled-up magazines, making them a readily available option for securing your couch covers. With this method, you won't have to worry about your covers shifting during use, ensuring your sofa remains looking sharp and stylish.
Upholstery Pins Usage
If you're looking for a more permanent way to secure your sofa covers, upholstery pins might just be the answer. These small, strong pins offer a semi-permanent solution that won't damage your leather or fabric.
To effectively use upholstery pins, start by placing them under the armrests and along the back of the sofa. This positioning helps minimize slipping and keeps everything looking neat. For additional support, consider the benefits of professional cleaning services, which can help maintain your sofa's appearance and longevity, as well as enhance overall cleanliness and comfort in your living space finding the best carpet cleaning service.
Before pinning, make certain to stretch and tug the fabric for a snug fit. This technique guarantees the cover remains taut and visually appealing, which is especially important in homes with children and pets.
The discreet nature of upholstery pins means they can hold the cover firmly in place without being noticeable.
Don't forget to regularly check and adjust the pins as necessary. Over time, the cover may shift, and maintaining the stability of the cover will keep your sofa looking its best.
With the right approach, upholstery pins can be an effective way to guarantee your sofa covers stay in place, providing both style and functionality to your living space.
Velcro Attachments Installation
When it comes to securing your sofa covers, installing Velcro attachments can be a game-changer. Using high-quality, industrial-strength Velcro, you can effectively adhere the covers to your leather sofa. This approach is similar to the way smart home integration enhances functionality by minimizing movement and guaranteeing everything stays in place.
Start by cutting the Velcro strips to size and attach them strategically to areas prone to lifting, like the seating area and under the armrests. This minimizes movement and helps keep sofa covers in place.
For maximum adhesion, make certain to firmly press the Velcro together. The beauty of Velcro attachments is that they're invisible and won't damage your leather, allowing for easy removal when it's time to wash the covers.
After installation, regularly check the Velcro for wear. If you notice any signs of deterioration, reapply or replace the strips as needed to maintain a secure fit.
This simple method not only enhances the stability of your sofa covers but also guarantees they stay looking great. By following these steps, you can enjoy a tidy and well-kept sofa without the hassle of constantly readjusting your covers.
Product Highlights
Choosing the right sofa cover can make all the difference in keeping your furniture looking new and secure. When it comes to couch covers, Nolan Interior Couch Covers stand out due to their high-stretch jacquard fabric, which combines 95% polyester and 5% spandex. This blend not only guarantees a snug fit but also provides excellent grip on leather sofas, preventing the fabric from slipping.
For those interested in enhancing their overall well-being while enjoying their living space, incorporating essential oils for respiratory health can create a calming and revitalizing atmosphere.
Another excellent option is the Magic Sofa Covers, available in various styles such as 3-piece and 4-piece sectional covers. This versatility means you can find the perfect fit for your specific leather sofa configuration.
With a stellar rating of 4.8 stars from over 5,800 reviews, the Classic cover from Magic Sofa Covers has proven its effectiveness and garnered high customer satisfaction.
Both brands incorporate innovative anti-slip designs that prevent shifting, making them particularly ideal for leather surfaces that often struggle with cover stability.
Best Practices for Maintenance
Maintaining the perfect fit of your sofa covers is essential for both aesthetics and longevity. To prevent your covers from slipping, regularly check and readjust them to guarantee a snug fit, especially since leather surfaces can cause them to shift easily.
One of the best tips for keeping your covers in place is to choose options with non-slip backing or anti-slip designs, which work effectively on smooth leather. Additionally, considering that the right cleaning tools can enhance your overall home maintenance, you might want to explore best value vacuum cleaners for keeping your space tidy.
Additionally, you can discreetly employ upholstery pins under armrests and along the back of your sofa for extra anchoring without damaging the leather. If you want an even more secure hold, consider using Velcro strips attached to both the leather sofa and the cover. This method minimizes movement while still allowing for easy removal when it's time to clean.
Lastly, incorporating foam sticks between the cushions and the cover can enhance friction and stability, guaranteeing your cover stays in place. By implementing these practices, you'll maintain the look and fit of your sofa covers, keeping your furniture looking fresh and stylish for years to come.
Foam Sticks Technique
To keep your sofa covers securely in place, the Foam Sticks Technique is a simple yet effective solution. This method involves using cut pool noodles or spherical foam tubes to anchor your sofa covers into the creases between the cushions and the sofa frame. By tucking the foam into gaps along the back and arms of your leather sofa, you can greatly reduce slipping and guarantee that the cover maintains a snug fit.
Additionally, just like creating a personal budget, it's vital to assess your home decor needs regularly to confirm your solutions remain effective and aesthetically pleasing regular review.
Not only is this technique cost-effective, but foam noodles can also be purchased inexpensively or even made from household items like rolled magazines. This accessibility makes it an excellent choice for many. If you choose color-matching foam, it can enhance the aesthetic integrity of your sofa, blending seamlessly with both the cover and leather furniture.
Implementing the Foam Sticks Technique requires no permanent alterations to your furniture, allowing for easy removal when you need to wash or maintain the cover. By addressing any excess fabric with this method, you'll find that your sofa looks tidy and well-kept, making it a practical addition to your home decor strategy.
Using Upholstery Pins
Using upholstery pins can be a game changer for keeping your sofa covers secure. They work similarly to how common types of cold medications hold their place, providing a reliable solution for maintaining order.
Effective Pin Placement Techniques
Achieving a snug fit for your sofa cover is vital for both aesthetics and functionality, and effective pin placement techniques can make all the difference. Start by using small, strong upholstery pins to discreetly secure the edges of the cover without damaging your leather sofa. Proper placement of these pins is significant; focus on the areas under the armrests and along the back, as these spots often experience the most movement.
Additionally, understanding the importance of quality materials and techniques can enhance the overall look of your space, similar to the way various brewing methods affect the final coffee experience.
Before inserting the pins, stretch and tug the fabric to guarantee a snug fit that adheres closely to the contours of your sofa. For ideal results, place the pins at regular intervals along the seams, particularly in areas prone to slipping. This will help maintain a smooth and tidy appearance.
Don't forget to regularly check the placement of the pins and adjust as needed. This will help maintain the cover in place and prevent any fabric shifting over time. By following these effective pin placement techniques, you can enhance the stability of your sofa cover and enjoy both comfort and style in your living space.
Benefits of Using Pins
Upholstery pins offer a practical solution for keeping your sofa covers securely in place, especially on smooth surfaces like leather. These small, strong pins create a semi-permanent hold, preventing your covers from being prone to slipping and shifting, which can be a common issue with leather furniture.
By strategically placing pins under armrests and along the back of your sofa, you can guarantee a neat and tidy appearance.
Using upholstery pins allows you to maintain the aesthetic of your leather while providing a firm grip that withstands daily use, making them ideal for homes with children and pets. Unlike other fastening methods, pins won't damage the leather, preserving its quality and look.
Moreover, it's important to regularly check and adjust the pins to maintain the effectiveness of your cover's fit over time. This ongoing attention can help you avoid any unexpected shifts, keeping your sofa looking its best.
Installing Velcro Attachments
Installing Velcro attachments can greatly enhance the stability of your sofa covers, especially on leather surfaces. To start, grab some high-quality, industrial-strength Velcro strips. Cut them to the appropriate lengths, guaranteeing they fit well in key areas where the cover tends to lift, like under the cushions and along the armrests.
Next, attach one side of the Velcro strips to the cover and the other side directly to the leather sofa. Make sure you press the Velcro firmly together on both sides. This maximizes adhesion and helps keep the cover securely in place, reducing the chances of slipping during use.
It's also a good idea to regularly check your Velcro attachments for any signs of wear and tear. If you notice they're losing their grip, don't hesitate to replace them to maintain that strong bond.
This method not only enhances stability but also allows for easy removal of the cover for washing, keeping your sofa looking fresh. By following these steps, you can guarantee your sofa covers stay put while enjoying the comfort of your leather furniture.
Additional Tips and Tricks
Your sofa cover's stability can be further improved with some simple yet effective tips. Using high-quality Velcro strips is a great way to secure the edges of your cover, providing a tight fit that minimizes movement. Consider incorporating foam sticks or rolled magazines in the gaps between cushions and the cover to enhance grip and reduce slipping. You can also discreetly apply upholstery pins under the armrests and along the back of the sofa to hold the cover in place without damaging the leather.
Regularly check and adjust the cover after use, as leather's smooth surface can cause covers to shift more easily than fabric. For the best results, consider investing in a tailored or custom-fit cover that matches the exact dimensions of your leather sofa.
Here are some top tips to remember:
Tip | Description |
---|---|
Velcro Strips | Secure edges for a tighter fit. |
Foam Sticks | Fill gaps between cushions. |
Upholstery Pins | Hold cover in place discreetly. |
Regular Adjustments | Confirm the cover stays in place. |
Frequently Asked Questions
How to Make a Sofa Cover Stay in Place?
To make a sofa cover stay in place, choose a high-stretch fabric, fill gaps with foam sticks, use Velcro strips for secure attachment, and check regularly for a snug fit to minimize slippage.
Can You Put a Sofa Cover on a Leather Couch?
Absolutely, you can drape a sofa cover over your leather couch. Just remember to choose one that fits snugly and consider options with anti-slip features, ensuring your space stays cozy and stylish without constant adjustments.
How to Stop Throw From Slipping on Leather Sofa?
To stop your throw from slipping on your leather sofa, try using foam sticks between cushions, apply Velcro strips for a secure fit, and incorporate upholstery pins discreetly to anchor it without damage. Regularly check adjustments.
How Do I Keep My Leather Couch Cushions From Sliding?
You're tired of your leather couch cushions sliding around, right? Try using foam sticks tucked between them, or add rug grip strips for extra friction. It'll keep everything in place and restore your couch's comfort.
Conclusion
To summarize, keeping sofa covers in place on leather can be a breeze with the right techniques. Remember, "a stitch in time saves nine," so taking a few moments to secure your covers can save you from constant adjustments later. Whether you choose foam sticks, upholstery pins, or Velcro, each method offers its own benefits. With a bit of maintenance and care, your sofa will not only look great but stay comfortable for years to come!
Interior Design
Transform Your Party With Tropical Decor
Discover how to elevate your gathering with vibrant tropical decor that will leave your guests wanting more fun and unforgettable moments.
Transform your party with tropical decor and create an unforgettable experience for your guests. Use bold colors, palm trees, and flamingos to set a lively atmosphere. Incorporate eye-catching centerpieces like pineapple vases or tiki-themed accents for extra flair. Add a lush palm leaf table runner and seashell accents to enhance your tablescape. Don't forget to light up the space with tiki torches and string lights for a cozy ambiance. With playful decorations and vibrant themes, you'll uplift spirits and inspire social interactions. Discover even more exciting tips to elevate your tropical celebration!
Key Takeaways
- Use vibrant colors and playful designs to create a festive atmosphere that transports guests to a tropical paradise.
- Incorporate unique centerpiece ideas like pineapple vases and tiki-themed decorations for impactful table displays.
- Enhance the ambiance with tiki torches, string lights, and tropical lanterns to create a warm and inviting glow.
- Engage guests with interactive DIY decoration stations and encourage floral attire for an immersive tropical experience.
- Utilize tropical elements like palm leaves and seashells as accents to elevate the overall theme and encourage social interaction.
Overview of Tropical Decor
When it comes to party planning, tropical decor can instantly transform your space into a vibrant, festive paradise.
You'll find that themes featuring palm trees, flamingos, and pineapples create an inviting atmosphere for birthdays, luaus, or beach-themed events. Incorporating bold colors and playful designs not only enhances the aesthetic but also elevates the guest experience.
Think about using decorations like Hawaiian luau sets or honeycomb centerpieces to add depth and excitement to your gathering. These elements serve as memorable backdrops for photos and lively interactions, ensuring your event stands out.
Centerpiece Ideas for Impact
To make a striking impression at your tropical-themed event, choosing the right centerpieces is key.
Consider vibrant floral arrangements featuring exotic orchids in shades of pink, purple, and yellow to captivate your guests. For a playful touch, honeycomb centerpieces add a 3D effect and color that draws the eye.
Tiki-themed centerpieces can evoke a sense of Hawaiian culture, making your tables feel festive. You might also opt for palm tree centerpieces, bringing the essence of the tropics right to your table.
If you're feeling creative, why not use a pineapple as a vase? This unique twist will surely stand out.
With these ideas, you'll create a memorable atmosphere that enhances your event's tropical vibe.
Essential Decoration Items
A vibrant array of essential decoration items can transform your tropical party into an unforgettable experience. Start by selecting bright and playful elements that capture the essence of the tropics. Consider using decorations like Hawaiian Luau kits, centerpiece sticks, and honeycomb table centerpieces. These items not only attract attention but are also easy to set up and take down.
Decoration Item | Description |
---|---|
Hawaiian Luau Kit | 9-piece set with various tropical themes |
Centerpiece Sticks | 18-piece set including turtles and leaves |
Honeycomb Centerpieces | 10-piece set with colorful designs |
Tiki-themed Decor | Fun, cultural elements for a festive feel |
Floral Arrangements | Customizable tropical flower displays |
Utilizing these key items will elevate your party atmosphere greatly!
Unique Table Decor Tips
Building on the vibrant atmosphere created by your essential decoration items, unique table decor can take your tropical party to the next level.
Start with a lush palm leaf table runner to add a pop of green. For centerpieces, consider pineapple vase floral arrangements that capture the essence of the tropics.
Use colorful tiki masks as place cards to inject some whimsy into your settings. Seashell and starfish accents can enhance the beach vibe, while a tiki hut mini bar display serves as both decor and a drink station.
Don't forget to incorporate vibrant colors and playful designs, ensuring each table feels festive and engaging, making your guests feel transported to a tropical paradise.
Creating Ambiance With Lighting
Lighting plays an essential role in creating the right ambiance for your tropical party. It can transform your space from ordinary to extraordinary.
Here are some effective lighting options to contemplate:
- Tiki Torch Candle Holders: They provide a warm, inviting flame that sets a relaxed outdoor atmosphere.
- Tropic-Inspired Lanterns: Use these to illuminate your setting with a cozy, warm glow, enhancing the tropical vibe.
- String Lights: Drape them around trees or tables to create a whimsical, festive feel.
- Flame Ambiance Settings: Incorporate flickering flames for a mesmerizing atmosphere that draws guests in.
With these lighting elements, you'll create a vibrant and welcoming environment that keeps your guests enjoying the tropical spirit all night long.
Techniques for a Festive Atmosphere
To create a festive atmosphere at your tropical party, start by incorporating vibrant colors and playful decorations that instantly transport guests to a lively Hawaiian setting.
Use hula skirt table skirting to add a fun, tropical touch to your tables, and consider colorful grassy accents to enhance your centerpieces.
Don't forget to play lively Hawaiian music and serve tropical cocktails that keep the energy high.
Encourage guests to wear floral attire to immerse everyone in the theme.
For added charm, use tiki torches for warm lighting and create a welcoming vibe.
Finally, engage your guests with interactive elements like DIY decoration stations to make the experience unforgettable.
These techniques will guarantee your tropical party is both festive and memorable!
Advantages of Tropical Decor
Tropical decor brings numerous advantages that can elevate your event experience. By incorporating these elements, you'll create a lively atmosphere that resonates with your guests. Here are some key benefits:
- Joyful Ambiance: The vibrant colors and patterns instantly uplift spirits.
- Enhanced Interaction: A tropical theme encourages socializing, making it easier for guests to mingle.
- Thematic Consistency: Using tropical decor guarantees your event feels cohesive, allowing for seamless shifts throughout the gathering.
- Creative Photo Opportunities: The picturesque backdrops created by tropical elements invite guests to capture memories.
With these advantages, you can transform your party into an unforgettable tropical paradise, assuring everyone has a fantastic time!
DIY Decoration Inspirations
When planning your tropical party, getting crafty with DIY decorations can add a personal touch that elevates the overall vibe.
Start by creating custom centerpieces using vibrant local tropical flowers. You can also repurpose recycled materials to craft unique table decor, like colorful tiki masks or seashell arrangements.
Incorporate personal items, such as photos or cherished souvenirs, to make your setup more meaningful. Engage your guests by inviting them to join in the decoration process, turning it into a fun activity.
Ultimately, utilize natural elements like sand or palm leaves for authenticity.
With these DIY decoration inspirations, you'll create a festive atmosphere that your guests will remember long after the party ends.
Frequently Asked Questions
What Are the Best Tropical Decor Colors for My Event Theme?
For your event theme, consider vibrant colors like turquoise, coral, sunny yellow, and lush green. These shades evoke a tropical vibe, creating a lively atmosphere that'll excite your guests and elevate the overall decor.
How Can I Incorporate Tropical Decor in a Winter Party?
You can incorporate tropical decor in a winter party by using vibrant colors like teal and coral, adding palm leaves and exotic flowers, and including festive elements like tiki torches to create a warm, inviting atmosphere.
Where Can I Find Affordable Tropical Decoration Supplies?
You can find affordable tropical decoration supplies at local party stores, online retailers, or discount shops. Don't forget to check out thrift stores or DIY options for unique, budget-friendly items that add flair!
How Do I Clean and Store Tropical Decorations After the Event?
To clean and store your tropical decorations, wipe them down with a damp cloth, ensuring no residue remains. Then, carefully pack them in labeled boxes to prevent damage and make future setups easier.
Can Tropical Decor Be Used for Formal Events?
You can effortlessly elevate formal events with tropical decor. Imagine palm fronds dancing elegantly, vibrant colors swirling around. It'll mesmerize your guests, turning any gathering into an unforgettable celebration of style and sophistication.
Conclusion
As you plunge into the vibrant world of tropical decor, let your imagination soar like a parrot in paradise. With a splash of creativity and a touch of aloha spirit, you'll transport your guests to an island escape they'll cherish. Whether it's the whimsical flamingos or the swaying palm leaves, each detail you choose will weave a tapestry of joy and celebration. So go ahead, embrace the tropical vibe and turn your gathering into an unforgettable luau!
-
Beauty and Grooming3 months ago
Embrace Natural Glow With Bronzer-Free Accelerators
-
Beauty and Grooming3 months ago
Discover Top Outdoor Tanning Lotions Today
-
Fashion Trends3 months ago
Fall 2024 Fashion Trends: Be Ahead of the Curve!
-
Vetted3 months ago
15 Best Affordable Sustainable Fashion Brands You Need to Know About in 2024
-
Beauty and Grooming3 months ago
Unlock Flawless Tanning With Skin Prep
-
Vetted3 months ago
15 Best Women's Fashion Trends of 2024 You Need to Know About
-
Vetted3 months ago
15 Best Fashion Trends for Girls in 2024 That You'll Want to Try
-
Fashion Trends3 months ago
Fashion Nova Kids: Stylish Outfits for Your Little Ones!